

Power's budget audio build (pics!!!)


After building some pretty elaborate audio systems through my teens and 20s... life happened and my audio itch had to be put on the back burner... Been dealing with decent factory audio setups since then but have been getting the itch to do some audio upgrades once again. I thought that the 'alpine' system in my new RAM was going to scratch the itch but all it did was remind me of what I was missing. Priorities have certainly changed since my last build... as well as the budget but I just had to do something... 
Where I am so far...
Installed
Sound deadening - $35
Amp wire kit - - $40
Sub amp - - $163
Dash - $60
Harness - Metra 71-039 - $10
Subs - 2 - - $120
Hand built fiberglass and MDF sub boxes - $100
Awaiting Install
Planned
Front door speakers
Rear door speakers - maybe
??????
Total spent..... $500
Where I am so far...
Installed
Sound deadening - $35
Amp wire kit - - $40
Sub amp - - $163
Dash - $60
Harness - Metra 71-039 - $10
Subs - 2 - - $120
Hand built fiberglass and MDF sub boxes - $100
Awaiting Install
Planned
Front door speakers
Rear door speakers - maybe
??????
Total spent..... $500
The build began with some sound deadening. My first priority was to keep as much sound in the truck as possible and keeping as much outside noise out. You can spend tons of money on vehicle sound deadening but there are much cheaper ways that are just as effective. You need only to stop by your local hardware store and pick up some peel and stick flashing and elastomeric roof coating
Here is the truck with the storage well carpet and rear cab liner removed.
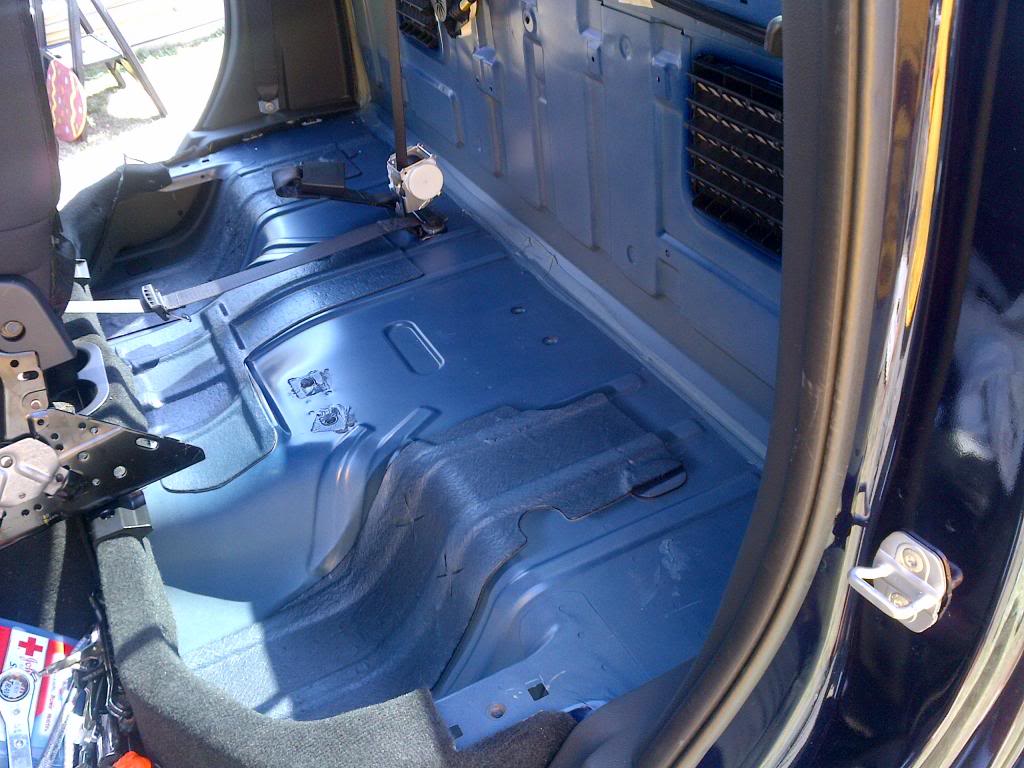
Peel and stick roof flashing strategically applied around the small amounts applied at the factory. This stuff is largely asphalt based. This is good for sound deadening but can smell pretty bad when the temps get up... even with the aluminum facing. (Tape was used to cover the places I did not want getting coated during the next step.)
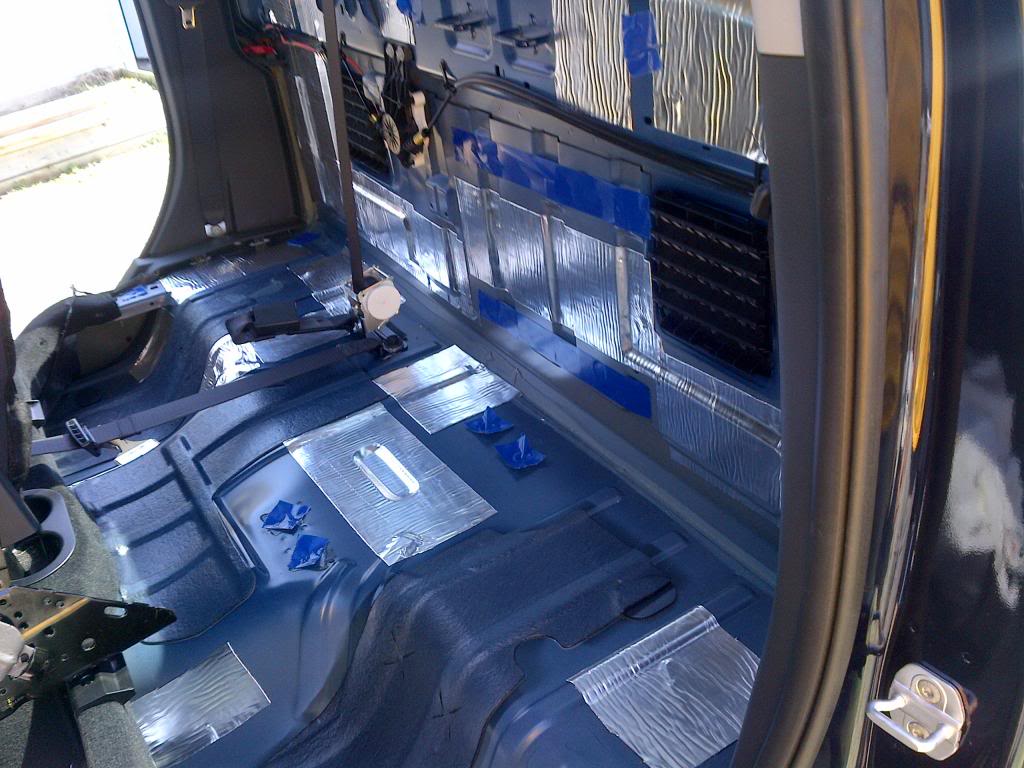
Painting everything with the elastomeric roof coating adds deadening and seals the asphalt smell that would otherwise permeate from the flashing. You could skip the flashing and just use this product but i find that they work wonders together.

The cab is so quiet now. You can't even hear my exhaust with the windows rolled up. My wife has already requested i do the same on the passenger side floorboard.
Here is the truck with the storage well carpet and rear cab liner removed.
Peel and stick roof flashing strategically applied around the small amounts applied at the factory. This stuff is largely asphalt based. This is good for sound deadening but can smell pretty bad when the temps get up... even with the aluminum facing. (Tape was used to cover the places I did not want getting coated during the next step.)
Painting everything with the elastomeric roof coating adds deadening and seals the asphalt smell that would otherwise permeate from the flashing. You could skip the flashing and just use this product but i find that they work wonders together.
The cab is so quiet now. You can't even hear my exhaust with the windows rolled up. My wife has already requested i do the same on the passenger side floorboard.
While i had everything apart i decided to go ahead and mount and wire the amp. Sadly it will be several weeks before I can get the fiberglass boxes built for the subs 
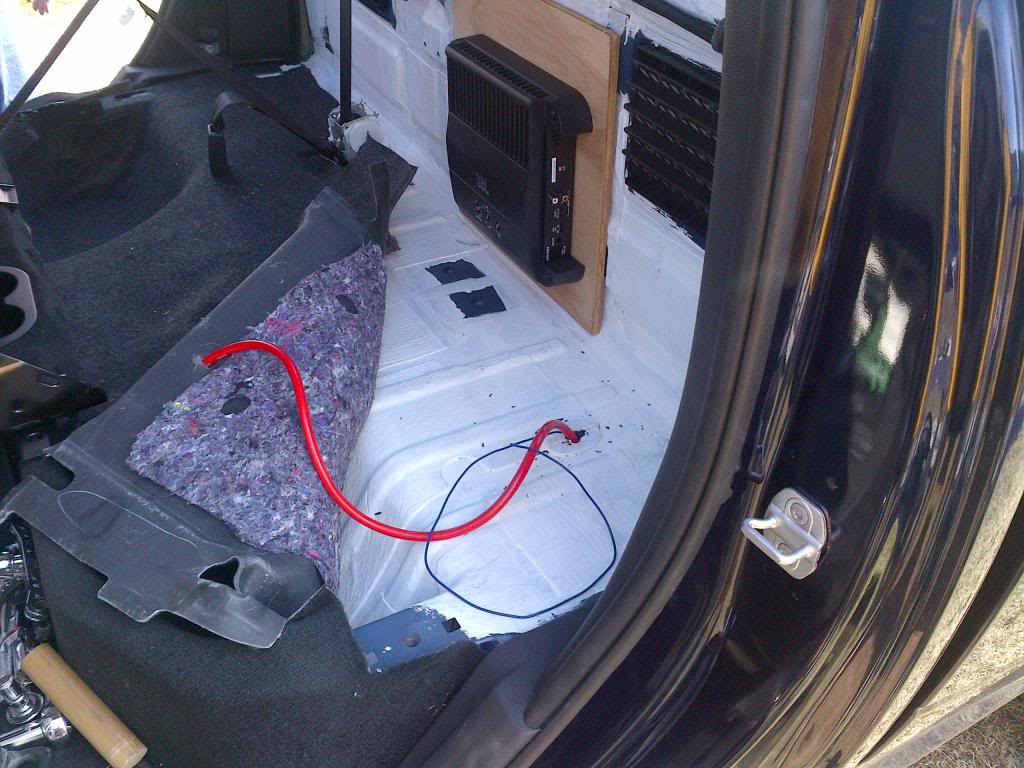
I used silicone to attach a piece of plywood to the back wall (remember the 2 strips of blue tape from before ) This gives a sturdy place to mount the amp without drilling holes in the back wall of the cab. Many thanks to UNBROKEN for the tip.
I drilled a hole in one of the plastic knock out plugs for the 4 ga power wire and amp remote wire. Both are run along the frame rail under the truck beside the brake lines and up into the engine compartment.
**EDIT - The remote wire was rerouted and tapped to the power port in the center console since I had to open the center console to run the wire for the bass control for the amp.
I reinstalled the carpet and cab liner, cutting the liner around the amp. At some point i will paint that board black to match the liner but really, no one will ever see it.
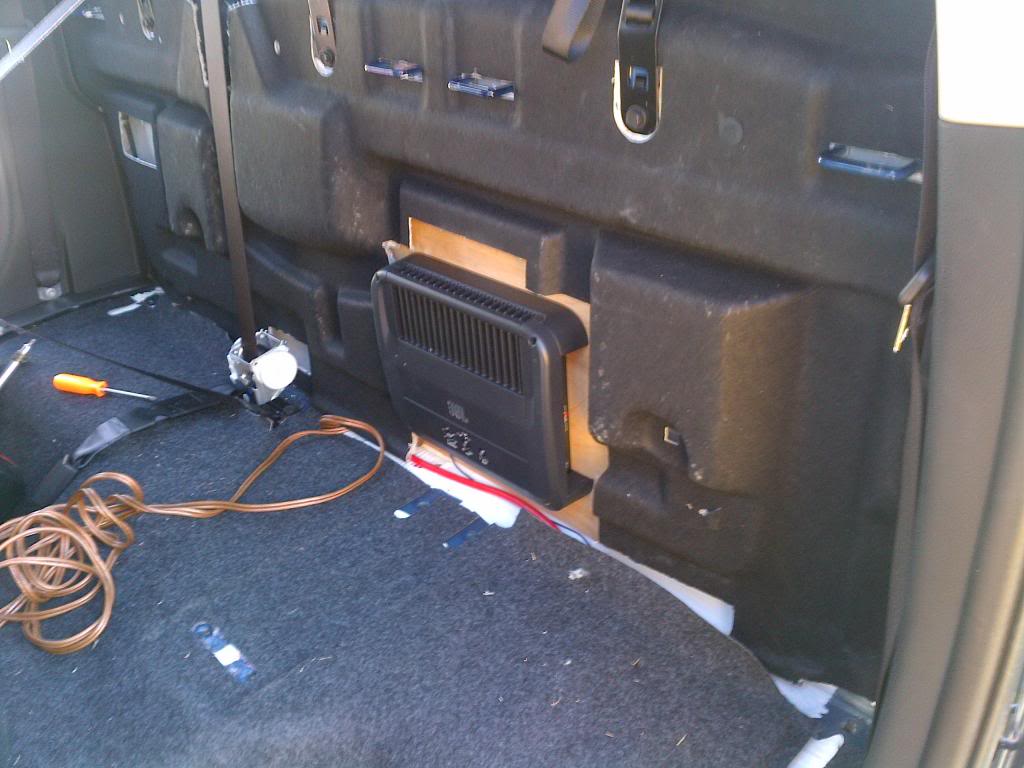
I used silicone to attach a piece of plywood to the back wall (remember the 2 strips of blue tape from before
) This gives a sturdy place to mount the amp without drilling holes in the back wall of the cab. Many thanks to UNBROKEN for the tip.I drilled a hole in one of the plastic knock out plugs for the 4 ga power wire and amp remote wire. Both are run along the frame rail under the truck beside the brake lines and up into the engine compartment.
**EDIT - The remote wire was rerouted and tapped to the power port in the center console since I had to open the center console to run the wire for the bass control for the amp.
I reinstalled the carpet and cab liner, cutting the liner around the amp. At some point i will paint that board black to match the liner but really, no one will ever see it.
Once the METRA harnesses came in I installed my new Infinity 3 1/2s. No way would I install new speakers without them. Install was really simple. Pop the speaker grill of, remove two screws and the factory speaker, install Metra harness and new speaker with factory screws. Total install took about 15 minutes. This is a must do for $70!!
Stock 'alpine' beside new Infinity
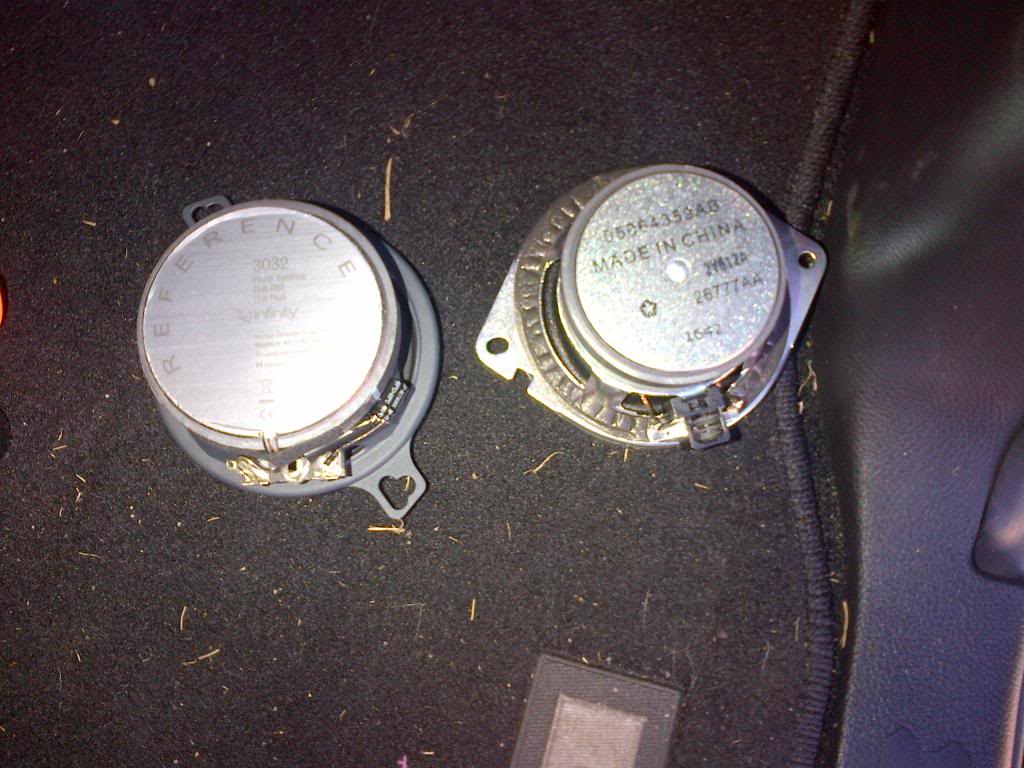
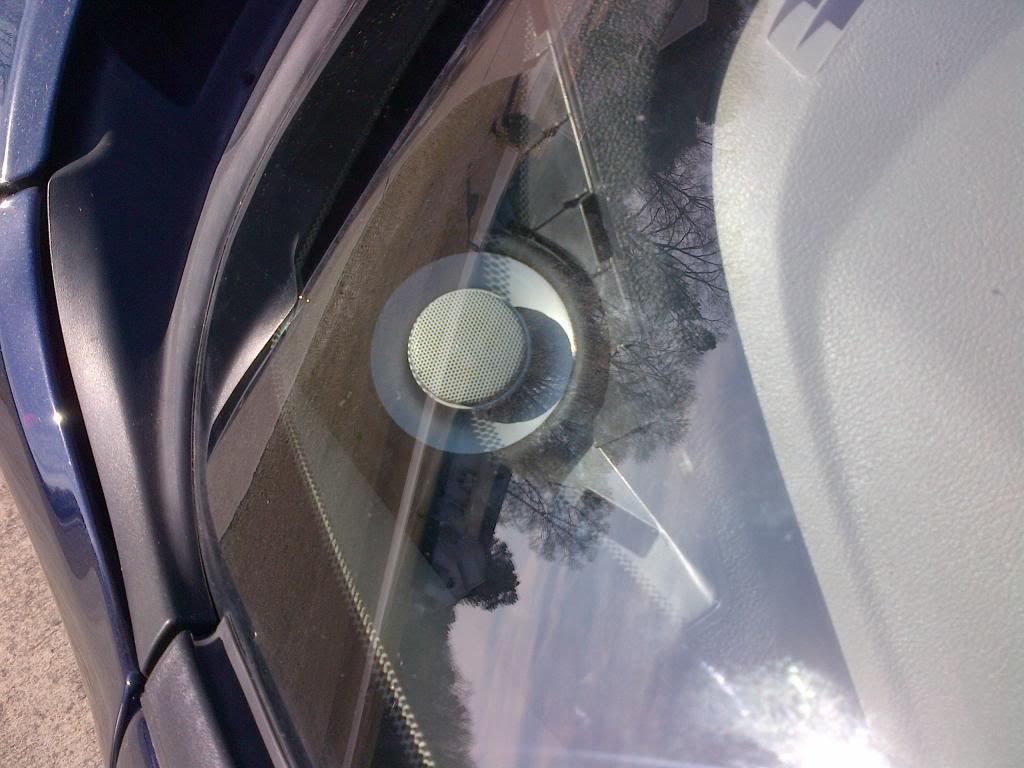
All nice and snug in his new home
Stock 'alpine' beside new Infinity
All nice and snug in his new home
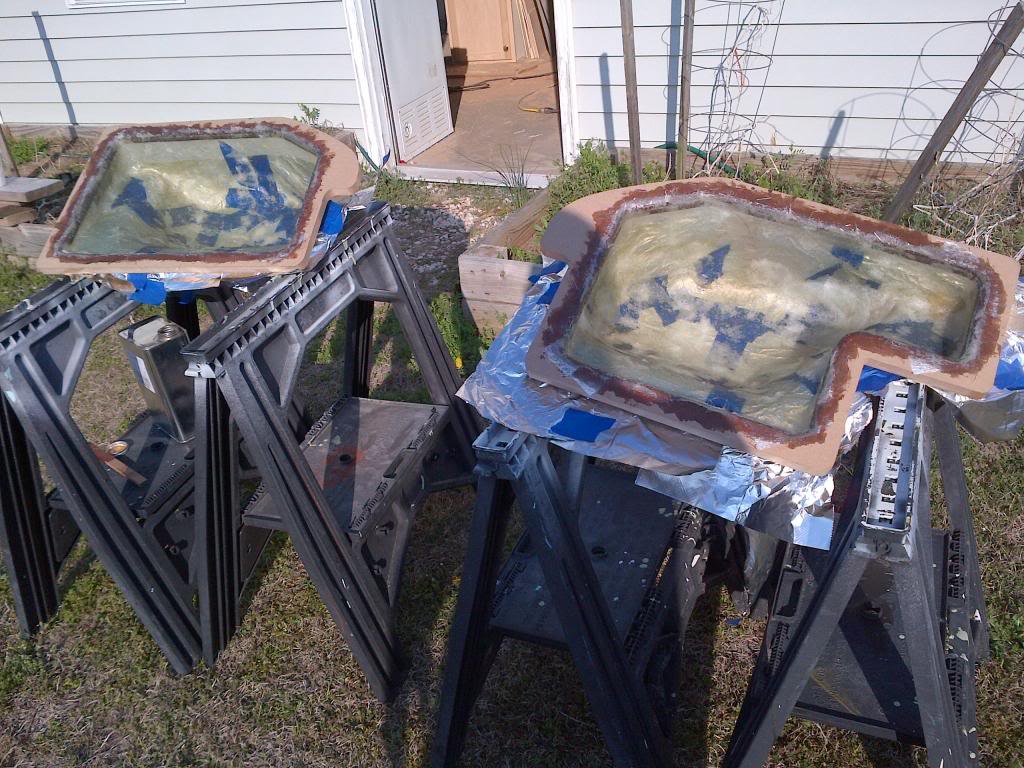
Inspired by all those that have done this before me (thanks to Myoung and many others!!!) I decided to build fiberglass and mdf boxes for 2 Infinity 10s. after much debate I decided to make 2 separate boxes instead of 1 big one.
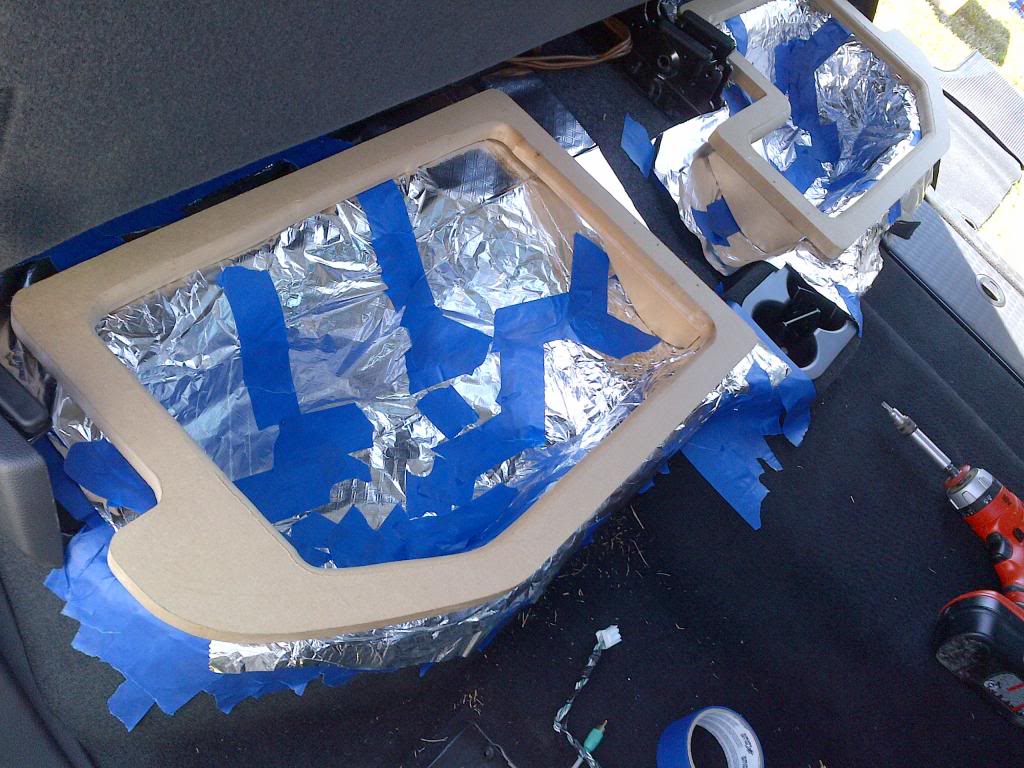
Started with 1 overlapping layer of masking tape followed by 1 overlapping layer of cheap aluminum foil using more tape to seal the seams. Tape protects the carpet 'just in case' the foil ensures that the fiberglass boxes will come out easily.
Next comes the many layers of fiberglass and resin.


Started with 1 overlapping layer of masking tape followed by 1 overlapping layer of cheap aluminum foil using more tape to seal the seams. Tape protects the carpet 'just in case' the foil ensures that the fiberglass boxes will come out easily.

Next comes the many layers of fiberglass and resin.

It took me about 2.5 hours to lay the 4 layers of fiberglass. for the last batch of resin I doubled the amount of hardener mixed into the resin to help quicken the curing process. After curing for about 30 minutes the tubs were ready to be removed from the truck. Thanks to the foil they lifted right out
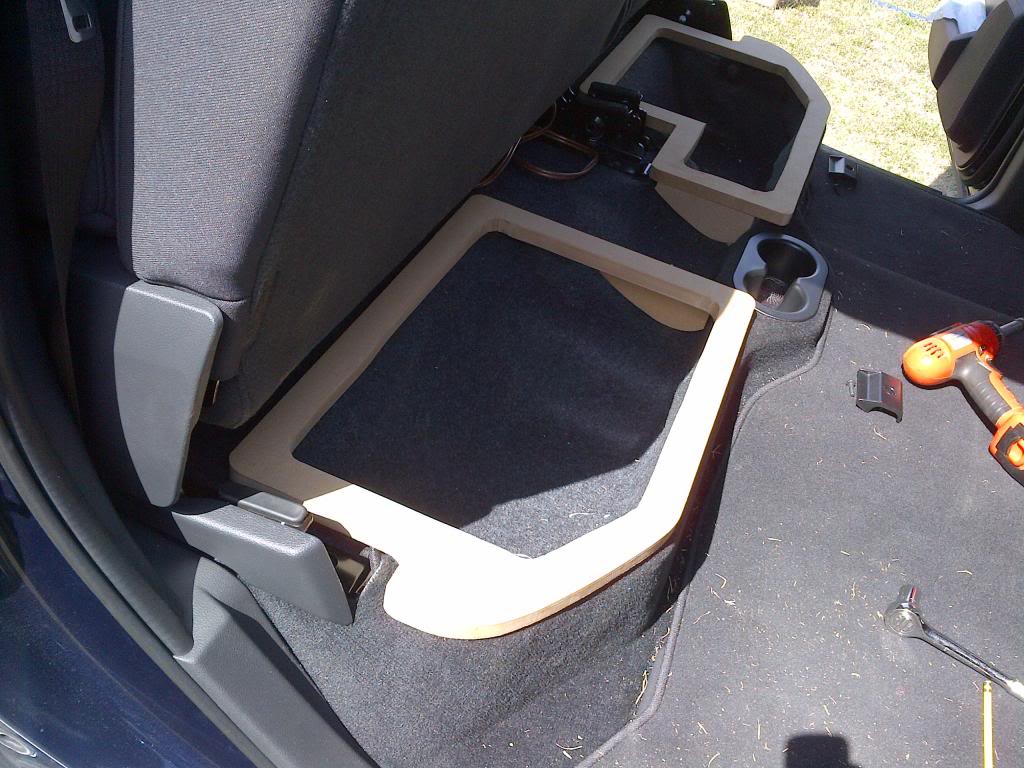
As the fiberglass was curing I started routing the top pieces of MDF for the subs to mount to as well as some trim rings to protect the subs when the seats are down.
I finally assembled the sub boxes and gave the whole system a test run. Man I missed having real subs!!! This things sound awesome. The only real downside is that the fiberglass smell is real strong in the truck. Until...
I coated all exposed fiberglass with the elastomeric coating i used to sound deaden the cab. The result... no more smell in the truck
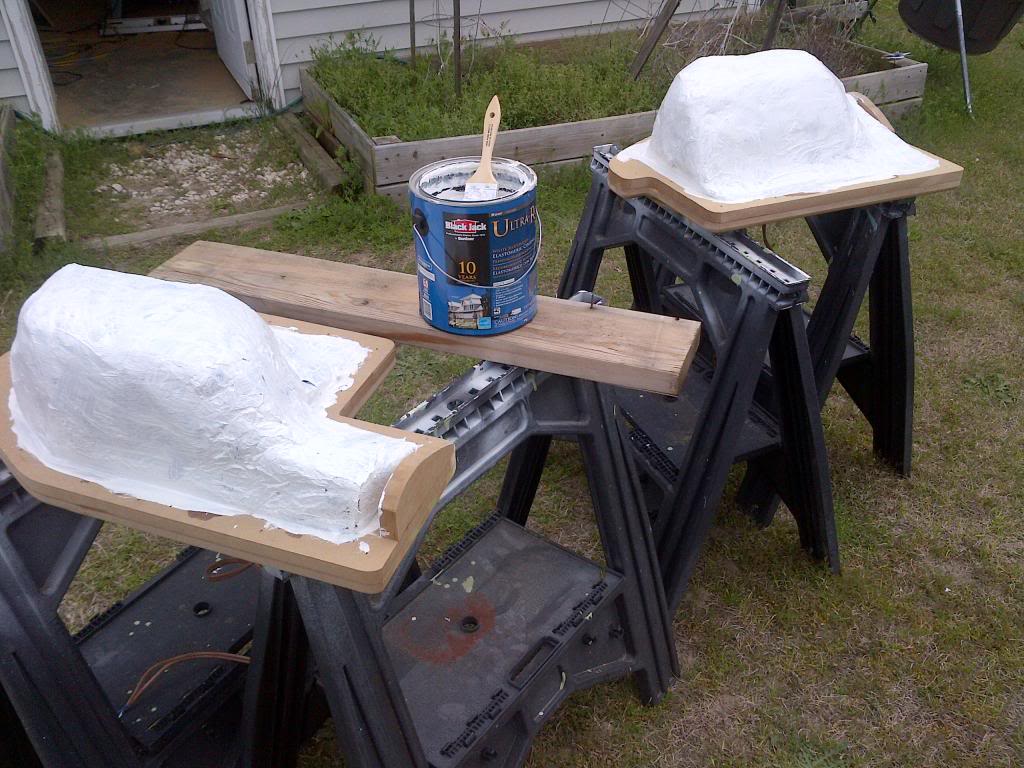
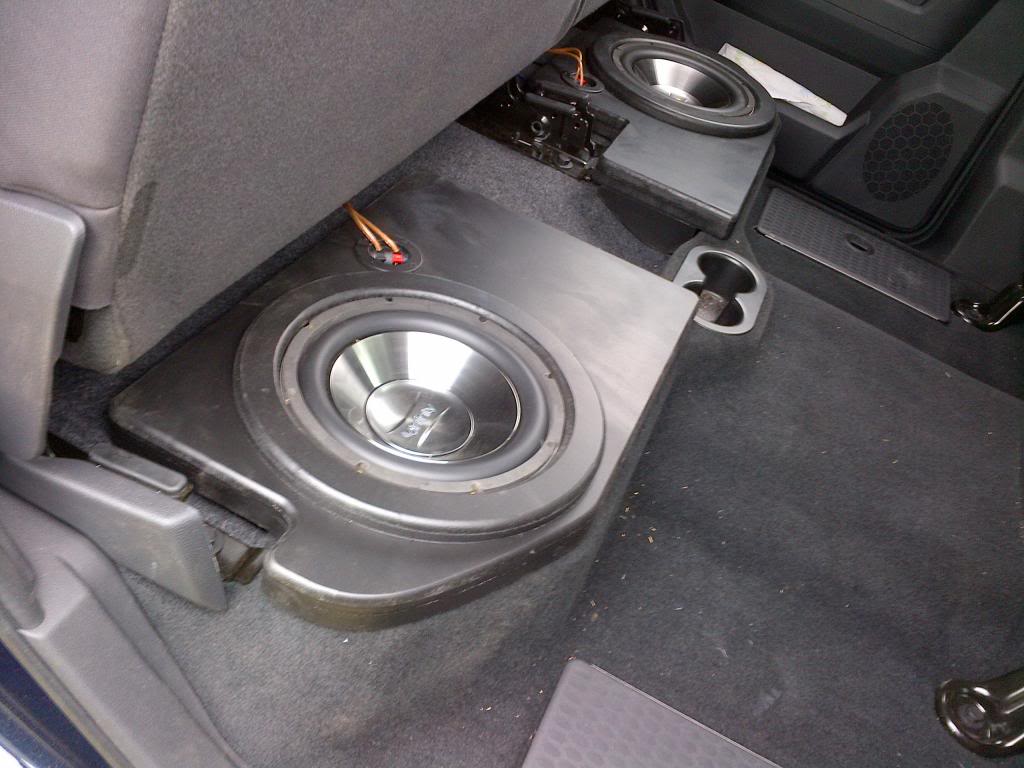
I decided I would try Plasti-dip for the all the exposed wood surfaces. This being my first time using the stuff I was not sure what to expect. The first few coats really soaked into the edges but one they dried the rest of the coats went on real smooth. Here they are in the truck after the finish hardened. As you can see the truck needs a good detail but until pine pollen season is over there is no real point.

As the fiberglass was curing I started routing the top pieces of MDF for the subs to mount to as well as some trim rings to protect the subs when the seats are down.
I finally assembled the sub boxes and gave the whole system a test run. Man I missed having real subs!!! This things sound awesome. The only real downside is that the fiberglass smell is real strong in the truck. Until...
I coated all exposed fiberglass with the elastomeric coating i used to sound deaden the cab. The result... no more smell in the truck

I decided I would try Plasti-dip for the all the exposed wood surfaces. This being my first time using the stuff I was not sure what to expect. The first few coats really soaked into the edges but one they dried the rest of the coats went on real smooth. Here they are in the truck after the finish hardened. As you can see the truck needs a good detail but until pine pollen season is over there is no real point.

Overall I am very happy with this project so far. The new dash speakers made a huge improvement over the factory 'alpine' units. The subs sound great and are exactly what I have been missing. I still need to sound deaden the doors and the front floorboard but that will have to wait until after Spring Break vacation. I also need to decide on some replacement mids for the front doors but I am not in any huge rush at this point. Total investment to date is right at $500 which is right where I wanted to be.