

NP249-->NP231/242 swap info


Thread Starter
|
Grand Champion
Joined: Jan 2007
Posts: 5,584
Likes: 0
From: Lima, Ohio
My Jeep is a 1993 ZJ with the 4.0 and 42RE/249 with the short input shaft, so results may vary with different year Jeeps.
Parts Required:
NP231 from an XJ or ZJ. There are 3 different input shafts, .750", .840", and 1.55". Your best bet is to find a transfer case with the same input shaft. If not, you can swap input shafts, but be aware of the annulus gear cut change that occurred in mid 94. So if you have a 95-98 ZJ, get a transfer case from a 95-98. If you have a 93 ZJ, get one from a 93 ZJ or older XJ, unless you find one with the same length input shaft from a newer Jeep. If you have a 94, it's a hit or miss, and it's just best to find one with the same input. If you use an older input in a newer planetary set, damage will occur to the case.
NP231 T case Linkage: This may be optional, but I only used the linkage that connects the shifter assembly to the transfer case, it is about 2 inches shorter on the NP231. You should be able to adjust the shifter assembly enough to make due with the NP249 linkage, but I found that this made it a bit easier.
NP231 Shift Indicator Sensor: The NP249 sensor WILL NOT work, as the threaded portion is about 3 times longer. I attempted to shim it to no avail.
New Seals: Cheap insurance if you're doing a transfer case swap. Oreilly's can get the transmission output seal, and transfer case input and output seals for under $15 bucks.
Fluid: The new T case requires 1.5 quarts of fluid, so grab 2 quarts of ATF+4
OPTIONAL:
NP231 Shift Gate and Bezel
Tools Required:
-30mm socket
-14mm or 9/16" open end wrenches (a 9/16" ratchet wrench is GREAT!)
-Metric socket set with ratchets (8-18mm, deep wells may be needed)
-Assorted extensions
-Misc. Screwdrivers
-Channel locks and pliers
-Air tools (optional)
Start by either driving your Jeep onto a set of ramps or jacking it up and placing jack stands under your Heep. Be sure to chock your wheels, and PLEASE, PLEASE don't rely on a jack to support the Jeep. You will need it later anyways.
Drain the old T case (this is where the 30mm socket comes in handy, and be sure to recycle your old fluid!)
Check again that your wheels are chocked, and put the transfer case in neutral. Remove the front and rear drive shafts using an 8mm socket or ratchet wrench.
Remove the shift linkage from the Tcase, along with the speed sensor and shift indicator connectors.
Remove the 2 18mm bolts holding the shift linkage assembly to the transmission.
Place your jack under the middle of the transmission cross member. Put a little pressure on it, and remove the 4 15mm cross member bolts.
SLOWLY lower the transmission and transfer case, watch for binding or pulling of any electrical or mechanical connections, then remove the transfer case vent from the clips on the transmission.
Once you feel you can access the top nuts on the transfer case, remove the bottom 4 with the 14mm or 9/16" wrench. Loosen the 2 top nuts, but leave them started until you are completely ready to remove the case. A buddy is nice here, however the case is not too heavy and should be handled easily by one person (no problem for me, but I bench 240 so... haha)
Finish removing the top 2 nuts, and slowly pull the transfer case from the transmission.
Now that you have the 249 out, you can put a new output seal on the transmission, and hopefully by now you have your 231 ready to go with new seals. Swap the speed sensor and gear from the 249 into your 231.
As Haynes would say, installation is reverse of removal. Be sure to fill with new ATF+4 once it is installed!!!
Once you have the new case back in, it's time to decide if you need to adjust the transfer case linkage. Try and engage 4 lo. If you have an easy, full swing of each gear, then no adjustment is necessary. Most likely though, you will not be able to fully engage 4 lo. This is easily fixed. Put the shift lever in 2wd, then get under the Jeep and loosen the 13mm adjustment bolt on the shift linkage. Push the shifter all the way forward, and tighten the adjustment bolt. You should have full engagement of all gears now. If you have the new shifter gate or shift bezel, now is the time to install it. Take it for a test drive and be sure to test all the gears, then take it back to the shop and check for leaks. Check the fluid one more time, and correct any leaks that may be present.
VIC Plugs
For the lights in the VIC (Vehicle Information Center) to function properly with the new transfer case, it's as simple as a plug.
Start by removing the 4 screws holding the console bezel in place
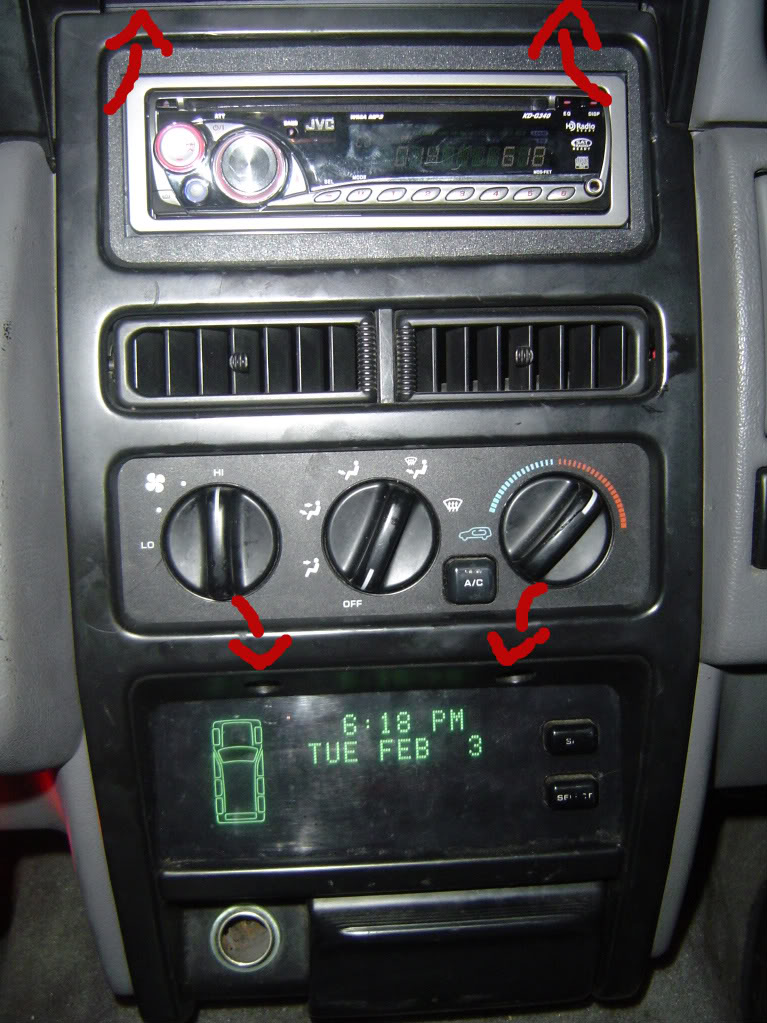
Remove the 2 lights from the cigarette lighter and ash tray, and the power to the cigarette lighter.
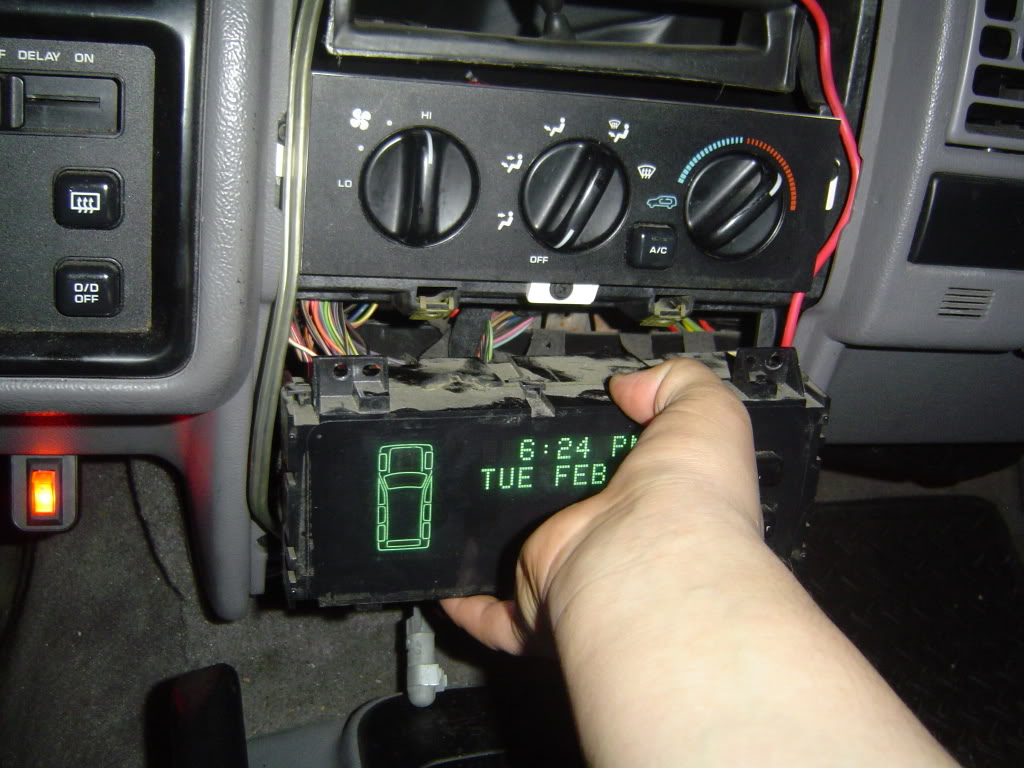
Remove the three screws holding the VIC in place (two on top, 1 on the bottom) and slide straight out.
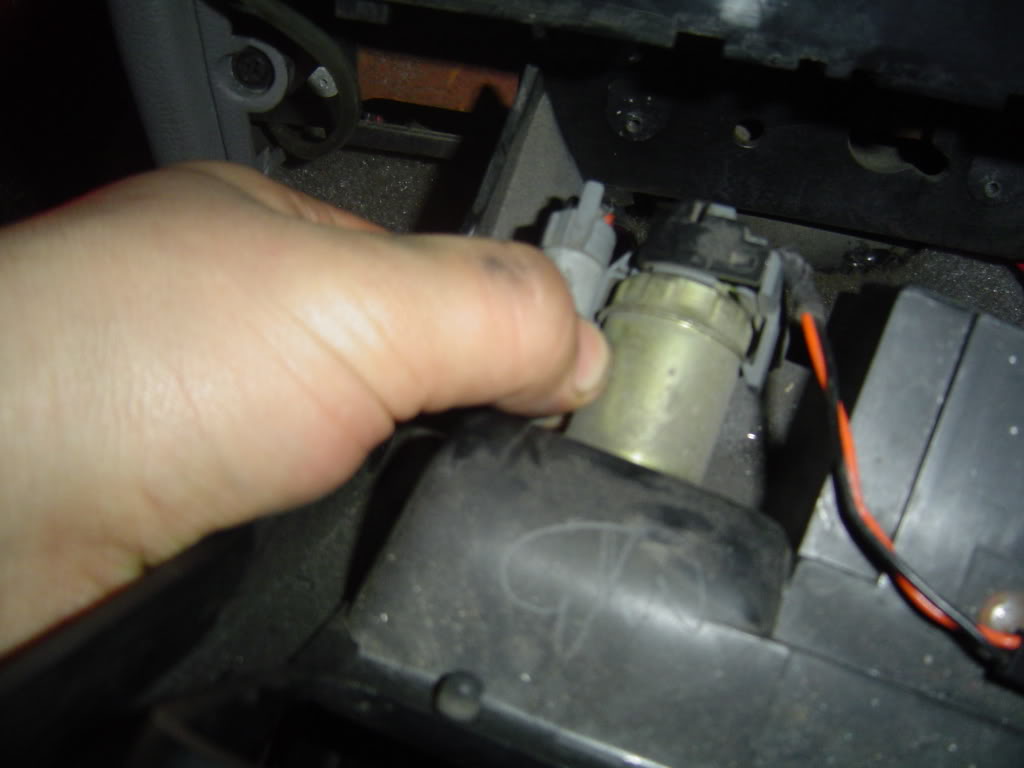
If you had the NP249, the red plugs should be connected:
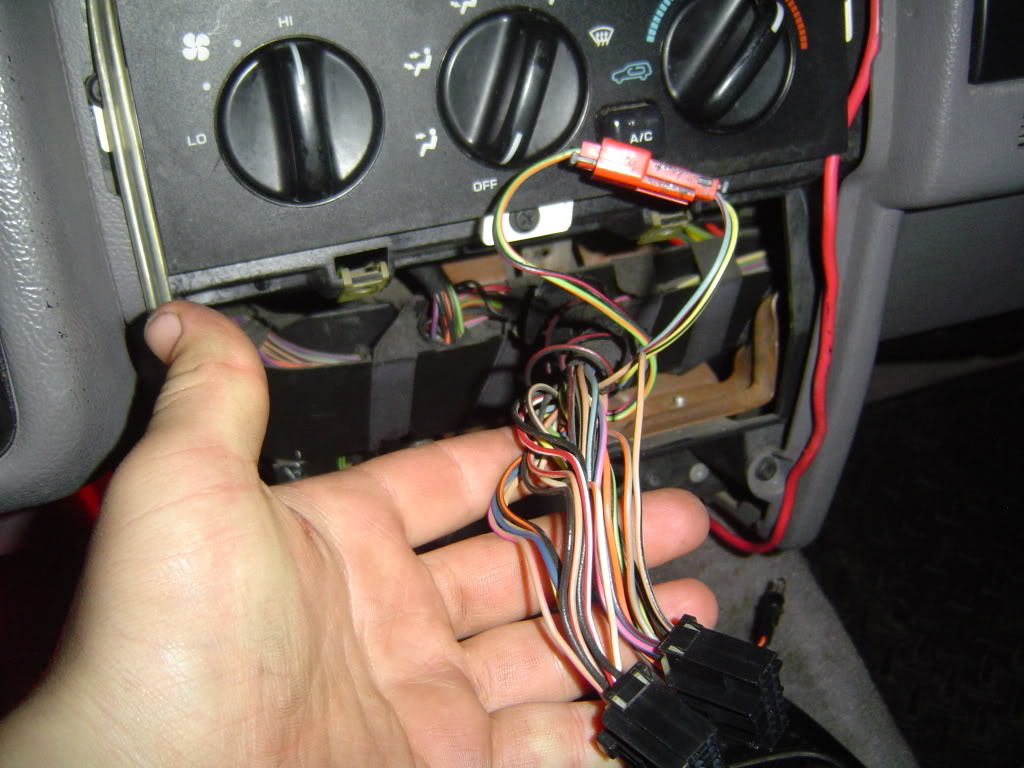
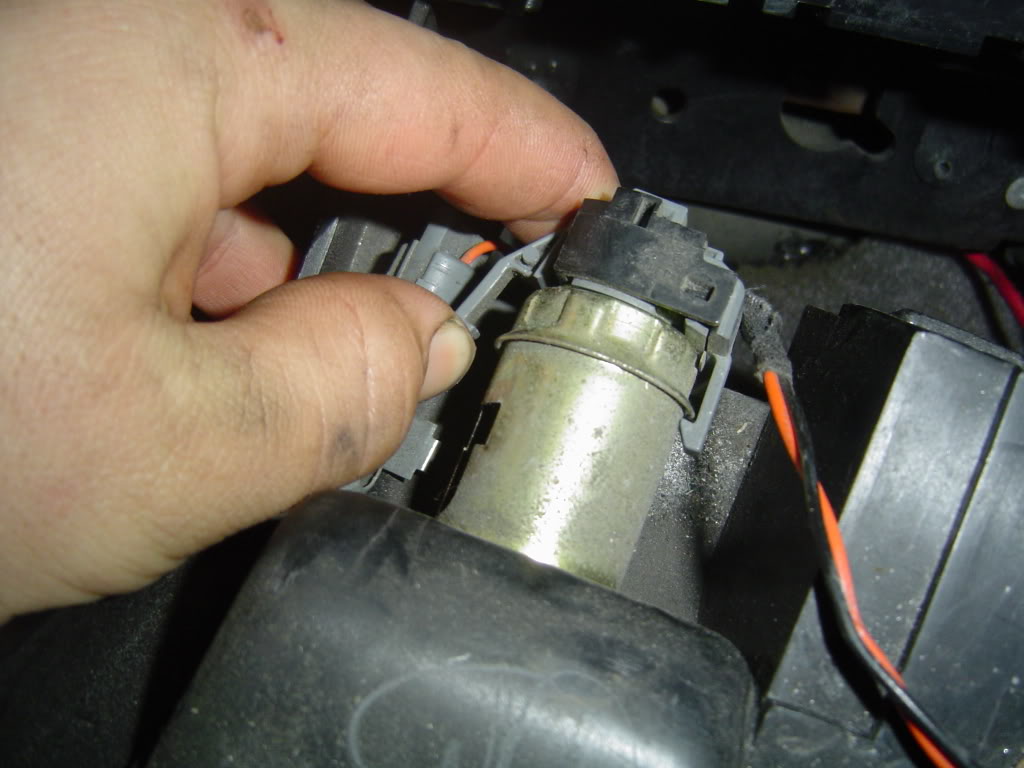
Disconnect the red plugs, and dig in the wire loom until you find 2 black plugs. 1 female and 1 male, then connect them together.
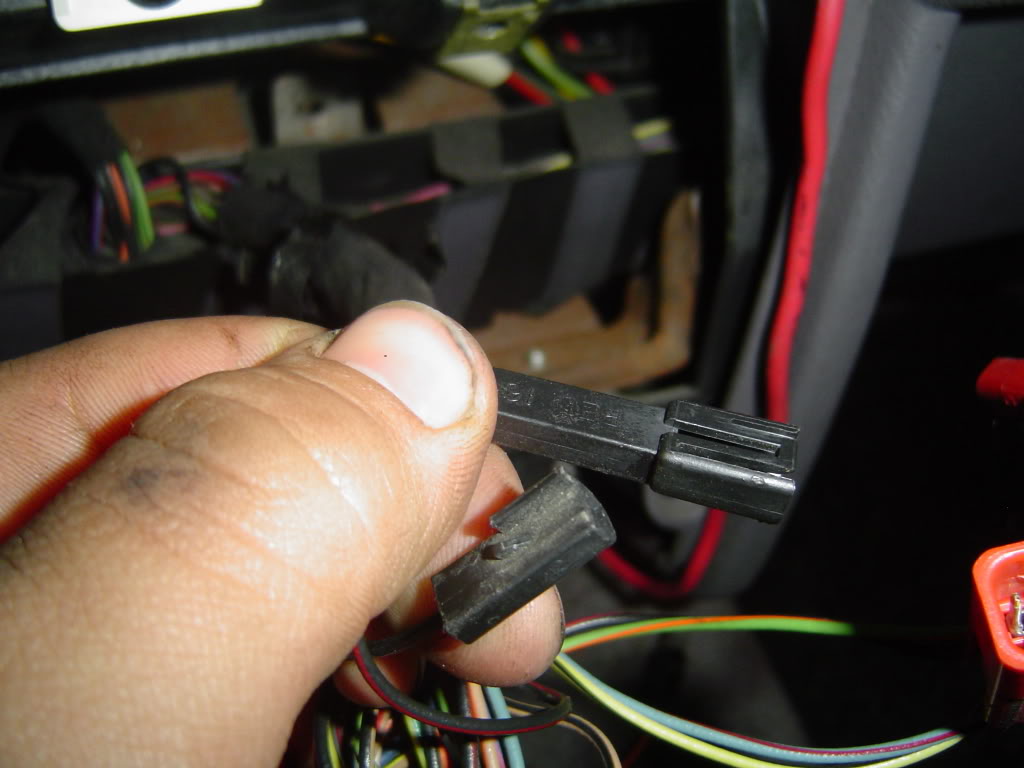
The plugs should look like this:
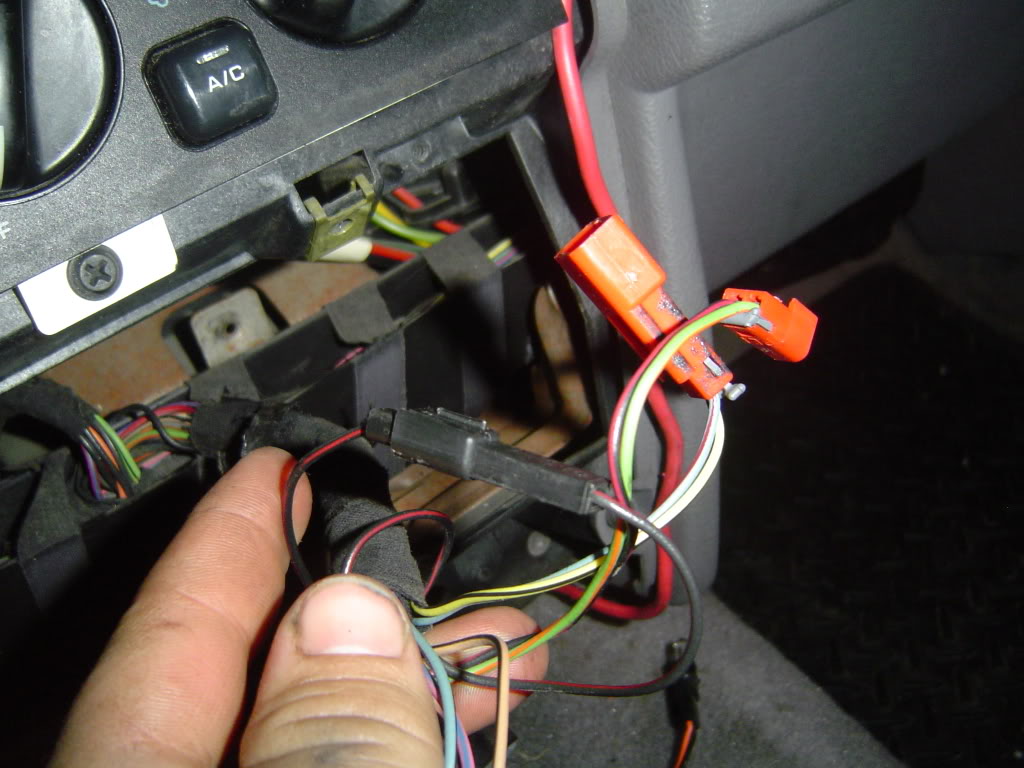
Leave the red plugs un plugged, just as the black ones were, and again, installation is reverse of removal.
Good Luck!
Parts Required:
NP231 from an XJ or ZJ. There are 3 different input shafts, .750", .840", and 1.55". Your best bet is to find a transfer case with the same input shaft. If not, you can swap input shafts, but be aware of the annulus gear cut change that occurred in mid 94. So if you have a 95-98 ZJ, get a transfer case from a 95-98. If you have a 93 ZJ, get one from a 93 ZJ or older XJ, unless you find one with the same length input shaft from a newer Jeep. If you have a 94, it's a hit or miss, and it's just best to find one with the same input. If you use an older input in a newer planetary set, damage will occur to the case.
NP231 T case Linkage: This may be optional, but I only used the linkage that connects the shifter assembly to the transfer case, it is about 2 inches shorter on the NP231. You should be able to adjust the shifter assembly enough to make due with the NP249 linkage, but I found that this made it a bit easier.
NP231 Shift Indicator Sensor: The NP249 sensor WILL NOT work, as the threaded portion is about 3 times longer. I attempted to shim it to no avail.
New Seals: Cheap insurance if you're doing a transfer case swap. Oreilly's can get the transmission output seal, and transfer case input and output seals for under $15 bucks.
Fluid: The new T case requires 1.5 quarts of fluid, so grab 2 quarts of ATF+4
OPTIONAL:
NP231 Shift Gate and Bezel
Tools Required:
-30mm socket
-14mm or 9/16" open end wrenches (a 9/16" ratchet wrench is GREAT!)
-Metric socket set with ratchets (8-18mm, deep wells may be needed)
-Assorted extensions
-Misc. Screwdrivers
-Channel locks and pliers
-Air tools (optional)
Start by either driving your Jeep onto a set of ramps or jacking it up and placing jack stands under your Heep. Be sure to chock your wheels, and PLEASE, PLEASE don't rely on a jack to support the Jeep. You will need it later anyways.
Drain the old T case (this is where the 30mm socket comes in handy, and be sure to recycle your old fluid!)
Check again that your wheels are chocked, and put the transfer case in neutral. Remove the front and rear drive shafts using an 8mm socket or ratchet wrench.
Remove the shift linkage from the Tcase, along with the speed sensor and shift indicator connectors.
Remove the 2 18mm bolts holding the shift linkage assembly to the transmission.
Place your jack under the middle of the transmission cross member. Put a little pressure on it, and remove the 4 15mm cross member bolts.
SLOWLY lower the transmission and transfer case, watch for binding or pulling of any electrical or mechanical connections, then remove the transfer case vent from the clips on the transmission.
Once you feel you can access the top nuts on the transfer case, remove the bottom 4 with the 14mm or 9/16" wrench. Loosen the 2 top nuts, but leave them started until you are completely ready to remove the case. A buddy is nice here, however the case is not too heavy and should be handled easily by one person (no problem for me, but I bench 240 so... haha)
Finish removing the top 2 nuts, and slowly pull the transfer case from the transmission.
Now that you have the 249 out, you can put a new output seal on the transmission, and hopefully by now you have your 231 ready to go with new seals. Swap the speed sensor and gear from the 249 into your 231.
As Haynes would say, installation is reverse of removal. Be sure to fill with new ATF+4 once it is installed!!!
Once you have the new case back in, it's time to decide if you need to adjust the transfer case linkage. Try and engage 4 lo. If you have an easy, full swing of each gear, then no adjustment is necessary. Most likely though, you will not be able to fully engage 4 lo. This is easily fixed. Put the shift lever in 2wd, then get under the Jeep and loosen the 13mm adjustment bolt on the shift linkage. Push the shifter all the way forward, and tighten the adjustment bolt. You should have full engagement of all gears now. If you have the new shifter gate or shift bezel, now is the time to install it. Take it for a test drive and be sure to test all the gears, then take it back to the shop and check for leaks. Check the fluid one more time, and correct any leaks that may be present.
VIC Plugs
For the lights in the VIC (Vehicle Information Center) to function properly with the new transfer case, it's as simple as a plug.
Start by removing the 4 screws holding the console bezel in place
Remove the 2 lights from the cigarette lighter and ash tray, and the power to the cigarette lighter.
Remove the three screws holding the VIC in place (two on top, 1 on the bottom) and slide straight out.
If you had the NP249, the red plugs should be connected:
Disconnect the red plugs, and dig in the wire loom until you find 2 black plugs. 1 female and 1 male, then connect them together.
The plugs should look like this:
Leave the red plugs un plugged, just as the black ones were, and again, installation is reverse of removal.
Good Luck!