LOG IN
REGISTER
Forums
General
New Member Area
Members Rides
Newsletter Archive
Brand News, Concepts & Rumors
Dodge Forum Site Issues and Suggestions
The DF Lounge
DodgeForum.com Club Section
Racing Talk
Regional
Dodge Trucks
Dodge Ram
Dodge Dakota
Dodge SUVs
Dodge Durango
Dodge Nitro
Ramcharger, Trailduster & Power Wagon
Jeeps
Dodge Cars
Dodge Avenger
Dodge Caliber
Dodge Challenger
The New Dodge Demon
Dodge Charger
Dodge Dart
Dodge Daytona
Dodge Intrepid
Dodge Magnum
Dodge Neon
Dodge Stealth
Dodge Stratus
Dodge Viper
Dodge Vans & CUVs
Dodge Caravan
Dodge Sprinter
Dodge Pro Master
Dodge Ram Van
Dodge Journey
A Blast From the Past
Dodge Muscle Cars
Dodge Classics
K-Cars
Technical Help & Information
DIY - Do It Yourself
Detailing
Audio/Visual Electronics
Wheels & Tires
Technical Archives
Dodge Classifieds
Vendor Group And Special Buys
User Classifieds
News
Marketplace
Vendor Directory
Become a Vendor
Member Marketplace
New Posts
Tools
Car Payment Calculator
Tire Rim Calculator
Vin Decoder
Recalls
Technical Service Bulletins (TSBs)
Members List
Live Feed
How-Tos
Gallery
View Dark Mode
Please register or login to enable Dark Mode.
Log In
Register
Threads
Google
Threads
Posts
Advanced
Dark Mode
Please register or login to enable Dark Mode.
Log In
Forgot your Password?
By logging into your account, you agree to our
Terms of Use
and
Privacy Policy
, and to the use of cookies as described therein.
or
Login with Google
Login with Facebook
Recent
Commented
Albums
My Pictures
My Post Pictures
CFSELMAN
May 3, 2024
31
0
Sort:
Default
Default
Most Recent
0
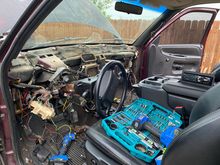
2024/05/03 12:46:57
CFSELMAN
0
2024/05/03 12:47:02
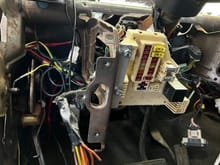
CFSELMAN
New Fuse Block Location
0
2024/05/06 16:11:55
CFSELMAN
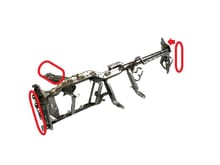
Instrument Panel Metal Reinforcement Cut and where it sits
0
2024/05/06 16:11:56
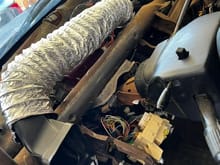
CFSELMAN
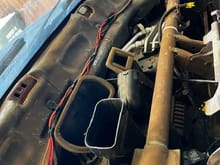
Temporary A/C Ducts
0
2024/05/06 16:11:58
CFSELMAN
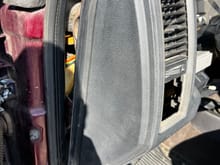
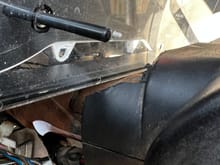
Driver Side Dash Gap only visible with Door Open
0
2024/05/06 16:12:01
CFSELMAN
Drivers Side top Dash Gap
0
2024/05/06 16:12:06
CFSELMAN
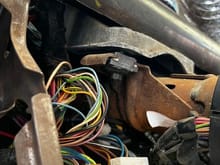
Mocked Up Wire Placement
0
2024/05/06 16:12:10
CFSELMAN
Instrument Panel Metal Reinforcement Cut and where it sits
0
2024/05/06 16:12:11
CFSELMAN
Longer view of Instrument Panel Metal Reinforcement
0
2024/05/06 16:12:13
CFSELMAN
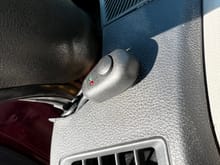
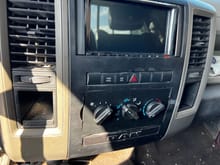
1999 Jeep Cherokee XJ Sport A/C Heat Climate Control Unit 55037426AD
0
2024/05/06 16:12:16
CFSELMAN
Similiar Instrument Panel Metal Reinforcement and the red circles are where we cut off
0
2024/05/06 16:12:20
CFSELMAN
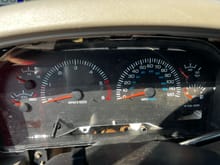
Instrumental Cluster Fitment on Steering Column
0
2024/05/06 16:12:23
CFSELMAN
Instrument Cluster Fitment (it's tight but it works)
0
2024/05/06 16:12:26
CFSELMAN
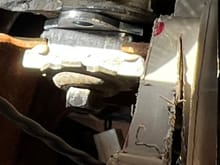
Shimmed Steering Column with 1/8" Alignment Shims. Thanks Harbor Freight
0
2024/05/06 16:12:31
CFSELMAN
Steering Column Shimmed
0
2024/05/06 16:12:35
CFSELMAN
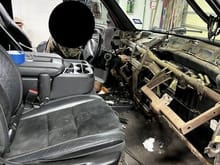
Fitting the Instrument Panel Metal Reinforcement AKA Dash Mounting
0
2024/05/06 16:12:38
CFSELMAN
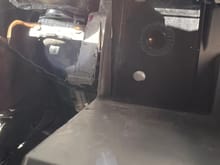
Driver Side Core Mount from inside view. Used the old brace that I cut off and was able to utilize it.
0
2024/05/06 16:49:39
CFSELMAN
Driver Side Mount Outside View. The passenger side, a hole lined up with the new core and I reamed it a little bit and it fit perfect for me. YMMV. I also put a few self tappers above on the passenger side for good measure.
0
2024/05/06 16:49:44
CFSELMAN
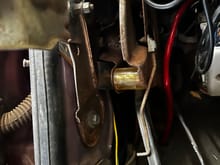
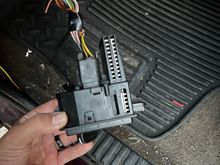
Up top is the original Ram Headlswitch Bottom is a Dodge Durango headlight switch same year. The Fog light circuit is the problem and kept blowing park lamp fuses.
0
2024/05/10 14:07:50
CFSELMAN
Left: Ram Right: Durango
0
2024/05/10 14:07:54
CFSELMAN
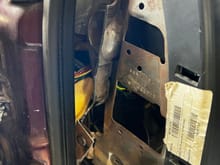
All together
0
2024/05/10 14:07:59
CFSELMAN
0
2024/05/10 14:08:03
CFSELMAN
0
2024/05/10 14:08:07
CFSELMAN
0
2024/05/10 14:08:11
CFSELMAN
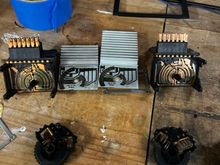
Top is dodge ram headlight switch Bottom is dodge Durango headlight switch The fog light circuit breaker is white, kept blowing my park lamp fuse
0
2024/05/10 14:11:02
CFSELMAN
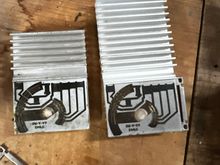
The one on the left is the original heat sink The one on the right is a dodge Durango heat sink The circuits for your dome light and dimming are exactly the same
0
2024/05/10 14:11:06
CFSELMAN
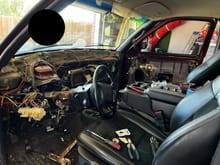
Just showing most of the pieces together
0
2024/05/10 14:11:10
CFSELMAN
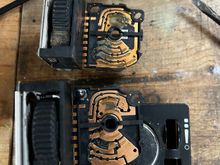
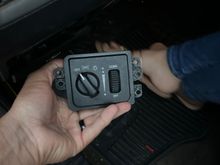
This is the backside of your actually headlight switch. This is very delicate to put together in fact the springs as you can see in the top middle go inside. There is a cylinder piece of copper that sits on those springs and has held in contact with a circuit board just through the entire component being put back together A note here is the Durango does not use the bottom contact point so you will have to take out the screen in the contact from the old switch and put it in to the Durango switch
0
2024/05/10 14:11:15
CFSELMAN
Basically, all I did was utilize the back half of the Dodge Durango switch, and the plastic cover piece with the Dodge Durango heat sink. I also use the dimmer switch out of the Durango. However, my headlight switch is my original.
0
2024/05/10 14:11:19
CFSELMAN
This is just showing it all back together. It works 100% all the plastic piece are from the Dodge Durango. You will utilize the heat sink from the dodge Durango. Internally, you will use the Dodge ram headlights circuit controls see the picture above
0
2024/05/10 14:11:23
CFSELMAN