Dodge Ram 1994-2001: How to Replace Fuel Pump, Fuel Filter, and Fuel Sending Unit
To replace the fuel pump, the fuel tank must be lowered from the body of the truck. On top of the heavy weight of the tank, fuel is a volatile liquid, making it dangerous to handle. Although difficult, this job can be accomplished with the right equipment and patience.
This article applies to the 2nd generation Dodge Ram (1994-2001).
The fuel pump, filter, and sending unit are all located in the fuel tank as one assembly. The fuel pump is electric and driven by a permanent magnet electric motor. As the rotor inside the pump turns, fuel is drawn into the pump and pressurized throughout the fuel system. The fuel sending unit's float lever drops with the fuel level in the tank. The sending unit is a variable resistor, meaning the sensors resistance to current flow changes as its position moves. This change in current is displayed by the driver's information center (gas gauge). Fuel contamination from dirt and water is the main source of damage to fuel system components. One way to reduce your chances of drawing in dirt and water from the main tanks at gas stations is by filling up when the station is not being re-supplied. Also, stations with more business tend to have fresher gas.

Materials Needed
- Basic tool set (ratchet, sockets, screwdrivers, pliers)
- Hammer
- Strap wrench
- 10mm wrench
- Fuel tank siphon pump
- One or more floor jacks, stands, and blocks of wood (if necessary)
- Electrical tape (optional)
- Fuel pressure gauge with drain hose (optional)
There are several ways to replace the fuel pump. The most common way is by dropping the fuel tank, which will be covered here. The bed of the truck can be tilted or removed. A hole can be cut in the bed directly above the fuel pump as well.
Have your fuel level as low as possible before removal of the tank. Each gallon of fuel weighs six pounds, so each gallon lighter your tank is, the less you have to worry about handling.
Step 1 – Set the emergency brake
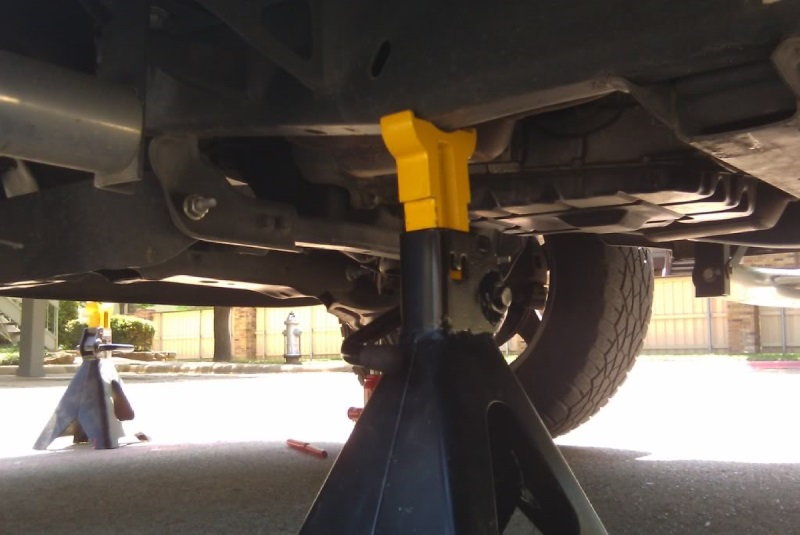
If you need more room under the rear of your truck, place wheel chocks in front of the front wheels and raise it with a floor jack. Place jack stands on each side against the frame rails. Blocks of wood can be used to reduce damage caused by the sharp areas of the jack stands.
Step 2 – Disconnect battery and siphon fuel from tank
Use a 10mm wrench to remove the negative (black) battery cable. Place it in an area it cannot accidentally contact the battery, or wrap it with electrical tape.
Use a suitable siphon pump to remove excess fuel from the tank. Tanks filled with fuel can weigh in access of 200 pounds, making it very difficult to remove.
Step 3 – Relieve the fuel pressure
Find the fuel pump fuse and remove it. There should be a diagram on the top or bottom of the under-hood fuse box cover with its location. Once removed, start the engine and wait for the engine to stall on its own.
If the fuel pump is not working, locate the pressure relief valve on the fuel rail. You will need to push the small valve in with a screwdriver or attach a fuel pressure gauge with a drain hose. Be careful using the screwdriver method because fuel will spray out in all directions.

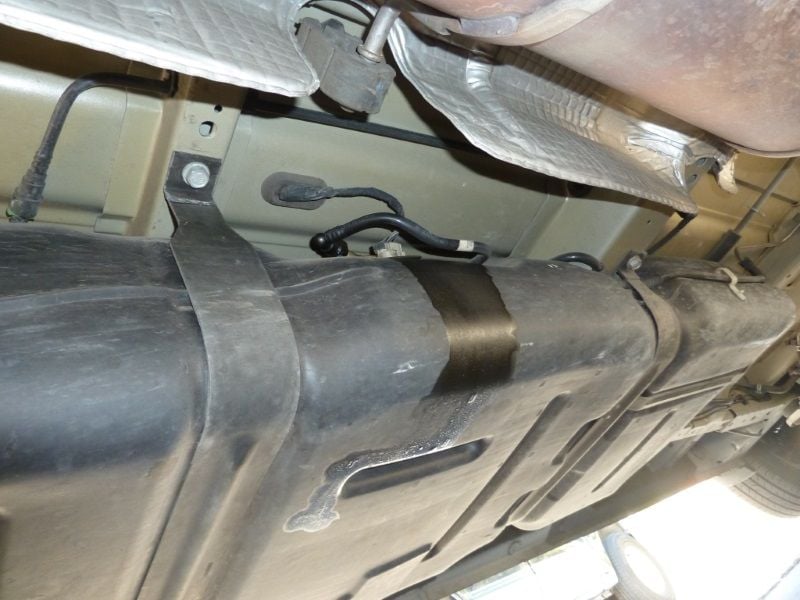
Step 4 – Loosen the fuel tank straps
Loosen the straps using a 15mm socket, but do not completely remove them. Once they are loosened, remove the skid plates on the front and side of the fuel tank.
Step 5 – Disconnect fuel filler neck from body of truck
When you open the fuel door, you will see three or four Phillips head screws surrounding the filler hose opening. Once these are removed, loosen the fuel filler hose and vent hose clamps located near the filler neck. Pull the hoses away from the fuel filler neck.

Step 6 – Disconnect electrical connector and fuel pressure hose
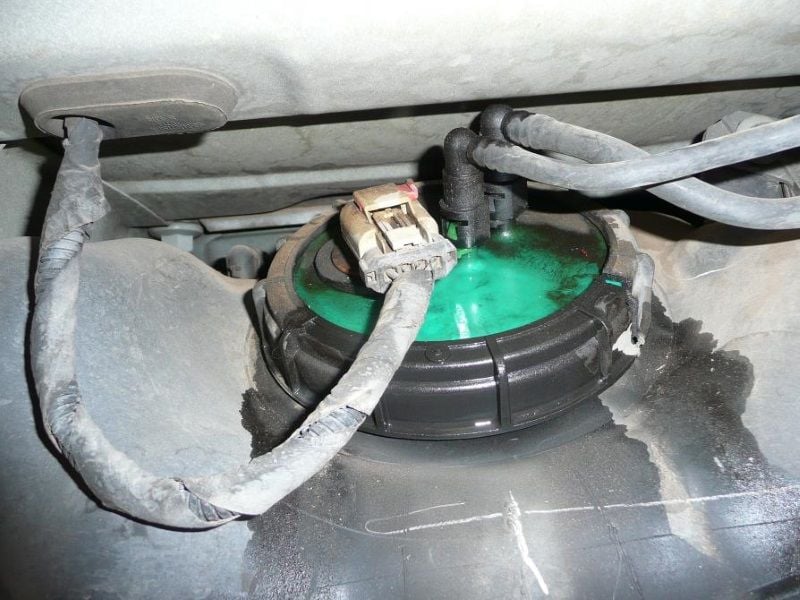
Lower the tank down as far as possible without damaging the hoses attached to the fuel pump. Once enough space is made, reach up, disconnect the electrical connector by pushing on the red locking tab, and squeezing the flexible tab on the connector plug. While squeezing, pull the connector plug away from the fuel pump.
To remove the fuel pressure hose, squeeze the sides of the plastic quick disconnect fitting and pull the hose away from the fuel pump.
Before lowering the tank to the ground, double check there are no other connections to the tank.
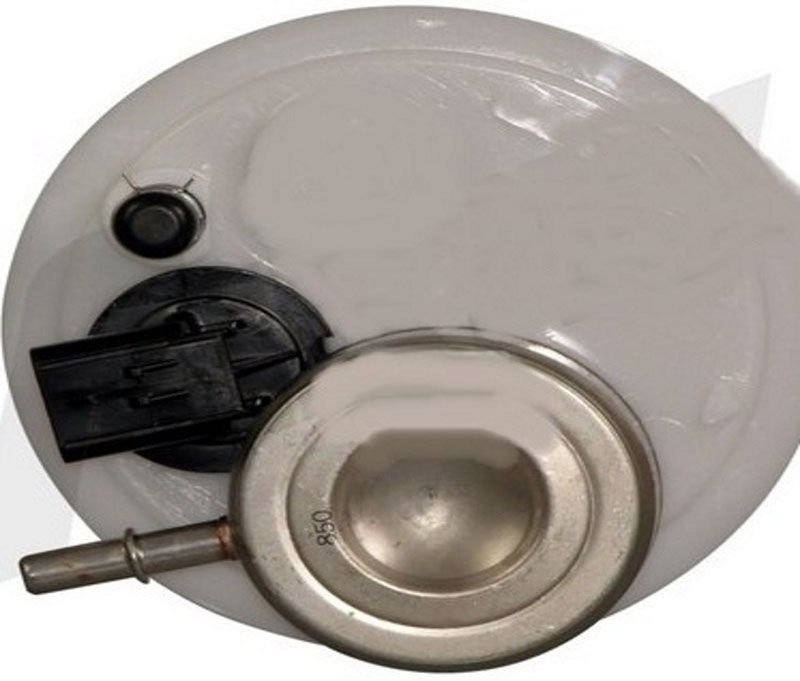
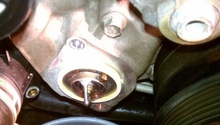
Figure 5. A view of the top of the fuel pump with the fuel hose and electrical connector removed. 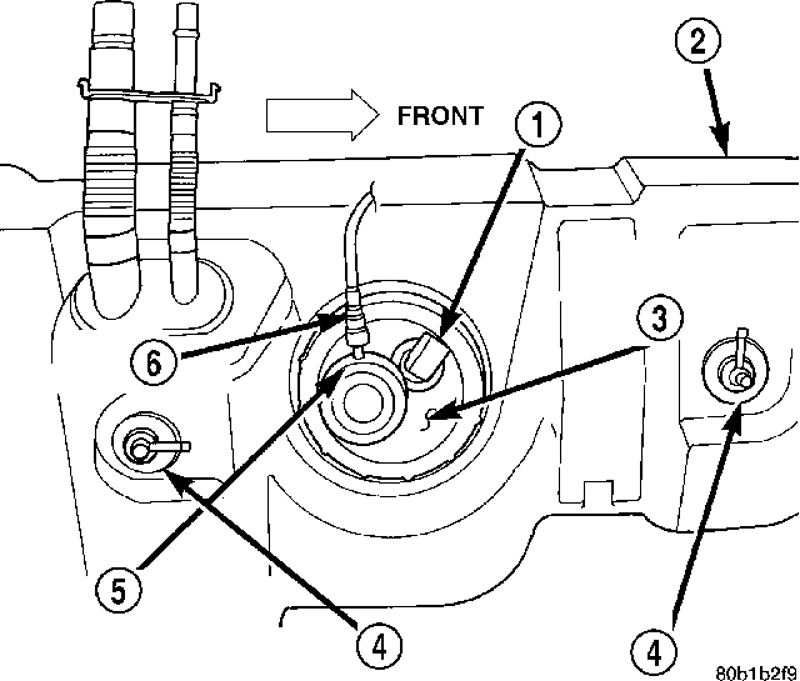
Figure 6. Number one indicates the electrical connector, and number two indicates the fuel pressure hose.
Step 7 – Replace fuel pump
You will see a plastic lock ring surrounding the fuel pump assembly. It can be removed with a strap wrench type tool, or using a screw driver/punch and a hammer. Use a screwdriver to pry the fuel pump assembly away from the rubber O-ring and lift the fuel pump out of the tank.
Before installing the new fuel pump, make sure any parts that were not included with the new assembly are transferred over. The new pump's instructions should provide the specifics. Install the new rubber O-ring onto the tank. Make sure it stays level/in-place as the new pump is being installed. Position the new pump at an angle to first insert the sending unit's float, and then press the fuel pump down onto the O-ring. Tighten the plastic lock ring, and get ready to install the tank back onto the truck.

Step 8 – Raise tank into the truck and reconnect hoses
Raise the tank high enough to begin tightening a fuel tank strap. Keep enough space between the tank and the truck to connect the electrical connector as well as the fuel pressure hose to the fuel pump. Continue raising the fuel tank until you can re-connect the fuel filler hose and vent hose. Once connected, attach the fuel filler neck to the body of the truck. Slide the skid plates back into place and tighten the tank down to the truck with the tank straps.
Step 9 – Check for leaks
Re-connect the negative battery cable and install the fuel pump fuse. Turn the ignition on and inspect around the fuel tank for leaking fuel. If none is found, the installation is done!
Featured Video: How to Replace Fuel Pump
Related Discussions
- DIY on Replacing Fuel Pump - DodgeForum.com
- Replace Fuel Sending Unit or Fuel Pump - DodgeForum.com
- Is There Fuel Filter on 2nd Gen? - DodgeForum.com
- Fuel Pump Issue, Please Help - DodgeForum.com