


 Aug 5, 2015, 01:08 PM
Last edit by: IB Advertising
See related guides and technical advice from our community experts:
Browse all: Brakes
- Dodge Ram 2nd Gen How to Replace Brake Pads, Calipers, Rotors
Step by step instructions for the do-it-yourself repairs.
Browse all: Brakes

DIY Front Brakes and Caliper Replacement
Thread Starter
|
Professional
Joined: Sep 2012
Posts: 231
Likes: 0
From: Wade NC
Ok, I've done the rears and wheel cylinders. I remember when I replace a wheel hub a while back one of my front brake calipers had a bad seal, not leaking. So now I'm replacing them and new brake pads. I upgraded to 2500 under 7500 gvwr. Intriguing enough the calipers look identical to a 1500, however, the front brake pad was about 1/4" wider, the rear pad about 1/8 wider. I probably should have put new rotors on because of this, but reused the old ones, they where not warped or grooved at all.
1997 dodge ram 1500 4x4 5.2l
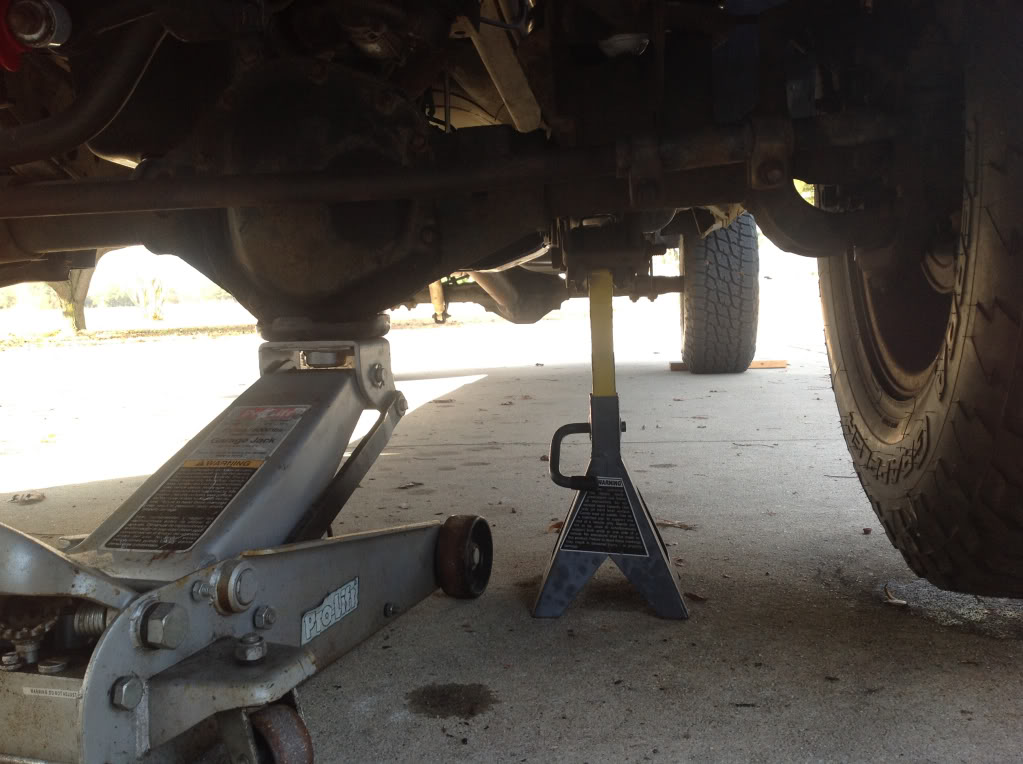
Place jack stand under front axel so tire is just off the ground. I leave the jack in place for added security.
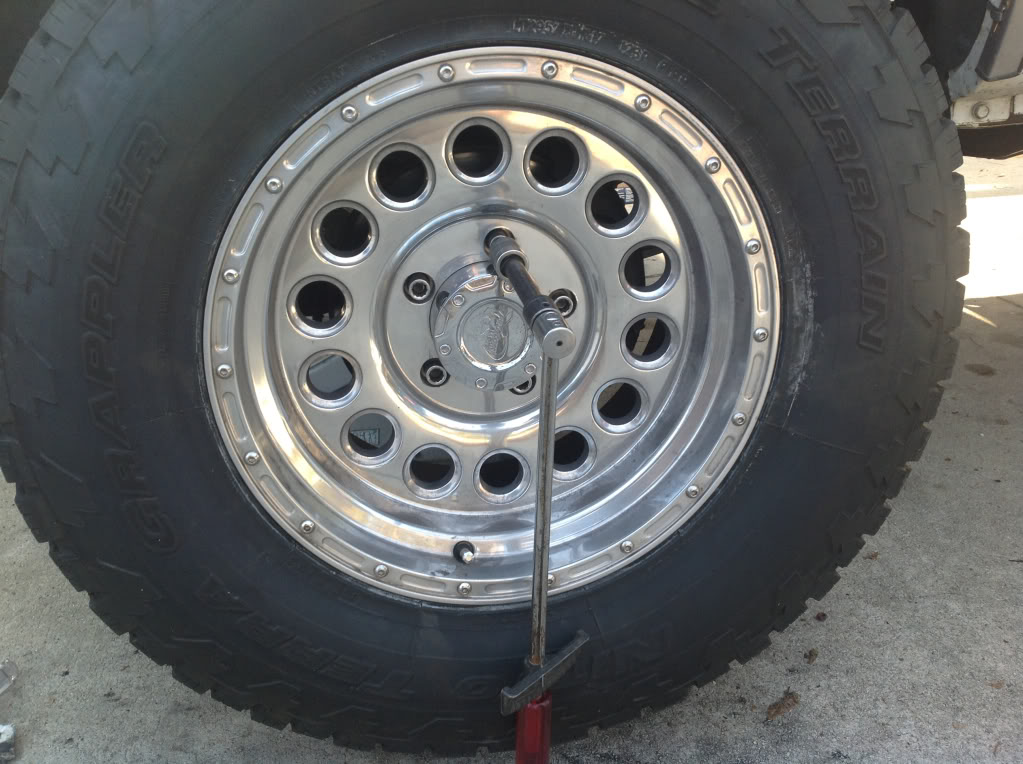
Loosen and remove lug nuts and tire.

Have the new caliper and two copper washers within reach, when we crack the brake line we want to put it right on the new caliper before too much fluid loss. Brakes only...skip this part.
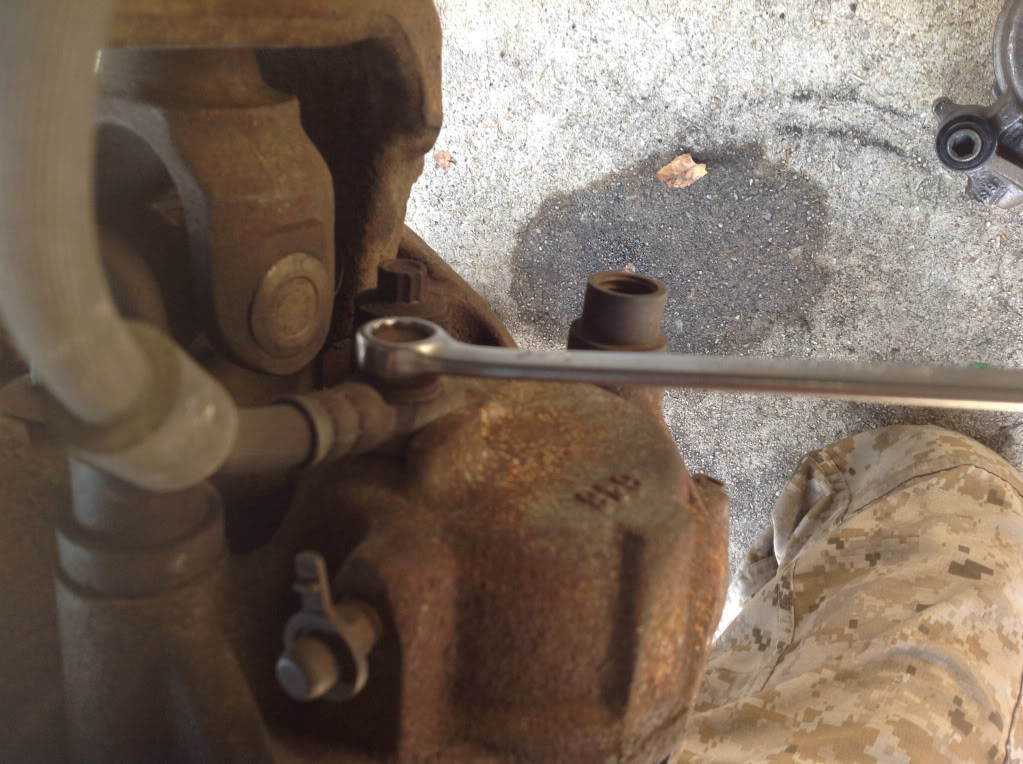
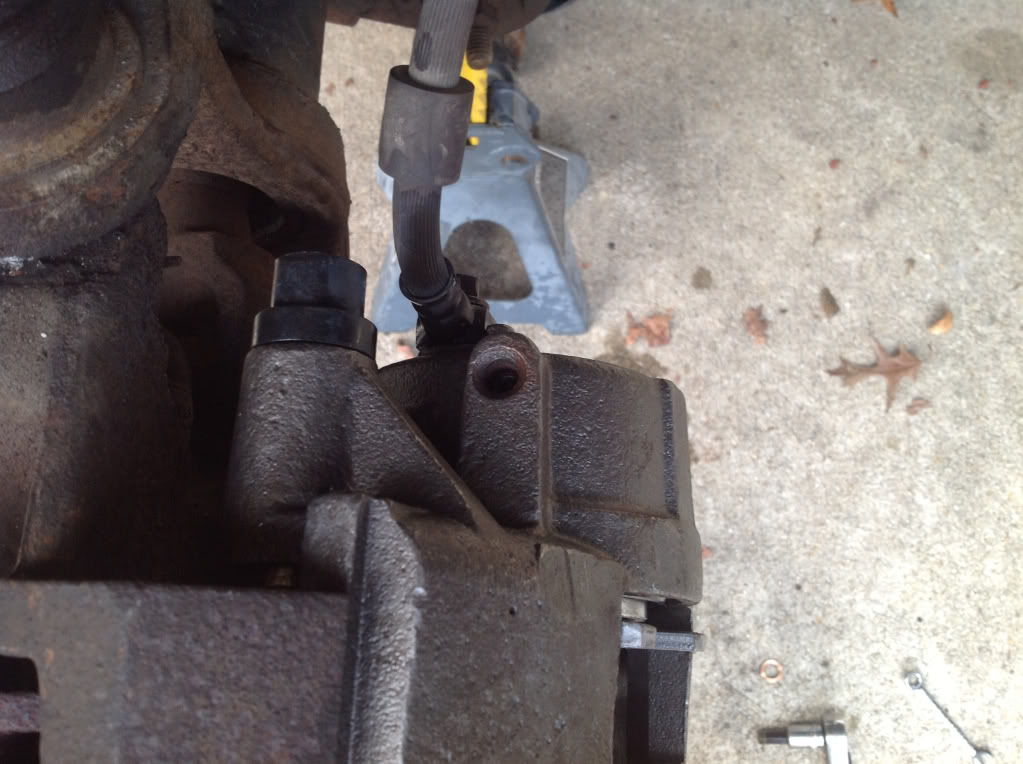
Using a 3/8 wrench remove the line lug and bolt from the old caliper. Brakes only skip this part.
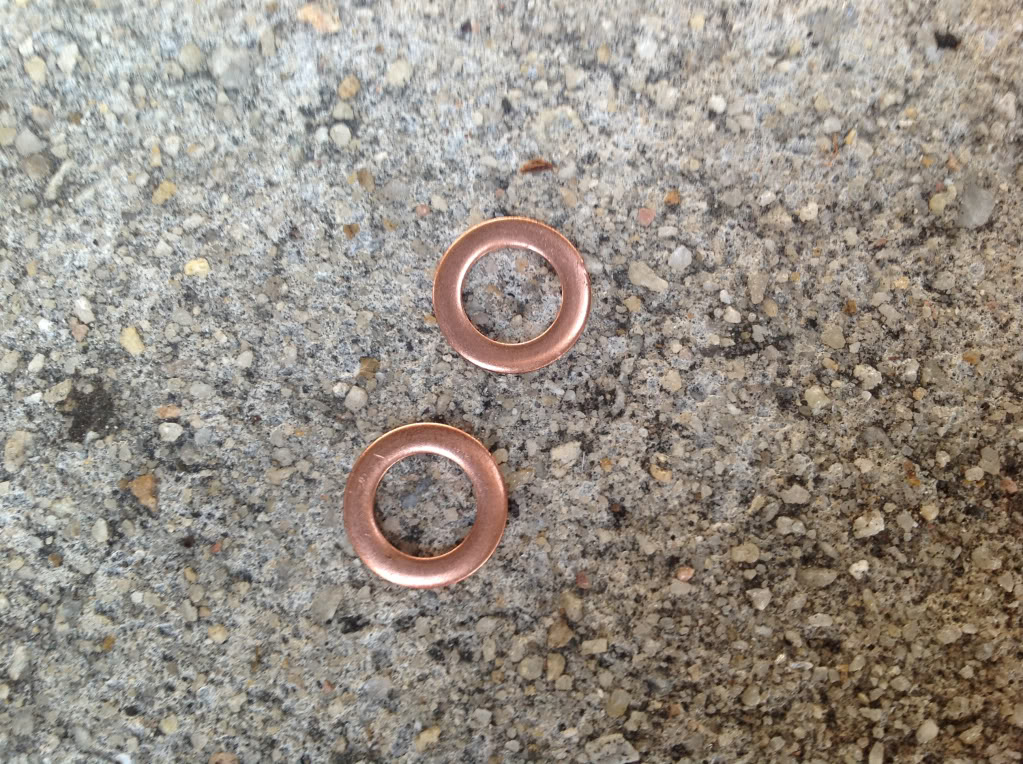
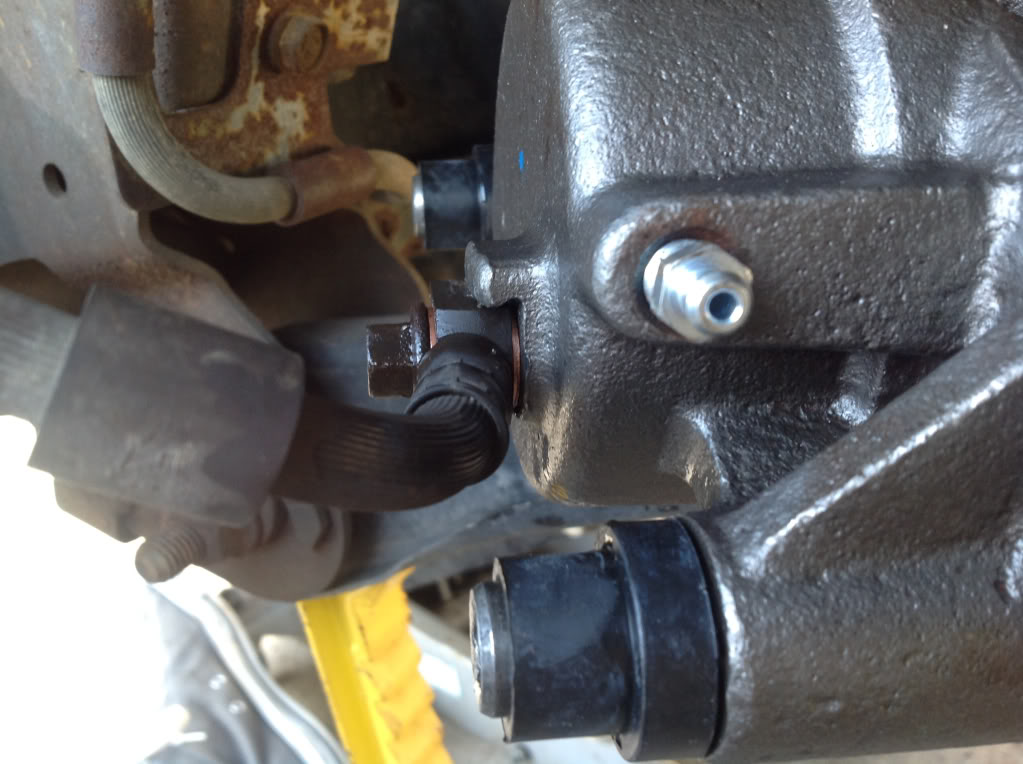
Using supplied copper washers screw line lug and bolt to new caliper, and tighter bolt. Take note of the copper washer locations
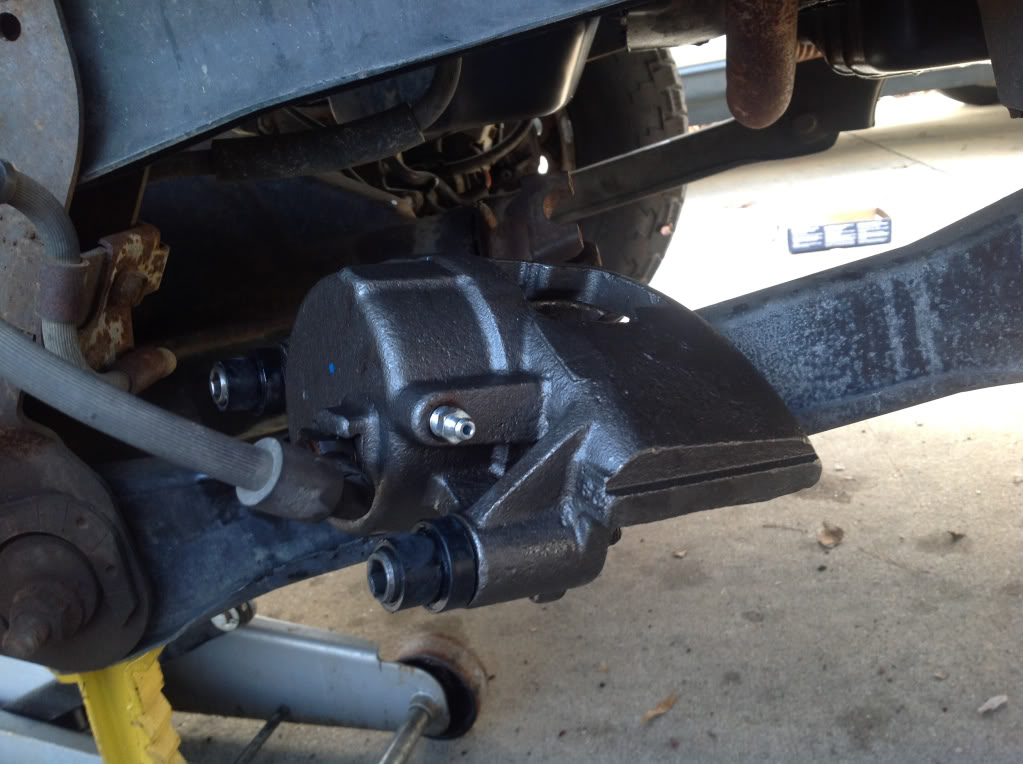
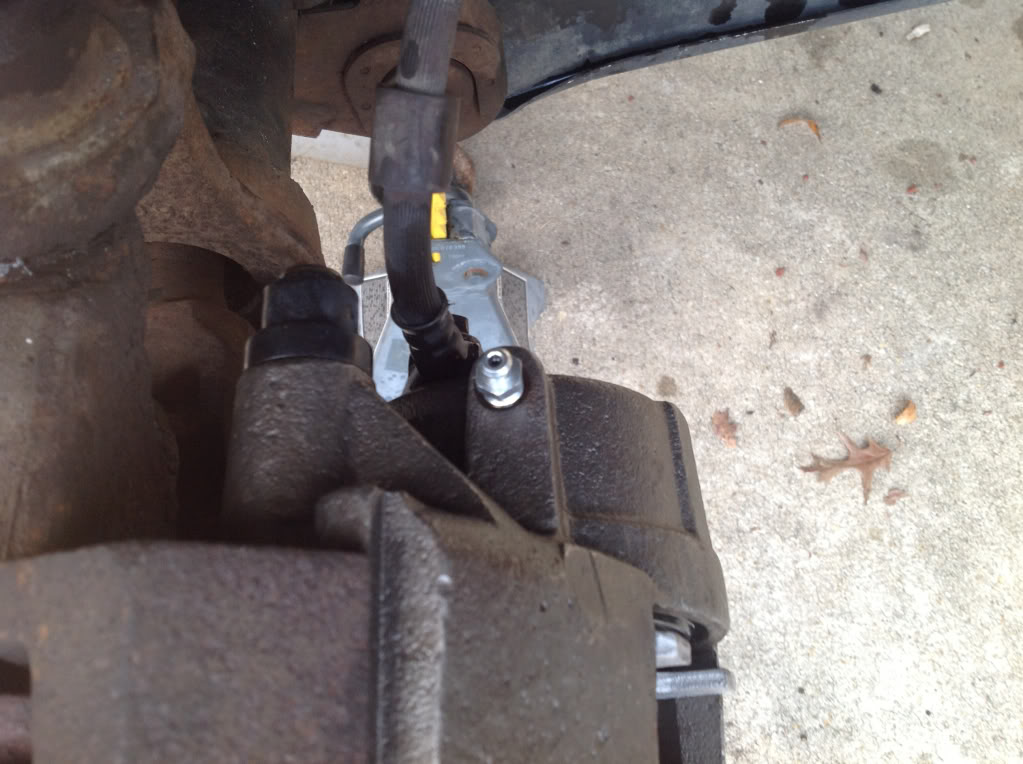
Place new caliper on the supplied caliper hanger, this is the perfect spot so were not messing up the brake line.
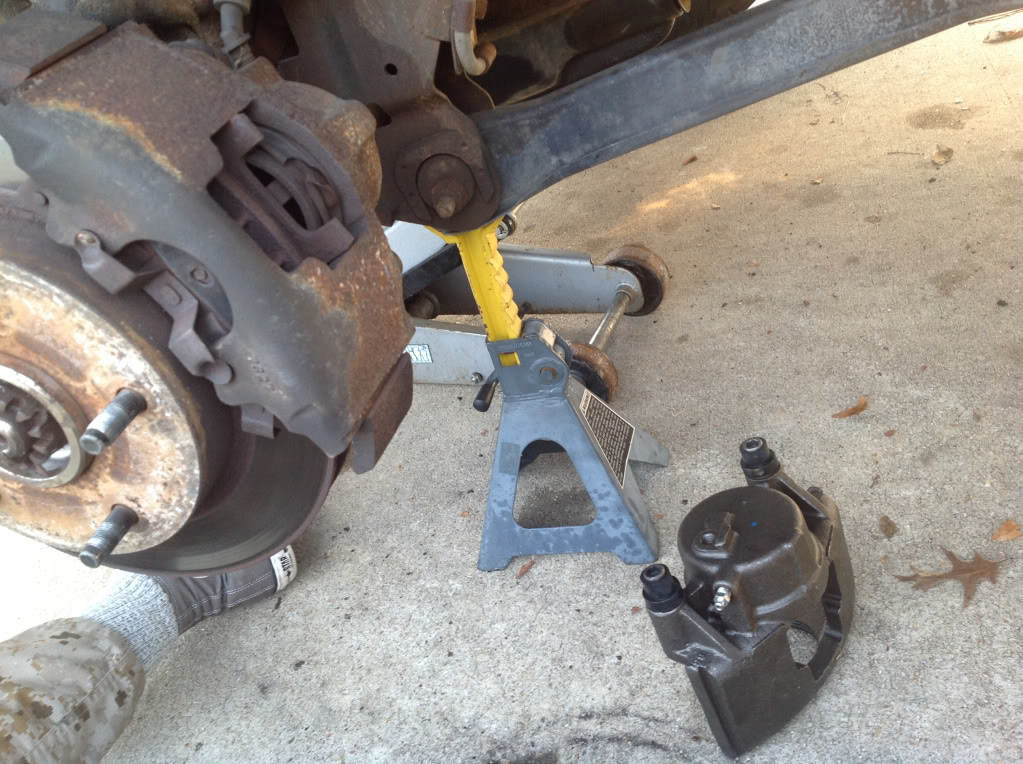
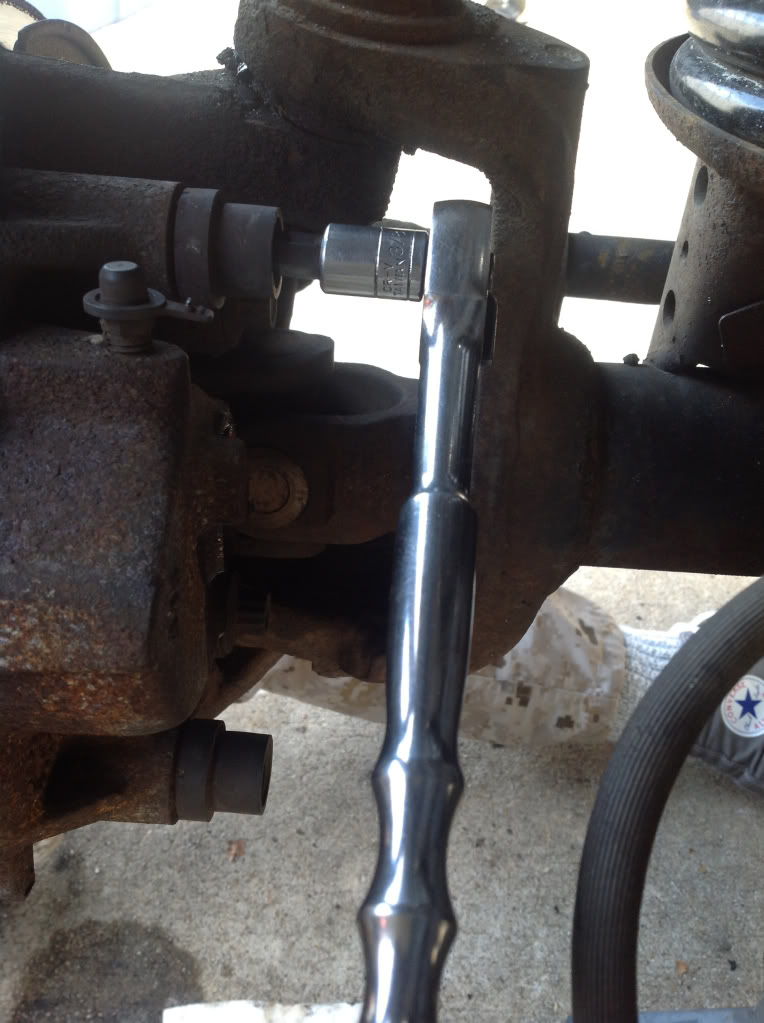
BRAKES ONLY START HERE. With a 3/8 Allen socket and ratchet, remove the old caliper bolts.
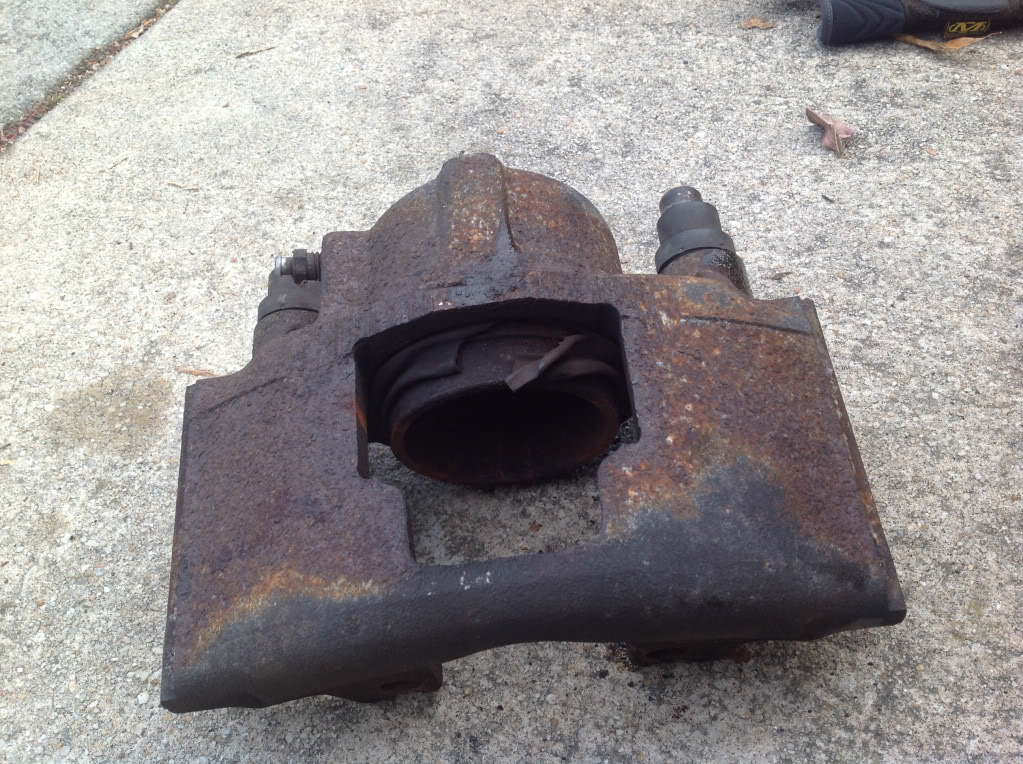
Remove damaged caliper and plug hole so fluid does not leak out. Brakes only skip.
BRAKES ONLY START HERE!!!
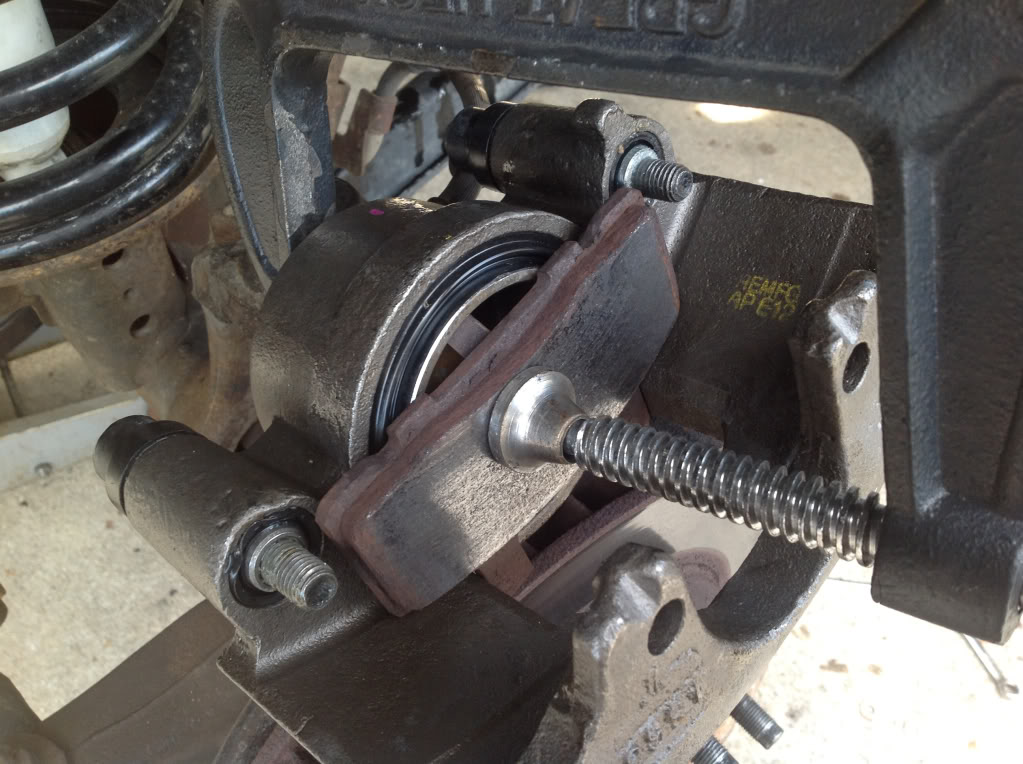
Leave old rear brake pad in place, use a large C-clamp to push piston back in. WARNING, it is a good idea to check your brake fluid reservoir before doing this step. If the reservoir is full, you will want to remove some of the fluid first. (A plastic turkey baster) works great. The reason for this is as you compress the piston, fluid will be forced back to the reservoir, if its already full, it will spill out all over.
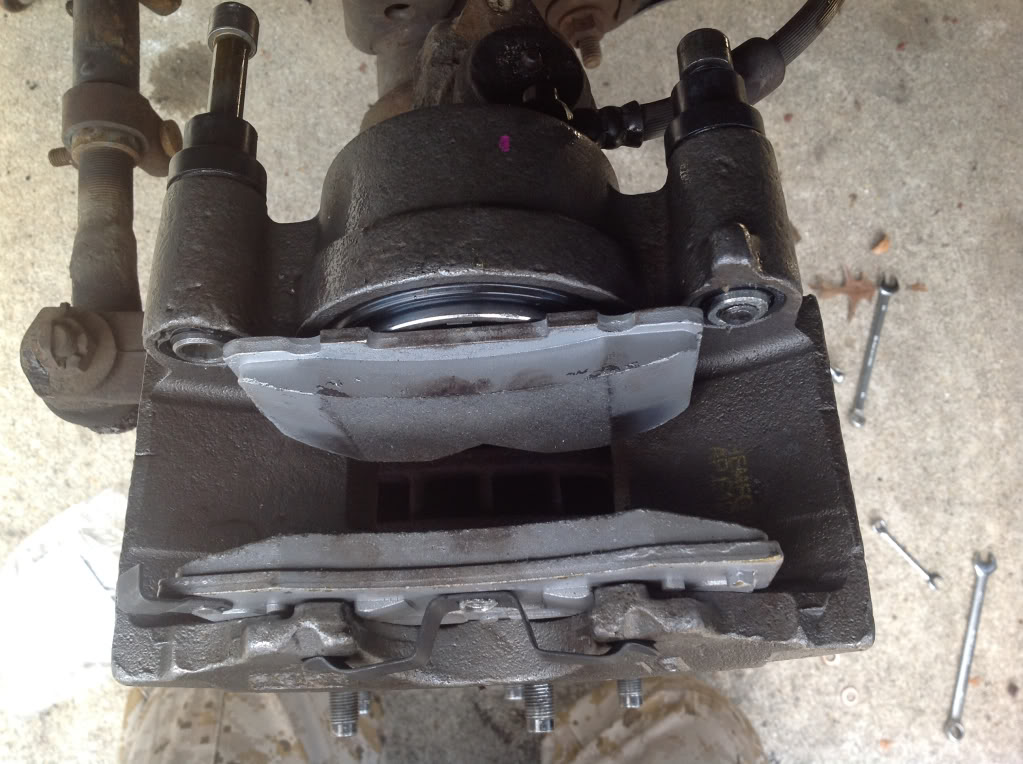
Install new brake pads onto caliper...it's fairly simple to figure out which one goes where.
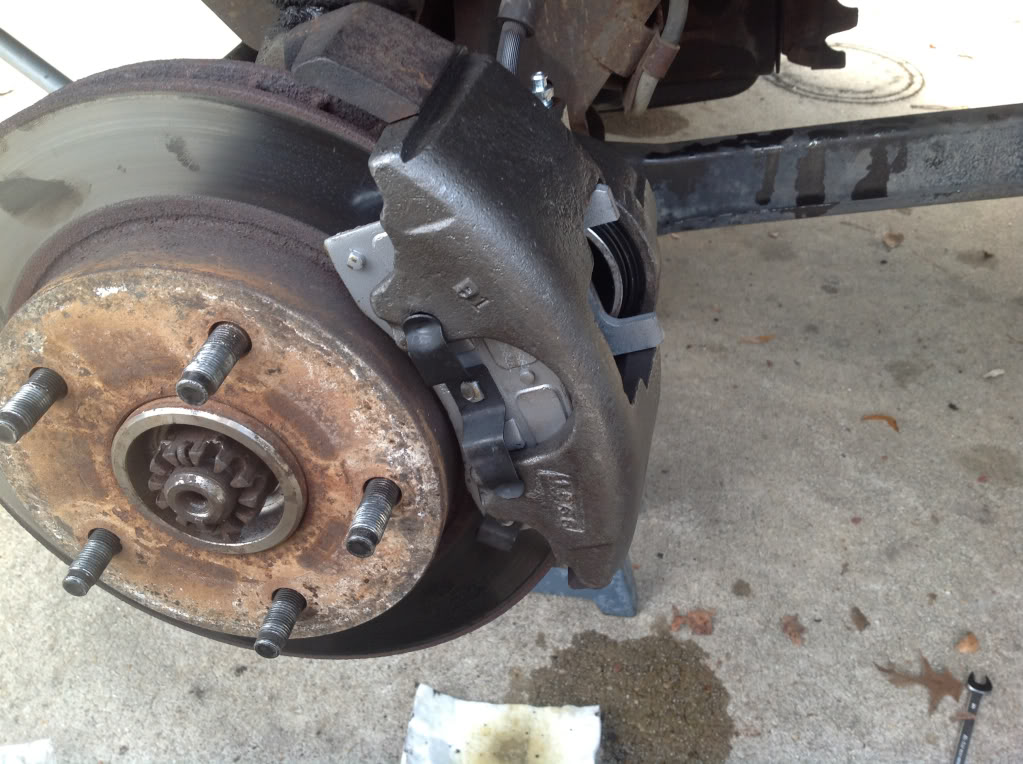
Reinstall pad filled caliper and tighten Allen bolts.
Using a 10mm wrench, remove the bleeder valve. What is nice about bleeding front brakes is it is so close to the reservoir we can gravity bleed. Once valve is removed, remove reservoir cover. In a minute or so you will see fluid begin to flow from the valve port, as soon as is appears, replace the bleeder valve and tighten. I then put reservoir cover back on, press brake pedal a couple times til it firms up. Open bleeder valve to remove any last air bubbles, and recheck fluid level.

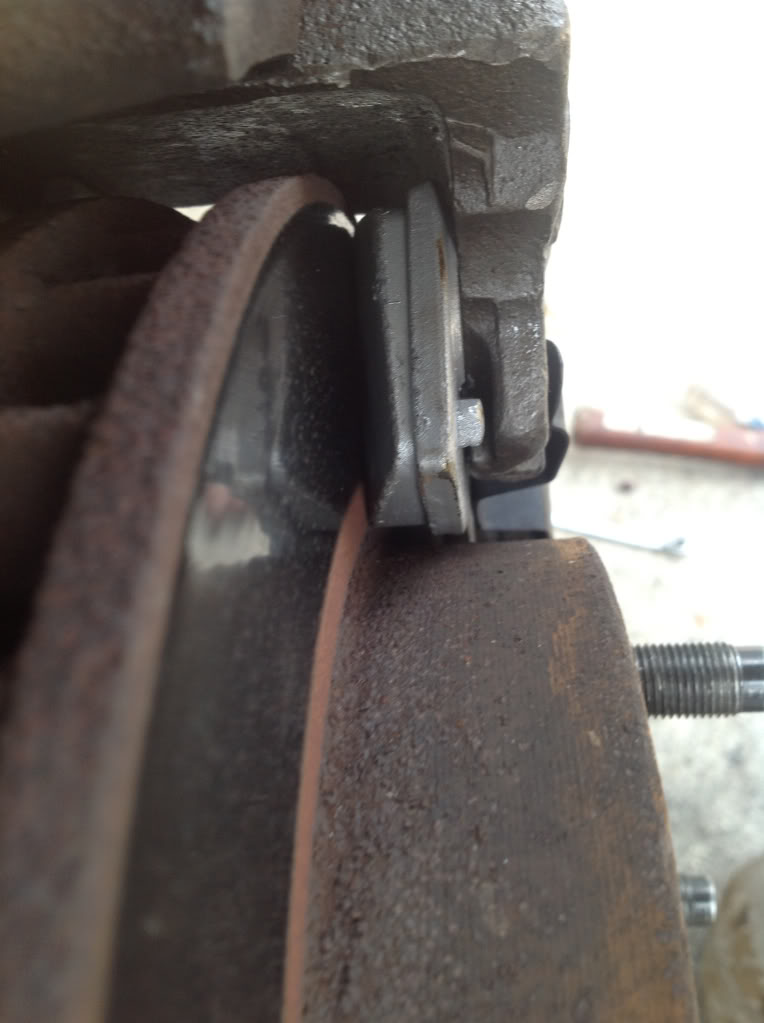
Here you can see that the new pads are wider.
Put tire back on and tighten lug nuts... Then.... test drive.
My brakes are now awesome again!!!!
1997 dodge ram 1500 4x4 5.2l
Place jack stand under front axel so tire is just off the ground. I leave the jack in place for added security.
Loosen and remove lug nuts and tire.
Have the new caliper and two copper washers within reach, when we crack the brake line we want to put it right on the new caliper before too much fluid loss. Brakes only...skip this part.
Using a 3/8 wrench remove the line lug and bolt from the old caliper. Brakes only skip this part.
Using supplied copper washers screw line lug and bolt to new caliper, and tighter bolt. Take note of the copper washer locations
Place new caliper on the supplied caliper hanger, this is the perfect spot so were not messing up the brake line.
BRAKES ONLY START HERE. With a 3/8 Allen socket and ratchet, remove the old caliper bolts.
Remove damaged caliper and plug hole so fluid does not leak out. Brakes only skip.
BRAKES ONLY START HERE!!!
Leave old rear brake pad in place, use a large C-clamp to push piston back in. WARNING, it is a good idea to check your brake fluid reservoir before doing this step. If the reservoir is full, you will want to remove some of the fluid first. (A plastic turkey baster) works great. The reason for this is as you compress the piston, fluid will be forced back to the reservoir, if its already full, it will spill out all over.
Install new brake pads onto caliper...it's fairly simple to figure out which one goes where.
Reinstall pad filled caliper and tighten Allen bolts.
Using a 10mm wrench, remove the bleeder valve. What is nice about bleeding front brakes is it is so close to the reservoir we can gravity bleed. Once valve is removed, remove reservoir cover. In a minute or so you will see fluid begin to flow from the valve port, as soon as is appears, replace the bleeder valve and tighten. I then put reservoir cover back on, press brake pedal a couple times til it firms up. Open bleeder valve to remove any last air bubbles, and recheck fluid level.
Here you can see that the new pads are wider.
Put tire back on and tighten lug nuts... Then.... test drive.
My brakes are now awesome again!!!!


