

My 97 RAM Project
#21
 01-18-2017, 01:13 PM


Join Date: Sep 2015
Location: Texas
Posts: 106
Likes: 0
Received 0 Likes
on
0 Posts
#22
01-18-2017, 02:36 PM
Join Date: Sep 2015
Location: Texas
Posts: 106
Likes: 0
Received 0 Likes
on
0 Posts
Here is another update:
My crap shoot DIY door seal fix seems to be working, for now. It has been raining for 2 days and so far no leaks! You can see in the pics after the doors have been shut now for couple days the weatherstripping has flattened out some but seems to be holding shape and sealing ok. Only time will tell. LoL, this is the worst hack fix I have ever done, but its temporary so screw it...
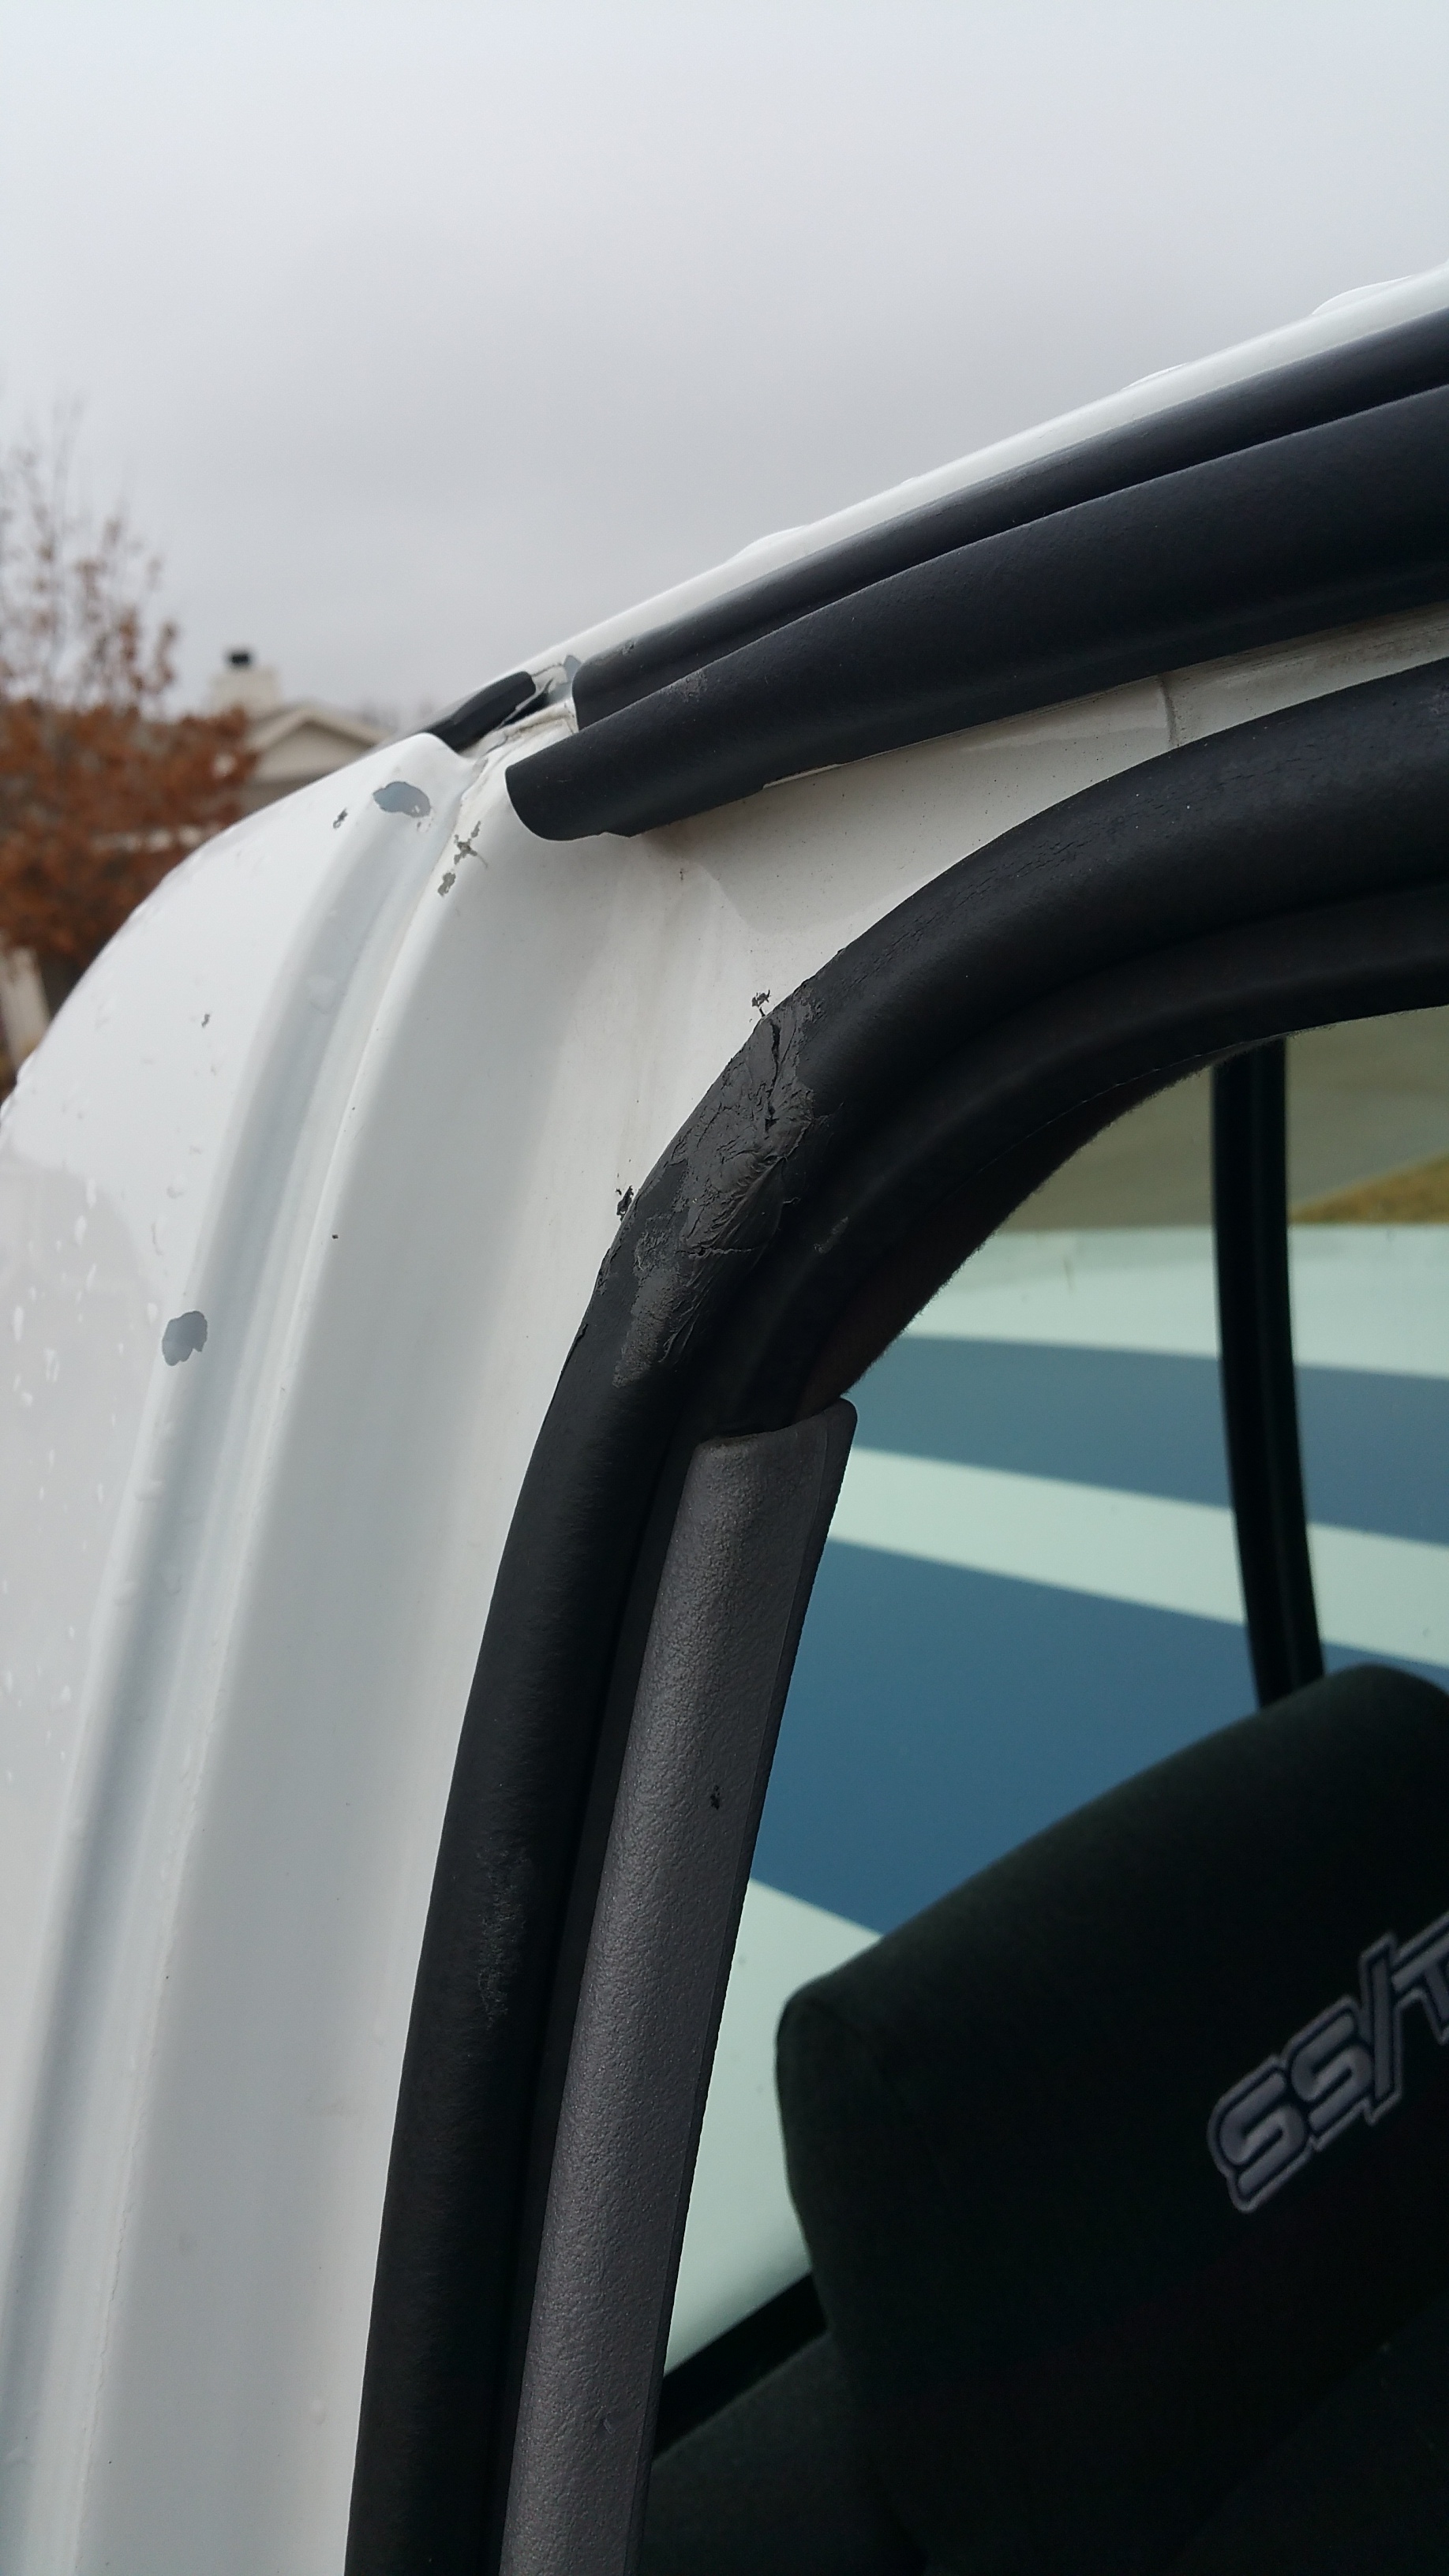

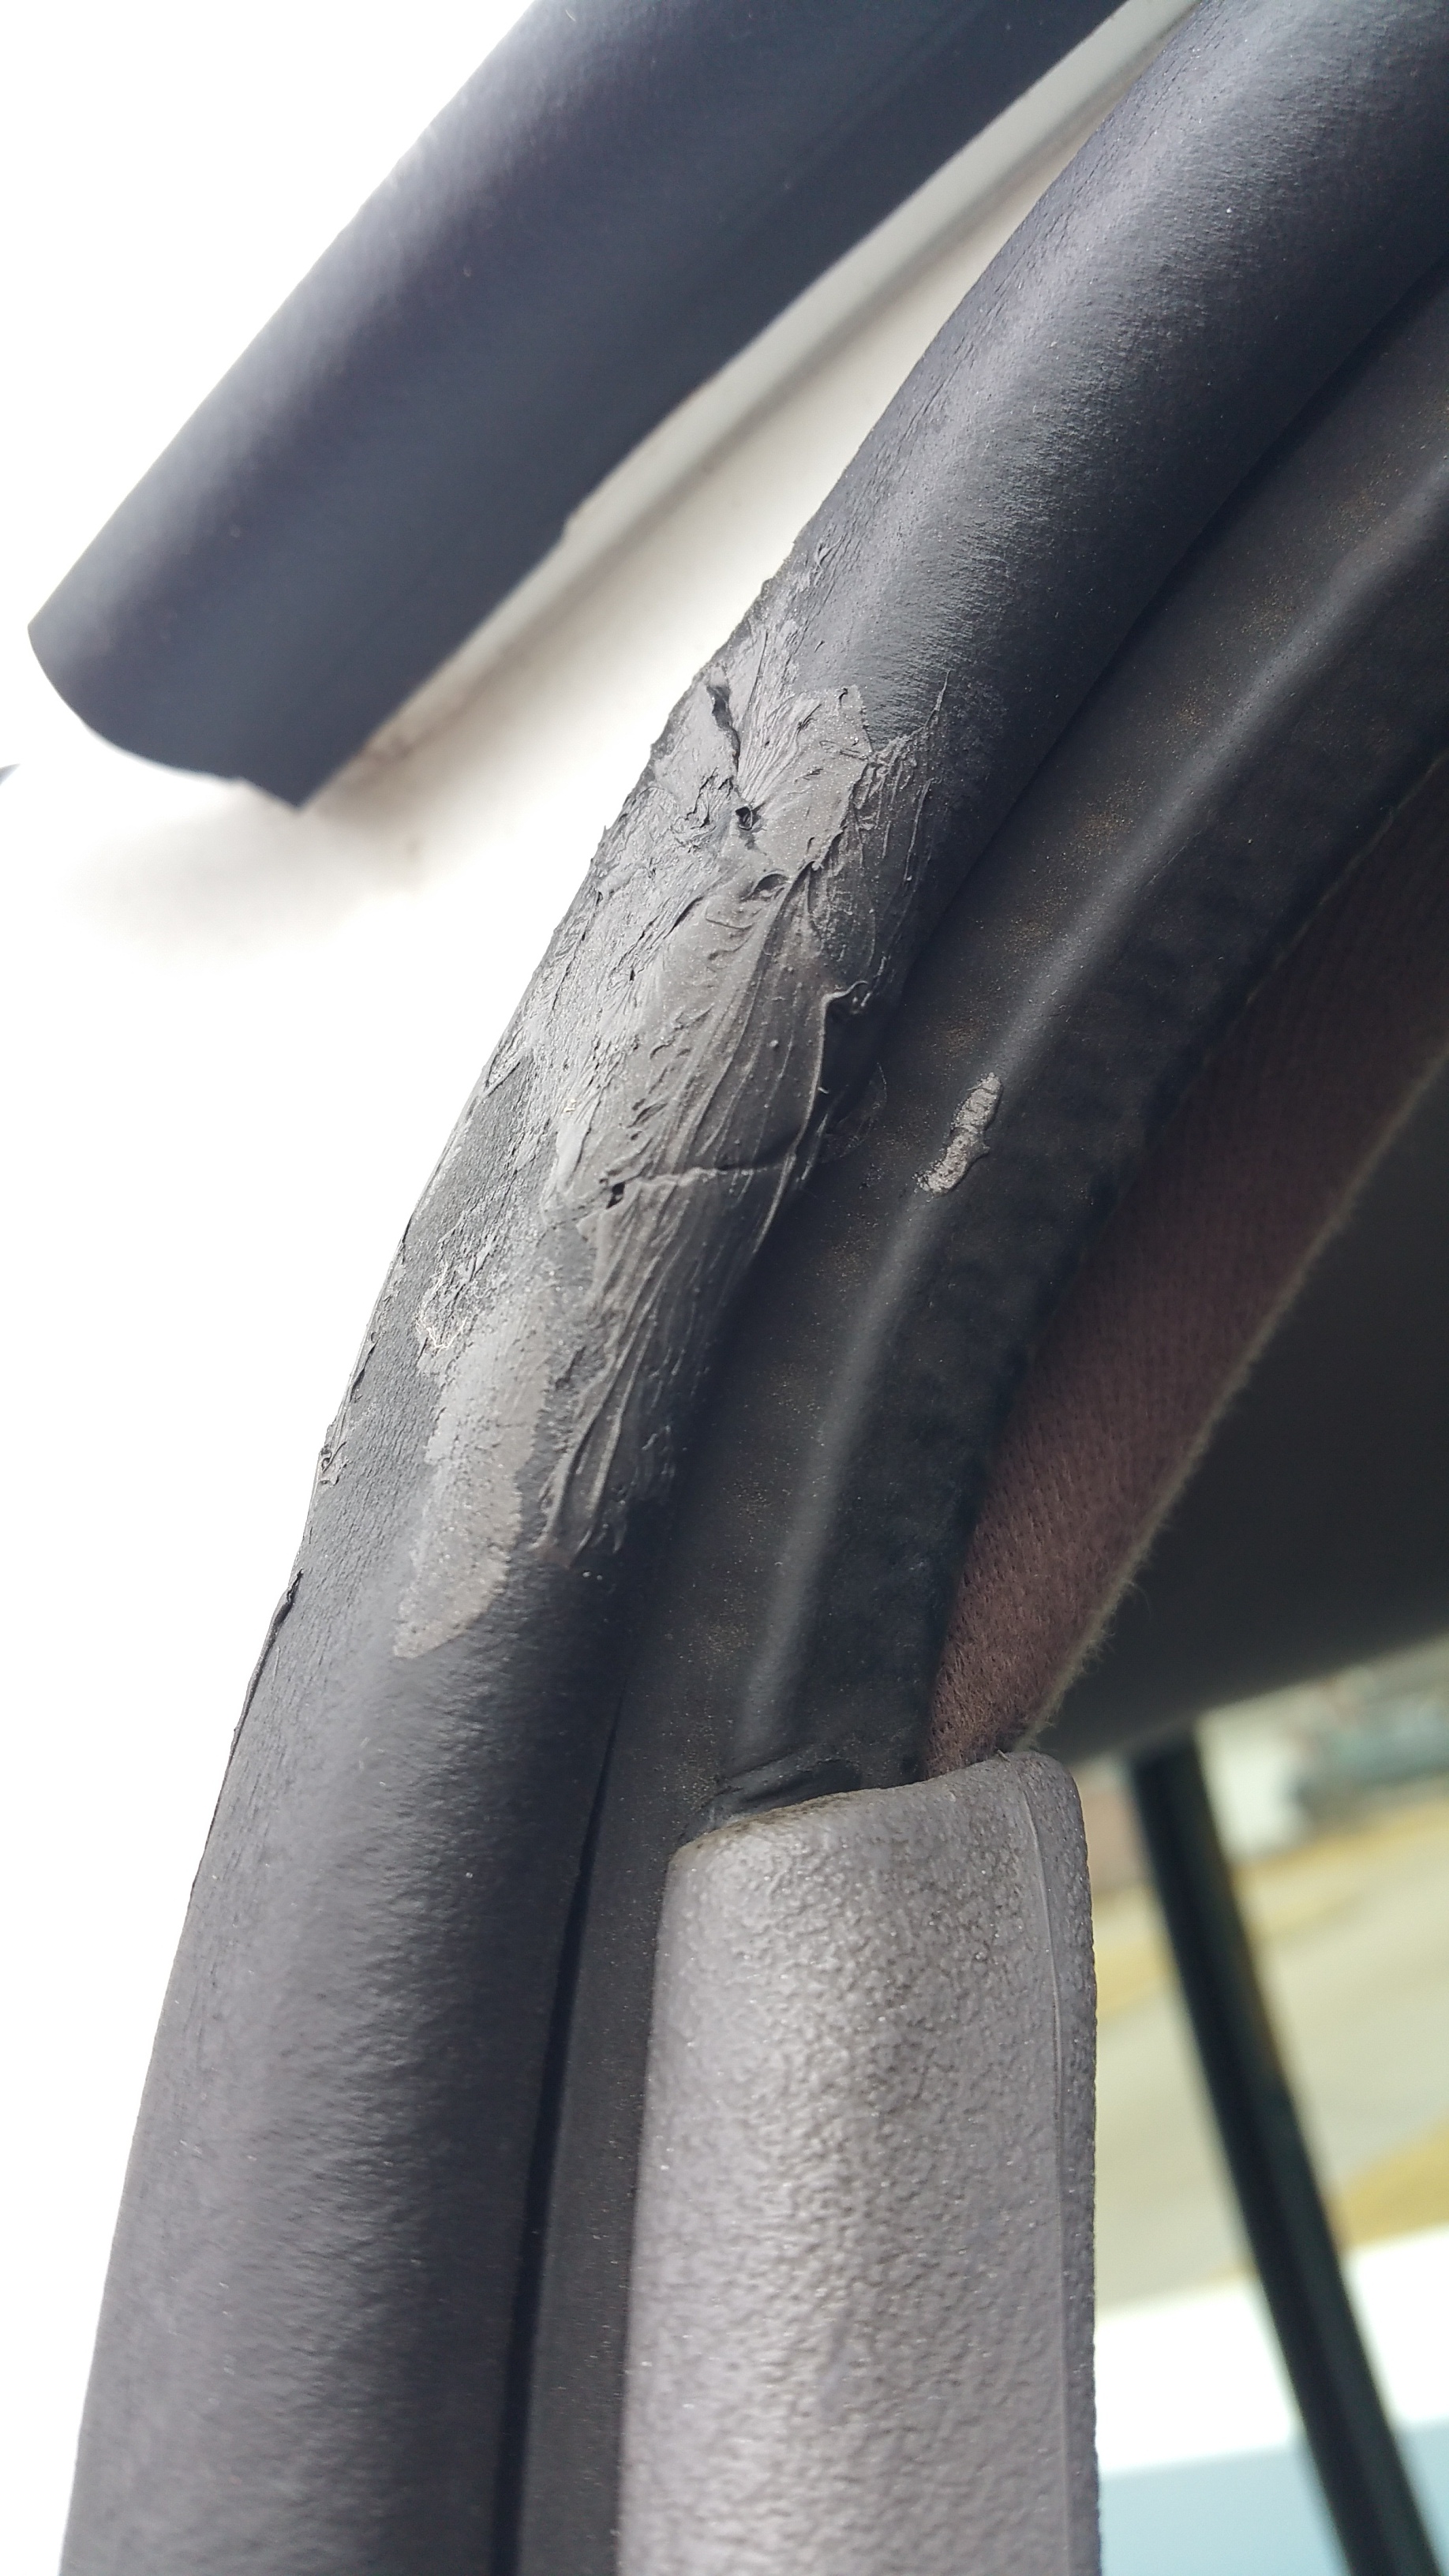
My crap shoot DIY door seal fix seems to be working, for now. It has been raining for 2 days and so far no leaks! You can see in the pics after the doors have been shut now for couple days the weatherstripping has flattened out some but seems to be holding shape and sealing ok. Only time will tell. LoL, this is the worst hack fix I have ever done, but its temporary so screw it...


Last edited by ram-tuff; 02-06-2017 at 04:02 PM.
#24
01-18-2017, 06:01 PM
Join Date: Sep 2015
Location: Texas
Posts: 106
Likes: 0
Received 0 Likes
on
0 Posts
yup, thats it, money, just temp till i get the quan for those seals. I need more than just the door seals unfortunately. I found that the top door seal that goes all the way down the windshield line is shot. The actual frame rail that is attached to the door a the top of door is seperating from the door. I can see the pasenger side is still ok but its sealant is started to fail too. the driver side sealant is almost completely gone and that top bracket is completely loose allowing all the water to slip by the upper most top seal on door so the next seal, the one that goes all the way around the door, is the only thing standing between the water and my inner cab. I had to do something since that inner door seal was hosed from all the times a wire hanger was used to open the door due to the faulty keyless entry locking the doors when its not supposed to.
dominos man, dominos. I'm just trying to stop the bleeding for now till I can get some sewing material to permanently patch this beast...
dominos man, dominos. I'm just trying to stop the bleeding for now till I can get some sewing material to permanently patch this beast...
#25
01-18-2017, 06:48 PM

Yeah, the stock heads suck. End of story.  They deck castings were too thin, so, they are quite prone to cracking. If you have close to, or over, 100K on the truck, you can bet money the heads are cracked.
What I usually recommend if you are going to yank the heads is: Don't bother doing anything at all with them. Just toss 'em. Order up a set of NEW heads from Odessa/clearwater. They are better castings, no core charge, they don't want your old nasty ones back, they come fully assembled, so, you can just bolt 'em right on. You can get a pair for under 600 bucks still, I think.
They deck castings were too thin, so, they are quite prone to cracking. If you have close to, or over, 100K on the truck, you can bet money the heads are cracked.What I usually recommend if you are going to yank the heads is: Don't bother doing anything at all with them. Just toss 'em. Order up a set of NEW heads from Odessa/clearwater. They are better castings, no core charge, they don't want your old nasty ones back, they come fully assembled, so, you can just bolt 'em right on. You can get a pair for under 600 bucks still, I think.
#26
01-20-2017, 10:45 AM
Join Date: Sep 2015
Location: Texas
Posts: 106
Likes: 0
Received 0 Likes
on
0 Posts
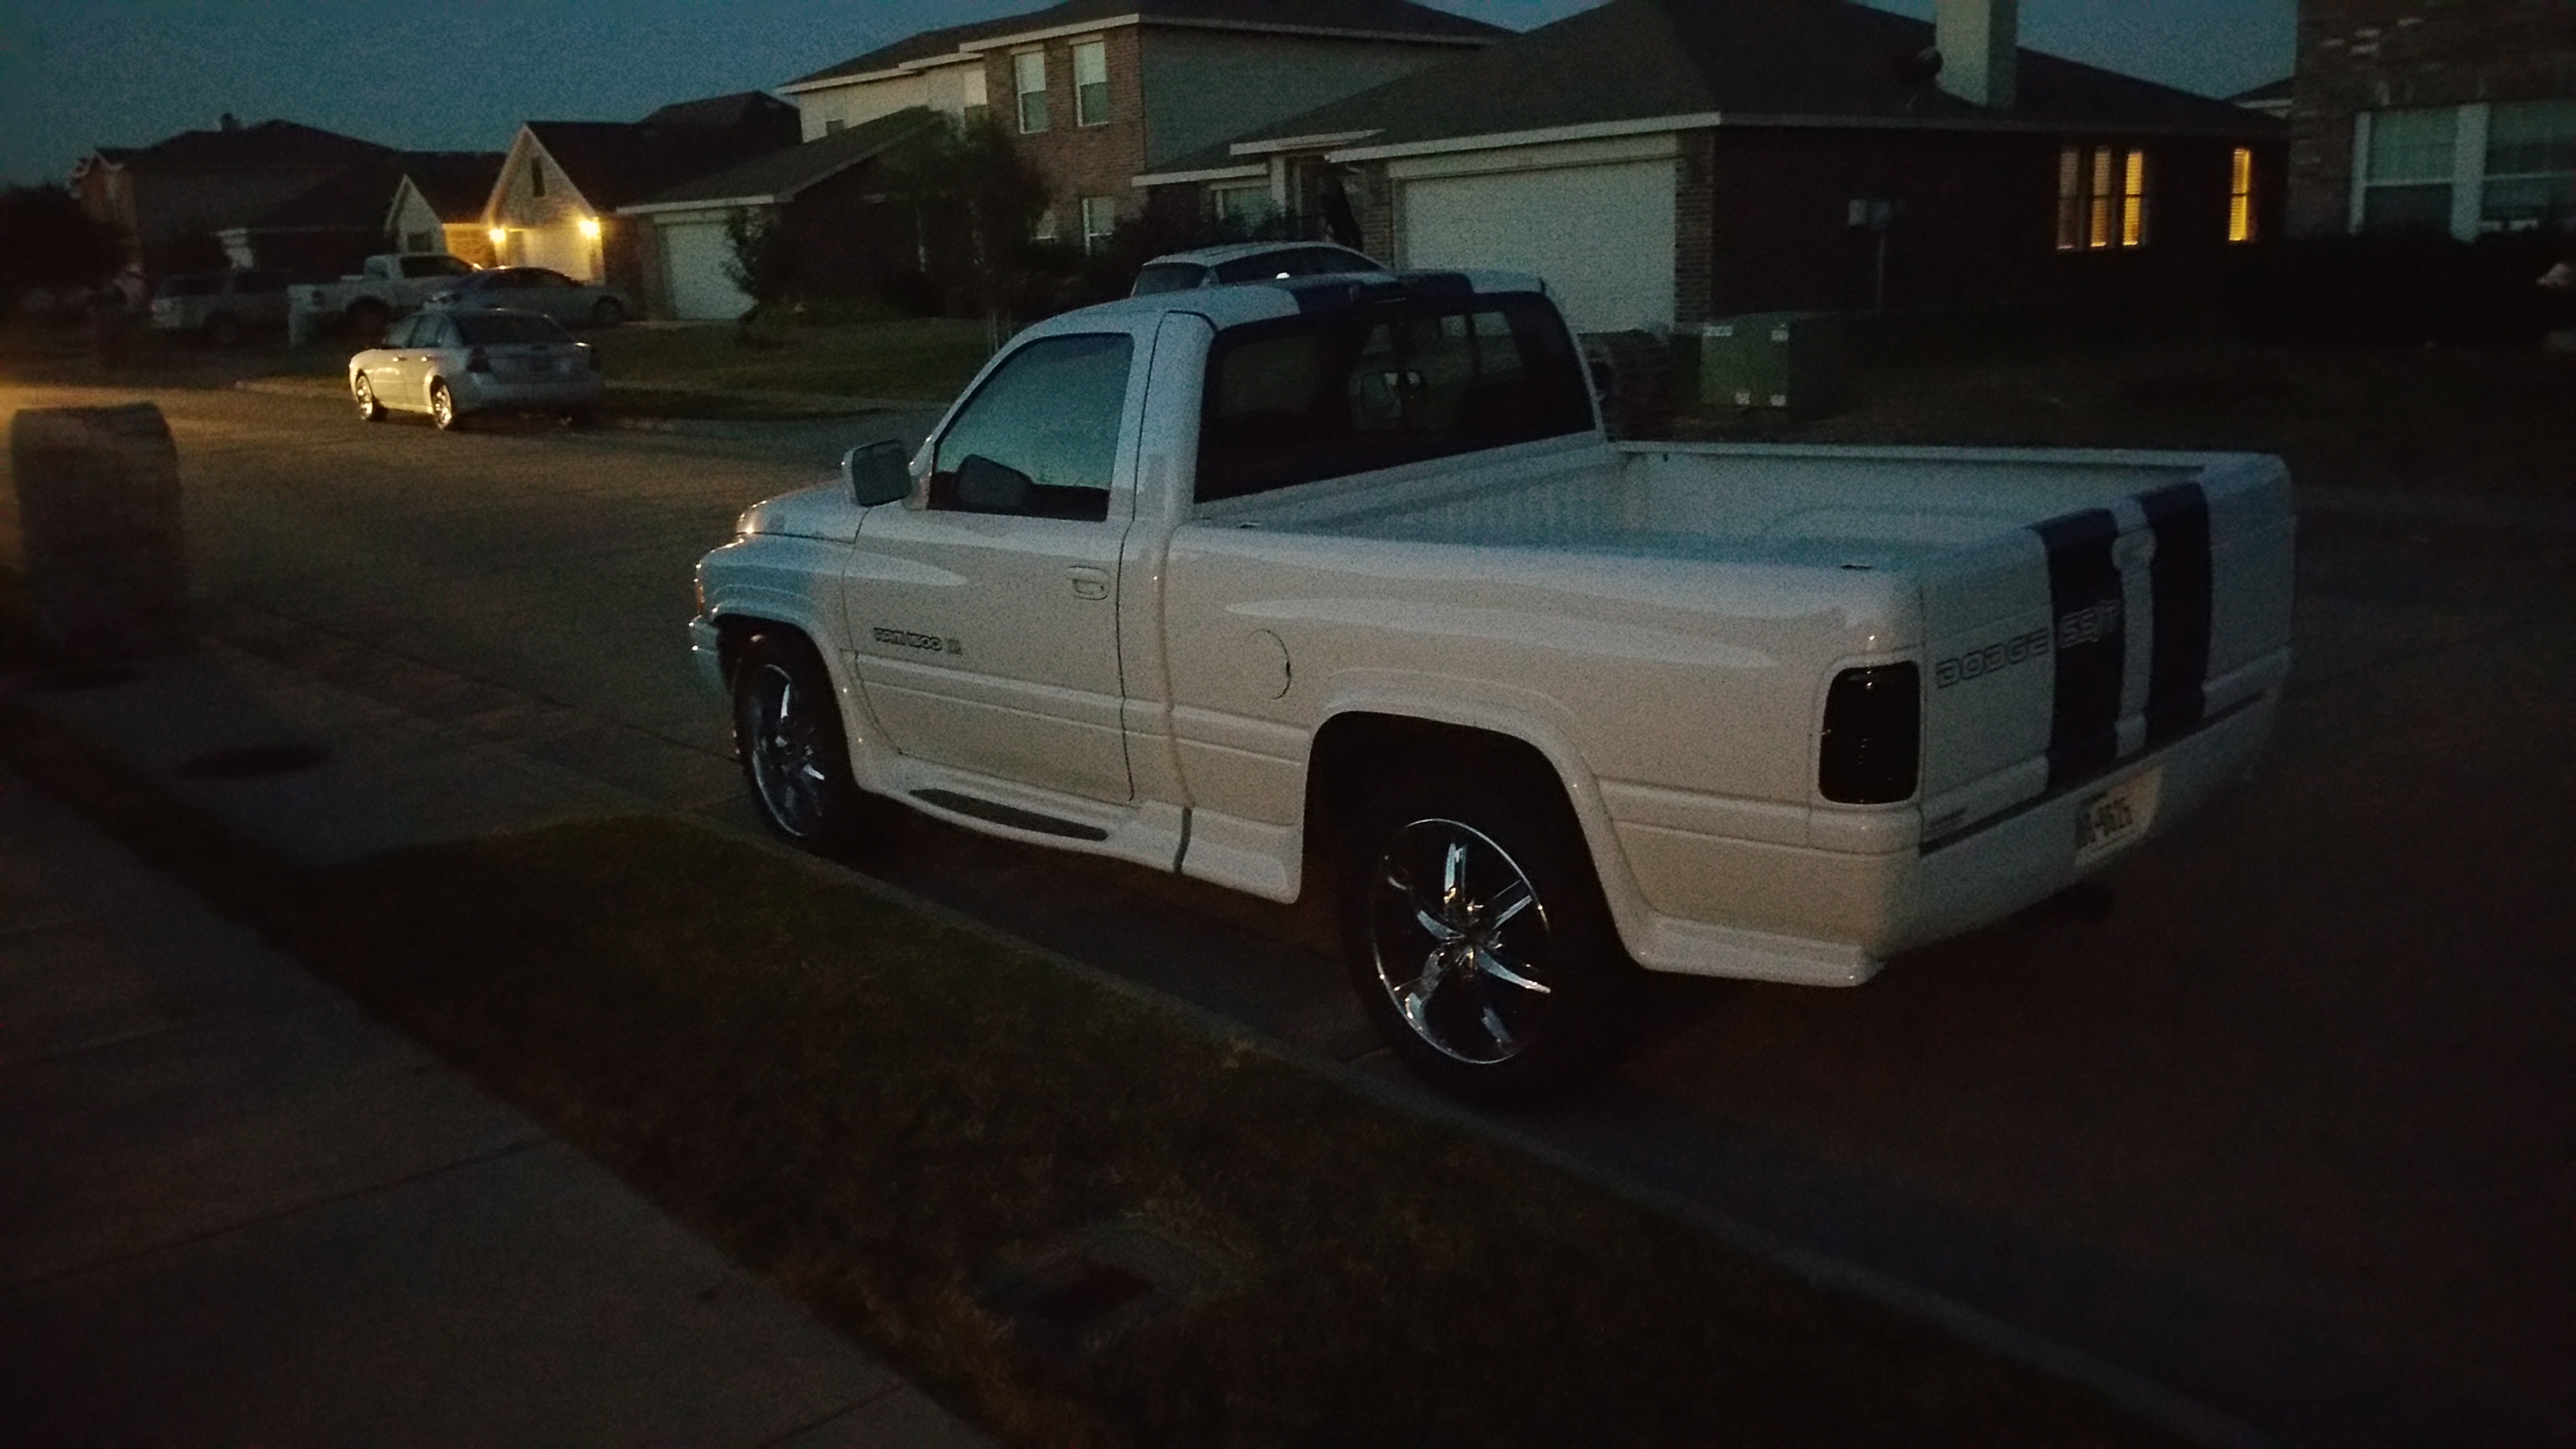
Had the tonneau cover off the truck for a while back when I was moving. Since I bought the truck the underside of the cover was peeling paint pretty bad from the fiberglass. My guess is whoever did the job didn't prep the thing very well, or it was just simply old old old.
This was only pic I got of the truck with cover off...
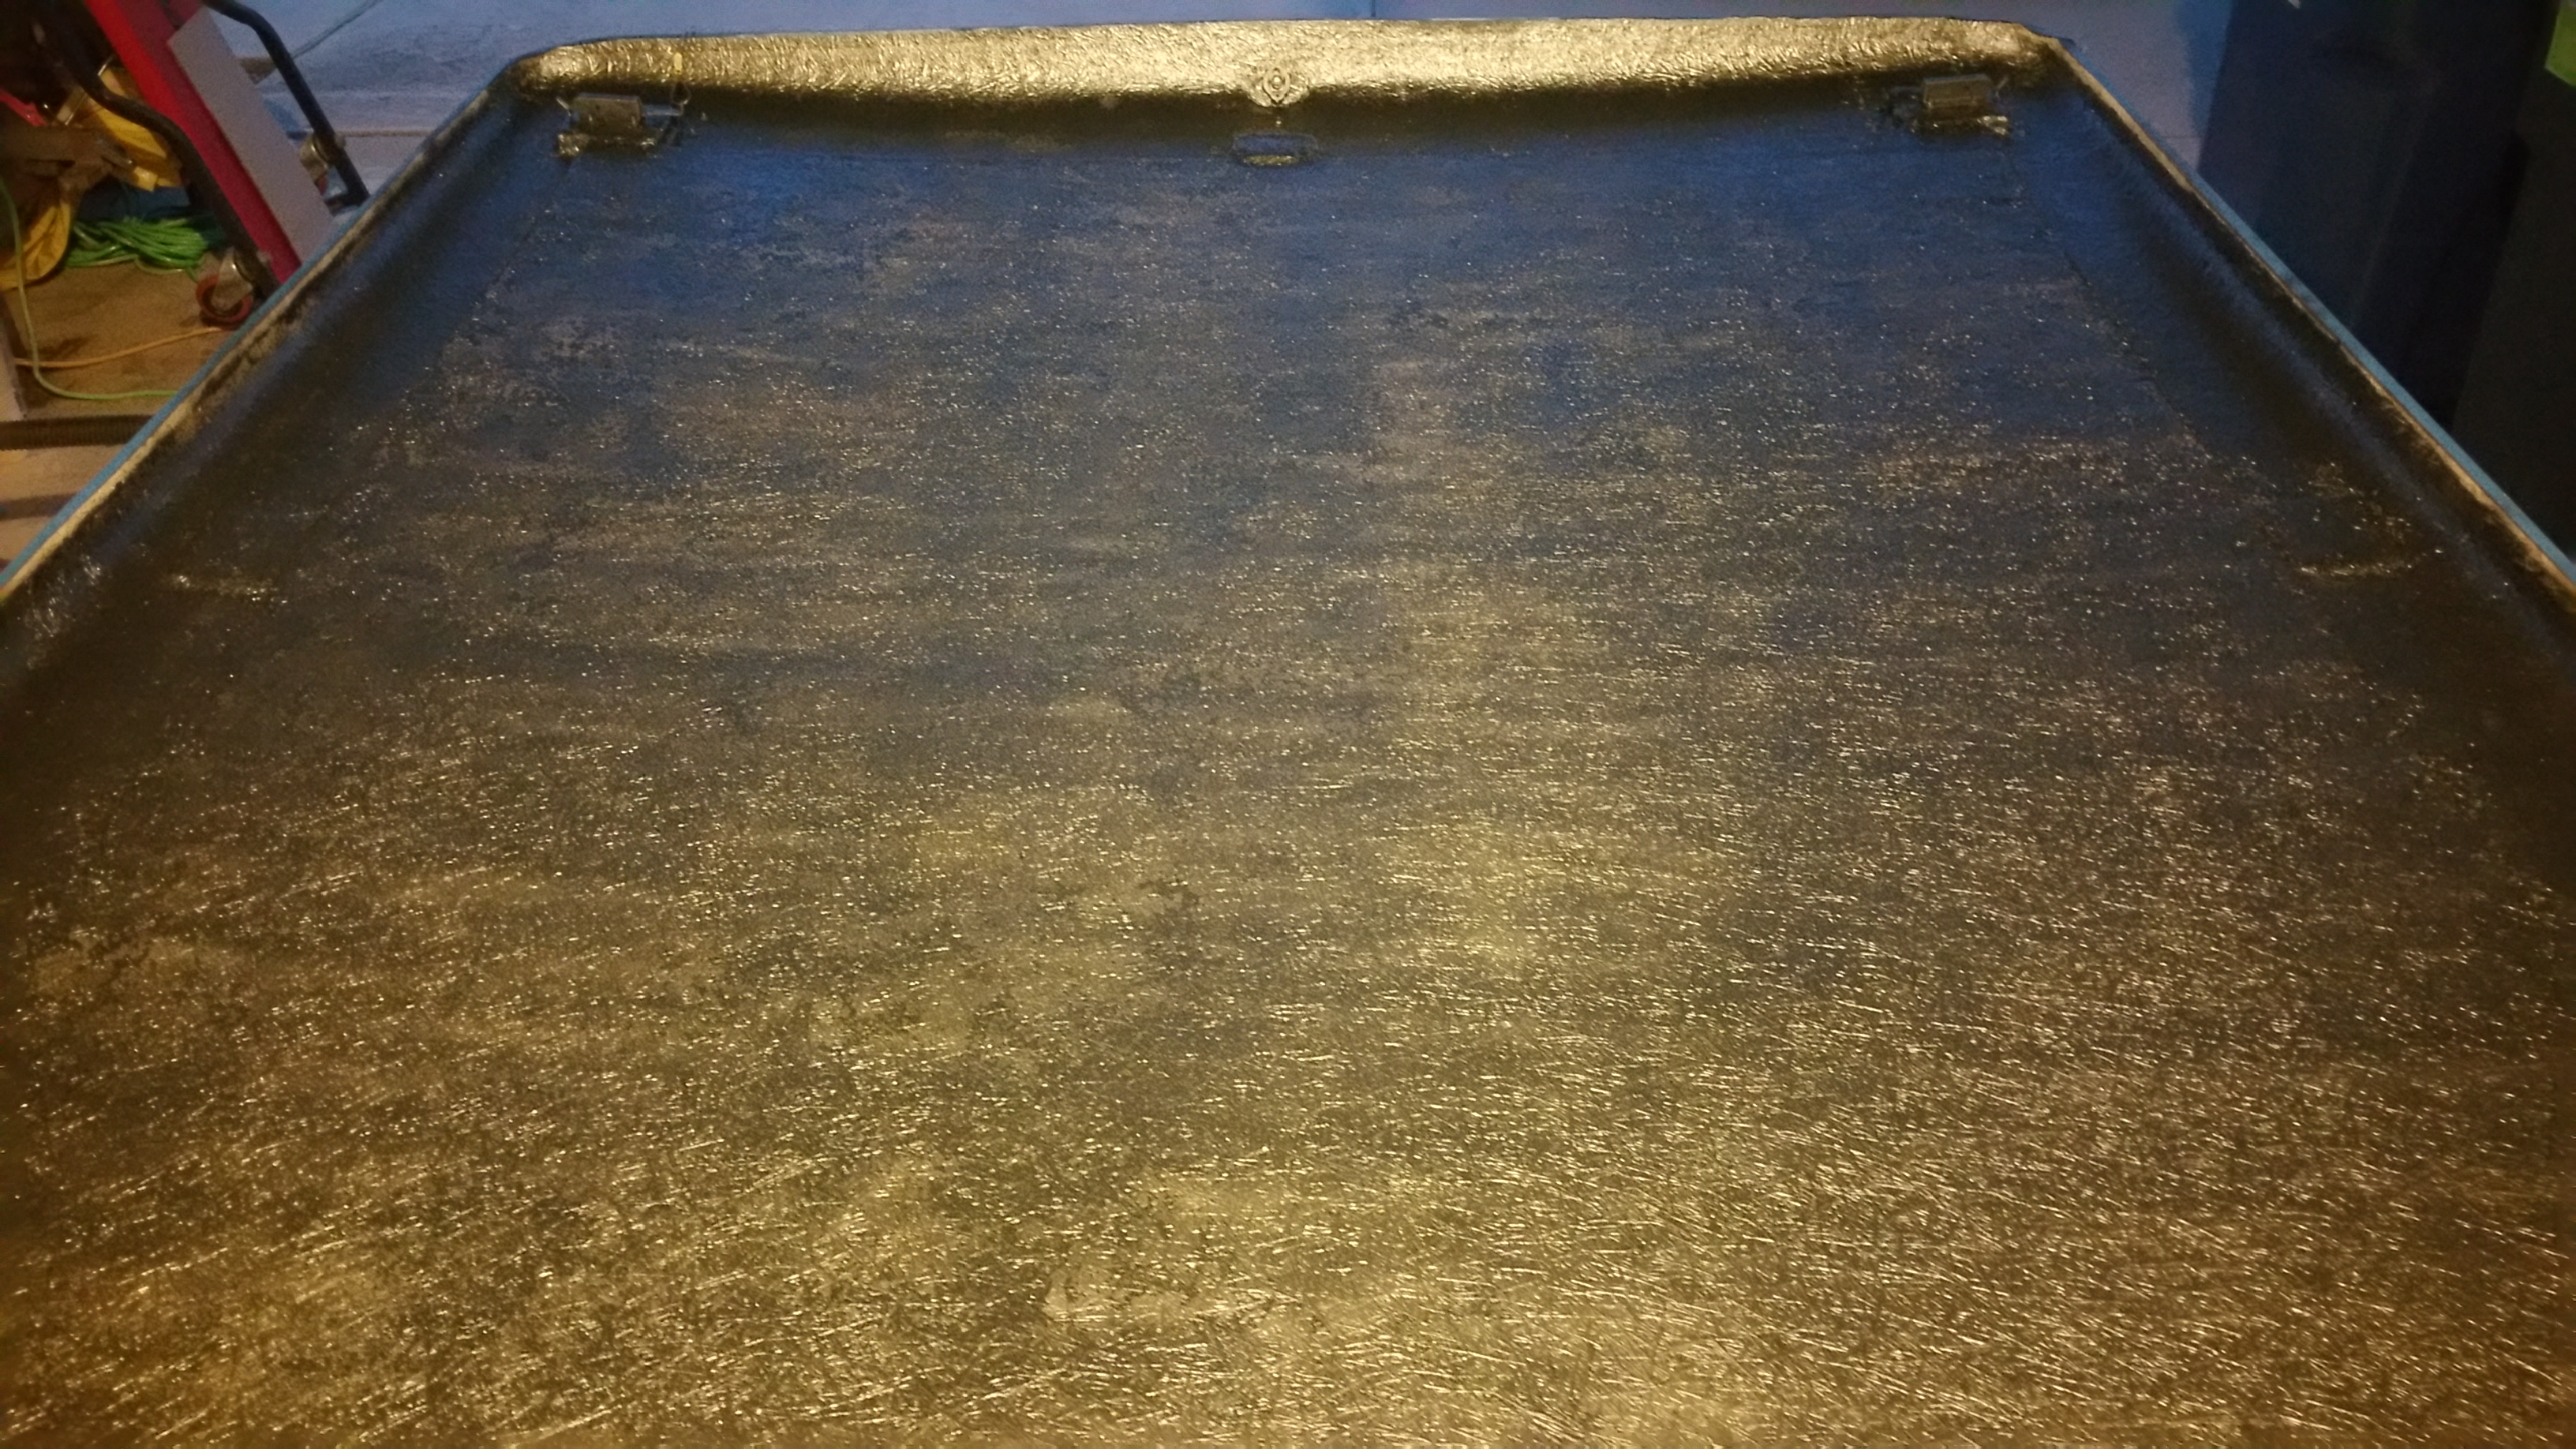
Anyway I decided to tackle that project while I had the cover off. I removed all the hardware and grabbed a wire brush, the welders kind with a handle. That brush took all the old paint off pretty easily. Easier than a drill with a wire brush. I think the stiffer bristles were the key.
I had some issues cleaning the tonneau cover after I was done scraping the old paint off. I used a water hose.... Evidently that was stupid. Water got in all the poors of the cover and it kept bubbling yellow glue for days. I even turned it over upside down so it would hopefully dry faster but no. I ended up propping it up in the yard on the last day on a good windy day.
I was looking around for paint and I couldn't decide what I wanted to use. Worried about how long the paint would last, either rough fiberglass just doesn't accept paint very well, or some other reason I didn't know about. Then I had an epiphany. I spotted some of that new peel coat by rust-oleum. I got the graphite stuff and never looked back. Took 3 cans!

I thought if I didn't like the stuff, it just peels off, or if the fiberglass wasn't prepped right or wouldn't accept the paint, i could just peel it off. Figure something else out later like sanding the fiberglass down smooth.... EEEK!
The whole process took like 4-5 coats until I was happy with it. That stuff goes on light and takes a while to build up to the thickness to provide full coverage and adequate color. I am pretty pleased at how it turned out. We shall see how long it lasts. Its been on there now for about 4 months now. Still looks the same.
This was after 2 coats:
3rd and 4th coats:
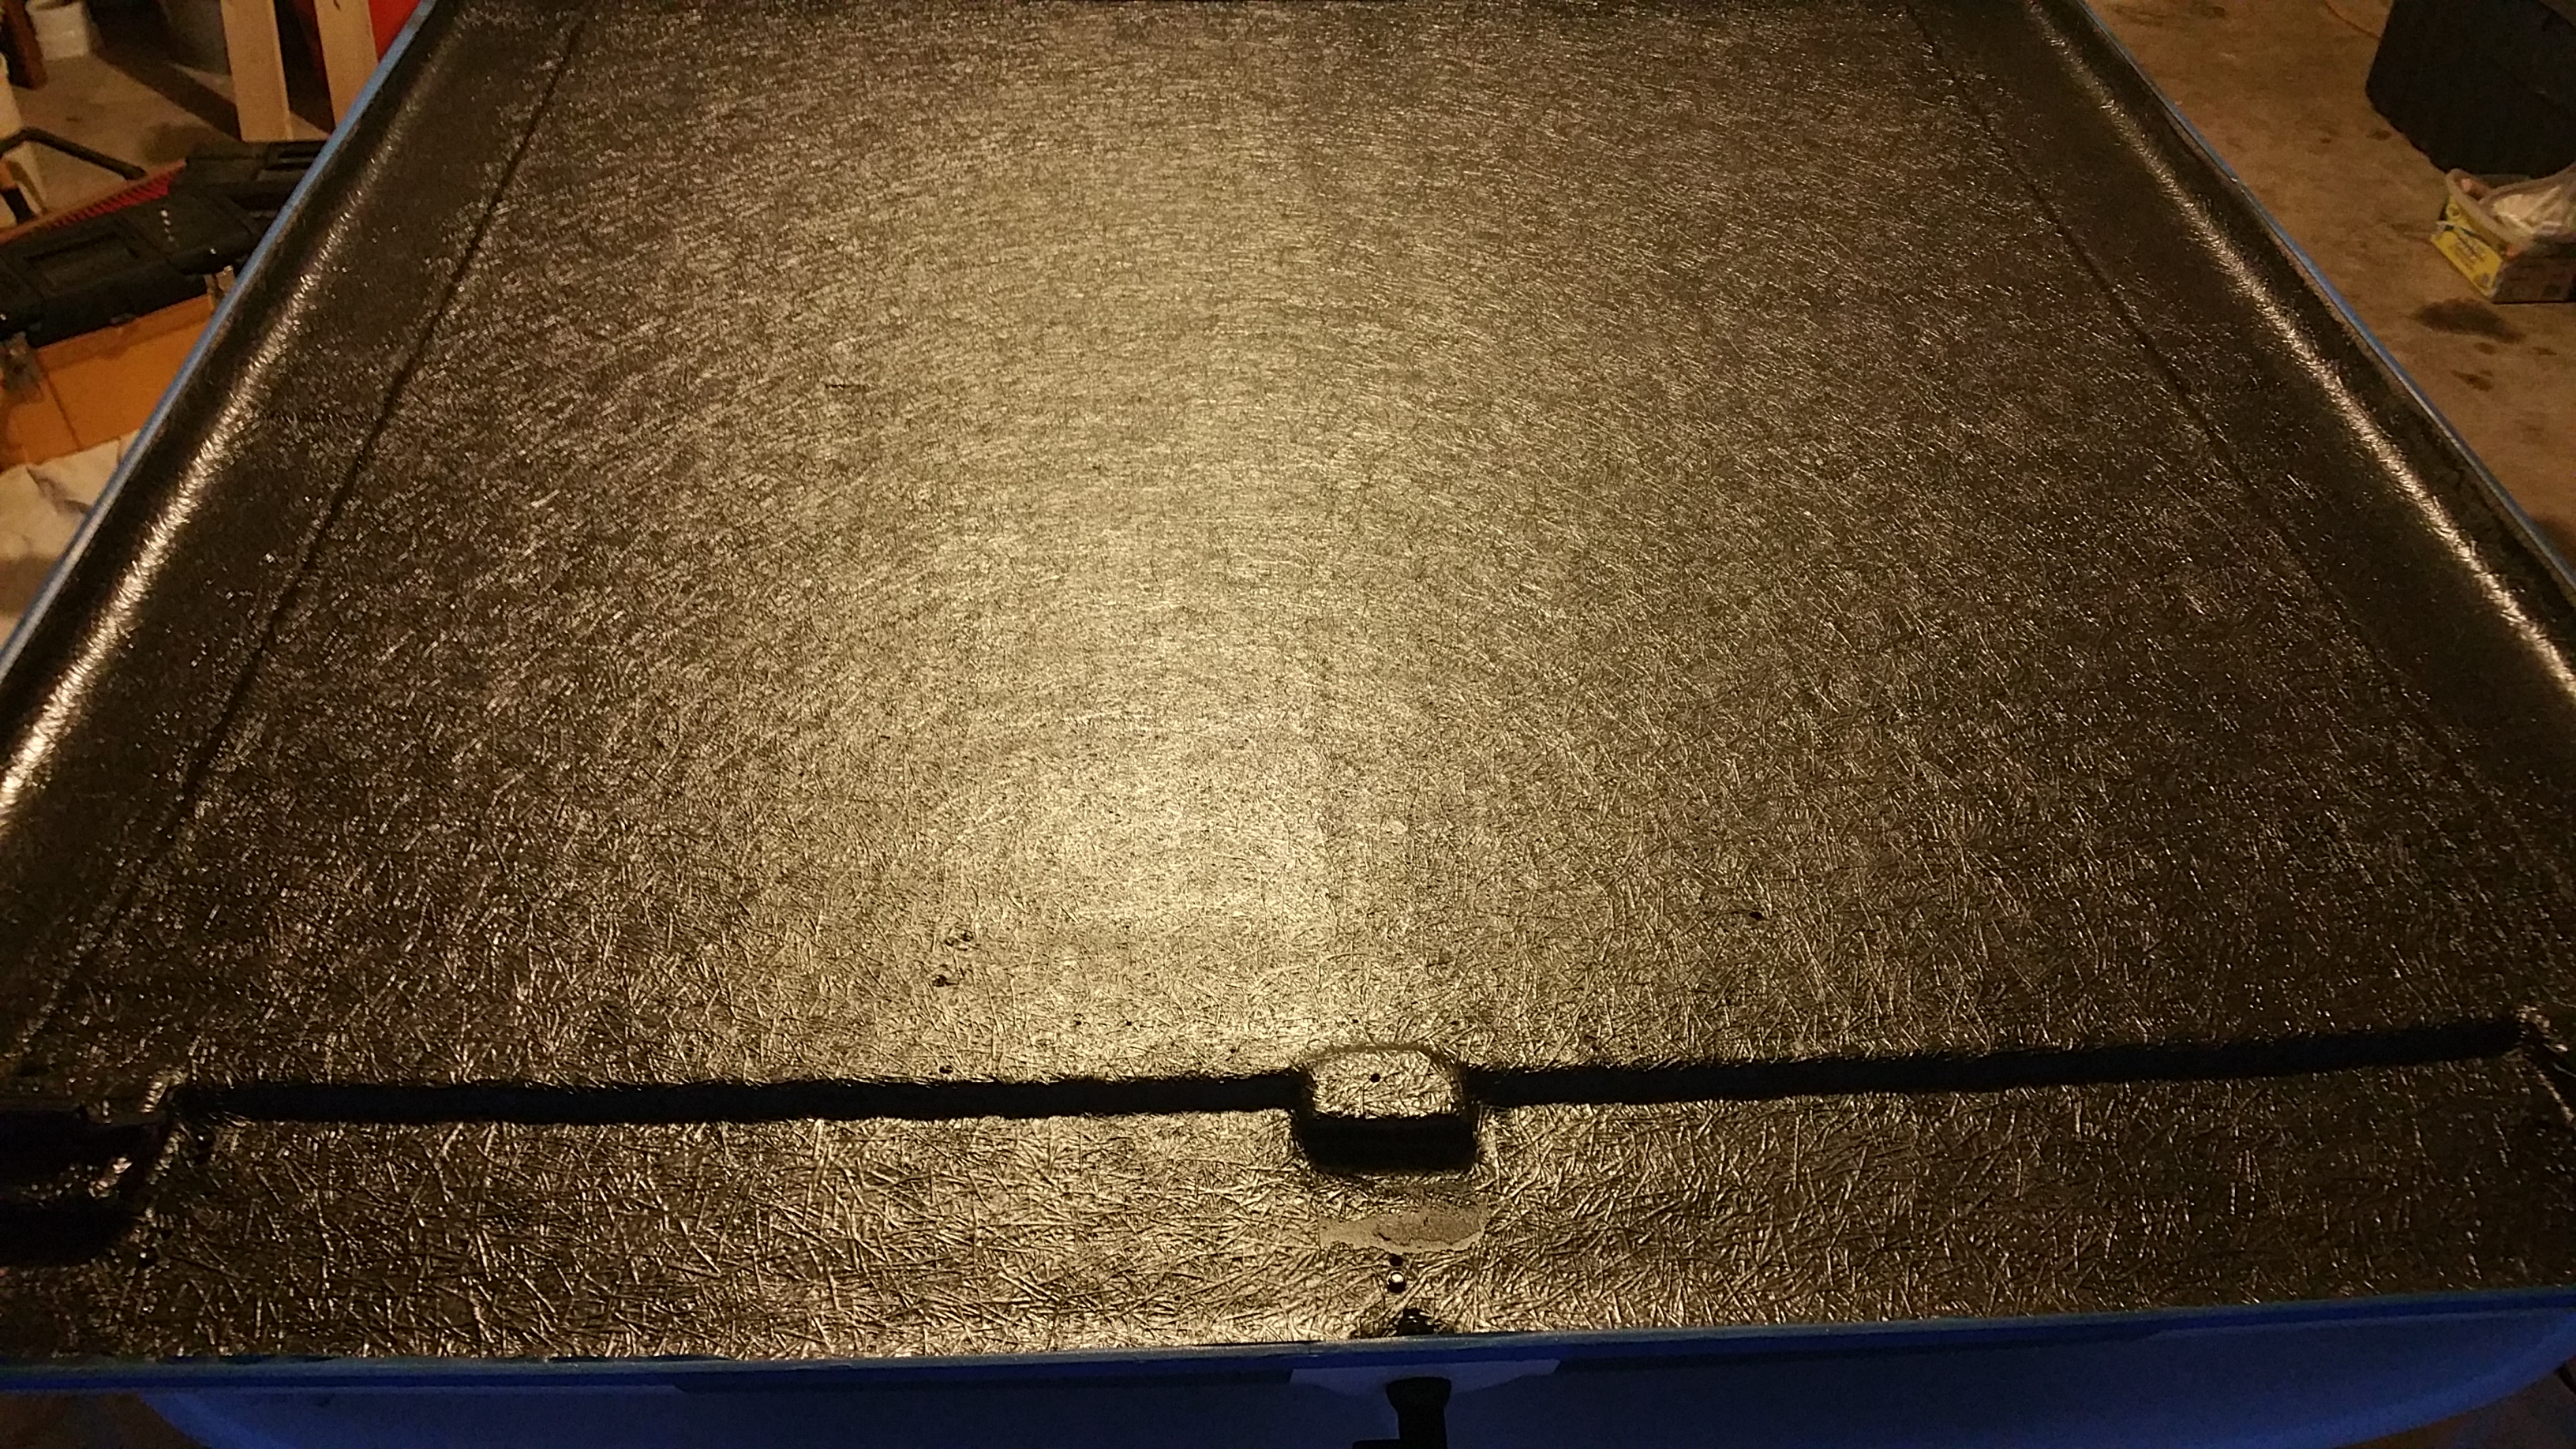
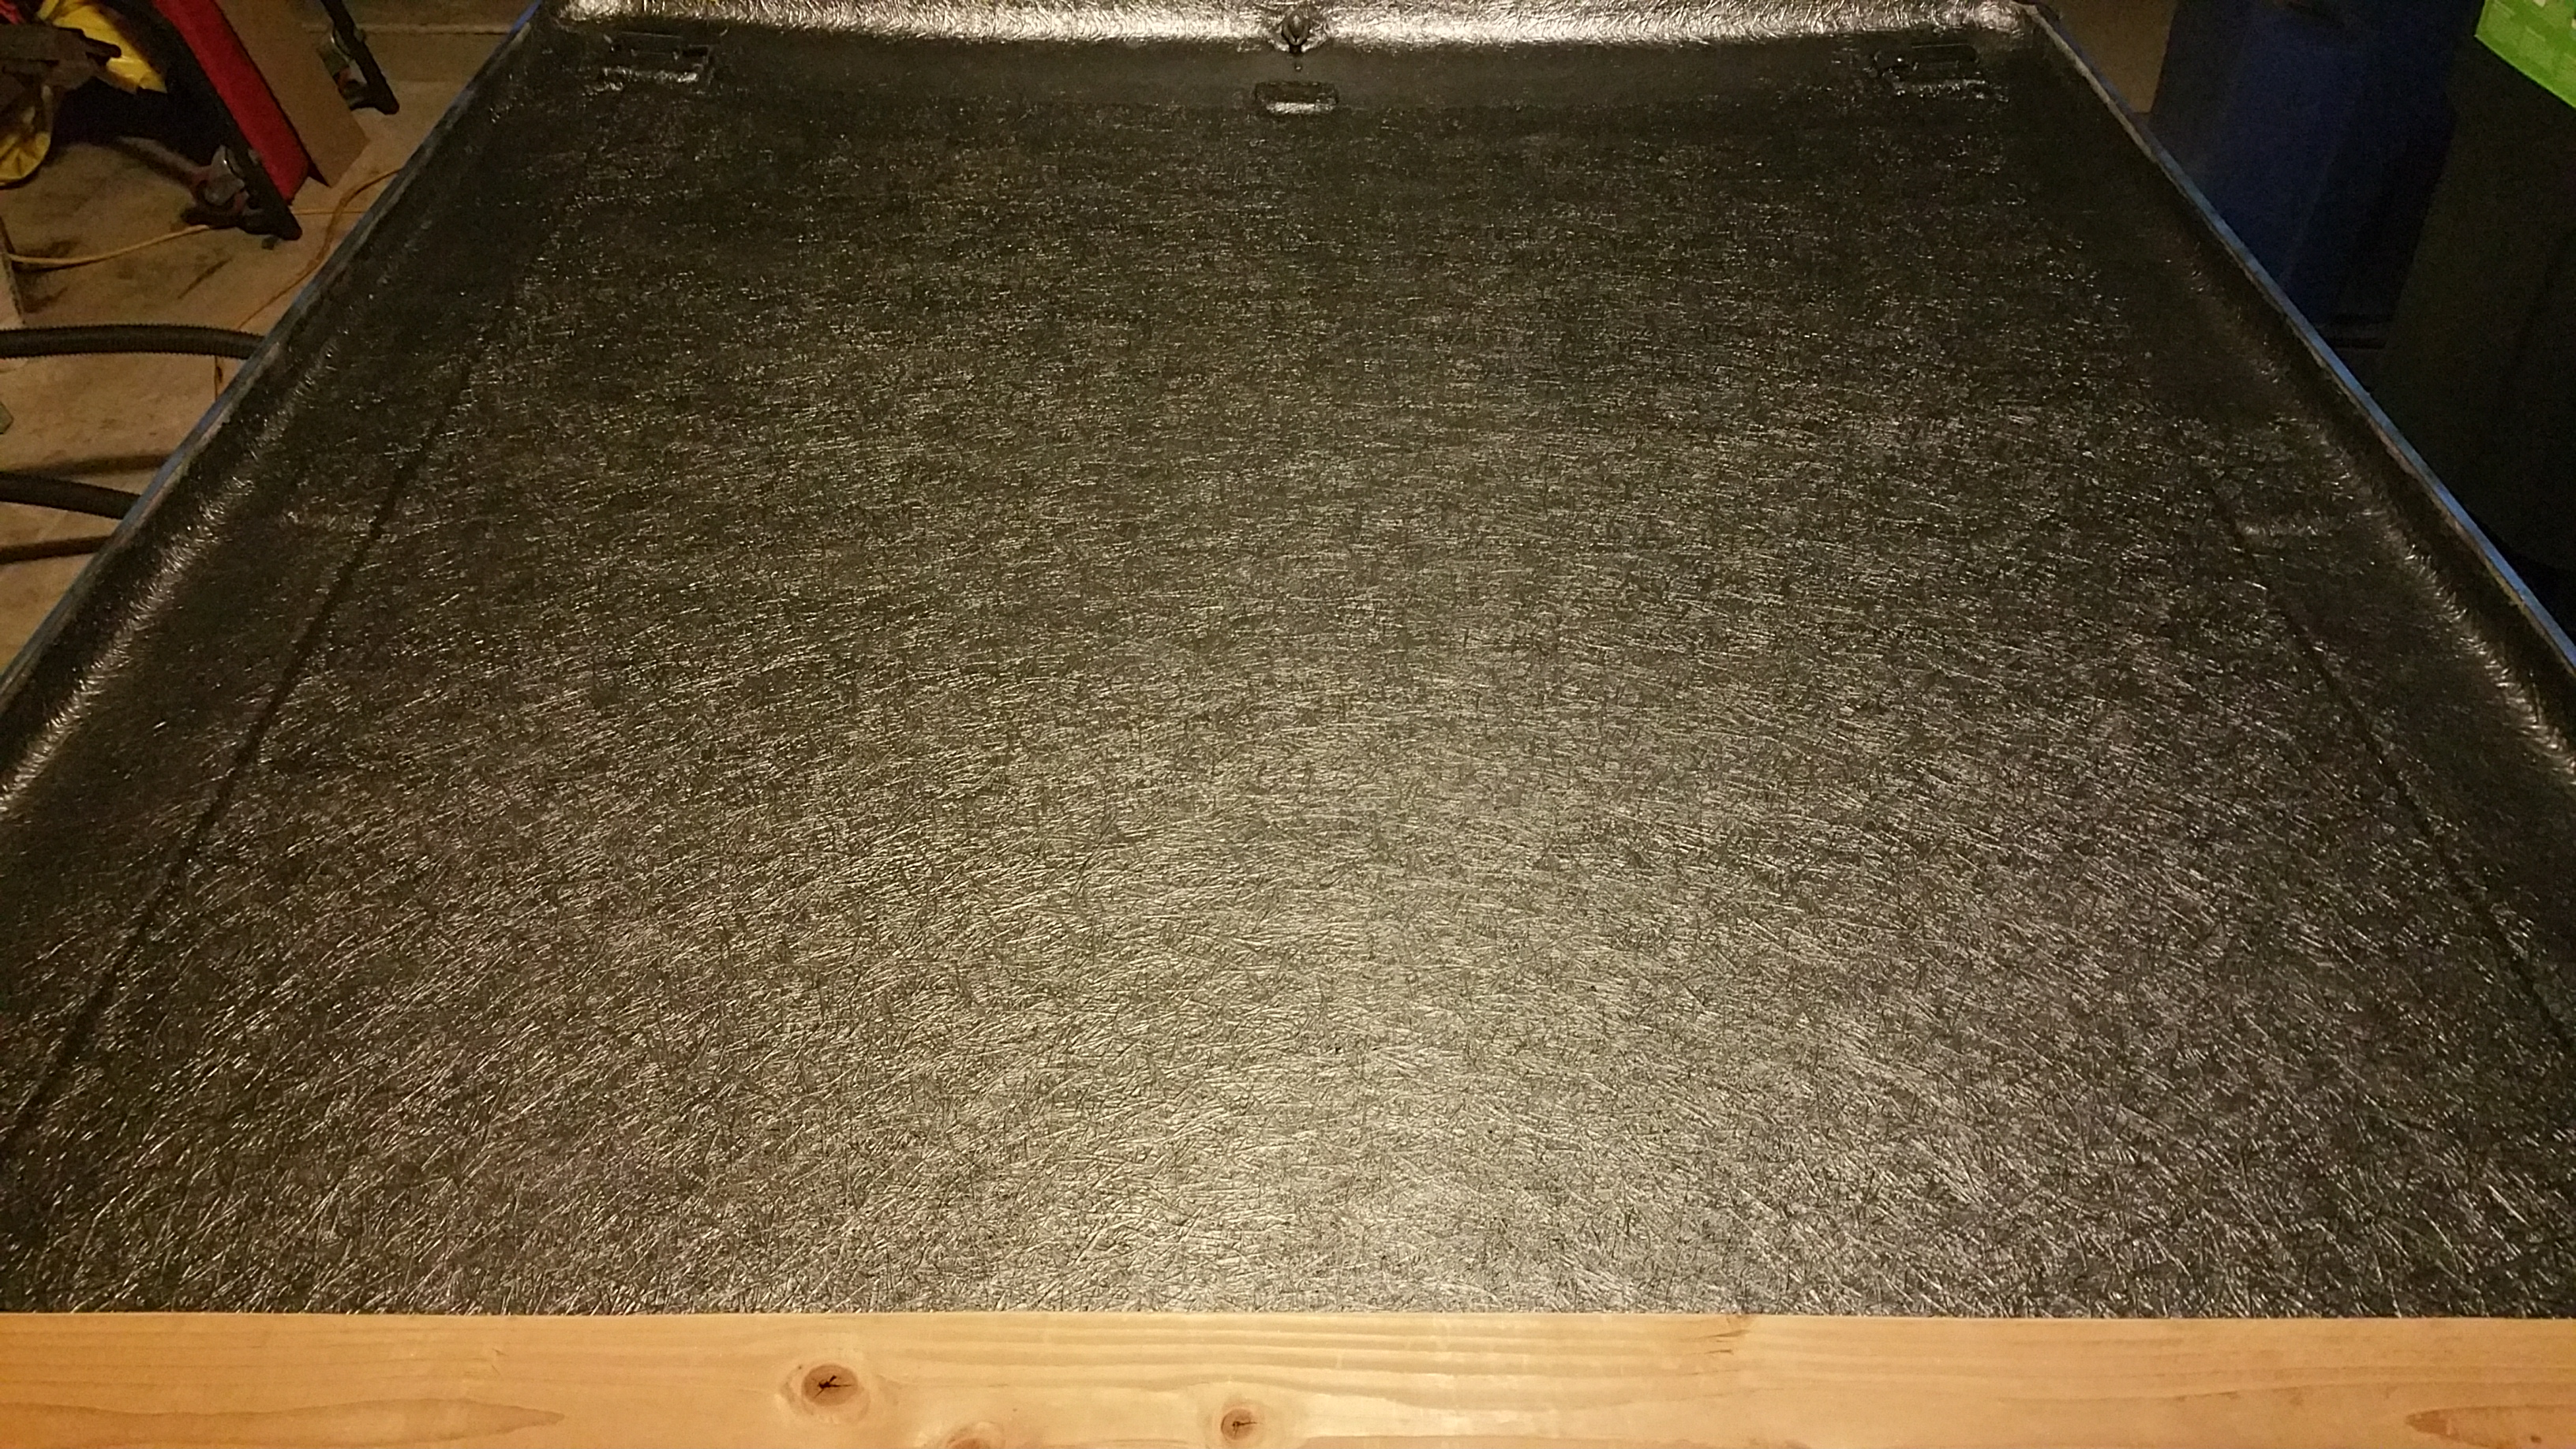
I'm happy with it
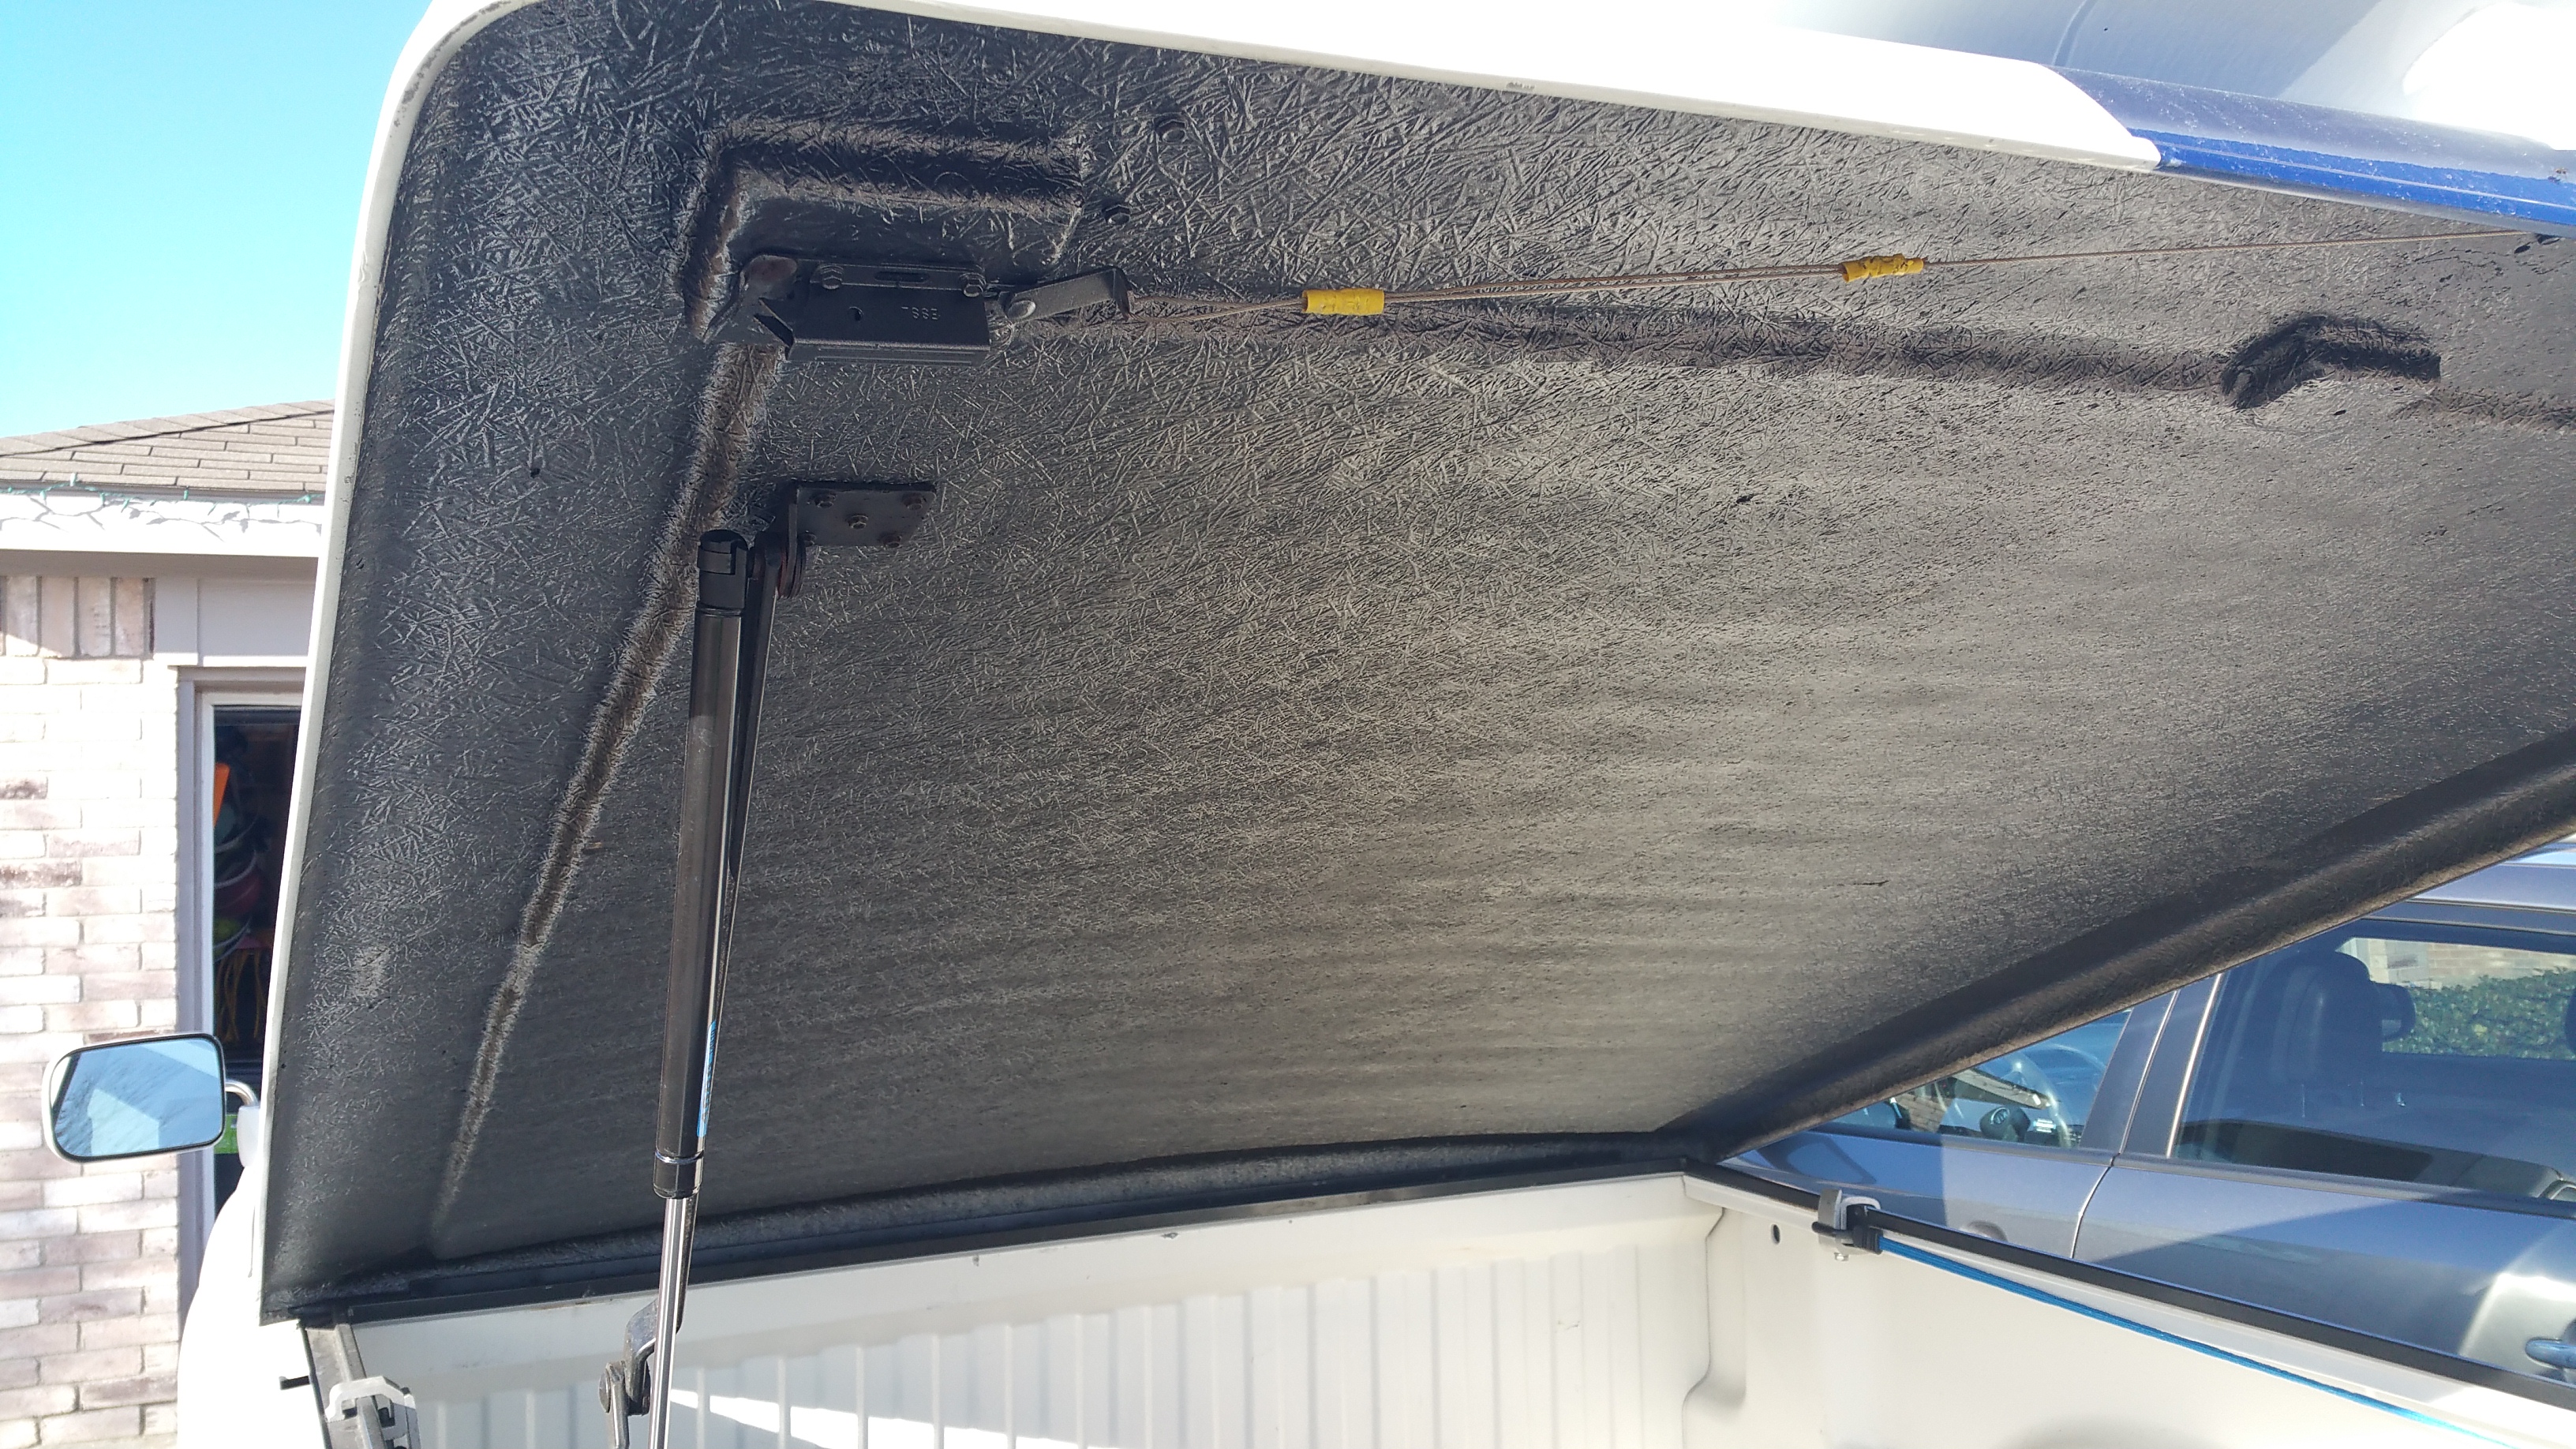
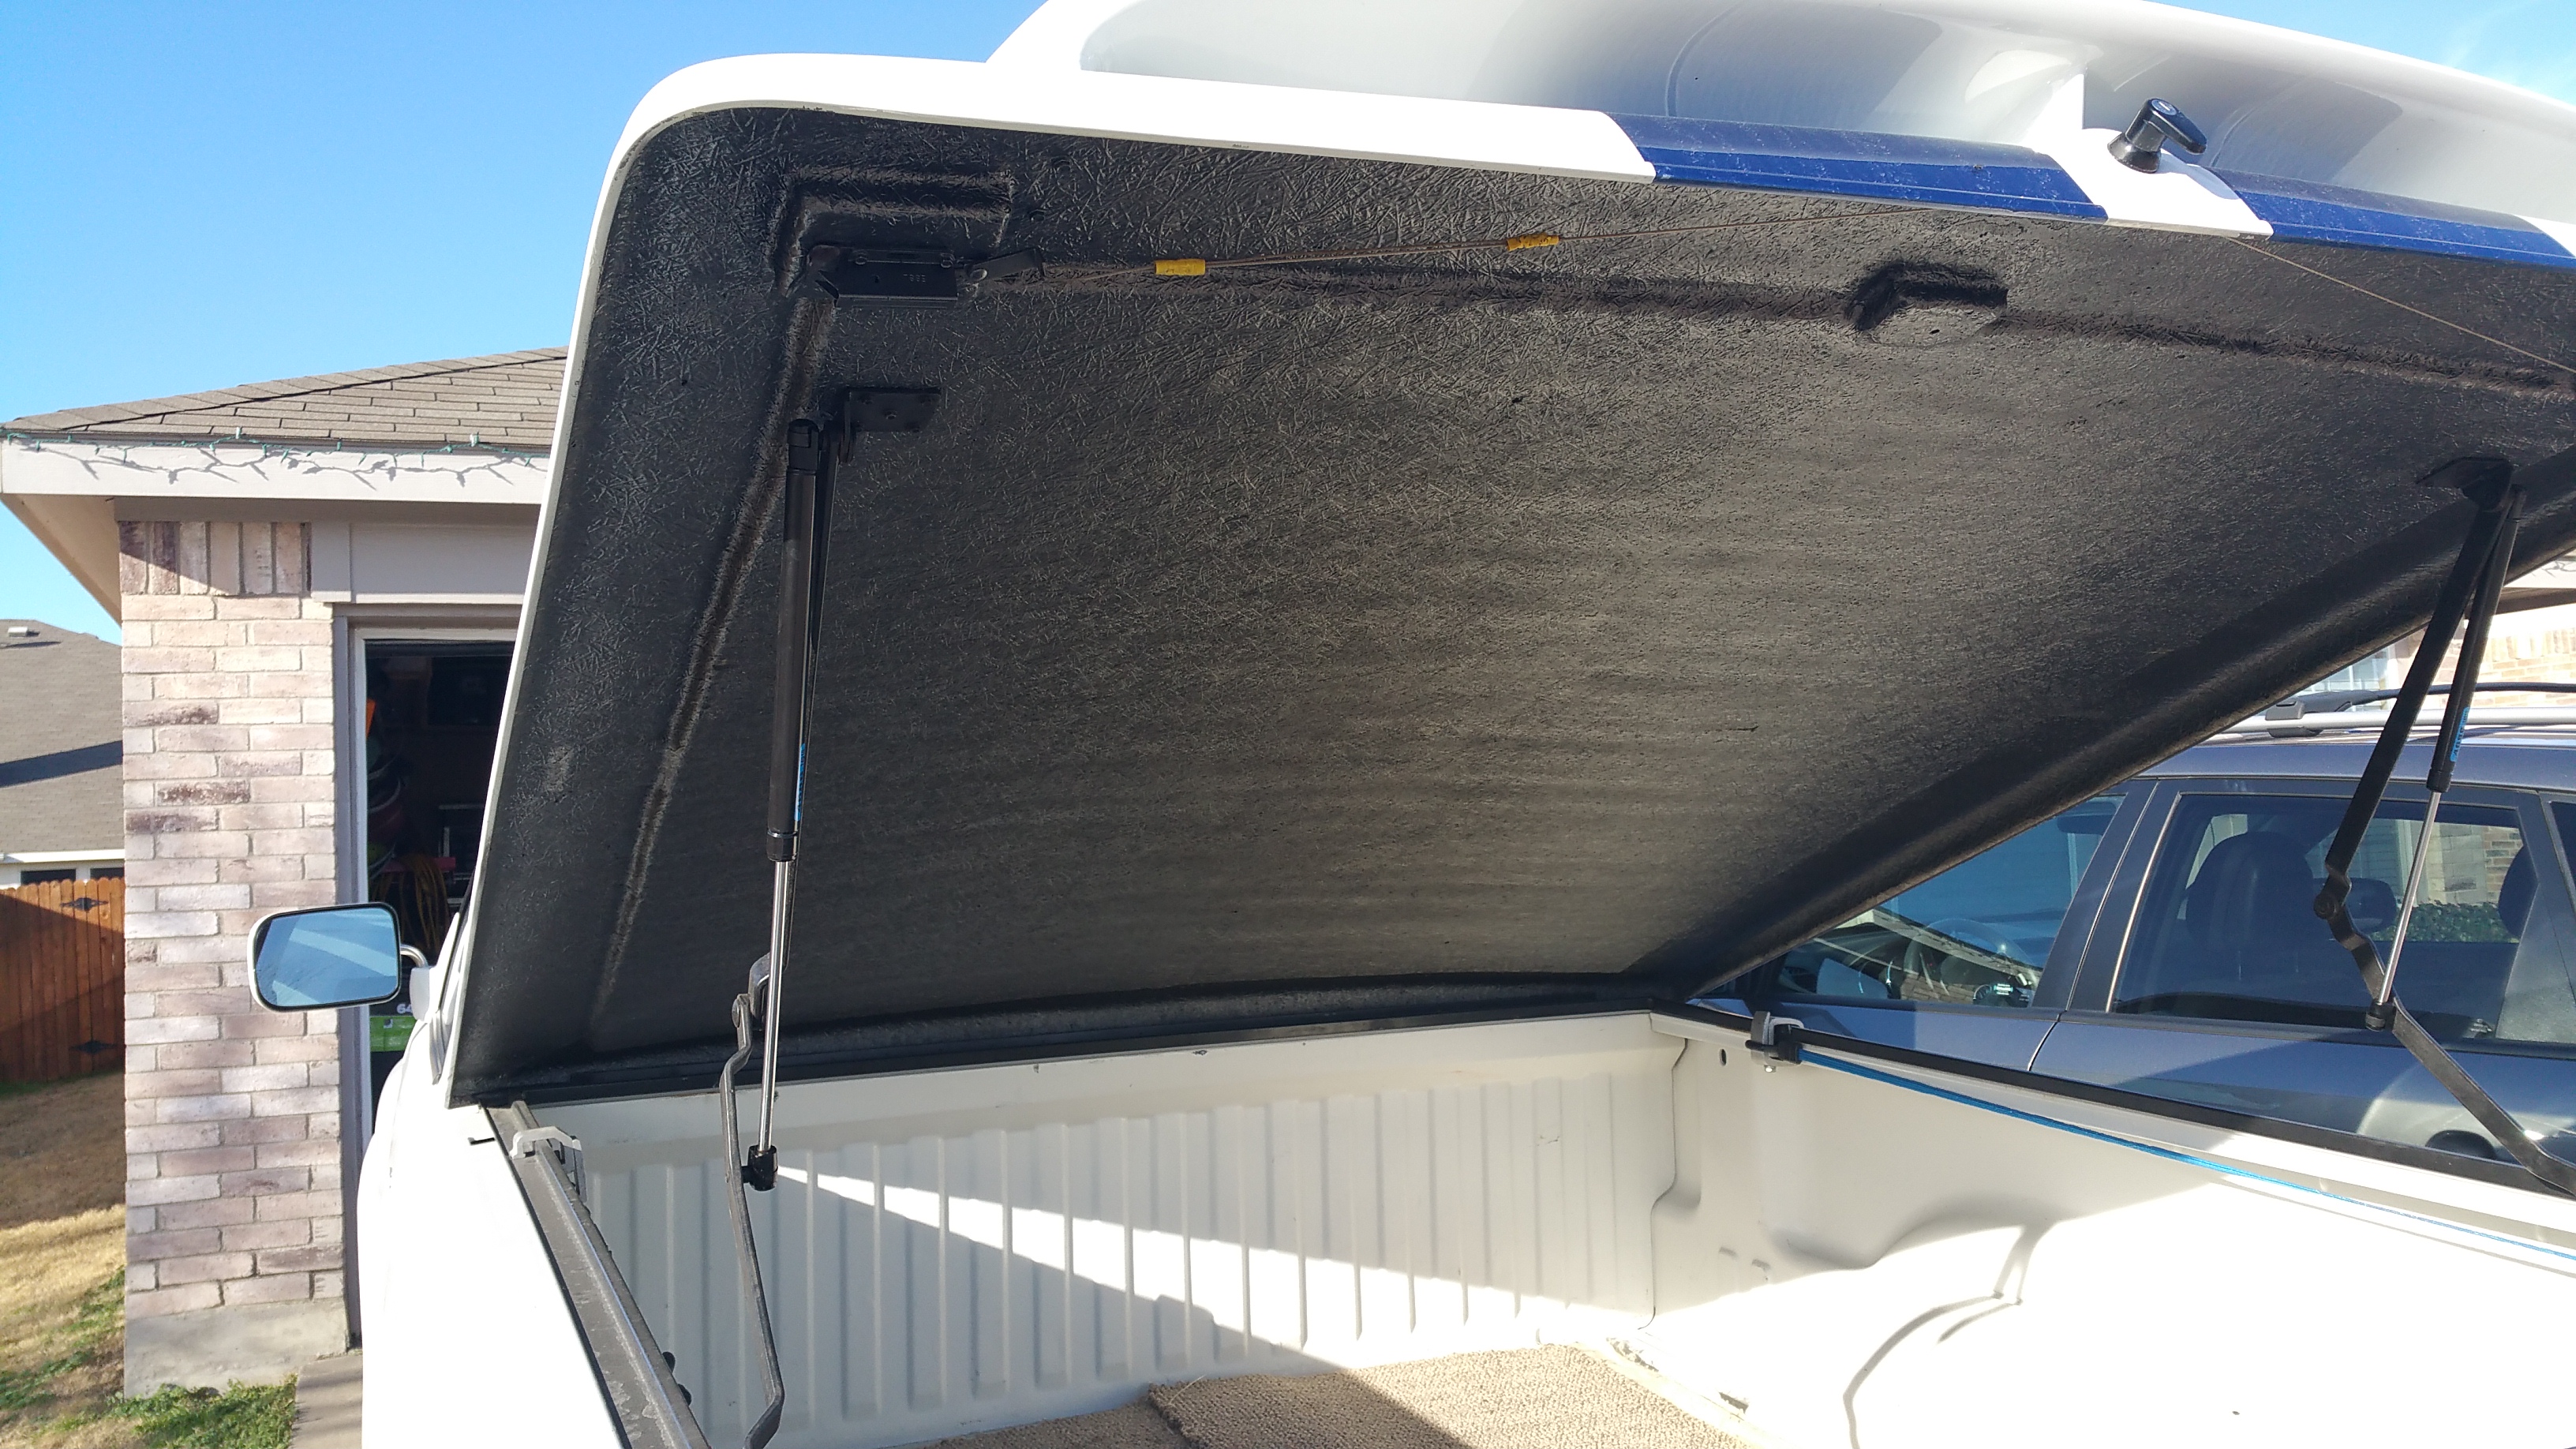
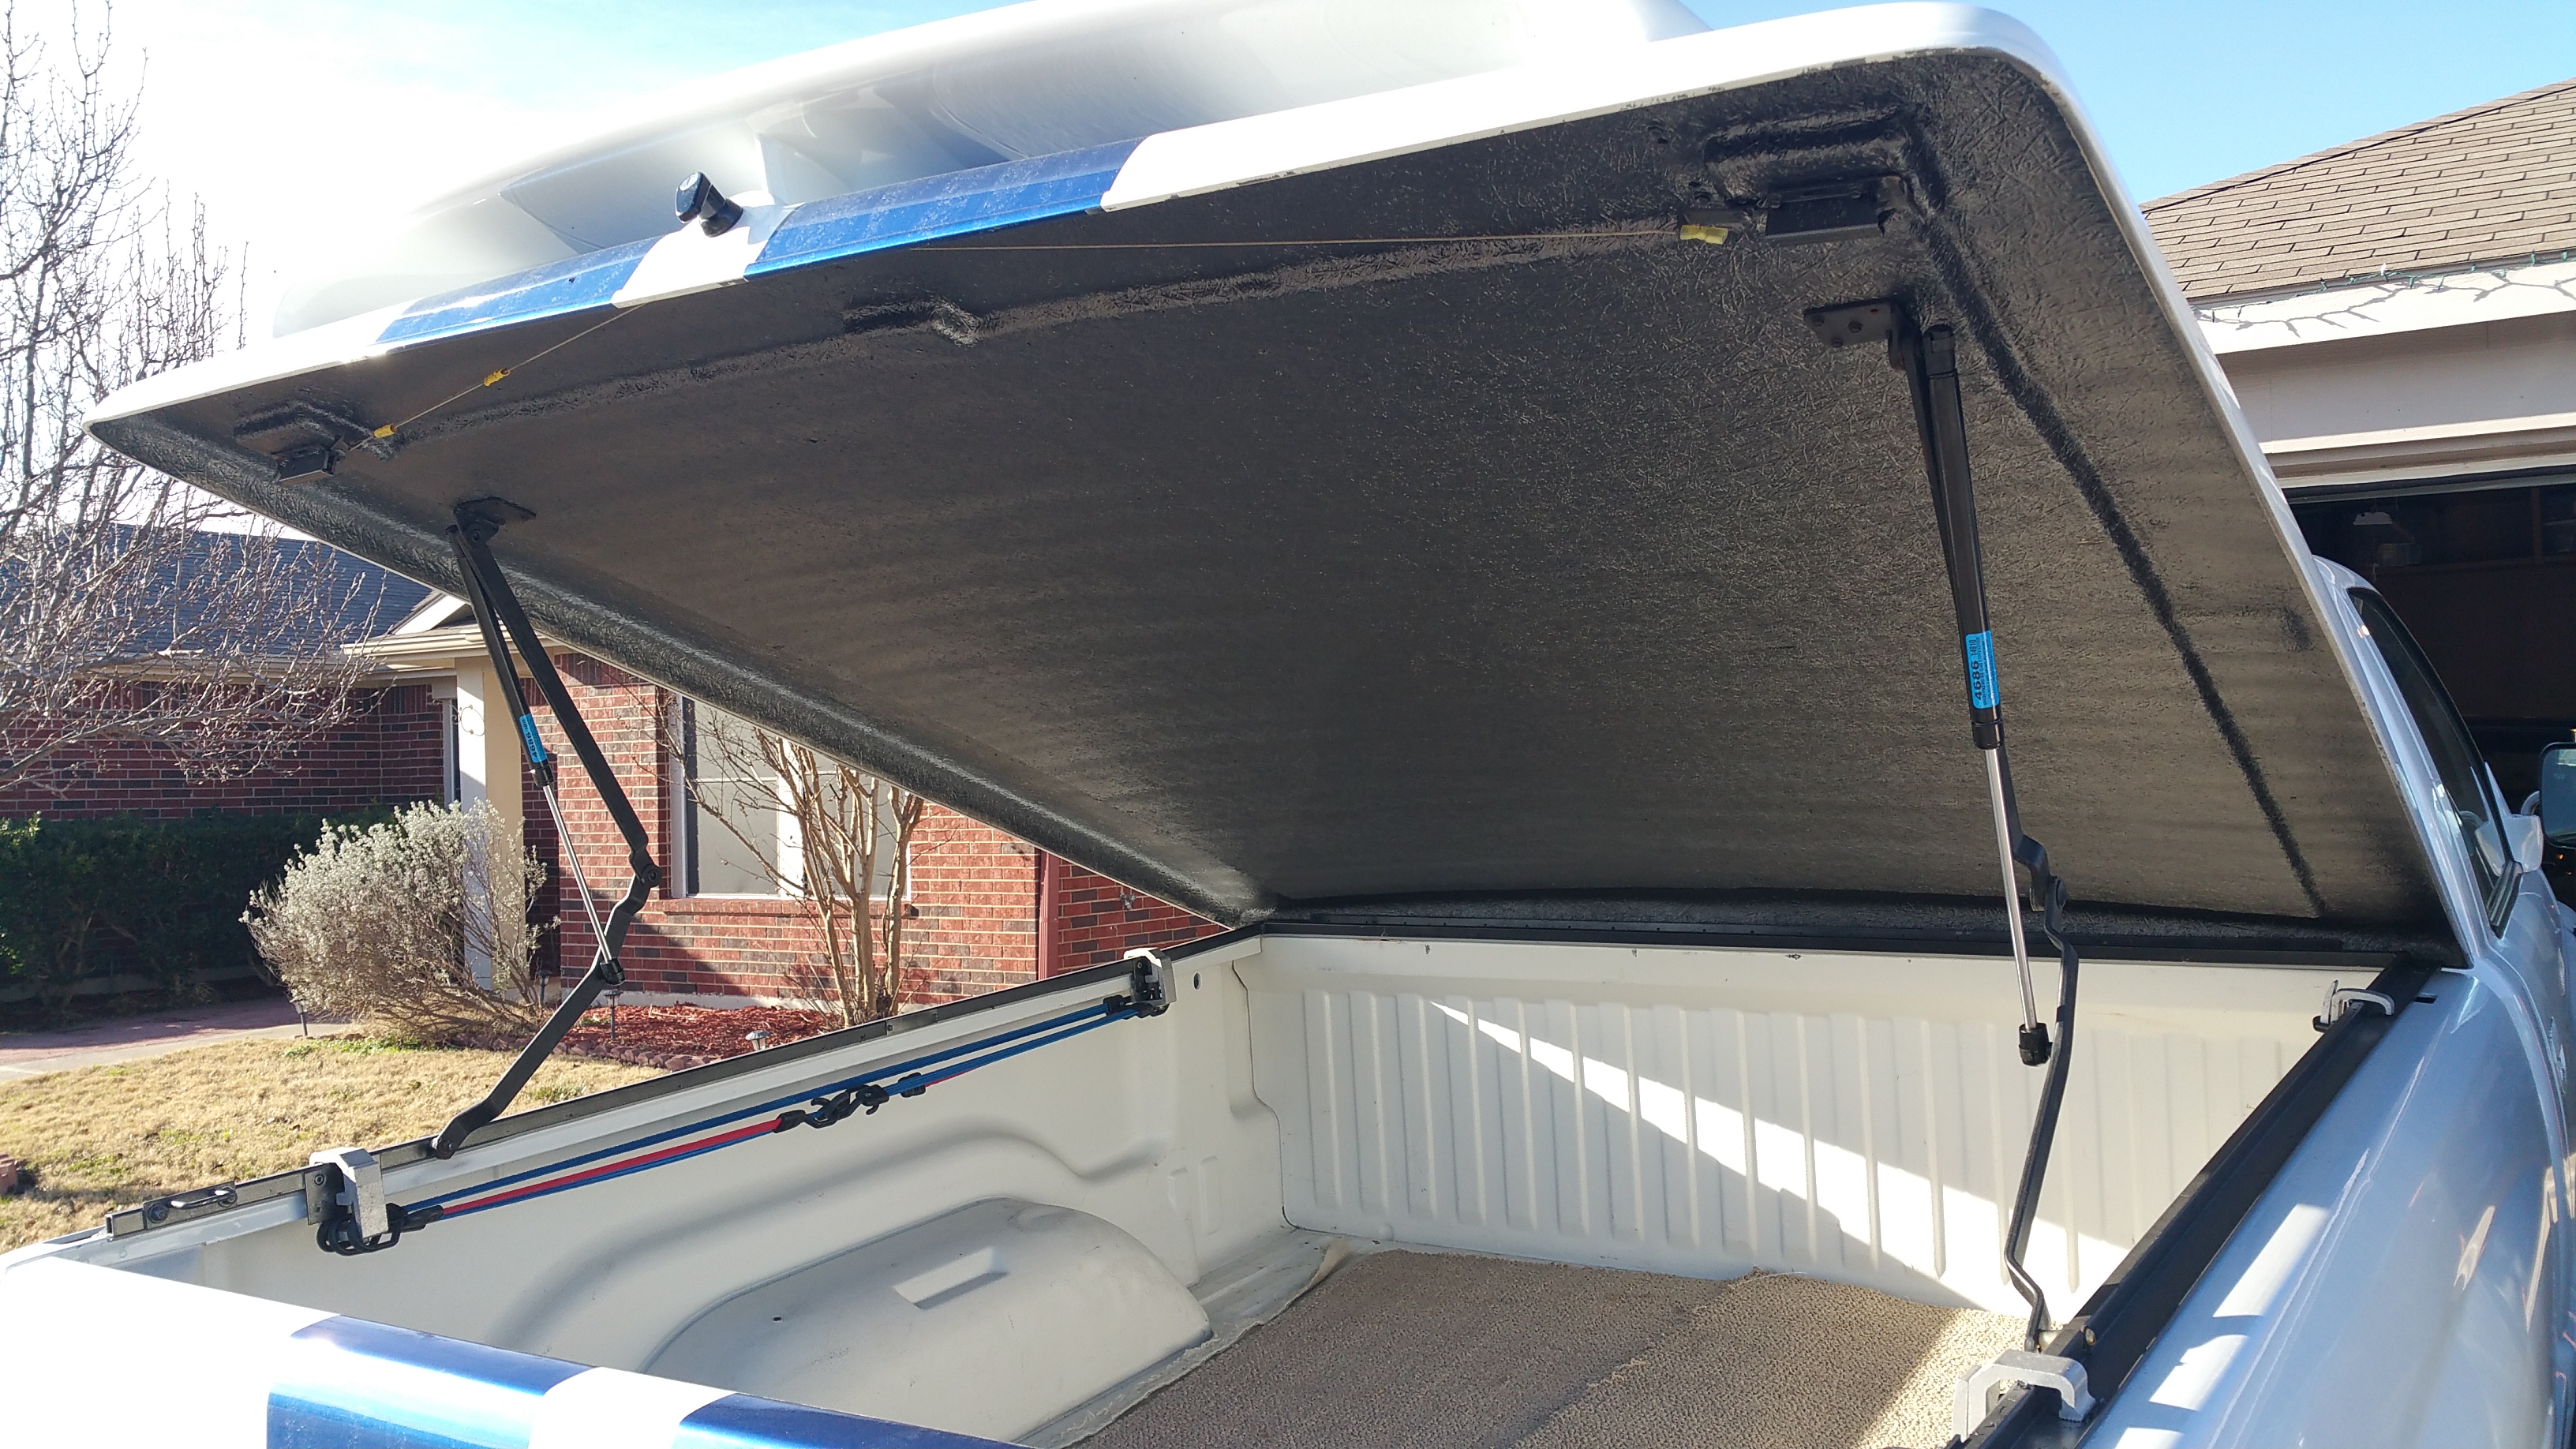
PS: Those hydraulics on the cover are #4686, they are for hatchbacks and work nice and stiff for the heavy tonneau cover.
I also put on new foam seals under the cover. Found some with the sticky backing at home depot in the garage door seal section. They have big rolls of this stuff cheap, and its like 1.5" wide so it works great under the rails between the bed.
.
This was only pic I got of the truck with cover off...

Anyway I decided to tackle that project while I had the cover off. I removed all the hardware and grabbed a wire brush, the welders kind with a handle. That brush took all the old paint off pretty easily. Easier than a drill with a wire brush. I think the stiffer bristles were the key.
I had some issues cleaning the tonneau cover after I was done scraping the old paint off. I used a water hose.... Evidently that was stupid. Water got in all the poors of the cover and it kept bubbling yellow glue for days. I even turned it over upside down so it would hopefully dry faster but no. I ended up propping it up in the yard on the last day on a good windy day.
I was looking around for paint and I couldn't decide what I wanted to use. Worried about how long the paint would last, either rough fiberglass just doesn't accept paint very well, or some other reason I didn't know about. Then I had an epiphany. I spotted some of that new peel coat by rust-oleum. I got the graphite stuff and never looked back. Took 3 cans!

I thought if I didn't like the stuff, it just peels off, or if the fiberglass wasn't prepped right or wouldn't accept the paint, i could just peel it off. Figure something else out later like sanding the fiberglass down smooth.... EEEK!
The whole process took like 4-5 coats until I was happy with it. That stuff goes on light and takes a while to build up to the thickness to provide full coverage and adequate color. I am pretty pleased at how it turned out. We shall see how long it lasts. Its been on there now for about 4 months now. Still looks the same.
This was after 2 coats:

3rd and 4th coats:


I'm happy with it


PS: Those hydraulics on the cover are #4686, they are for hatchbacks and work nice and stiff for the heavy tonneau cover.
I also put on new foam seals under the cover. Found some with the sticky backing at home depot in the garage door seal section. They have big rolls of this stuff cheap, and its like 1.5" wide so it works great under the rails between the bed.
.
Last edited by ram-tuff; 02-06-2017 at 04:02 PM.
#27
01-21-2017, 07:38 PM
Record Breaker
google the part number and found them cheaper https://www.google.com/search?source...69i57.1804j0j8
Dave
#28
01-31-2017, 01:37 PM
Join Date: Sep 2015
Location: Texas
Posts: 106
Likes: 0
Received 0 Likes
on
0 Posts
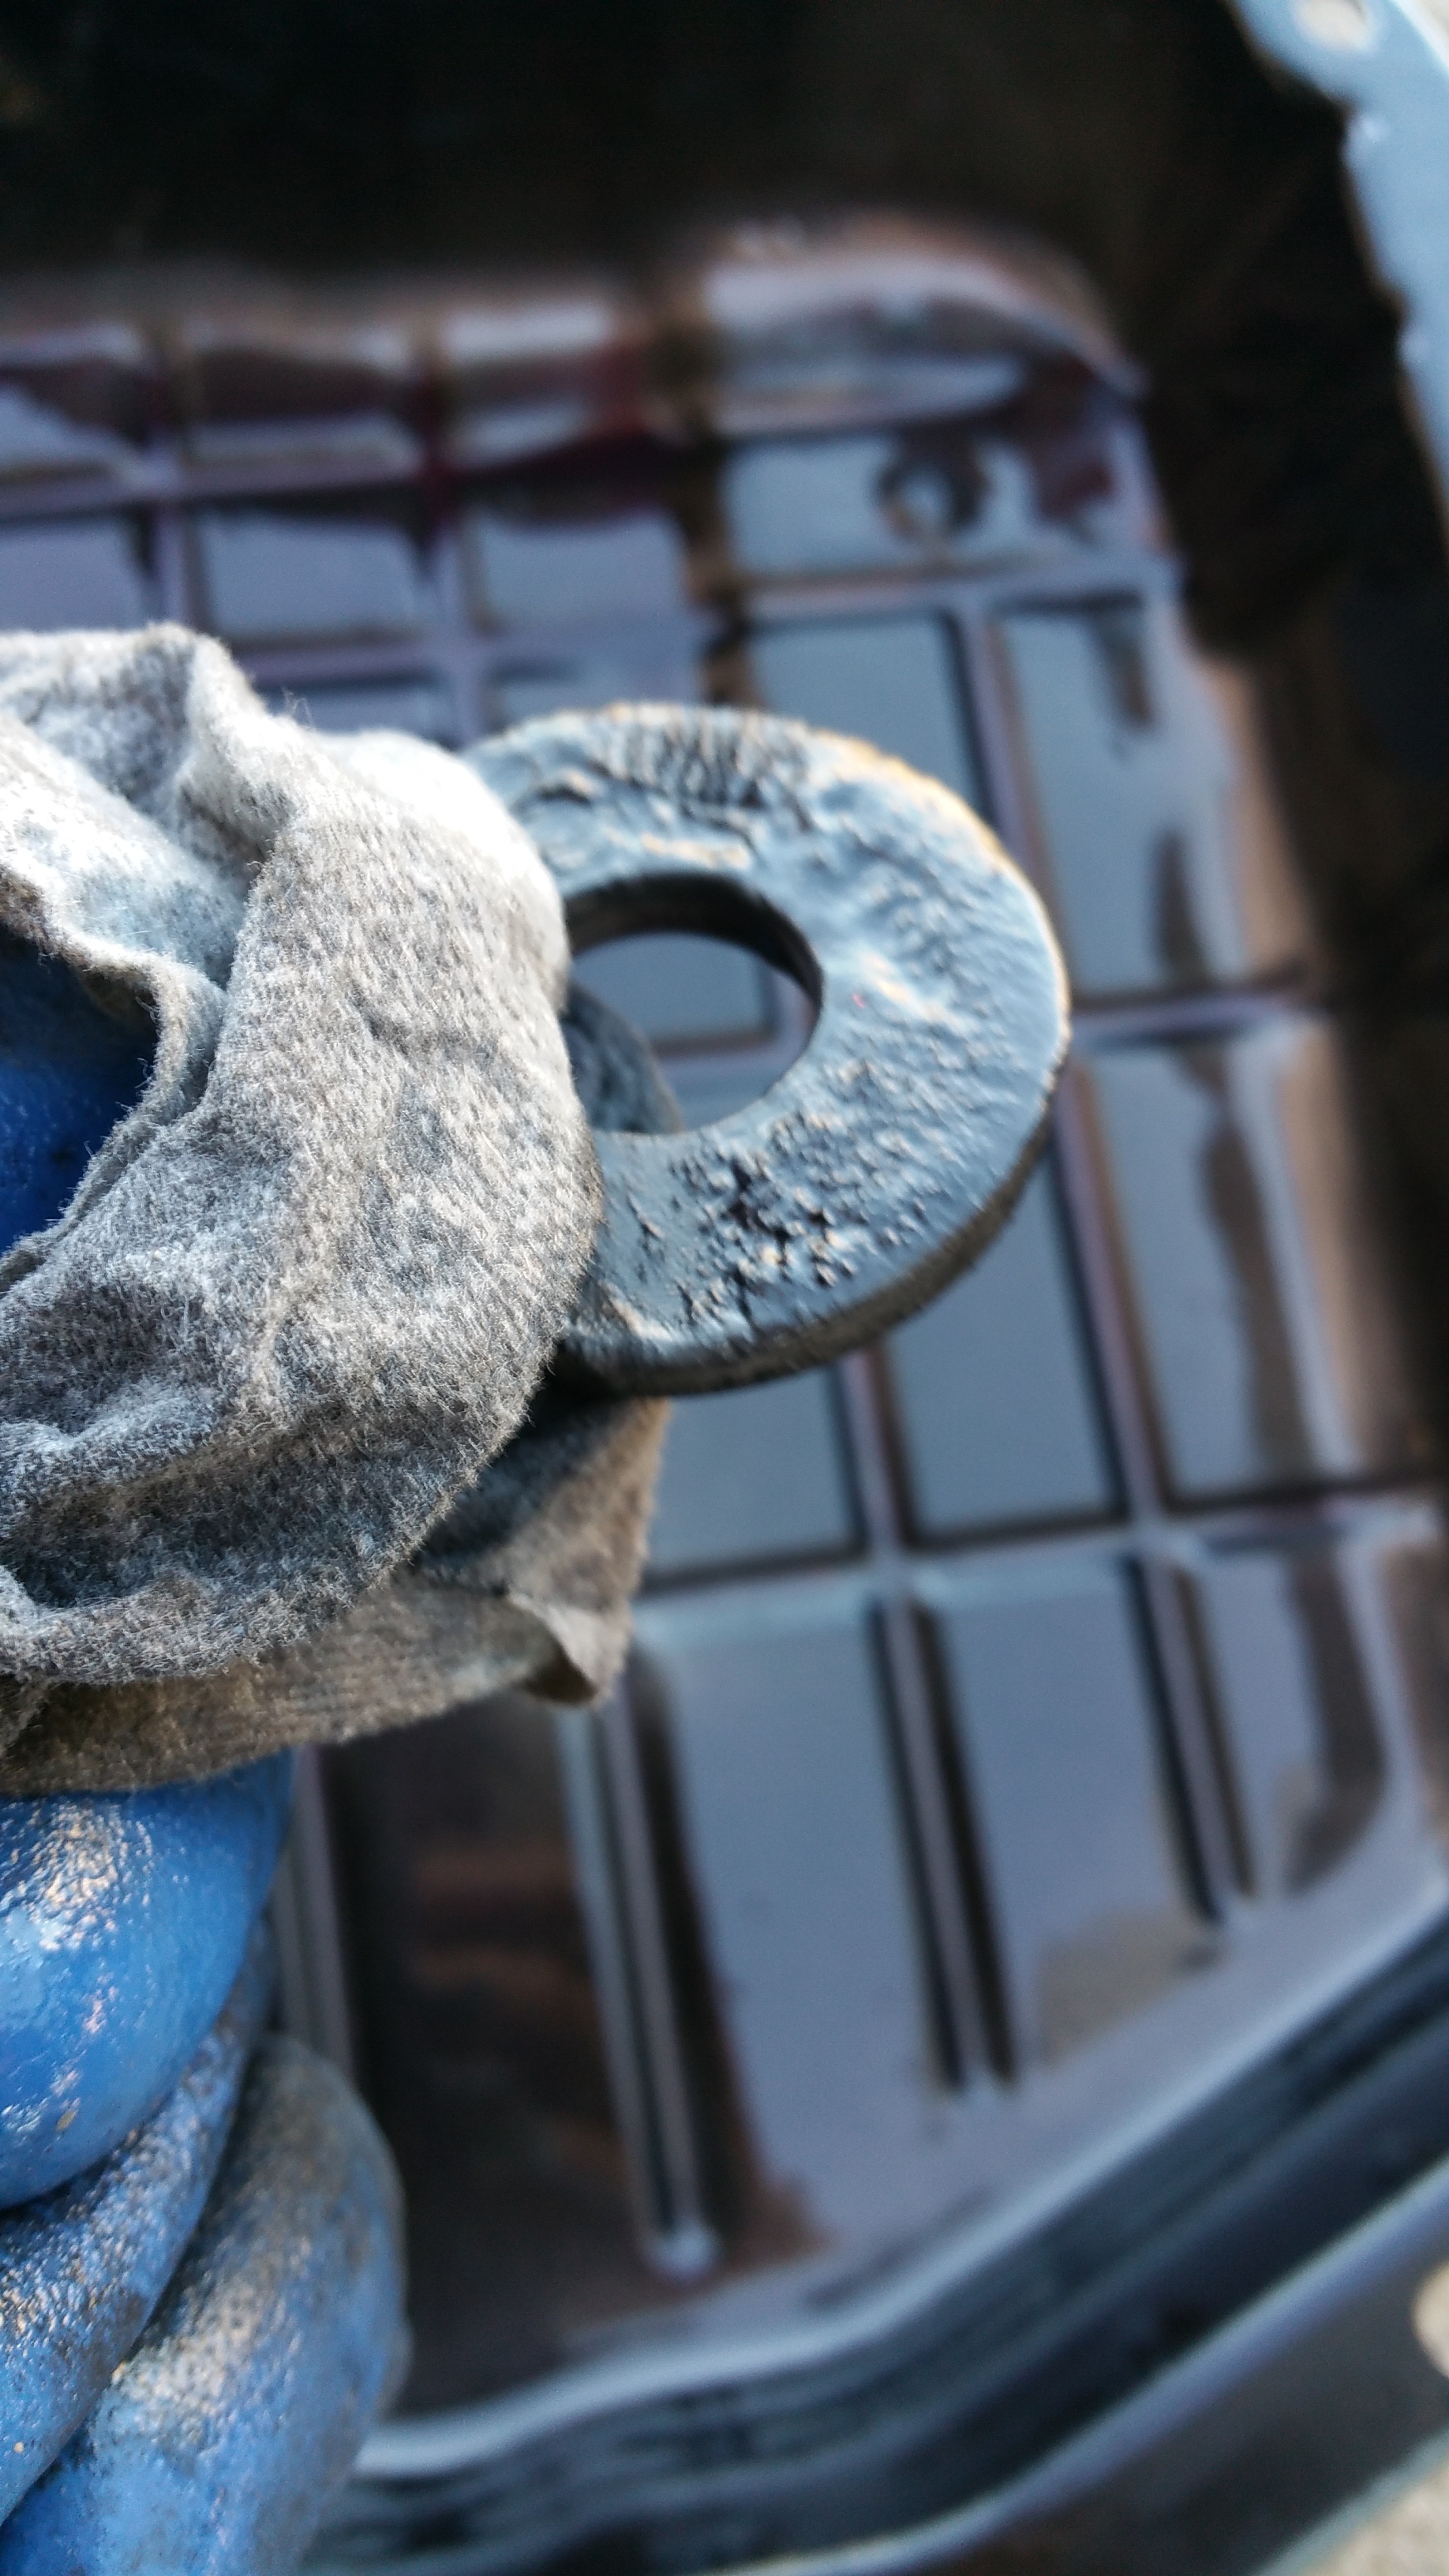
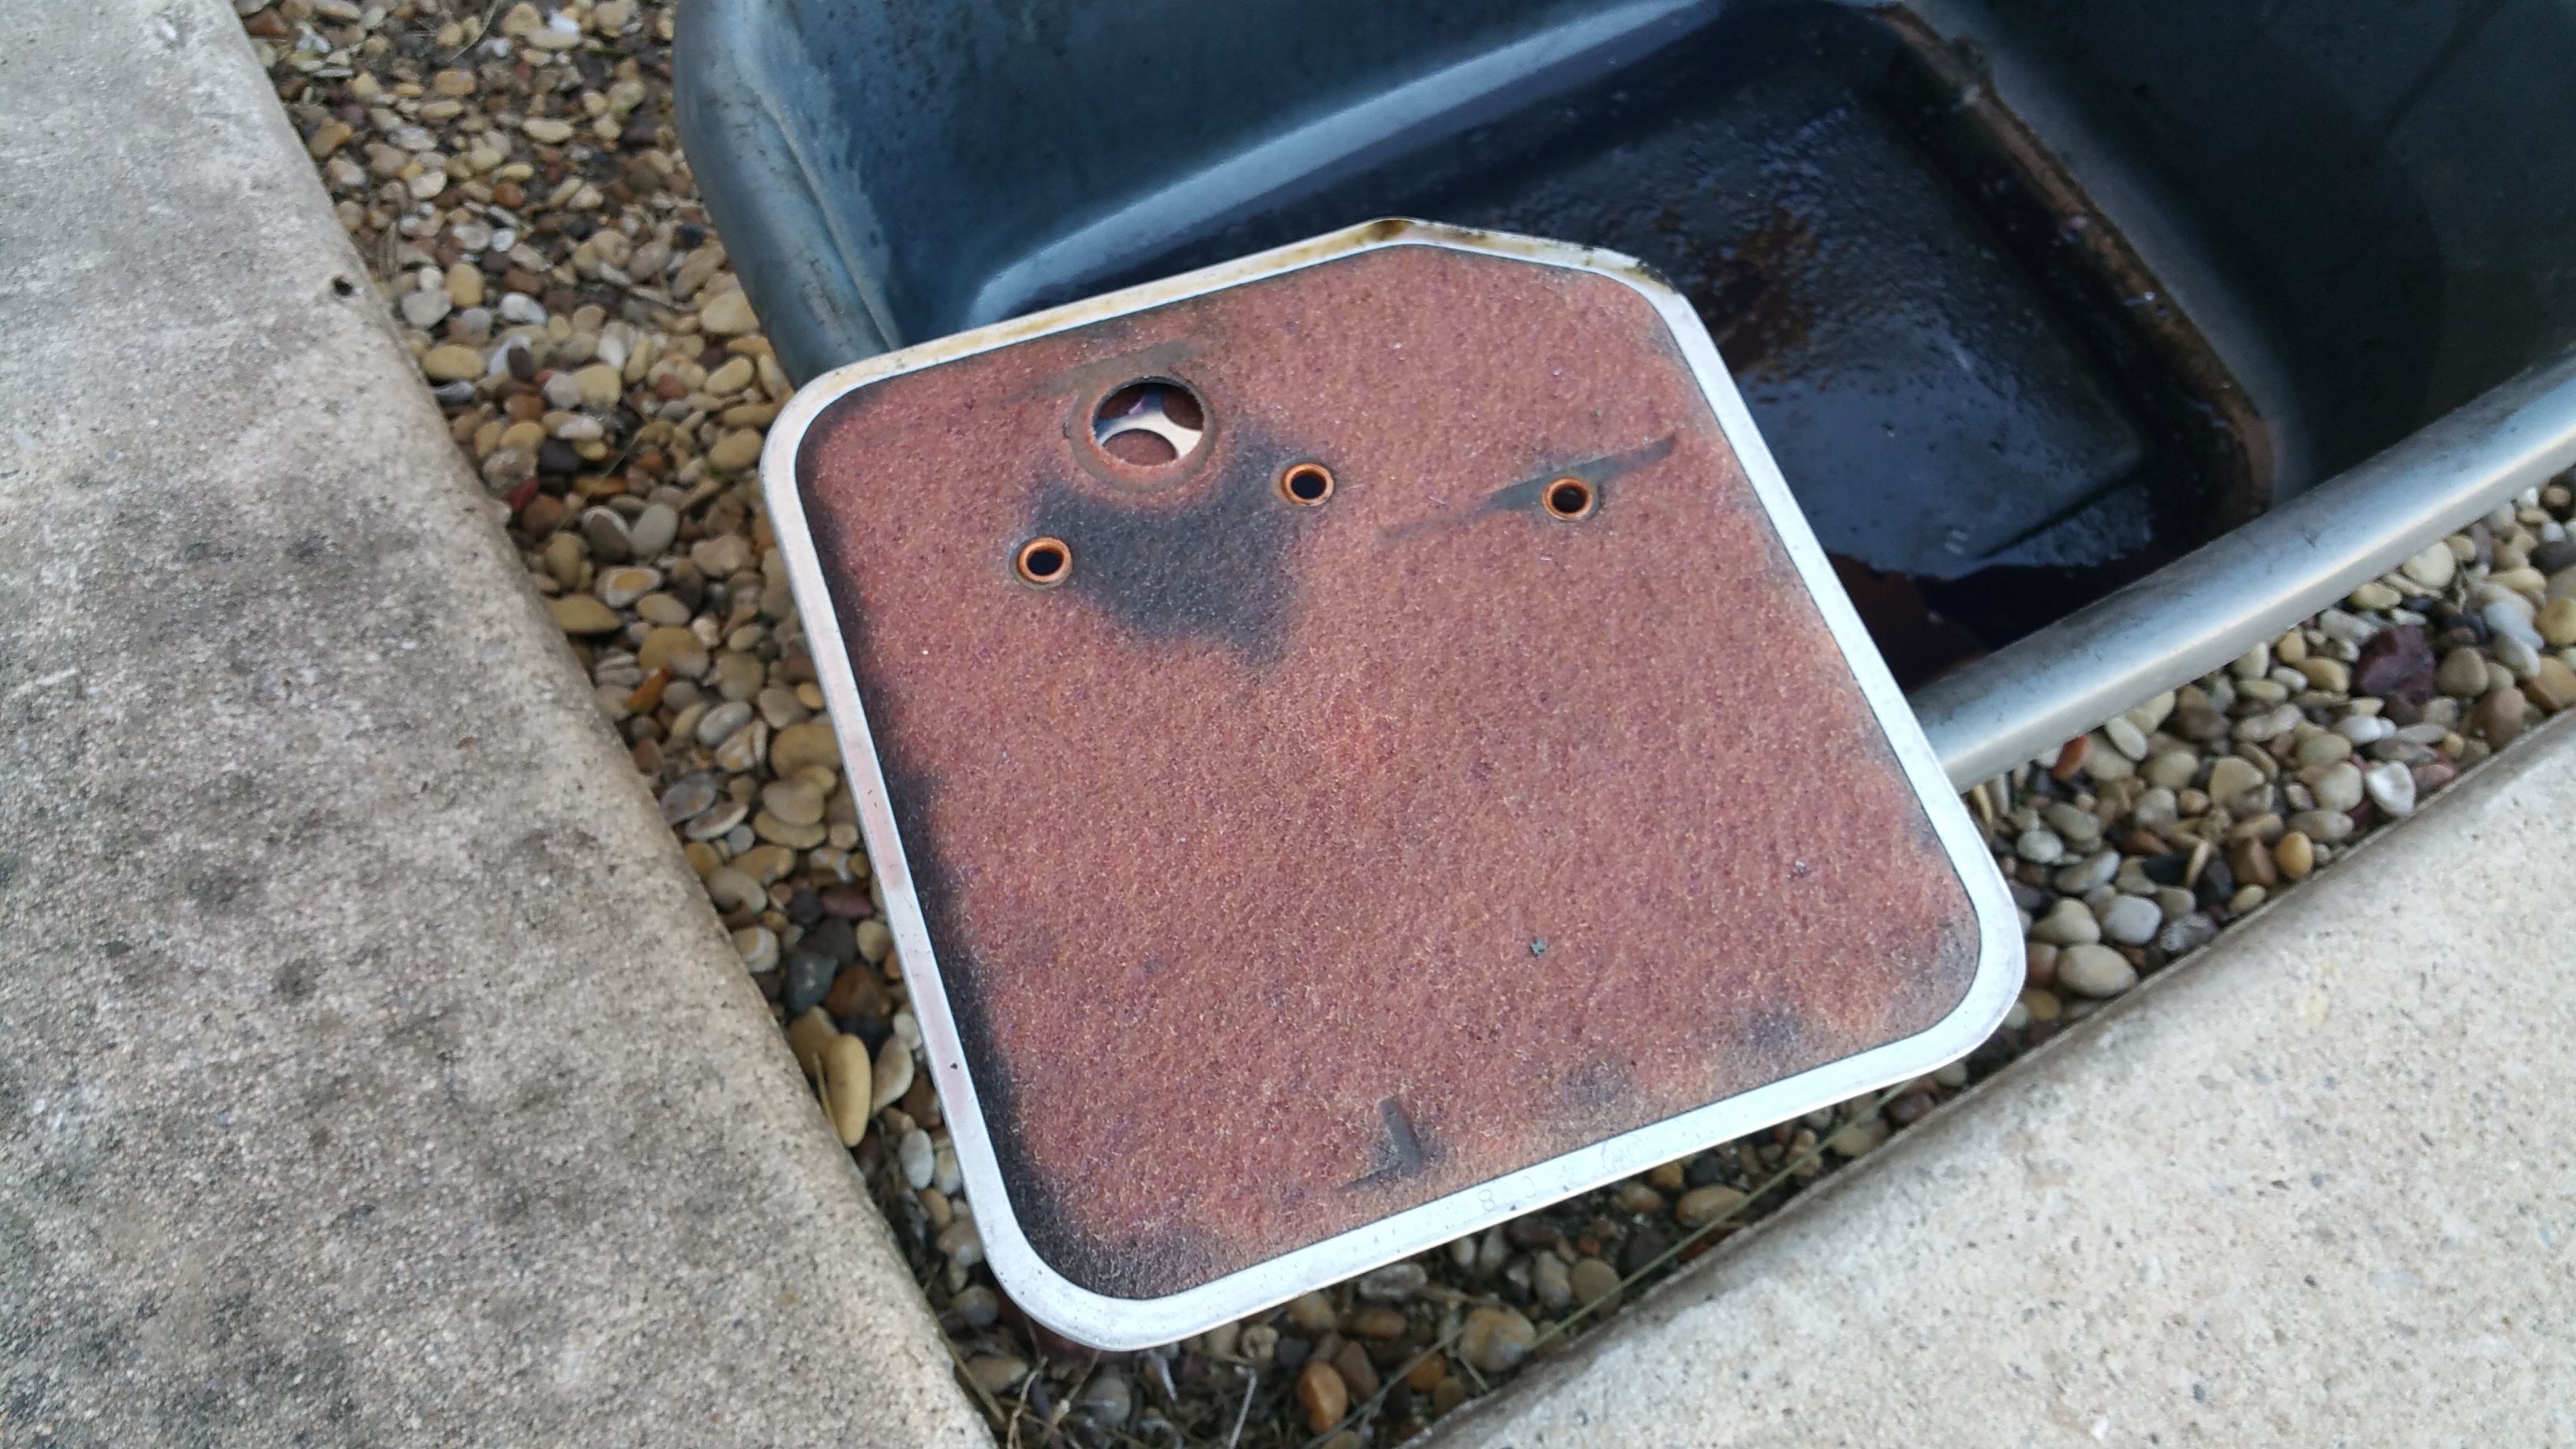
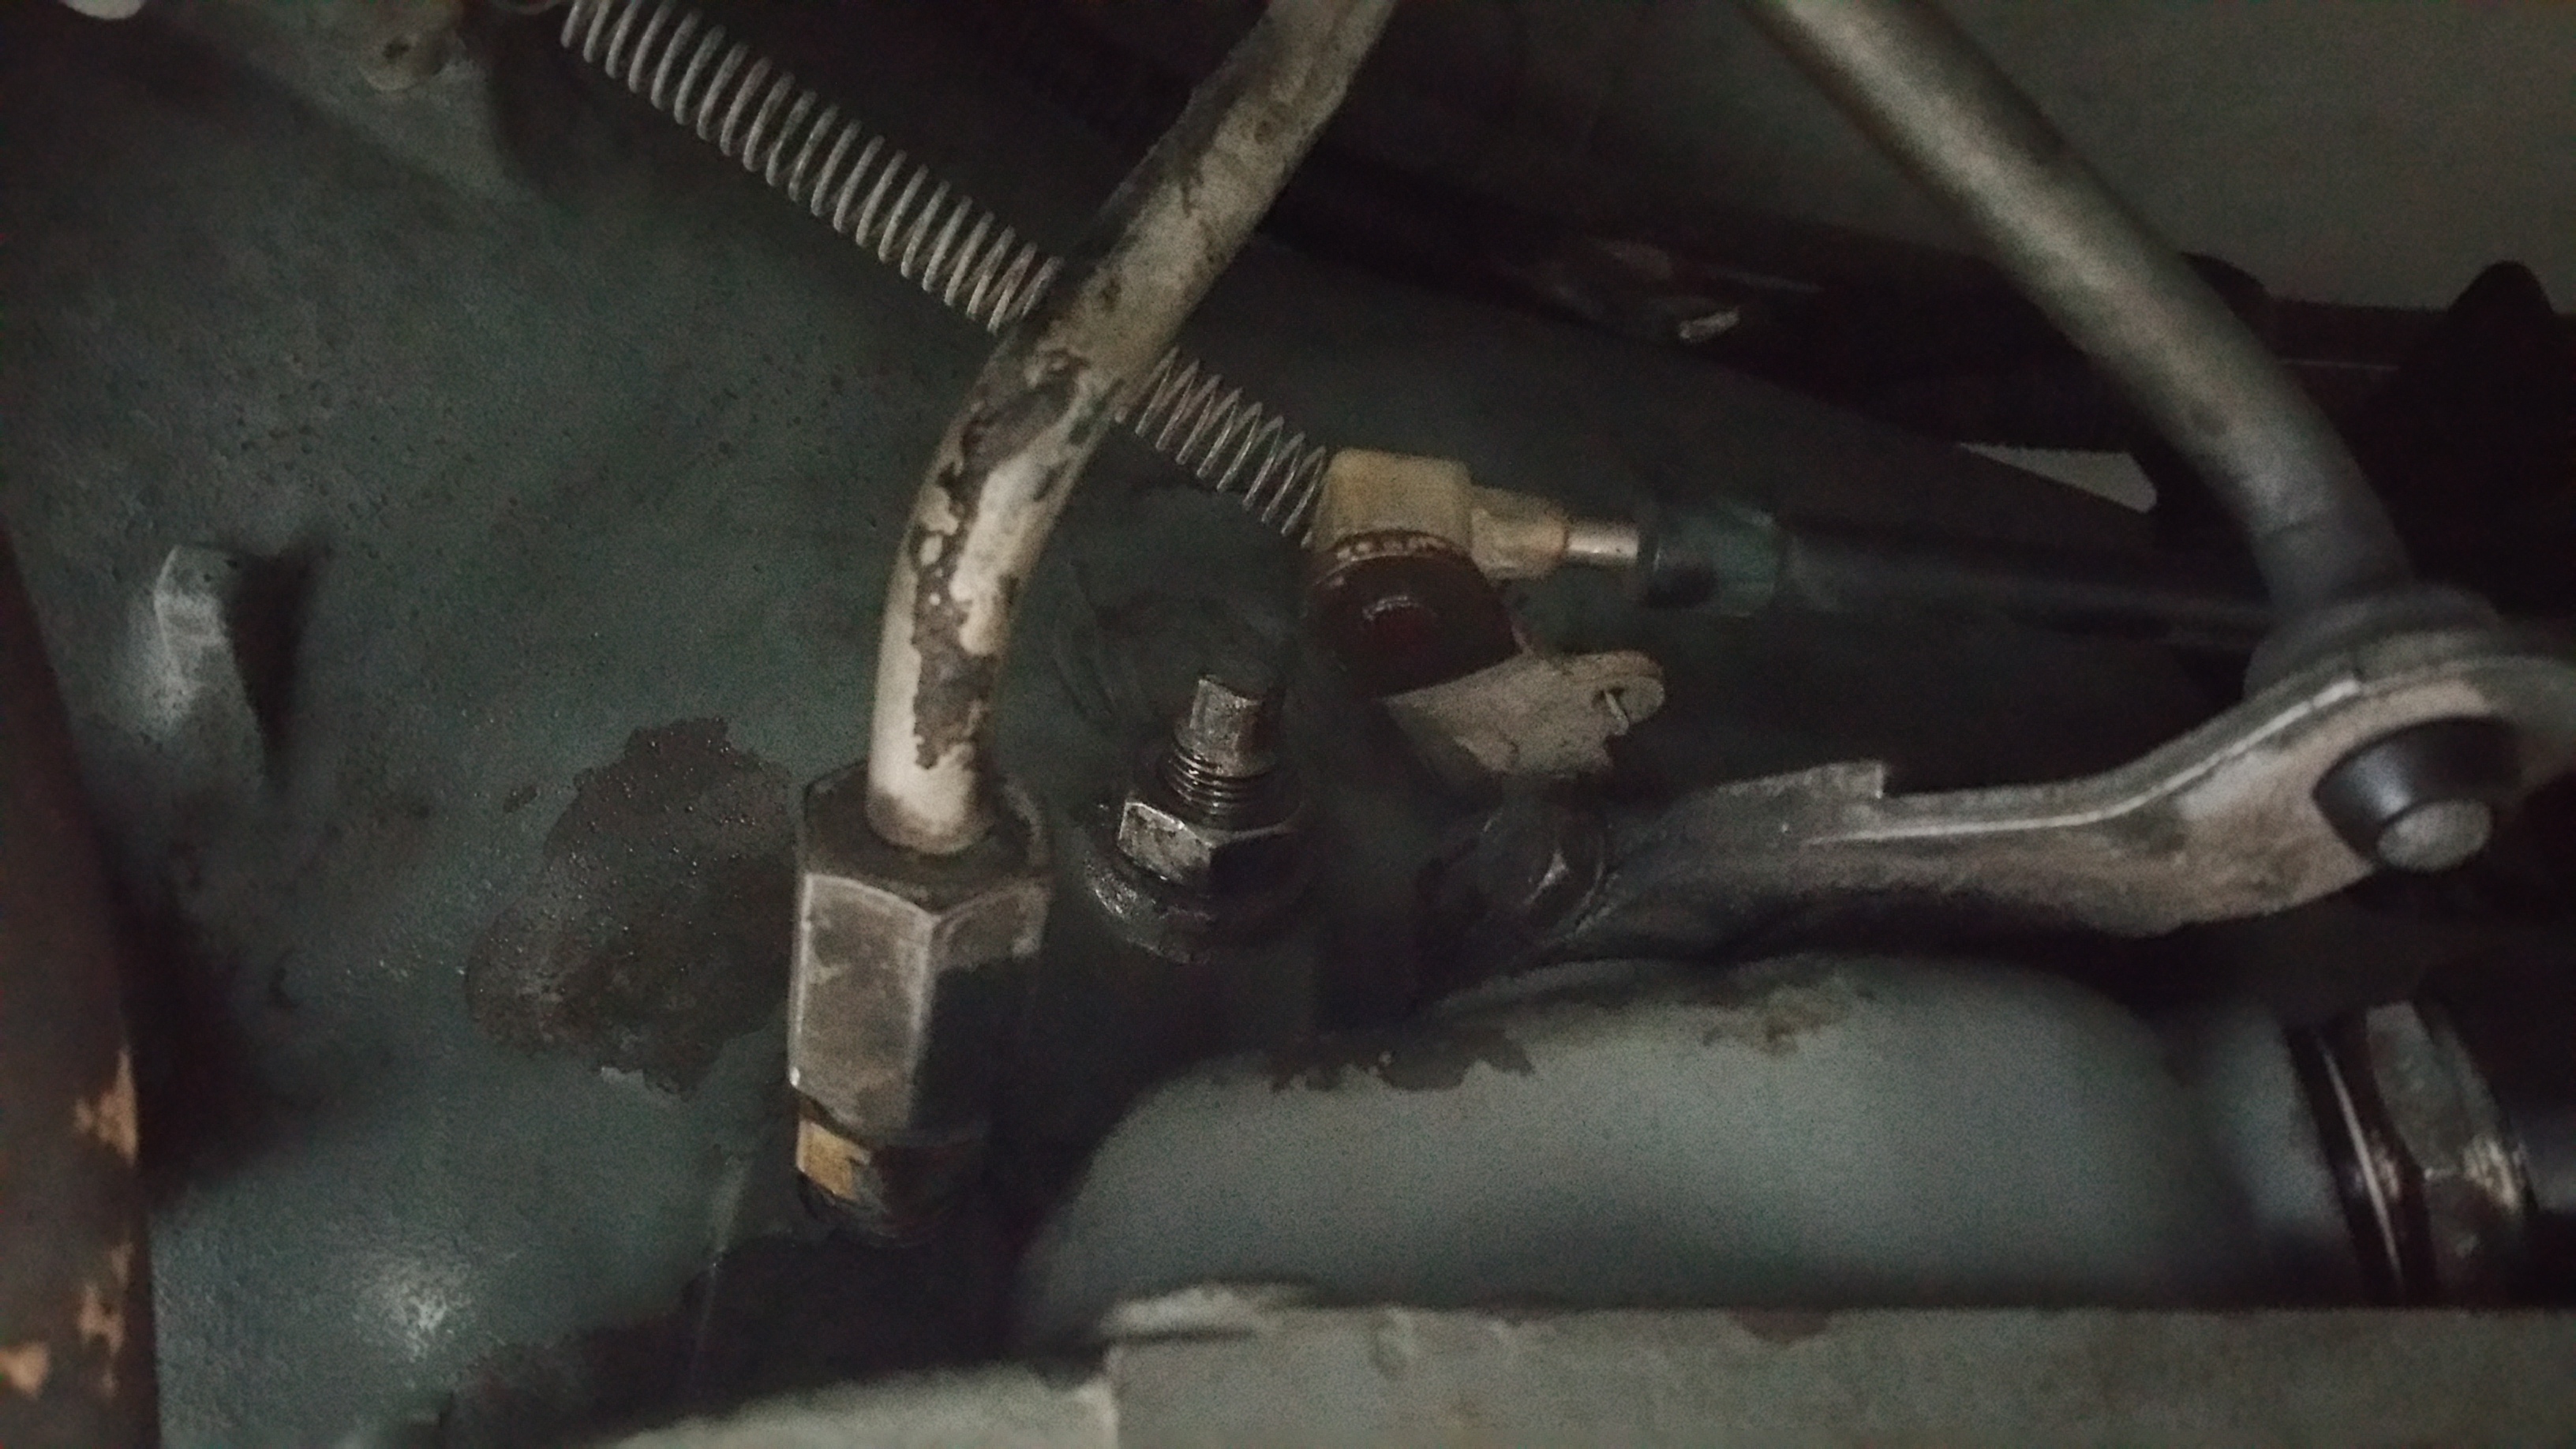
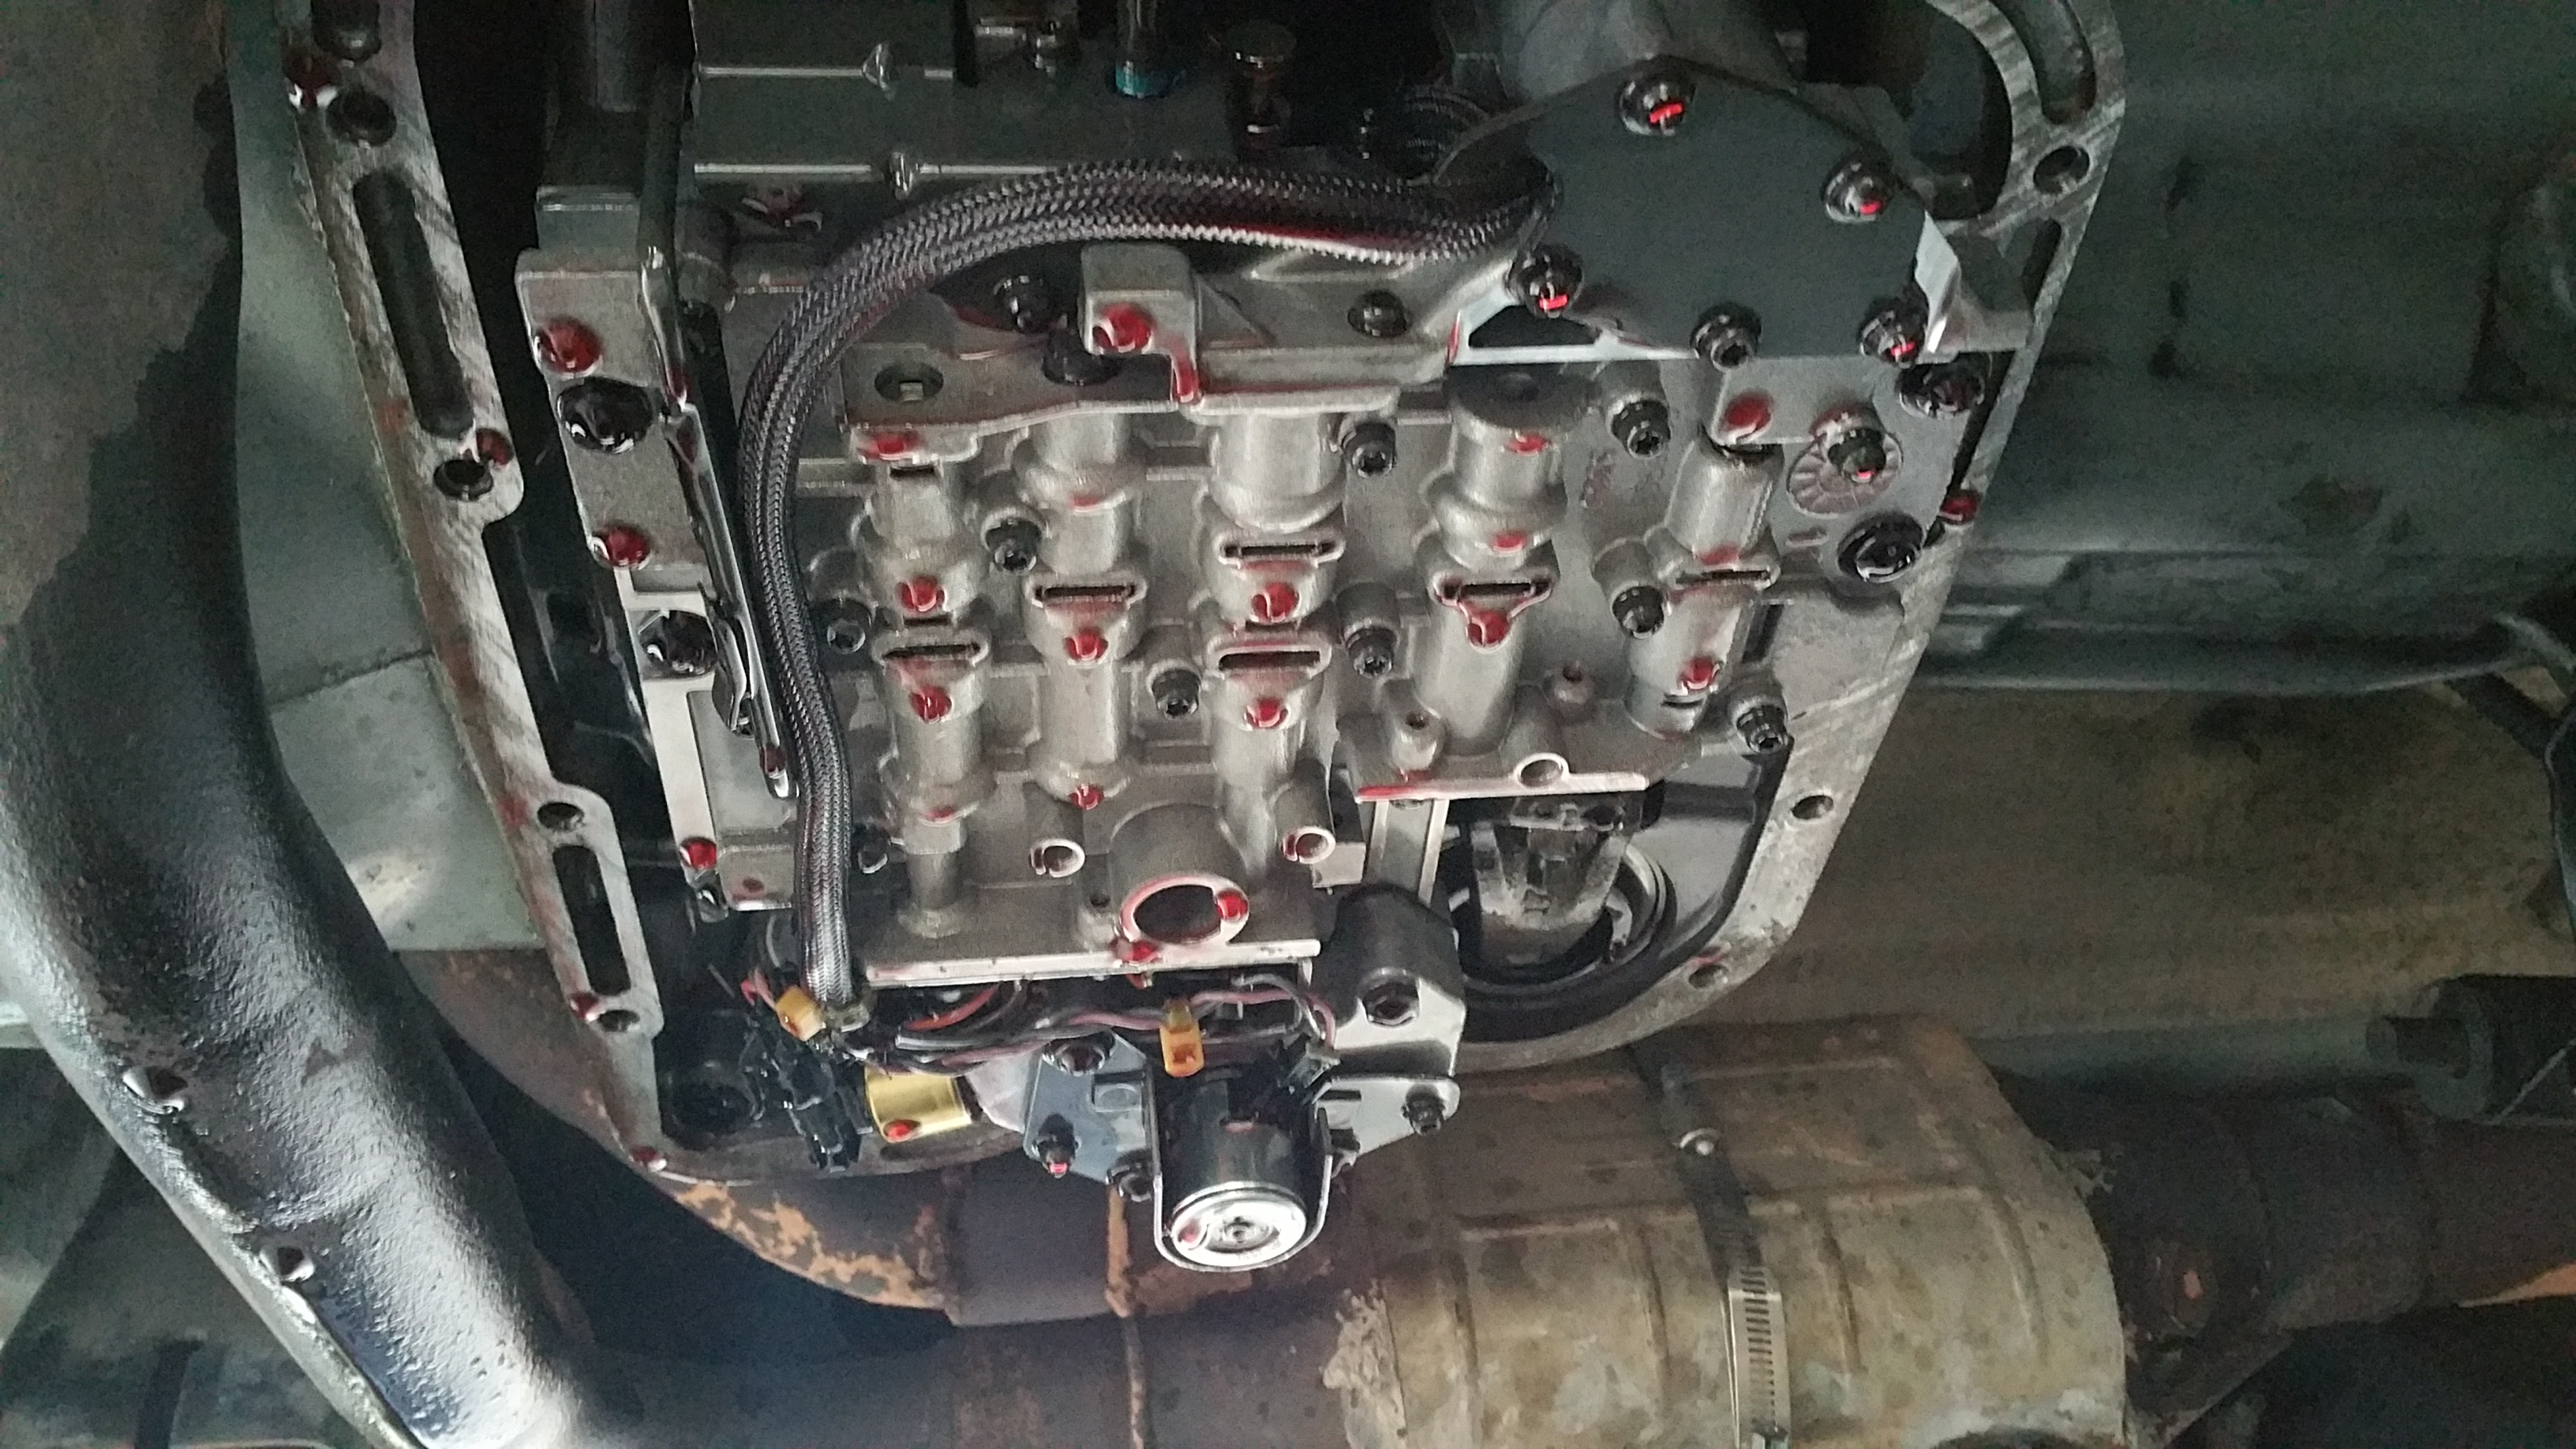
Well after 2 years my transmission pan was leaking. I dropped the pan 2 years ago after buying the truck to see what it looked like. The truck has always shifted pretty hard in gear, especially when its cold. Anyway, the trans pan didn't have much metal in it and the filter was rather new so i wasn't too worried about it. Fast forward, it leaking all of a sudden.
So I dropped the pan and 2 years later it looked the same, bit of metal, not much, pretty small flakes here and there, magnet had all the fine dust like material. Not worried still. I got her all back together with a new filter again, adjusted the bands, and cleaned and painted up the pan. Long story short, I think it going to start leaking again.
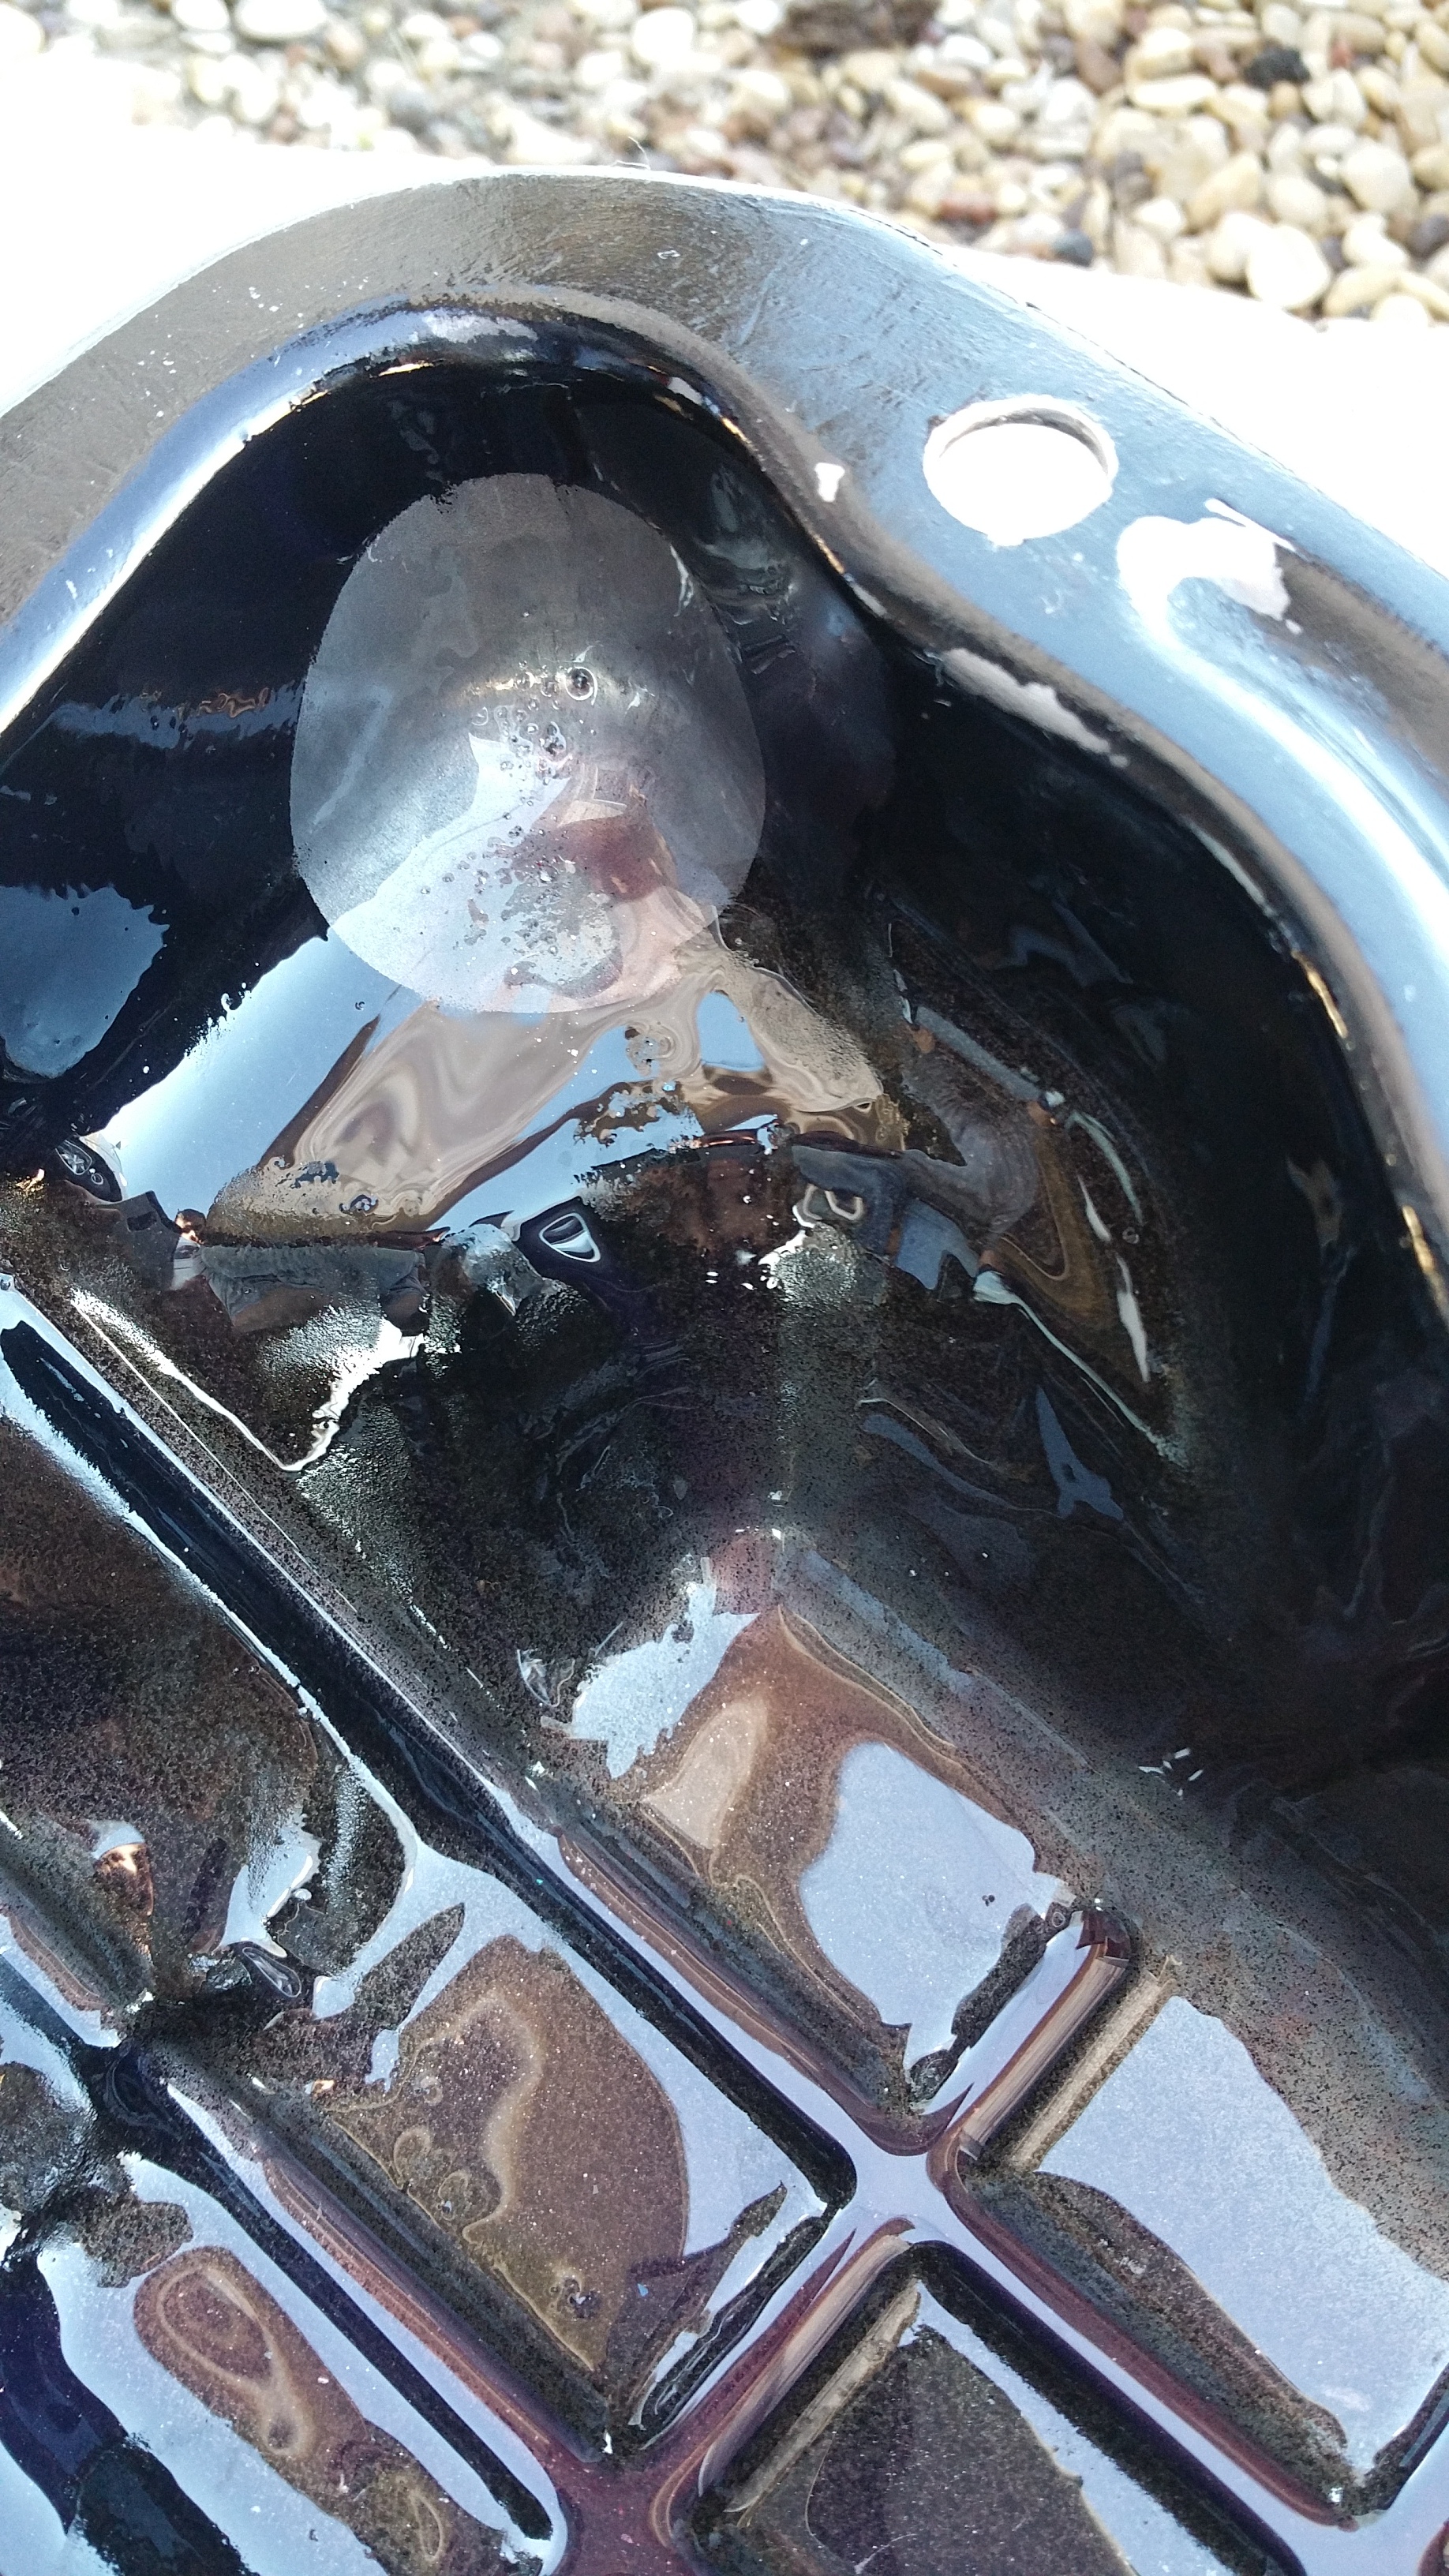
For fear of filling it too full I only put 3 quarts in after I was done and fired it up, shifted through the gears slowly, then drover around a bit. Got back it was low. I ended up putting 4 quarts in and it was perfectly filled. What I think happened though was that while it was too low, it created a vacuum or suction that pulled some of my gasket in... Yeah, go figure. Guess is what sucking for more ATF and it didn't have enough with just 3 quarts and I screwed myself.
Pics:
Magnet and pan looked decent.
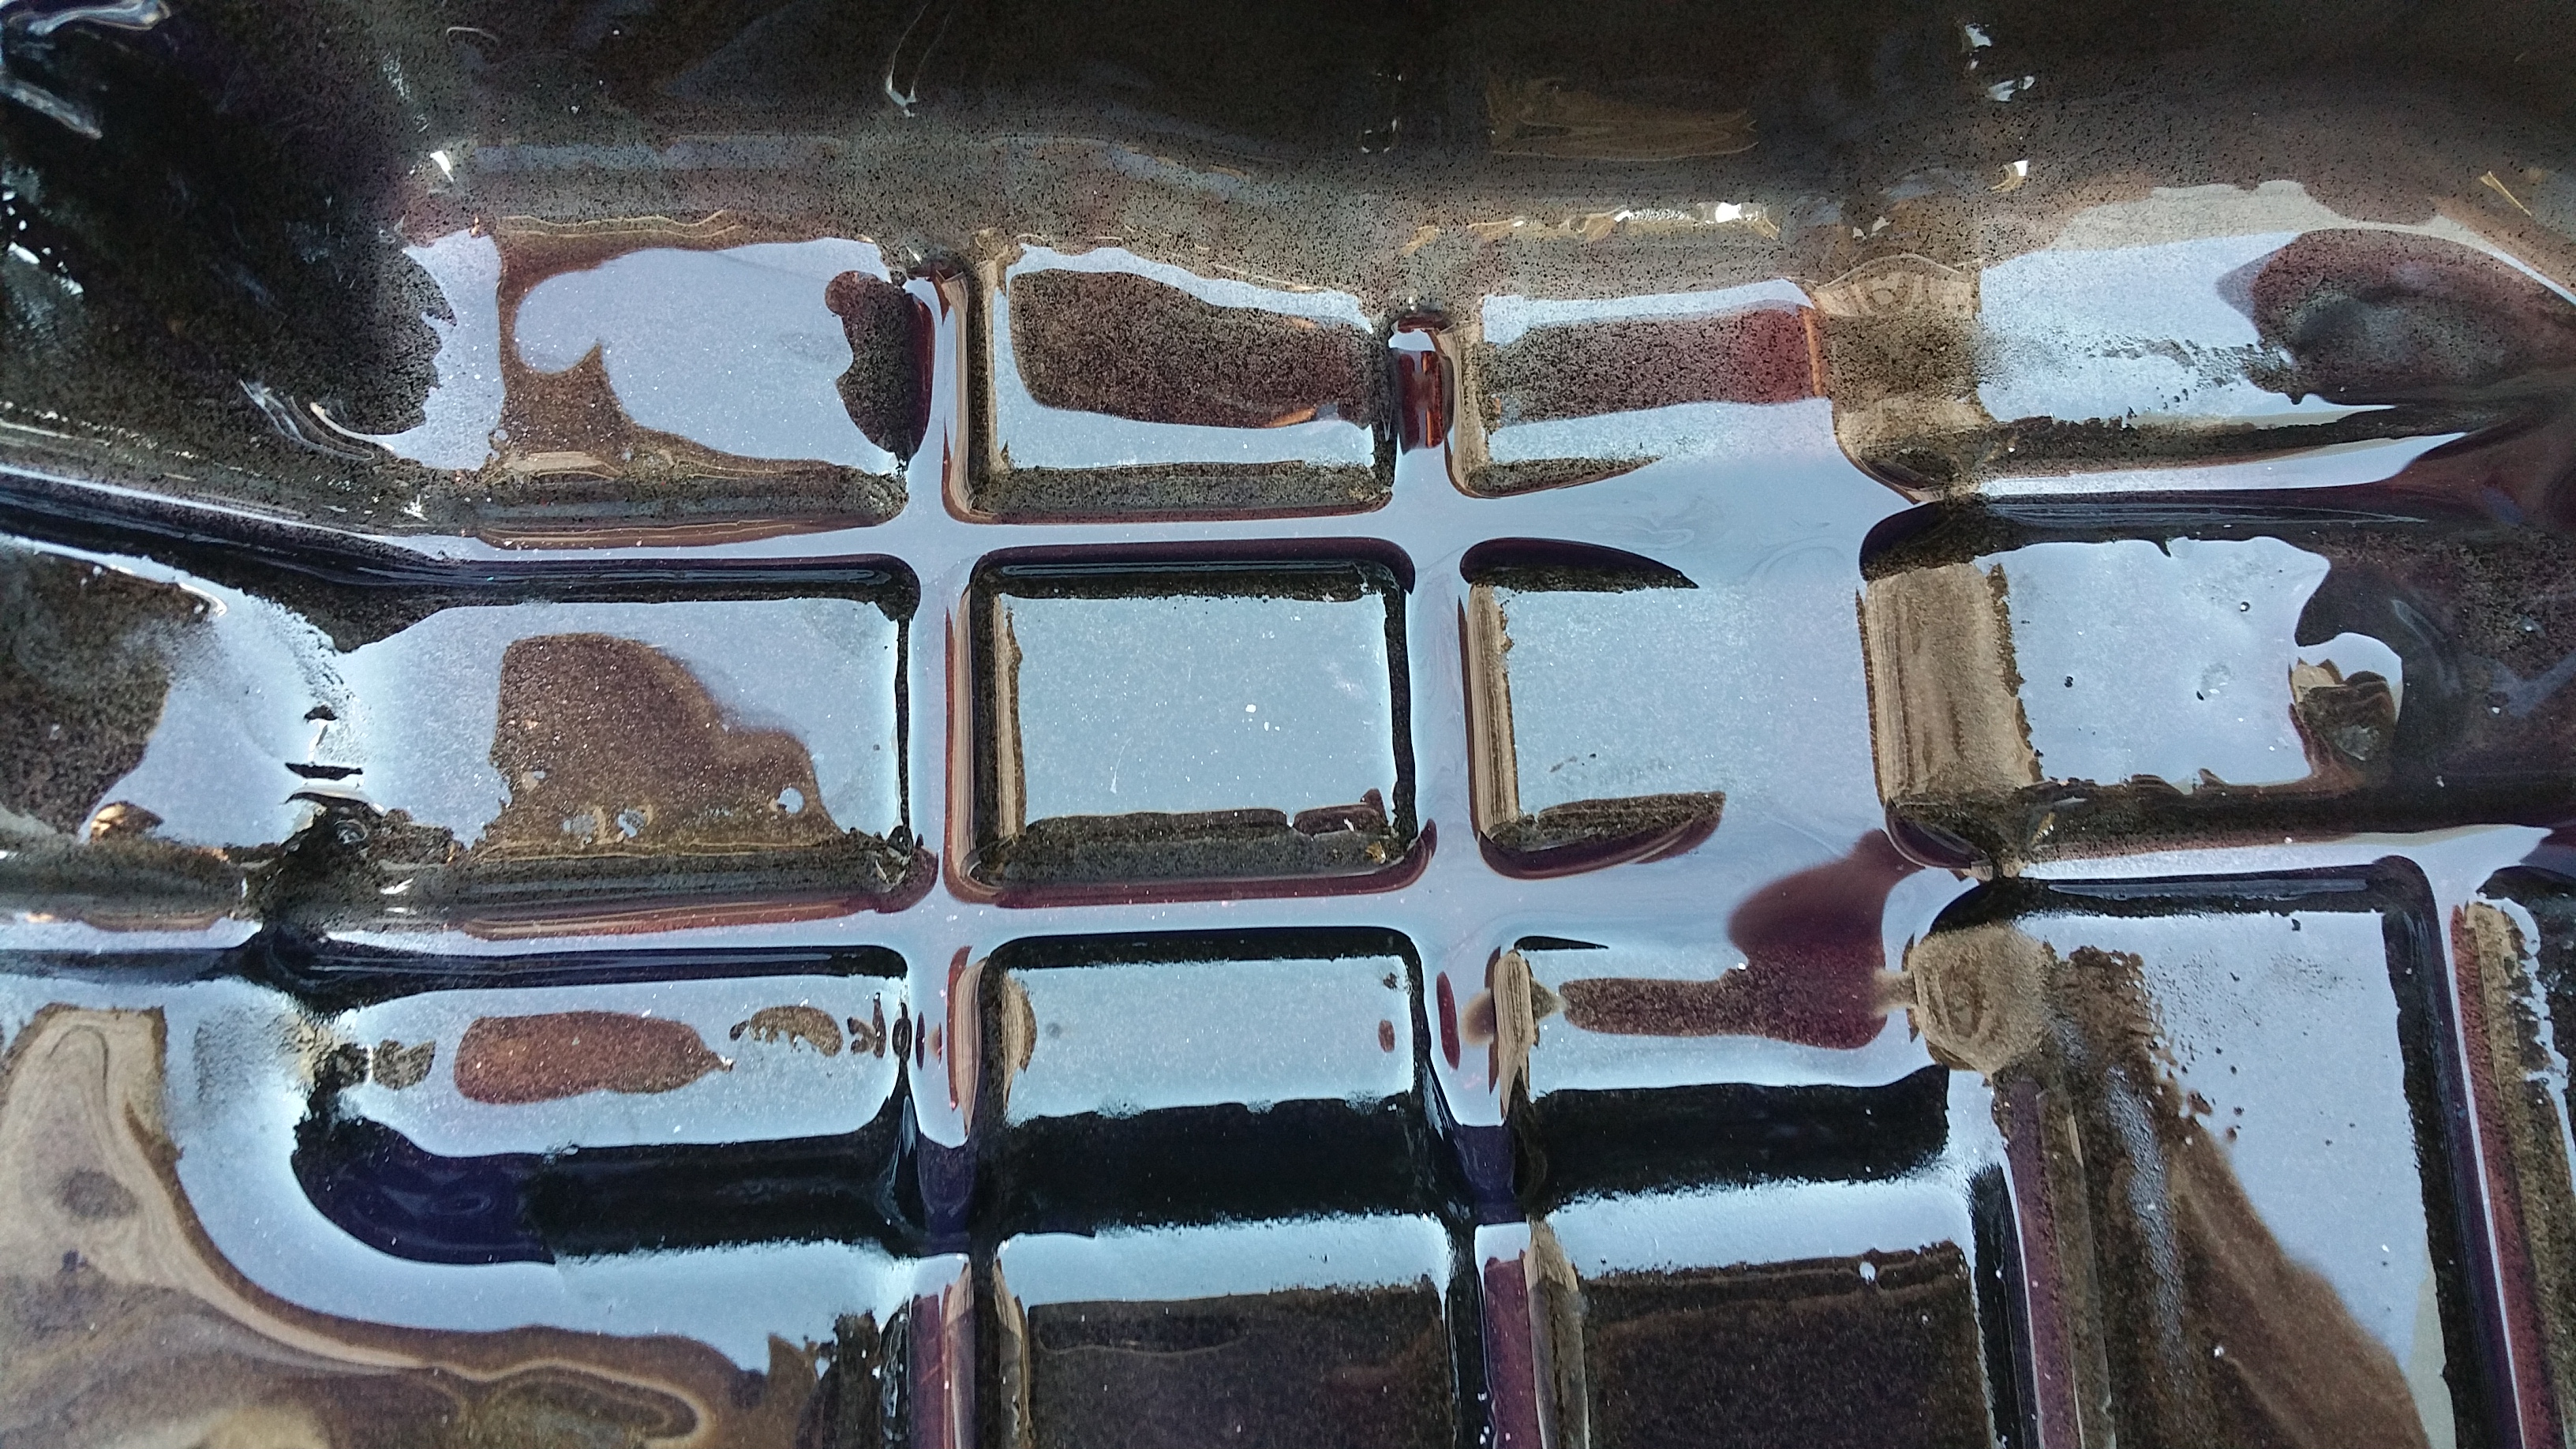
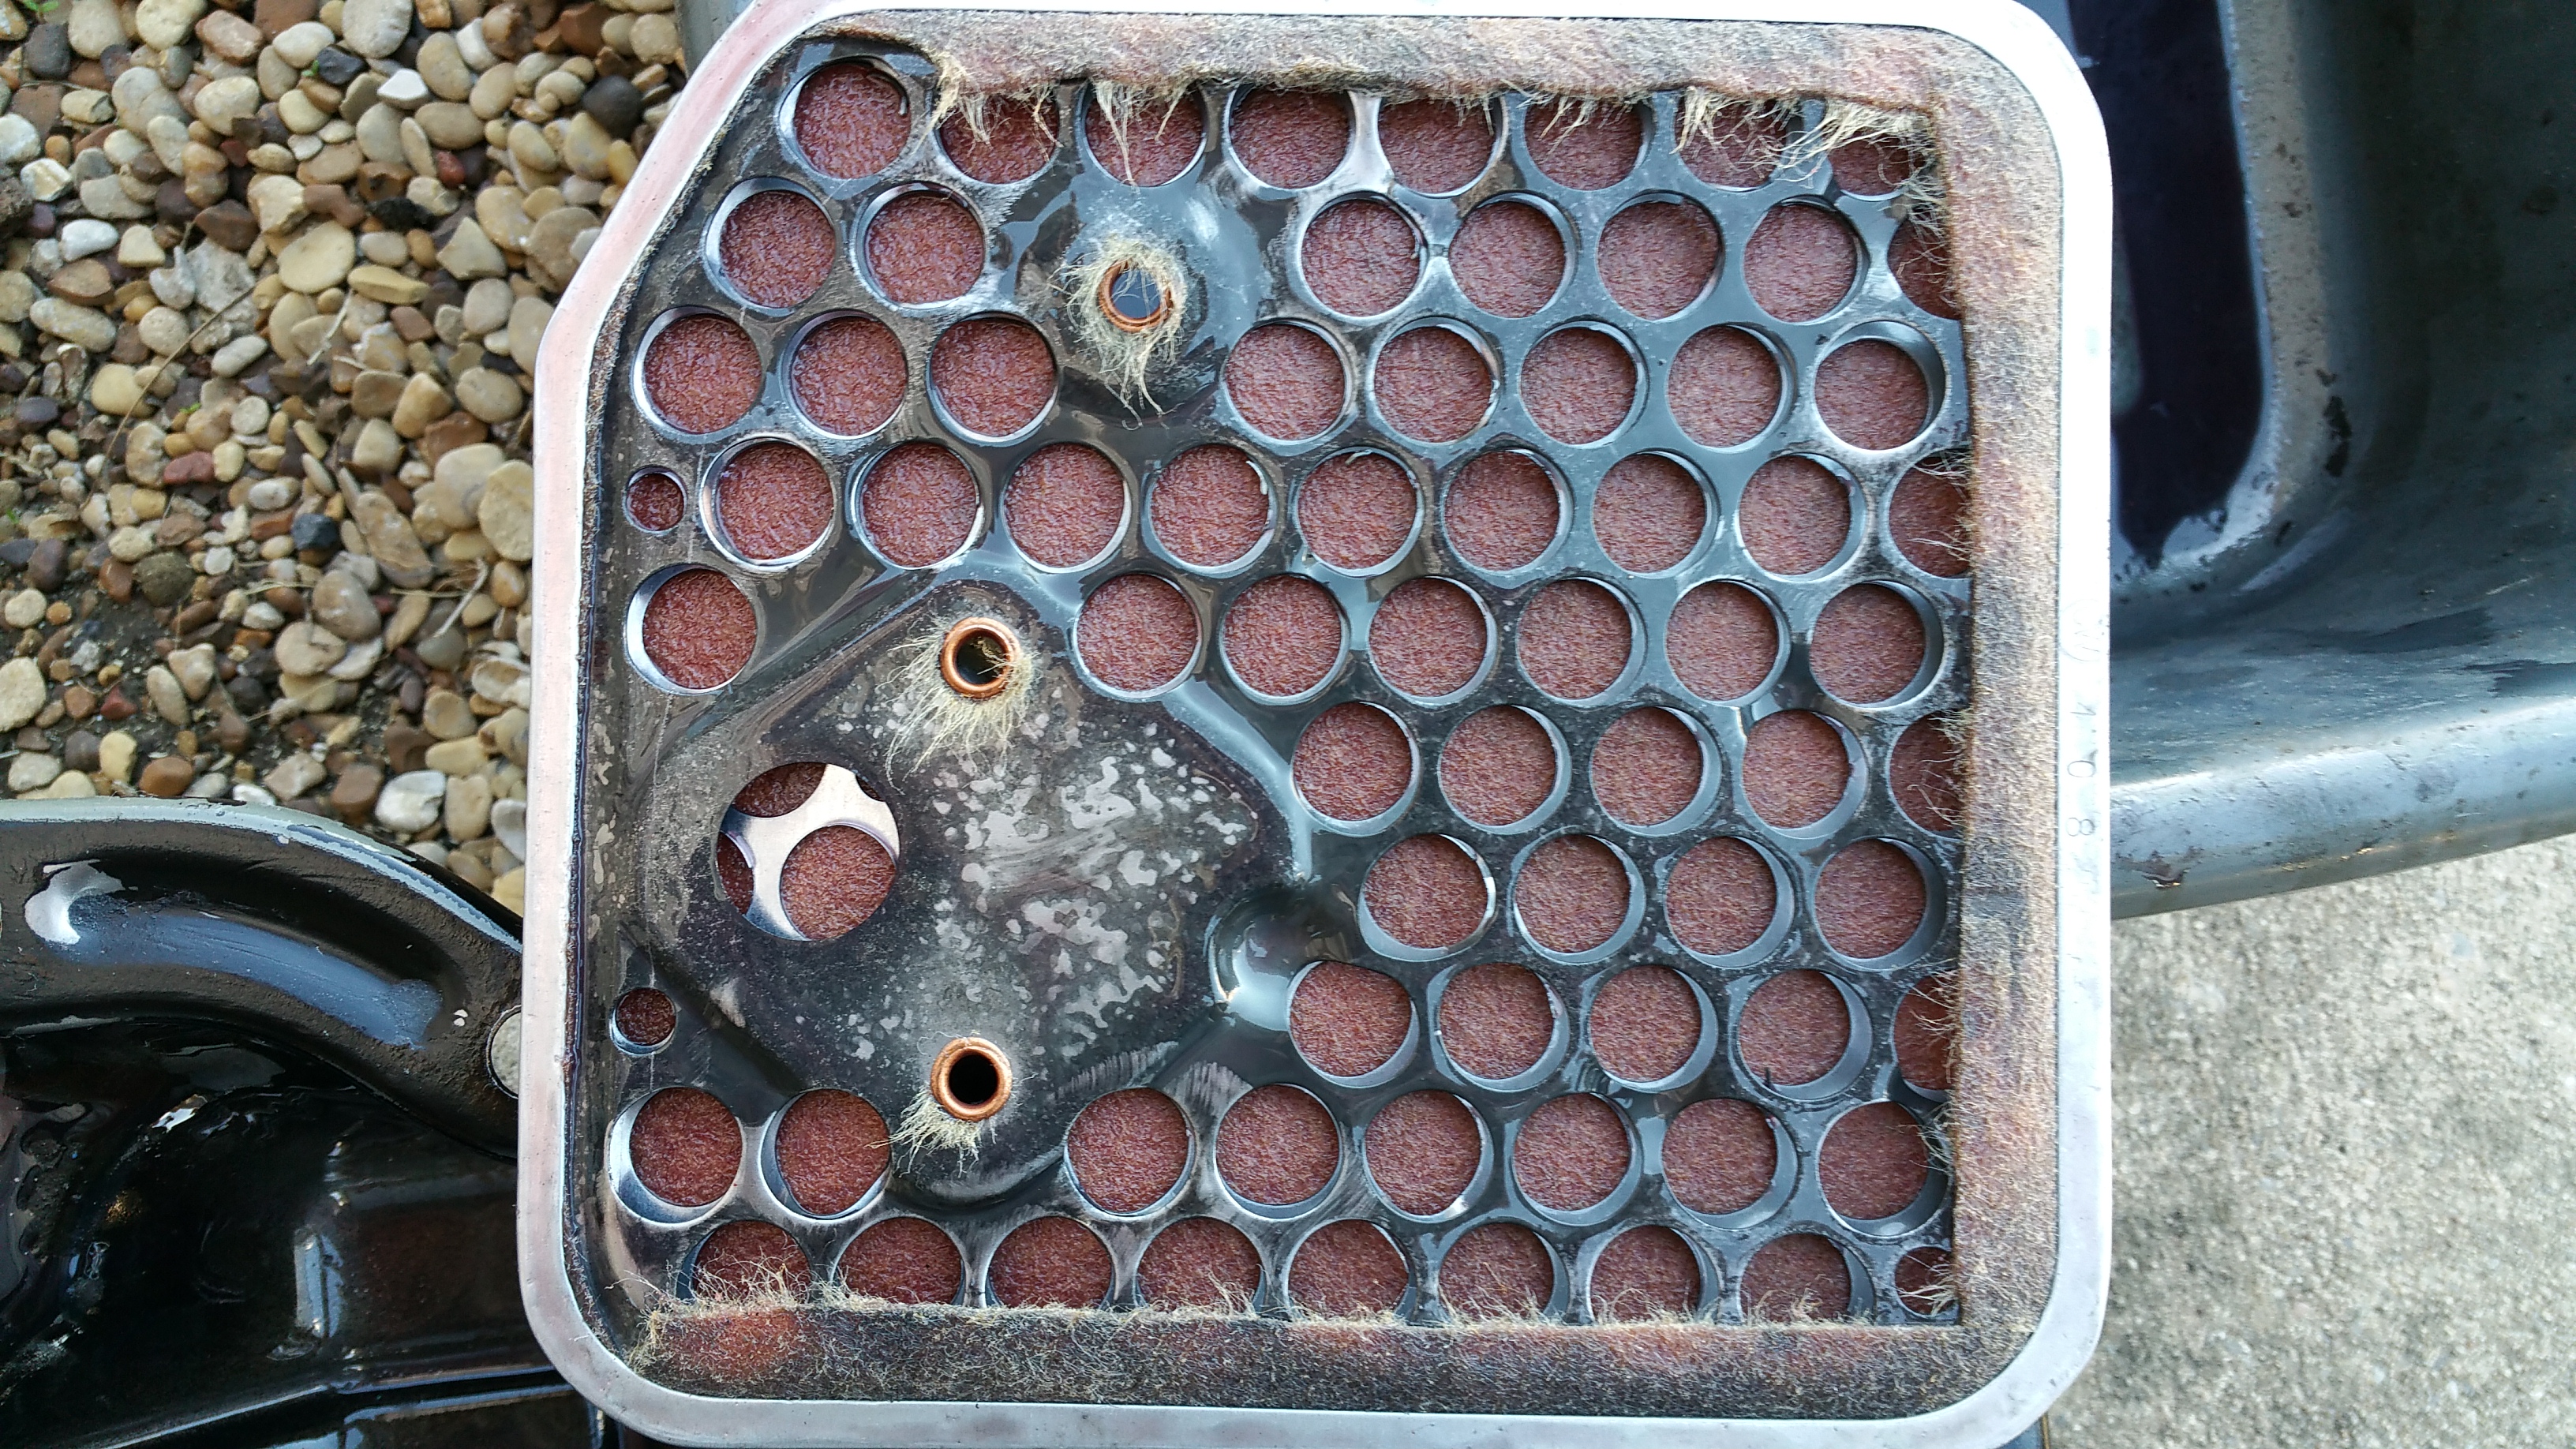
I tore apart the old filter and had a look inside, just dust no flakes, very happy, but you can see the dark spots on the outside it was filtering, same material that the magnet has attached.

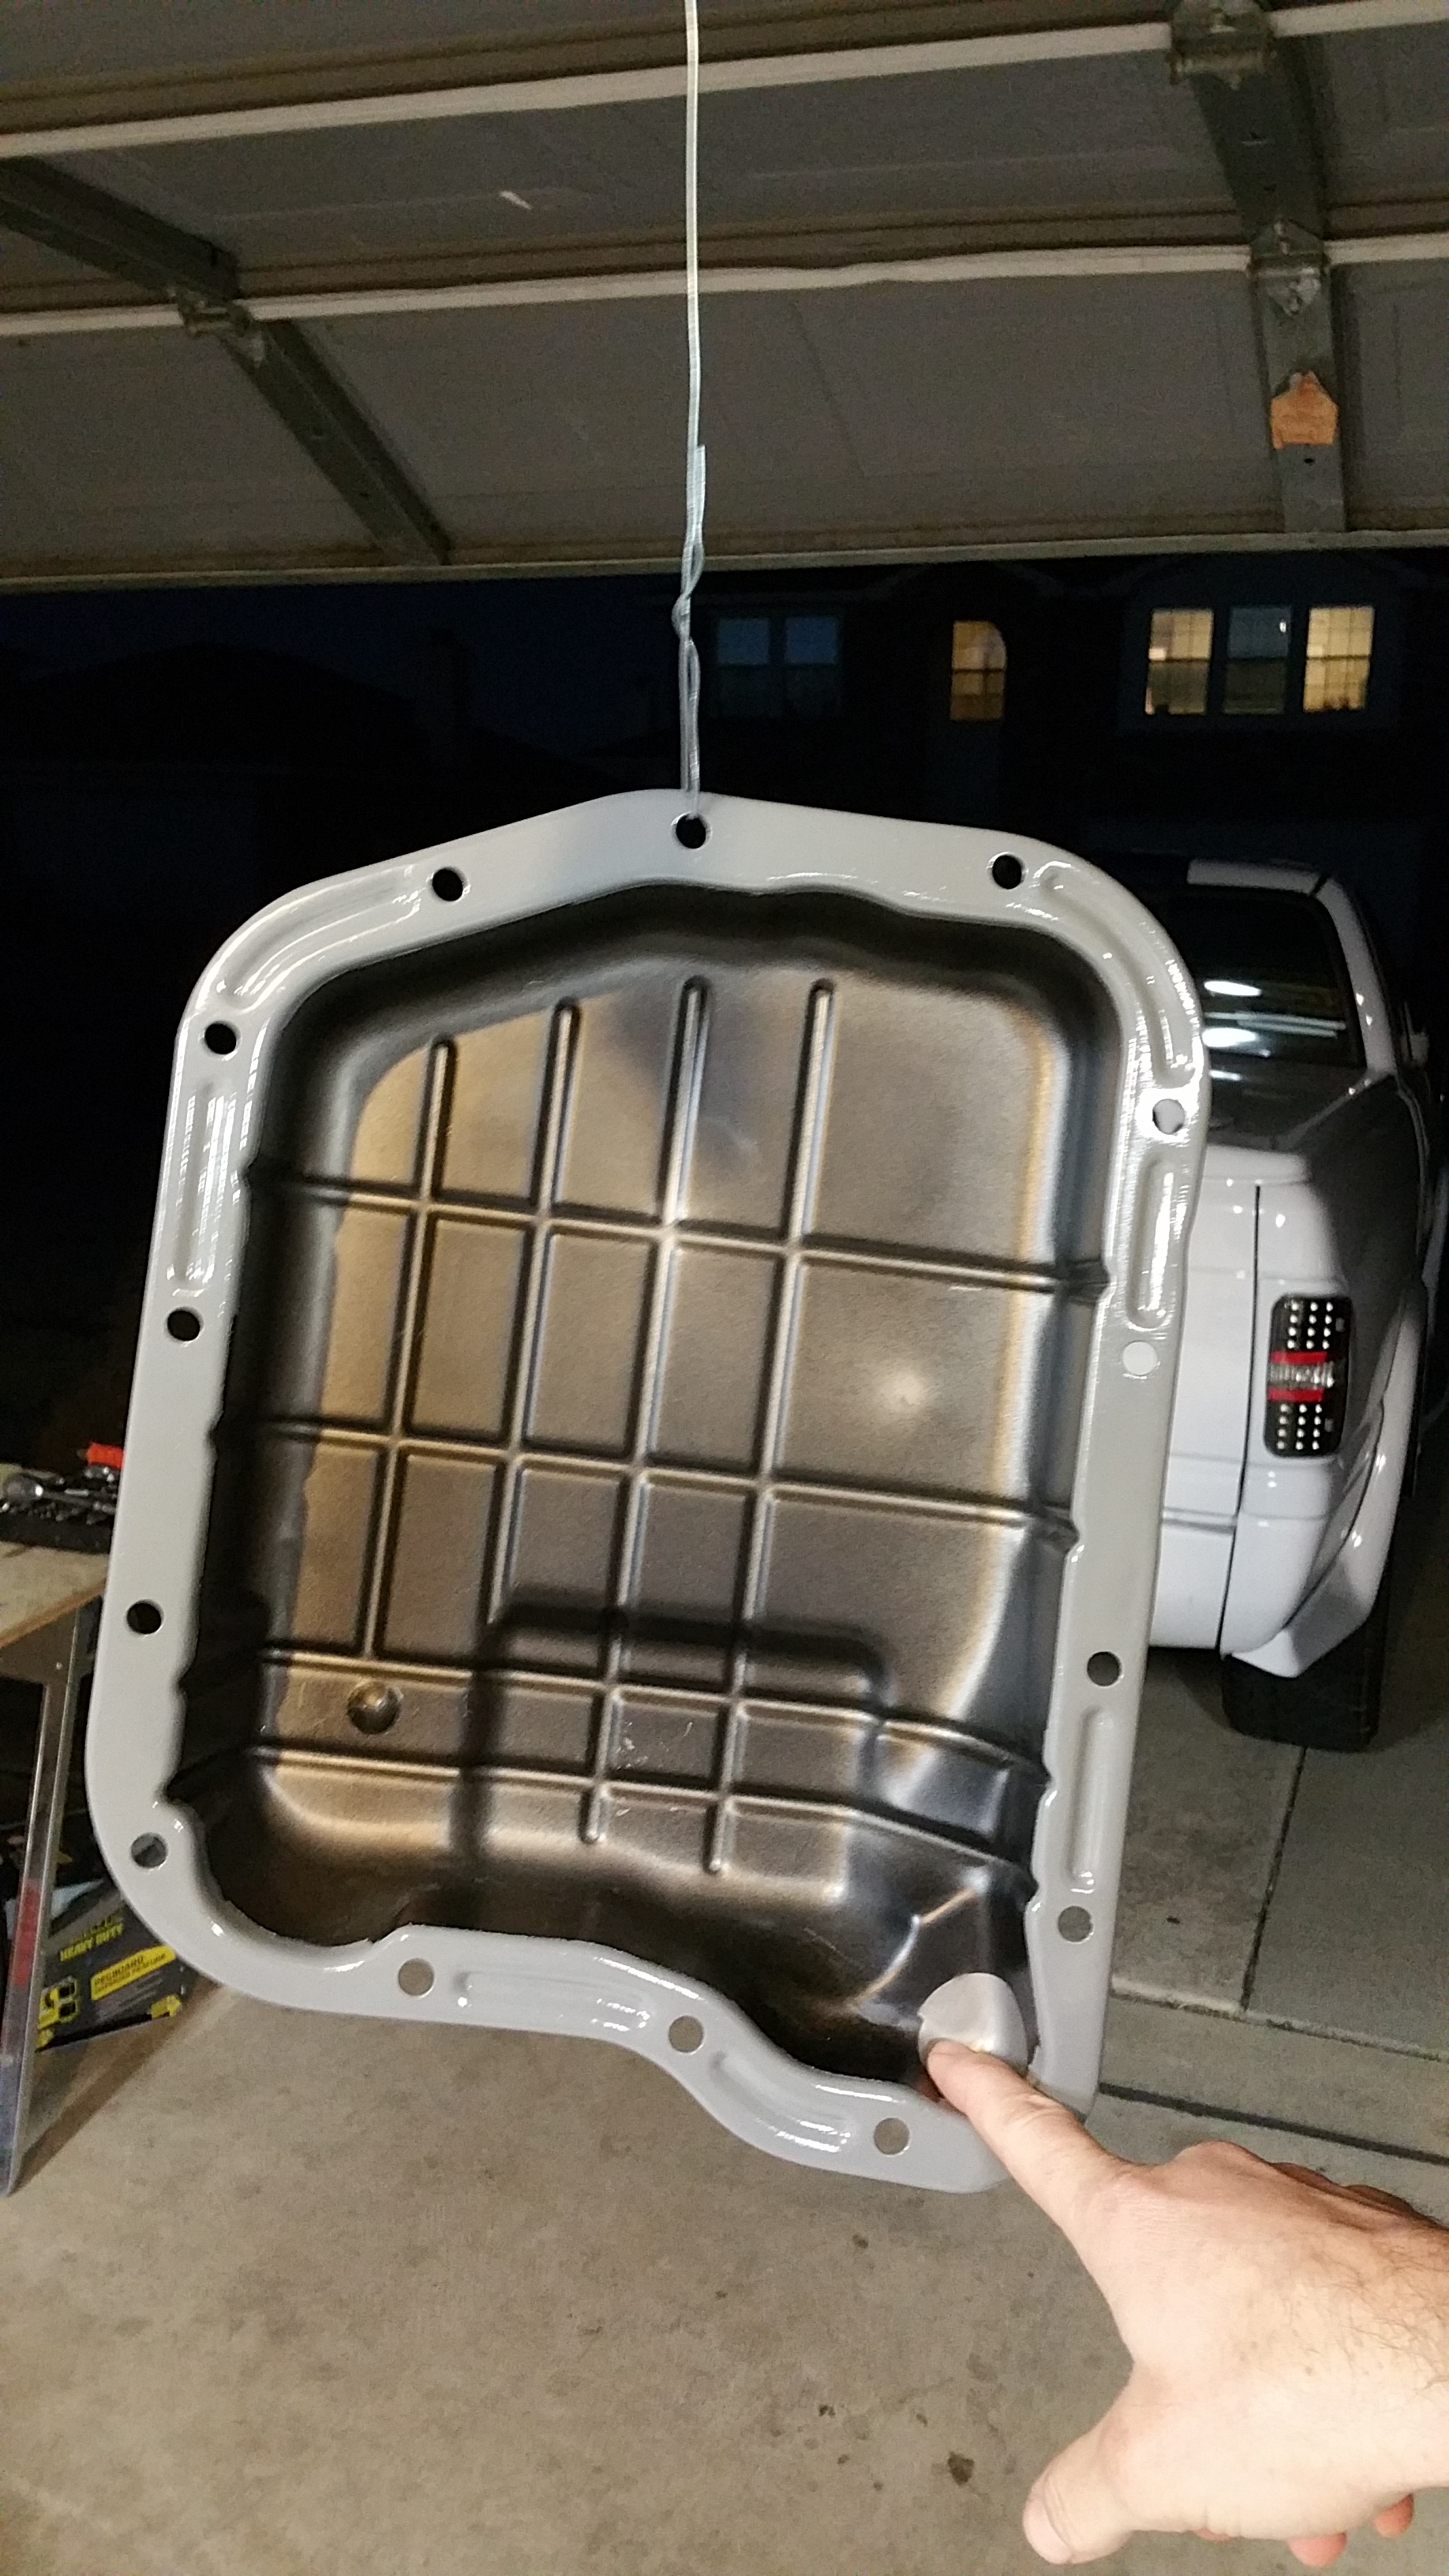
I banged out the pan a little in spots I thought needed it.
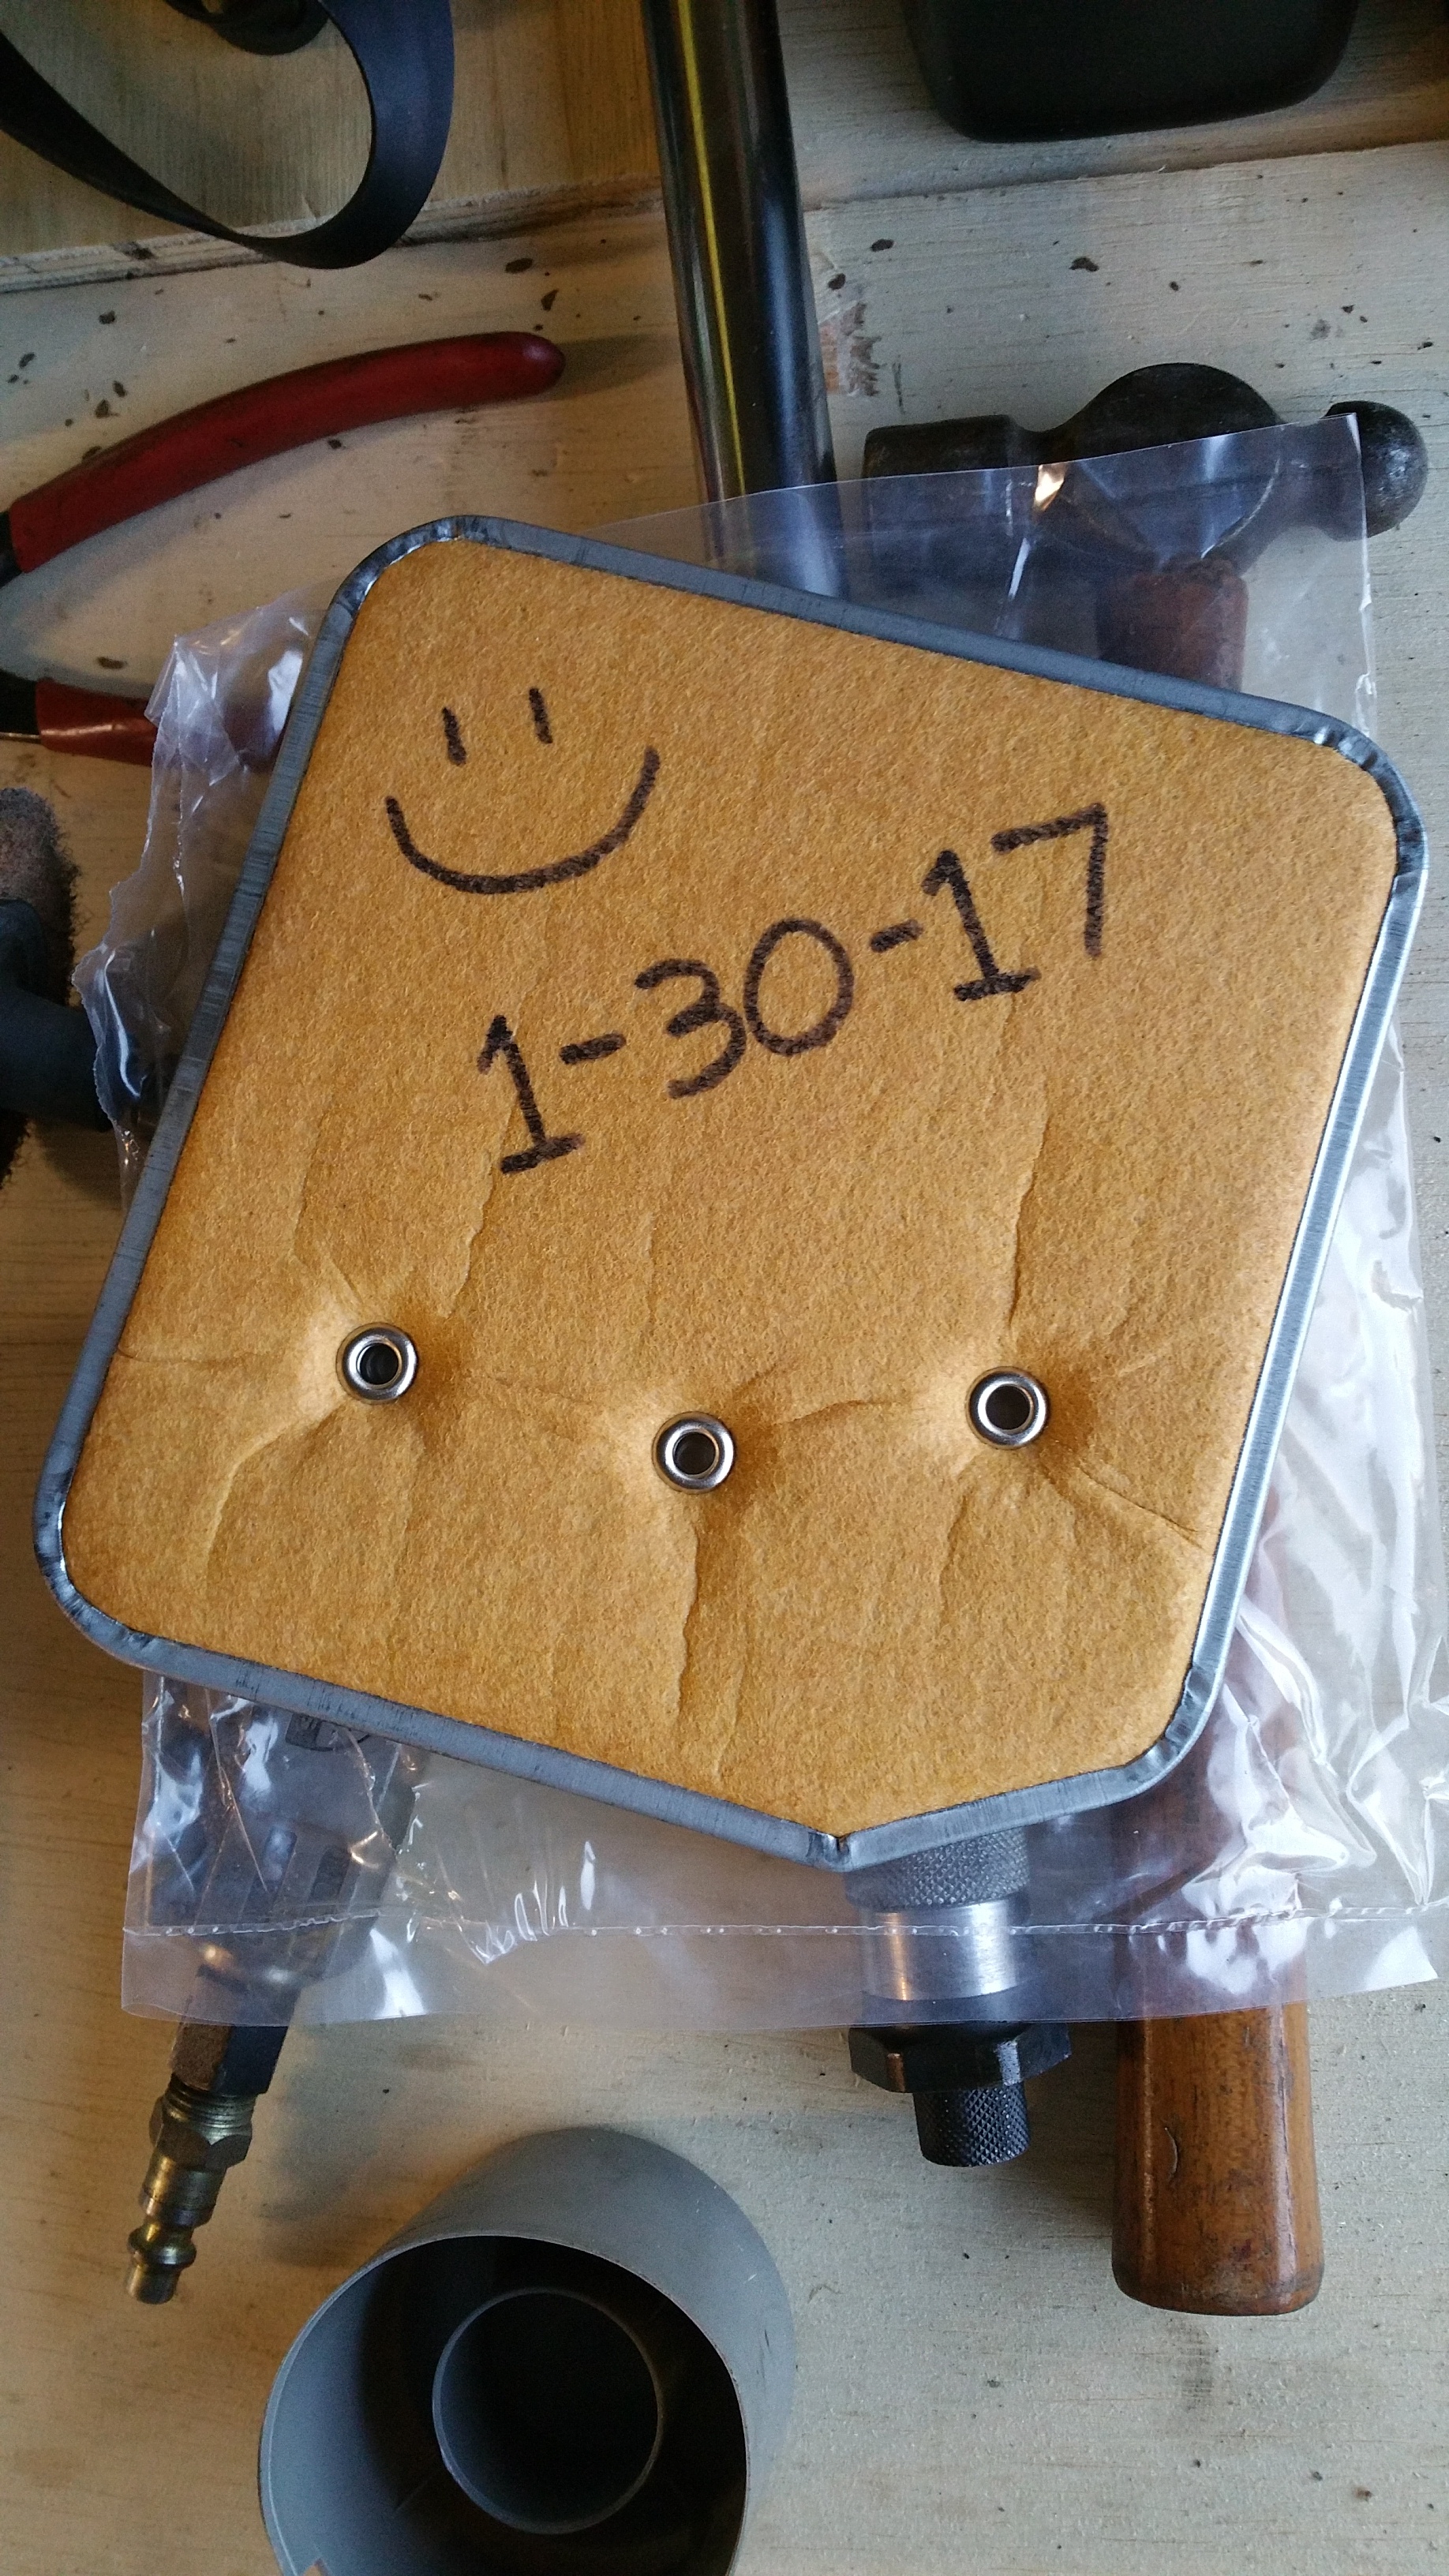
Made a happy filter with date for next time.
Adjusted the bands. First I did the outside band, tightened to 72 inch pounds and backed off 2 7/8". Put a mark on my socket for guide. That helps.
Then the inside band, 72 inch pounds in, backed off 2 turns.

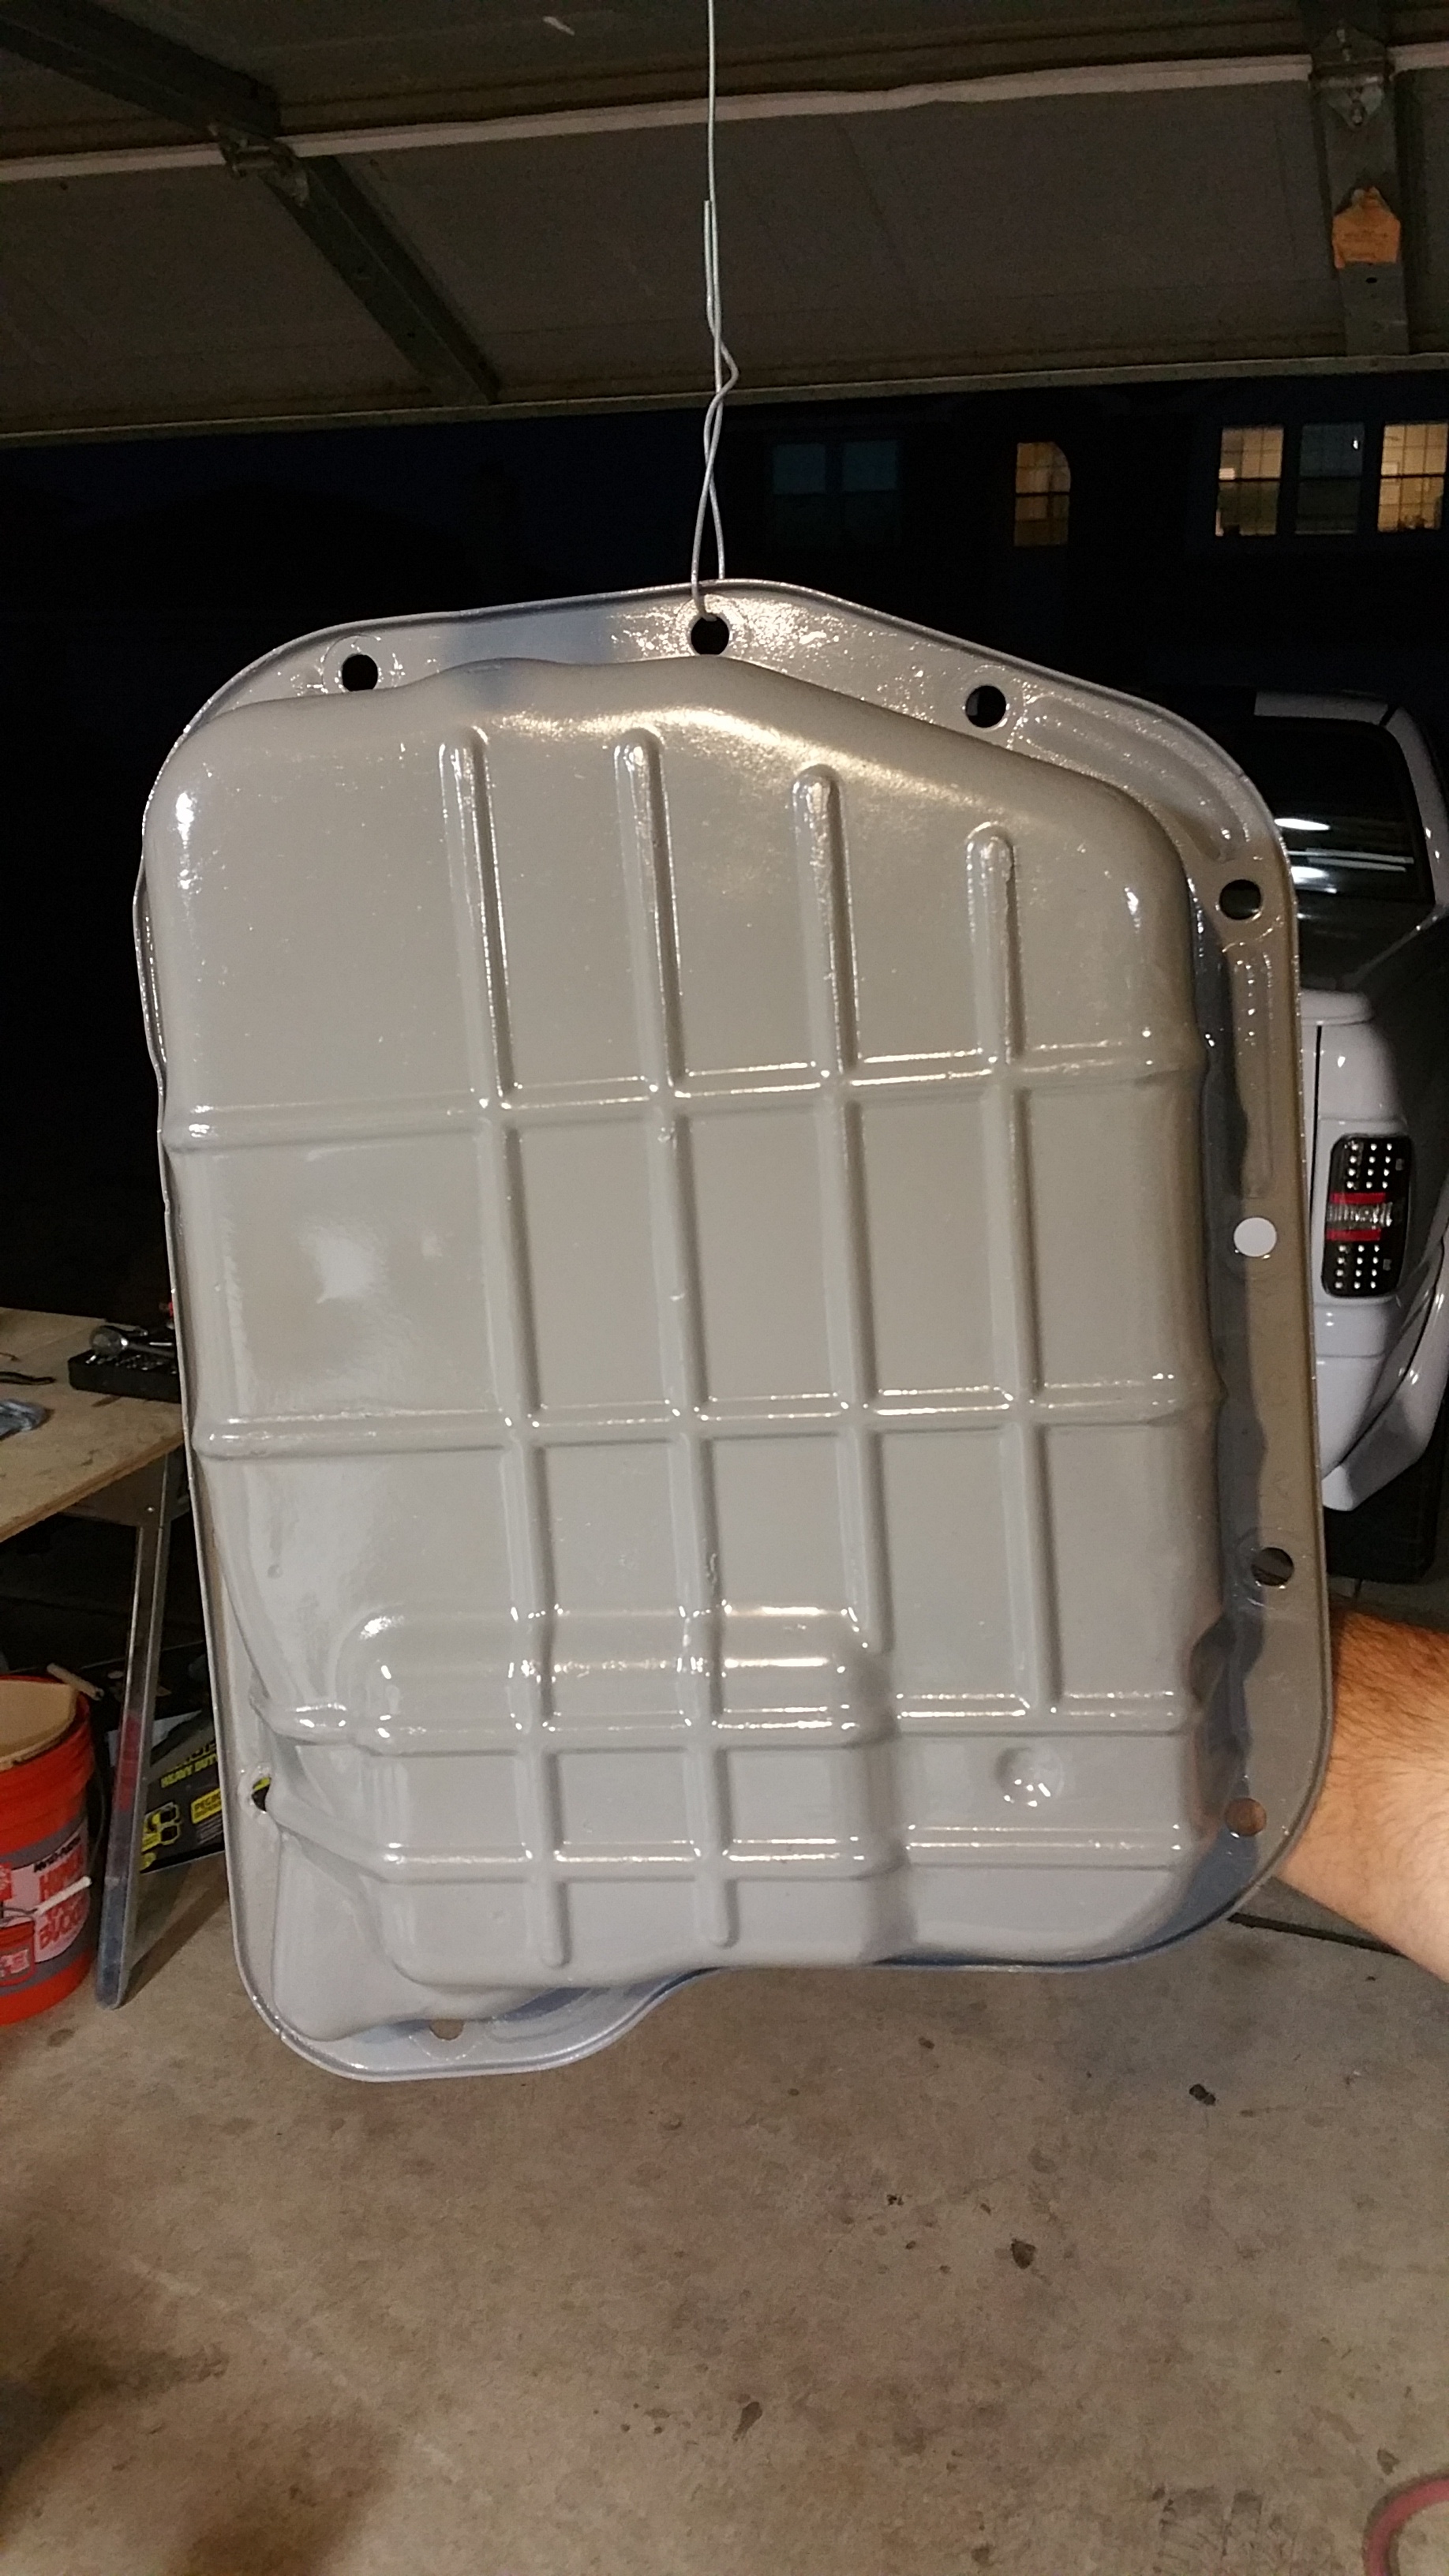
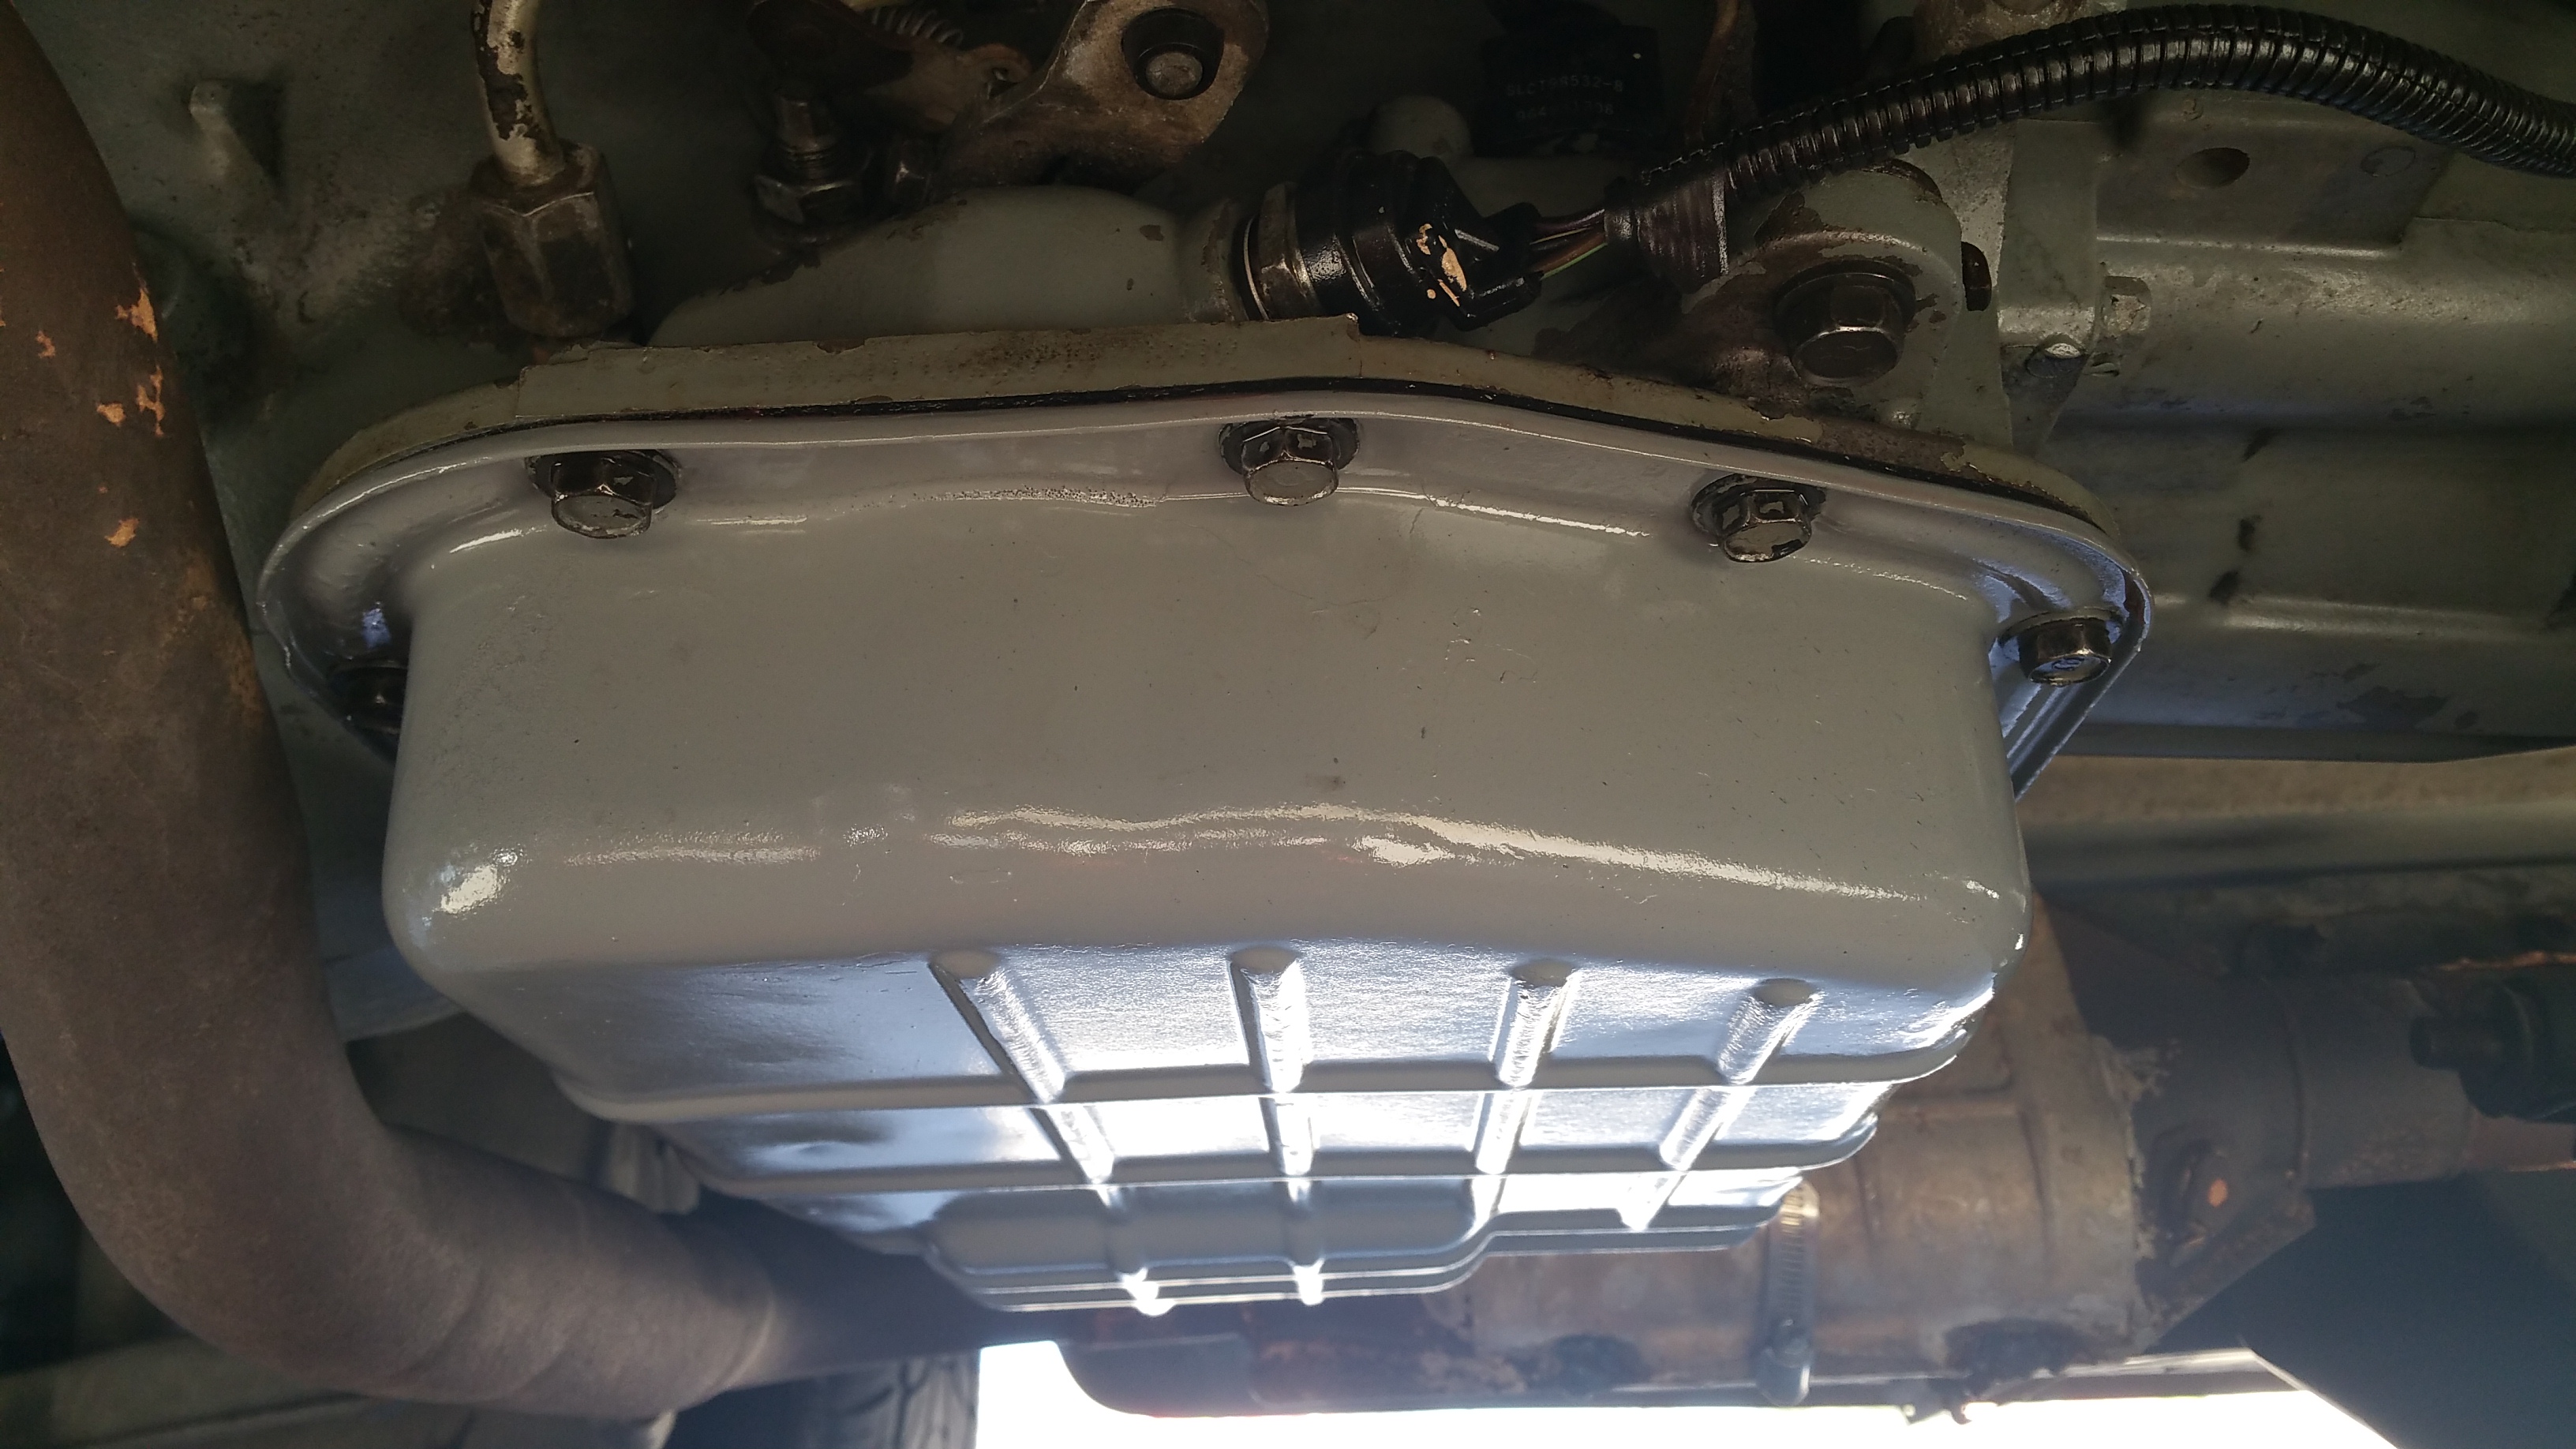
Pan got stripped, primed 2 coats high temp, 2 coats color epoxy high temp, 1 coat of epoxy clear just for safe measure.
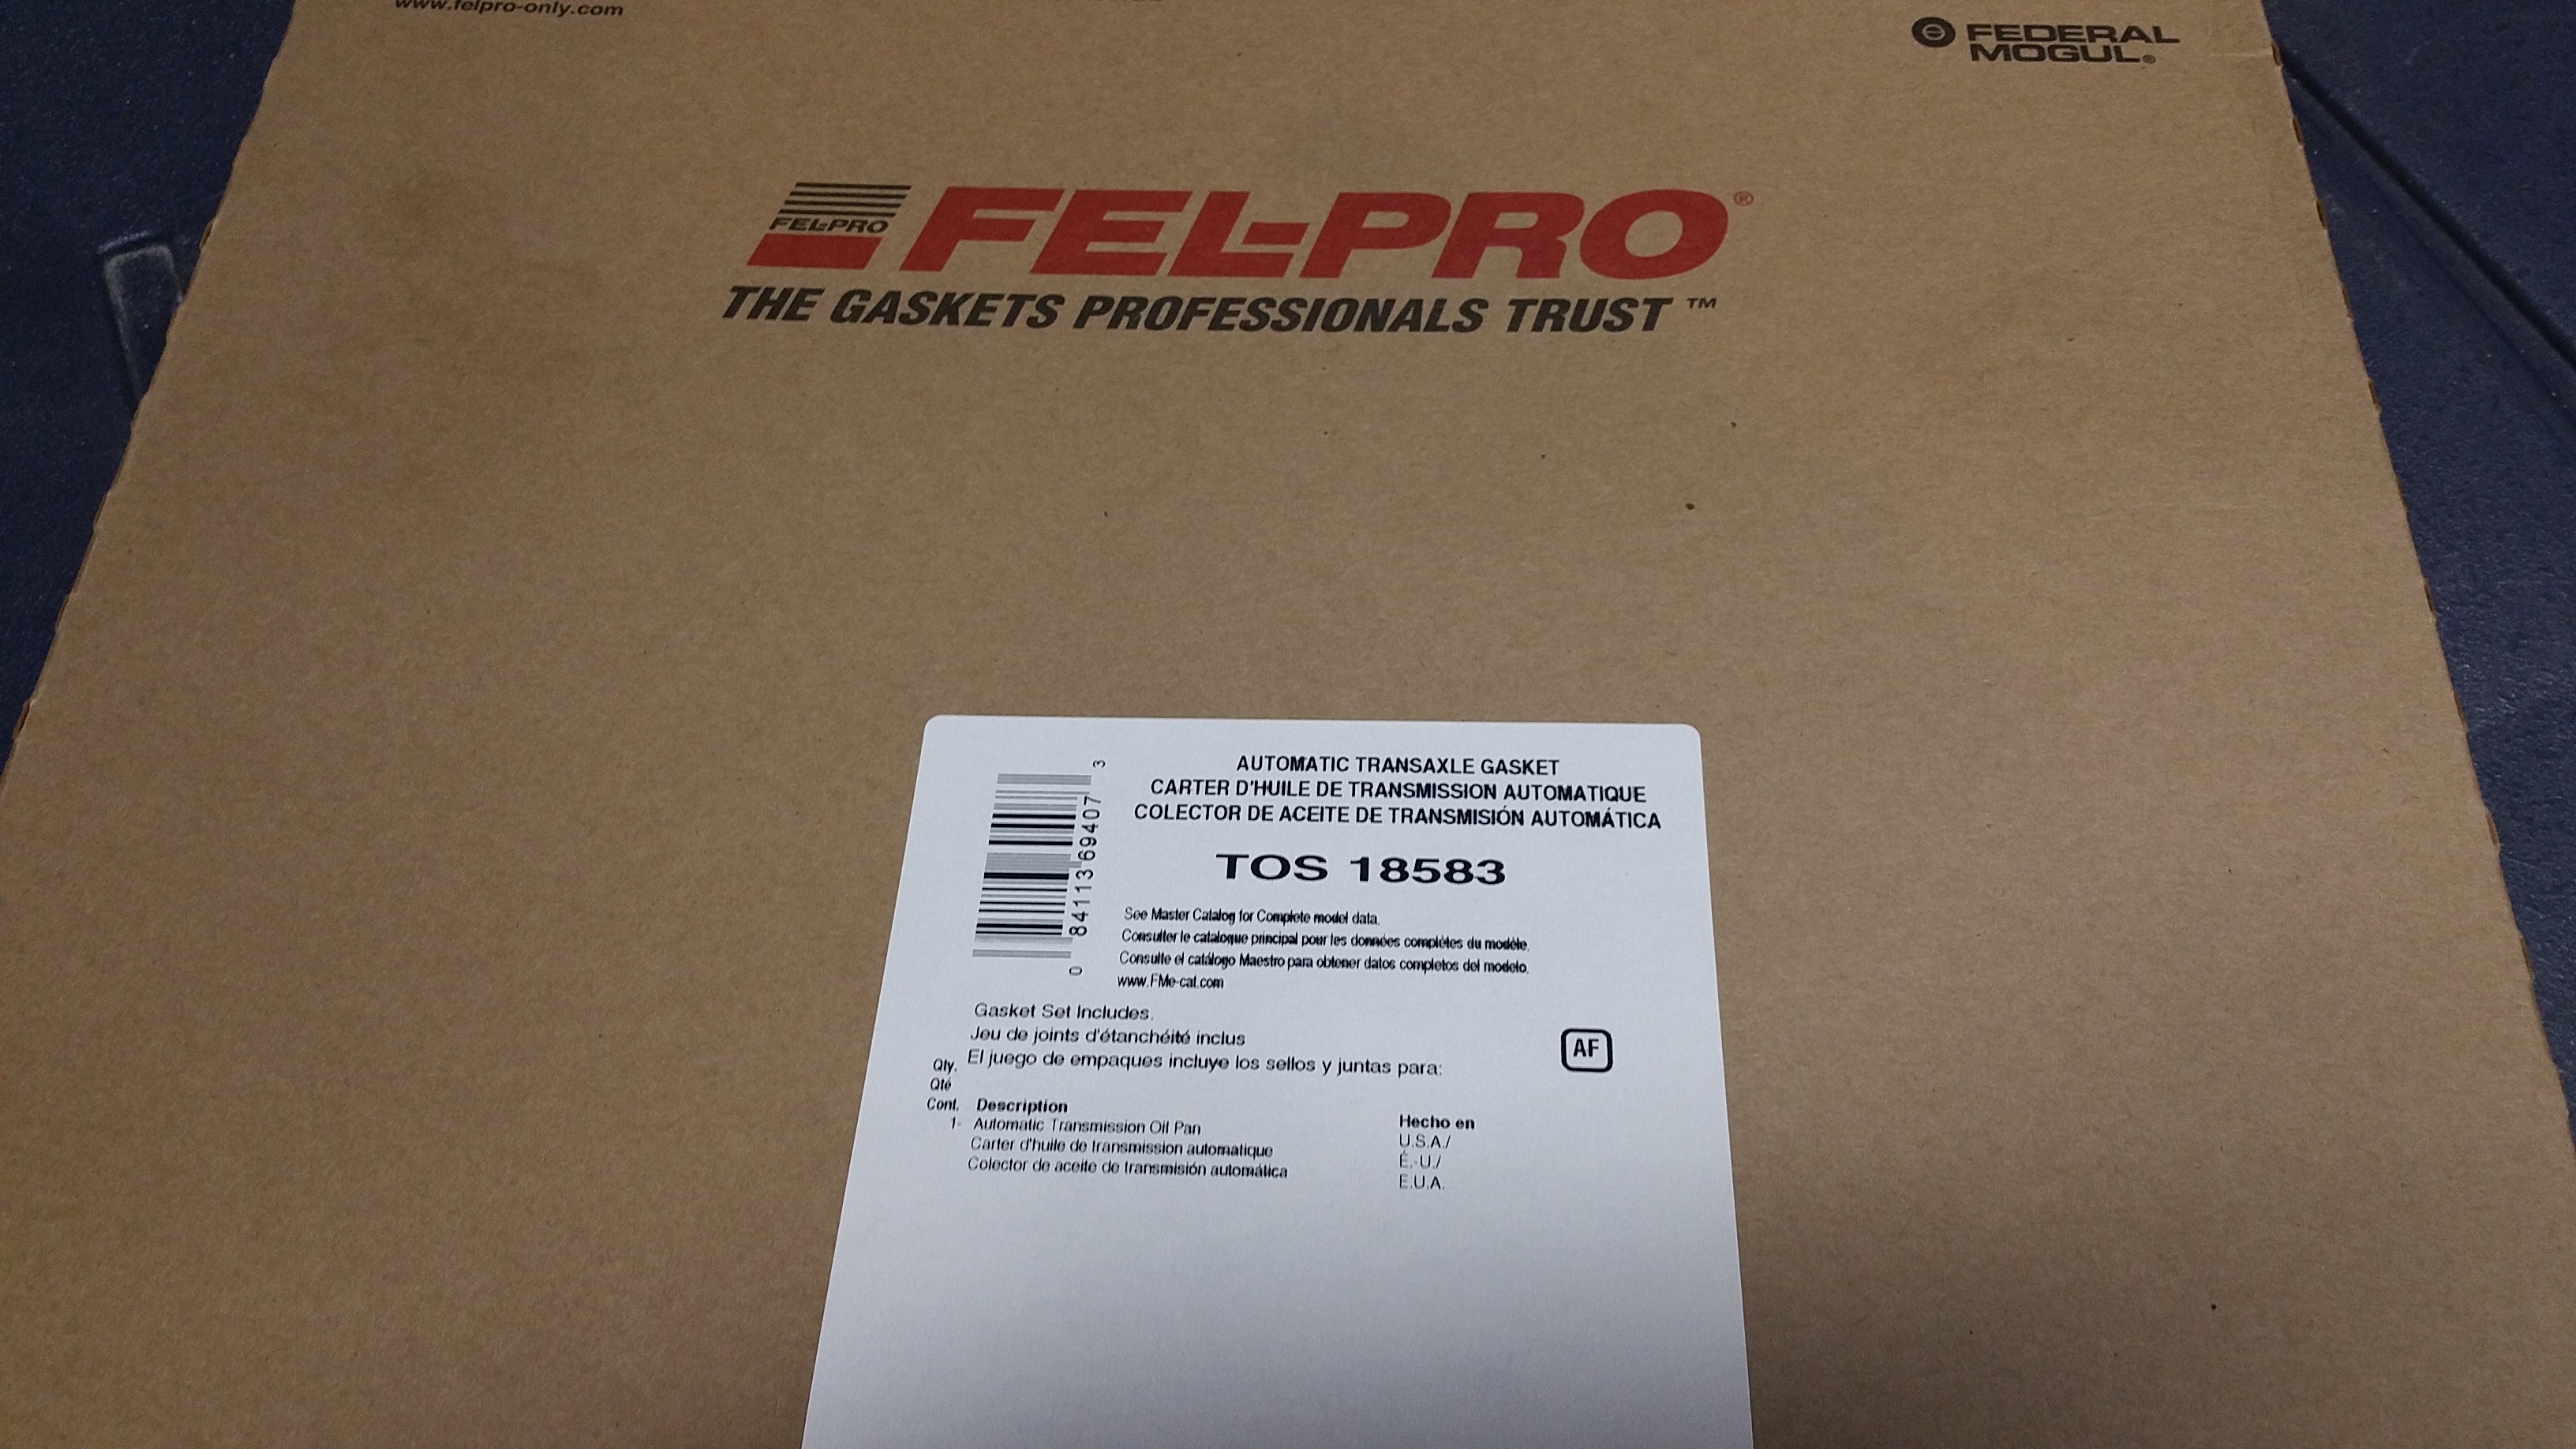
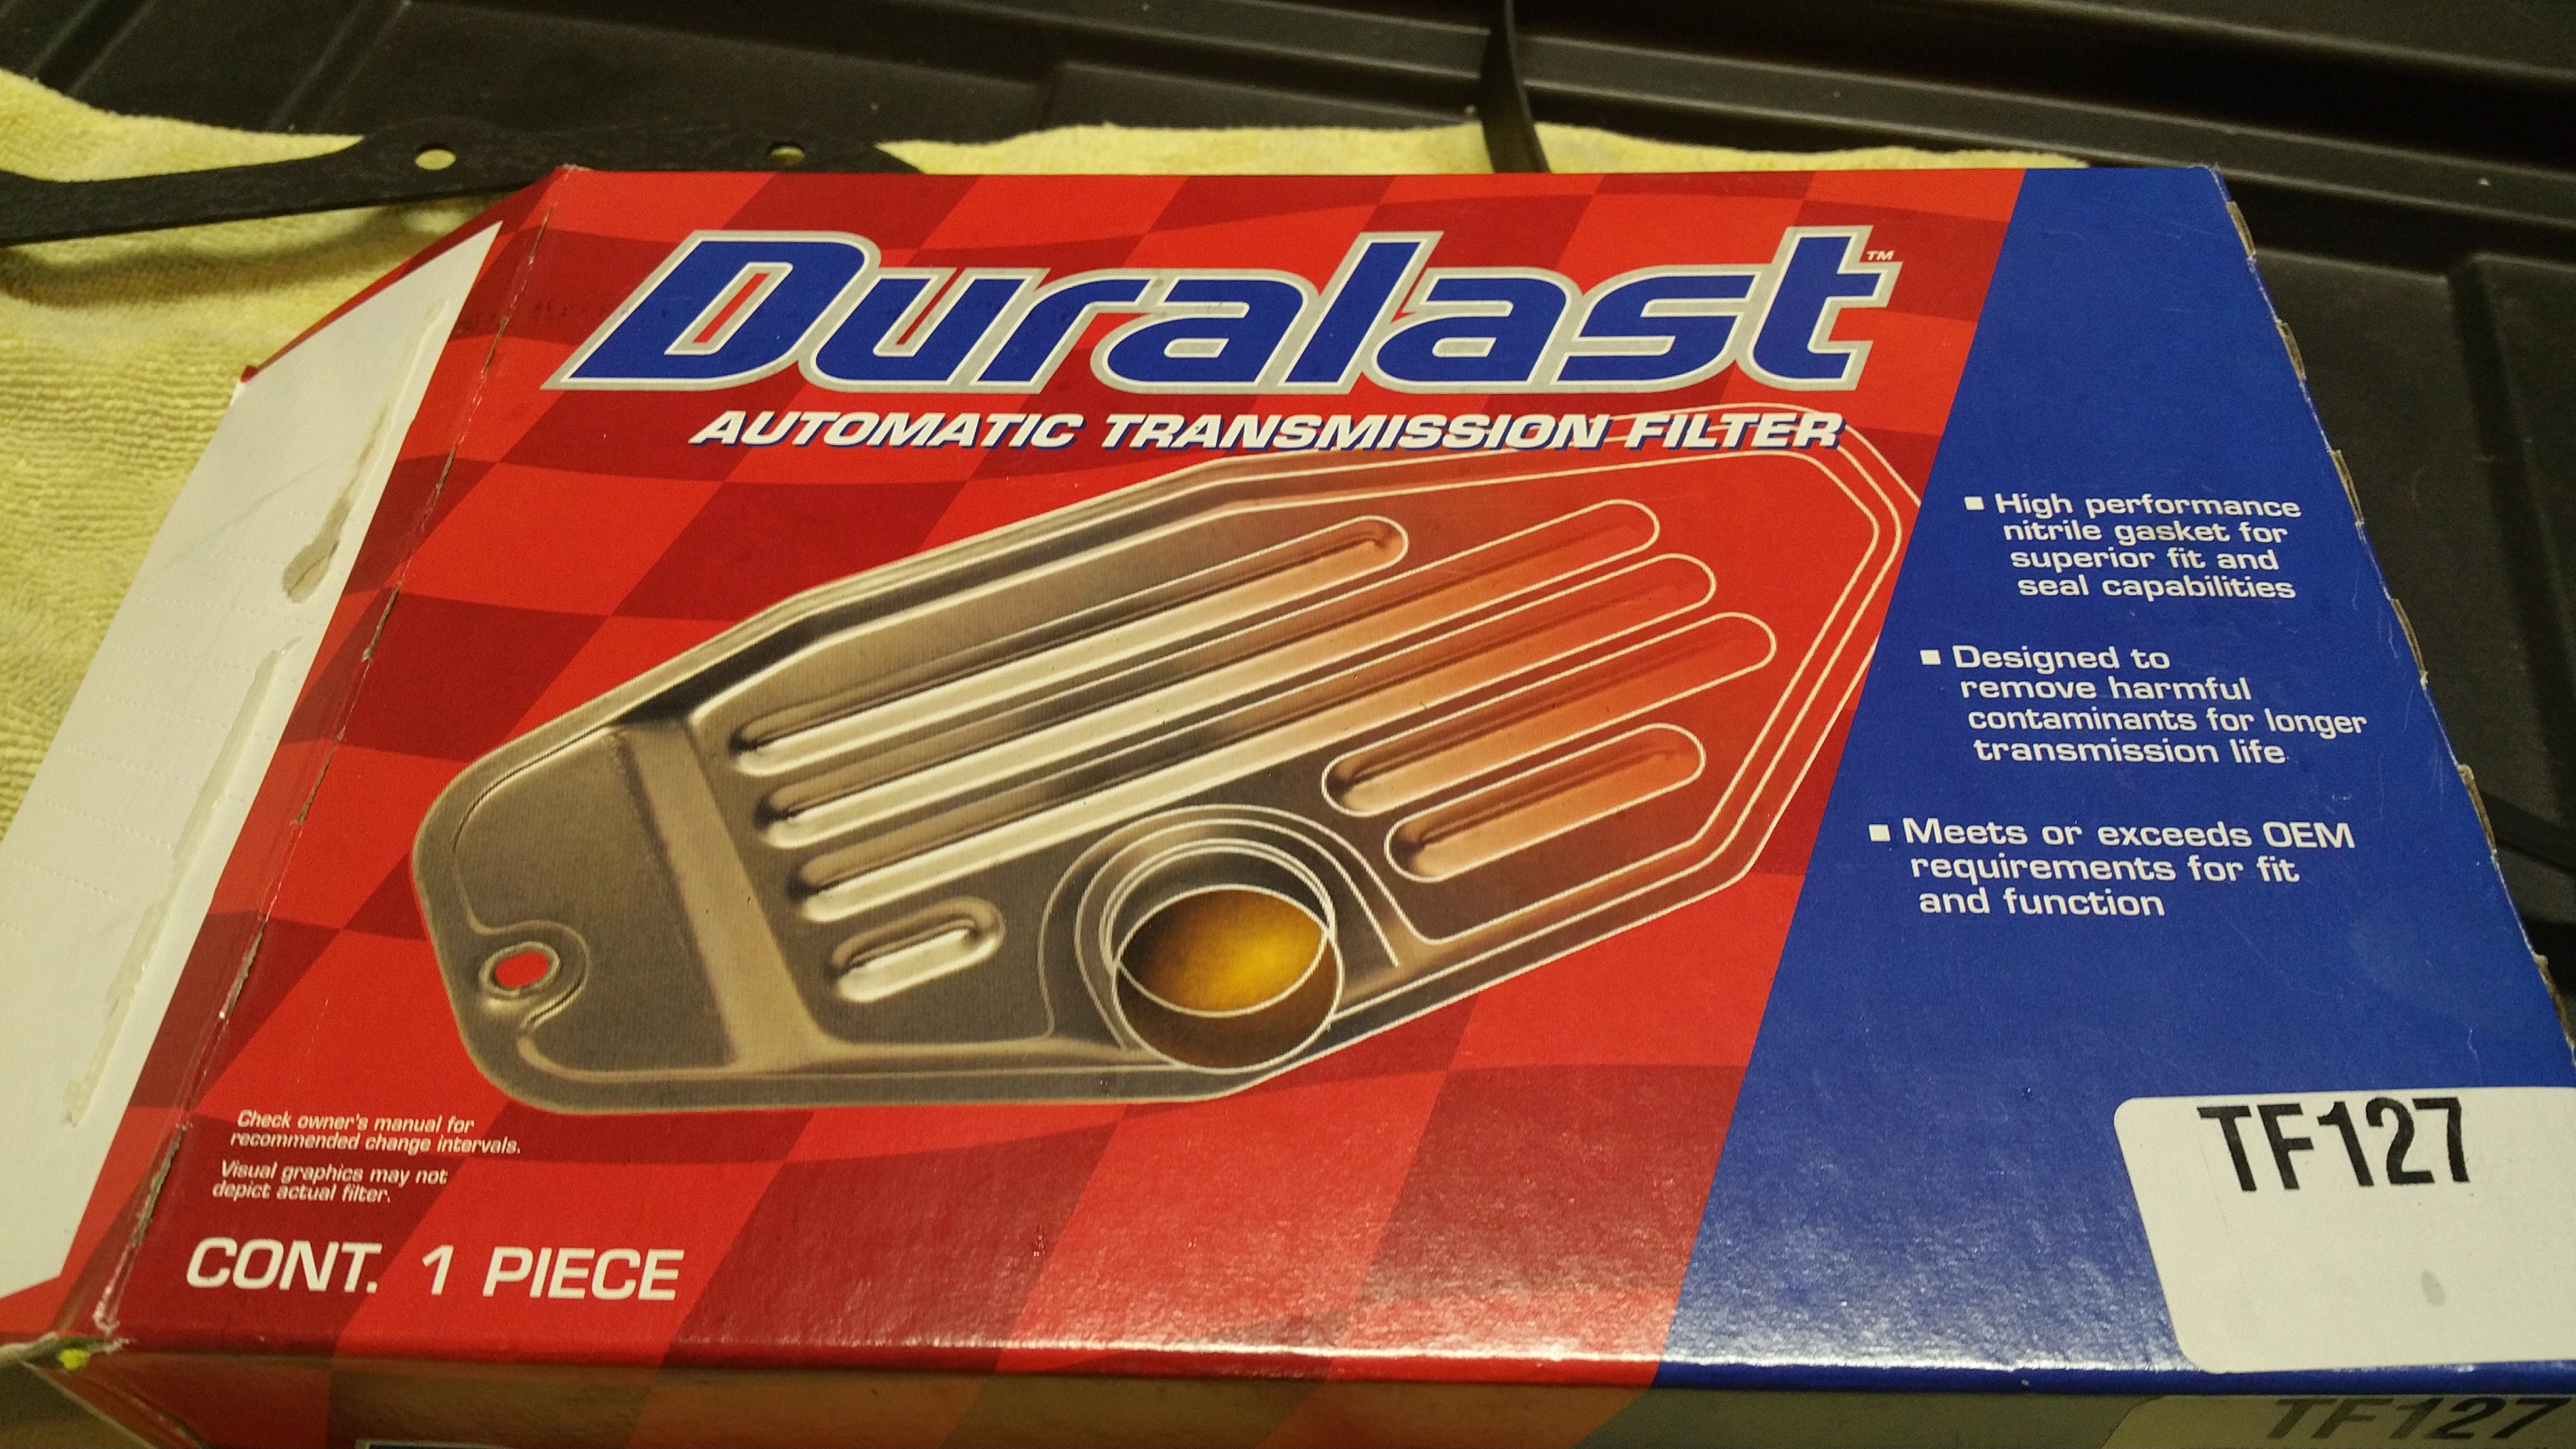
Then came the gasket. I had originally bought just a felpro gasket a few weeks back when I developed the leak. Then I need ATF and a new filter. Used AZ for parts. The duralast filter came with rubber gaskets. The felpro was twice as thick but a different type of gasket, didn't seem like cork, didn't seem like rubber, not sure what its made of but I used the gaskets from the filter box last time and they failed so I decided to go with the felpro one this time.
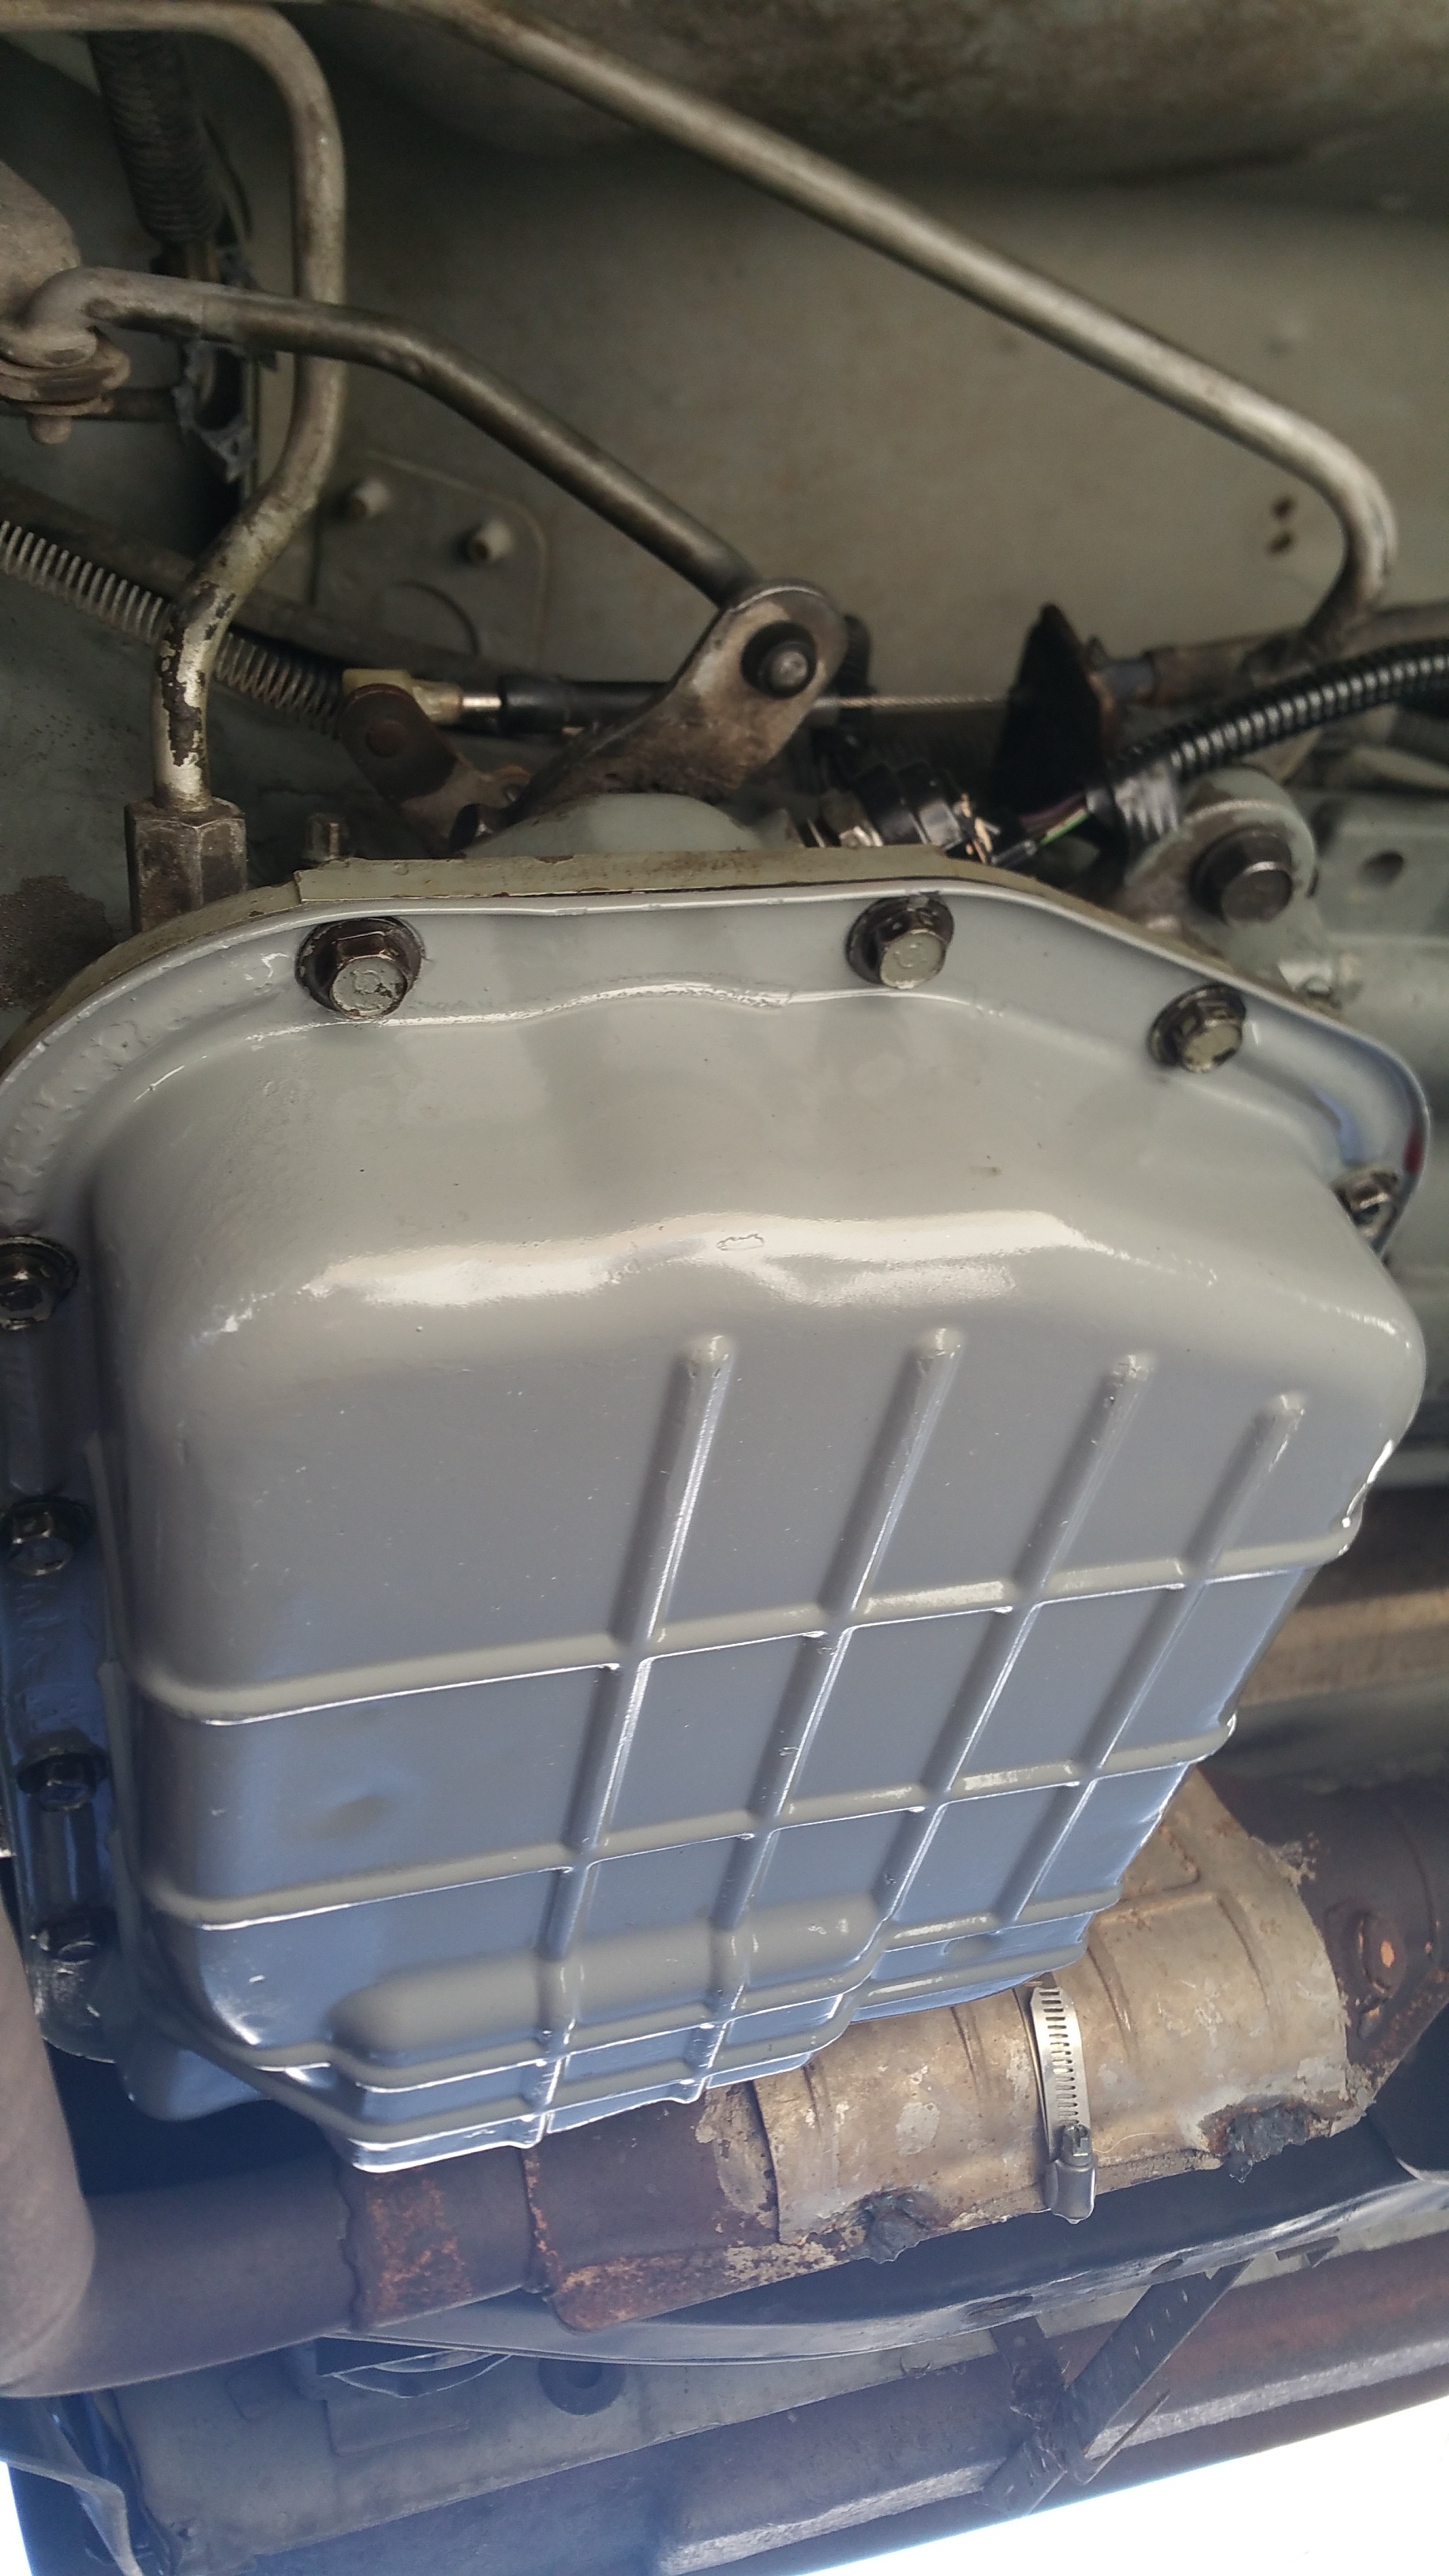
Final product installed.
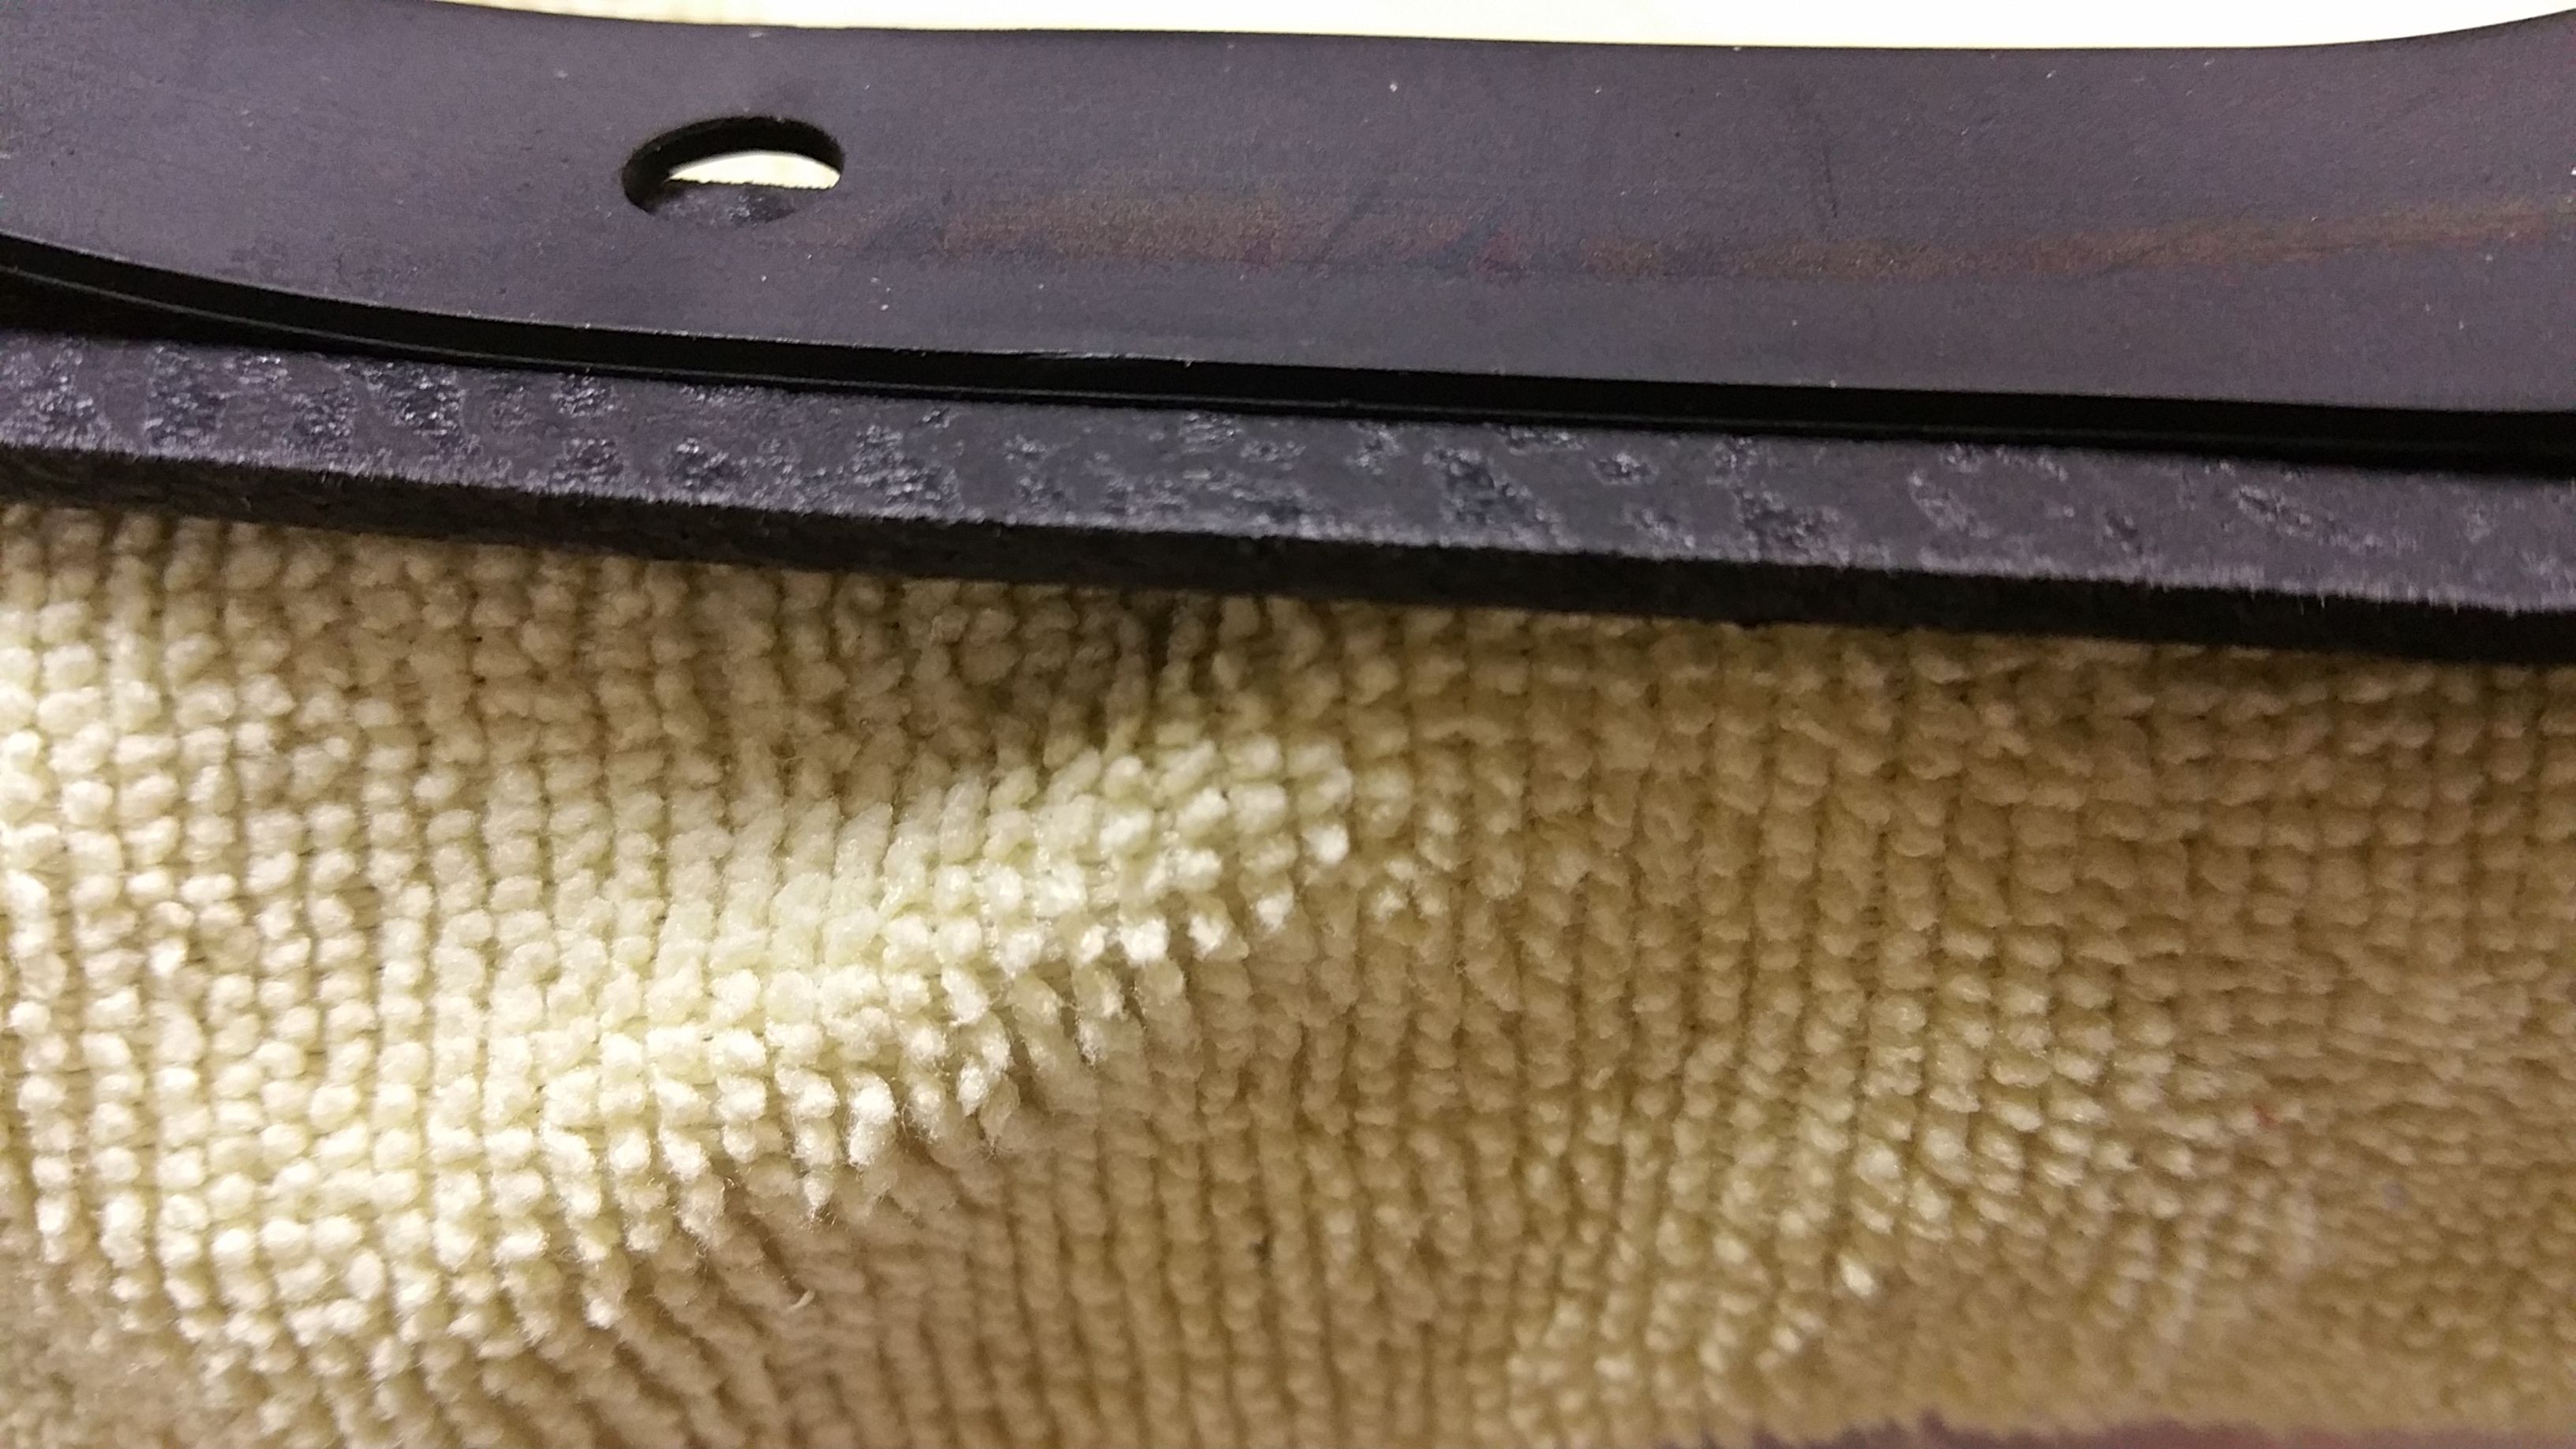
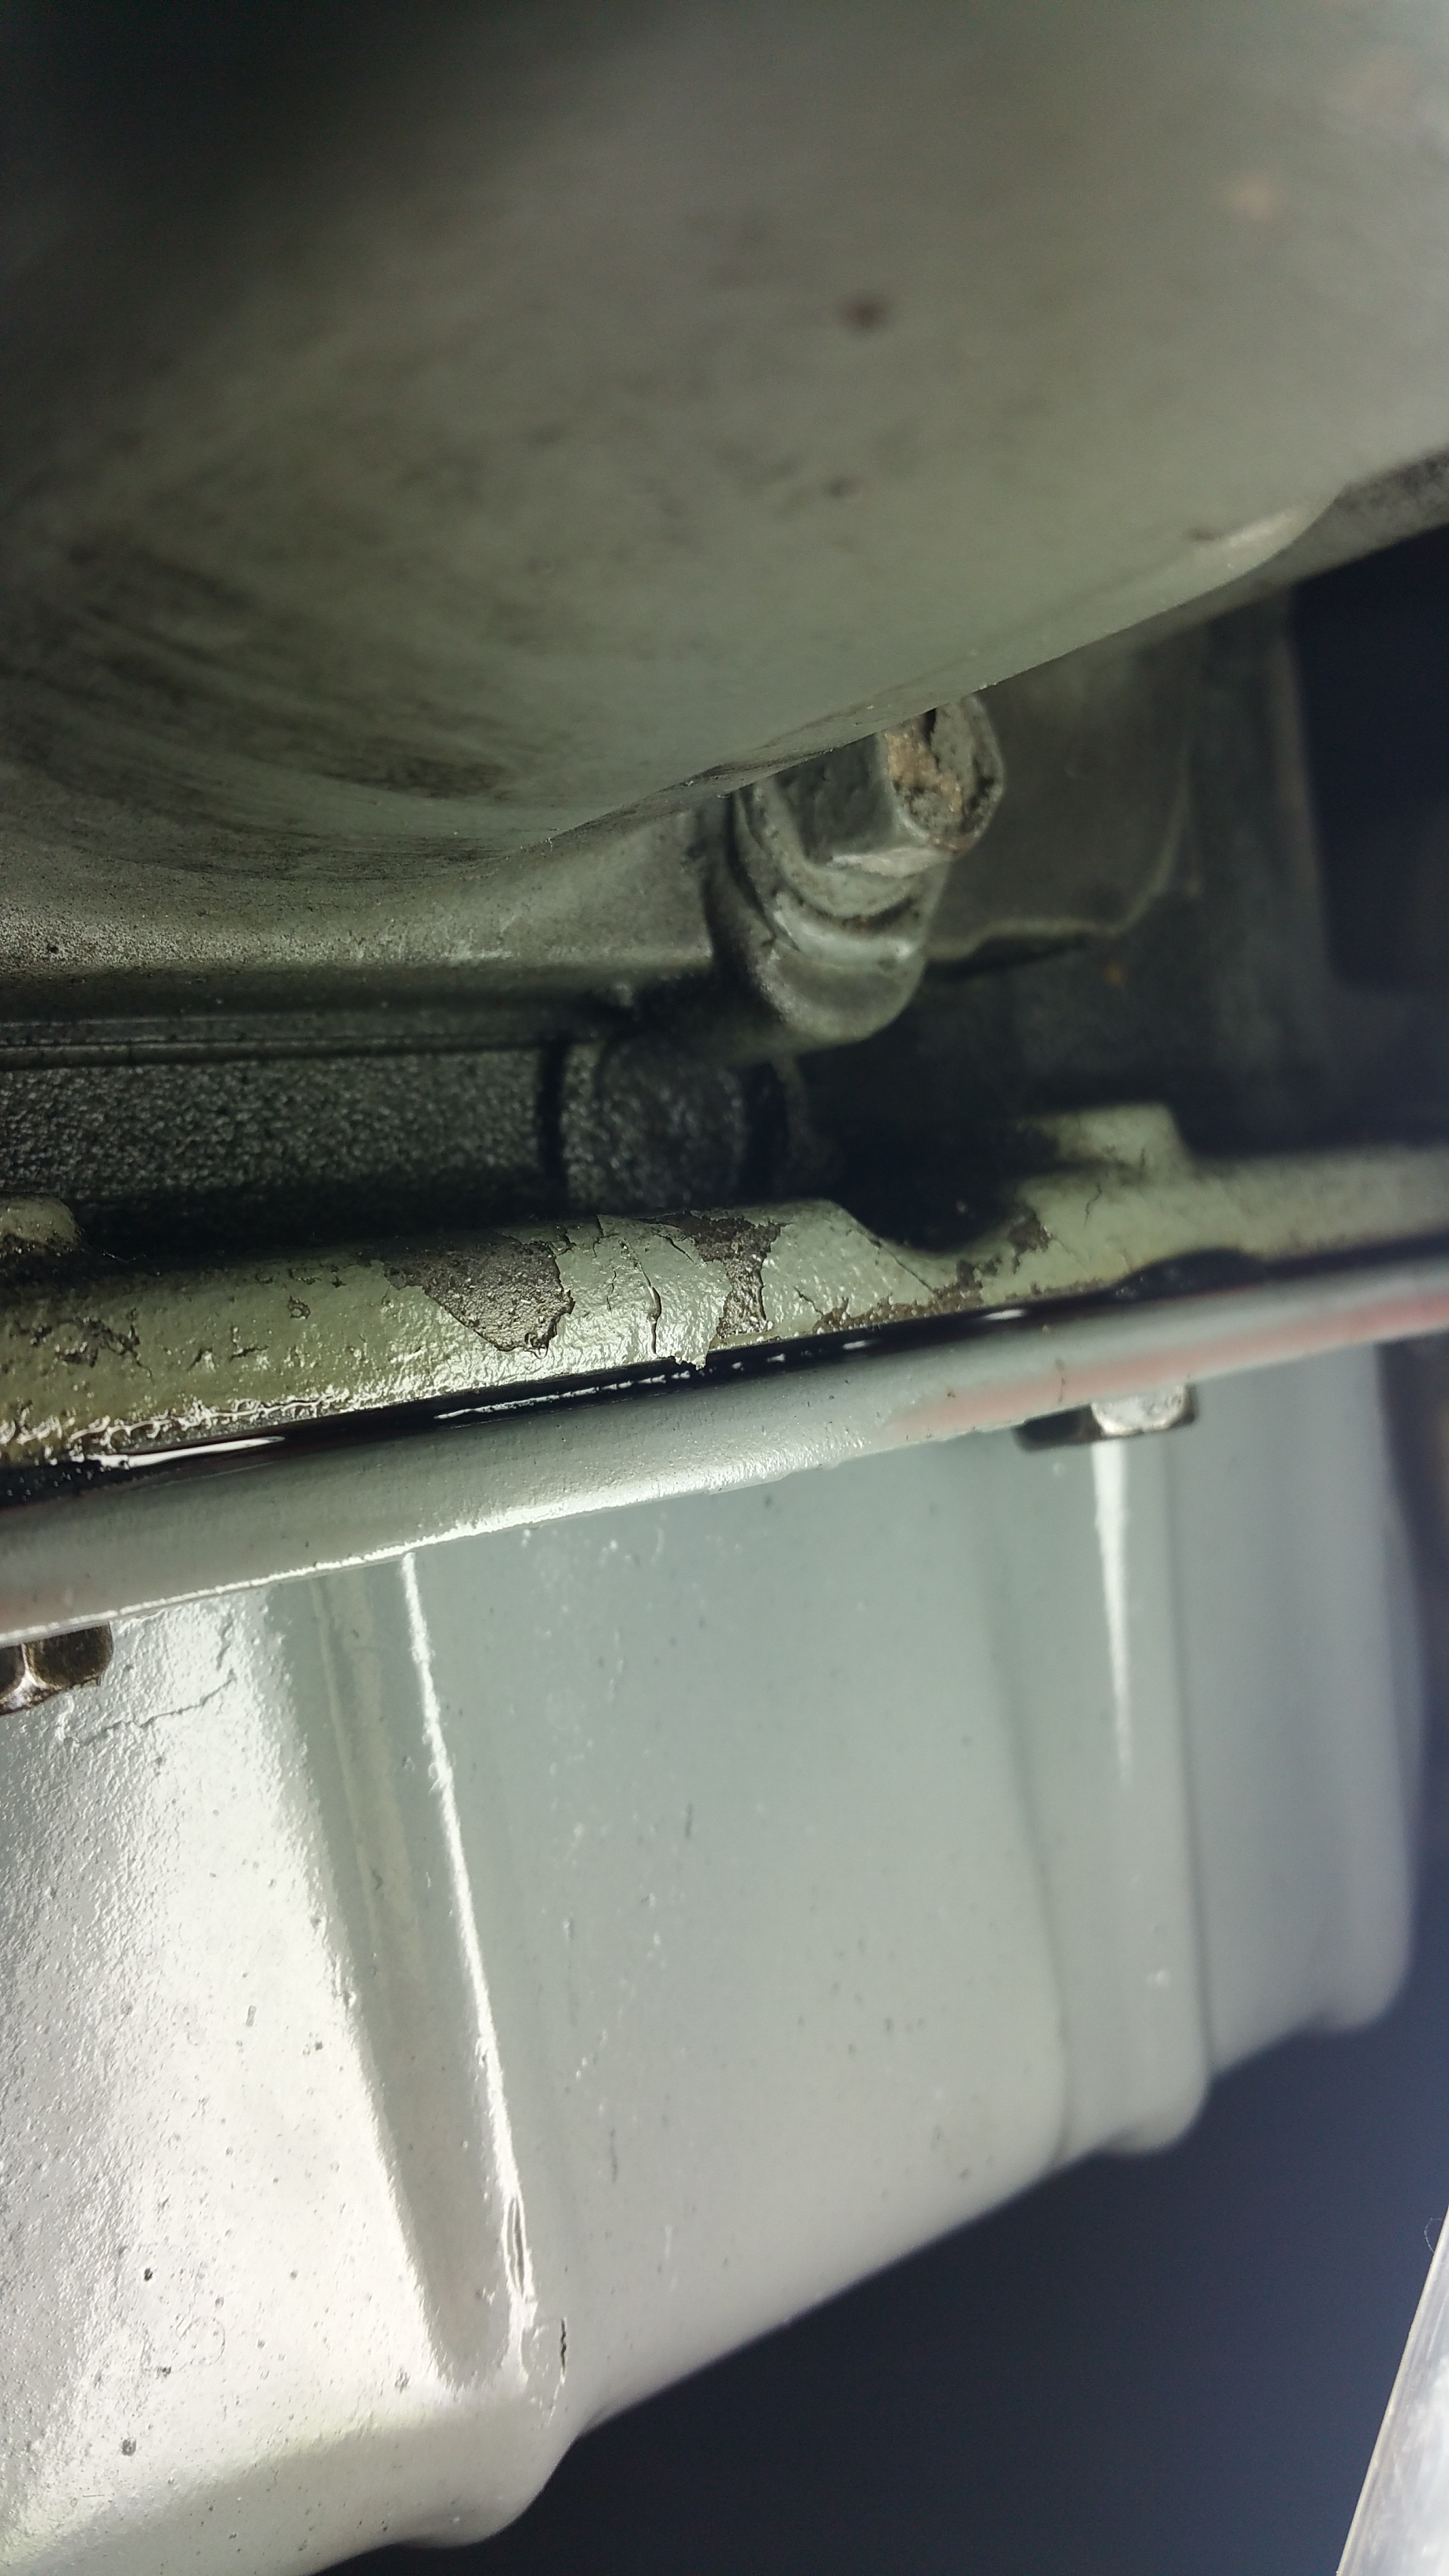
And here I hope you can see the gasket being sucked in after just a couple of quick short drives. I am probably going to have to pull the pan again and redo the gasket. I am already seeing a drip on one of the bolts under this area...

So I dropped the pan and 2 years later it looked the same, bit of metal, not much, pretty small flakes here and there, magnet had all the fine dust like material. Not worried still. I got her all back together with a new filter again, adjusted the bands, and cleaned and painted up the pan. Long story short, I think it going to start leaking again.
For fear of filling it too full I only put 3 quarts in after I was done and fired it up, shifted through the gears slowly, then drover around a bit. Got back it was low. I ended up putting 4 quarts in and it was perfectly filled. What I think happened though was that while it was too low, it created a vacuum or suction that pulled some of my gasket in... Yeah, go figure. Guess is what sucking for more ATF and it didn't have enough with just 3 quarts and I screwed myself.
Pics:
Magnet and pan looked decent.


I tore apart the old filter and had a look inside, just dust no flakes, very happy, but you can see the dark spots on the outside it was filtering, same material that the magnet has attached.


I banged out the pan a little in spots I thought needed it.

Made a happy filter with date for next time.

Adjusted the bands. First I did the outside band, tightened to 72 inch pounds and backed off 2 7/8". Put a mark on my socket for guide. That helps.

Then the inside band, 72 inch pounds in, backed off 2 turns.


Pan got stripped, primed 2 coats high temp, 2 coats color epoxy high temp, 1 coat of epoxy clear just for safe measure.


Then came the gasket. I had originally bought just a felpro gasket a few weeks back when I developed the leak. Then I need ATF and a new filter. Used AZ for parts. The duralast filter came with rubber gaskets. The felpro was twice as thick but a different type of gasket, didn't seem like cork, didn't seem like rubber, not sure what its made of but I used the gaskets from the filter box last time and they failed so I decided to go with the felpro one this time.


Final product installed.


And here I hope you can see the gasket being sucked in after just a couple of quick short drives. I am probably going to have to pull the pan again and redo the gasket. I am already seeing a drip on one of the bolts under this area...


#29
01-31-2017, 03:16 PM

Professional
Join Date: Nov 2016
Location: St Louis
Posts: 127
Likes: 0
Received 0 Likes
on
0 Posts