Dodge Ram 2002-2008: How to Replace Radiator
The radiator is tasked with the job of exposing hot coolant from the engine to air flow found near the grille. Orifices inside of the radiator are small and can clog easily. On the ends of the radiator are plastic tanks that can crack due to impact and vibration, making replacement of the radiator mandatory.
This article applies to the Dodge Ram 3rd Generation (2002-2008).
The radiator uses aluminum fins coupled with many rows of tubing to transfer the engine coolant's heat to the atmosphere. As the moving air passes over the tubes, heat is carried away. Coolant enters and exits the radiator from the plastic end tanks on the sides of the radiator.
When the wrong coolant is used or coolant is not changed in the recommended service interval, corrosion can take place inside the radiator, This can cause internal leaks and clogs. Plastic end tanks are susceptible to cracks, especially near the radiator cap. Any crack along the plastic tanks will cause a loss of coolant and system pressure, making the radiator unusable.

Materials Needed
- Radiator
- 3-4 gallons of 50/50 mixed coolant (use HOAT (Mopar) coolant if that is what your truck has installed)
- Socket set (8mm-19mm)
- Ratchets (3/8" and 1/2")
- Pliers (channel locks and hose clamp type)
- 10mm wrench
- 3/4" wrench
- Flat head screwdriver
- 3" and 5" ratchet extensions
- Drain pan
- Electrical tape (optional)
Step 1 – Disconnect battery and drain coolant
Remove the negative (black) cable with a 10mm wrench. Place the cable in an area it cannot accidentally contact the battery, or wrap the cable with electrical tape.
Then, place a drain pan under the radiator. At the bottom corner of the driver's side of the radiator is a drain. Turn the plug counterclockwise with a 3/4" wrench.

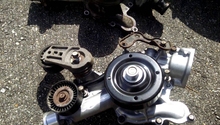
Step 2 – Remove recovery bottle and other components
You will need to remove the recovery bottle, windshield washer fluid reservoir, viscous fan, and the fan shroud. Refer to the Related Article: How to Replace Water Pump for the removal and install procedure of these parts. Note that some year models have four bolts holding the fan shroud to the radiator instead of two.
Instead of removing the entire fan clutch assembly from the water pump, you can also choose to unbolt the fan from the fan clutch. The fan shroud does not have to be completely removed. Instead it can be tilted forward and out of the way.
Step 3 – Remove transmission and power steering coolers
Remove the transmission and power steering coolers from the radiator.
At the bottom of the radiator mounts the power steering cooler. It is held in place by two bolts at each end of the cooler. Access to the bolts is easier from the bottom of the truck.
At the middle of the radiator on the front side is the transmission cooler. Three bolts with 1/2" heads hold it in position. These bolts can be accessed from the top or bottom. Once you have the transmission cooler removed, you will see the cooler lines running alongside the passenger's side of the radiator. These are held to the radiator by plastic clips. Pull the lines away from the clips and they will snap free.
You can use some wire to keep the coolers from hanging on the lines.

Figure 2. The small red circles indicate the three bolts holding the transmission cooler to the radiator. Ignore the larger red circle. 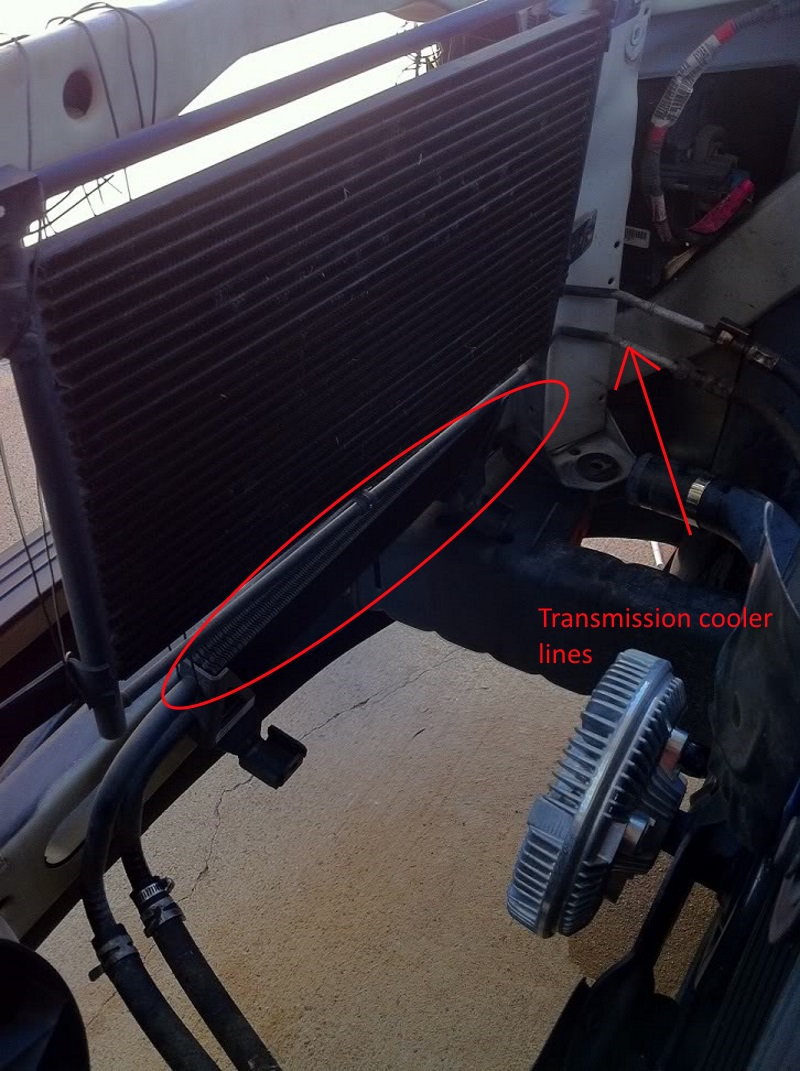
Figure 3. The power steering and transmission cooler lines are identified.
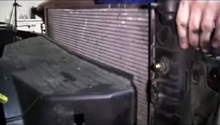
Step 4 – Remove the radiator and transfer components
At this point the radiator can be lifted out of the engine bay.
On the old radiator mounting tabs for the transmission cooler you will find metal clips. Remove these clips and place them in the same location on the new radiator. You will find a small metal tab that needs to be pried up to remove them. There are also rubber bushings that fit between the radiator mount flanges and bumper beam.
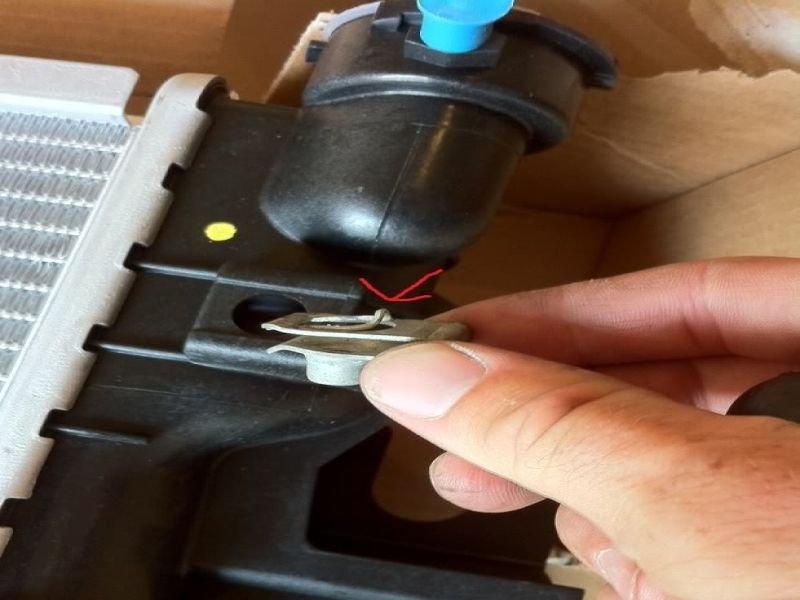
Figure 4. Pry the metal tab as indicated by the red arrow. 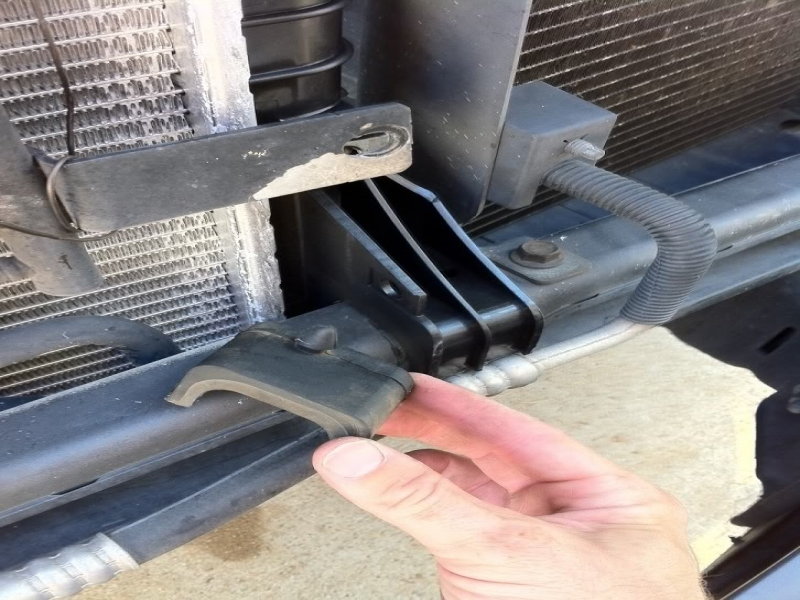
Figure 5. Installing the rubber radiator bushings.
Step 5 – Finish the installation
After you set the new radiator into position on the truck, re-install the components in the reverse order of removal. Remember to connect all coolant hoses and electrical connectors.
Once everything is bolted back into place, again refer to the how-to article listed in Step 2 for the cooling system filling and bleeding procedure.
Featured Video: Dodge Ram Radiator Change
Related Discussions
- Replacing the Radiator - DodgeForum.com
- Some Questions on Replacing Radiator - DodgeForum.com
- Dodge Ram 1500 Radiator Replacement - DodgeForum.com