
DIY: Installing Remote Start on Your 4th-Gen Ram on a Budget

Simple DIY using an eBay kit adds remote start to your Ram with the factory key for far less than a dealership’s price.
Remote start is available on pretty much every new Ram truck and it has been offered as an option since the fourth generation, but it wasn’t as common of a feature on those older models. You can have your fourth gen Ram 1500 up-fitted with remote start by your dealership, but it will cost you somewhere in the area of $500.
Fortunately, this simple DIY written up by forum member “rengnath” shows you what kit to buy and how to install that kit to add remote start to your 2013 Ram for far less than $500. Best of all, much of the install of this aftermarket setup is plug-and-play, with only a bit of simple wire-splicing required.
Introduction
The remote start DIY for the 2013 Ram 1500 begins with the OP explaining the basic differences between the 2013 models and the earlier fourth gen trucks (2009-2012), along with including a link to the kit that he purchased for the install.
“I haven’t seen much talk about the DBALL modules here, but long story short, the Ram trucks are remote start ready and these modules can be used to remote start your vehicle with 3x presses of the lock button. There is alot of information for the 09-12 Rams out there, and all is required is a flashed DBALL module and a wiring harness if you’d prefer. This will generally run you less than $75. For 2013’s, you pay for the more expensive (and less available) harness and the ability to program with Key2Go. If you’re interested in a kit, check out the XpressKit website, download the RSR Install Guide for your vehicle, and it will give you a good idea of whats involved.
For those in the same boat as I was, if you’d like the DBALL option for you 13+ Ram, a additional install process is required called Key2Go, and it required a dealer log in. There is an eBay seller (no affiliation) that provides this access with the purchase of the kit, so you can still DIY.
For the 09-12s, there are a ton of different purchasing options you can take, including buying the module and flashing it yourself with the ~$25 xloader, or you can purchase from someone who will flash it for you, generally for free or low cost.”
The original thread also includes links, but we haven’t included all of those in this piece.
Component Installation
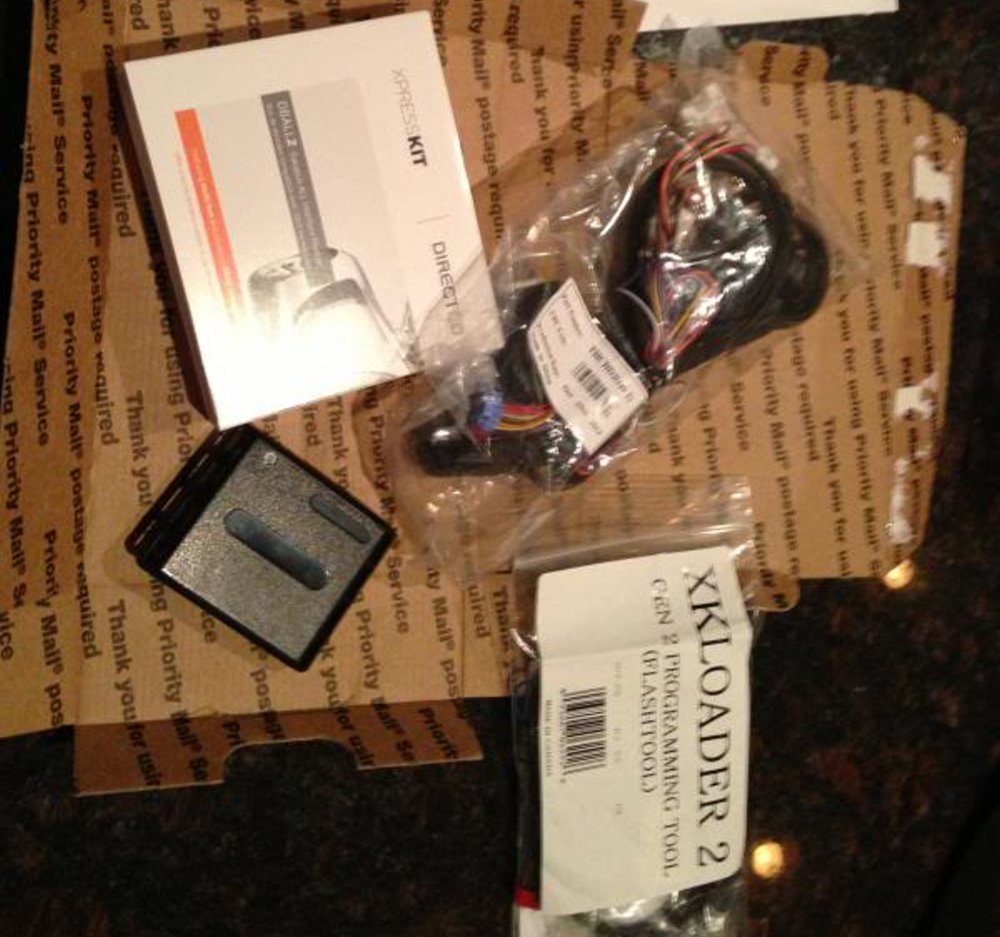
After explaining the basics of this project and walking us through the contents of the package, the OP started into the simple component installation portion of the upgrade.
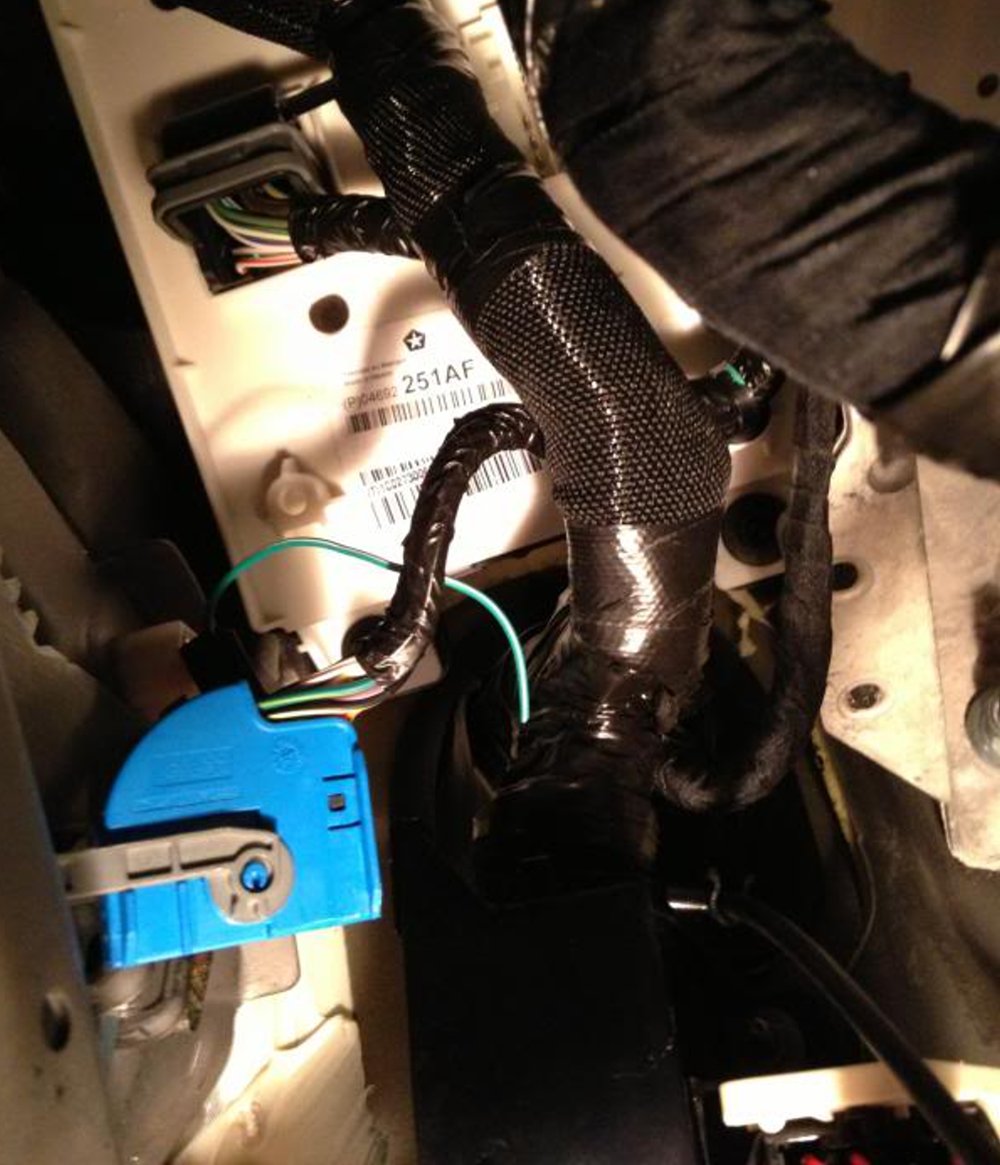
He starts by removing the plastic trim piece below the steering wheel, adding the new OBDII harness in the under-dash location of the stock plug.
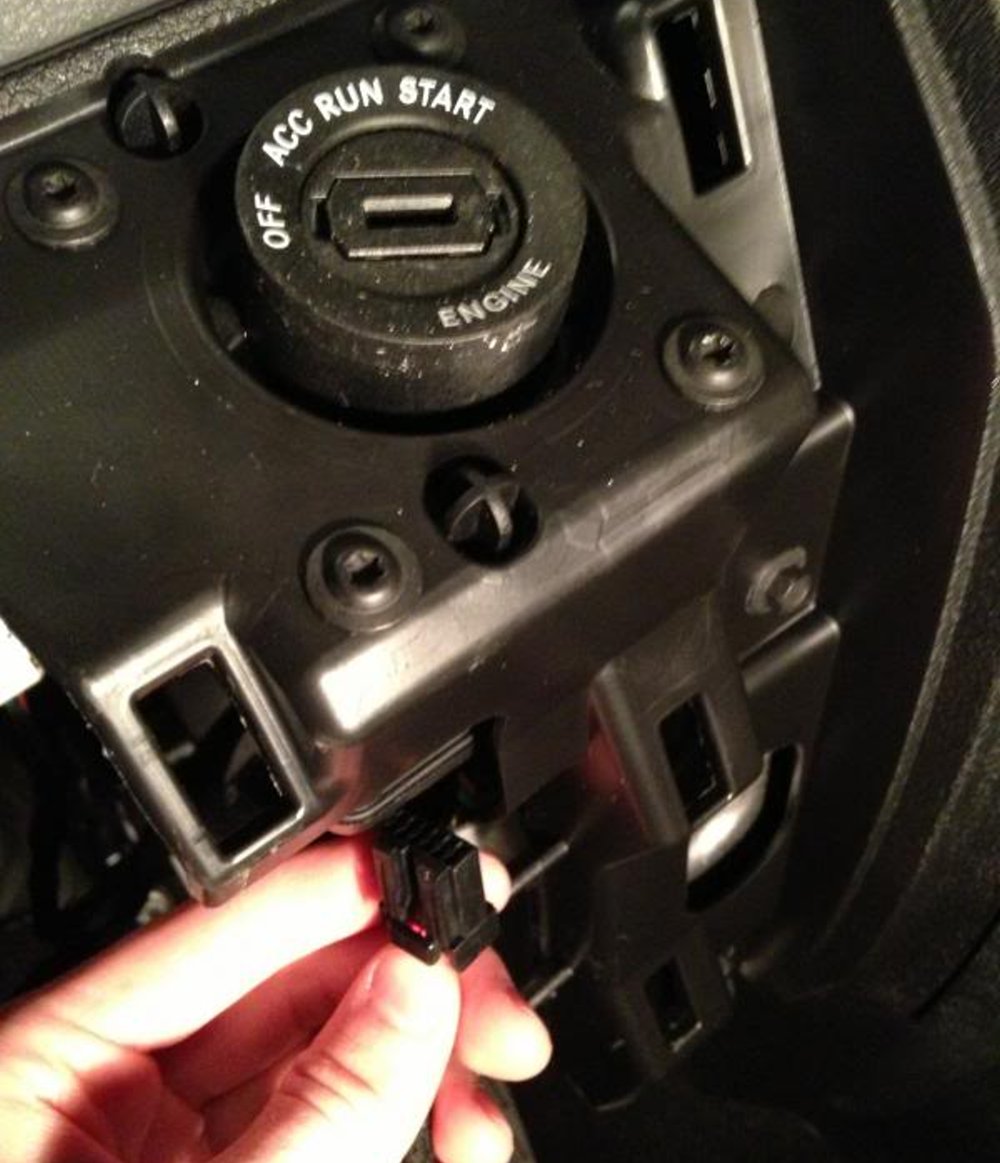
Next, the new harness runs over to the ignition harness behind the key cylinder in the steering column. Like the OBDII port, this part of the project is plug-and-play.
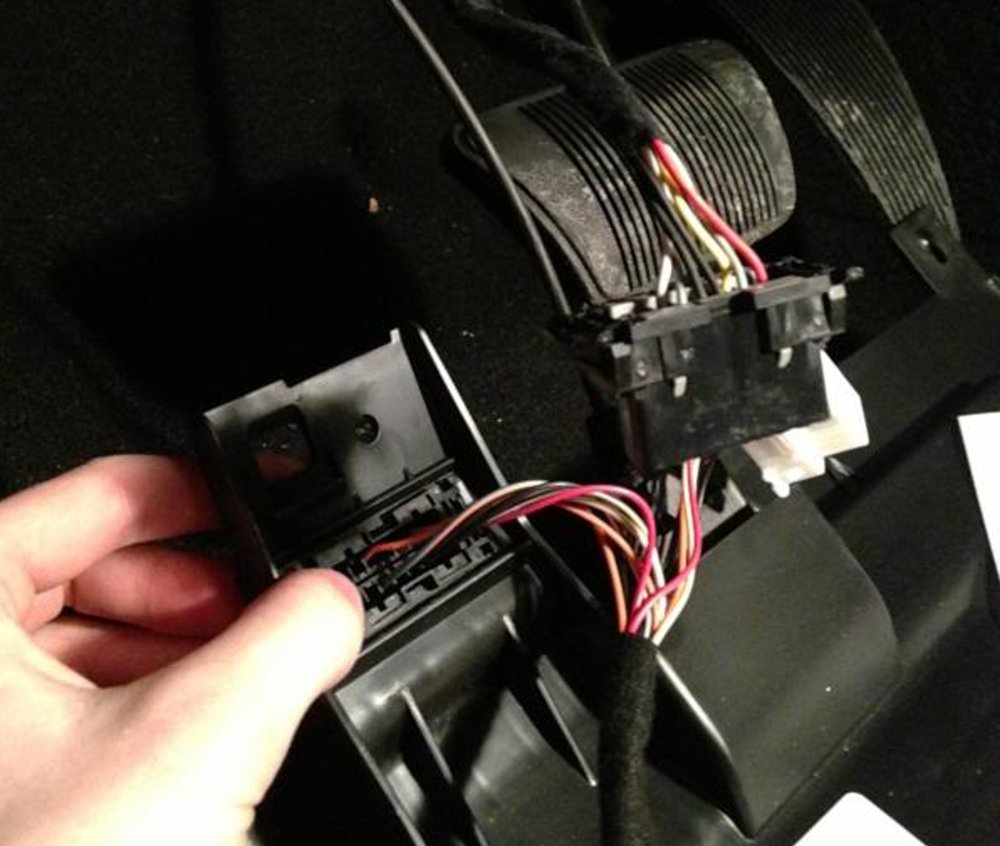
Finally, the OP disconnects to of the harnesses going to the Body Control Module (BCM) of his 2013 Ram. This is the one part of the project that requires you to tap into stock wiring rather than just plugging something in, but in addition to the directions included with the kit, the DIY thread explains how and where to connect into the stock wires.
Programming the DBall
Once you have all of the wiring plugged in and spliced up to the stock wires in your Ram, it is time for the programming portion of the project. The OP walks us through each step, right down to the login processes required to make everything work. He also points out where he had problems along the way, with pointers on how to get around those obstacles.
When completed correctly, Ram truck owners who perform this upgrade will be able to start their truck remotely with the factory key fob. Since there is no remote start button on the factory keys, this system utilizes the lock button, which starts the engine when it is pushed three times.


You must be logged in to post a comment.