


Heater core


I would love to replace the core in 3 hours or less and without having to remove the dash! Please enlighten us!!! Then again, I always throught the dash is a one piece and not multiple pieces?
Last edited by Kensai; Dec 24, 2009 at 05:02 PM.

Thread Starter
|
Amateur
Joined: Dec 2009
Posts: 33
Likes: 0
From: greensburg, pa
the dash is definitly one piece. however i have done them on rams by just sliding them back enough to get the box out. i dont see how you could do it on a d because the doors are not as long as a pick-up trucks doors. would like to know how to do it without removing the dash completly though if i have to do it again.

Record Breaker
Joined: Jan 2008
Posts: 1,163
Likes: 1
From: Upstate Ny
I started to make up a DIY, never got to finish and most of my pictures dissapeared  Im quite busy now but i will finish up the steps/add missing info/and get more pictures as soon as time permits.
This is a quick general guide, im going off what i remember and this wasnt my first time with the core removal so it may take you a little more time...
Power tools/cordless drills/air tools drasticly cut your time, have em handy (cordless drills are a must, makes cake work of the screws)
This is my 99 durango, years/models/layout may differ drasticly- I also do not have AC, it was removed and that process will not be addressed
Discconect your battery, remove airbag fuses (IF EQUIPED WITH ELECTRIC SEATS MOVE THEM AS FAR BACK AND LOW AS POSSIBLE BEFORE DISCONNECTING BATTERY)
First you start off with the removal of your center consule/cup holder- should be common knowlegde to most, the bolts/screw locations
i dont have pictures/layout but general locations come in sets of twos (Storage is four screws-under the storage two bolts-under the cup holder rubber two bolts-etc etc.
Remove kick panels (two screws per side-one under sill, other on firewall )
Remove driverside trim (above Dash on column)
Remove passenger side Oh SH#T handle and trim
Remove gauge.dash trim (Vehicle parking break on, key in ignition, lever on lowest setting, steering wheel at full tilt, just pull off)
Remove the four retaining screws from the HVAC controls and lay the unit sideways in dash (allows play in the tubing for later)
Remove Knee panel underneath steering wheel
Disconnect gear selector cable ( Comes from gauges to the steering column)
Remove the hood/ODB brace and let it hang
Remove the glove box (open, then press in on each side to pass stopper, then pull to remove lower hinge)
Remove ashtray
Remove center panel (under stereo) disconecting the rear wiper/cig/assc
In the glove box opening disconnect the stereo antenna/heater fan, also remove the plastic wire securing retainer for the light switch
Remove the center dash support and two support braces for the steering wheel
Center support (4 bolts)
left SW support (DO NOT REMOVE BOLT COMPLETELY-Just enough to remove the brace with leway)
Right SW support

Remove the two last nuts that hold up the steering wheel and let it drop down
Right side Dash support Two bolts-one ground/one support( You may have the Factory Amp in the way-mines removed)
Remove the top bols on dash (5 5/16ths bolts)
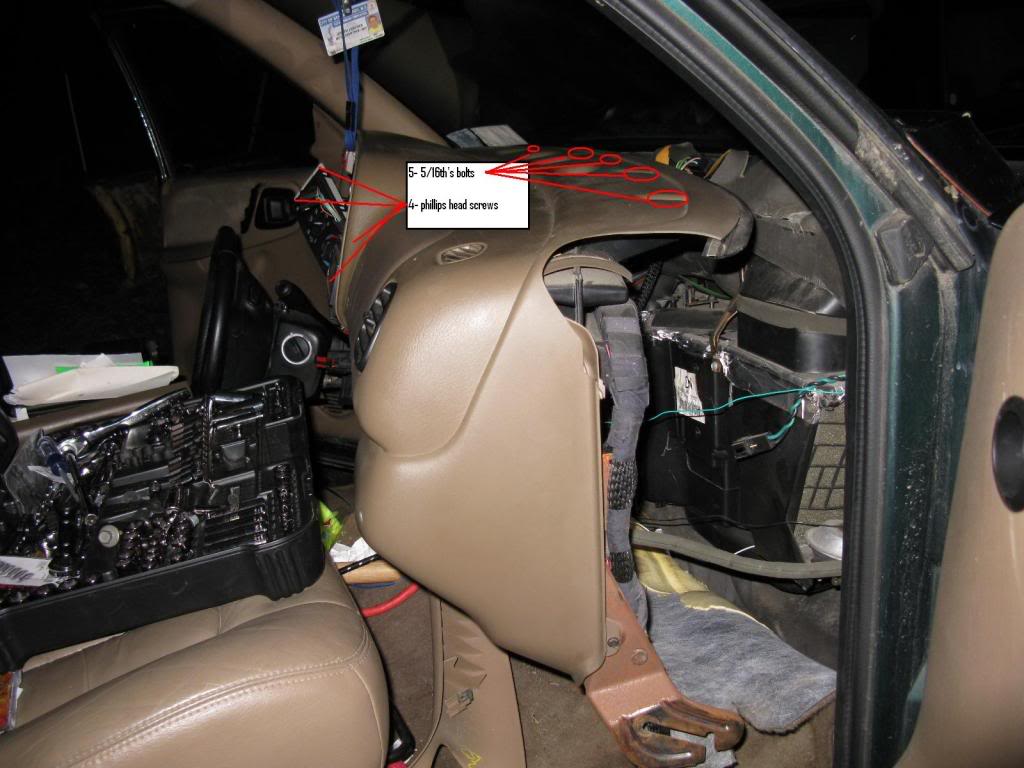
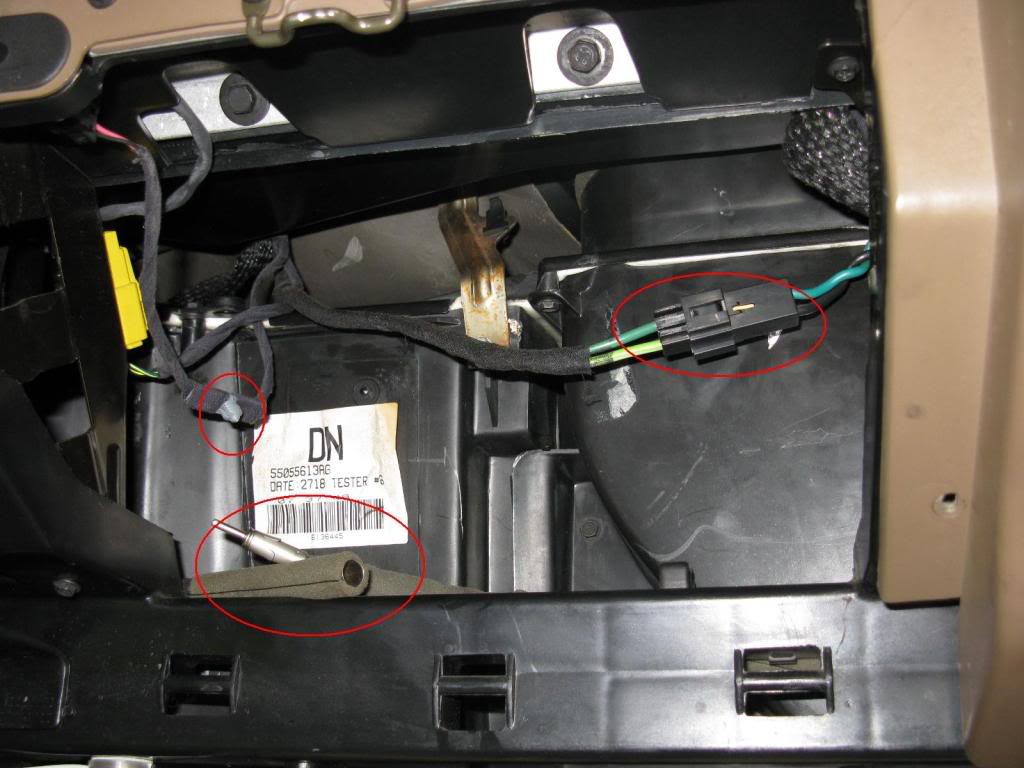
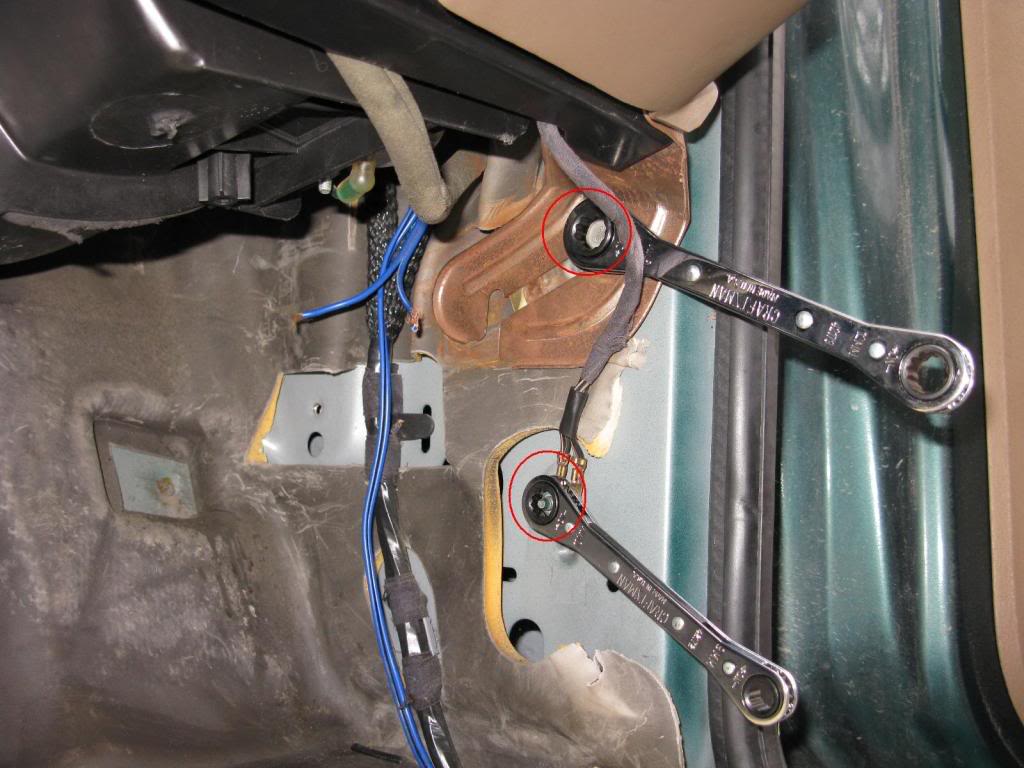
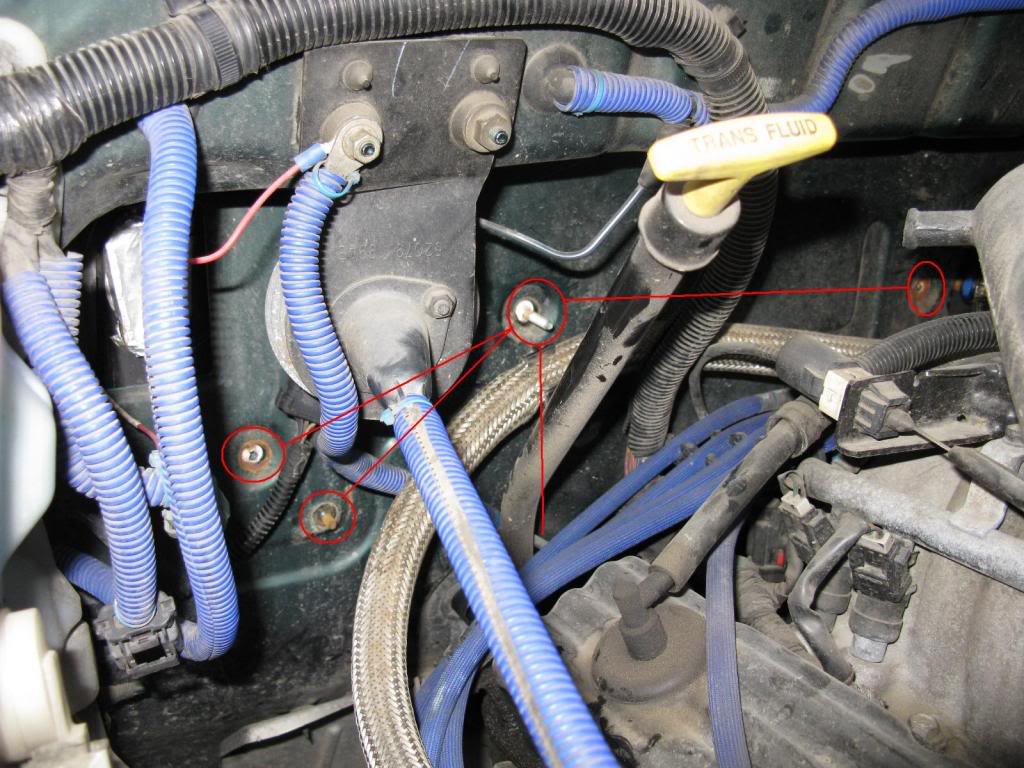
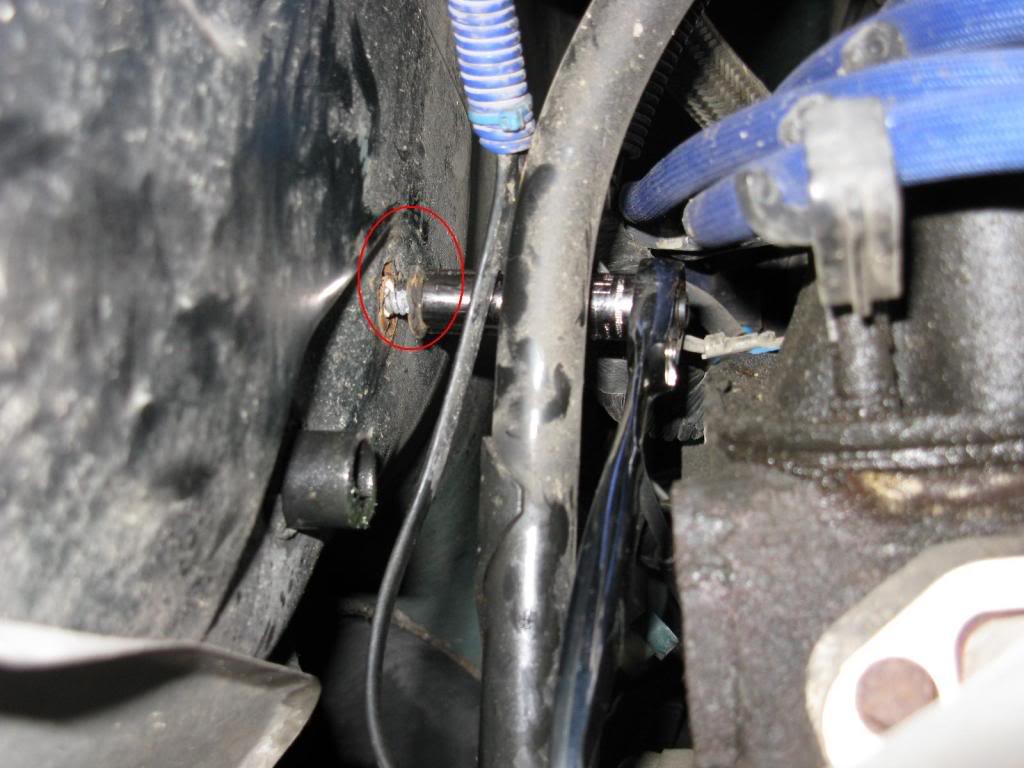
The heater core mounting bolts (one interior, the rest are in the engine bay-better access with mine due to body lift)
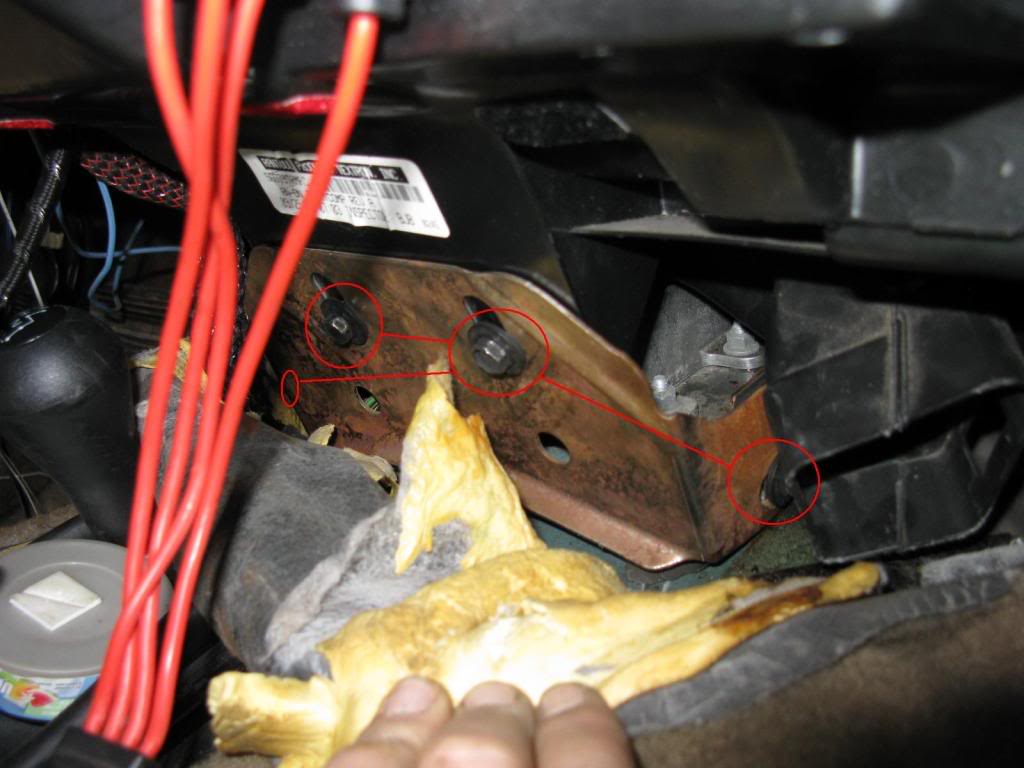
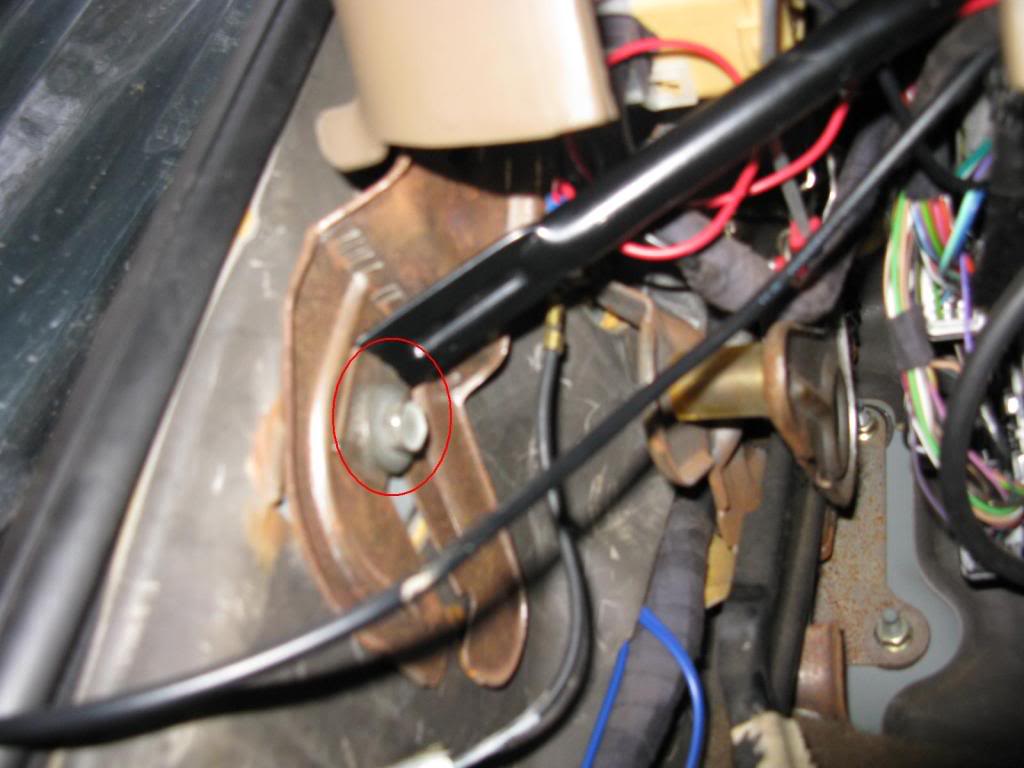
Fire wall securing bolts in engine bay
This is a quick general guide, im going off what i remember and this wasnt my first time with the core removal so it may take you a little more time...
Power tools/cordless drills/air tools drasticly cut your time, have em handy (cordless drills are a must, makes cake work of the screws)
This is my 99 durango, years/models/layout may differ drasticly- I also do not have AC, it was removed and that process will not be addressed
Discconect your battery, remove airbag fuses (IF EQUIPED WITH ELECTRIC SEATS MOVE THEM AS FAR BACK AND LOW AS POSSIBLE BEFORE DISCONNECTING BATTERY)
First you start off with the removal of your center consule/cup holder- should be common knowlegde to most, the bolts/screw locations
i dont have pictures/layout but general locations come in sets of twos (Storage is four screws-under the storage two bolts-under the cup holder rubber two bolts-etc etc.
Remove kick panels (two screws per side-one under sill, other on firewall )
Remove driverside trim (above Dash on column)
Remove passenger side Oh SH#T handle and trim
Remove gauge.dash trim (Vehicle parking break on, key in ignition, lever on lowest setting, steering wheel at full tilt, just pull off)
Remove the four retaining screws from the HVAC controls and lay the unit sideways in dash (allows play in the tubing for later)
Remove Knee panel underneath steering wheel
Disconnect gear selector cable ( Comes from gauges to the steering column)
Remove the hood/ODB brace and let it hang
Remove the glove box (open, then press in on each side to pass stopper, then pull to remove lower hinge)
Remove ashtray
Remove center panel (under stereo) disconecting the rear wiper/cig/assc
In the glove box opening disconnect the stereo antenna/heater fan, also remove the plastic wire securing retainer for the light switch
Remove the center dash support and two support braces for the steering wheel
Center support (4 bolts)
left SW support (DO NOT REMOVE BOLT COMPLETELY-Just enough to remove the brace with leway)
Right SW support
Remove the two last nuts that hold up the steering wheel and let it drop down
Right side Dash support Two bolts-one ground/one support( You may have the Factory Amp in the way-mines removed)
Remove the top bols on dash (5 5/16ths bolts)
The heater core mounting bolts (one interior, the rest are in the engine bay-better access with mine due to body lift)
Fire wall securing bolts in engine bay


That's still alot of work! haha, I don't know if I can tackle a big job like that on my own. Now my core is really leaking, my passenger floor mats is wet with antifreeze coming from the heater vents below. Not drivable now until the core gets replaced.
Anyone have any recommendation on where to purchase a good solid "dependable" core? I won't go back to OEM. Seem they don't last long and they are over $100 bucks vs aftermarket for around $35.
Anyone have any recommendation on where to purchase a good solid "dependable" core? I won't go back to OEM. Seem they don't last long and they are over $100 bucks vs aftermarket for around $35.


