


Fix your heated seats for free


Registered User
Joined: Nov 2011
Posts: 11
Likes: 0

Im planning on tackling the wife's new durango's heated driver seat flash-of-death in about an hour when she gets home, wish me luck!
Just got the D a few weeks ago, just long enough for her to fall in love with the seat heater, and then go out lol
Just got the D a few weeks ago, just long enough for her to fall in love with the seat heater, and then go out lol


Thread Starter
|
THE ULTI-MOD


Joined: Jan 2007
Posts: 19,797
Likes: 36
From: Union NJ
high and low use the same elements, however there is a heating element in the back of the seat, and one in the bottom (that you sit on) if i were you i would start by cleaning connections and see what happens, then go from there.

Amateur
Joined: Nov 2009
Posts: 36
Likes: 0
From: Lima, Peru
Thanks for the write-up! I just followed the instructions and fixed the heated seat in my Durango. Shorted as well with a burn mark. It puzzled me at first that the wire appeared intact because the plastic coating was not broken at the burn mark. But upon stripping some of the plastic away, the wire was completely seperated.

Rookie
Joined: Oct 2008
Posts: 57
Likes: 0
From: Ft Campbell ky/ Clarksville TN
heated seat repair
WOW thank you I had no idea where to turn for this. for mine my high light flashes and the low doesnt come on at all I hope this will fix it I have missed the dammm thing especially nowadays its cold in Ky
ok well i went out and did it this morning, including the time to get the tools out, and clean up, and having to drag out the impact gun(one of the bolts holding the seat in was in there too damn good) it took me just over an hour (including quite a few coffee breaks  )
)
so i thought it give you a nice write up for anyone else looking to try it
the problem

the diagnostic chart i used to determine what the problem was can be seen here

the procedure
first, park the truck somplace where you can easily and safely open the drivers (or passenger depending) door open ALL THE WAY, and the back door being open helps too.
first grab your tools
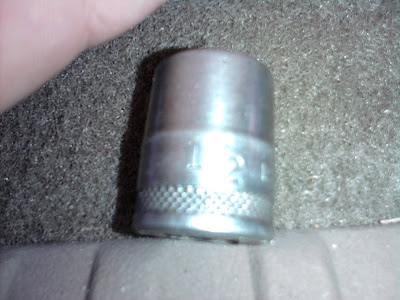
1/2 inch socket for the front of the seat
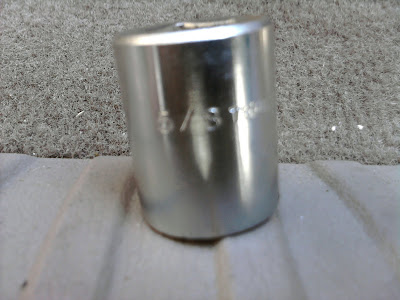
5/8 inch socket for the seatbelt bolt
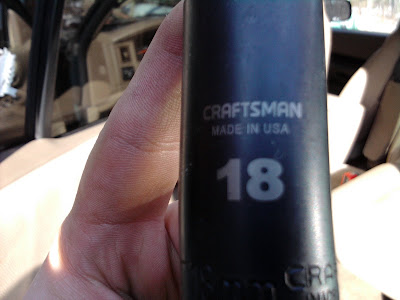
18mm socket for the back (idk its the one that fit for me)

a socket wrench which fits your sockets (mine was 3/8" drive)
second, run the seat all the way back (im assuming you have power seats here)
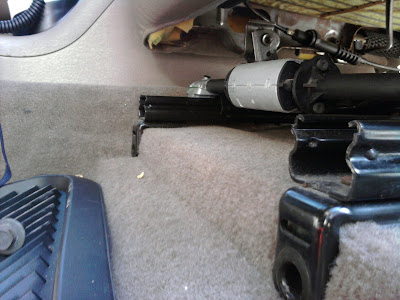
(use the 1/2" socket for this)
you can see that i have already taken the bolts out in that picture
next run it far enough forward to take the seatbelt end off the seat
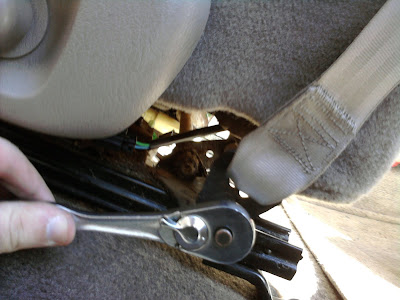
(use your 5/8" socket for this)
next, slide the seat ALL THE WAY FRONT
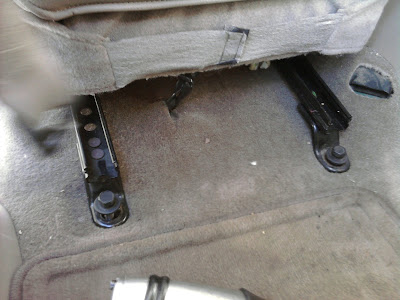
and use the 18mm socket to take out the two bolts that are now exposed
(i had to drag out the impact gun for the outside one it was too much work to do by hand, but was definetly doable, im just impatient and want results quickly)
i used the power drill to aid in getting the bolts out once i had them loose(except the back outside bolt which i used the air gun on)
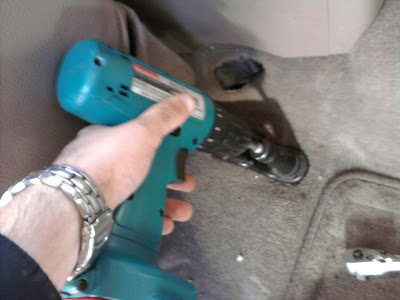
next run the seat back far enough that you can lean it backwards to get to the power for the adjustment motors and the heating elements, and lean the seat back to get access
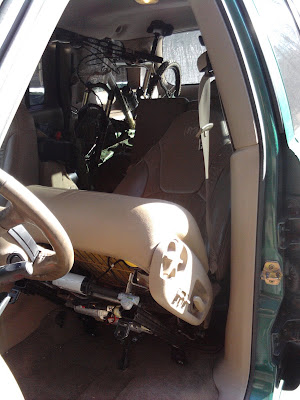
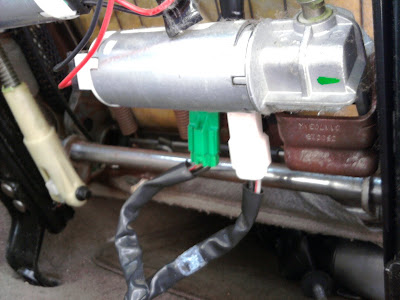
now you can take the seat out of the truck and go someplace warm (i did this in January when it was sub 30* outside so i moved it into the basement, anyplace you are comfortable working is fine) note: no pictures of this bc i needed two hands to carry the seat
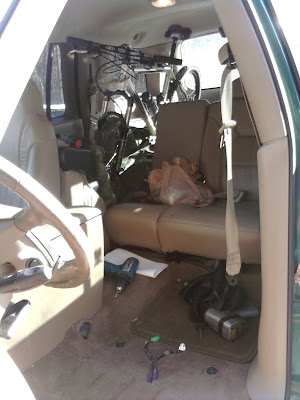
once in a more comfortable place to work take the side panel with all the controls off, should be 5 screws, one is missing on mine, so give me a break
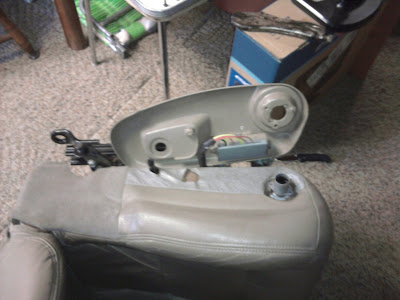
three of the 5 screws are under the wheel which controls the lumbar support, one is in the handle which allows you to recline the seat, right on the shaft part of it actually, and one is pretty easy to find right there on the side.
Once you have this off be careful as the controls for the seat adjustments are still attached, remove one of the two screws which hold it down and loosen the other.
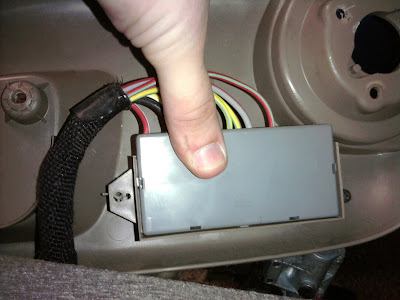
as you can see here i have one of the screws out and the other one loose, i held it in place for the picture
ok, no pics for this part, but go around the bottom of the seat and look for black plastic clips that hold the cover (leather in my case) to the chair frame, and remove them, its not too hard to do, but be careful not to brake them as you need them to put the cover back on later. Once you do that pull the seat cover up and off of the cushion, you will not get it all the way off, but maybe 1/2 way, from there you can pull the cushioning material out a little ways.
Now it is time to look for the break (open circuit) in the heating pad (the white part) mine was easy to find as there was a burn spot showing me exactly where it was. found it yet? good!!, now carefully, and preferably with a razor knife (i used my pocket knife OOPS!!) cut through the white so that you can get the wire out of it, you will probably have to cut through on both sides of the wire.

once you get the wire out, pull the ohm meter out (most multimeters will work for this) and shave off a little of the insulation on each side of the break, to make sure there is no reading across the suspected break, if you get a reading of 0 ohms (an open circuit) or an out of range on a digital meter, you have found the problem area, strip the insulation off going to either side of the break and fire up the soldering iron. flux both sides of the break and twist together, then apply solder (sorry no pictures, i only have 2 hands and needed them to work the soldering iron safely).
now check for continuity at the plug under the seat, the inside two prongs are for the bottom and the outside two are for the back (yes i figured this out for you, bc im that awesome)
now, before putting the cover back on the seat make sure to cover up the bare wires you just soldered, i like liquid electrical tape as it will conform to the existing metal and wont come off as easily its like $5 for a bottle at your local HD
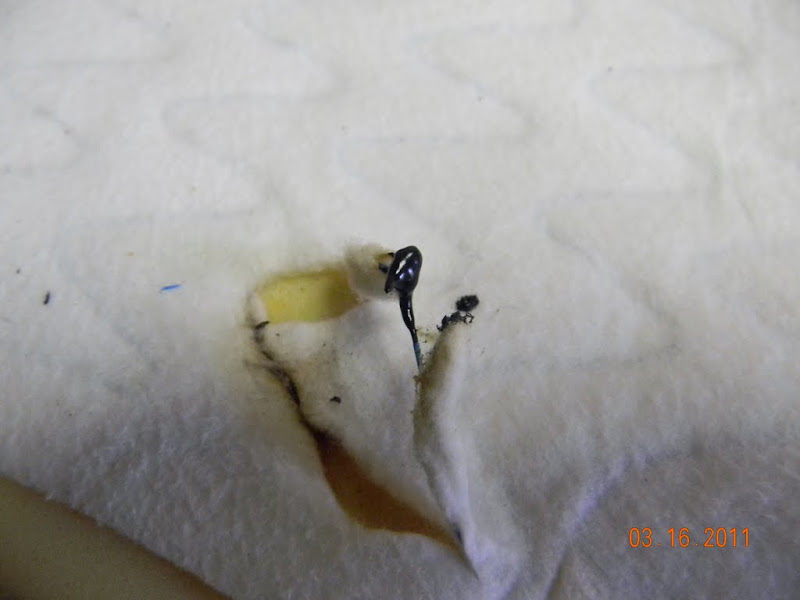

now put the cover back on, and take it back to the truck and plug the seat in, and make sure the blinking light is off, now you can put the seat back in in the reverse of how it came apart.
and here is the final result (remember the problem from above??)

happy fixing, and hope this helps you to some extent
EDIT: i am not responsible if you screw this up or make it worse, or damage yourself, or your vehicle while attempting this, JUST SAYIN!!!!!!!
and here are all the pictures i took while doing the project http://picasaweb.google.com/BillHoch...eat=directlink
)so i thought it give you a nice write up for anyone else looking to try it
the problem
the diagnostic chart i used to determine what the problem was can be seen here
the procedure
first, park the truck somplace where you can easily and safely open the drivers (or passenger depending) door open ALL THE WAY, and the back door being open helps too.
first grab your tools
1/2 inch socket for the front of the seat
5/8 inch socket for the seatbelt bolt
18mm socket for the back (idk its the one that fit for me)
a socket wrench which fits your sockets (mine was 3/8" drive)
second, run the seat all the way back (im assuming you have power seats here)
(use the 1/2" socket for this)
you can see that i have already taken the bolts out in that picture
next run it far enough forward to take the seatbelt end off the seat
(use your 5/8" socket for this)
next, slide the seat ALL THE WAY FRONT
and use the 18mm socket to take out the two bolts that are now exposed
(i had to drag out the impact gun for the outside one it was too much work to do by hand, but was definetly doable, im just impatient and want results quickly
)i used the power drill to aid in getting the bolts out once i had them loose(except the back outside bolt which i used the air gun on
)next run the seat back far enough that you can lean it backwards to get to the power for the adjustment motors and the heating elements, and lean the seat back to get access
now you can take the seat out of the truck and go someplace warm (i did this in January when it was sub 30* outside so i moved it into the basement, anyplace you are comfortable working is fine) note: no pictures of this bc i needed two hands to carry the seat
once in a more comfortable place to work take the side panel with all the controls off, should be 5 screws, one is missing on mine, so give me a break
three of the 5 screws are under the wheel which controls the lumbar support, one is in the handle which allows you to recline the seat, right on the shaft part of it actually, and one is pretty easy to find right there on the side.
Once you have this off be careful as the controls for the seat adjustments are still attached, remove one of the two screws which hold it down and loosen the other.
as you can see here i have one of the screws out and the other one loose, i held it in place for the picture
ok, no pics for this part, but go around the bottom of the seat and look for black plastic clips that hold the cover (leather in my case) to the chair frame, and remove them, its not too hard to do, but be careful not to brake them as you need them to put the cover back on later. Once you do that pull the seat cover up and off of the cushion, you will not get it all the way off, but maybe 1/2 way, from there you can pull the cushioning material out a little ways.
Now it is time to look for the break (open circuit) in the heating pad (the white part) mine was easy to find as there was a burn spot showing me exactly where it was. found it yet? good!!, now carefully, and preferably with a razor knife (i used my pocket knife OOPS!!) cut through the white so that you can get the wire out of it, you will probably have to cut through on both sides of the wire.
once you get the wire out, pull the ohm meter out (most multimeters will work for this) and shave off a little of the insulation on each side of the break, to make sure there is no reading across the suspected break, if you get a reading of 0 ohms (an open circuit) or an out of range on a digital meter, you have found the problem area, strip the insulation off going to either side of the break and fire up the soldering iron. flux both sides of the break and twist together, then apply solder (sorry no pictures, i only have 2 hands and needed them to work the soldering iron safely).
now check for continuity at the plug under the seat, the inside two prongs are for the bottom and the outside two are for the back (yes i figured this out for you, bc im that awesome)
now, before putting the cover back on the seat make sure to cover up the bare wires you just soldered, i like liquid electrical tape as it will conform to the existing metal and wont come off as easily its like $5 for a bottle at your local HD
now put the cover back on, and take it back to the truck and plug the seat in, and make sure the blinking light is off, now you can put the seat back in in the reverse of how it came apart.
and here is the final result (remember the problem from above??)
happy fixing, and hope this helps you to some extent
EDIT: i am not responsible if you screw this up or make it worse, or damage yourself, or your vehicle while attempting this, JUST SAYIN!!!!!!!
and here are all the pictures i took while doing the project http://picasaweb.google.com/BillHoch...eat=directlink

Registered User
Joined: Jan 2013
Posts: 1
Likes: 0
From: Rolla, MO
Great thread, but I have a quick question...
What's the durability like on this? I've heard other places that it isn't a permanent repair (and if it's on the internet, it must be true).
If it does tend to break again, is there any reason not to use a crimp connection, and then solder it as well? (That's the way we treat all the wire ends on our Formula SAE car here at school, but we don't intentionally induce heat in them.)
What's the durability like on this? I've heard other places that it isn't a permanent repair (and if it's on the internet, it must be true).
If it does tend to break again, is there any reason not to use a crimp connection, and then solder it as well? (That's the way we treat all the wire ends on our Formula SAE car here at school, but we don't intentionally induce heat in them.)
Thread Starter
|
THE ULTI-MOD
Joined: Jan 2007
Posts: 19,797
Likes: 36
From: Union NJ
my repair is still holding up just fine (check the date on the first post, makes 3 years as this month)
i would suggest NOT using a crimp connection in this case because it would be very bulky on the seat, making the seat very uncomfortable, also solder provides a better connection (also a more reliable connection), crimps should only be used in places where you cannot get a soldering iron as it is simply too easy for wires to pull out of crimps
i would suggest NOT using a crimp connection in this case because it would be very bulky on the seat, making the seat very uncomfortable, also solder provides a better connection (also a more reliable connection), crimps should only be used in places where you cannot get a soldering iron as it is simply too easy for wires to pull out of crimps

Registered User
Joined: Sep 2014
Posts: 4
Likes: 0
New to this forum and it's been a great help. I'm working on my 03 Durango heated seats per the excellent post with the fix. I have complete continuity in all areas of the pad.
My high light blinks when pushed. I removed the seat and the light acts just the same.
Does this indicate a bad seat warmer switch?
My high light blinks when pushed. I removed the seat and the light acts just the same.
Does this indicate a bad seat warmer switch?
Thread Starter
|
THE ULTI-MOD
Joined: Jan 2007
Posts: 19,797
Likes: 36
From: Union NJ
the flashing high light means an open in the circuit, it doesnt have to be in the pad, check continuity between the switch and the seat, the wire diagrams are available in the FAQ thread if you need more dtail about what to check.