


Body Lift


Thread Starter
|
Veteran
Joined: Sep 2010
Posts: 314
Likes: 0
From: Western Mass
So with the nice weather in my area lately I decided to do my body lift that I've had since December. A few people asked me to do a write up on it but I'm horrible at them, so I'll just describe how it went along with some pictures.
First off, I ordered the lift from 4X4groupbuy.com for about $215 plus shipping. It is from Performance Accessories.
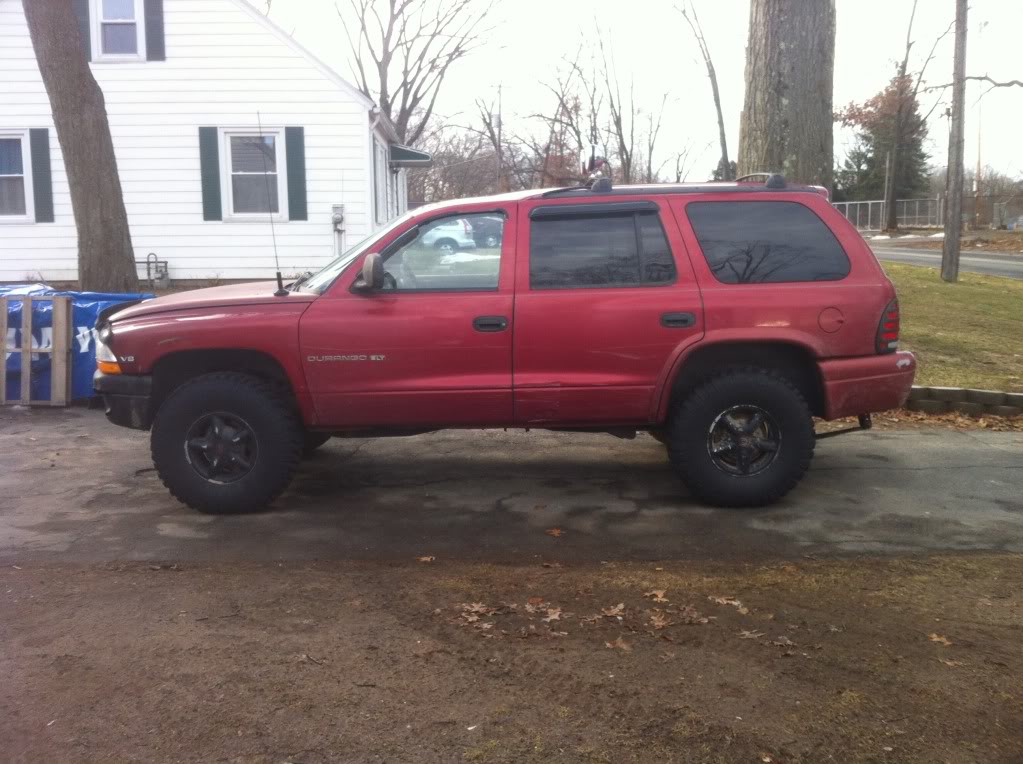
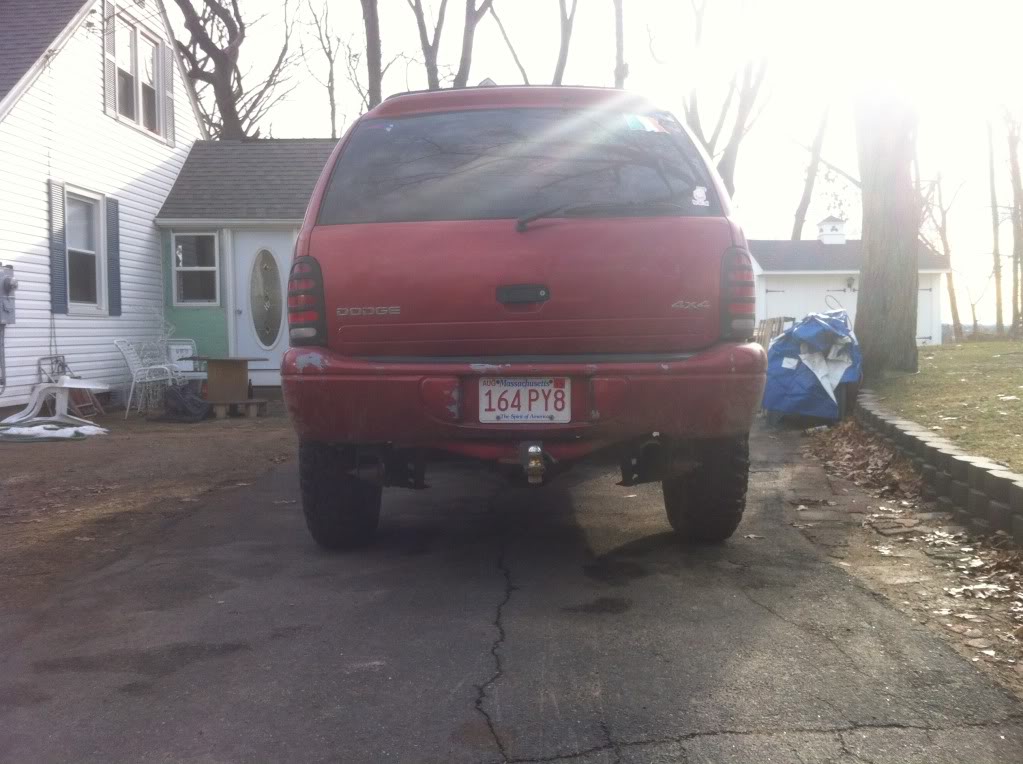
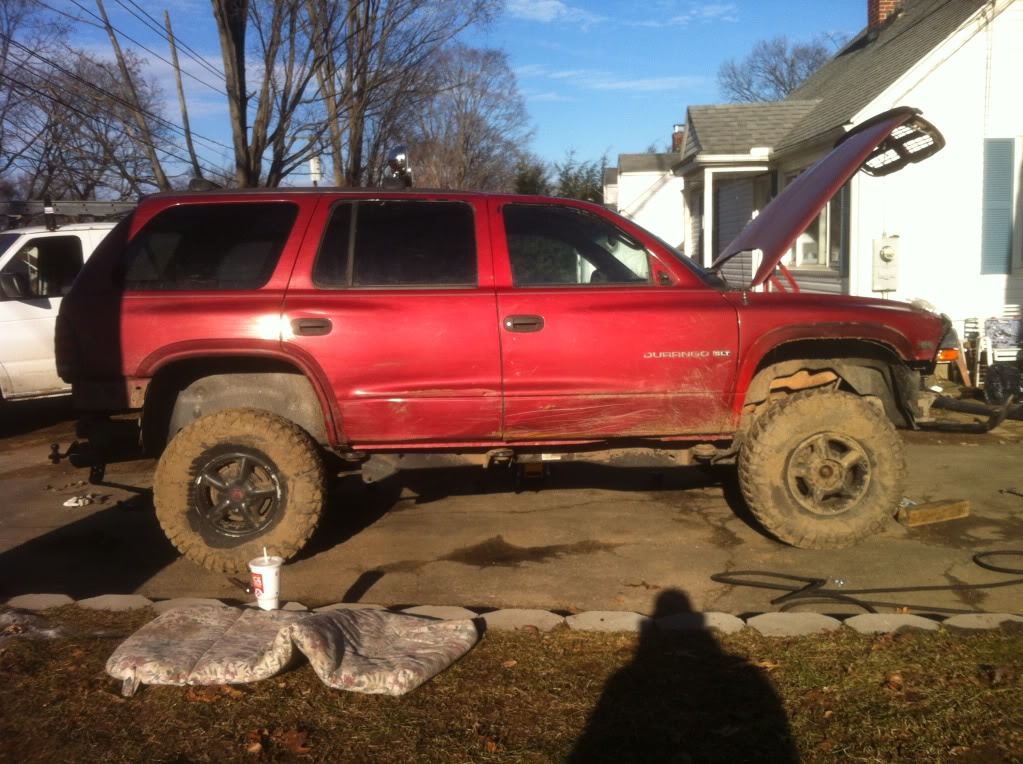
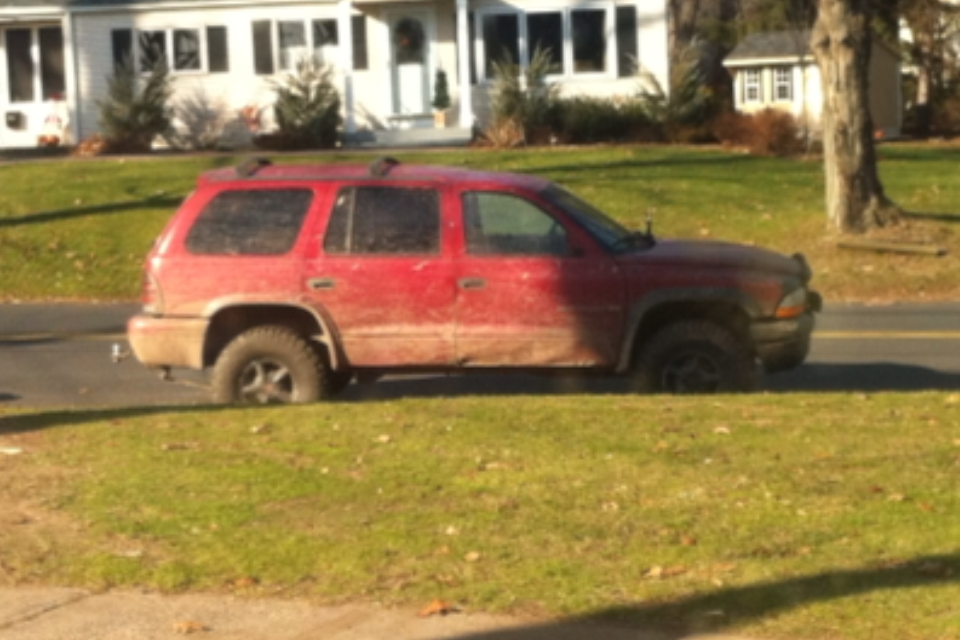
Now I'll start with my before pictures. Keep in mind i have the t/s lift.
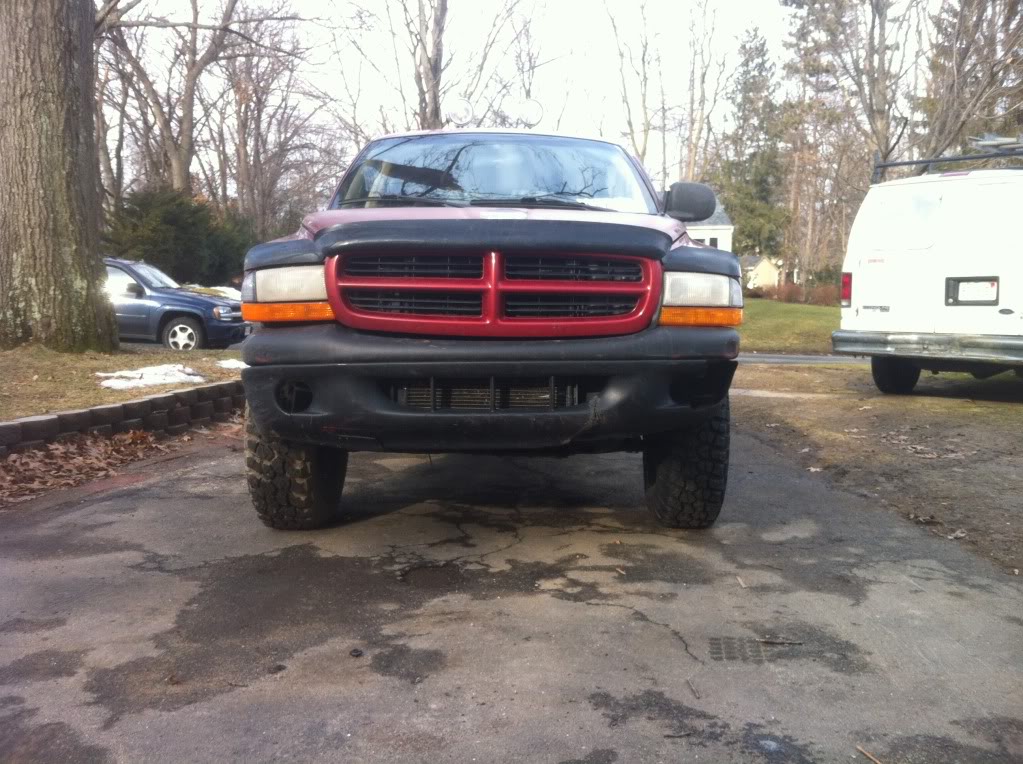
Excuse the appearance of the front bumper. I was backed into.
I read through the directions a couple times just to get the jest of how to go about doing it. They are very well written and easy to follow. The only thing I wish they had were pictures since it easier for me to see what I'm supposed to be doing.I would recommend reading them as I did to get a full understanding of what your getting yourself into. I'd also recommend going through the parts list included in the directions and making sure you have everything as well. Nothing worse than starting a project and realizing half way through you don't have what you need.
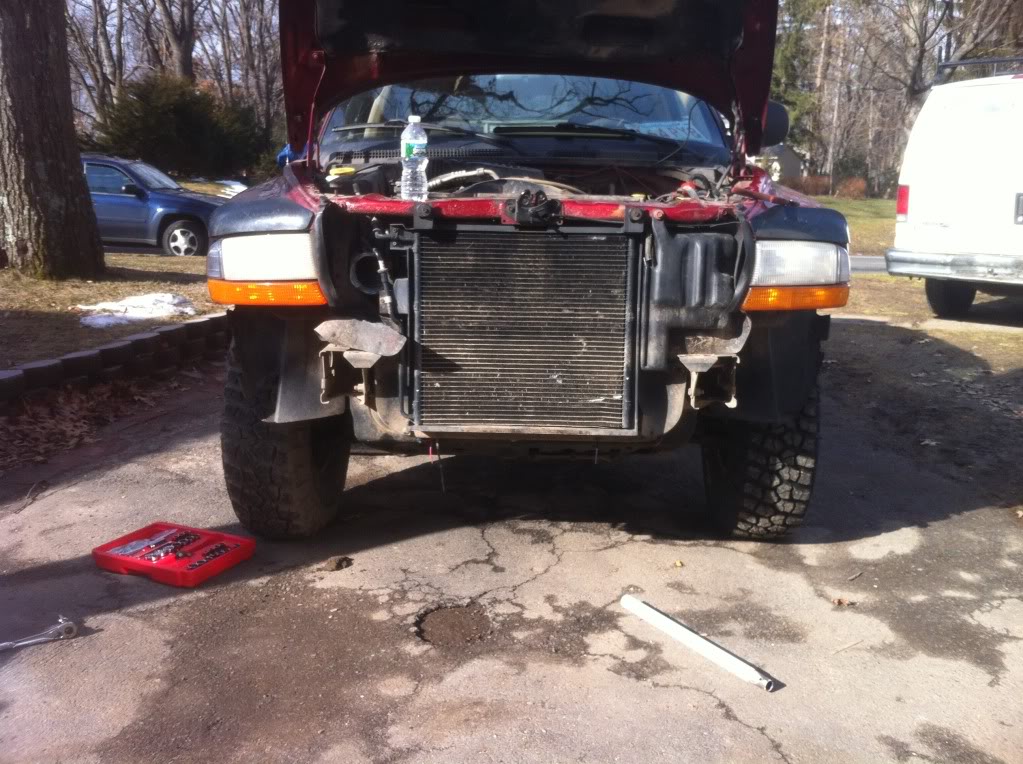
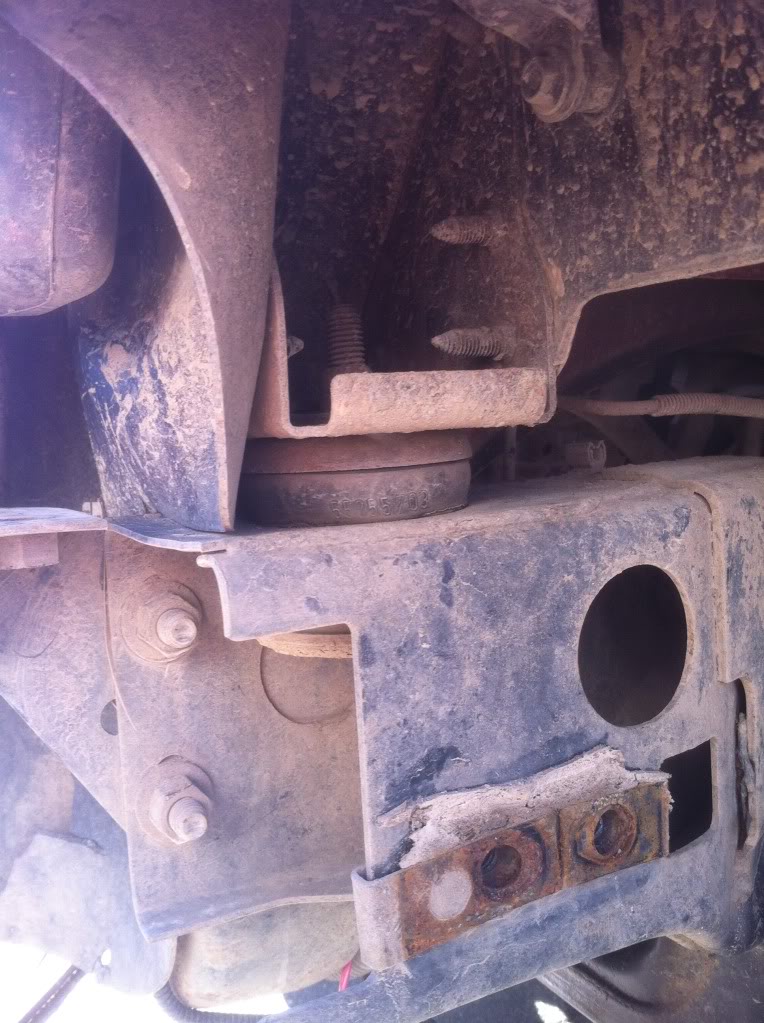
As far as the lift itself goes it was fairly easy. Just remove the bumpers. I had to drop my tow package to get to one of my body mounts but that was the only thing in my way. Snapped two bolts so that's why i left the other side up.

Then loosen all of the stock mounting hardware.
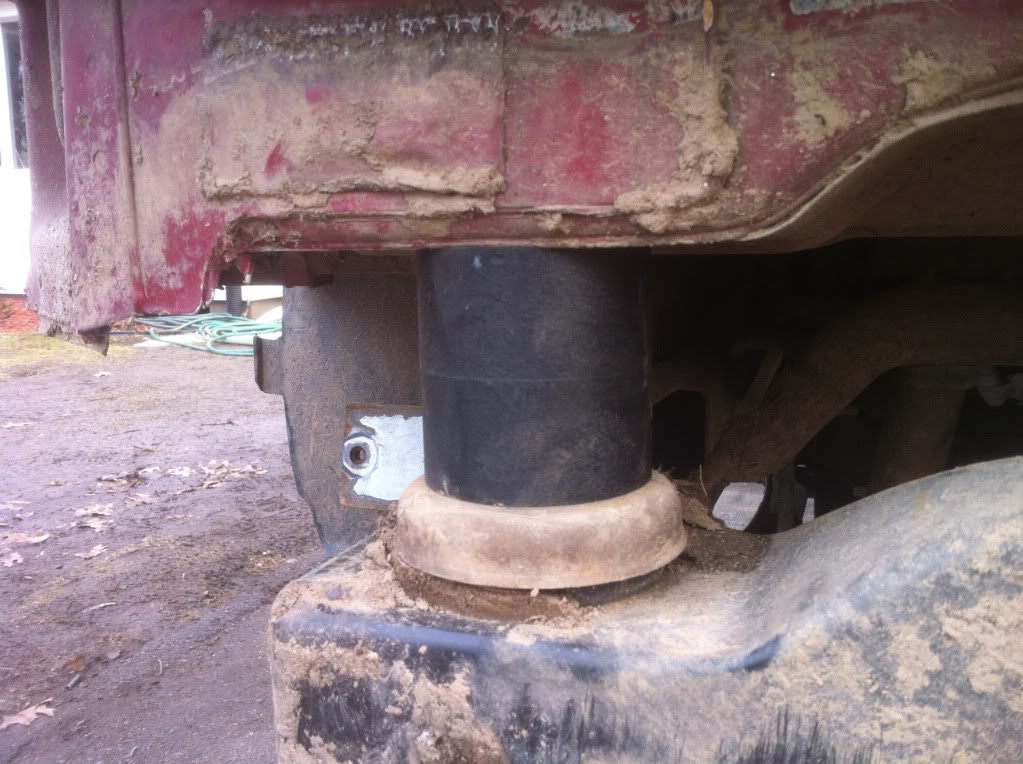
These are the stock mounts.
Then jack up the passenger side from the body just enough to get the new lift blocks on. put the new hardware in about hand tight. Then repeat for the drivers side.
Passenger side lifted
The new lift mounts. The directions said to leave the stock ones on as well.

After they're all on simply locktite them all and tighten.
*NOTE: Make sure your brake lines are long enough for this and remove them from all retaining clips (specifically the ones going from the master cylinder to the splitters on the frame). I broke 2 lines because I wasn't paying attention. They were on their way out anyway lol.
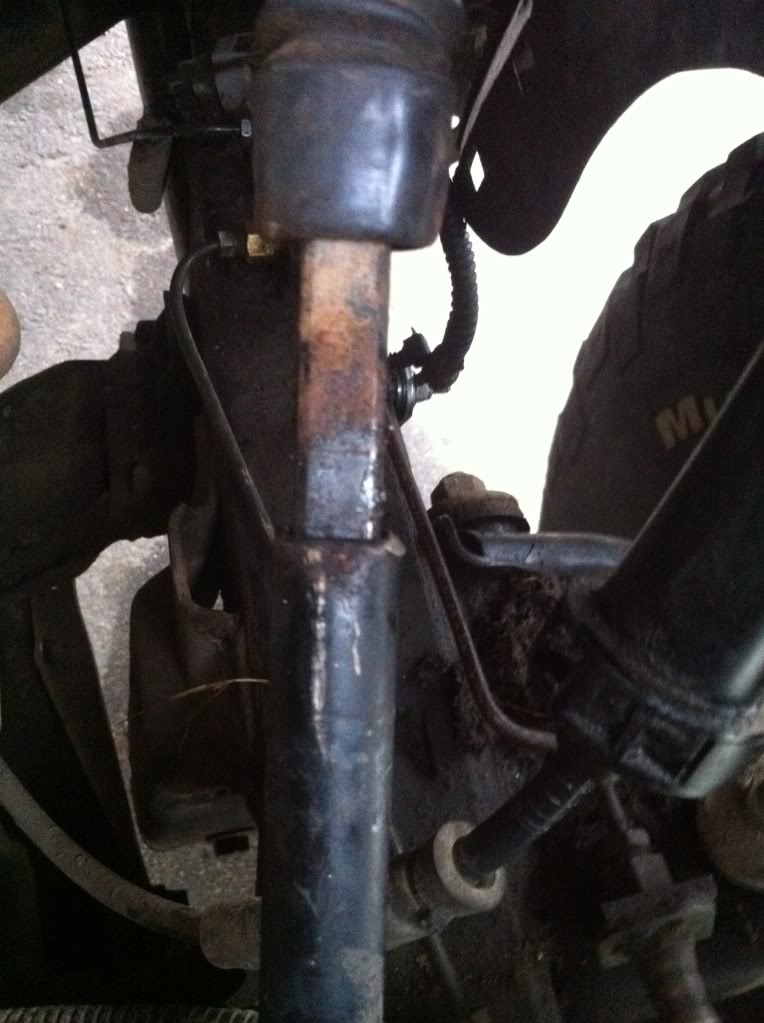
Where i ran into an issue was the steering extension. It seemed too long but after multiple phone conversations with the tech guy at performance accessories we found out that Dodge made the steering shaft collapsible in case of an accident. All that needs to be done is you slide the lower piece up and then into the extension. Mine was rusted together so it took a lot of pb blaster and a very large c-clamp to press it together.
This is the extension

This is where the steering shaft telescopes
After all of that is done you simply put on the new bumper mounts to accommodate for the 3 inches of lift and re-install the bumpers.
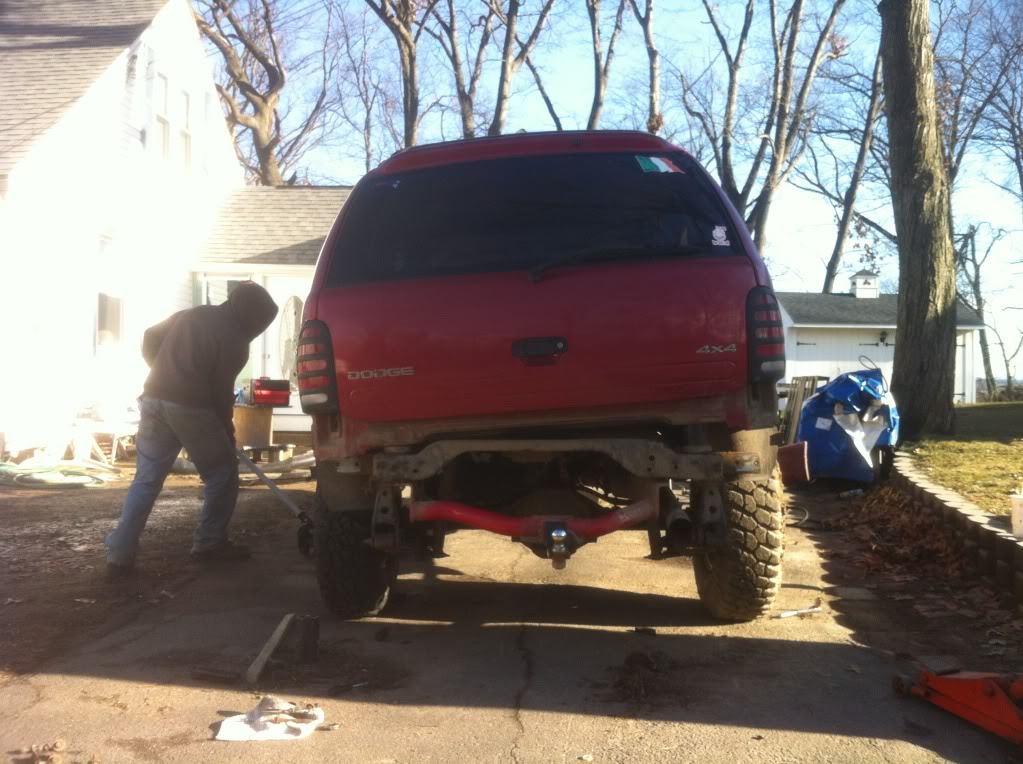
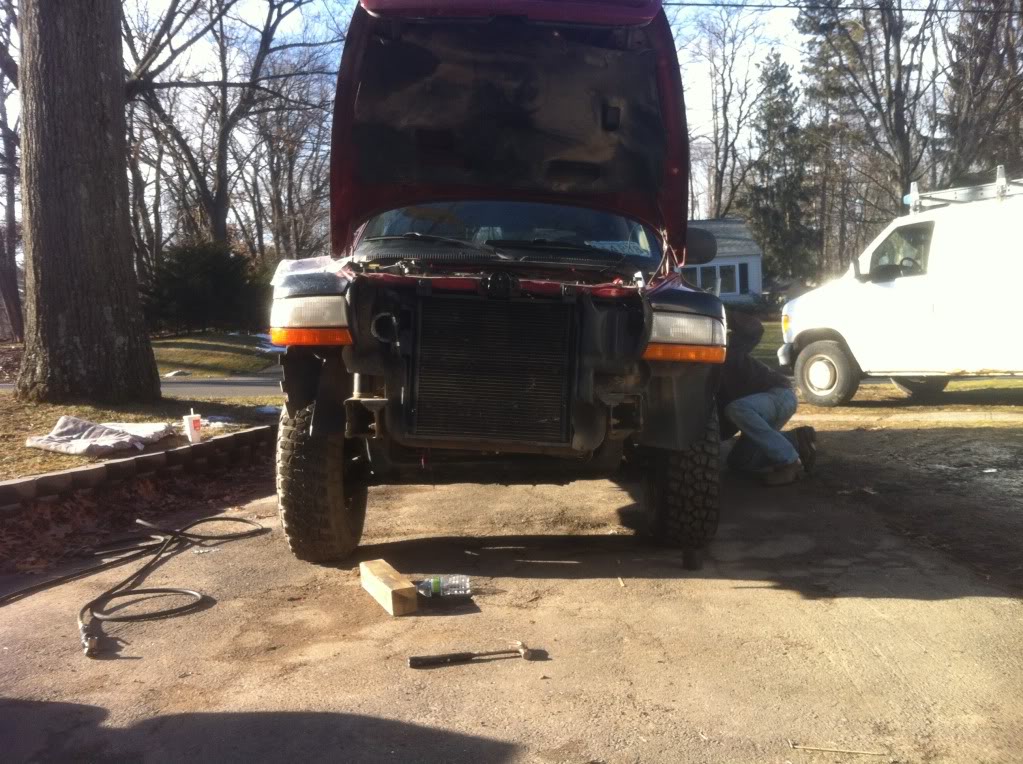
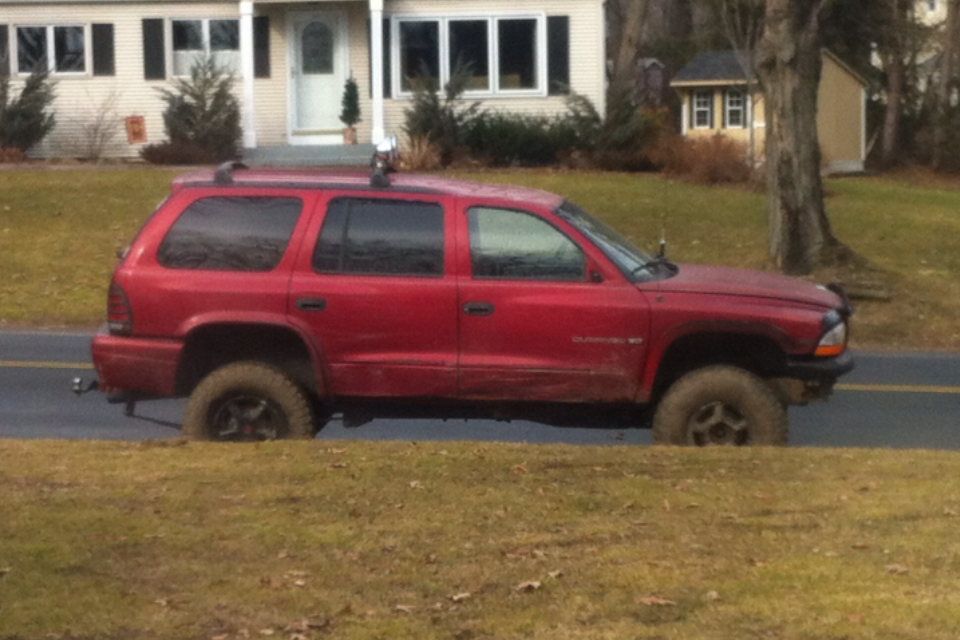
Here are the after pictures. This is all i have for now. will get more tomorrow. I didn't re-install the plastic half of the front bumper because it was beat to ****. I'm building a new one.
Before
After
All-in-all it was a relatively easy lift. If i hadn't run into the steering issue the lift would have only taken me about 4 hours including beer brakes. I also had one other person helping me. Hope this helps anyone who planned on doing this lift themselves. If you have any questions feel free to ask
First off, I ordered the lift from 4X4groupbuy.com for about $215 plus shipping. It is from Performance Accessories.
Now I'll start with my before pictures. Keep in mind i have the t/s lift.
Excuse the appearance of the front bumper. I was backed into.
I read through the directions a couple times just to get the jest of how to go about doing it. They are very well written and easy to follow. The only thing I wish they had were pictures since it easier for me to see what I'm supposed to be doing.I would recommend reading them as I did to get a full understanding of what your getting yourself into. I'd also recommend going through the parts list included in the directions and making sure you have everything as well. Nothing worse than starting a project and realizing half way through you don't have what you need.
As far as the lift itself goes it was fairly easy. Just remove the bumpers. I had to drop my tow package to get to one of my body mounts but that was the only thing in my way. Snapped two bolts so that's why i left the other side up.
Then loosen all of the stock mounting hardware.
These are the stock mounts.
Then jack up the passenger side from the body just enough to get the new lift blocks on. put the new hardware in about hand tight. Then repeat for the drivers side.
Passenger side lifted
The new lift mounts. The directions said to leave the stock ones on as well.
After they're all on simply locktite them all and tighten.
*NOTE: Make sure your brake lines are long enough for this and remove them from all retaining clips (specifically the ones going from the master cylinder to the splitters on the frame). I broke 2 lines because I wasn't paying attention. They were on their way out anyway lol.
Where i ran into an issue was the steering extension. It seemed too long but after multiple phone conversations with the tech guy at performance accessories we found out that Dodge made the steering shaft collapsible in case of an accident. All that needs to be done is you slide the lower piece up and then into the extension. Mine was rusted together so it took a lot of pb blaster and a very large c-clamp to press it together.
This is the extension
This is where the steering shaft telescopes
After all of that is done you simply put on the new bumper mounts to accommodate for the 3 inches of lift and re-install the bumpers.
Here are the after pictures. This is all i have for now. will get more tomorrow. I didn't re-install the plastic half of the front bumper because it was beat to ****. I'm building a new one.
Before
After
All-in-all it was a relatively easy lift. If i hadn't run into the steering issue the lift would have only taken me about 4 hours including beer brakes. I also had one other person helping me. Hope this helps anyone who planned on doing this lift themselves. If you have any questions feel free to ask

Thread Starter
|
Veteran
Joined: Sep 2010
Posts: 314
Likes: 0
From: Western Mass
I have 33s on it now. Give it a good look. After these are done and I replace the shocks I'm gonna go with 35s. I can fit them now with the body lift but they rub a little tiny bit in the turning. Once the shocks are replaced it'll be fine. All of them are ahit so I sag a little all the way around
Professional
Joined: Aug 2009
Posts: 140
Likes: 0
From: Nevada
Nice write up and pic's man. I was thinking of doing a body lift on my wife's ram 1500 4x2. Just put a 2" rough country leveling kit on it with new Rancho 5000 that are 2" longer then the stock one's. Oh yeah and new tie rod end's and camber/caster kit. It look's good leveled out but i like the bodylift lol

Record Breaker

Joined: Jun 2011
Posts: 2,387
Likes: 41
From: Bismarck, ND
What about the fuel filler neck and the t-case shift leaver? Also how are your rear leafs taking the t/s lift with the 33's? Mine are flattening to the point i'm now worried about towing.........
Last edited by adukart; Feb 12, 2012 at 09:32 PM.
Record Breaker
Joined: Jun 2011
Posts: 2,387
Likes: 41
From: Bismarck, ND
Ok, mine are sagging a lot now, maybe I'll start a thread on it. Was there any modification to the fuel filler neck?
Trending Topics
Thread Starter
|
Veteran
Joined: Sep 2010
Posts: 314
Likes: 0
From: Western Mass
not the filler neck itself. the kit came with a new breather hose and an extension for the filler hose. the neck has 2 steel hoses coming half way to the tank and bolts to the body. one breather and one filler. and the other half is a rubber hose which is what i replaced
Record Breaker
Joined: Jun 2011
Posts: 2,387
Likes: 41
From: Bismarck, ND
Factory hitch, also I haven't towed at all since the lift. I haven't even hauled more than one other person. I'll take some pics and start a new thread so I don't hijack this one........