


How To Install Overdrive/lockup, Gov. Pressure And Tranducer Solenoids

Hello Everyone,
Back again with another DIY write up.......
NOTE: Myself or Dodge Forum are not responsible for any mishaps or problems while wrenching. We (the forum and myself) are not responsible for knuckle busters, alien abductions, fines, tantrums, births, whining, drinking behaviors, throwing of tools, fried electrical circuits, or other conditions that may occur during this mod or repair.. all modding and repairs is done at your OWN RISK!! This thread is intended to be used as a guide and please stay within your skill set when wrenching.
With that said lets get back to the regular scheduled DIY.......
Today I will attempt to explain the process of replacing the Overdrive/Lockup solenoid on all the “RE” transmissions. I will also be explaining how to replace the Governor Pressure Transducer and Solenoid. This is a pretty easy process, Don't let it scare you..... With doing anything on a vehicle just take your time and do it right, you should not have any issues.
I completed this job in about an hour and a half as I took my time, checked and double checked everything as I went along. One major key to doing transmission work is to be as clean as possible. Make sure to use lint free rags to do any wiping as you don't want any tiny pieces getting in and clogging the throttle body.
List of tools
You will need:
T20 Hex bit
T25 Hex bit
11MM wrench
� “ Socket
Plenty of extentions
Flat screwdriver
Filter kit
ATF +4
Step 1
First you will need to drain the fluid pan and remove it. I installed a universal pan plug so I didn't have to mess around dropping the pan with it full with ATF. If you don't have one already I highly recommend one as they cut down the mess a lot.
Step 2
You should now have the pan off and be able to see the top of the throttle body. You will want to keep your catch pan under there as it will still be dripping fluid. Next, remove the filter by removing the 2-3 T20 hex bolts. Then you should be seeing this.....
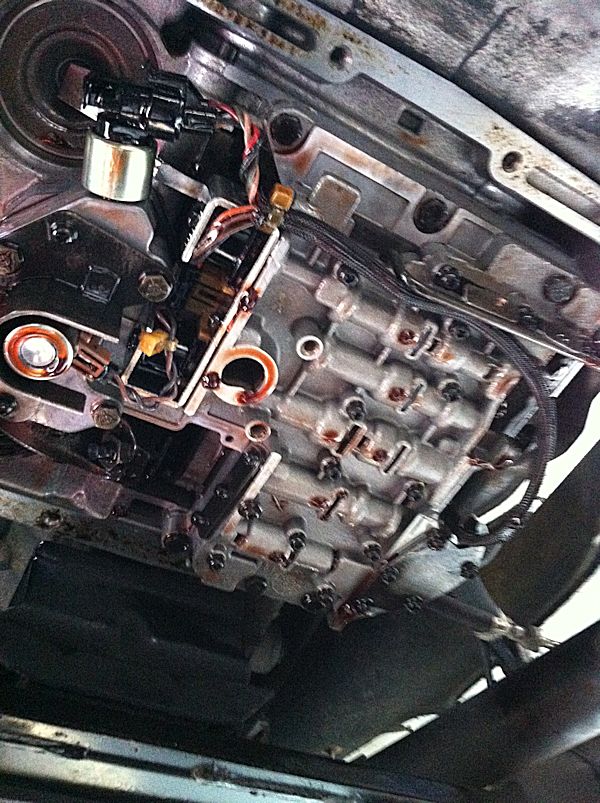
Step 3
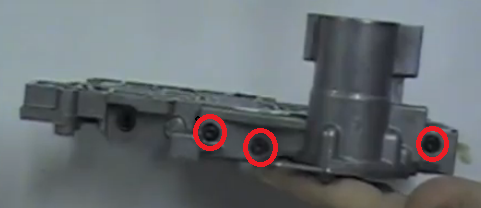
Now you are ready to remove the governor body to replace the Governor Pressure Transducer and Solenoid. You will start by removing the 2 (T20) hex bolt and the 4 (11mm) bolts all circled in red. Be careful removing them as there may be some fluid that drains out of them.
After the governor body is loose you will need to remove the connectors on each component then you should have this....
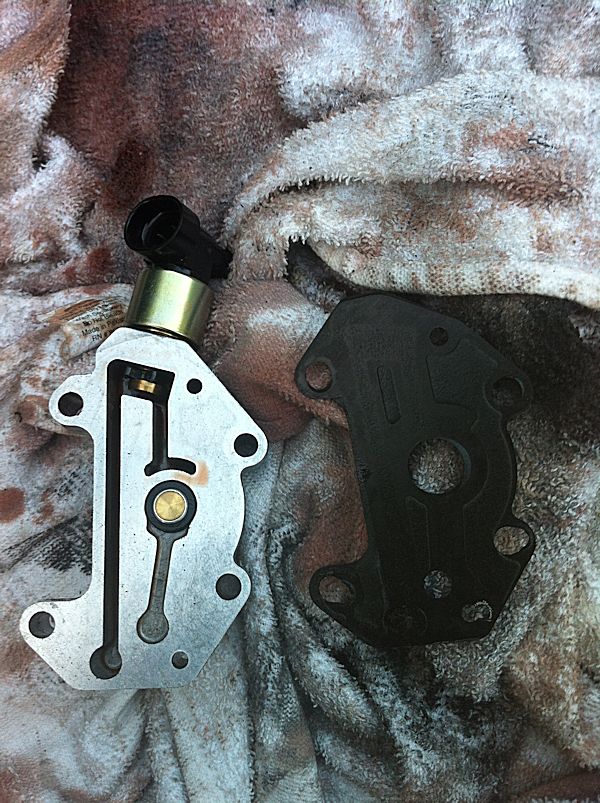
Remove the Governor pressure solenoid (top center of body) by simply removing the cover plate and pushing it out. The Transducer (side of body) is removed my getting the clip off with a flat screwdriver and then it slides out. Be careful removing the clip as it wants to fly out on you..
Installation is the opposite of removal, just make sure to lube up the O-Ring on the new parts really good to help ease the insertion.
Step 4
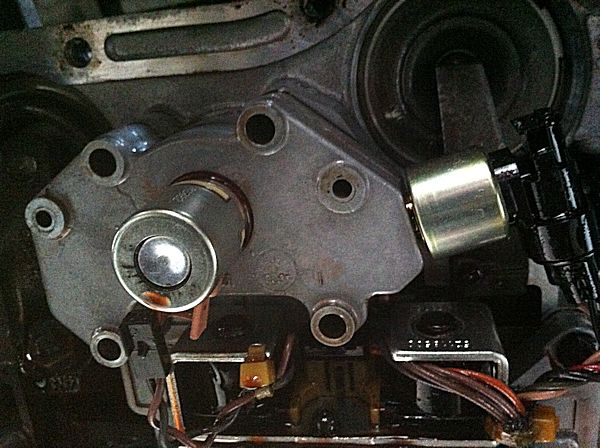
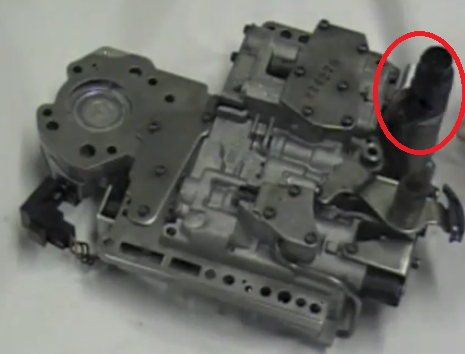
Now you are ready to remove and install the Overdrive/Lockup solenoid. It will look like this...

With the governor body removed you will have access to 3 (T25) hex nuts. There is one in the center and one on each end. Remove all of them and it should come right off...
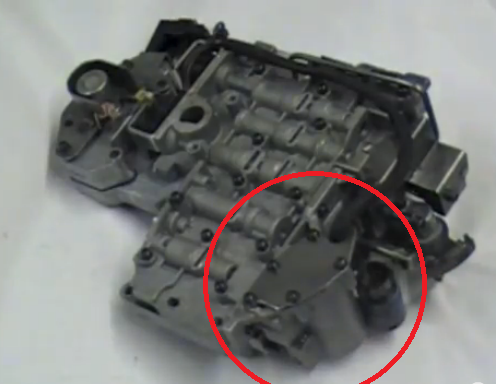
Next, you will need to remove the 3-4 Accumulater spring housing. Before you do this make sure you disconnect the 8-pin plug on the drivers side of the transmission located near the linkage cables. Once you have done that then you will need to remove the 3 (T25) hex nuts circled in red here...
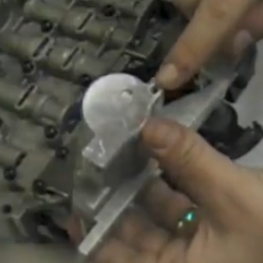
Here is what the accumulater housing looks like looking at it from the bottom, again circled in red...
Bottom Veiw
Top View
Both top views show where the 8-pin connector screws to the body.
While removing the accumulater housing make sure to hold on to it is there is 2 springs in there one with a cap that will come out once you remove the housing.

Wiggle the housing out that will allow you to install the new wire harness that came with the overdrive/lockup solenoids.
Installation is the reverse as removal
Step 5
You are now ready to reinstall the governor body and connect the Governor Pressure Transducer and Solenoid to the wire harness. Make sure to reinstall the gasket between the governor body and the throttle body... I reused mine as it was not in bad shape at all.
Step 6
Last you will install the new filter, clean out the pan and the magnet, install the new gasket to the pan and re install the pan. Once you have the pan all buttoned up add the correct amount of ATF+4 and you are done.
Back again with another DIY write up.......
NOTE: Myself or Dodge Forum are not responsible for any mishaps or problems while wrenching. We (the forum and myself) are not responsible for knuckle busters, alien abductions, fines, tantrums, births, whining, drinking behaviors, throwing of tools, fried electrical circuits, or other conditions that may occur during this mod or repair.. all modding and repairs is done at your OWN RISK!! This thread is intended to be used as a guide and please stay within your skill set when wrenching.
With that said lets get back to the regular scheduled DIY.......
Today I will attempt to explain the process of replacing the Overdrive/Lockup solenoid on all the “RE” transmissions. I will also be explaining how to replace the Governor Pressure Transducer and Solenoid. This is a pretty easy process, Don't let it scare you..... With doing anything on a vehicle just take your time and do it right, you should not have any issues.
I completed this job in about an hour and a half as I took my time, checked and double checked everything as I went along. One major key to doing transmission work is to be as clean as possible. Make sure to use lint free rags to do any wiping as you don't want any tiny pieces getting in and clogging the throttle body.
List of tools
You will need:
T20 Hex bit
T25 Hex bit
11MM wrench
� “ Socket
Plenty of extentions
Flat screwdriver
Filter kit
ATF +4
Step 1
First you will need to drain the fluid pan and remove it. I installed a universal pan plug so I didn't have to mess around dropping the pan with it full with ATF. If you don't have one already I highly recommend one as they cut down the mess a lot.
Step 2
You should now have the pan off and be able to see the top of the throttle body. You will want to keep your catch pan under there as it will still be dripping fluid. Next, remove the filter by removing the 2-3 T20 hex bolts. Then you should be seeing this.....
Step 3
Now you are ready to remove the governor body to replace the Governor Pressure Transducer and Solenoid. You will start by removing the 2 (T20) hex bolt and the 4 (11mm) bolts all circled in red. Be careful removing them as there may be some fluid that drains out of them.
After the governor body is loose you will need to remove the connectors on each component then you should have this....
Remove the Governor pressure solenoid (top center of body) by simply removing the cover plate and pushing it out. The Transducer (side of body) is removed my getting the clip off with a flat screwdriver and then it slides out. Be careful removing the clip as it wants to fly out on you..
Installation is the opposite of removal, just make sure to lube up the O-Ring on the new parts really good to help ease the insertion.
Step 4
Now you are ready to remove and install the Overdrive/Lockup solenoid. It will look like this...
With the governor body removed you will have access to 3 (T25) hex nuts. There is one in the center and one on each end. Remove all of them and it should come right off...
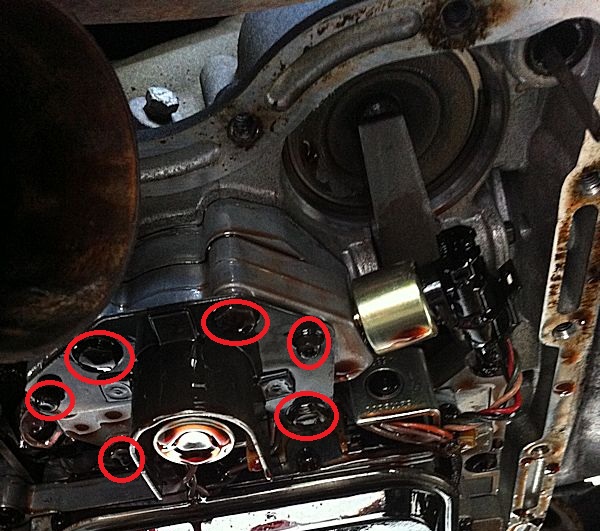
Next, you will need to remove the 3-4 Accumulater spring housing. Before you do this make sure you disconnect the 8-pin plug on the drivers side of the transmission located near the linkage cables. Once you have done that then you will need to remove the 3 (T25) hex nuts circled in red here...
Here is what the accumulater housing looks like looking at it from the bottom, again circled in red...
Bottom Veiw
Top View
Both top views show where the 8-pin connector screws to the body.
While removing the accumulater housing make sure to hold on to it is there is 2 springs in there one with a cap that will come out once you remove the housing.
Wiggle the housing out that will allow you to install the new wire harness that came with the overdrive/lockup solenoids.
Installation is the reverse as removal
Step 5
You are now ready to reinstall the governor body and connect the Governor Pressure Transducer and Solenoid to the wire harness. Make sure to reinstall the gasket between the governor body and the throttle body... I reused mine as it was not in bad shape at all.
Step 6
Last you will install the new filter, clean out the pan and the magnet, install the new gasket to the pan and re install the pan. Once you have the pan all buttoned up add the correct amount of ATF+4 and you are done.
Last edited by Old_School; Jan 13, 2013 at 12:04 AM.
Mostly yes... only difference is they changed the transducer from the canister style to the more flat style but its all laid out the same...

Amateur
Joined: Oct 2019
Posts: 32
Likes: 1
2001 dodge durango 5.9. Replaced governor solenoid filter new fluid. After getting code for p1762 after putting it all back together an refilling with new fluid. Trans still doesnt want to shift up when its supposed to. Do i need to drain it again take it apart and do the transducer as well tox fix this p1762 code. Or whats next. Parts store did not habe the transducer on hand so i flew without a new one


