


44RE Rebuild - DIY w/Pics

Just wanted to give a bit of an update...
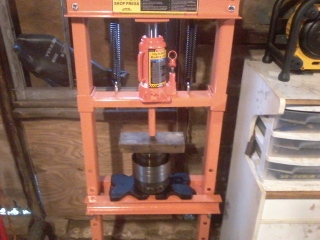
The press has arrived!!! now i just have to assemble it.....
Now i am just waiting on UPS to deliver the final shipment of parts. I decided since its apart that i was going to replace all the bearings inside... If all goes well i should have it all together and ready to install this coming weekend..
All that's left to do is bolt on the overdrive, bolt up the transfer case, and install both drive shafts.


It don't matter to me... Feel free to add anything to it that i may have missed or any tricks of the trade you like... I tried to add every bit of correct info that i could while building it..
Final day of work on this month long process...
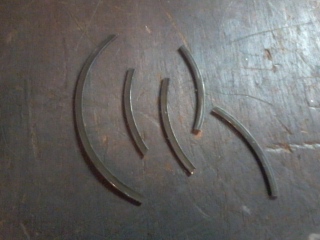
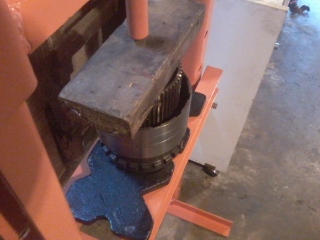
So last night i assembled the press and this morning i pressed the overdrive piston. Here is what the snap ring looked like that i pulled out.
And on the press....
Overall the inside was in pretty good shape. the clutches where not very worn compared to the new ones. the only issues with it was the broken snap ring and the output bearing became pitted and was causing a whine similar to differential noise. My guess was that some pieces from the snap ring got in there to cause the damage. I went ahead and replace all the bearing and races within the whole unit.
One more thing that i forgot to mention.. When you are putting it all back together, make sure to take all the new clutches and soak them in ATF+4. The instructions that came with the master rebuild kit say for atleast 30 mins min. I let them sit overnight and most of the next day.
Overall dispite not having a clue what i was getting into when i started and saying enough cuss words to make a sailor cringe... I am very happy that i had the chance to to do it. Yes i would do i again if i had the chance. I hope this thread served its purpose of helping guide someone else through it and keeps doing so for a long time. If i could give someone attempting this any tips they would be the following:
1) Do your research
2) Take your time
3) Stay clean and organized
4) Pay attention to details
5)
Thanks, and good luck to anyone who decides to try this on there own....
So last night i assembled the press and this morning i pressed the overdrive piston. Here is what the snap ring looked like that i pulled out.

And on the press....


Overall the inside was in pretty good shape. the clutches where not very worn compared to the new ones. the only issues with it was the broken snap ring and the output bearing became pitted and was causing a whine similar to differential noise. My guess was that some pieces from the snap ring got in there to cause the damage. I went ahead and replace all the bearing and races within the whole unit.
One more thing that i forgot to mention.. When you are putting it all back together, make sure to take all the new clutches and soak them in ATF+4. The instructions that came with the master rebuild kit say for atleast 30 mins min. I let them sit overnight and most of the next day.

Overall dispite not having a clue what i was getting into when i started and saying enough cuss words to make a sailor cringe...
1) Do your research
2) Take your time
3) Stay clean and organized
4) Pay attention to details
5)
Thanks, and good luck to anyone who decides to try this on there own....
loosen the bolt and pry on the leaver till it pops off... yes they can be a bitch to get off.. a little soaking in PB Blaster would help.

Veteran
Joined: May 2011
Posts: 462
Likes: 0
From: Denver
I wish I had the time, place and tools to have done my transmission work myself, but I didn't and still don't, my goal once I become a homeowner is to have a nice setup in the garage for doing work like this, I'd love to never have to take it to anyone else for any kind of repairs, this goes for anything I plan on driving in the future as well, unless its still under warranty I'd rather do it myself, mostly for the savings in labor costs, but also because I actually enjoy doing it, and I'll know I did it correctly because I'll have the FSM to refer to for proper procedures and such. And there's a forum with experts like you guys for almost any car/truck out there for even more support and encouragement when needed. Few things are as satisfying as bing able to work on something and enjoy the results.
As a side note, downloading the FSM off of this site has been a great help, I've used it several times for various things, the biggest being when we rebuilt the rear differential, I just printed off the pages that I needed and we had then there in the garage with us. We could have got the job done without it, but its great to KNOW that everything was torqued to the right amount, shimmed properly, etc...
As a side note, downloading the FSM off of this site has been a great help, I've used it several times for various things, the biggest being when we rebuilt the rear differential, I just printed off the pages that I needed and we had then there in the garage with us. We could have got the job done without it, but its great to KNOW that everything was torqued to the right amount, shimmed properly, etc...