Battery relocation write up.

First off you will need to grab this at the store. It can be found at both your local auto parts store and walmart.
Power wire (a set of jumper cable 4 gauge or 2 gauge if you feel the need. Maybe 10-12 foot or a subwoofer power wire)
You will need 4 heavy duty circle wire crimps.
Battery box
Some screws
Battery terminals
Start by removing your stock battery and tray. (3 bolts) Also remove the battery temp sensor front the tray. Put that somewhere cold.
Next throw the battery box in the back.
Cut your power wire so it will reach from the front to the back under the carpet and hidden.
The extra length you have left over will be used as your battery to frame ground in the back.
Throw a wire crimp on one side of the left over wire and mount it to you strut tower (ground)
Next head up to under the hood. You will need to locate you power distributions box. You will remove the black
cover over w here the power wire connects. Remove the 2 10 mm bolts off there also. Now it gets a little tricky so dont mess it up.
You will cut you stock terminals off. Cut them right close the the terminal. Both of them.
The ground that connects to the frame in front of the radiator (8mm bolt) can be removed. and remove the ground.
Next run the ground that hooks to the block and starter (the other ground from the terminal) put a crimp on it and mount that to the
frame. You can us e the same spot you removed the smaller one from.
Now your ground system should be all setup.
Now remember the wire that was under the 10mm bolts on the power box (its a few inches long and connects to the stock turminal) Take that wire and cut it from the little metal tab with the 2 bolt holes in it. You will need that piece! It will act li ke a washer to hold the power wires on good. Now you need to put a wire crimp on the end of the power wire for the starter. (front of the car still)
Now put a crimp on the power wire thats ran from the back. Take them and but them on your power distribution box. U se the washer thing on the outside and tighten the 2 10mm bolts down over them. Be sure to put the plastic cover back over these 2 wires. Maybe a little tape is in order so it doesnt hit off the car and short out your electrical system. You will also need 2 new battery terminals.
Double check all your connections. Then hook the 2 wires in the back up to you battery. The ground and the one power wire. If you blow something up or catch fire I am not responsible neither is the the dodgeforum or people that work at the forum. Do this at your own risk.
Picures of my setup. Its all li ke the write up accept I us e a T split at the front of the car.

Rear power terminal. Only reason there is more then one wire on it is because I had subs.

I put my setup on the drivers side of the car. Also shows the rear ground terminal. Notice I us ed two ground to chassis wires instead of one.

Ground wire bolted to strut. Notice the power wire also.


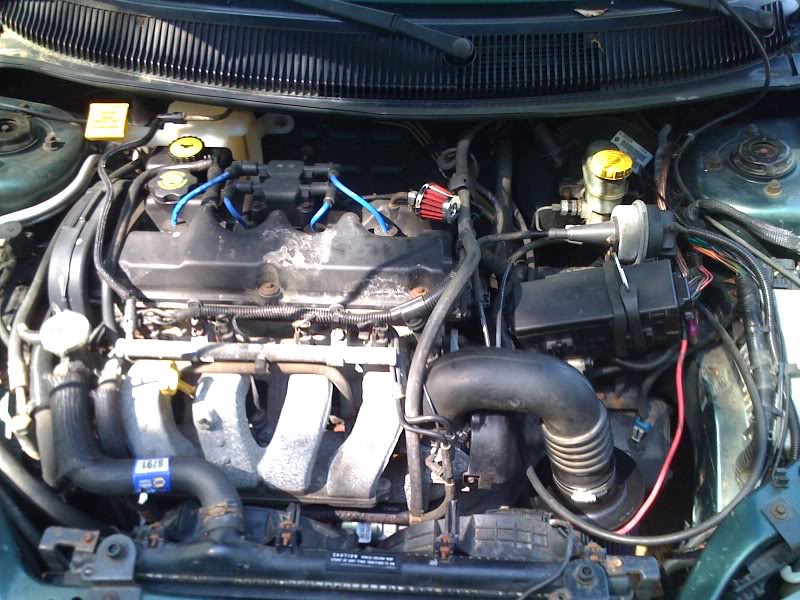
Notice on this setup I us ed the T. You can see where the power comes from the back then T's. One to the starter and one to the power distribution box. I us ed a walmart audio power splitter. 1 to 2.

Heavy duty wire crimp. Round. Notice the little metal plate holding it down. Be sure to us e both 10mm bolts so it is tight.

Wider view. Notice the invisible engine .
.
EDIT** If you have cruise control mounted underneath the battery tray you may have to mount it to something else.
Power wire (a set of jumper cable 4 gauge or 2 gauge if you feel the need. Maybe 10-12 foot or a subwoofer power wire)
You will need 4 heavy duty circle wire crimps.
Battery box
Some screws
Battery terminals
Start by removing your stock battery and tray. (3 bolts) Also remove the battery temp sensor front the tray. Put that somewhere cold.
Next throw the battery box in the back.
Cut your power wire so it will reach from the front to the back under the carpet and hidden.
The extra length you have left over will be used as your battery to frame ground in the back.
Throw a wire crimp on one side of the left over wire and mount it to you strut tower (ground)
Next head up to under the hood. You will need to locate you power distributions box. You will remove the black
cover over w here the power wire connects. Remove the 2 10 mm bolts off there also. Now it gets a little tricky so dont mess it up.
You will cut you stock terminals off. Cut them right close the the terminal. Both of them.
The ground that connects to the frame in front of the radiator (8mm bolt) can be removed. and remove the ground.
Next run the ground that hooks to the block and starter (the other ground from the terminal) put a crimp on it and mount that to the
frame. You can us e the same spot you removed the smaller one from.
Now your ground system should be all setup.
Now remember the wire that was under the 10mm bolts on the power box (its a few inches long and connects to the stock turminal) Take that wire and cut it from the little metal tab with the 2 bolt holes in it. You will need that piece! It will act li ke a washer to hold the power wires on good. Now you need to put a wire crimp on the end of the power wire for the starter. (front of the car still)
Now put a crimp on the power wire thats ran from the back. Take them and but them on your power distribution box. U se the washer thing on the outside and tighten the 2 10mm bolts down over them. Be sure to put the plastic cover back over these 2 wires. Maybe a little tape is in order so it doesnt hit off the car and short out your electrical system. You will also need 2 new battery terminals.
Double check all your connections. Then hook the 2 wires in the back up to you battery. The ground and the one power wire. If you blow something up or catch fire I am not responsible neither is the the dodgeforum or people that work at the forum. Do this at your own risk.
Picures of my setup. Its all li ke the write up accept I us e a T split at the front of the car.
Rear power terminal. Only reason there is more then one wire on it is because I had subs.
I put my setup on the drivers side of the car. Also shows the rear ground terminal. Notice I us ed two ground to chassis wires instead of one.
Ground wire bolted to strut. Notice the power wire also.
Notice on this setup I us ed the T. You can see where the power comes from the back then T's. One to the starter and one to the power distribution box. I us ed a walmart audio power splitter. 1 to 2.
Heavy duty wire crimp. Round. Notice the little metal plate holding it down. Be sure to us e both 10mm bolts so it is tight.
Wider view. Notice the invisible engine
.EDIT** If you have cruise control mounted underneath the battery tray you may have to mount it to something else.
Last edited by I_Ride_Neon; Aug 4, 2008 at 11:31 PM.


Registered User
Joined: Apr 2009
Posts: 43
Likes: 0
From: Pineville, NC
Very useful information you got here and helped me get mine done smoothly.
I wanted to share a few more pictures to help other that may be looking at moving their battery to the trunk.
Parts I used:
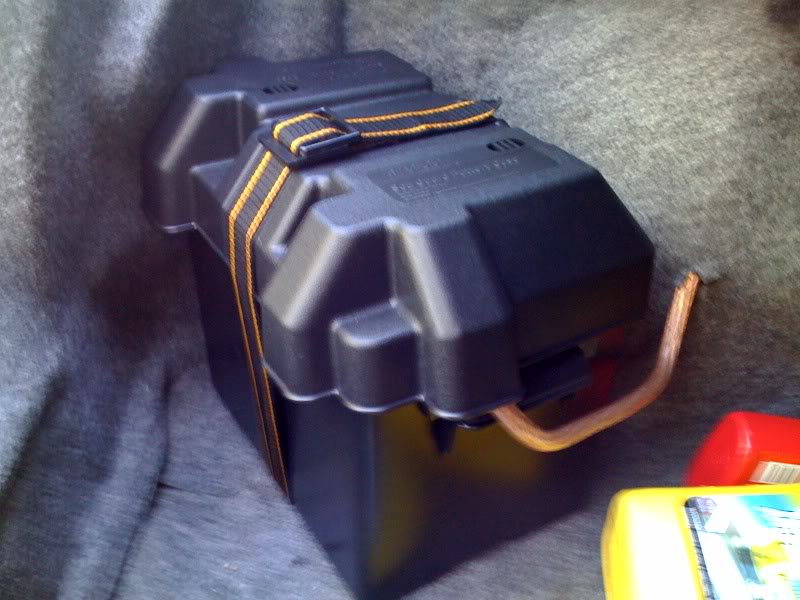
Battery Box Attwood Power Guard 27M 90671 (Napa auto)
20ft of 2 Gauge wire (Advance Auto)
x3 2 gauge wire crimps (advance Auto)
Battery Terminals (advance Auto)
x4 1" screw with bolts (Lowes)

As described in the guide, after removing the negative battery terminal I grounded the block in the same spot that the battery used to ground to.

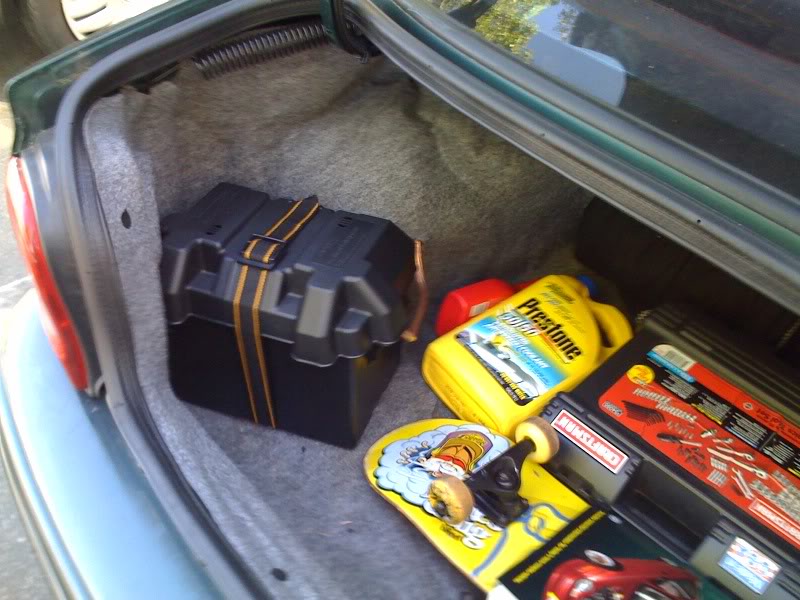
Positive lead runs through the fire wall, under the carpet starting at the hood release lever, through the trunk release, all the way to the back seat, up and under, and through the carpet in the trunk.

Still needs some rewiring because the starter positive lead is short Id rather tuck that up and under around the body with the harness. Also plan to move the block negative hidden from sight underneath.
More pictures coming soon.
I wanted to share a few more pictures to help other that may be looking at moving their battery to the trunk.
Parts I used:
Battery Box Attwood Power Guard 27M 90671 (Napa auto)
20ft of 2 Gauge wire (Advance Auto)
x3 2 gauge wire crimps (advance Auto)
Battery Terminals (advance Auto)
x4 1" screw with bolts (Lowes)
As described in the guide, after removing the negative battery terminal I grounded the block in the same spot that the battery used to ground to.
Positive lead runs through the fire wall, under the carpet starting at the hood release lever, through the trunk release, all the way to the back seat, up and under, and through the carpet in the trunk.
Still needs some rewiring because the starter positive lead is short Id rather tuck that up and under around the body with the harness. Also plan to move the block negative hidden from sight underneath.
More pictures coming soon.