

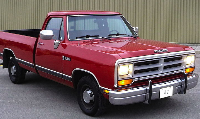
How to replace door pins and bushings

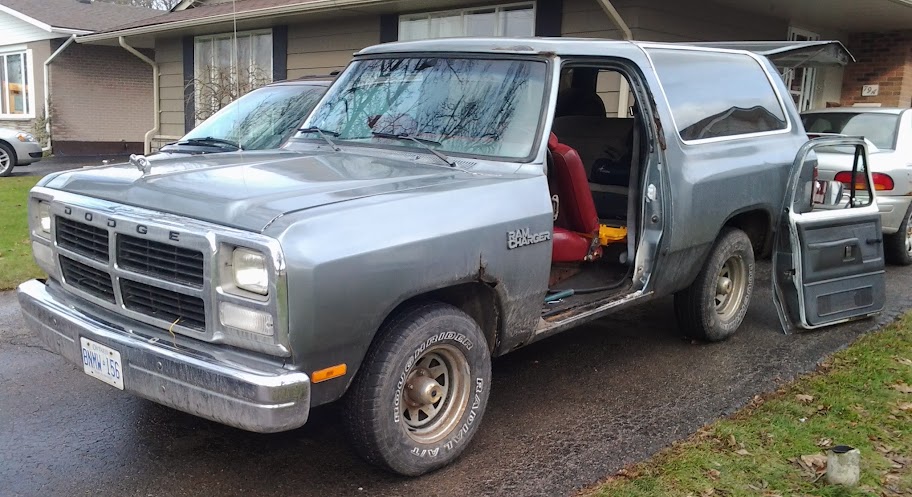
This is a guide to helping you replace the pins and bushings on a 1st generation dodge ram.
I recommend two people to do this but it can be done with one person, it is just more of a pain.
What you will need:
Door pin and bushing kit
hammer
Assortment of punches
9/16 wrench and socket
Extension more than 3in
Some PB blaster or equivalent
Multi-purpose grease (recommended)
Oil (regular motor oil works fine, I used 10w-40)
Something to support the door, friend, jack, boards, buckets, combination of the previously listed
phillips and flathead screwdrivers
Approximate time: 2-5 hours
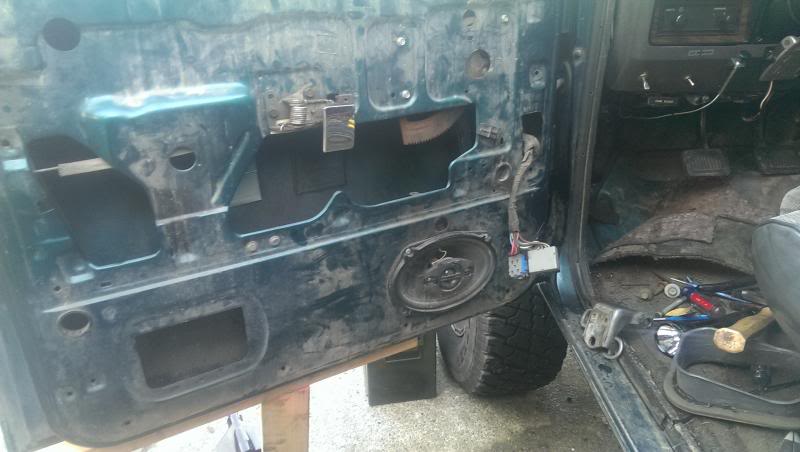
1. First go ahead and remove the kick panel on the drivers side where the vent is. Screws are phillips. Then remove the black plastic oval piece with a flathead. The bolts there are for the hinge.
2. Next you need to support the weight of the door. If your door sags (which is the reason you would need to do this) lift it up so that it is not sagging. Be gently if using a jack on the door. I used a jack and 2x4s, which worked terribly so I would try and use something different. It was not very steady.
Note: I had my door trim panel already removed before I did this, It made it easier but its not necessary.
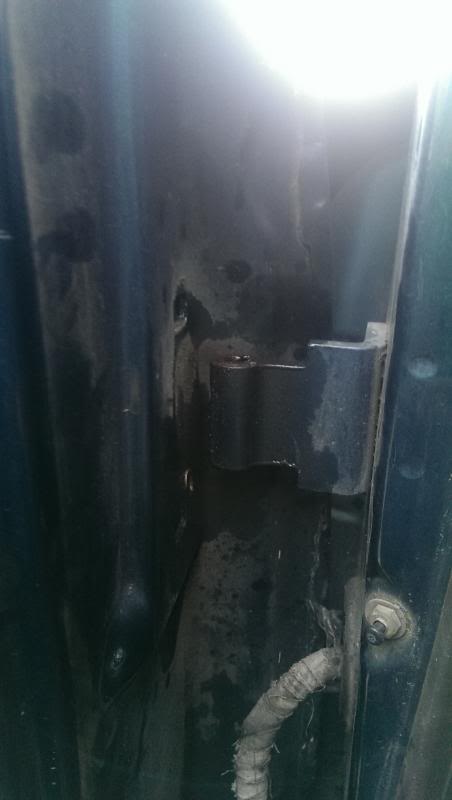
3. Spray the door hinges with some PB blaster to help loosen things up.
4. For this guide we will start with the bottom hinge, but it doesnt really matter. Using a punch and hammer, beat the pin from the hinge from the bottom up. I used a punch just larger than the pin then changed to one much smaller after the pin went into the hinge. I boogered my pin up a little so I had to sand the tip down some to get through the upper hinge part. It was a pain to get the pin out.
5. After the pin is out remove the bolts than hold the hinge to the cab. Two inside and one outside, three total. Then pull that side of the hinge out.
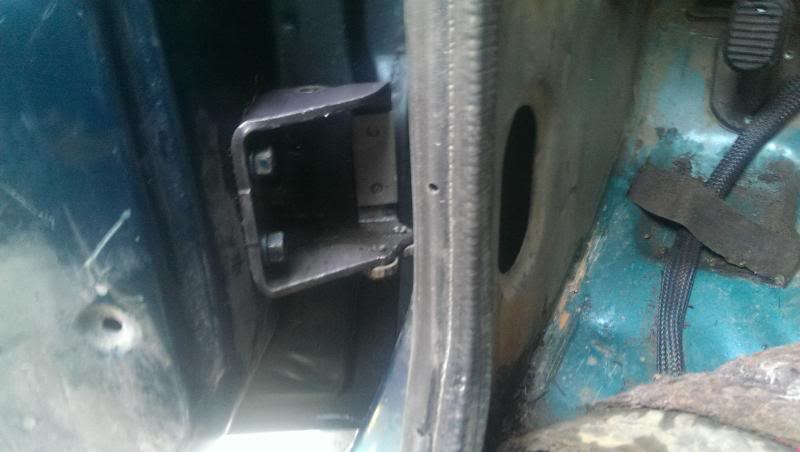
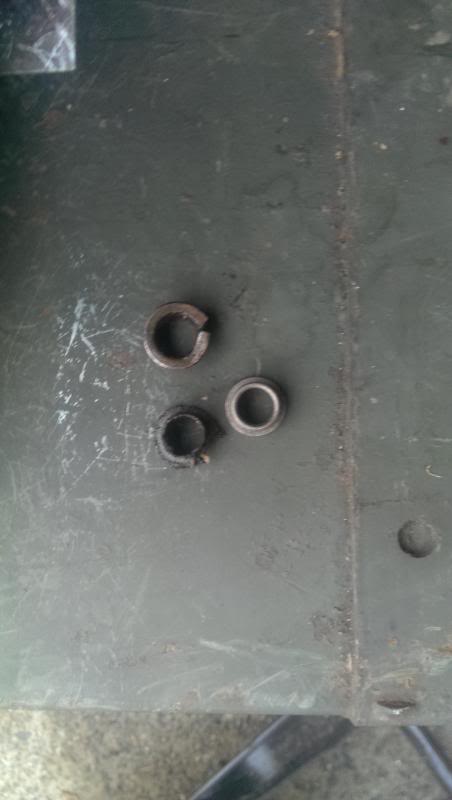
6. The bushing are installed on this side of the hinge. Youll need to pop the old ones out. I used a flathead. be sure all the pieces come up, mine had broken up. Then clean the hinge of all dirt and scrap, especially near and in the bushing hole.
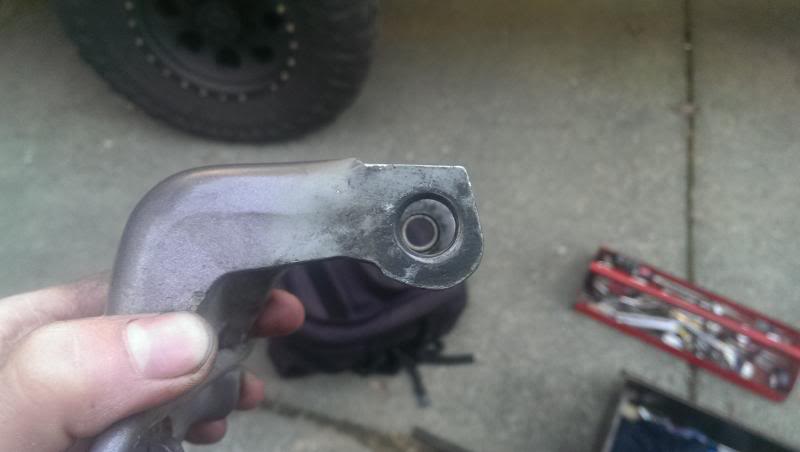
The bushing on the right is a new one, the other two are both bad old ones. I later discovered the lower left one was only part of a bushing, it had seperated.
7. Take a bushing in a finger and drop oil into the middle then squeeze your fingers together, and repeat two or three times. This is to impregnate the bushing with oil as much as you can.
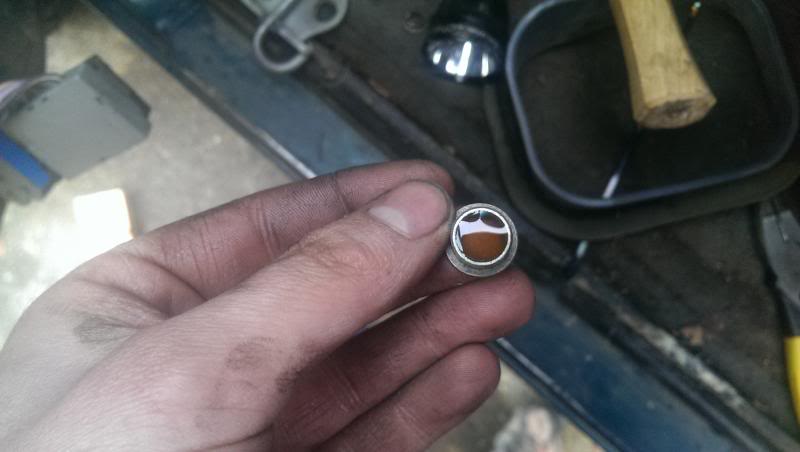
8. After the bushing is good and oiled up, press then into the bushing hole on the hinge with your fingers. Make sure the lip of the bushing is on the outer side of the (cab side) hinge.
9. Then put the hinge back on. Try to line it up best you can. You may have to re-adjust at the end, I did.
10. Now take the new pin and get some oil on it. Then beat it into the hinge from the top. I didnt use a punch to put it back in. Once its back in, you should notice most of the sag in the door should be gone (DONT SLAM YOUR DOOR CLOSED YET). Moving on to the upper hinge.
11. The upper one went alot easier for me then the bottom one, I was done with the top in literally minutes. Beat the pin out from the bottom just like the bottom one. Be aware if you door is not secured, the door can be damaged more by only being on the lower hinge. I got a nasty chip and slighly pulled out on the door where the lower hinge mounts.
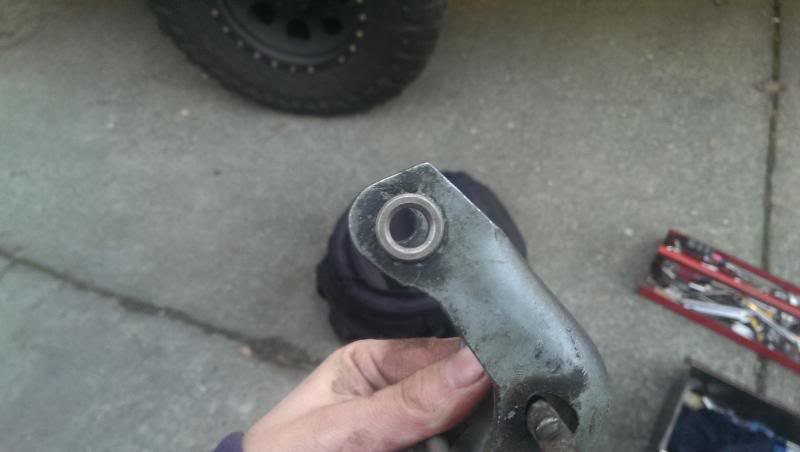
12. Remove the two bolts holding the door side of the hinge, the remove the hinge. Now remove the bushings just like the lower hinge. This time you will have to just pry them out.
13. After you remove the bushings. Clean the inside of the (cab side) hinge real good. I used a screwdriver and a rag.
14. Now redo step 7 (oil bushings) and press them into the cab side of the hinge, lip facing outward from the hinge.
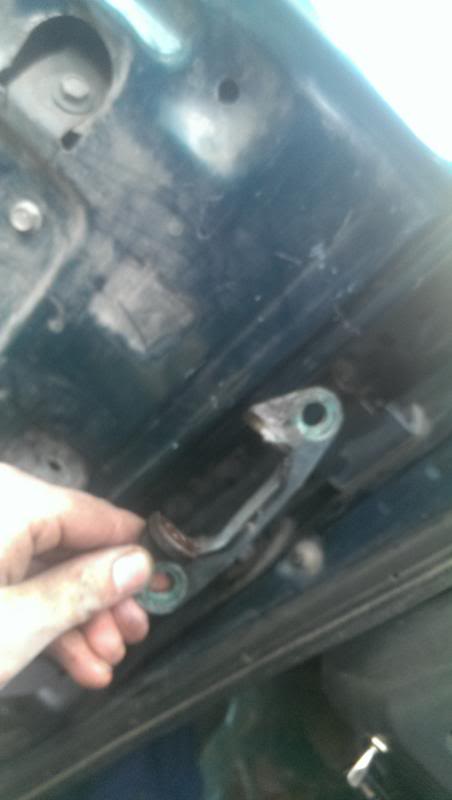
15. Put the door side of the hinge back on, lined up best you can.
16. I took some multi-purpose (non disc brake) type grease and pushed some into the hinge and covered the pin in it. I would recommend doing this although not necessary.
17. Put the pin back through the hinge using a hammer.
18. Once the pin is back in you can unsupport the door and check alignment. I had to go and reset both hinges. This is where a second person really comes in handy. Check for alignment just by how the latch and striker meet up, along with outer trim piece. Make sure to check the entire outline of the door to make sure you are rubbing panels. Alignment took awhile for me and the door still isnt lined up like it should be, but it closes without jamming anything.
Overall it was a simple but frustrating project mainly due to not having a good way to support the door and the bottom hinge gave me a little trouble. Not being able to line the door up properly bothers me a little too.
I recommend two people to do this but it can be done with one person, it is just more of a pain.
What you will need:
Door pin and bushing kit
hammer
Assortment of punches
9/16 wrench and socket
Extension more than 3in
Some PB blaster or equivalent
Multi-purpose grease (recommended)
Oil (regular motor oil works fine, I used 10w-40)
Something to support the door, friend, jack, boards, buckets, combination of the previously listed
phillips and flathead screwdrivers
Approximate time: 2-5 hours
1. First go ahead and remove the kick panel on the drivers side where the vent is. Screws are phillips. Then remove the black plastic oval piece with a flathead. The bolts there are for the hinge.
2. Next you need to support the weight of the door. If your door sags (which is the reason you would need to do this) lift it up so that it is not sagging. Be gently if using a jack on the door. I used a jack and 2x4s, which worked terribly so I would try and use something different. It was not very steady.
Note: I had my door trim panel already removed before I did this, It made it easier but its not necessary.
3. Spray the door hinges with some PB blaster to help loosen things up.
4. For this guide we will start with the bottom hinge, but it doesnt really matter. Using a punch and hammer, beat the pin from the hinge from the bottom up. I used a punch just larger than the pin then changed to one much smaller after the pin went into the hinge. I boogered my pin up a little so I had to sand the tip down some to get through the upper hinge part. It was a pain to get the pin out.
5. After the pin is out remove the bolts than hold the hinge to the cab. Two inside and one outside, three total. Then pull that side of the hinge out.
6. The bushing are installed on this side of the hinge. Youll need to pop the old ones out. I used a flathead. be sure all the pieces come up, mine had broken up. Then clean the hinge of all dirt and scrap, especially near and in the bushing hole.
The bushing on the right is a new one, the other two are both bad old ones. I later discovered the lower left one was only part of a bushing, it had seperated.
7. Take a bushing in a finger and drop oil into the middle then squeeze your fingers together, and repeat two or three times. This is to impregnate the bushing with oil as much as you can.
8. After the bushing is good and oiled up, press then into the bushing hole on the hinge with your fingers. Make sure the lip of the bushing is on the outer side of the (cab side) hinge.
9. Then put the hinge back on. Try to line it up best you can. You may have to re-adjust at the end, I did.
10. Now take the new pin and get some oil on it. Then beat it into the hinge from the top. I didnt use a punch to put it back in. Once its back in, you should notice most of the sag in the door should be gone (DONT SLAM YOUR DOOR CLOSED YET). Moving on to the upper hinge.
11. The upper one went alot easier for me then the bottom one, I was done with the top in literally minutes. Beat the pin out from the bottom just like the bottom one. Be aware if you door is not secured, the door can be damaged more by only being on the lower hinge. I got a nasty chip and slighly pulled out on the door where the lower hinge mounts.
12. Remove the two bolts holding the door side of the hinge, the remove the hinge. Now remove the bushings just like the lower hinge. This time you will have to just pry them out.
13. After you remove the bushings. Clean the inside of the (cab side) hinge real good. I used a screwdriver and a rag.
14. Now redo step 7 (oil bushings) and press them into the cab side of the hinge, lip facing outward from the hinge.
15. Put the door side of the hinge back on, lined up best you can.
16. I took some multi-purpose (non disc brake) type grease and pushed some into the hinge and covered the pin in it. I would recommend doing this although not necessary.
17. Put the pin back through the hinge using a hammer.
18. Once the pin is back in you can unsupport the door and check alignment. I had to go and reset both hinges. This is where a second person really comes in handy. Check for alignment just by how the latch and striker meet up, along with outer trim piece. Make sure to check the entire outline of the door to make sure you are rubbing panels. Alignment took awhile for me and the door still isnt lined up like it should be, but it closes without jamming anything.
Overall it was a simple but frustrating project mainly due to not having a good way to support the door and the bottom hinge gave me a little trouble. Not being able to line the door up properly bothers me a little too.

Rookie
Joined: Oct 2006
Posts: 69
Likes: 0
From: Plano, TX
I just did this on my '85 yesterday! Nice write up here.
I did mine by myself, just a hammer, flat tip screwdriver and a long 1/4" drive extension, and a 9/16" wrench. Took me about 45 minutes total working time ( an hour if you count the time my neighbor told me about waxing his car...). I had nothing to hold up the door except my knee, so your way described above would have been much nicer on the body!
Now I just need to make a few slight adjustments on the striker bolt and/or the latch mechanism...
Rookie
Joined: Dec 2013
Posts: 70
Likes: 0
From: WA
Cool write-up. Thank you for posting it.
I'm sure most of you are familiar with this trick when you have to remove a hinge, be it from the door, trunk or hood - drill a 3/32" hole through the hinge mounting area into the body (or hood, or trunk). When you're reassembling things, you can use the drill bit to line up the hinge in its previous location. This can be a real help if you're doing the job by yourself, as it gets you back in the ballpark, alignment-wise, pretty quickly and easily.
I'm sure most of you are familiar with this trick when you have to remove a hinge, be it from the door, trunk or hood - drill a 3/32" hole through the hinge mounting area into the body (or hood, or trunk). When you're reassembling things, you can use the drill bit to line up the hinge in its previous location. This can be a real help if you're doing the job by yourself, as it gets you back in the ballpark, alignment-wise, pretty quickly and easily.
Legend


Joined: Jun 2009
Posts: 8,025
Likes: 72
From: orangeville ontario
i did the drivers side door on my ramcharger at the beginning of the month. cut the speaker wire and just took the door off all by myself. i had my sisters help to re install things. with the the door off the bottom pin went flying out of the hole when i hit it with a hammer. when i put everything back together i had adjust the bottom hinge. i find adjusting the hinges fairly easy. with the hinge loose you close the door and get into the cab through the opposite door and tighten things up. usually works. it only took me about 30 minutes to do the one door but it is not my first door. it is 3rd or 4th door that i have done.

Trending Topics
Registered User
Joined: Jun 2014
Posts: 2
Likes: 0
I've read the thread on hinge pins, and am surprised to find that mine won't budge. When I examined the lower pin, it is a factory installed pin, and it looks like it has a clip right below the lower bushing, and the end of the pin has "ears' pinched into it, as far as I can tell.
Anyone else find this, or am I nuts? If anyone has seen this, hood to I get the clip off?
Anyone else find this, or am I nuts? If anyone has seen this, hood to I get the clip off?