

Starting the build process


Thread Starter
|
Legend


Joined: Feb 2005
Posts: 8,058
Likes: 183
From: Fort Worth, TX
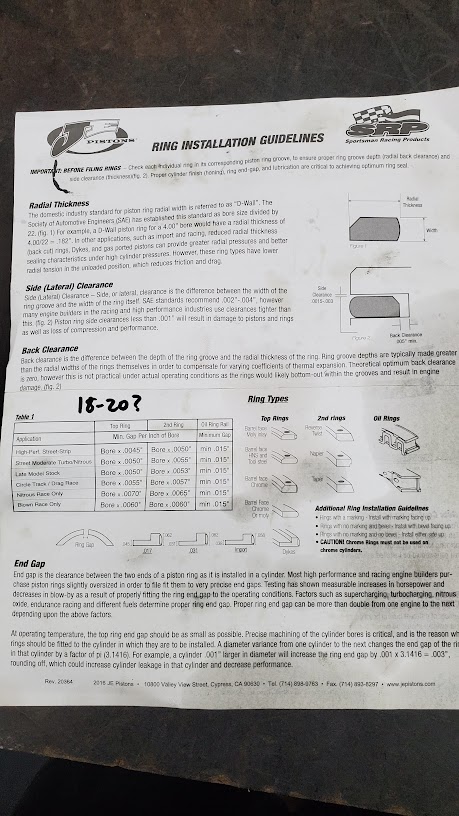
Piston rings are filed.
New rod bearings came in today
Dragster is unloaded to get ready for next weekend
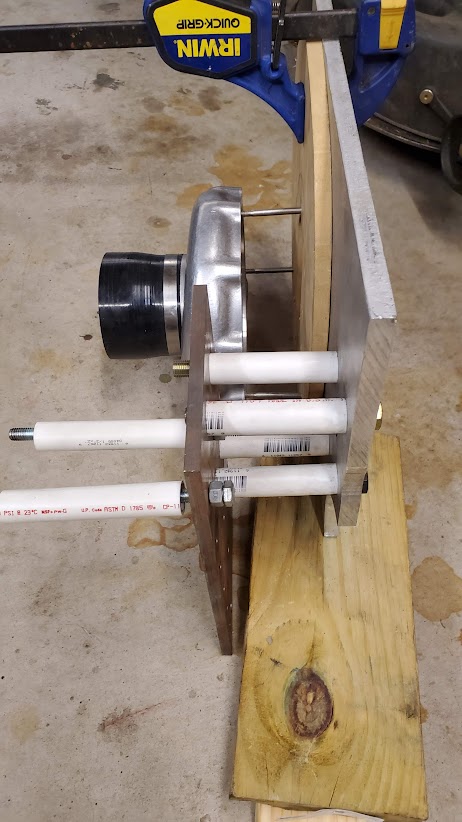
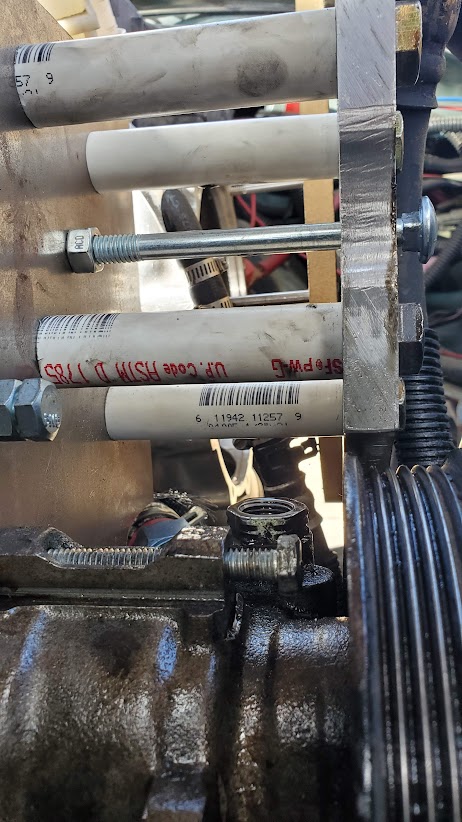
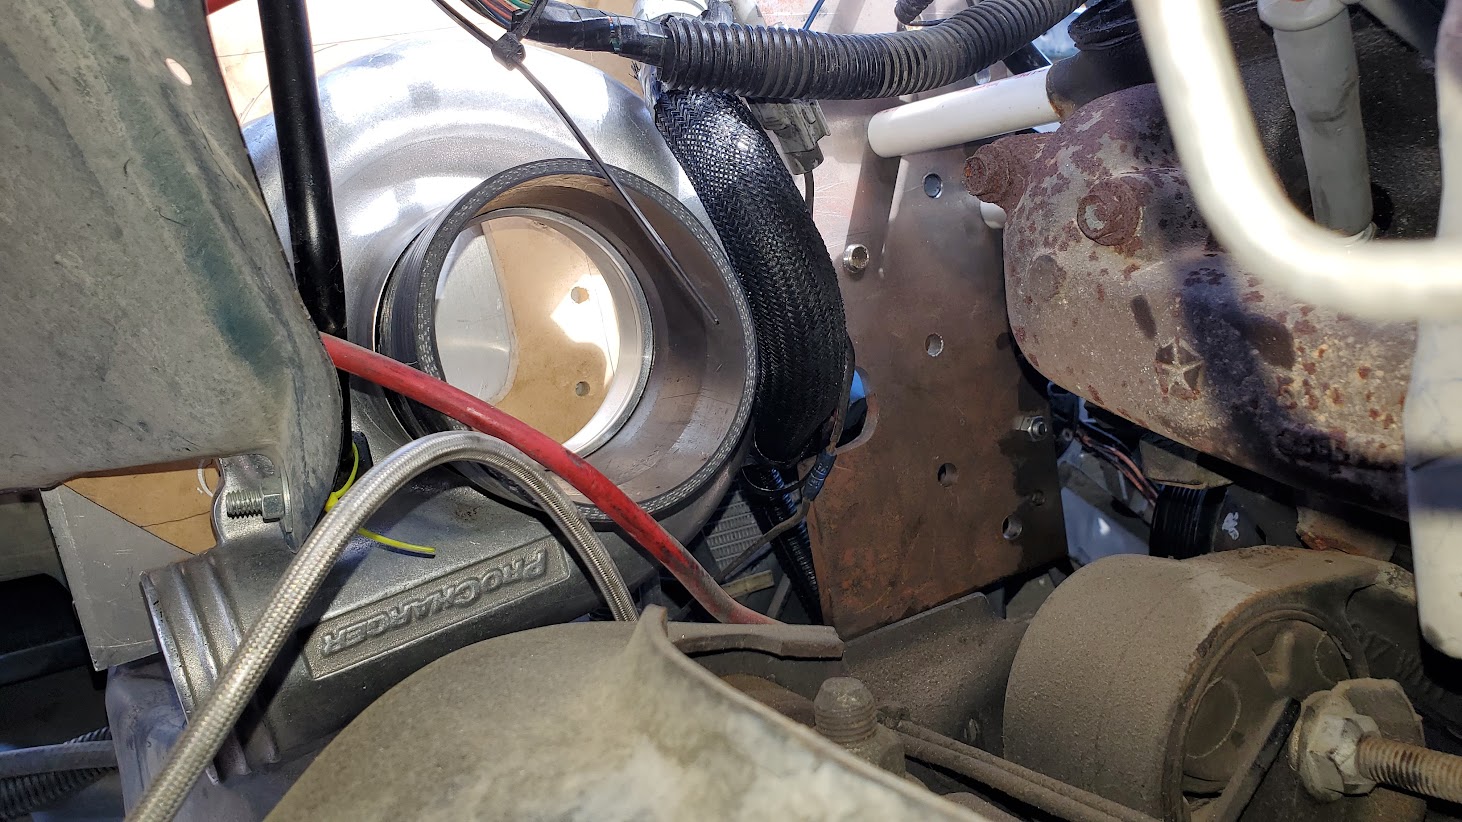
Procharger mock-up assembly is complete
Many loose ends are coming together....
Also, here is the procharger mounting bolt pattern that seems to not be published anywhere online.
Top to bottom, measuring horizontal spread:
4.975
5.536
4.650
1.810
I did not measure vertical spreads. Oops.
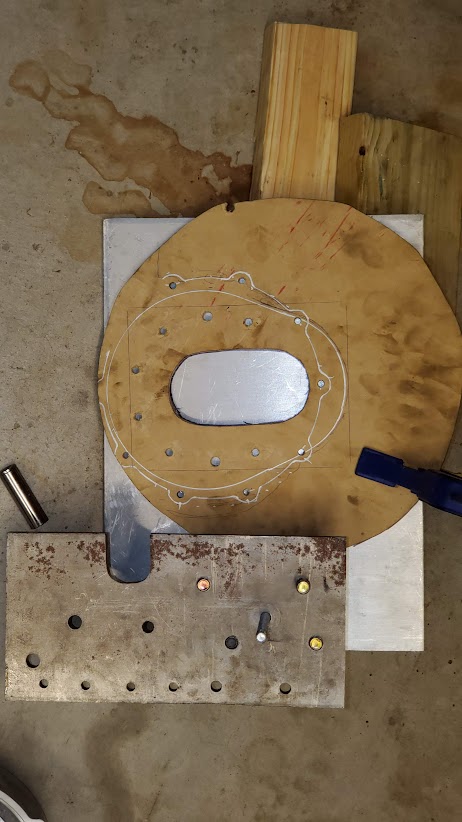
I cut the center oval opening in the board first. I started small and slowly worked my way up until it was snug.
I then used 5/16 and 3/8 Transfer Screws threaded into the procharger to mark their location in the board. I had the tip of each sticking up about 1/4", and tapped the board with a hammer until I had a solid impression from each screw. I then measured the in/in and out/out dimension of head impression (the screws have a point, then a hex) to get an average value, then I eyeballed the center point location. The numbers concurred pretty well.
I then drilled the holes to the appropriate size (5/16 or 3/8) and ran the bolts through.
Then, using a framing square, I made several many tick marks (at least 12-15) around the volute chamber to mark it's perimeter on the board. I also traced the perimeter of the gearbox for the sake of reference.
I then separated the volute from the gearbox and aligned it with my tick marks on the board, and traced it's perimeter. I then notated the location of the 1/4-20 threaded holes in the volute on the board, and drilled them out.
Once those were drilled and I verified that everything lined up using 3" 1/4-20 bolts, I countersunk the holes on the backside with a 1/2" drillbit so that the surface can be flat when placed in the fixture.
I'll put the fixture on the V6, then put the board and volute on, clamp them together, and trace out my mounting options onto the aluminum by tracing the board's cutout. Might happen this weekend, hard to say.


New rod bearings came in today
Dragster is unloaded to get ready for next weekend
Procharger mock-up assembly is complete
Many loose ends are coming together....
Also, here is the procharger mounting bolt pattern that seems to not be published anywhere online.
Top to bottom, measuring horizontal spread:
4.975
5.536
4.650
1.810
I did not measure vertical spreads. Oops.
I cut the center oval opening in the board first. I started small and slowly worked my way up until it was snug.
I then used 5/16 and 3/8 Transfer Screws threaded into the procharger to mark their location in the board. I had the tip of each sticking up about 1/4", and tapped the board with a hammer until I had a solid impression from each screw. I then measured the in/in and out/out dimension of head impression (the screws have a point, then a hex) to get an average value, then I eyeballed the center point location. The numbers concurred pretty well.
I then drilled the holes to the appropriate size (5/16 or 3/8) and ran the bolts through.
Then, using a framing square, I made several many tick marks (at least 12-15) around the volute chamber to mark it's perimeter on the board. I also traced the perimeter of the gearbox for the sake of reference.
I then separated the volute from the gearbox and aligned it with my tick marks on the board, and traced it's perimeter. I then notated the location of the 1/4-20 threaded holes in the volute on the board, and drilled them out.
Once those were drilled and I verified that everything lined up using 3" 1/4-20 bolts, I countersunk the holes on the backside with a 1/2" drillbit so that the surface can be flat when placed in the fixture.
I'll put the fixture on the V6, then put the board and volute on, clamp them together, and trace out my mounting options onto the aluminum by tracing the board's cutout. Might happen this weekend, hard to say.
Last edited by magnethead; May 4, 2019 at 12:43 AM.
Thread Starter
|
Legend
Joined: Feb 2005
Posts: 8,058
Likes: 183
From: Fort Worth, TX
So I did a thing.
Ordered the following from BruteSpeed:
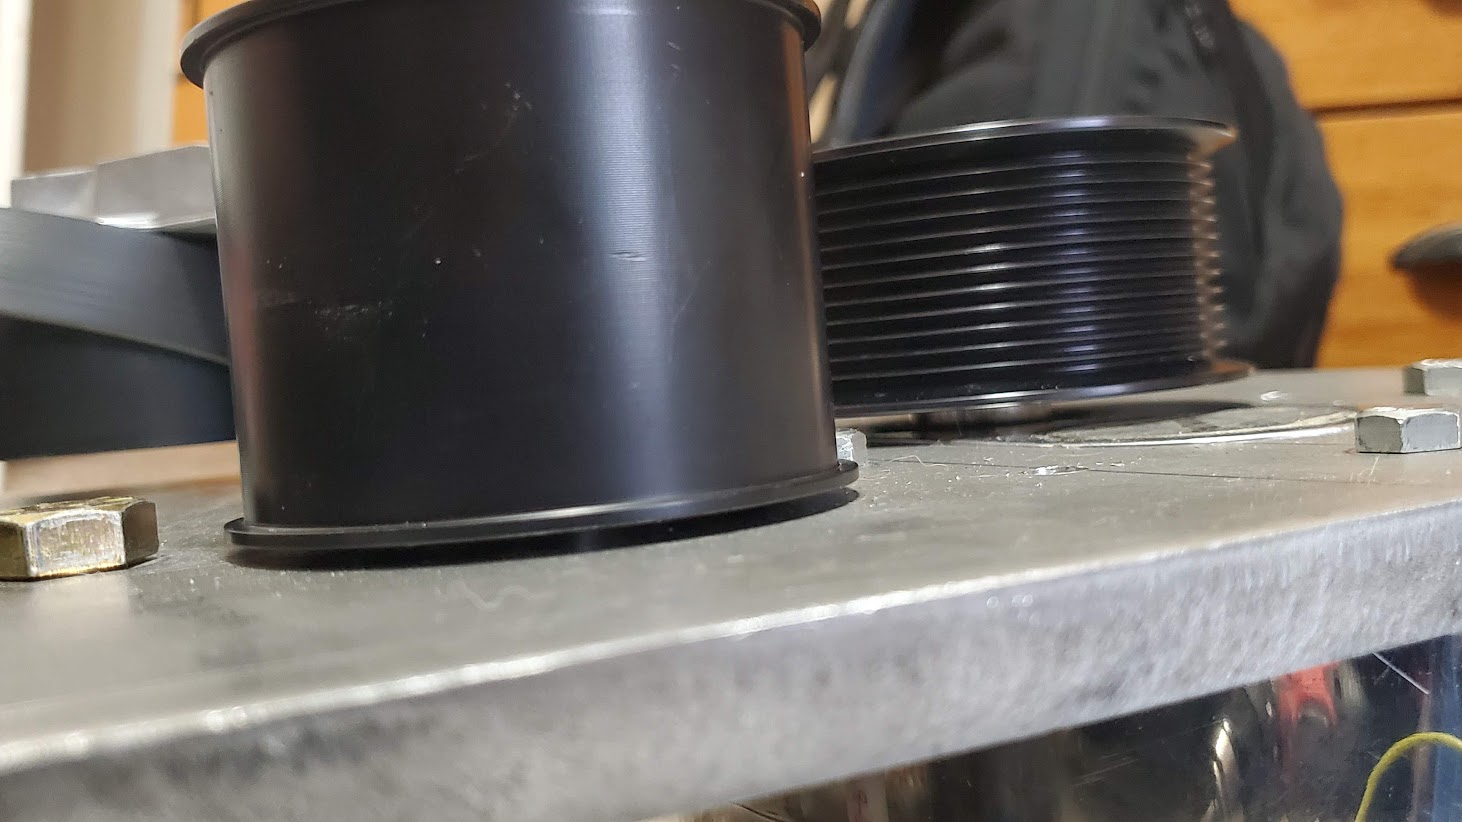
ATI DM002I-004 Idler Shaft
DM002I-077 IDLER SHAFT
ATI DC004A-012 3" IDLR PULLEY-12 RIB
DP400I-12DATI 12 Rib Pulleys (Standard, flush with shoulders)
I also ordered a Dayco belt tensioner from Advance Auto, and used a 25% code to pay a more reasonable price.
Dayco has a few 12R sizes for me to target:
5120477: 47.72" $39
5120483: 48.35" $NA
5120570: 57.01" $39
5120640: 63.98" $20
5120646: 64.57" $NA
5120738: 73.75" $49
5120783: 78.30" $45
5120788: 78.74" $32
5120843: 84.25" $63
5120852: 85.25", $62
5120858: 85.83" $53
5120865: 86.50" $41
5120870: 87.01" $25
5120873: 87.25" $38
5120903: 90.25" $42
5120910: 91.00" $40
5120919: 91.93" $34
5120978: 97.75" $50
5120980: 98.00 $55
5120985: 98.50" $41
5121040: 104.0" $37
5121050: 105.0" $64
5121140: 113.98" $59
Gates also has 12 rib options - http://www.gatesracing.com/assets/Ga...st%20LORES.pdf
55.95
59.4
60.59
61.22
62.08
64.07
64.97
65.5
65.99
66.5
66.98
67.5
68
70.23
81.46
84.23
86.36
87.82
89.12
90.31
92.5
93.19
96.41
97.54
103.94
Ordered the following from BruteSpeed:
ATI DM002I-004 Idler Shaft
DM002I-077 IDLER SHAFT
ATI DC004A-012 3" IDLR PULLEY-12 RIB
DP400I-12DATI 12 Rib Pulleys (Standard, flush with shoulders)
I also ordered a Dayco belt tensioner from Advance Auto, and used a 25% code to pay a more reasonable price.
Dayco has a few 12R sizes for me to target:
5120477: 47.72" $39
5120483: 48.35" $NA
5120570: 57.01" $39
5120640: 63.98" $20
5120646: 64.57" $NA
5120738: 73.75" $49
5120783: 78.30" $45
5120788: 78.74" $32
5120843: 84.25" $63
5120852: 85.25", $62
5120858: 85.83" $53
5120865: 86.50" $41
5120870: 87.01" $25
5120873: 87.25" $38
5120903: 90.25" $42
5120910: 91.00" $40
5120919: 91.93" $34
5120978: 97.75" $50
5120980: 98.00 $55
5120985: 98.50" $41
5121040: 104.0" $37
5121050: 105.0" $64
5121140: 113.98" $59
Gates also has 12 rib options - http://www.gatesracing.com/assets/Ga...st%20LORES.pdf
55.95
59.4
60.59
61.22
62.08
64.07
64.97
65.5
65.99
66.5
66.98
67.5
68
70.23
81.46
84.23
86.36
87.82
89.12
90.31
92.5
93.19
96.41
97.54
103.94
Last edited by magnethead; May 4, 2019 at 11:18 AM.


Thread Starter
|
Legend
Joined: Feb 2005
Posts: 8,058
Likes: 183
From: Fort Worth, TX
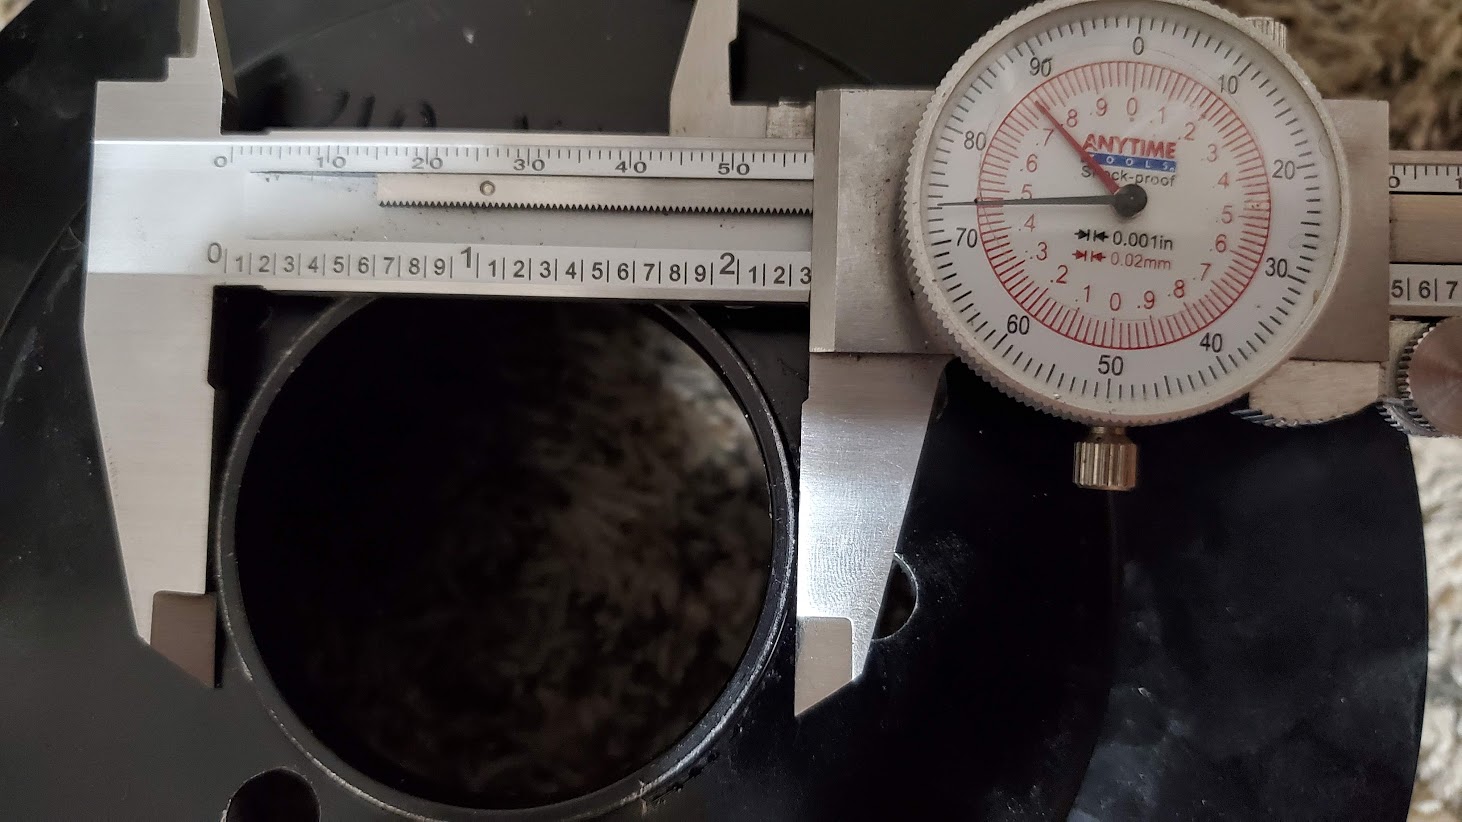
A lot has gone on in the last 2 weeks since the last update. Put the pistons in the block, found the rod bolts hitting the block, clearanced the block, then went back to the dragster. Won the Mid-West Pro Mod Series race in Tulsa. Received the pulleys from Brute Speed, got the tensioner from Advance (stacking discount codes FTW), got a power steering pump from Steerco AGR Performance, I'll have new power steering hoses from Orme Brothers on Monday, the Spintech Port Plates came in from Josh Haeusser, and I also had Josh cut me a new crank hub adapter. I took the idler pulley spacer over to Mike Keith Enterprises to have it lathed down to fit properly.
I also refined the CAD drawing a little further. I'll be sending the files to Josh to cut and machine as well once I have them finalized.


I also refined the CAD drawing a little further. I'll be sending the files to Josh to cut and machine as well once I have them finalized.


Thread Starter
|
Legend
Joined: Feb 2005
Posts: 8,058
Likes: 183
From: Fort Worth, TX
So dad and I have now learned that there is nothing more kick-in-the-nuts baptism-by-fire than building a mopar. For synopsis thus far,
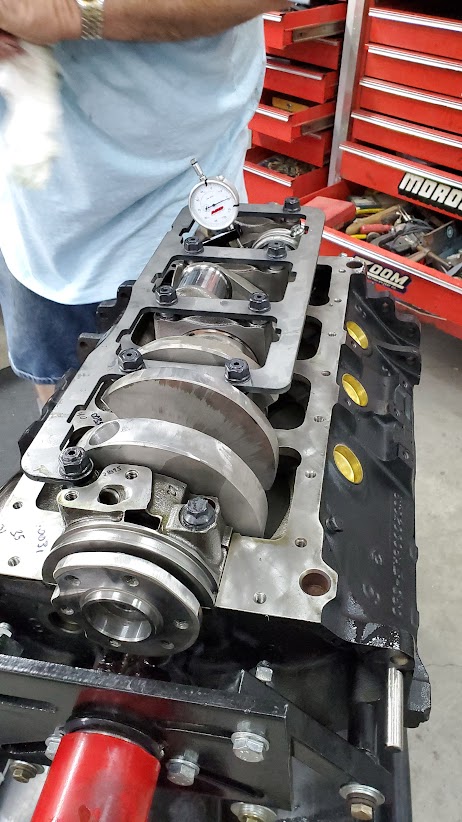
1) Main caps need to be done perfect for the girdle...and fly cut and honed properly to fit the crank
2) The block needs to be clearanced for any kind of real connecting rod clearance with 4" stroke
3) Always double check valve relief placement
4) There are 2 kinds of camshafts: The kind that fit right, and the kind that fit right when attachment is modified.
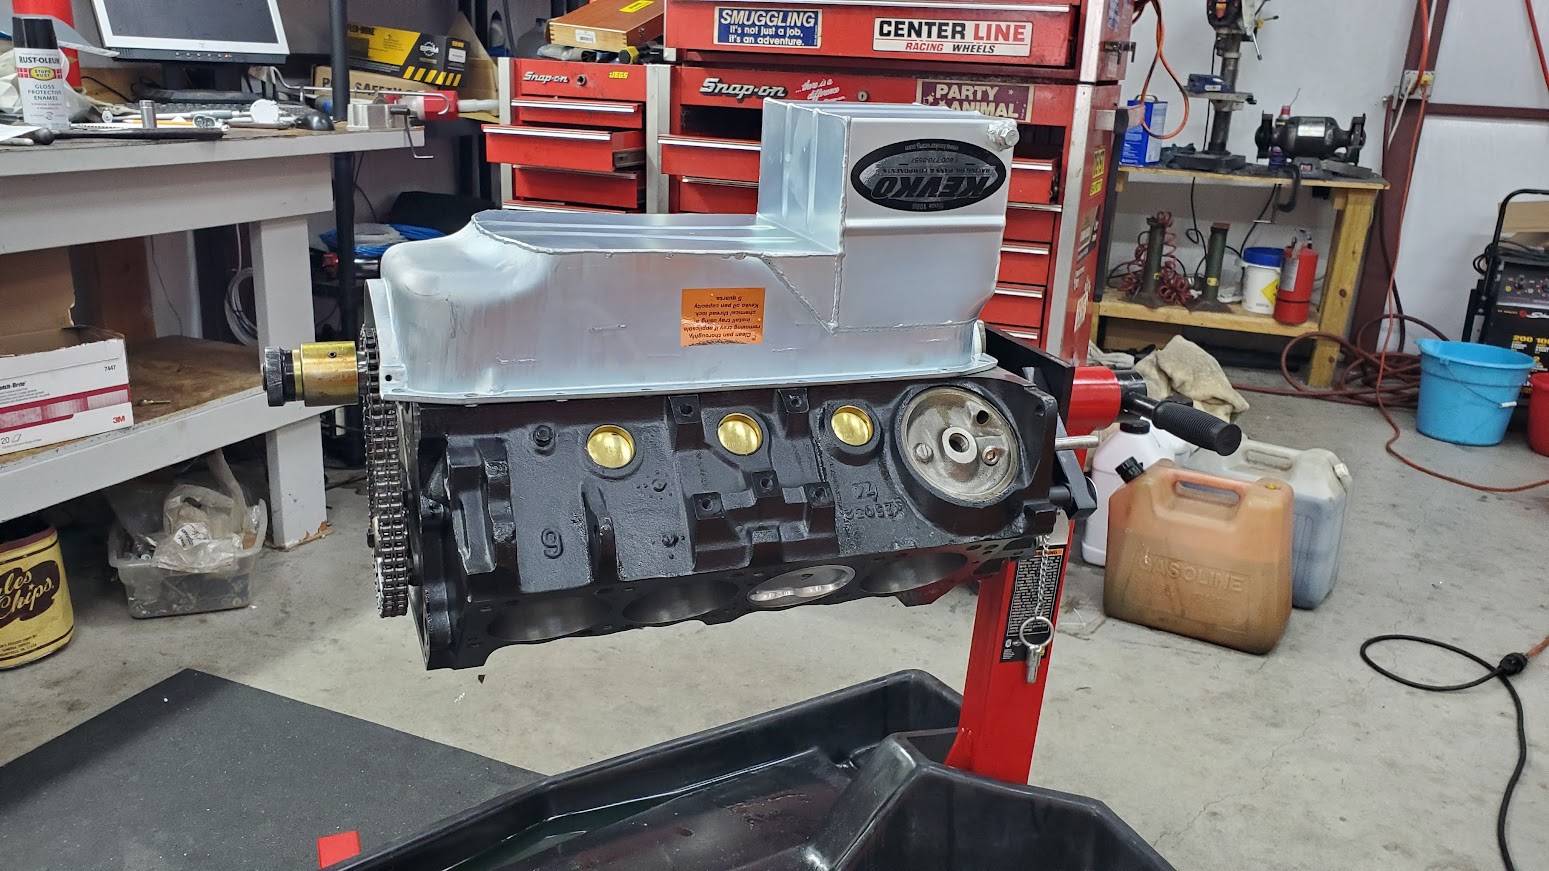
5) There are 8 total oil galley plugs. You can't see 2 of them. 5 thread in, 3 press in.
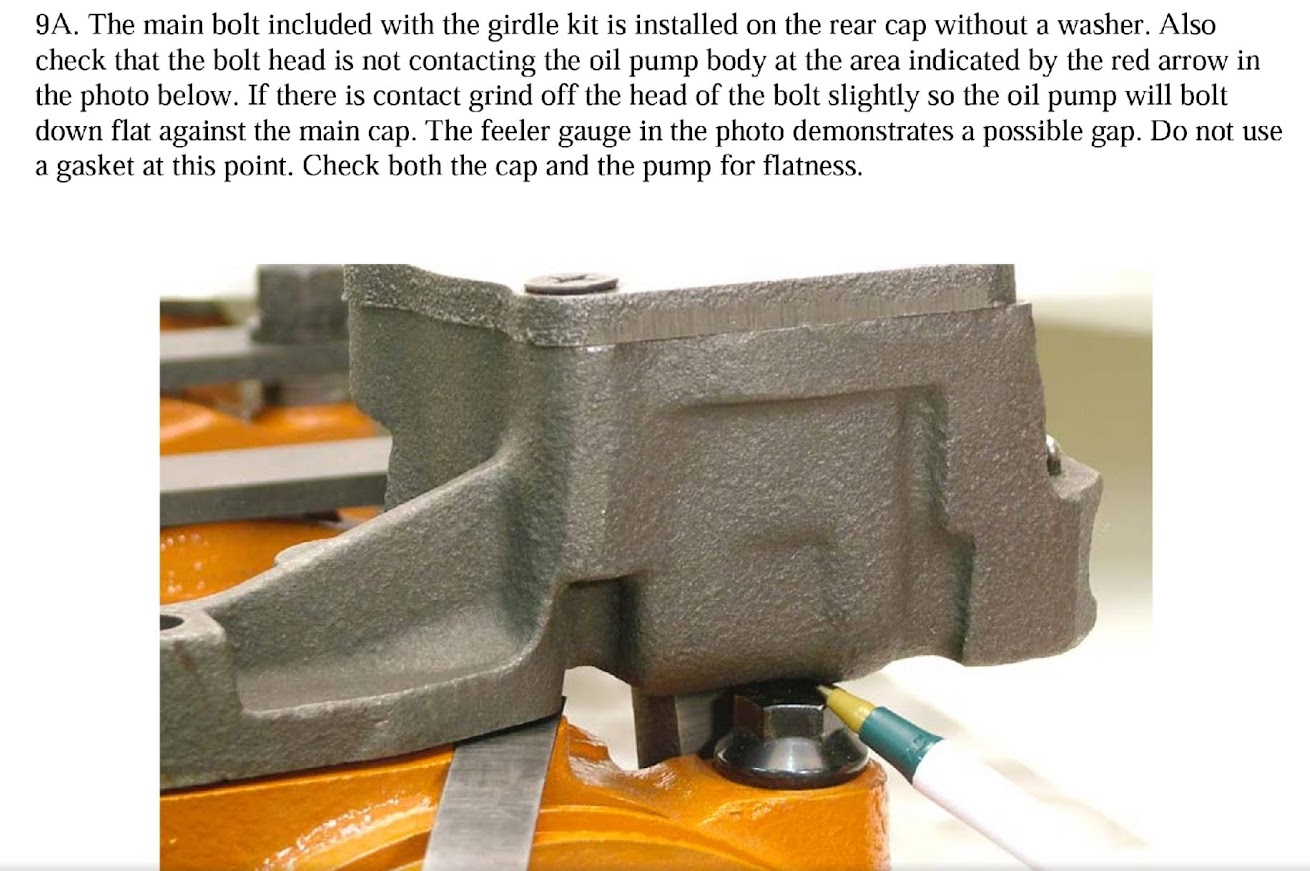
6) The oil pump and main cap bolt are conflicts of space
7) Windage tray and main girdle are conflicts of space
8) No matter which head stud kit you buy, the first one won't fit. (Odd are, the second won't either)
9) If something is easy, you're doing it wrong
10) #9 also applies to things fitting on first try.


1) Main caps need to be done perfect for the girdle...and fly cut and honed properly to fit the crank
2) The block needs to be clearanced for any kind of real connecting rod clearance with 4" stroke
3) Always double check valve relief placement
4) There are 2 kinds of camshafts: The kind that fit right, and the kind that fit right when attachment is modified.
5) There are 8 total oil galley plugs. You can't see 2 of them. 5 thread in, 3 press in.
6) The oil pump and main cap bolt are conflicts of space
7) Windage tray and main girdle are conflicts of space
8) No matter which head stud kit you buy, the first one won't fit. (Odd are, the second won't either)
9) If something is easy, you're doing it wrong
10) #9 also applies to things fitting on first try.
Thread Starter
|
Legend
Joined: Feb 2005
Posts: 8,058
Likes: 183
From: Fort Worth, TX
No real news *yet* for this week. Been a little slow while I work on other priorities.
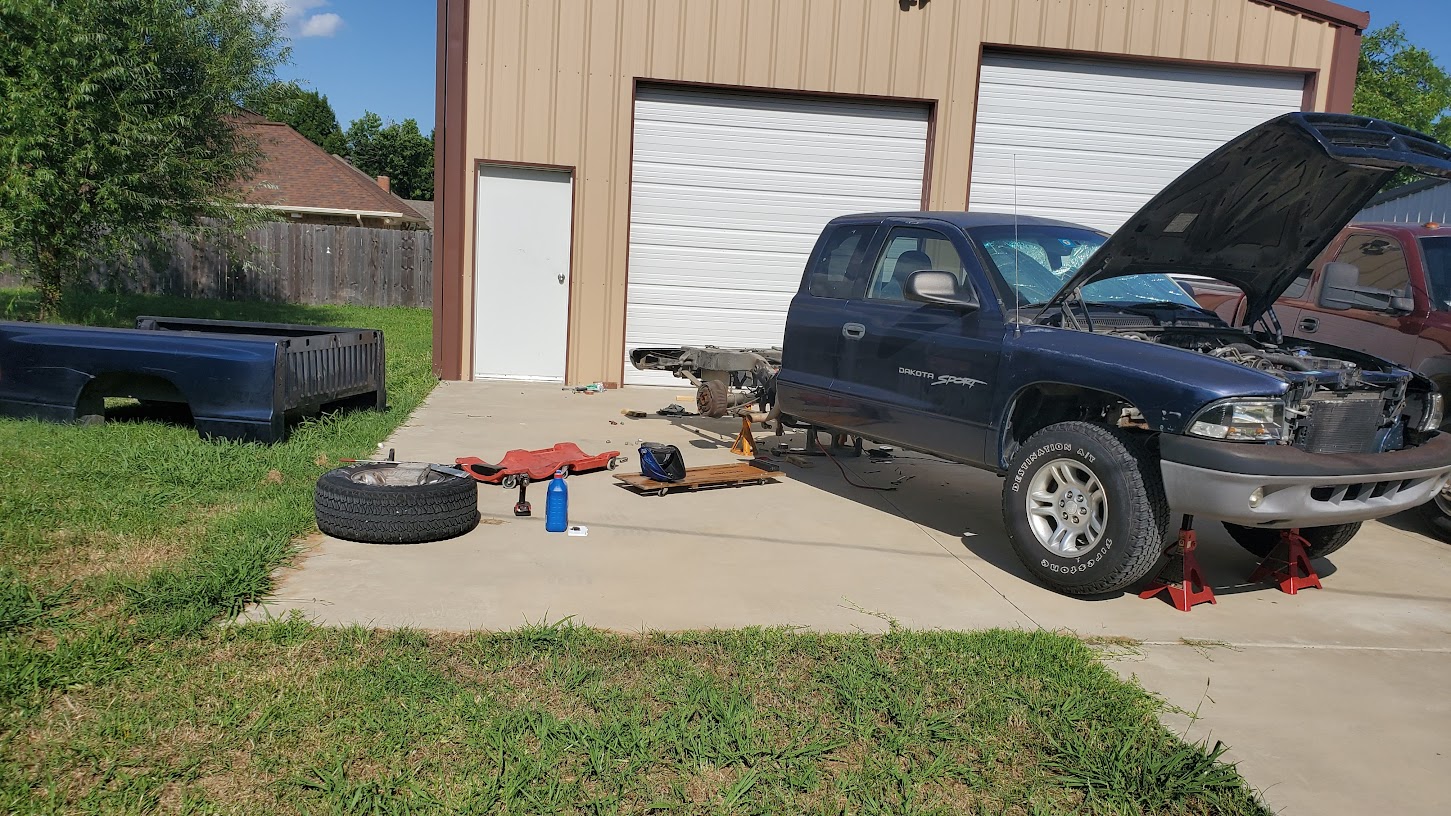
This coming week, and the week after, should have some more plentiful updates on the truck. I'll be getting a little dirty in the near future.
I did spend Saturday working on a friend's Dakota. Wired in a trans temp gauge from ISSPRO using their patented Clipsense bracket, which doesn't require cutting the cooler line or drilling into the transmission pan.
Meanwhile, dad drained the oil from the dragster and pulled the oil filter off, only to find a bunch of aluminum in it. Found a little more in the oil pan when we pulled it off. Examined the piston bottoms, rods, and cam with nothing found, even took the oil pump apart since it's billet aluminum. Timing set also looks good. Going to go ahead and cycle these rod bearings out since they have 34 runs on them, and use that opportunity to make sure there's no issues we don't know about. The oil pressure readings have been a little funny lately, but still above 50PSI when it drops.
Thread Starter
|
Legend
Joined: Feb 2005
Posts: 8,058
Likes: 183
From: Fort Worth, TX
Worked on the dragster some more after Corbin left on Saturday, and worked on my engine some on Sunday. Put the 2 oil galley plugs back in behind the am thrust plate, and put the hughes cam snout spacer on as well.
Gonna try to get some work done on the truck this week. Have a pro-mod race this weekend, so I'll be bouncing between a pro-mod shop and our own shop this week getting the pro-mod truck ready for this weekend. It's owned by another racer, but dad and I are the brains that make it run.


Gonna try to get some work done on the truck this week. Have a pro-mod race this weekend, so I'll be bouncing between a pro-mod shop and our own shop this week getting the pro-mod truck ready for this weekend. It's owned by another racer, but dad and I are the brains that make it run.
Thread Starter
|
Legend
Joined: Feb 2005
Posts: 8,058
Likes: 183
From: Fort Worth, TX
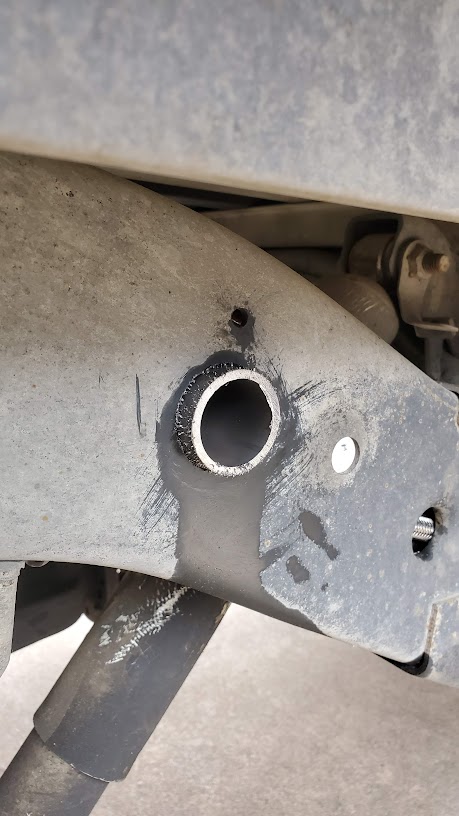
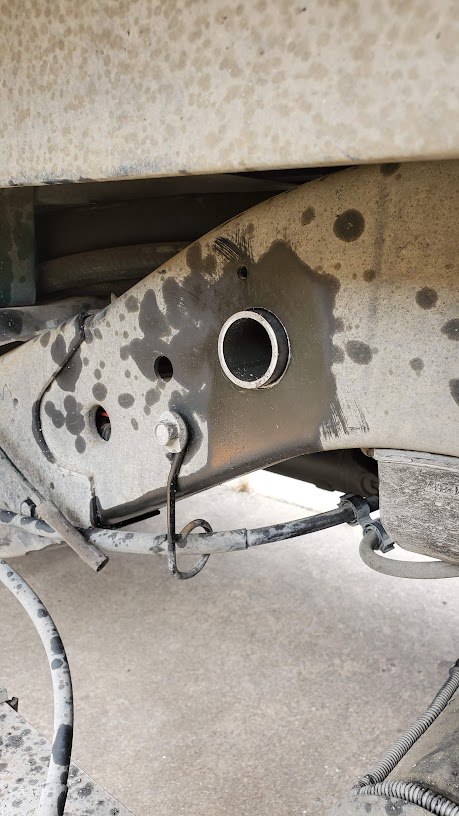
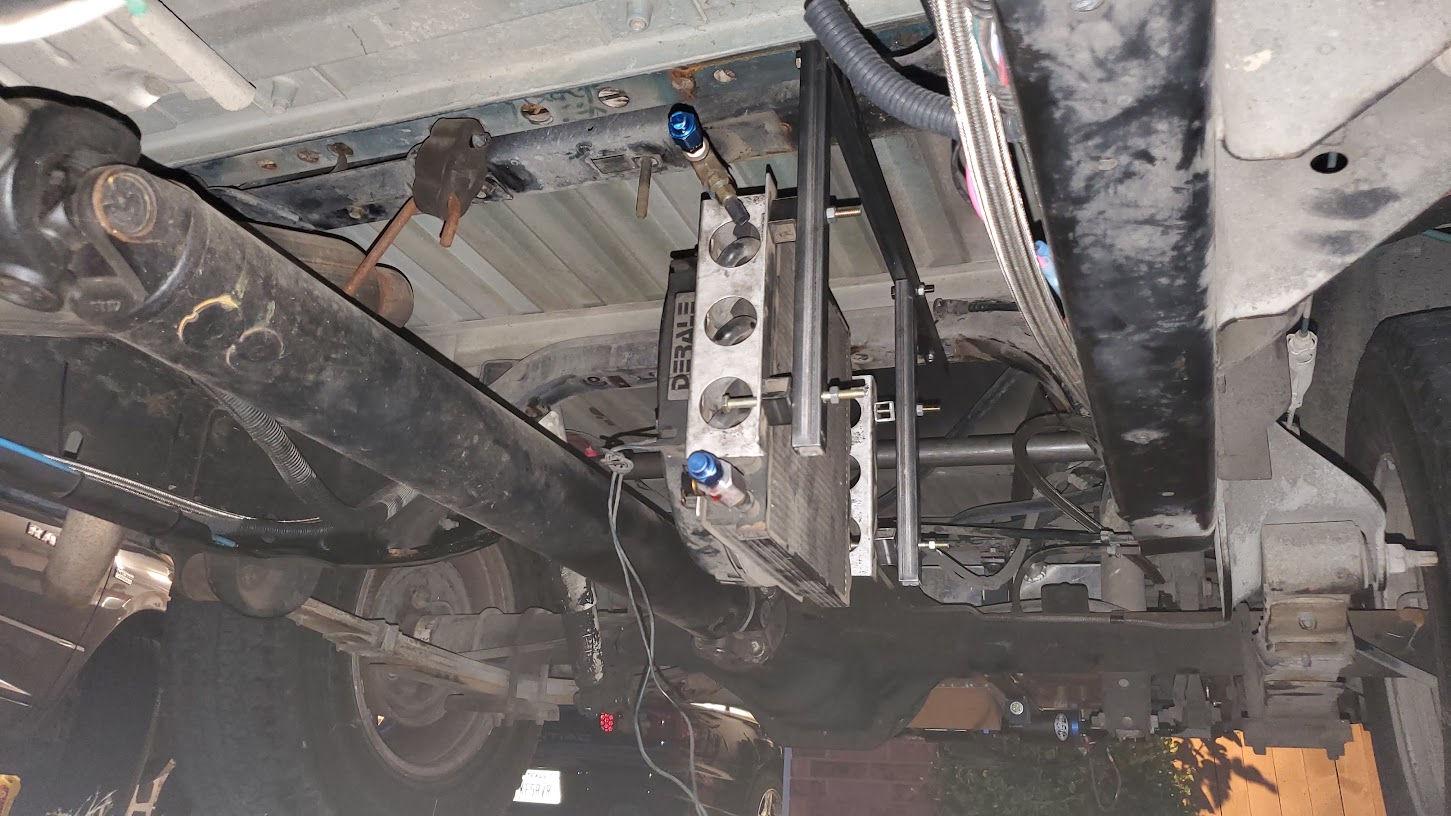
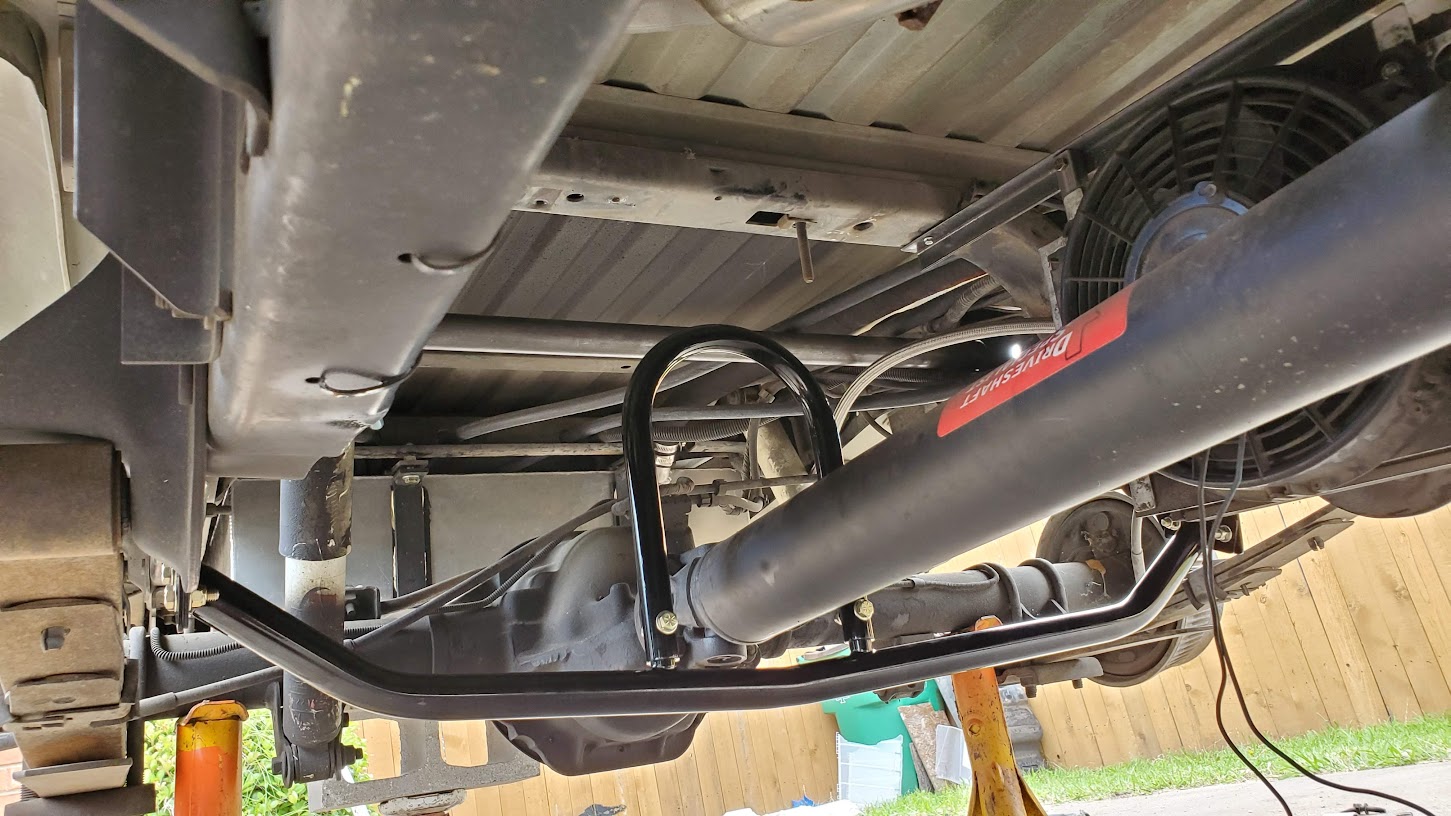
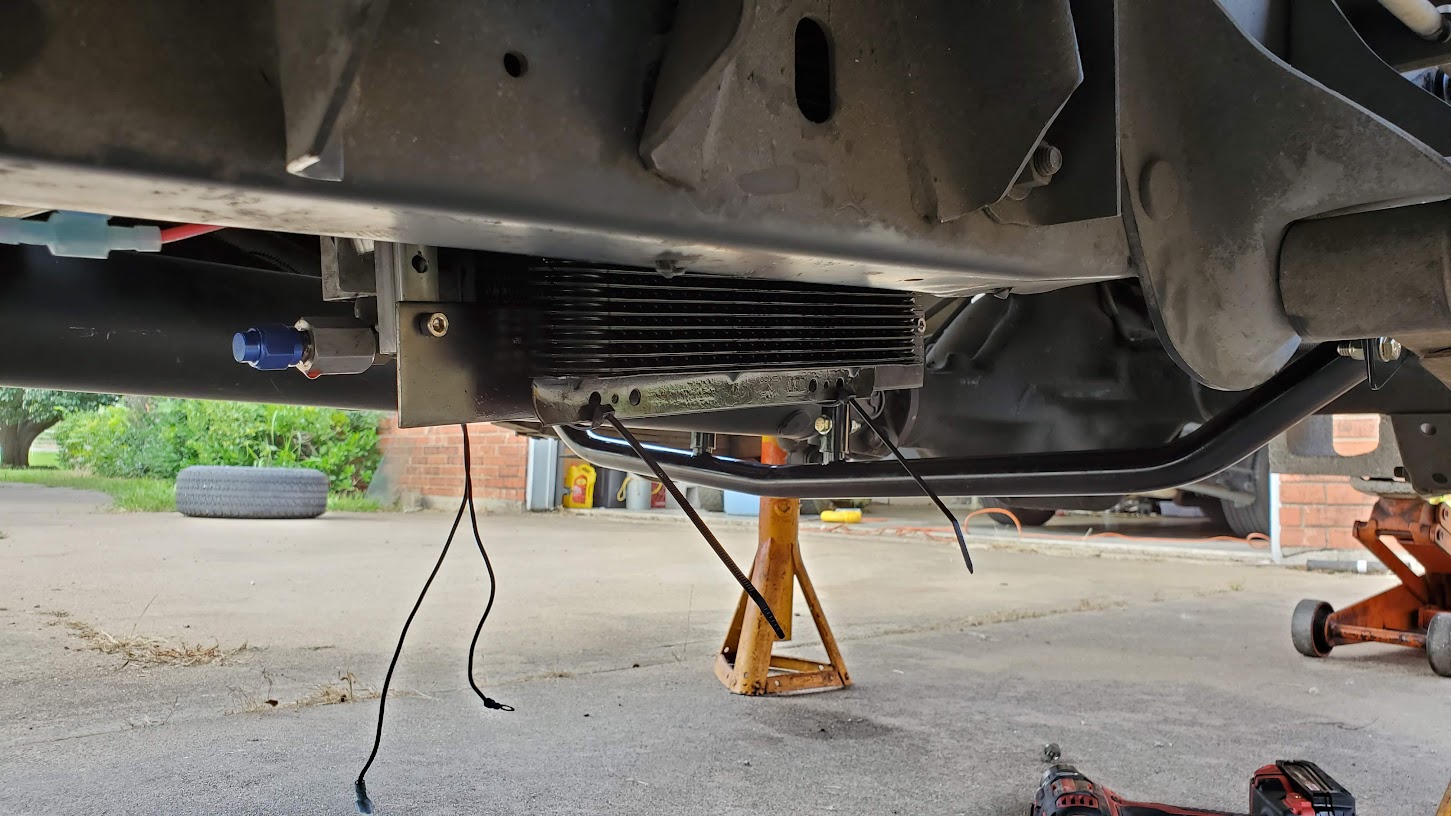
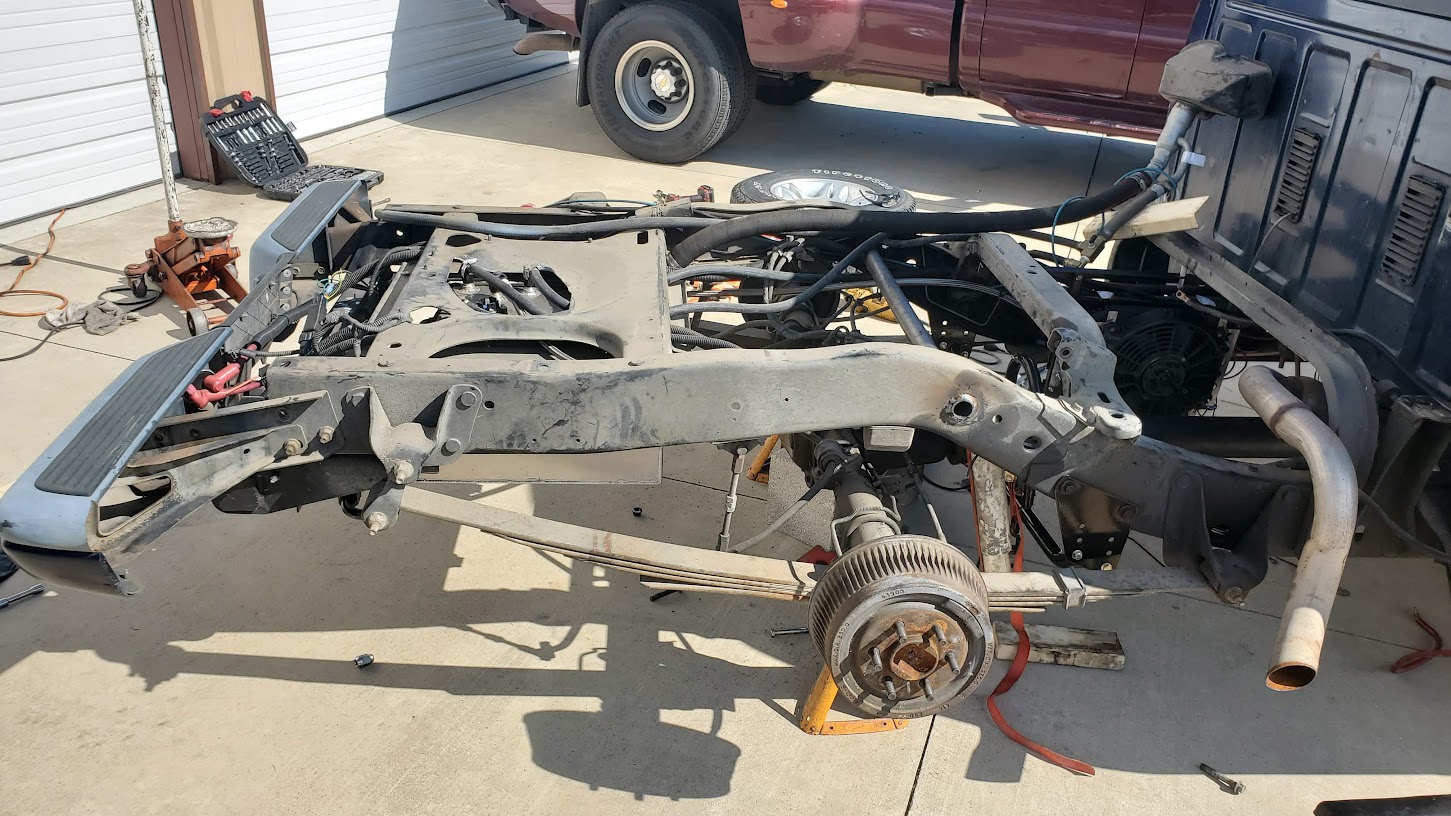
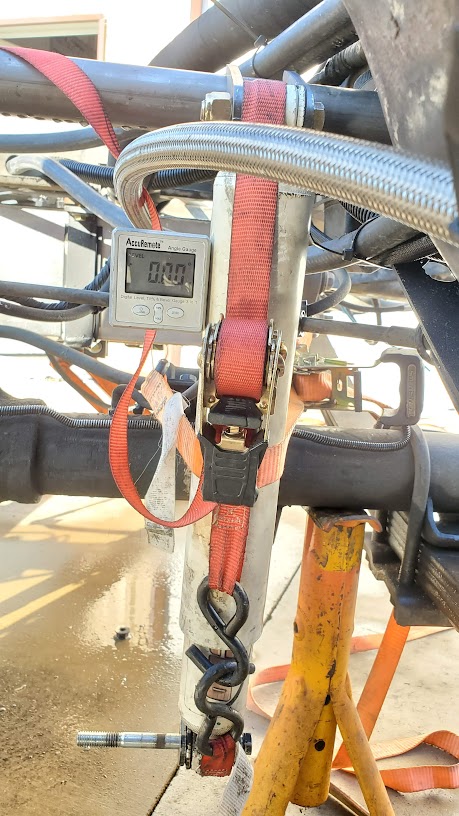
Here is this week's update...Got alot done the last 2 days. Front and rear driveshaft loops installed, trans cooler relocate mocked up, frame drilled for the new shock crossmember, and factory shock mount on the axle cut off.
My new shocks were supposed to show up today, but apparently somewhere between Houston and my house, they came out of the box, either by nature or by force....So i received an empty box with a hole in it and got to file a claim with UPS.


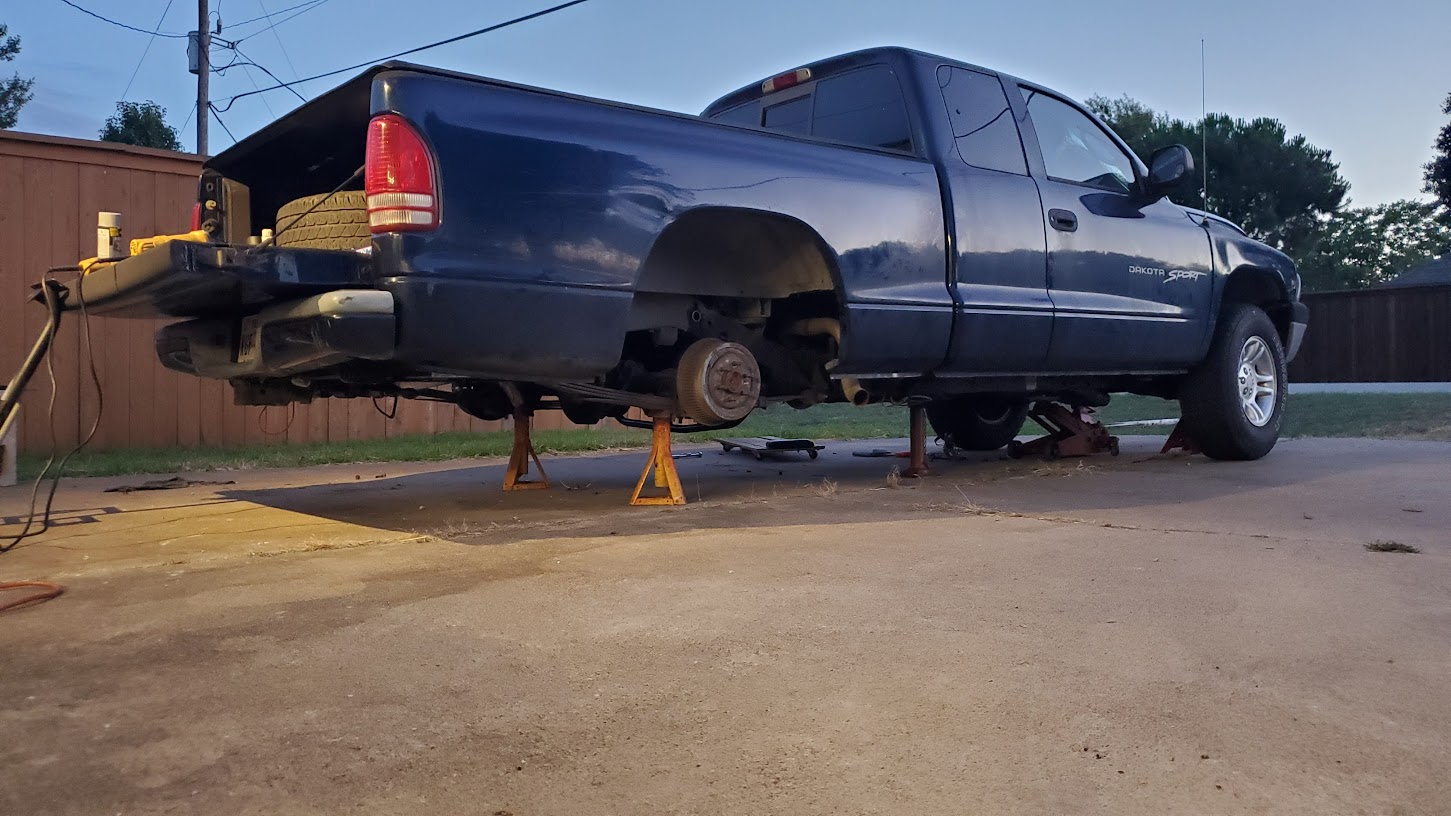


My new shocks were supposed to show up today, but apparently somewhere between Houston and my house, they came out of the box, either by nature or by force....So i received an empty box with a hole in it and got to file a claim with UPS.
Thread Starter
|
Legend
Joined: Feb 2005
Posts: 8,058
Likes: 183
From: Fort Worth, TX
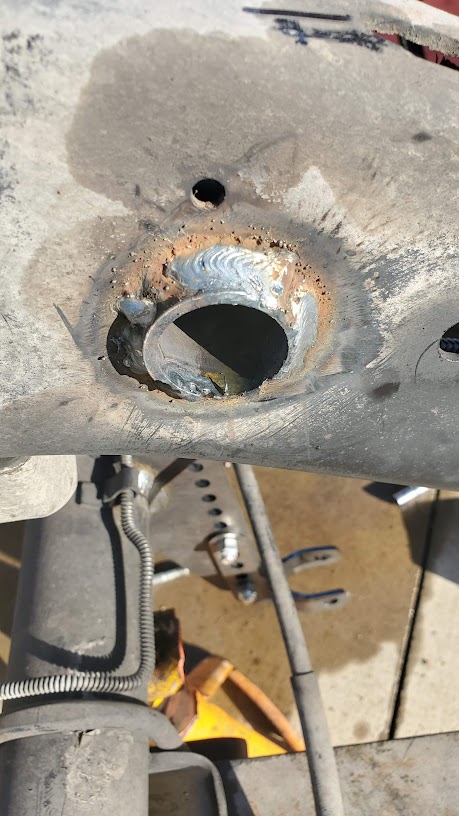
Tuesday Update....
Still haven't found the other half of that cutting wheel.
I never learned to MIG weld in high school, only Oxy and Arc welding. We don't so much welding around here, so I've been slowly self-teaching on non-structural components of the truck, and watching youtube videos. Today was my first welds on structural components.
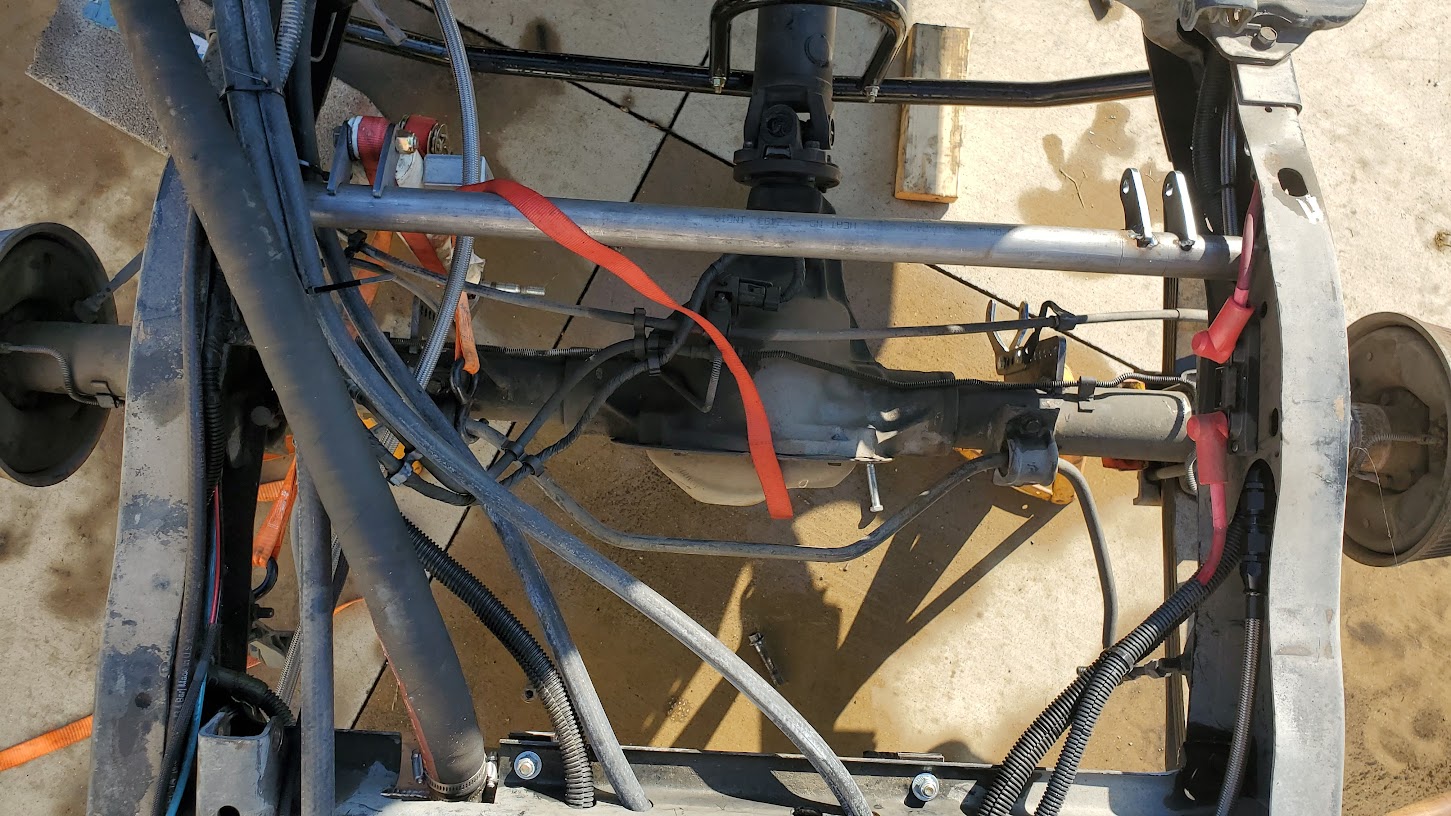
Got the upper crossmember welded in, the adjustable lowers welded in, then lifted the bed up, pulled the fuel level sender and got it fixed (simply a stuck float plunger), mounted the trans cooler array, then had a friend come over and help me lift the bed off. It got hung up on some of the EVAP hoses so now the driver side has a kink and bend I'm gonna have to work out of it (luckily, it's only sheet metal, easy to pull back once on truck). Once the bed was off, got the upper mounts welded in place and I cleaned up the array of hoses.
Get the bed put back on tomorrow, button everything up, and go from there. If UPS can find my lost shocks, that would be dandy too.


Still haven't found the other half of that cutting wheel.
I never learned to MIG weld in high school, only Oxy and Arc welding. We don't so much welding around here, so I've been slowly self-teaching on non-structural components of the truck, and watching youtube videos. Today was my first welds on structural components.
Got the upper crossmember welded in, the adjustable lowers welded in, then lifted the bed up, pulled the fuel level sender and got it fixed (simply a stuck float plunger), mounted the trans cooler array, then had a friend come over and help me lift the bed off. It got hung up on some of the EVAP hoses so now the driver side has a kink and bend I'm gonna have to work out of it (luckily, it's only sheet metal, easy to pull back once on truck). Once the bed was off, got the upper mounts welded in place and I cleaned up the array of hoses.
Get the bed put back on tomorrow, button everything up, and go from there. If UPS can find my lost shocks, that would be dandy too.