DIY - Master Window Switch Contact Cleaning
#1
I started a project after I noticed inconsistency when using my Master Drivers Side Switch. When trying to operate windows in my truck the passenger door switch would work, but the master would not roll the window down. Also sometimes the drivers side didn't want to roll up occasionally. Sometimes I would walk into the store after trying to roll up the window on the drivers side without any luck, but come out a few minutes later and start the truck and the damn thing went up! 
I hypothesized that the issue it's self was in fact a bad connection on the contacts of the Micro Switches them selves. So before I wasted $70 bucks on a new switch, I pondered if the Micro Switches them selves could be cleaned. So off I start my mission!
1. First I pulled the door handle. It has 2 Phillips screws.
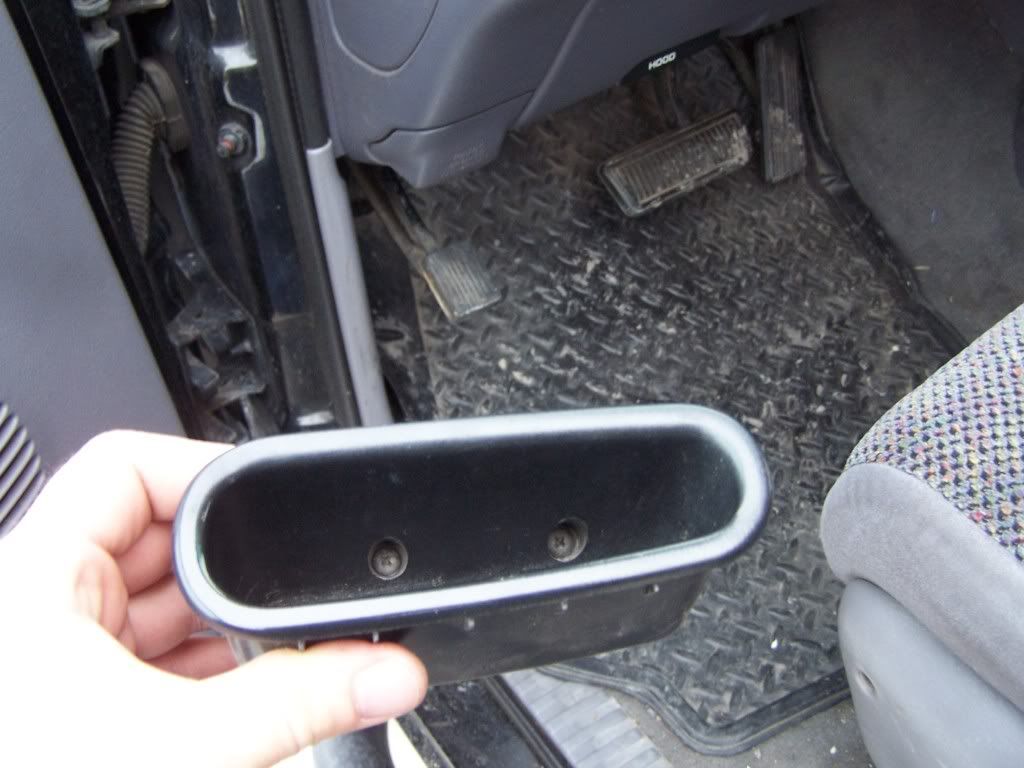
2. Then I slid a small Flat Head screw driver sideways just under the plastic in the door handle so that I could collapse the metal spring and pop up the back side of the switch from the door.
3. The pulled the switch backward (like tring to pull it out) to get the front of the switch and spring out of the hole.
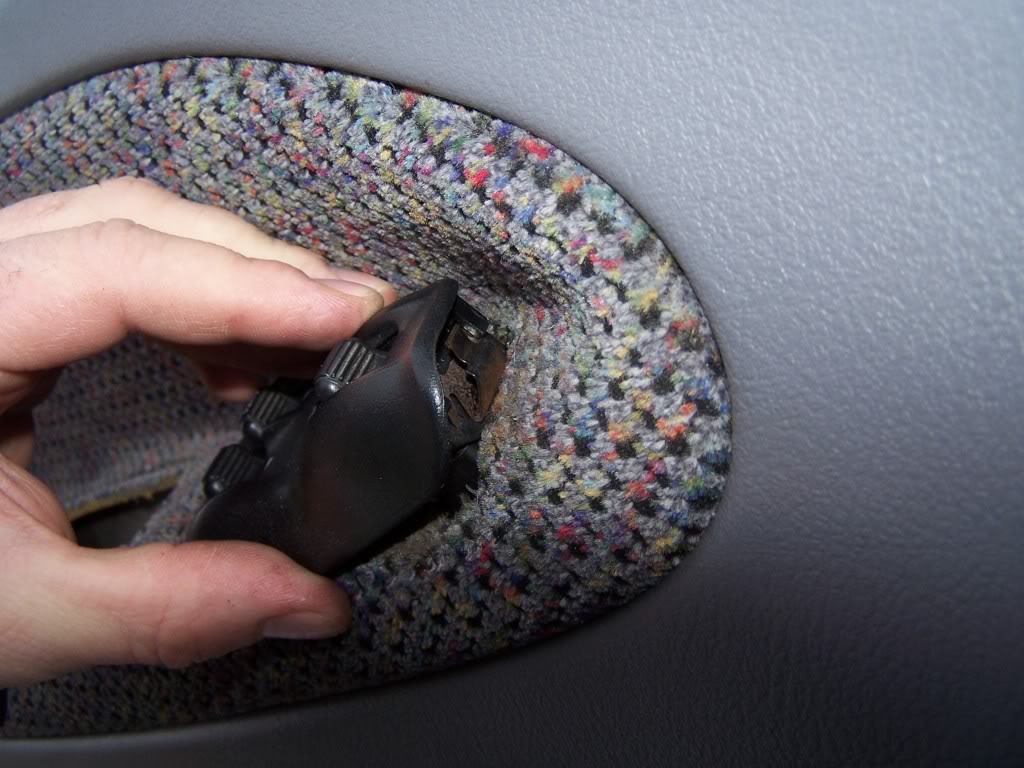
4. Push white button on harness pull the wiring loom from the harness.
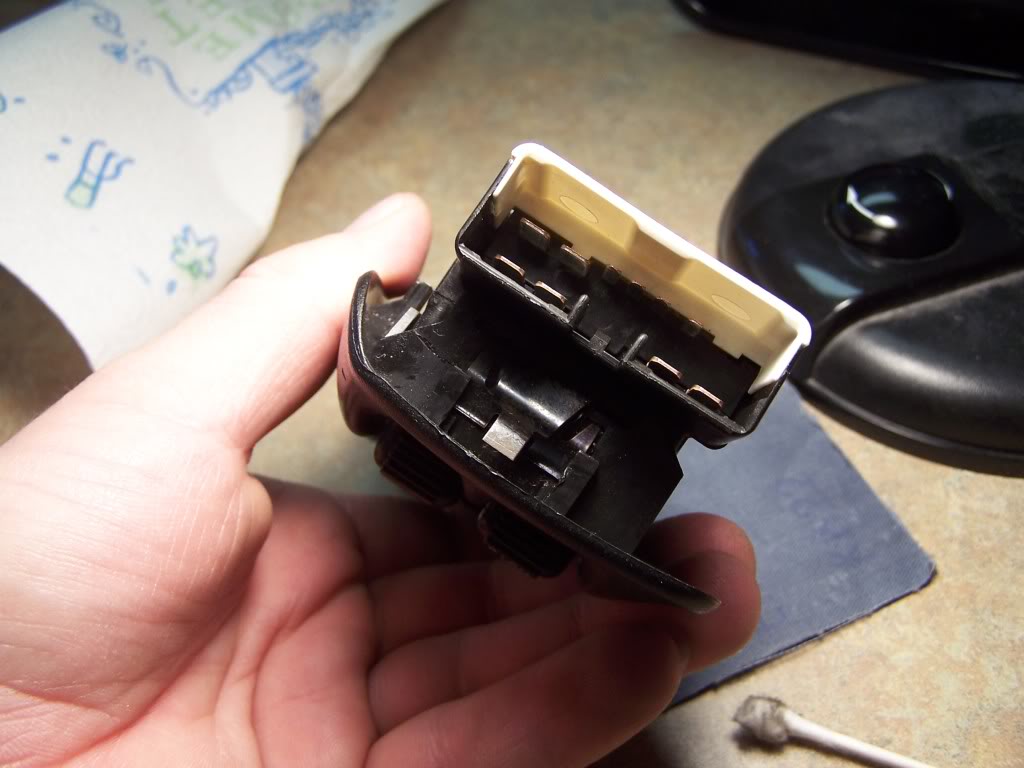
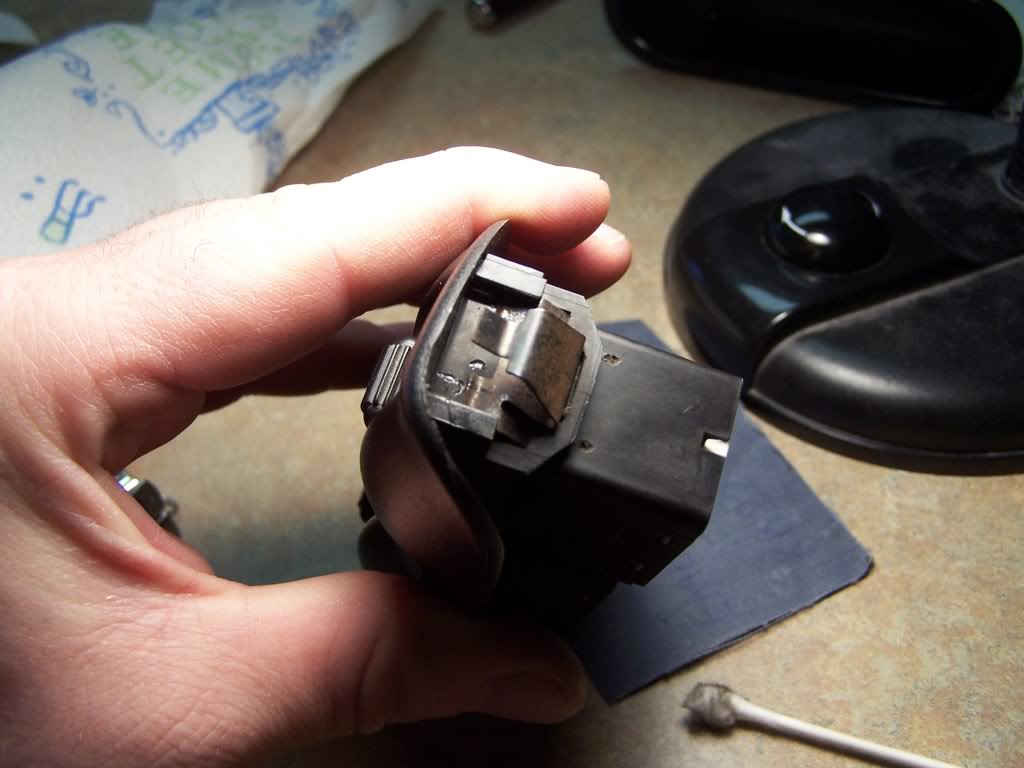
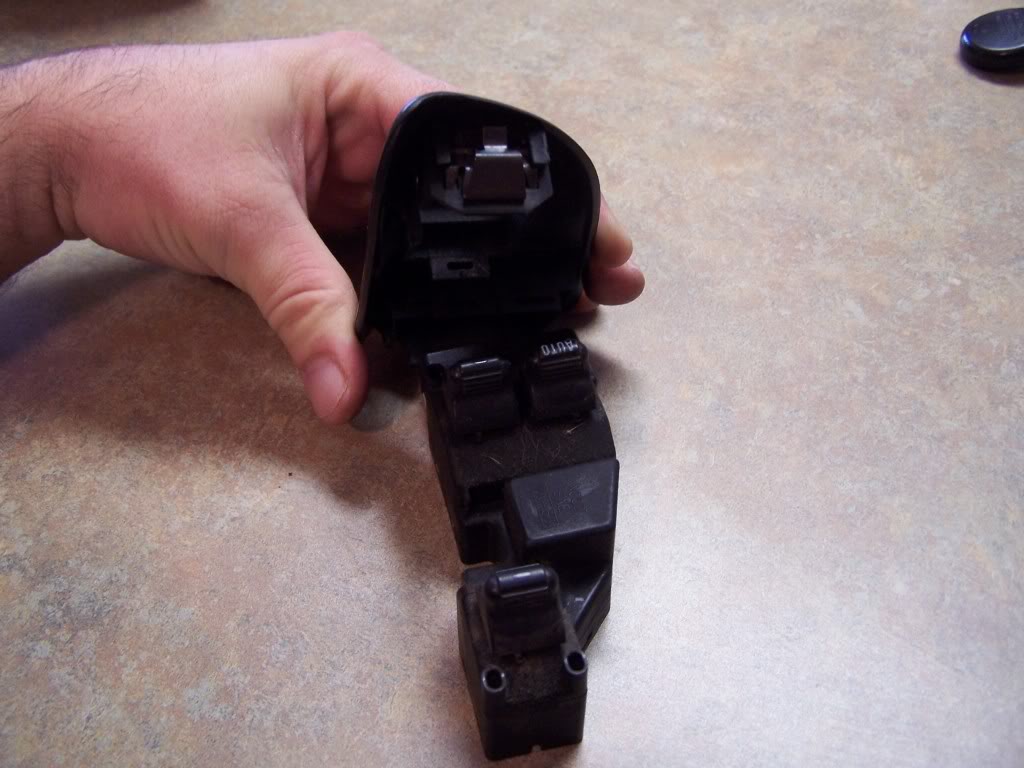
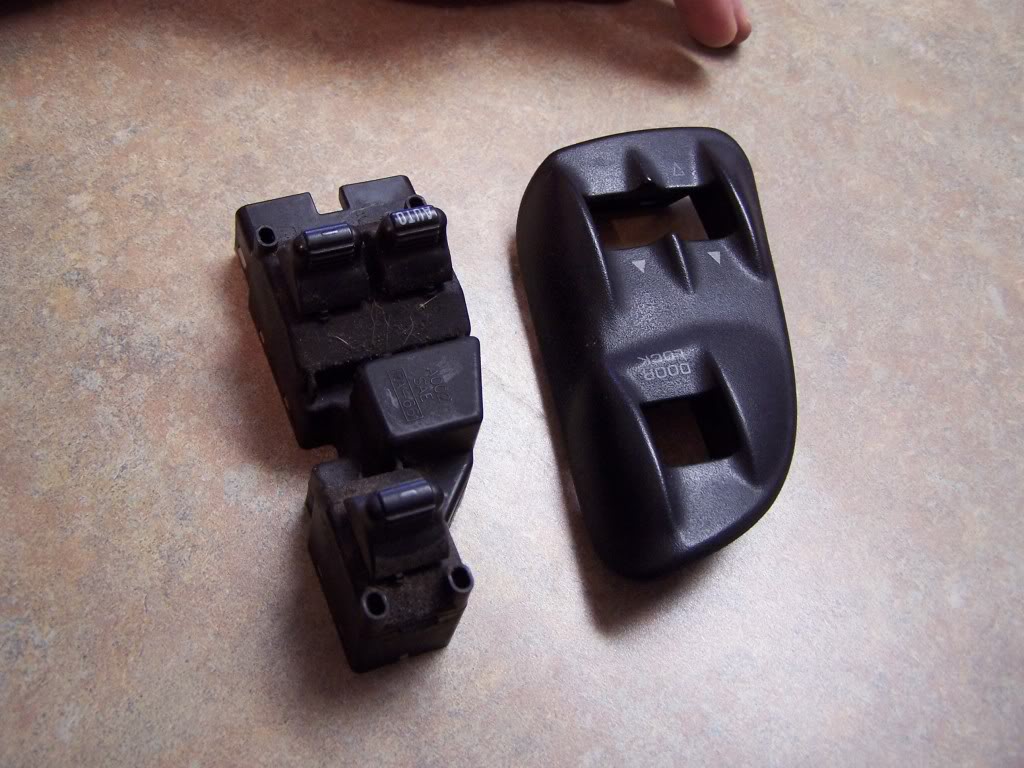
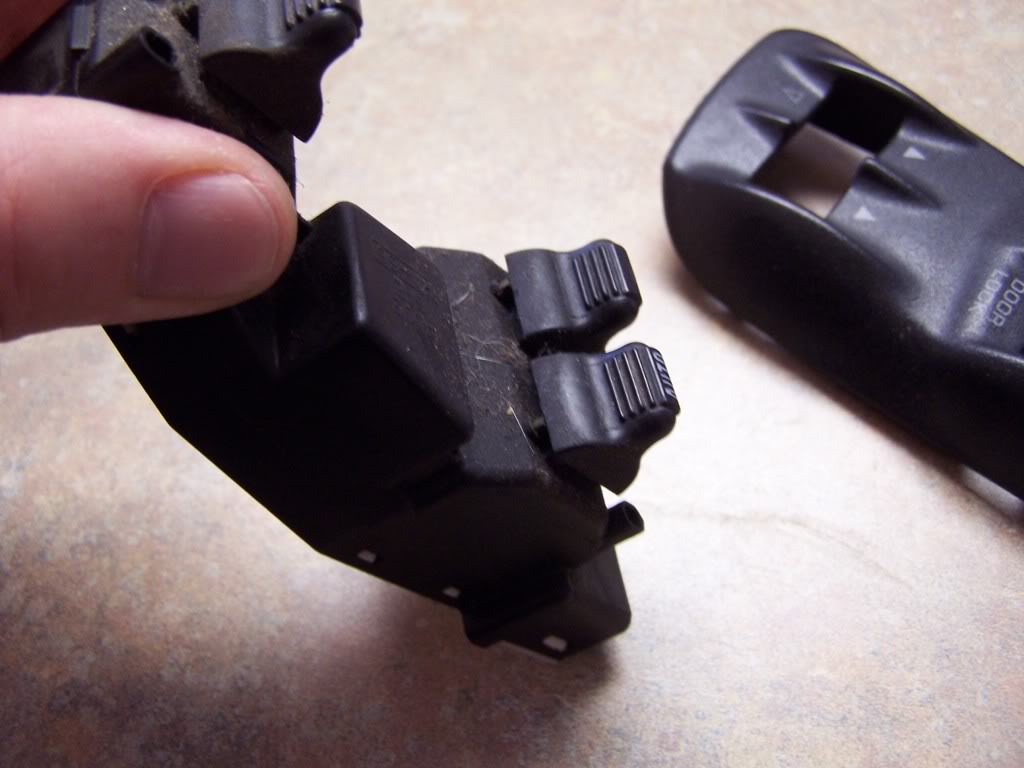
5. Now you separate the outer surface from the inner switch housing. Careful as there are tabs on the front and back! Do NOT snap these!!!!!!
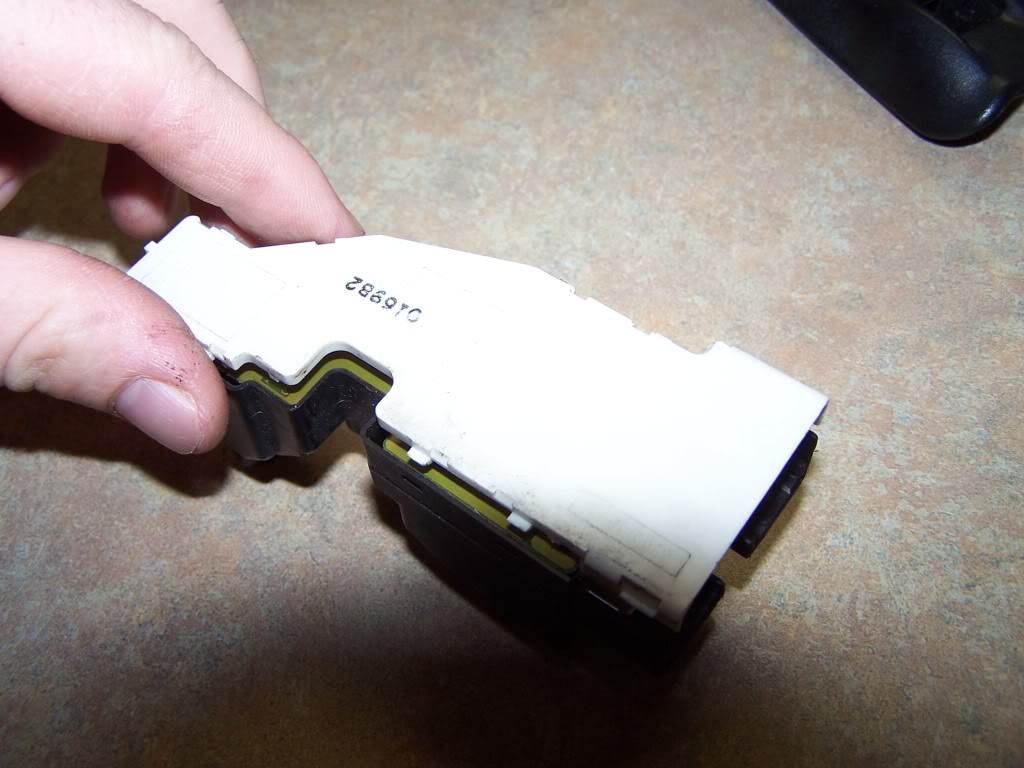
6. Next slowly pry the white backing up off the switch housing. Careful as there are tabs all around!
7. Pull the circuit board out of the switch housing. Lift the harness side up first.
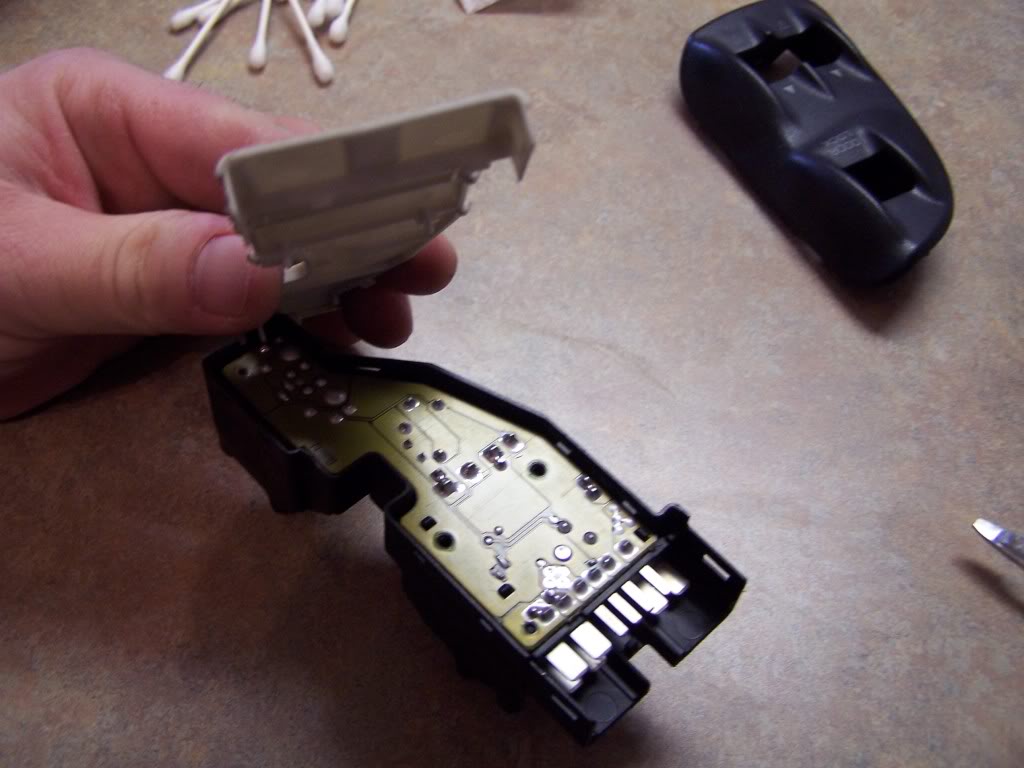
8. Here you can see the other side of the slide pins. They are slightly corroded however they do not come out and they are not hurting anything. I left them alone with no lube.
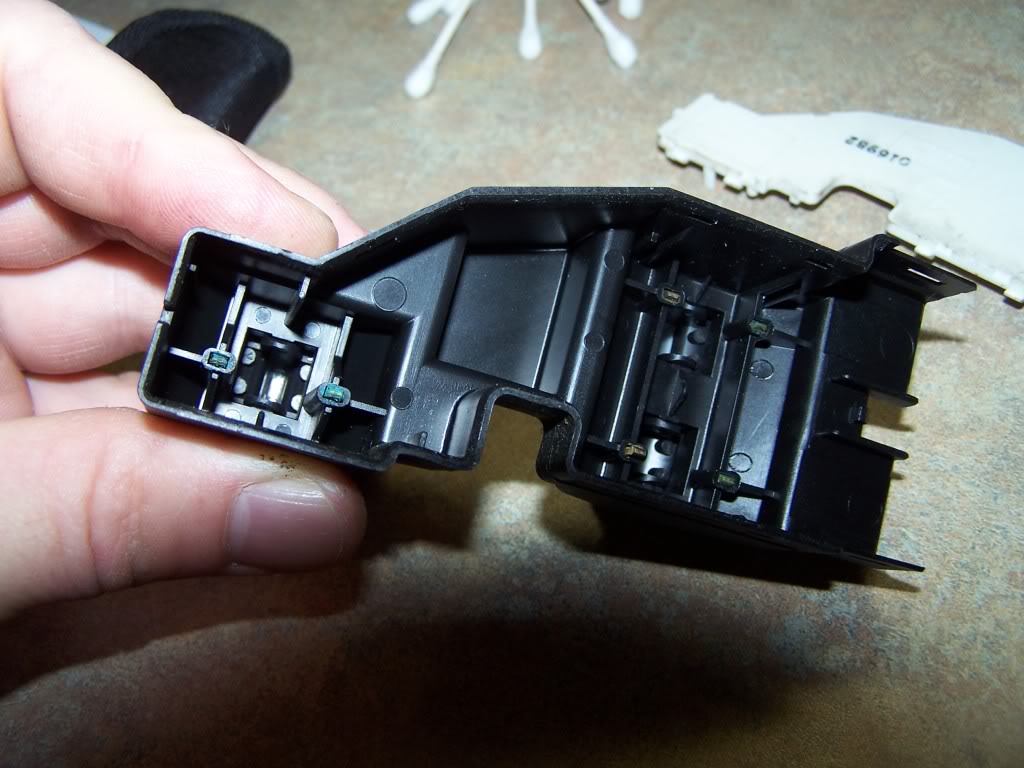
9. Here is the master switch board. The corrosion (green) on the surface of the switch isn't hurting anything. Clean if you want.
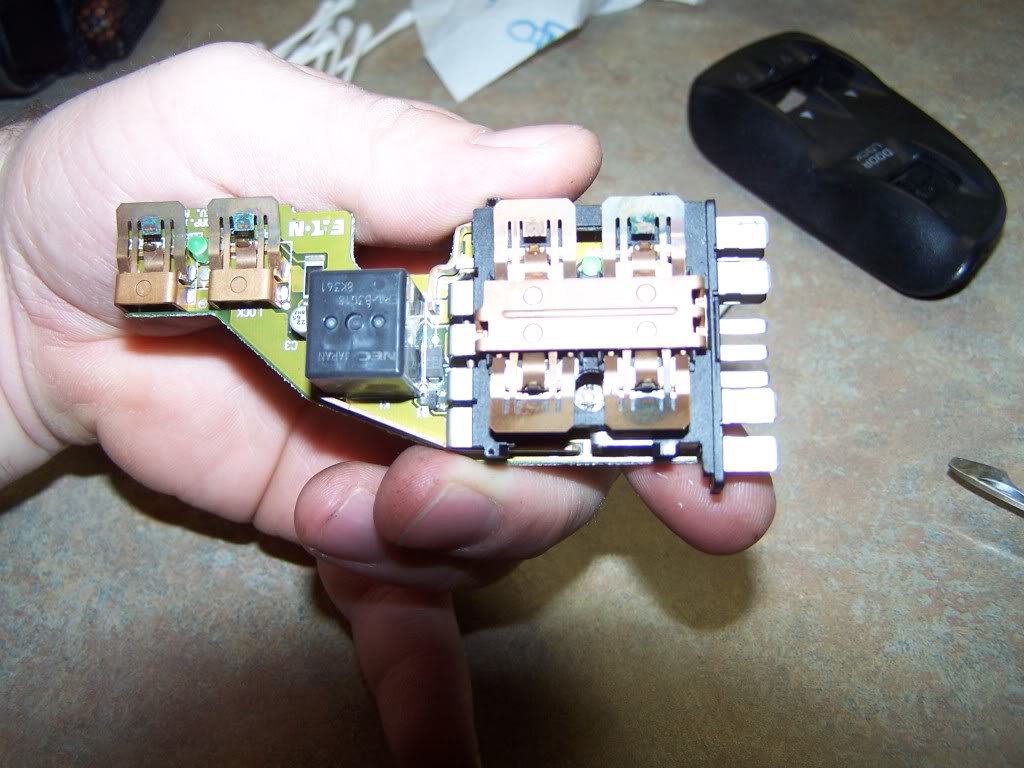
10. Here you can see a burned and pitted contact. This is on the locking switch (locking side).
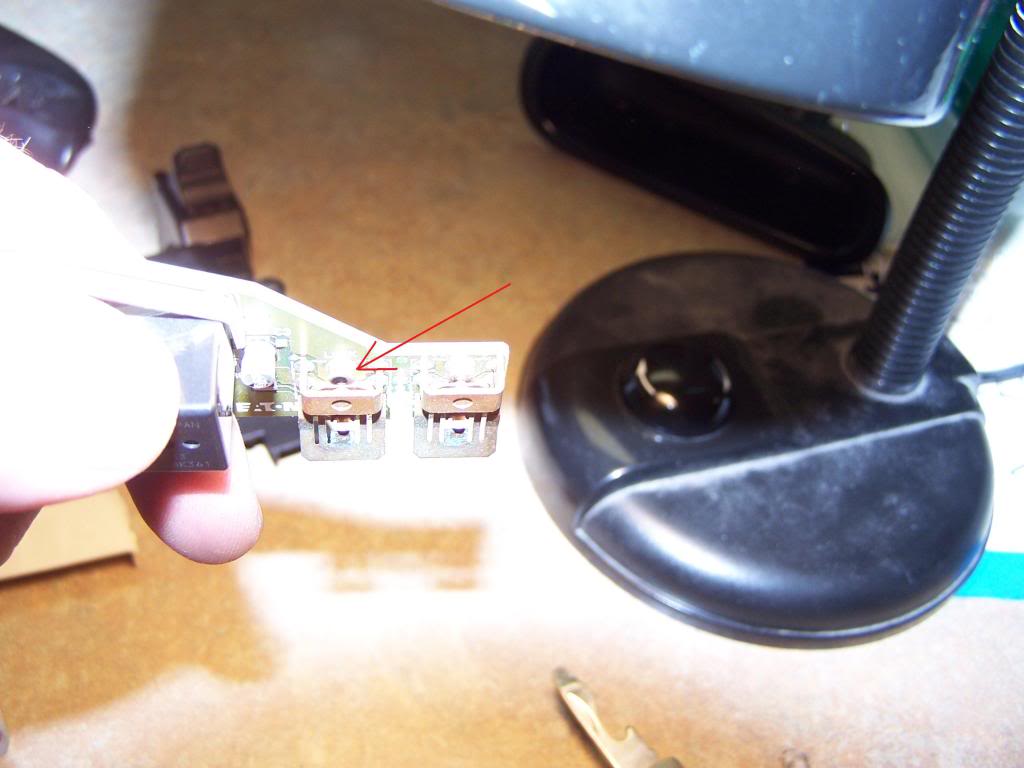
11. With one finger on the armature, and on finger on the end of the spring arm, pinch them together slightly.
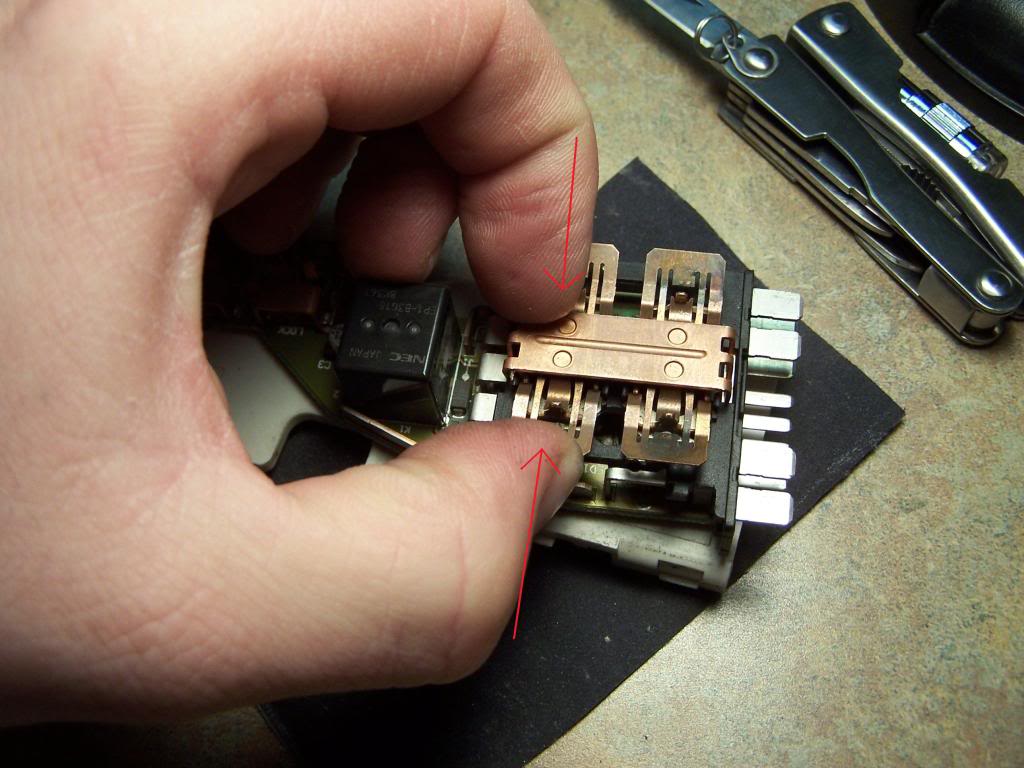
12. Raise your thumb slightly while keeping slight pressure and pop the spring arm contactor up.
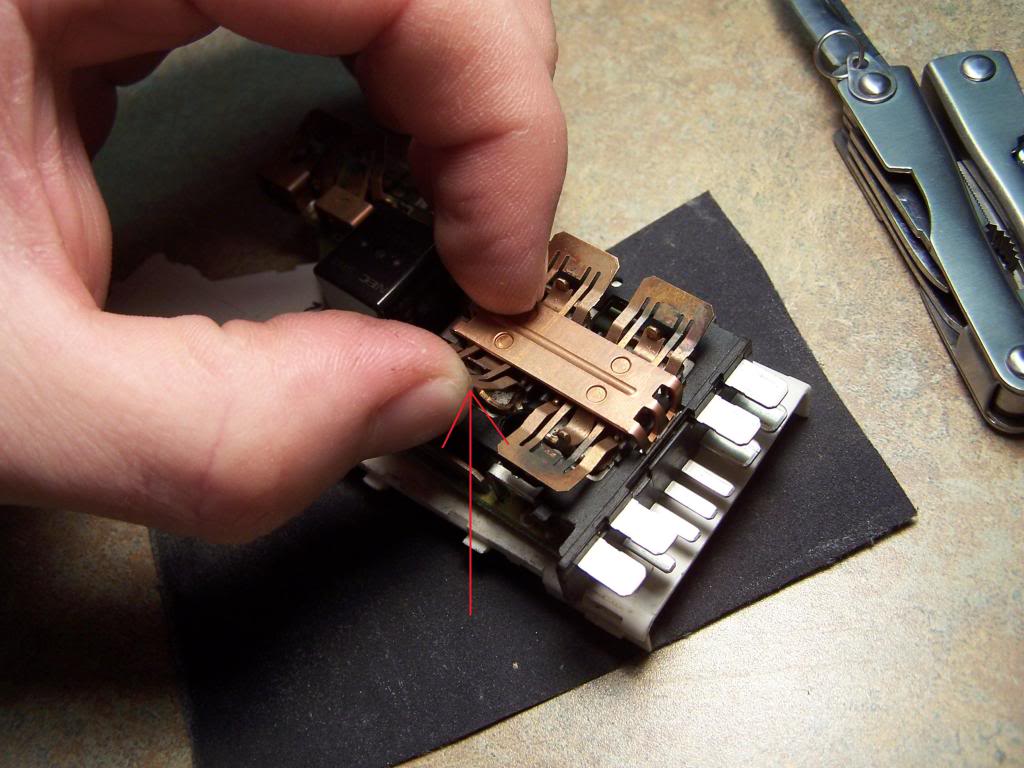
13. Remove spring contact. Here you can see the ware and burning.
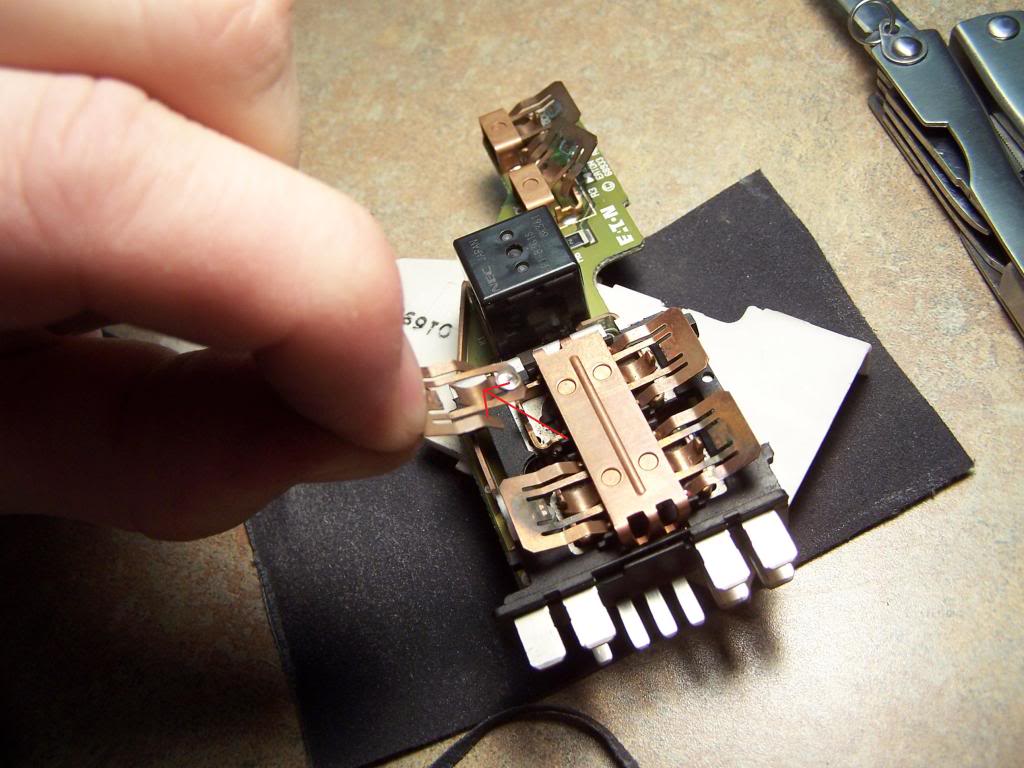
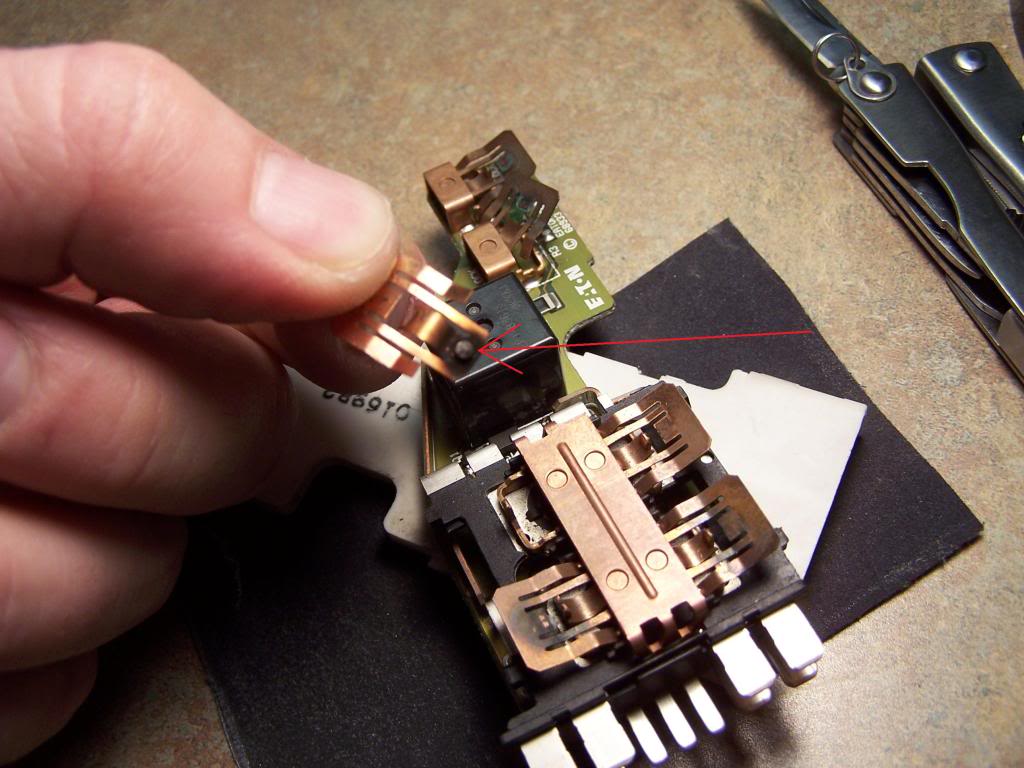
14. Clean spring arm contact (both sides).
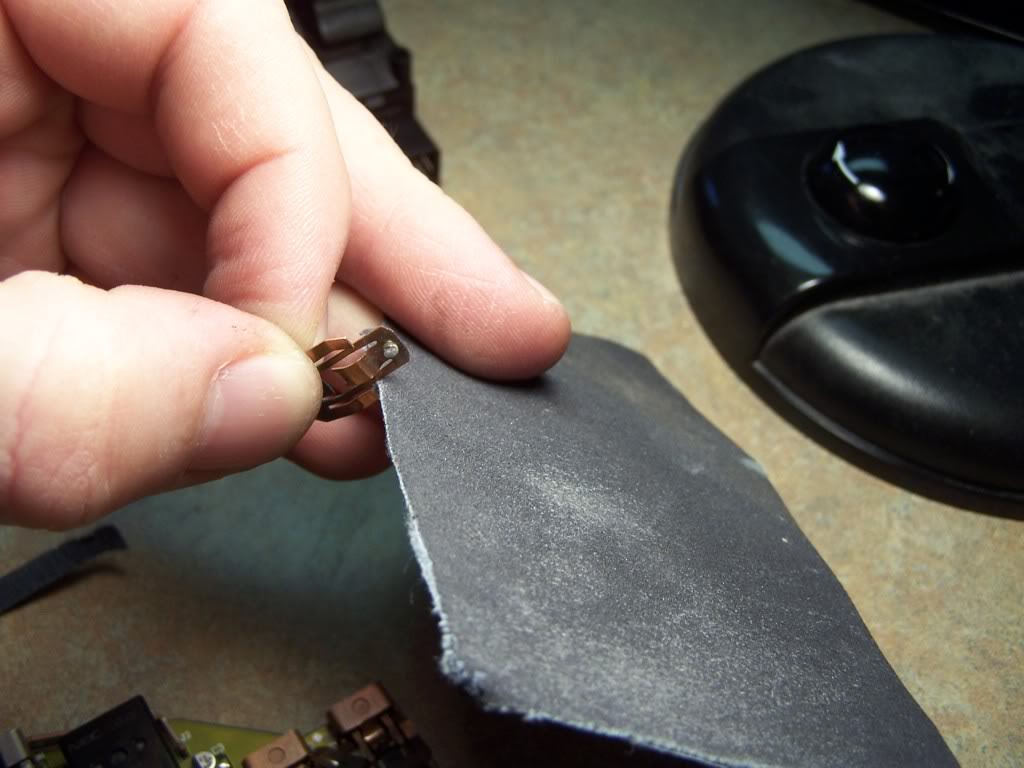
15. Clean contacts both lower and upper with fine sand paper (not metallic sand paper!) For a pitted contact, use a blade to widdle off a slight bit of fascia and swap a good slightly used spring arm contact there. Place the worn spring arm contact in a slightly used space.
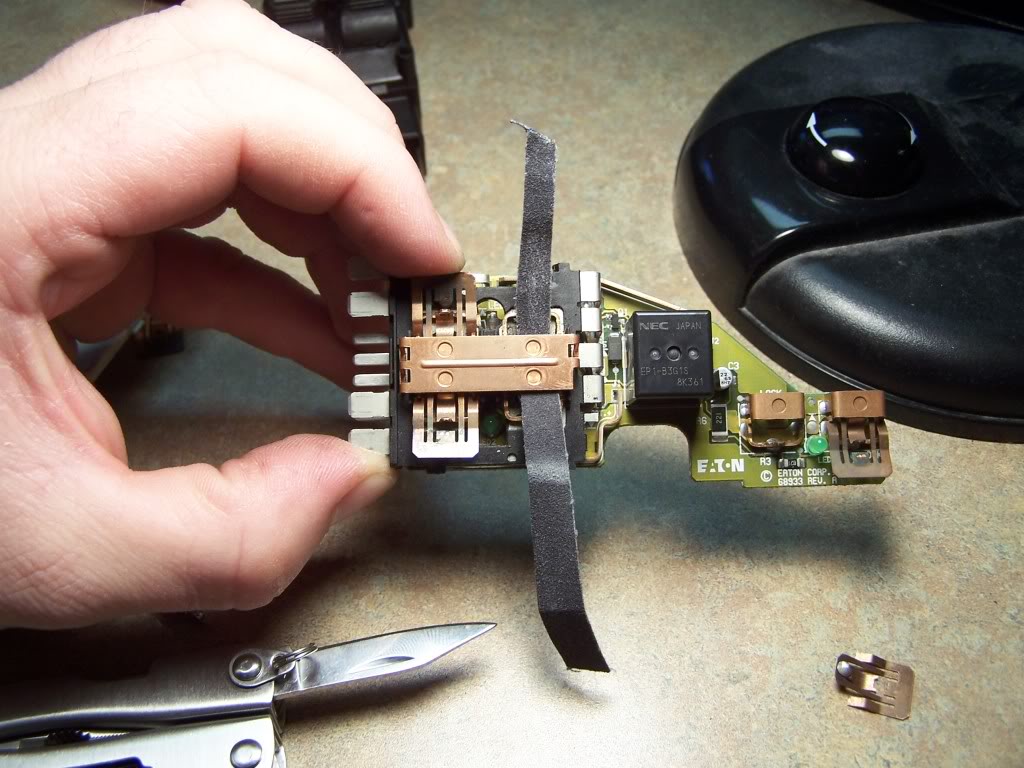
16. On this contact you can see the Drivers Window secondary and primary switches. The Red line is the contact for the main lowering, the yellow line is the secondary switch for hands free lowering of the window. (My secondary worked fine so I didn't mess with it).
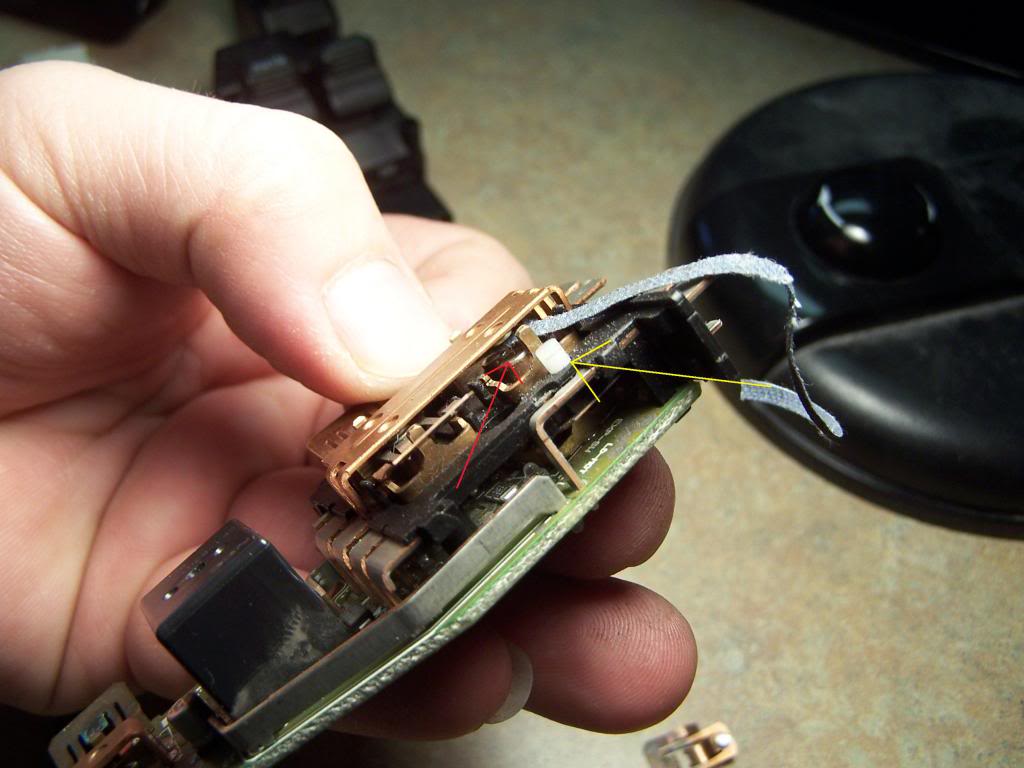
17. Time to install. Here is the spring arm contact. Notice the small arms I am pointing to in red. These line up with the anchors on the switch board.
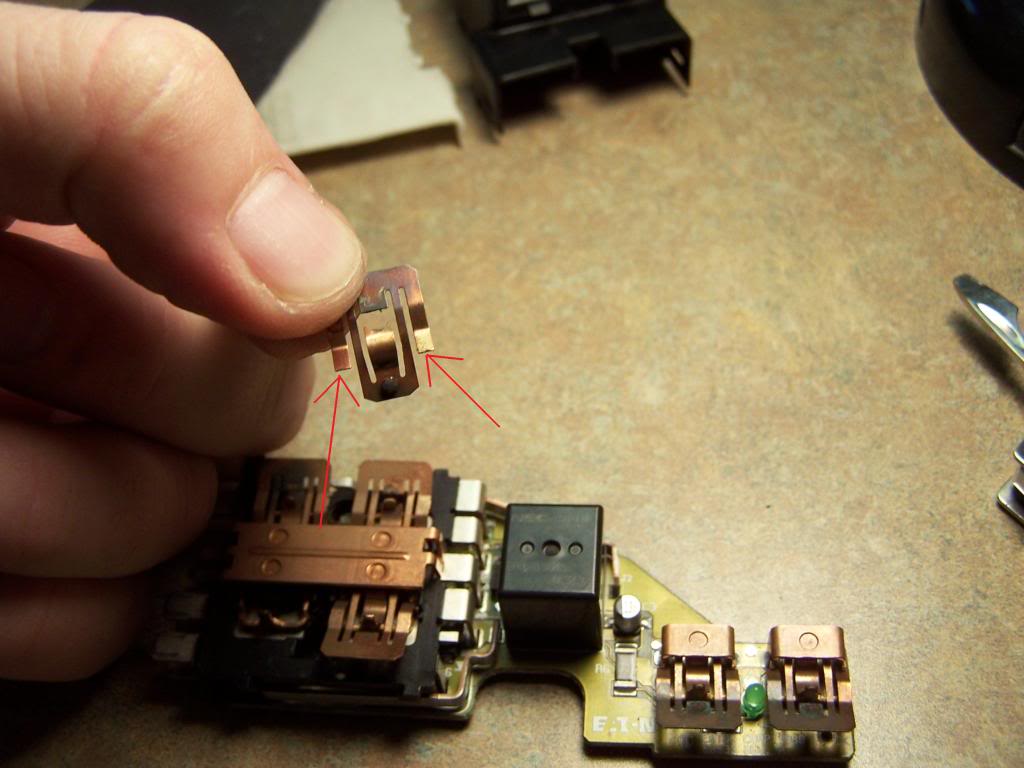
18. Here are the anchors that they rest into. Slip the arms into the anchors very carefully to line them up square.
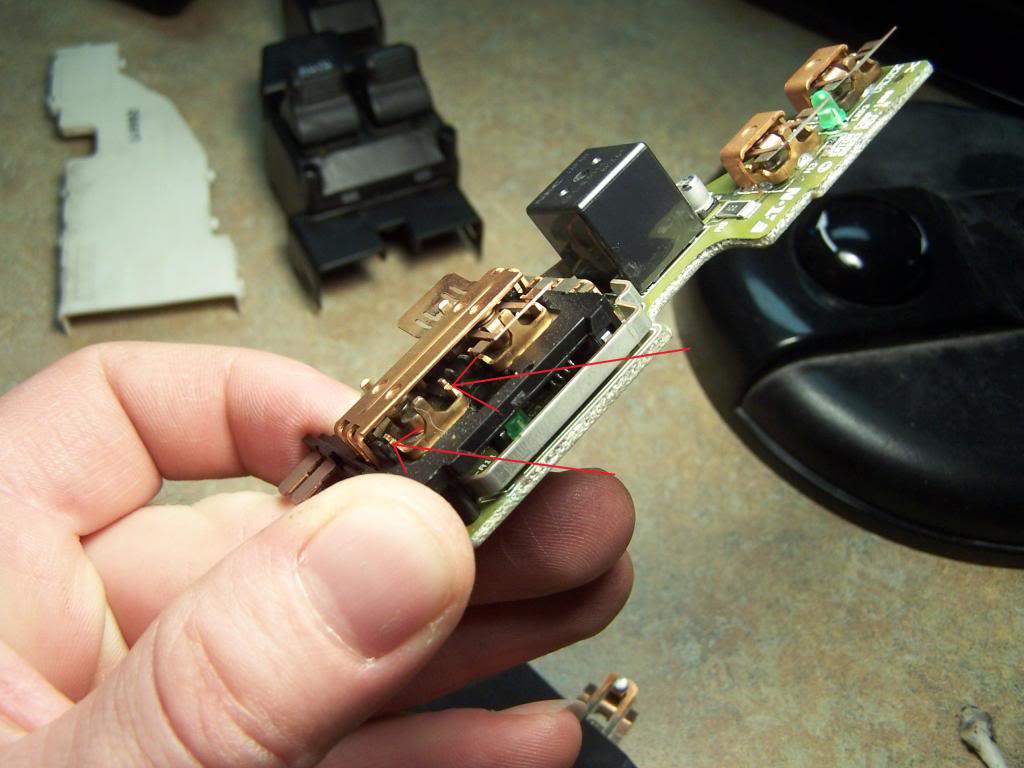
19. Now there is a small center reverse spring. You press down on this firmly. There is a secondary anchor here. You have to push the center arm straight down onto the other side of the anchor to lock it down. Now the spring arm contactor will be installed. Check to ensure that it is seated.
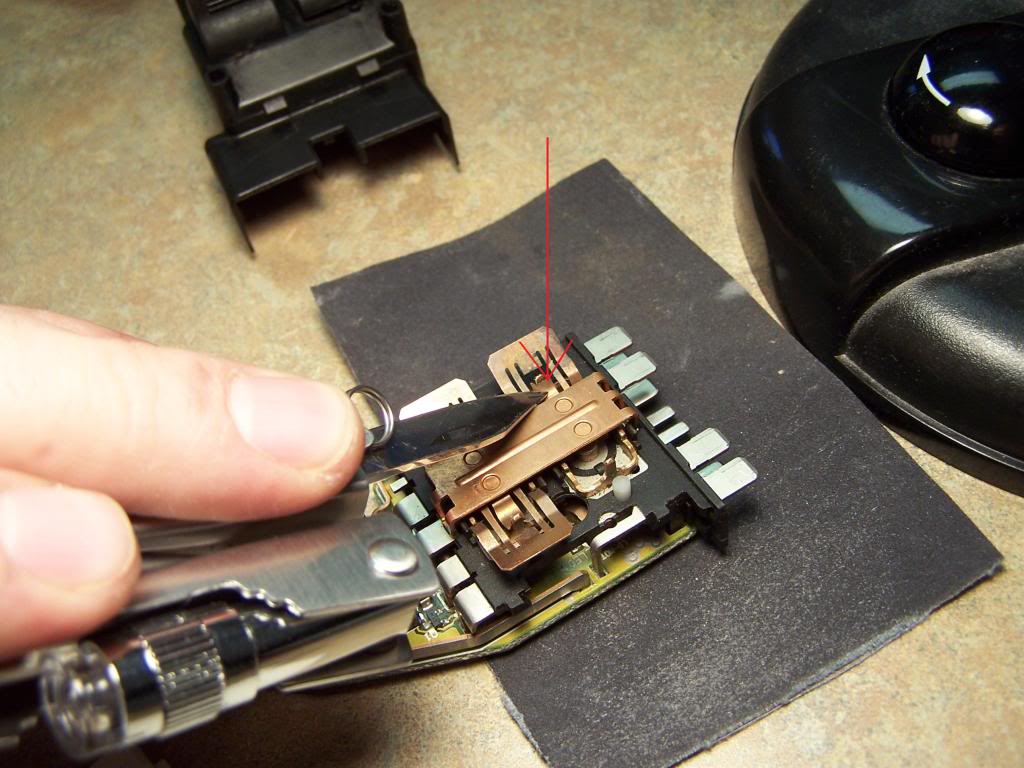
20. Here I'm cleaning the lock contacts.
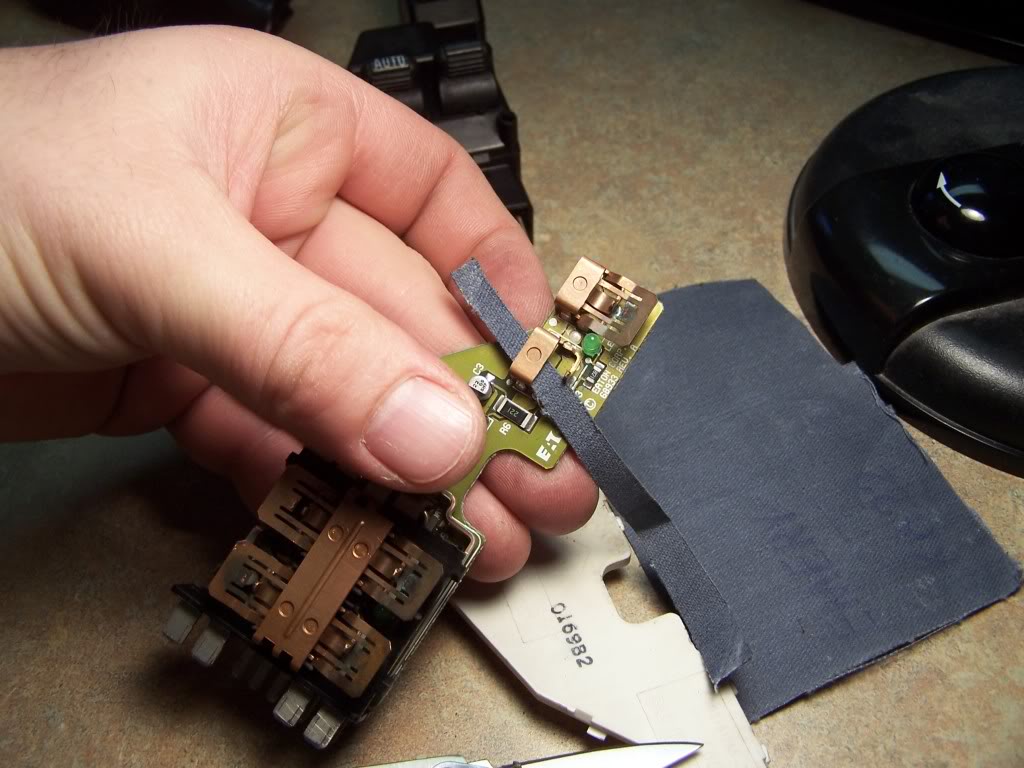
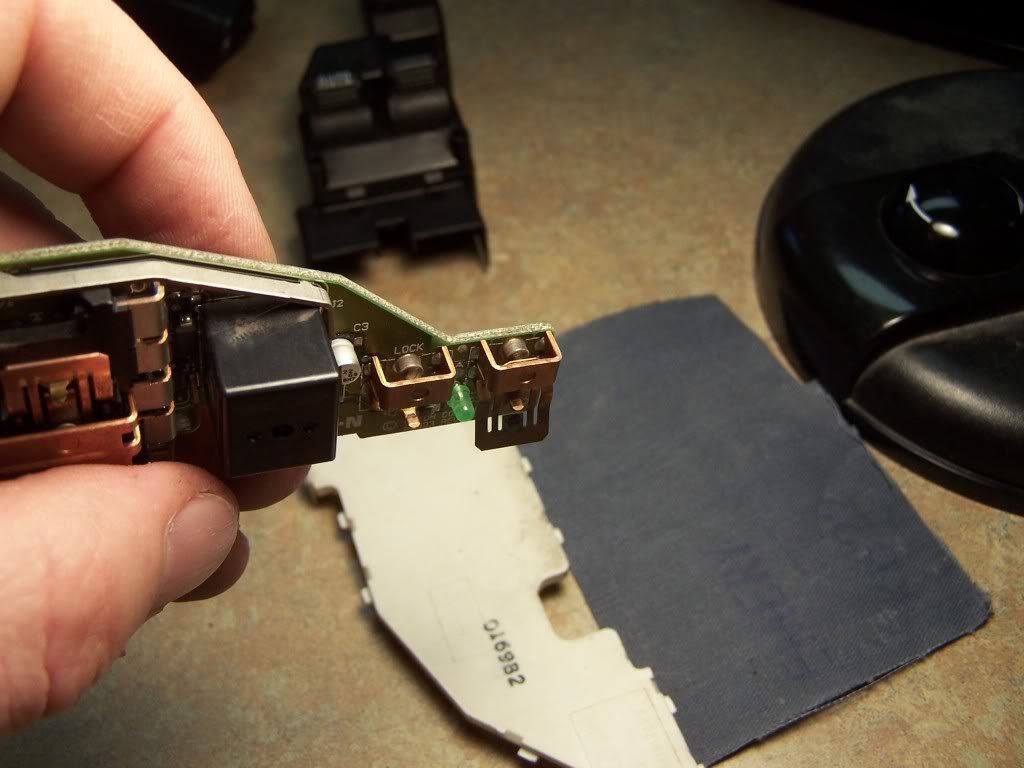
21. Finished.
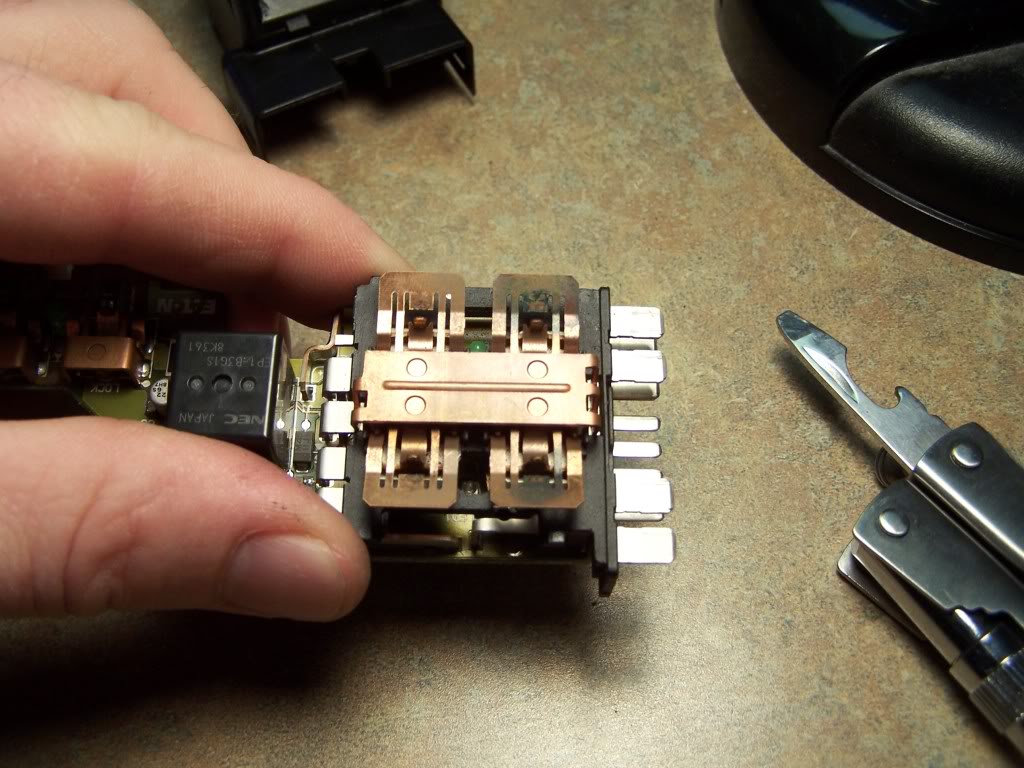
22. Clean the harness contacts if needed on the plug. (mine was clean).

23. Place the switch back in the housing.
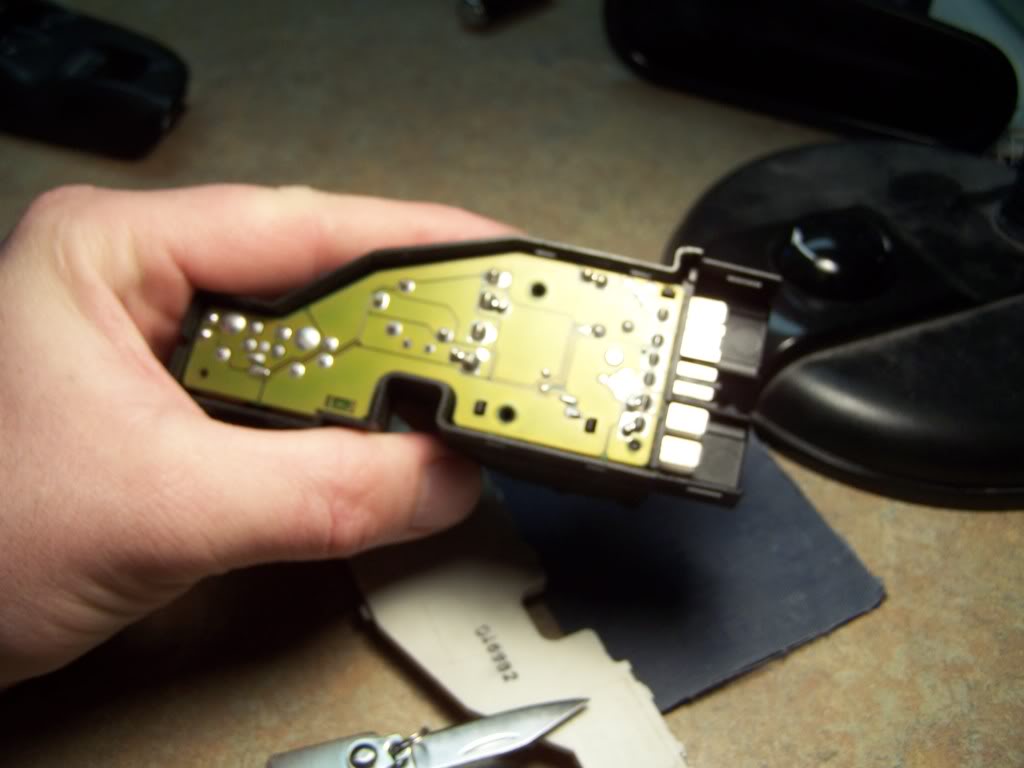
24. Snap the white cover back on and ensure it is fully seated.
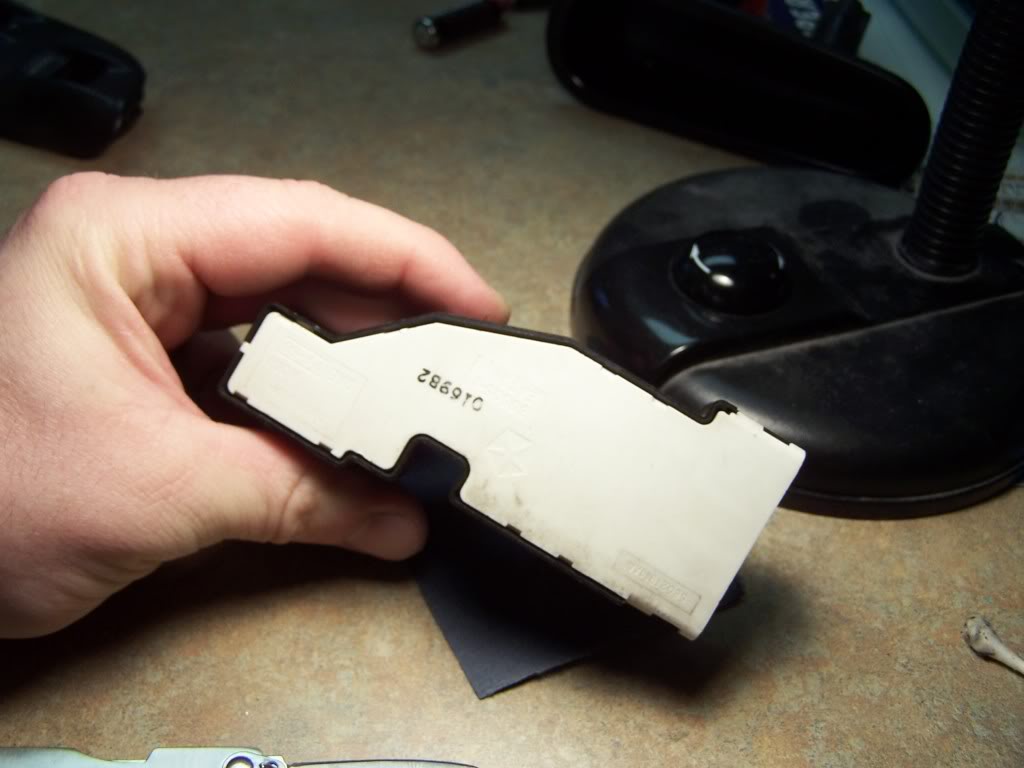
25. Snap the outer surface switch cover back on.
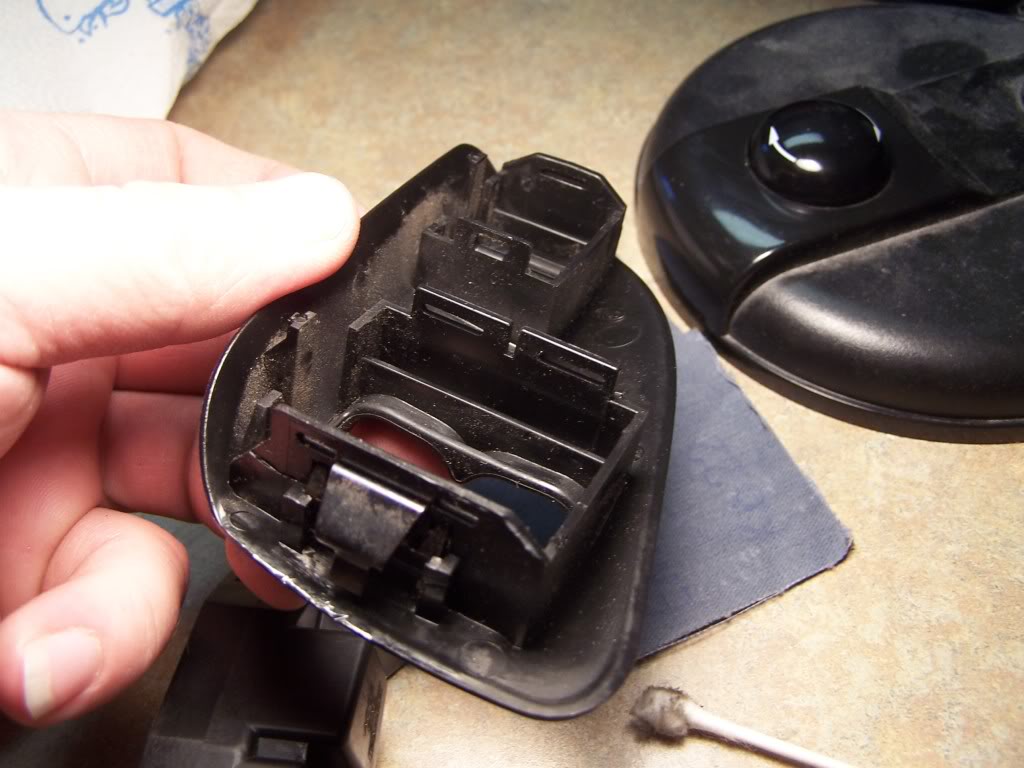
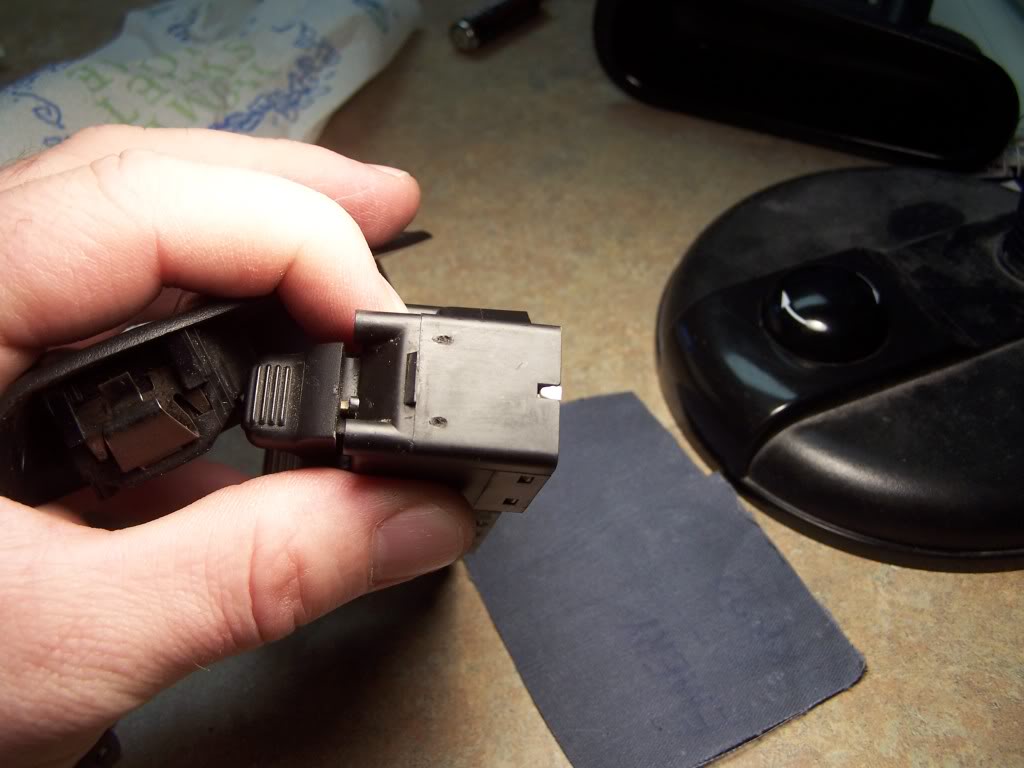
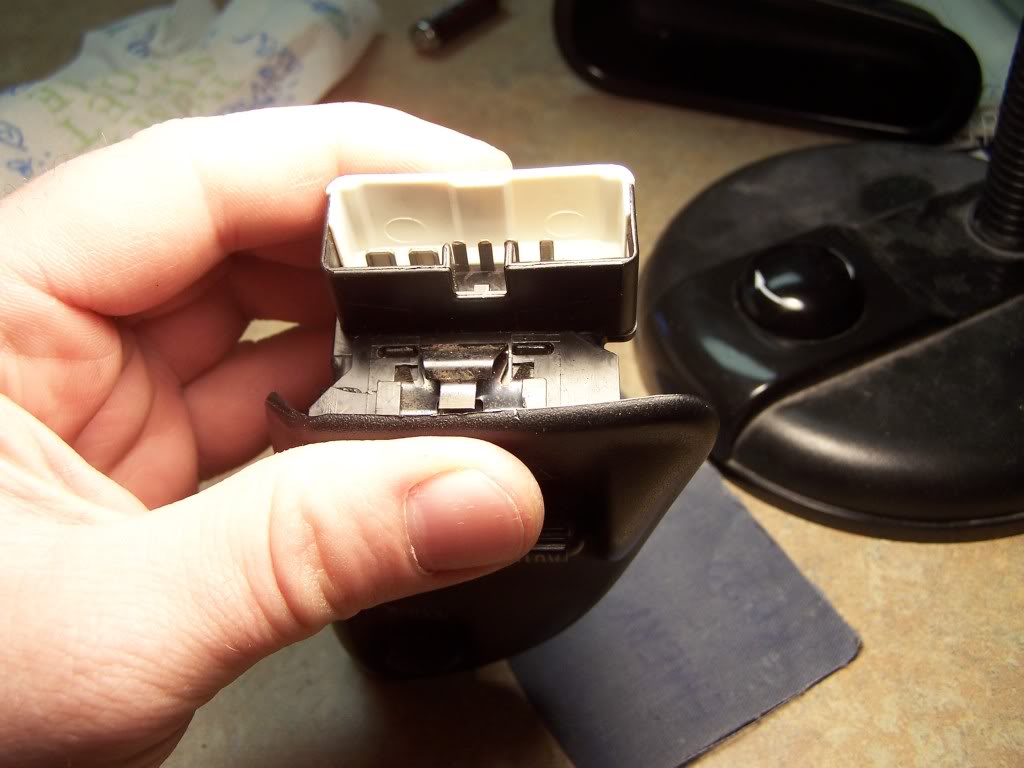

26. Plug in the wiring harness.
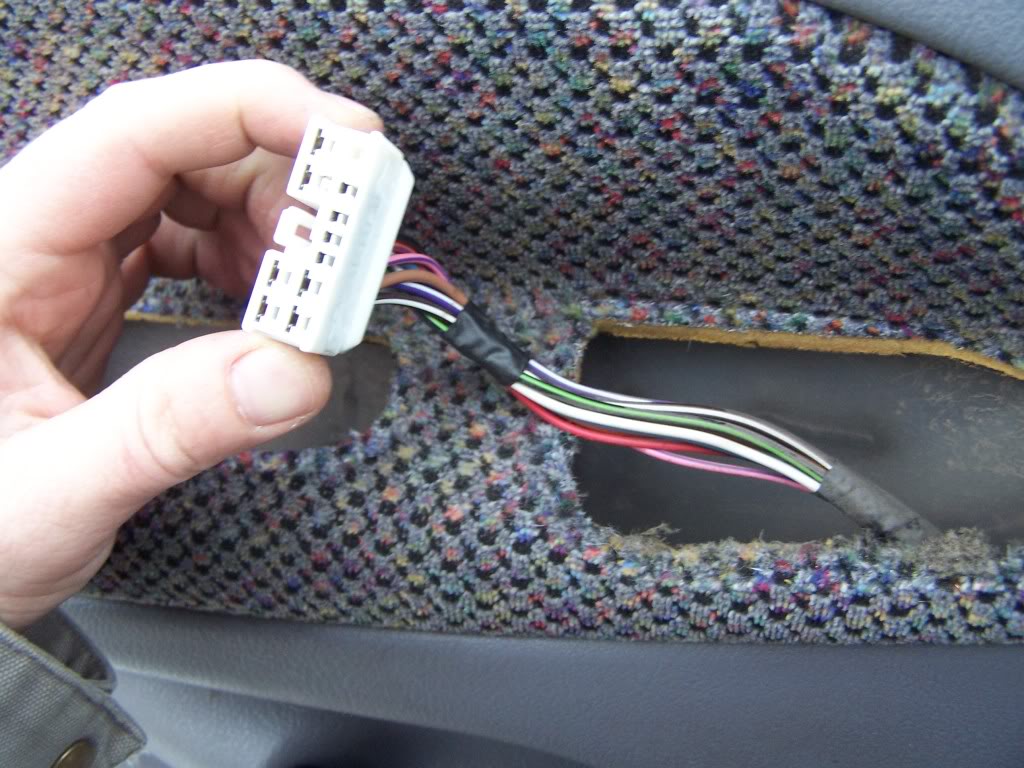
27. Place the back side of the switch in first (harness side) and ensure the snap spring in under the door plastic. Press the front down until it the snap springs snap and is fully seated.
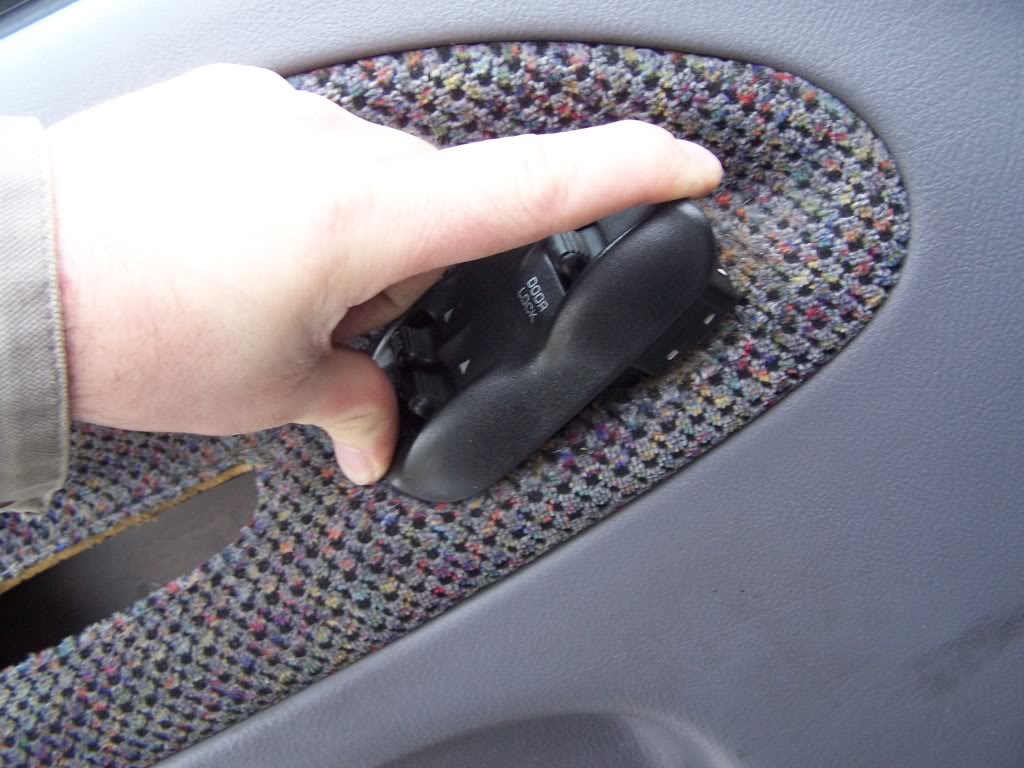
28. Replace the door handle.
Well I will get plenty of life (maybe even another 100k) out of it.
Disclaimer:
I, or the forum, are not responsible for any mishaps or issues while wrenching. Please do this at your own risk.
I hypothesized that the issue it's self was in fact a bad connection on the contacts of the Micro Switches them selves. So before I wasted $70 bucks on a new switch, I pondered if the Micro Switches them selves could be cleaned. So off I start my mission!
1. First I pulled the door handle. It has 2 Phillips screws.

2. Then I slid a small Flat Head screw driver sideways just under the plastic in the door handle so that I could collapse the metal spring and pop up the back side of the switch from the door.
3. The pulled the switch backward (like tring to pull it out) to get the front of the switch and spring out of the hole.

4. Push white button on harness pull the wiring loom from the harness.


5. Now you separate the outer surface from the inner switch housing. Careful as there are tabs on the front and back! Do NOT snap these!!!!!!


6. Next slowly pry the white backing up off the switch housing. Careful as there are tabs all around!

7. Pull the circuit board out of the switch housing. Lift the harness side up first.

8. Here you can see the other side of the slide pins. They are slightly corroded however they do not come out and they are not hurting anything. I left them alone with no lube.

9. Here is the master switch board. The corrosion (green) on the surface of the switch isn't hurting anything. Clean if you want.

10. Here you can see a burned and pitted contact. This is on the locking switch (locking side).

11. With one finger on the armature, and on finger on the end of the spring arm, pinch them together slightly.

12. Raise your thumb slightly while keeping slight pressure and pop the spring arm contactor up.

13. Remove spring contact. Here you can see the ware and burning.


14. Clean spring arm contact (both sides).

15. Clean contacts both lower and upper with fine sand paper (not metallic sand paper!) For a pitted contact, use a blade to widdle off a slight bit of fascia and swap a good slightly used spring arm contact there. Place the worn spring arm contact in a slightly used space.

16. On this contact you can see the Drivers Window secondary and primary switches. The Red line is the contact for the main lowering, the yellow line is the secondary switch for hands free lowering of the window. (My secondary worked fine so I didn't mess with it).

17. Time to install. Here is the spring arm contact. Notice the small arms I am pointing to in red. These line up with the anchors on the switch board.

18. Here are the anchors that they rest into. Slip the arms into the anchors very carefully to line them up square.

19. Now there is a small center reverse spring. You press down on this firmly. There is a secondary anchor here. You have to push the center arm straight down onto the other side of the anchor to lock it down. Now the spring arm contactor will be installed. Check to ensure that it is seated.

20. Here I'm cleaning the lock contacts.


21. Finished.

22. Clean the harness contacts if needed on the plug. (mine was clean).

23. Place the switch back in the housing.

24. Snap the white cover back on and ensure it is fully seated.

25. Snap the outer surface switch cover back on.


26. Plug in the wiring harness.

27. Place the back side of the switch in first (harness side) and ensure the snap spring in under the door plastic. Press the front down until it the snap springs snap and is fully seated.

28. Replace the door handle.
Well I will get plenty of life (maybe even another 100k) out of it.
Disclaimer:
I, or the forum, are not responsible for any mishaps or issues while wrenching. Please do this at your own risk.
#5
My passenger side window has never rolled up with the driver side switches since ive owned the truck. I saw this DIY post today and thought I would try it, as of about 10 minutes ago my window rolls up just fine! Very clear steps and plenty of pictures, definitely worthy of being in the DIY section.

