
I got inspired by Cousin Dan (
. He made doing a vinyl dash wrap look pretty easy on his Porsche. ....so I tried it on my '97 Ram. My dash was cracked up but not yet falling all to pieces. Since my dash was a larger than his, it was harder to do, but not impossible. I think for the time and budget (<$70) it came out okay.
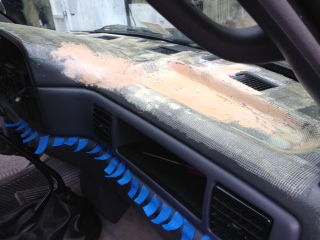
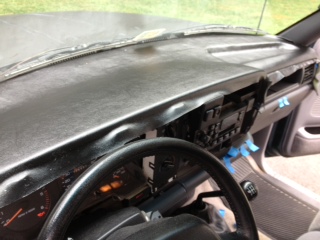
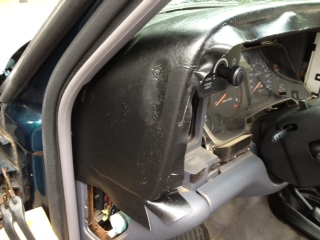
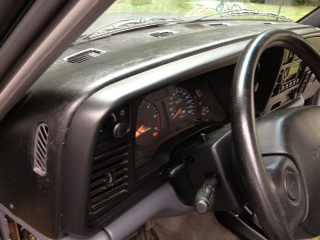
Before:
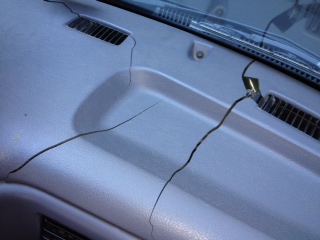
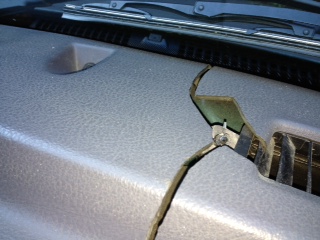
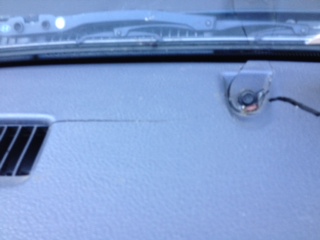
I used fiberglass joint tape from Lowes, fiberglass resin, and some bondo filler to get the pieces of the dash stuck together and reinforced.
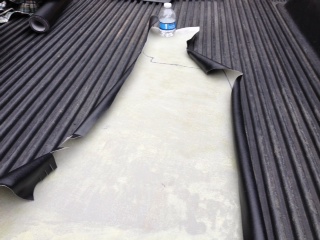
I used a quart of contact cement. That was enough to cover the vinyl fabric and the dashboard. If you do this, watch out that the cement makes the fabric roll up. I painted it with the glue and then worked inside the cab for a few minutes. When I came back out, it was folded over on itself! Fortunately, it rolled up so the slick side touched the glue and I could recover. If the glue had lapped onto the glue, I'da been toast!
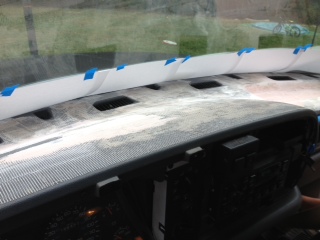
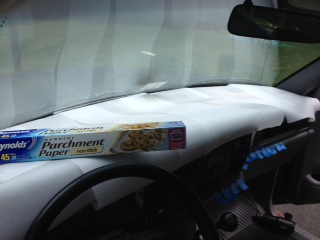
Before I brought the glue coated vinyl into the cab, I laid baking parchment paper over the dash. The rubber cement won't stick at all to it. By lining the dash and laying the coated vinyl on top of that, it made it so I could pull out the sheets of paper to expose the glue as I worked from windshield to the near edge of the dash.
During:
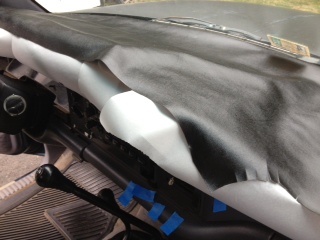
After:

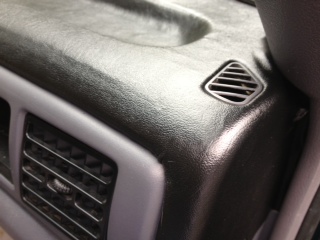
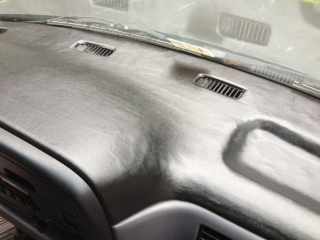
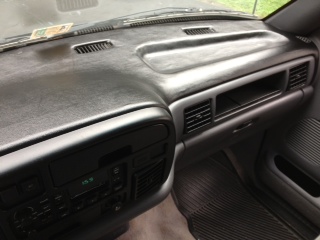
I'll total up the materials cost and post it. I think it was <$70. It's not restoration quality, but for the time and money I've got invested in it, I'm pleased with how it came out.
--VARam1500...
Before:


I used fiberglass joint tape from Lowes, fiberglass resin, and some bondo filler to get the pieces of the dash stuck together and reinforced.


I used a quart of contact cement. That was enough to cover the vinyl fabric and the dashboard. If you do this, watch out that the cement makes the fabric roll up. I painted it with the glue and then worked inside the cab for a few minutes. When I came back out, it was folded over on itself! Fortunately, it rolled up so the slick side touched the glue and I could recover. If the glue had lapped onto the glue, I'da been toast!

Before I brought the glue coated vinyl into the cab, I laid baking parchment paper over the dash. The rubber cement won't stick at all to it. By lining the dash and laying the coated vinyl on top of that, it made it so I could pull out the sheets of paper to expose the glue as I worked from windshield to the near edge of the dash.


During:


After:


I'll total up the materials cost and post it. I think it was <$70. It's not restoration quality, but for the time and money I've got invested in it, I'm pleased with how it came out.
--VARam1500...
HeyYou
Administrator
close


Yesterday
- Join DateApr 2010
- LocationClayton MI
- Posts:87,475
-
Likes:0
-
Liked:4,223 Times in 3,915 Posts
I'd like to see full size pics, but, your links go to the mobile site, and I cannot find a link to view the full pic. Any help here?
The larger pictures are here:http://s1004.photobucket.com/user/VA...hboard%20Large
Let me know if there's any issue with the link or access.
BTW, because the fabric on the roll at the store wasn't wide enough, I had to buy a long piece that I only used half of. I have the other half and will sell it if anyone wants to buy it. $30 + shipping. I used my old carpet dashmat as a starting pattern and traced it out on the back of the vinyl. If you buy the vinyl from me, I'll trace out the dashmat on the back if you want me to.
Materials:
Vinyl $30 (but I had to buy $60 worth of fabric to get the right size)
Fiberglass tape $7
Resin $20
Bondo filler $5
Contact cement $12
Disposable brushes $5
Sandpaper $5
---Total $84-ish.
--VARam1500...
HeyYou
Administrator
close
Yesterday
- Join DateApr 2010
- LocationClayton MI
- Posts:87,475
-
Likes:0
-
Liked:4,223 Times in 3,915 Posts
Awesome, thank you. Turned out good. 
jkeaton
DF Admin
close


Yesterday
- Join DateApr 2010
- LocationWinston Salem, NC
- Posts:28,211
-
Likes:1,135
-
Liked:366 Times in 352 Posts
Very nice. I am looking forward to seeing how yours holds out. I did the same thing on my Camaro's dash. It looked fantastic for about a month. Then the sun started making the vinyl "shrink" and it started pulling away at the ends and started looking "lumpy" all over. I ended up ripping it out and buying a carpeted dash pad instead.

Captain
That looks great! If I may ask... What kind of material is that, exactly? Is it a 4 way stretch? The way it worked into the contours is what I need. I have been wanting to do this to my dash in my '78, but haven't found a material that I feel I can work very well. I don't suppose you have a link to it? Again, looks great!
Quote:
I did have some shrinkage over time. In the places where I trimmed around the vents and in the edge that tucks into the horizontal plastic crease in front of the passenger, it got smaller by up to 1/8". The thing I learned about it is that it didn't hold up well in the places where I used the heat gun. After reading the contact cement can, it says that heating it will weaken the bond. So, mine did let go in the corners of the "tray" on the passenger side. It was "marine vinyl". Maybe not the truly right material for the job, but better than what I had. If it ever warms up, I have some plans to rework part of it. This material had a pretty strong fabric backing. My guess is that if you can find very thin material that doesn't have much reinforcement it will work best. It hasn't discolored in the sun at all.Originally Posted by Scooter78
That looks great! If I may ask... What kind of material is that, exactly? Is it a 4 way stretch? The way it worked into the contours is what I need. I have been wanting to do this to my dash in my '78, but haven't found a material that I feel I can work very well. I don't suppose you have a link to it? Again, looks great!

