


 Aug 6, 2015, 11:58 AM
Last edit by: IB Advertising
See related guides and technical advice from our community experts:
Browse all: Interior
- Dodge Ram 2nd Gen How to Vinyl Wrap Dashboard
Step by step instructions for the do-it-yourself repairs.
Browse all: Interior

Vinyl covered dashboard
Thread Starter
|
Amateur
Joined: Jan 2013
Posts: 25
Likes: 0
From: Central VA
I got inspired by Cousin Dan (
. He made doing a vinyl dash wrap look pretty easy on his Porsche. ....so I tried it on my '97 Ram. My dash was cracked up but not yet falling all to pieces. Since my dash was a larger than his, it was harder to do, but not impossible. I think for the time and budget (<$70) it came out okay.
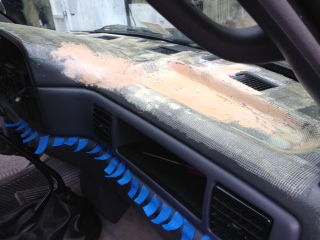
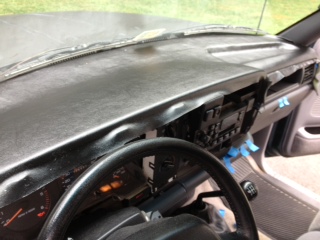
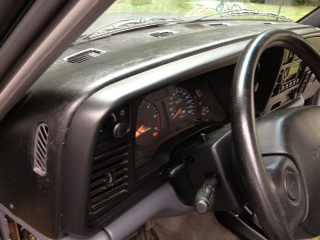
Before:
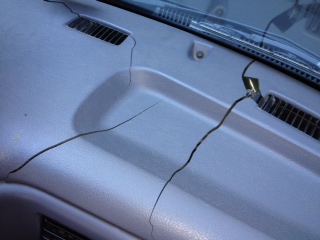
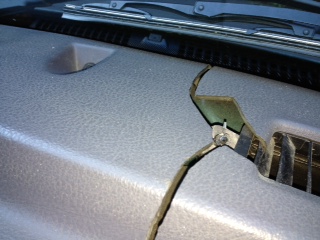
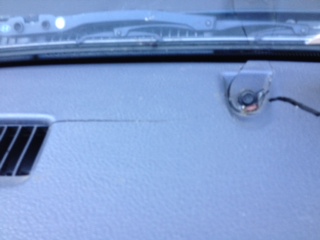
I used fiberglass joint tape from Lowes, fiberglass resin, and some bondo filler to get the pieces of the dash stuck together and reinforced.
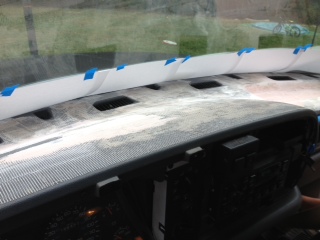
I used a quart of contact cement. That was enough to cover the vinyl fabric and the dashboard. If you do this, watch out that the cement makes the fabric roll up. I painted it with the glue and then worked inside the cab for a few minutes. When I came back out, it was folded over on itself! Fortunately, it rolled up so the slick side touched the glue and I could recover. If the glue had lapped onto the glue, I'da been toast!
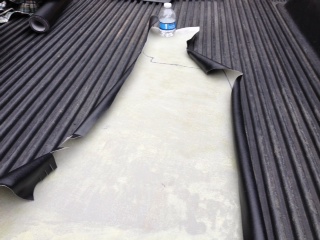
Before I brought the glue coated vinyl into the cab, I laid baking parchment paper over the dash. The rubber cement won't stick at all to it. By lining the dash and laying the coated vinyl on top of that, it made it so I could pull out the sheets of paper to expose the glue as I worked from windshield to the near edge of the dash.
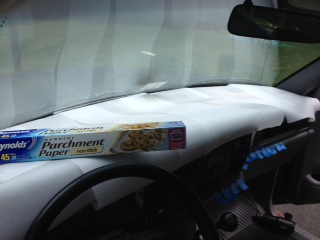
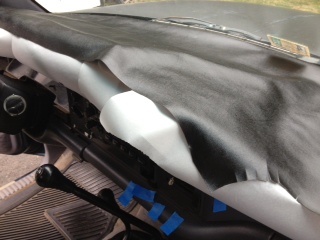
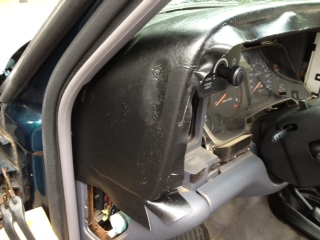
During:
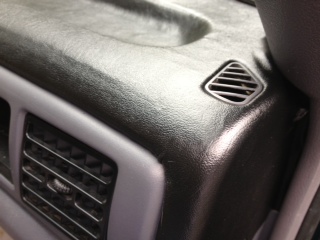
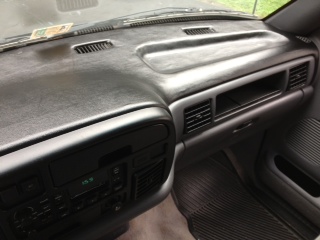
After:

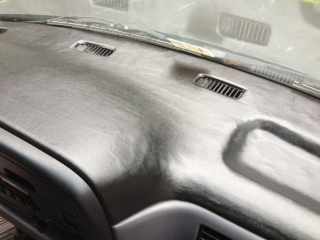
I'll total up the materials cost and post it. I think it was <$70. It's not restoration quality, but for the time and money I've got invested in it, I'm pleased with how it came out.
--VARam1500...
Before:


I used fiberglass joint tape from Lowes, fiberglass resin, and some bondo filler to get the pieces of the dash stuck together and reinforced.


I used a quart of contact cement. That was enough to cover the vinyl fabric and the dashboard. If you do this, watch out that the cement makes the fabric roll up. I painted it with the glue and then worked inside the cab for a few minutes. When I came back out, it was folded over on itself! Fortunately, it rolled up so the slick side touched the glue and I could recover. If the glue had lapped onto the glue, I'da been toast!

Before I brought the glue coated vinyl into the cab, I laid baking parchment paper over the dash. The rubber cement won't stick at all to it. By lining the dash and laying the coated vinyl on top of that, it made it so I could pull out the sheets of paper to expose the glue as I worked from windshield to the near edge of the dash.


During:


After:


I'll total up the materials cost and post it. I think it was <$70. It's not restoration quality, but for the time and money I've got invested in it, I'm pleased with how it came out.
--VARam1500...


Thread Starter
|
Amateur
Joined: Jan 2013
Posts: 25
Likes: 0
From: Central VA
The larger pictures are here:http://s1004.photobucket.com/user/VA...hboard%20Large
Let me know if there's any issue with the link or access.
BTW, because the fabric on the roll at the store wasn't wide enough, I had to buy a long piece that I only used half of. I have the other half and will sell it if anyone wants to buy it. $30 + shipping. I used my old carpet dashmat as a starting pattern and traced it out on the back of the vinyl. If you buy the vinyl from me, I'll trace out the dashmat on the back if you want me to.
Materials:
Vinyl $30 (but I had to buy $60 worth of fabric to get the right size)
Fiberglass tape $7
Resin $20
Bondo filler $5
Contact cement $12
Disposable brushes $5
Sandpaper $5
---Total $84-ish.
--VARam1500...
Last edited by VARam1500; Sep 29, 2013 at 08:51 AM.


Very nice. I am looking forward to seeing how yours holds out. I did the same thing on my Camaro's dash. It looked fantastic for about a month. Then the sun started making the vinyl "shrink" and it started pulling away at the ends and started looking "lumpy" all over. I ended up ripping it out and buying a carpeted dash pad instead.
Trending Topics

Captain
Joined: Apr 2012
Posts: 608
Likes: 2
From: Olympic Peninsula, Wa.
That looks great! If I may ask... What kind of material is that, exactly? Is it a 4 way stretch? The way it worked into the contours is what I need. I have been wanting to do this to my dash in my '78, but haven't found a material that I feel I can work very well. I don't suppose you have a link to it? Again, looks great!
Thread Starter
|
Amateur
Joined: Jan 2013
Posts: 25
Likes: 0
From: Central VA
That looks great! If I may ask... What kind of material is that, exactly? Is it a 4 way stretch? The way it worked into the contours is what I need. I have been wanting to do this to my dash in my '78, but haven't found a material that I feel I can work very well. I don't suppose you have a link to it? Again, looks great!

