


Homebuilt Tire Gate


Thread Starter
|
Banned
Joined: Oct 2009
Posts: 536
Likes: 0
From: Death to the CSA!
Alright, so finished out the rest of the frame yesterday, I also got the carrier plate installed. I need to hop on the mill for a while and make a shield plate for the lug nuts, that way one can't just throw some visegrips on there and get them off. I also need to machine some clevis pins, and cut the safety cables I have in mind. I'm also going to plate the back in how I like. Not quote sure how yet.
After all that, I need to grind some of the welds back a bit, then send it out for powdercoat.
Anyways, pictures:


After all that, I need to grind some of the welds back a bit, then send it out for powdercoat.
Anyways, pictures:
Last edited by 011500Ram; Dec 31, 2009 at 01:41 PM.
Thread Starter
|
Banned
Joined: Oct 2009
Posts: 536
Likes: 0
From: Death to the CSA!
I would never waste my money on a sketchy retread. Idk the weight, my friend works at discount and he balanced them until the machine read nearly perfectly balanced. Pretty good for a 33". You should have seen the weights on my 35" Baja T/A's.
Grand Champion
Joined: Apr 2008
Posts: 7,055
Likes: 7
From: Lee County, North Carolina
i was just asking about the re-tread deal because of the section of tread that toward the top of the tire in the second picture down that you can see the lines in. i've never seen that on a new tire but my sketchy re-treads have it.
and i forgot to mention, that's pretty nice work on the tire mount. with a little paint the entire gate will look store bought. you might have to start taking orders from pavementsucks.com if you throw these pictures on that site.
and i forgot to mention, that's pretty nice work on the tire mount. with a little paint the entire gate will look store bought. you might have to start taking orders from pavementsucks.com if you throw these pictures on that site.
Last edited by Sheriff420; Dec 31, 2009 at 02:12 PM.
Thread Starter
|
Banned
Joined: Oct 2009
Posts: 536
Likes: 0
From: Death to the CSA!
It's part of the injection. That tire has never been driven on. There is all sorts of excess rubber hanging off of it. Thanks for the well words. As for orders, you can buy one too! Just gather $1300 and head over to tiregate.com!
Here's how I think I'm going to start with the plating. After that I may use expanded sheet to fill in some of the gaps, but I'm not sure yet.
Here's how I think I'm going to start with the plating. After that I may use expanded sheet to fill in some of the gaps, but I'm not sure yet.
Last edited by 011500Ram; Dec 31, 2009 at 02:30 PM.
Champion
Joined: Jul 2008
Posts: 3,430
Likes: 2
From: NW Arkansas
I've been looking into different ways to store my spare tire, now that it will no longer fit under my bed. I thought about using a bed carrier, but only bro's use those stupid things. So I dug deeper and I found this product:


I loved the idea but I simply don't have the duckets for it at the price of $1000!
So I decided to build my own. I have all the tools I need, and I have the knowhow. So I did.
I started with a tube frame, but ditched it in favor of 3/16 strap, because it looks much cleaner and I lose less horizontal bed space.

From there I notched out the tubes I needed and tacked the basic design together. I also placed an old BFG up on top to show about what it will look like when finished.

After that I cut out the center members for the carrier plate:

That's all my progress for now. I'm going to put in two diagonal members, weld it all up, then send it out for powdercoat while my truck is in the shop this week. I'll be sure to post completed pictures. All said and done I'll only lose about 4 inches at the very end of the bed, and I can't really use that space anyways.
Any thoughts?
I loved the idea but I simply don't have the duckets for it at the price of $1000!
So I decided to build my own. I have all the tools I need, and I have the knowhow. So I did.
I started with a tube frame, but ditched it in favor of 3/16 strap, because it looks much cleaner and I lose less horizontal bed space.
From there I notched out the tubes I needed and tacked the basic design together. I also placed an old BFG up on top to show about what it will look like when finished.
After that I cut out the center members for the carrier plate:
That's all my progress for now. I'm going to put in two diagonal members, weld it all up, then send it out for powdercoat while my truck is in the shop this week. I'll be sure to post completed pictures. All said and done I'll only lose about 4 inches at the very end of the bed, and I can't really use that space anyways.
Any thoughts?
what sticker is that in the middle of your back glass???
Thread Starter
|
Banned
Joined: Oct 2009
Posts: 536
Likes: 0
From: Death to the CSA!
It's our Navy Jack.

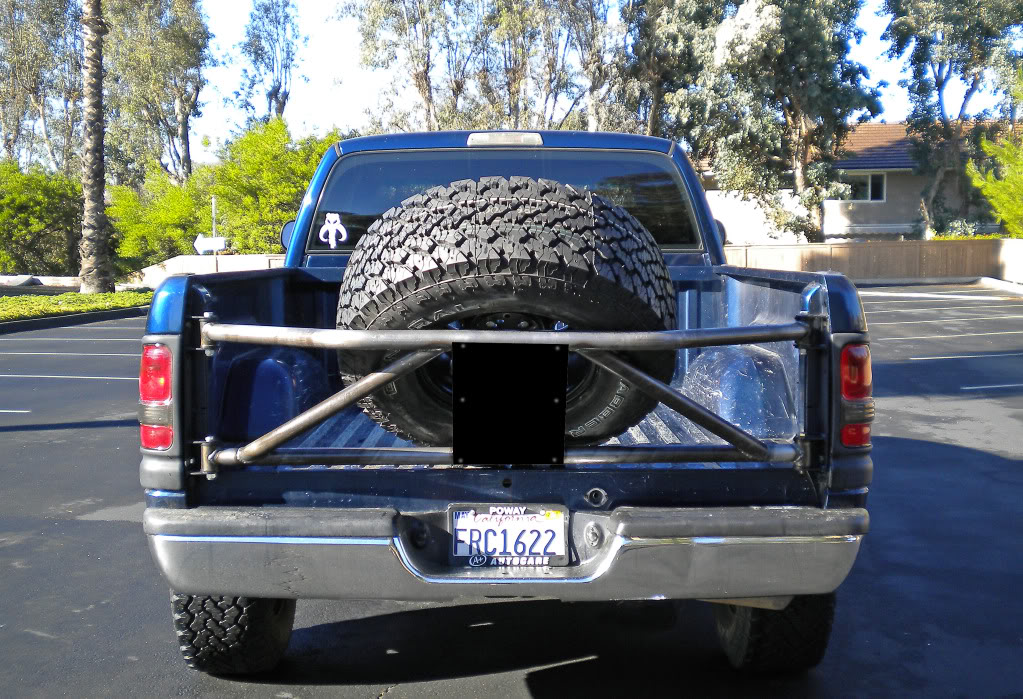
It's Finished! I made up the cables and got the lock for the opening side. I also threw the bushings and sleeves onto the lathe and took a bit off of them to make them slide in and out a bit easier on the side that opens. I also took the 9/16th bolts that the bushings are sleeved for, and turned down the ends to 1/2, with a bit of a taper. This had a duel purpose. Removing the threads, and facilitating the use of a pin.
Then I put them into the mill and made holes for hitch pins.
I raged on the tabs a bit to square them up a bit more, and voila. All I have to do now is touch up the paint where I beat on it. So thats it!
Last edited by 011500Ram; Jan 6, 2010 at 03:40 PM.
That looks really good! Nice attention to detail. Maybe you could also incorporate some L.E.D. trailer lights on it too, since it sticks out far enough.
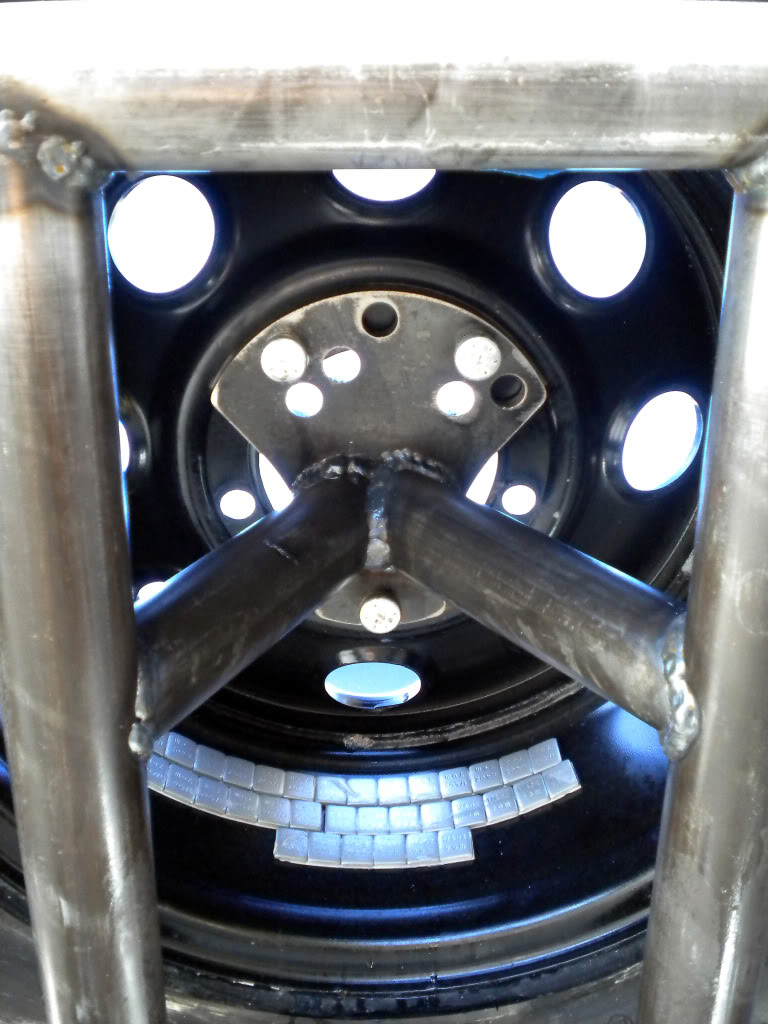
And BTW what the hell are those silver things on the inside of your spare wheel?
And BTW what the hell are those silver things on the inside of your spare wheel?
Thread Starter
|
Banned
Joined: Oct 2009
Posts: 536
Likes: 0
From: Death to the CSA!
It barely hangs over the back bumper. I'm not adding any lights. If anything, possibly an amber lamp so guys on bikes and quads can see me from a ways off. Can't tell you how many times I've almost killed myself at night riding my 450.
Those silver things would be weights.
Those silver things would be weights.
Professional
Joined: Jun 2009
Posts: 141
Likes: 0
From: Goose Creek, SC
They are wheel weights. I have them on mine as well.