Rebuild Magnum 360 Motor
#11
A BFH and safety glasses and I bet it will behave for you. Good luck and keep us posted. Pix would be nice as we are pix ****** here and it helps others that are doing this work.
#14
Ok, I got the motor out! I applied heat to the starter, and that didn't help. I ended up using an angle grinder to cut away at the metal on the starter (while being very careful not to cut the bellhousing, the starter was all corroded and the housing on it was cracked anyway). After cutting some of the metal away, I beat it with a 24oz roofing hammer and that did the trick. Got the starter off, unbolted the flywheel from the torque converter and pulled the motor out (although the torque converter decided to come out with the engine though). Thanks for the input! I'll be posting pictures soon.
#15
Glad to hear you stuck with it got just the motor out. The only thing I hate about these trucks is that the motor sits back so far. When I installed my new 5.9 motor, I made sure I had a new distributor cap (with brass inserts) and rotor on it, since the distributor is very hard to access with the motor and intake manifold (kegger) in-place.
Look forward to your pictures and seeing the new motor installed...
Look forward to your pictures and seeing the new motor installed...
#17
#18
I've thought about it a few times and the only thing that'd make me consider it would be the fact of how tough it was to get the top two bell housing bolts off & on lol. When I put my sisters motor back in, I went from under the truck with a swivel and bunch of extensions and then on the passengers side I remember a 1/8th turn at a time back ache fest from sitting in one spot doing nothing.
The biggest pain in the Hershey highway was the fact while I was taking a break to eat my sandwich and have a beer, my sisters drunk friend figured it was best to take the wiring harness out with the motor, which caused several issues after the new motor was in...like harness clamps not holding the harness and then it falls down onto the exhaust manifolds and the vacuum 4x4 actuator lines breaking/leaking from being pulled off. I've learned through the years, the less you have to fk with the better unless it substantially benefits you in time and quality of work.
The biggest pain in the Hershey highway was the fact while I was taking a break to eat my sandwich and have a beer, my sisters drunk friend figured it was best to take the wiring harness out with the motor, which caused several issues after the new motor was in...like harness clamps not holding the harness and then it falls down onto the exhaust manifolds and the vacuum 4x4 actuator lines breaking/leaking from being pulled off. I've learned through the years, the less you have to fk with the better unless it substantially benefits you in time and quality of work.
Last edited by JoshSlash87; 04-17-2013 at 04:02 AM.
#19
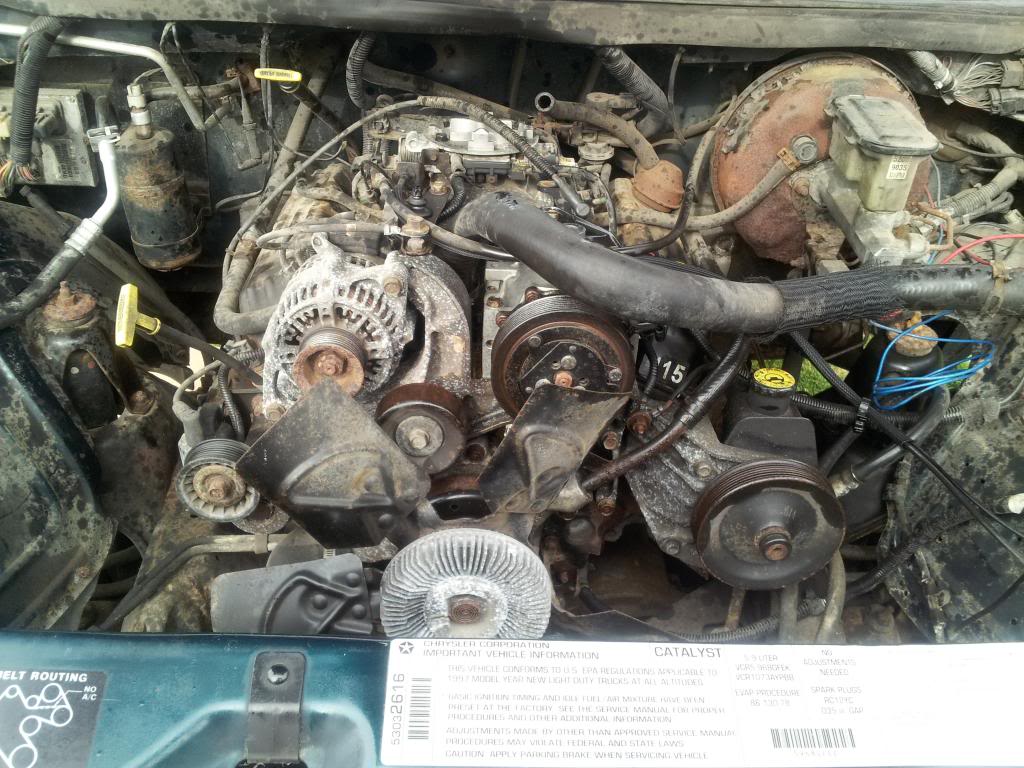
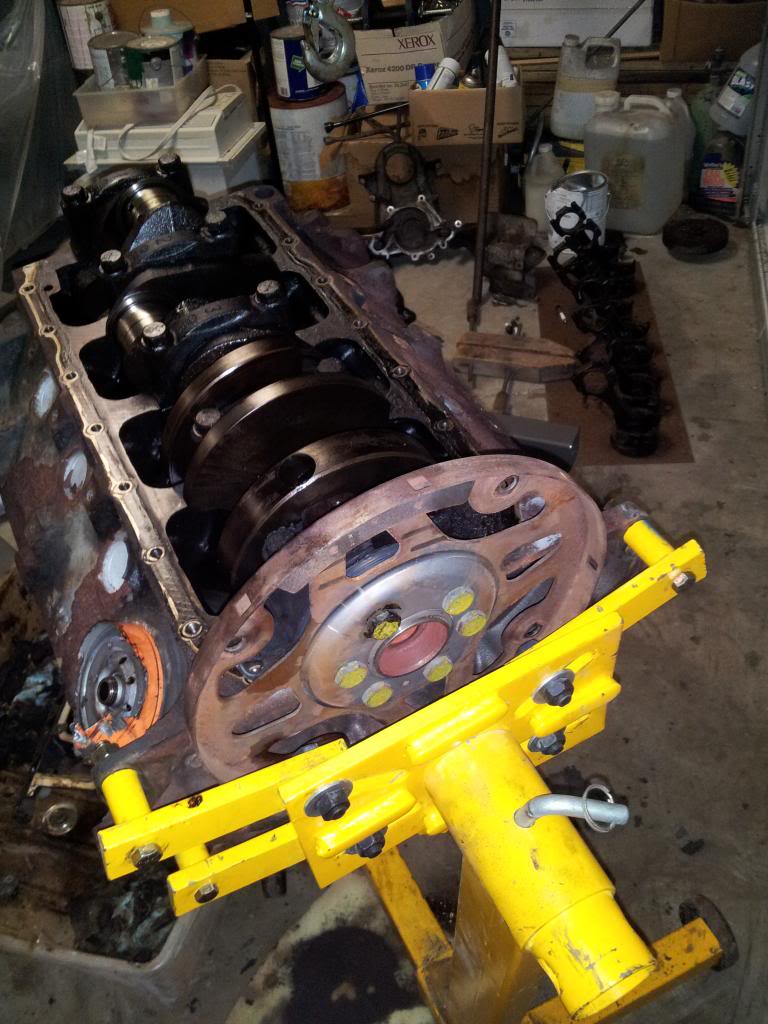
Ok, sorry for the delay, but I got the engine pulled and torn down. I'm uploading some pictures.

OilOrMud_zpsc3a3ae4e.jpg?t=1367979943
FilthyIntakeManifold_zps9185fa51.jpg?t=1367979937
This is after I drained the oil!
HorridLifteValley_zpsaac86a3a.jpg?t=1367979932
I cut the starter off to get it out!
EngineOut_zps14d27270.jpg?t=1367979919
Heads off
HeadsOff_zps450b6e7c.jpg?t=1367979906
Baked on crud!
20130424_171258_zps37d96a46.jpg?t=1367979892
Oil pan sludge
SludgeInPan_zpsa2135e18.jpg?t=1367979886
busted cam bearing 1
CamBearing2_zps3960000e.jpg?t=1367979872
Busted cam bearing 2
CamBearing1_zpsd6f1b670.jpg?t=1367979865
Rod Bearing
RodBearing_zpsf102a830.jpg?t=1367979859
Rusty!
RustedEngine_zps4fc7d376.jpg?t=1367979853
Notice the oil filter...

Worst Oil Filter Ever!
WorstOilFilterEver_zps86de6418.jpg?t=1367979827
Got some rust off!
RustOff1_zpse43d67c9.jpg?t=1367979807

OilOrMud_zpsc3a3ae4e.jpg?t=1367979943
FilthyIntakeManifold_zps9185fa51.jpg?t=1367979937
This is after I drained the oil!
HorridLifteValley_zpsaac86a3a.jpg?t=1367979932
I cut the starter off to get it out!
EngineOut_zps14d27270.jpg?t=1367979919
Heads off
HeadsOff_zps450b6e7c.jpg?t=1367979906
Baked on crud!
20130424_171258_zps37d96a46.jpg?t=1367979892
Oil pan sludge
SludgeInPan_zpsa2135e18.jpg?t=1367979886
busted cam bearing 1
CamBearing2_zps3960000e.jpg?t=1367979872
Busted cam bearing 2
CamBearing1_zpsd6f1b670.jpg?t=1367979865
Rod Bearing
RodBearing_zpsf102a830.jpg?t=1367979859
Rusty!
RustedEngine_zps4fc7d376.jpg?t=1367979853
Notice the oil filter...

Worst Oil Filter Ever!
WorstOilFilterEver_zps86de6418.jpg?t=1367979827
Got some rust off!
RustOff1_zpse43d67c9.jpg?t=1367979807
Last edited by 1997JollyGreenGiant; 05-07-2013 at 10:40 PM.
#20
So today I got all the sludge out of the block that I could and I cleaned the gasket surfaces. Currently, all the machined surfaces are covered in motor oil. The cross-hatch pattern is visible in the cylinder bores. I'm going to take the block to a machine shop to get it cleaned and checked. This is my first engine rebuild. What machine work should I get done?
I'm pretty comfortable with working with the top end of an engine, but the bottom end is new to me. Any tips on rebuilding it? Or am I better getting someone else to do it? Please be kind, I've never dealt with a bottom end before.
I'm pretty comfortable with working with the top end of an engine, but the bottom end is new to me. Any tips on rebuilding it? Or am I better getting someone else to do it? Please be kind, I've never dealt with a bottom end before.


