


Axle swap to Dana 60 and Dana 80

The axle swap started when I exploded the front grizzly locker in my Dana 44. I had just finished lifting the truck and putting 37's on. I had been running 35's on 4.56 gears for about 7 years and had not a problem one. The truck just lack approach angle and you know how it goes, you always want a little more than you have. So, now that my truck was broke, I didn't want to fix it in kind and worry about it breaking again, so I wanted to upgrade to 1 ton axles. After lots of research, I found that if I got axles from a Gen 2 ram that they would be nearly a bolt on swap. I found a pair of axle on car-parts.com web sight and for $1050 shipped to El Paso, TX out of Missouri. I then took the axles to a friends shop where I had him install 5.13 gears and ARB air lockers front and rear. We also replaced all the ball joints, u-joints and hubs and every seal and internal bearing there was. On August 26th I was able to pick up the new axles

Then it was time to get busy with the axle swap
Then it was time to get busy with the axle swap
Last edited by corbo1962; Oct 30, 2013 at 02:48 PM.


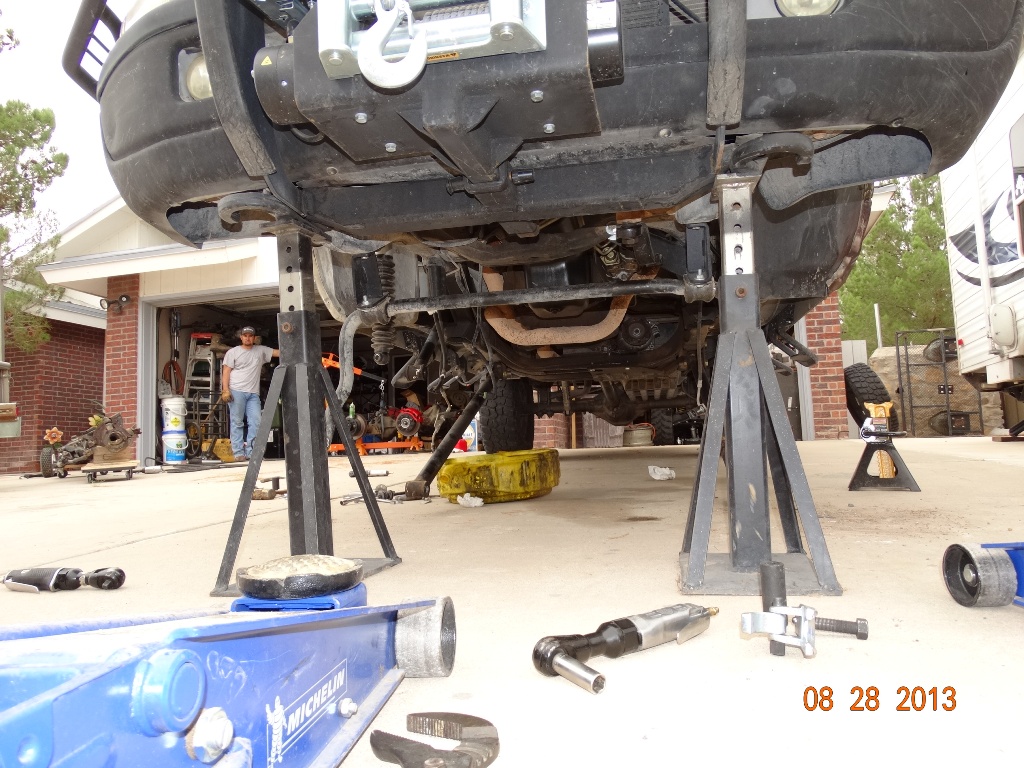
I had one friend available for help and two days to do the swap. We started at 7am the morning of the 27th of August. Pulled out the old axle


Now with the old axle out and the new parts bolted on the Dana 60, we are ready to install the D60.
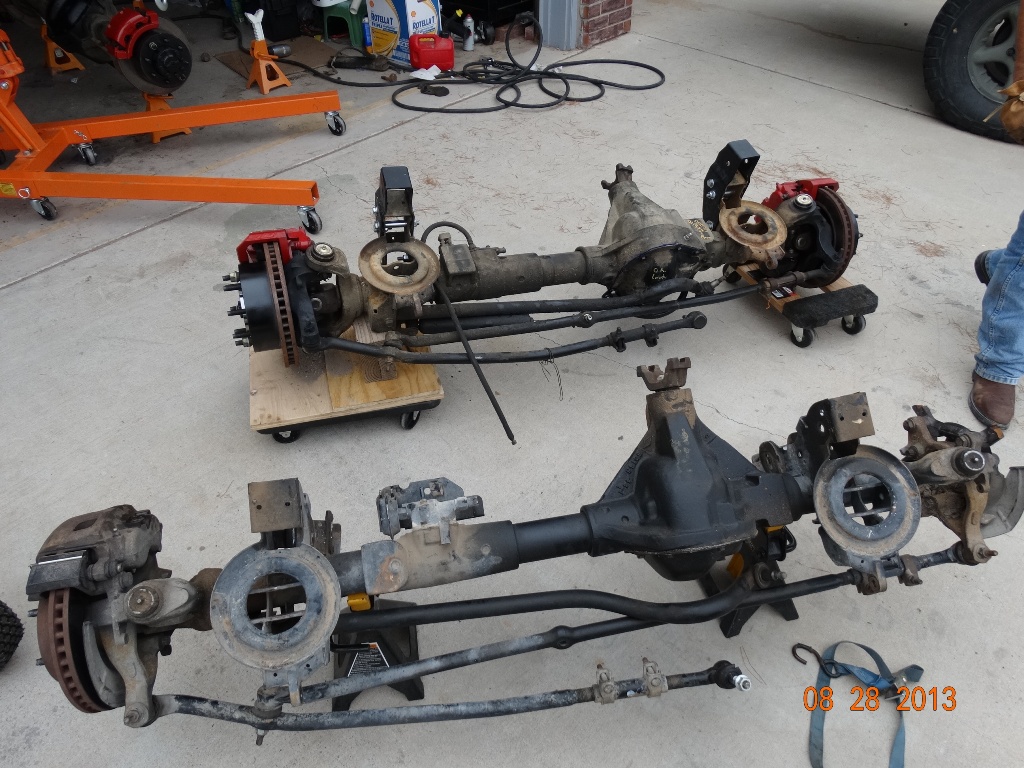
So we slid the axle in on movers furniture dolly's. This worked pretty well. We first lined up and bolted on both lower control arms. Then fought in the first upper control arm and then the second upper. now everything is more or less lined up. We installed the spring and shocks. The mounted up the track bar.
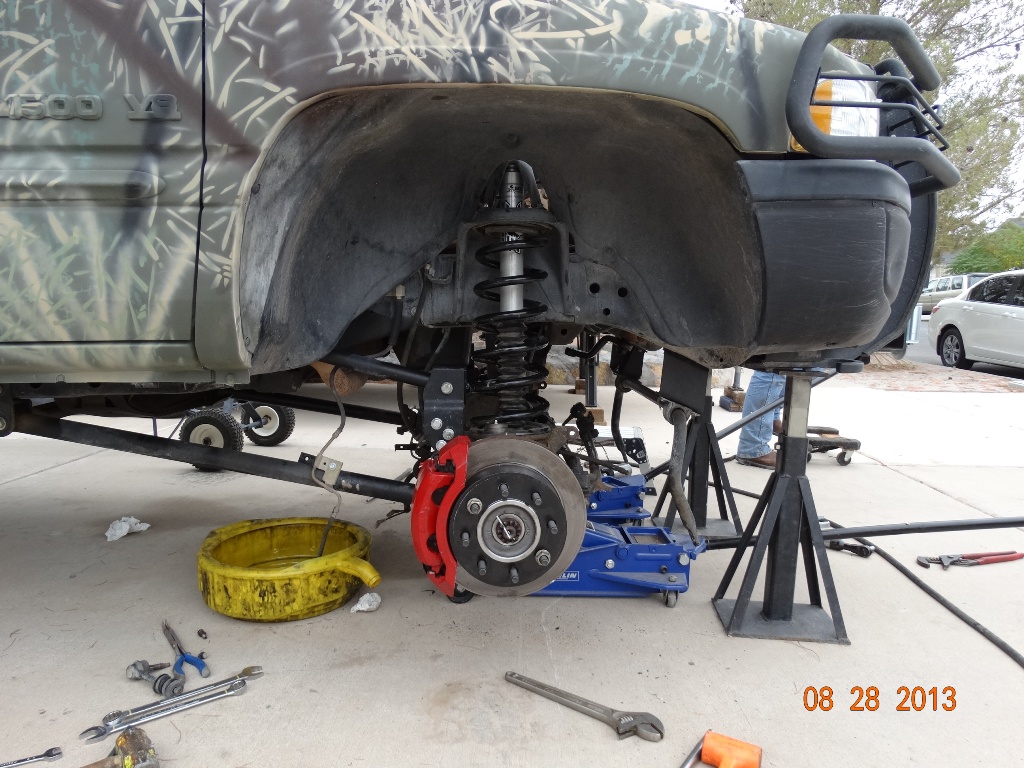
The steering arm was the mounted to the pitman arm. Hooked up the brakes, mounted the tires and put her down on the ground.

After that we hooked up the sway bar and the drive shaft and called it a day. It took us from &am when we started till just after noon. I took the rear Dana 80 over the a buddy's house and we removed the old spring perch pads and installed the new 2.5 inch pads in their new locations. and that was it for this day.
Now with the old axle out and the new parts bolted on the Dana 60, we are ready to install the D60.
So we slid the axle in on movers furniture dolly's. This worked pretty well. We first lined up and bolted on both lower control arms. Then fought in the first upper control arm and then the second upper. now everything is more or less lined up. We installed the spring and shocks. The mounted up the track bar.
The steering arm was the mounted to the pitman arm. Hooked up the brakes, mounted the tires and put her down on the ground.
After that we hooked up the sway bar and the drive shaft and called it a day. It took us from &am when we started till just after noon. I took the rear Dana 80 over the a buddy's house and we removed the old spring perch pads and installed the new 2.5 inch pads in their new locations. and that was it for this day.
I started this day at 6am, know my friend was going to be over later. I got the truck up on the stands, tires off, shocks disconnected, brake lines disconnected. I then prepped the D80 to be put in. I installed the steel braided brake line that goes from the truck to the axle. I might add that it had rained all night and that I was able to soak up all the loose water that was under the truck before My buddy got there to help. He showed up at 9ish and we disconnected the springs and pulled out the old axle

Now with everything out of the way, its time to get the Dana 80 ready to put in. notice in this side by side comparison how much bigger the D80 is over the Chrysler 9.25. The spring perch pads add 1" to my lift and I got another .25" of the bigger by .5" axle tube size. We stuffed it in just how you see it. pulled on the movers dolly side with a rope while one guided it in with the engine hoist. This method worked very well and if I would have thought about it for the front, I would have used it then too. Once we got the axle in position, we left the one side on the movers dolly and then put a floor jack under the other side and disconnected the engine hoist. we lifted the axle up and bolted it up to the spring. the new ubolt set up consisted on a 4" round ubolt and a 4" by 2.5" plate that now bolts on top of the spring. This plate was for a dana 70 HD axle for a 2.5 inch spring. We then lifted and bolted up the other side and torqued them both down.

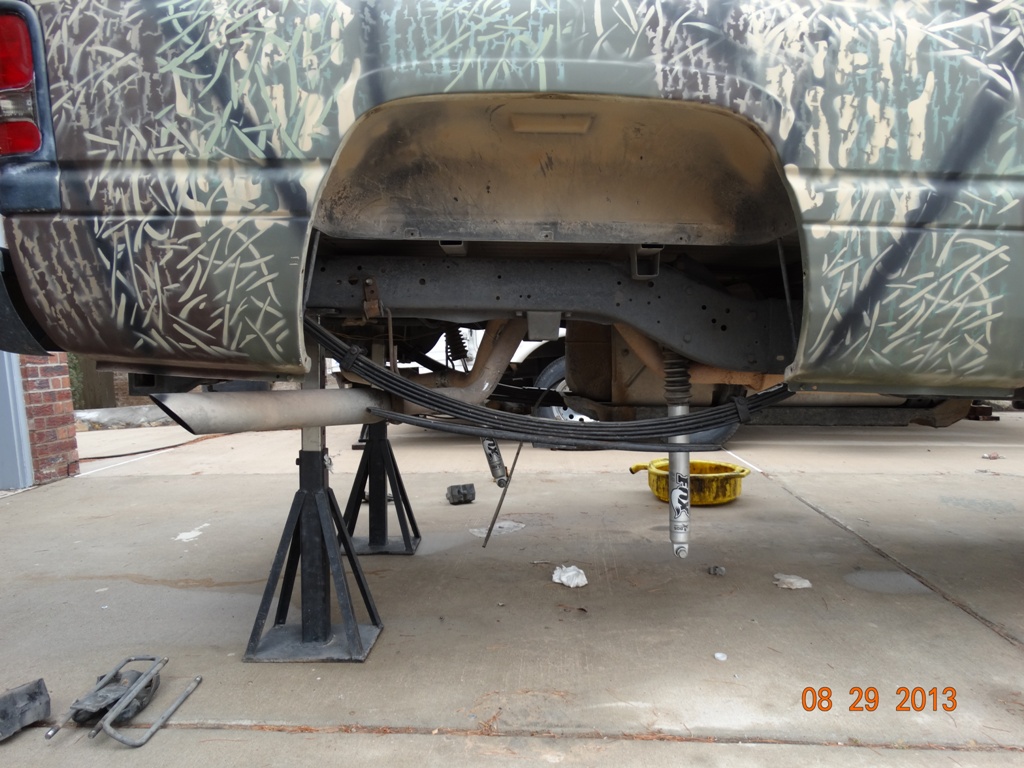
Then hooked up the shock and brake lines. put the tires on and set it back on the ground.

Notice how mush higher the rear sits than the front. It measure 2 inches higher
Now with everything out of the way, its time to get the Dana 80 ready to put in. notice in this side by side comparison how much bigger the D80 is over the Chrysler 9.25. The spring perch pads add 1" to my lift and I got another .25" of the bigger by .5" axle tube size. We stuffed it in just how you see it. pulled on the movers dolly side with a rope while one guided it in with the engine hoist. This method worked very well and if I would have thought about it for the front, I would have used it then too. Once we got the axle in position, we left the one side on the movers dolly and then put a floor jack under the other side and disconnected the engine hoist. we lifted the axle up and bolted it up to the spring. the new ubolt set up consisted on a 4" round ubolt and a 4" by 2.5" plate that now bolts on top of the spring. This plate was for a dana 70 HD axle for a 2.5 inch spring. We then lifted and bolted up the other side and torqued them both down.
Then hooked up the shock and brake lines. put the tires on and set it back on the ground.
Notice how mush higher the rear sits than the front. It measure 2 inches higher
Looks great. Tons of work. I'm doing a 60 swap right now front and back. Them suckers are heavy. I couldn't imagine how heavy a 80 is.
I really like those wheels, and that's the best camo paint job I've ever seen
I really like those wheels, and that's the best camo paint job I've ever seen
I mounted the ARB locker switches

And the ARB Compressor
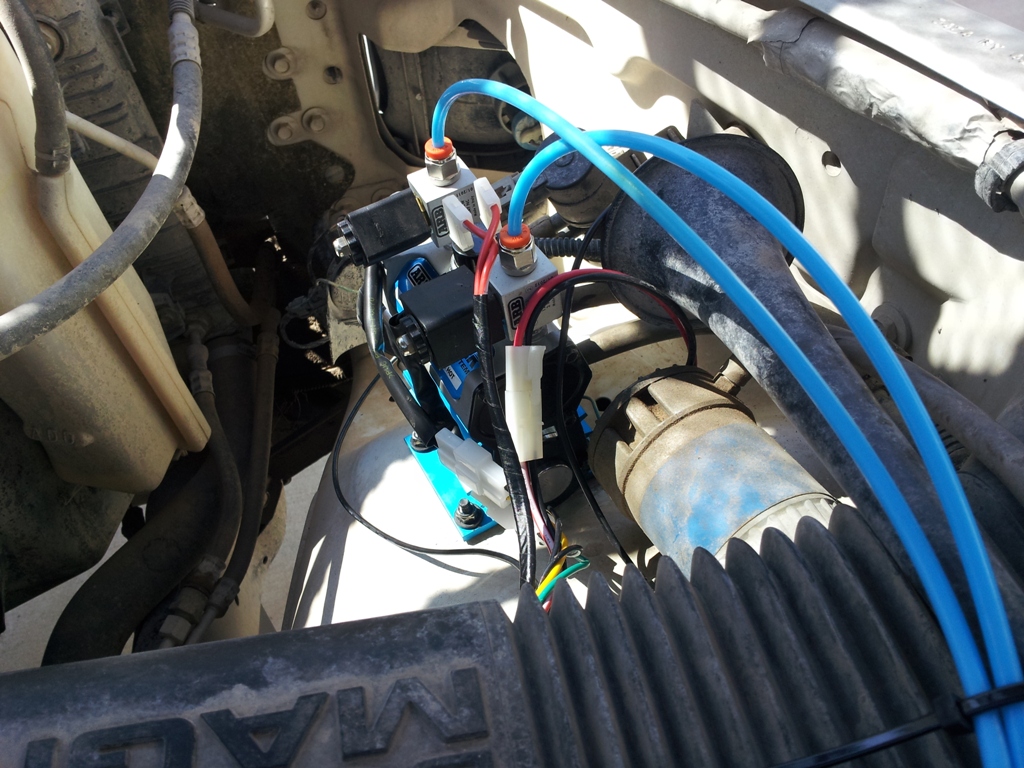
And hooked up the air lines and now have useable lockers. Starting to get excited to get this thing dirty.
I had a local drive shaft shop make me a rear drive shaft. I am now running a 1410 Ujoint in the rear at the D80 and a 1350 at the transfer case.
Now was the real challenge, to get the rear disc brakes to work. I read lots of article and several on this forum and there were a bunch of different ideas and ways of going about solving this issues. Some required replacing the master cylinder, proportioning valve and some I don't even remember. After all that I looked into the parts kit for a drum to disc brake upgrade kit for the rear of a truck. All the kit adds is an adjustable proportioning valve, so I figured that enough thought must have gone into these kits if they are going to sell them more than once. So that's exactly what I did, bought an adjustable proportioning valve and cut some tubing, making the necessary flairs and installed it.
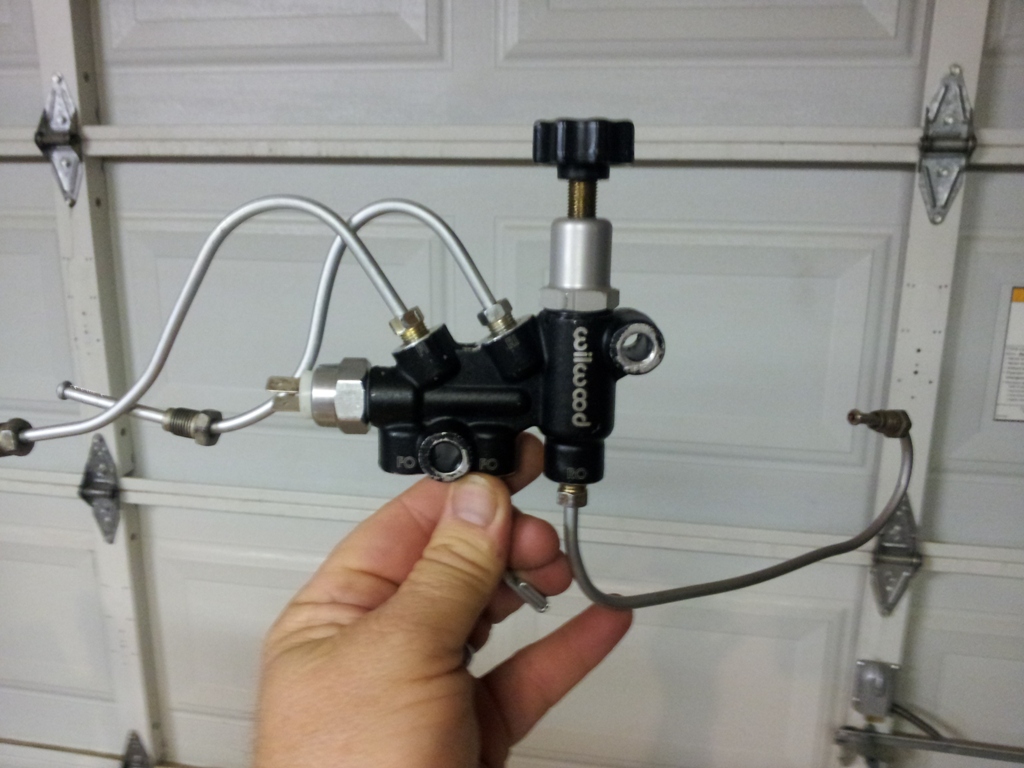
Took it for a test drive and after a few stopping runs in the dirt, dialed in the adjustment and the brakes worked great. With the increased size of the brakes and the 37 inch tires this truck now stops with much pedal to spare. I am amazed at the difference between now and before the swap.
The next problem to solve is to level the front out and that's exactly what I did. Bought some 2inch leveling spacers and installed them.

That pretty much tied up the lose ends. This is how she sat before I put the fender flairs on after all this work was done
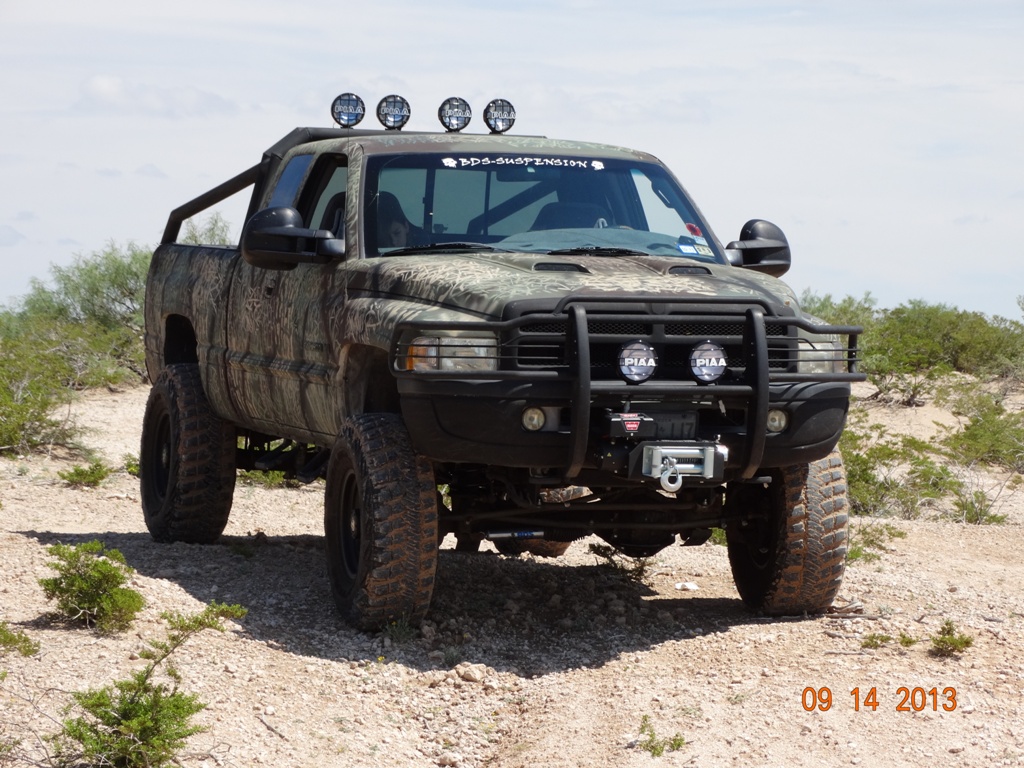
That's the axle swap story with pictures. And as Merc said, lots of time and money. But the result was well worth it. I turned my awesome off road edition into a "Camo Beast"
And the ARB Compressor
And hooked up the air lines and now have useable lockers. Starting to get excited to get this thing dirty.
I had a local drive shaft shop make me a rear drive shaft. I am now running a 1410 Ujoint in the rear at the D80 and a 1350 at the transfer case.
Now was the real challenge, to get the rear disc brakes to work. I read lots of article and several on this forum and there were a bunch of different ideas and ways of going about solving this issues. Some required replacing the master cylinder, proportioning valve and some I don't even remember. After all that I looked into the parts kit for a drum to disc brake upgrade kit for the rear of a truck. All the kit adds is an adjustable proportioning valve, so I figured that enough thought must have gone into these kits if they are going to sell them more than once. So that's exactly what I did, bought an adjustable proportioning valve and cut some tubing, making the necessary flairs and installed it.
Took it for a test drive and after a few stopping runs in the dirt, dialed in the adjustment and the brakes worked great. With the increased size of the brakes and the 37 inch tires this truck now stops with much pedal to spare. I am amazed at the difference between now and before the swap.
The next problem to solve is to level the front out and that's exactly what I did. Bought some 2inch leveling spacers and installed them.
That pretty much tied up the lose ends. This is how she sat before I put the fender flairs on after all this work was done
That's the axle swap story with pictures. And as Merc said, lots of time and money. But the result was well worth it. I turned my awesome off road edition into a "Camo Beast"
Thanks Ham Bone! I am going to make a post in the general discussion about the Camo job, I'll call it "Camouflage the Beast". I painted this camo job while I was waiting on the axles to be set up. It already had a camo job that I had done back in 2008.
Trending Topics
Last night I installed the Swaybar Disconnects. I had purchased them during the axle swap, but had bought the wrong style. We had to weld drop down tabs onto the sway bar to make them work. I bought longer adjustable disconnects so I could remove the swaybar relocation brackets that came with the lift. I didn't like the way you could see the swaybar from the front of the truck.
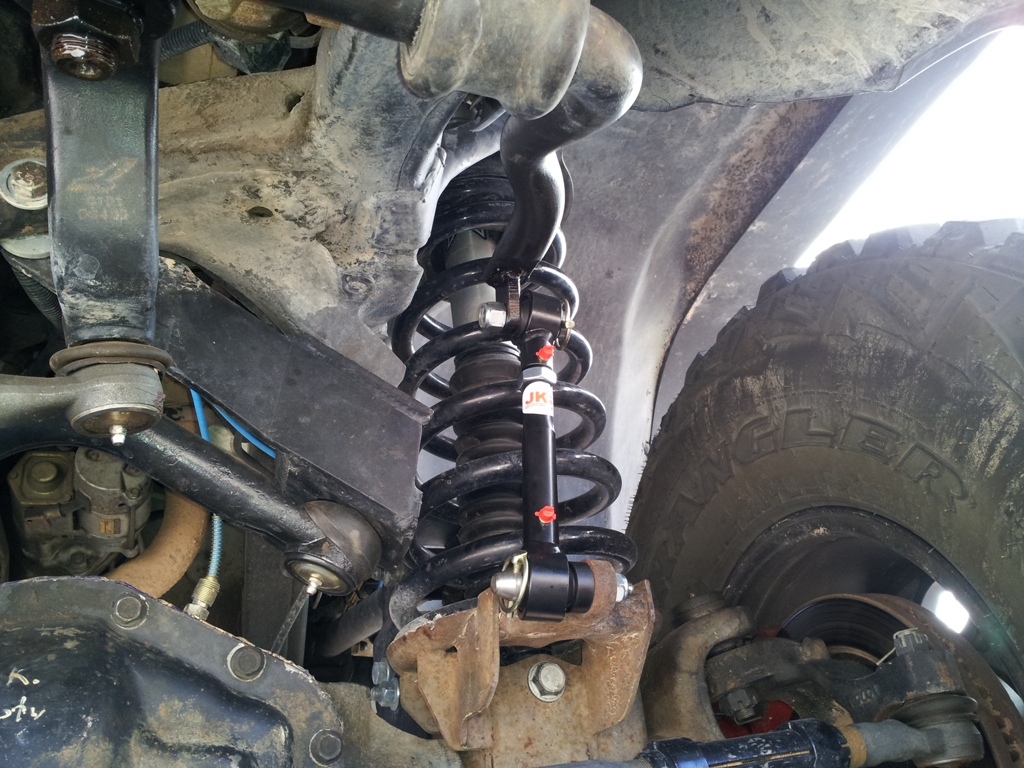
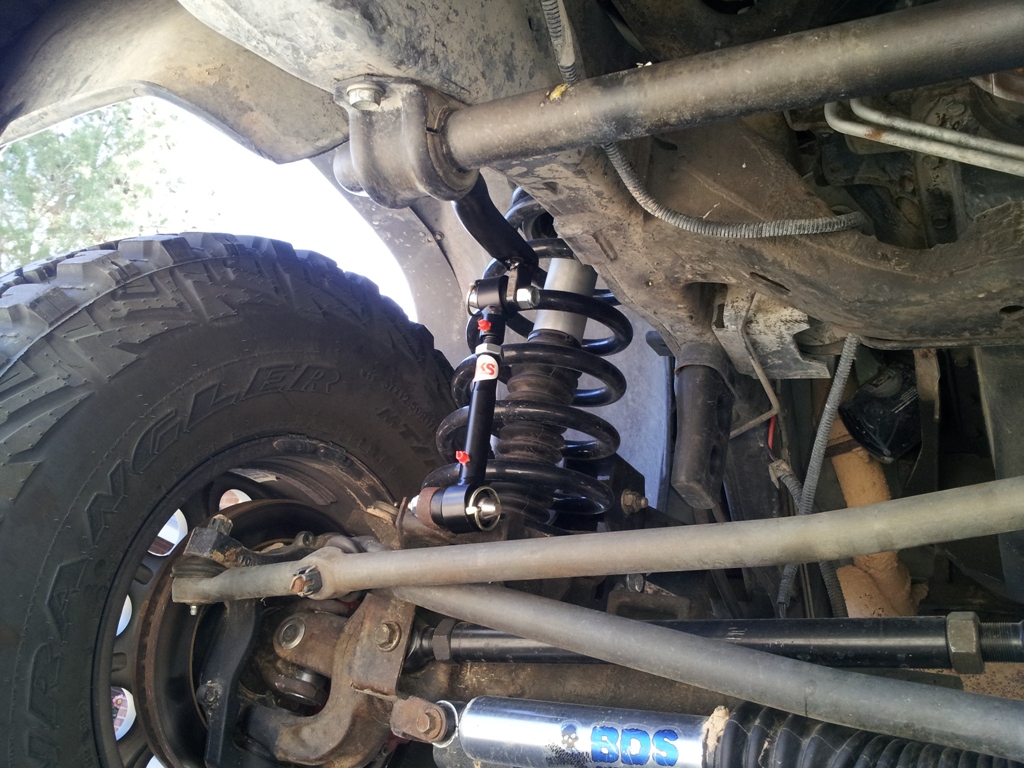
Now the swaybar is tucked back up where it should be.
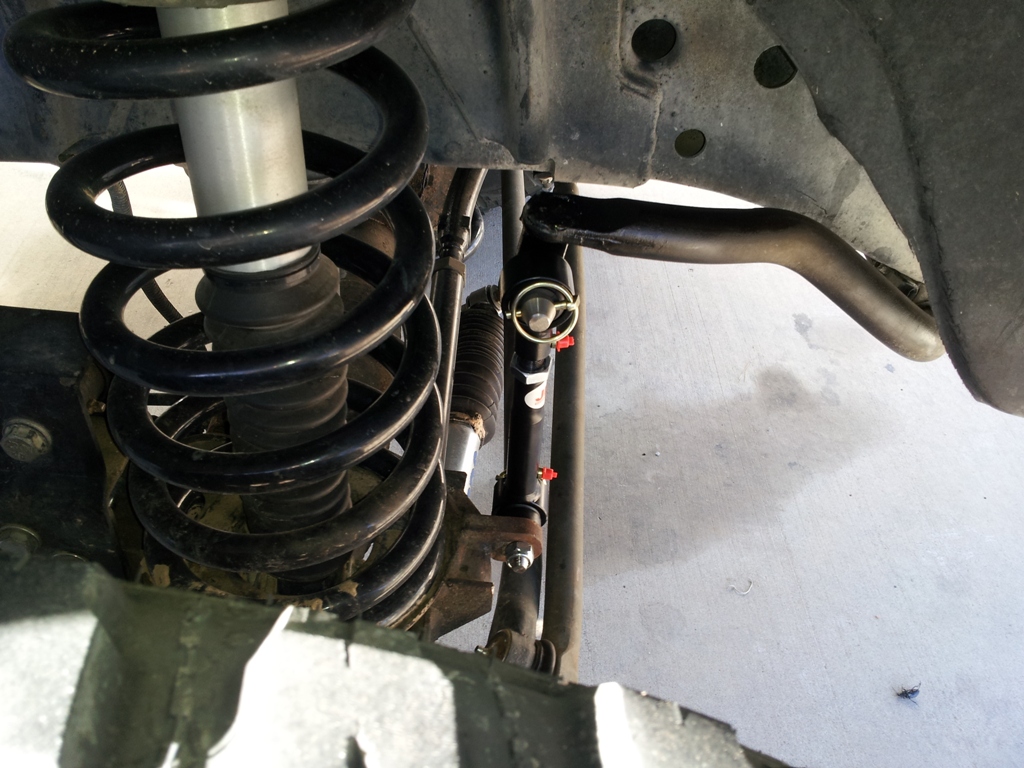
I guess there are occasions for a wheeler to want to disconnect the swaybar on a full-size truck, otherwise why would they have put them on the Power Wagon. Those rare unforeseen occasions are the lesser reason why I did it, the bigger reason is what I said above about getting the swaybar tucked up out of sight where it is protected.
Now the swaybar is tucked back up where it should be.
I guess there are occasions for a wheeler to want to disconnect the swaybar on a full-size truck, otherwise why would they have put them on the Power Wagon. Those rare unforeseen occasions are the lesser reason why I did it, the bigger reason is what I said above about getting the swaybar tucked up out of sight where it is protected.
Champion
Joined: Sep 2011
Posts: 3,891
Likes: 8
From: NorCal
Great work on the swap. I'm fairly certain you are the first person to show and tell much more about how to handle the drum/disk swap. Some other people just talked about it.
There's another way I'd like to try when I get there for my D70.
What was your rationale for going D80 over D70? Just curious.
I like the use of the JKS disconnects. Your lift is the BDS 5"? I noticed we both have same relocation of the front axle breather tube. It looks like you also have the CAD indicator wire still hooked up. You haven't ripped yours? I've tugged mine a bit where I just leave it disconnected. lol Of course, it doesn't help that wire as I completely remove the sway bar when I hit the trails.
You must have gotten some good dollar from the stock axles with 4.56s.
Again, well done and thanks for sharing.


