


Valve Covers


Thread Starter
|
Record Breaker
Joined: Oct 2005
Posts: 998
Likes: 0
From: Western New York
Looking into getting some new valve covers and I am haveing a problem finding any. Anyone have some suggestions on where to look besides summit. Don't want to pay 200 for a set of MP. I would like to get Aluminum.

Hall Of Fame


Joined: Jan 2004
Posts: 12,946
Likes: 309
I think they are all about the same $... try krc performance.com or hughes engines...
edit... I checked both of the above sites... and didnt see them easily...
http://www.mopartsracing.com/parts/ram.html check about 1/2 way down... they're about $189
edit... I checked both of the above sites... and didnt see them easily...
http://www.mopartsracing.com/parts/ram.html check about 1/2 way down... they're about $189

Thread Starter
|
Record Breaker
Joined: Oct 2005
Posts: 998
Likes: 0
From: Western New York
ORIGINAL: MGDMike
What about some Edelbrocks?
What about some Edelbrocks?

Record Breaker
Joined: Nov 2005
Posts: 1,827
Likes: 3
From: Ontario Canada
Funny, Edelbrock makes alum 2.02 heads for the Magnum but not the valve covers. I would check that out more thoroughly. Email them and ask if they have valve covers for part # 61779 
Thread Starter
|
Record Breaker
Joined: Oct 2005
Posts: 998
Likes: 0
From: Western New York
Indy I was going to pm you, I figured if anyone knew it would be you. By the way what color blue is your dash anyway and how the heck did you paint the vents. If I tried to get my fins out I would probably brake them.
Trending Topics
Record Breaker
Joined: Nov 2005
Posts: 1,827
Likes: 3
From: Ontario Canada
Vents, oh yeah, what a fricken treat that was. One of the few mods I have done that really drove me nuts. They are tricky little sob's & major pain in the @ss to reinstall. If your thin on patience or have high blood pressure I wouldnt advise this mod lol.
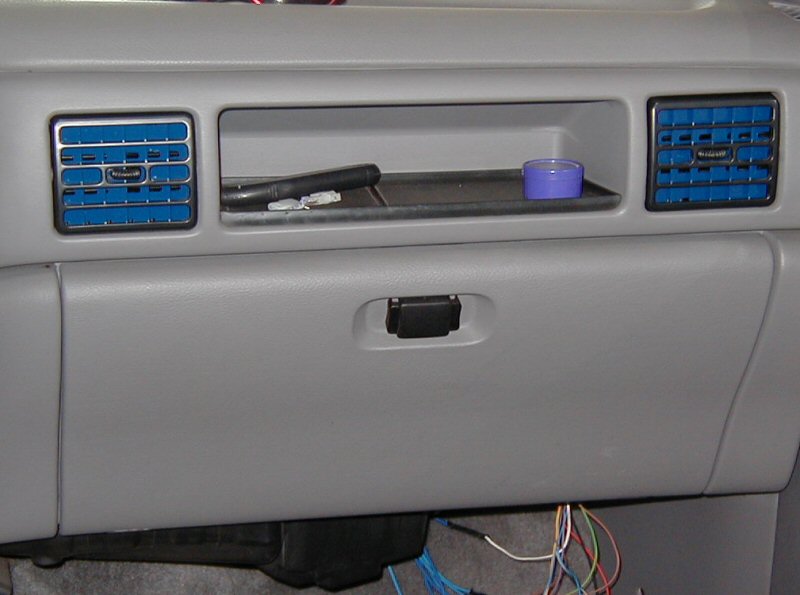
Vents, dash, gauge bezel & seat pedestals all have the same paint.
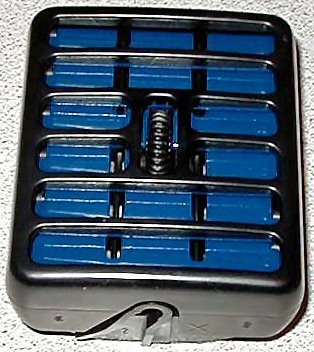
I used Tremclad primer and gloss medium blue & clear coat (no clear used on vanes), think its only available in Canada. Took a couple coats on each side till they were right. Make sure they are very dry before installing them. The paint I used is sort of enamel like so I gave them a lot of time. Sure there is better paint to use.
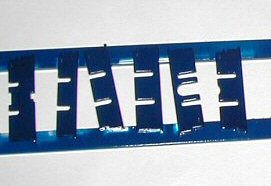
Pic below, vanes have small tabs at the top that they pivot on. They have other tabs 1/2 way down on the sides. These tabs plug into the thin piece with 5 holes, the upside down "U" piece connects the last 2 vanes on the opposite side. The vanes are in the right order except the top 2 need to switch. You have to either put it together like that then push the 10pcs(2 round pieces thumb wheels) into the case while maintaining the right distance and keeping everything together or put the vane into the case and try to put the connectors onto all the tabs.(couldnt do it) Lots of cursing and swearing is required threw this step. & I mean LOTS lmao.
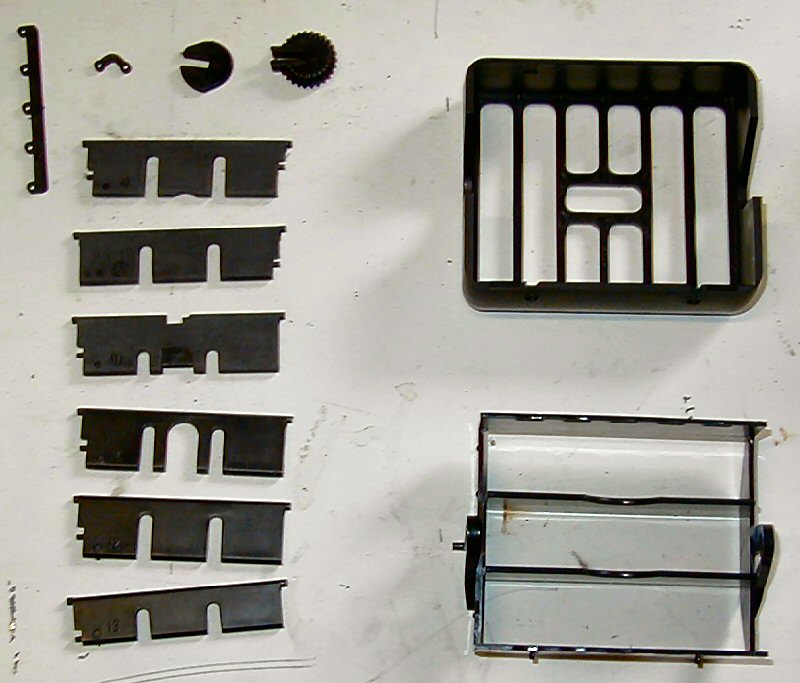
I managed to get everyone back in without breaking anything except for one vane. One vanes tab snapped off as I put the last vent together. If I open/close them the one tab wont move back closed. Need to remove them, drill the one and pin it to fix it. Not at the top of the list right now lol.
Left vent, right hand vane is the broken one [:@]
Good luck if you choose to accept this mission,,,,you may not come back
Vents, dash, gauge bezel & seat pedestals all have the same paint.
I used Tremclad primer and gloss medium blue & clear coat (no clear used on vanes), think its only available in Canada. Took a couple coats on each side till they were right. Make sure they are very dry before installing them. The paint I used is sort of enamel like so I gave them a lot of time. Sure there is better paint to use.
Pic below, vanes have small tabs at the top that they pivot on. They have other tabs 1/2 way down on the sides. These tabs plug into the thin piece with 5 holes, the upside down "U" piece connects the last 2 vanes on the opposite side. The vanes are in the right order except the top 2 need to switch. You have to either put it together like that then push the 10pcs(2 round pieces thumb wheels) into the case while maintaining the right distance and keeping everything together or put the vane into the case and try to put the connectors onto all the tabs.(couldnt do it) Lots of cursing and swearing is required threw this step. & I mean LOTS lmao.
I managed to get everyone back in without breaking anything except for one vane. One vanes tab snapped off as I put the last vent together. If I open/close them the one tab wont move back closed. Need to remove them, drill the one and pin it to fix it. Not at the top of the list right now lol.
Left vent, right hand vane is the broken one [:@]
Good luck if you choose to accept this mission,,,,you may not come back