


DIY: MyGig Lock Pick V.4 INSTALL!


Thread Starter
|
Professional
Joined: Mar 2011
Posts: 178
Likes: 0
From: Conowingo, MD
Ok so lets get the disclaimer out of the way. I am not responsible for any damage done to your vehicle by this product or during the installation of this product and I am in no way a representative or affliated with this company/product.
So I installed my MyGig Lockpick V.4 in my Durango and the install was very simple. The instructions had great pictures and went into some decent detail. Here is my experience installing the unit.
Here is the package as it came from the company....
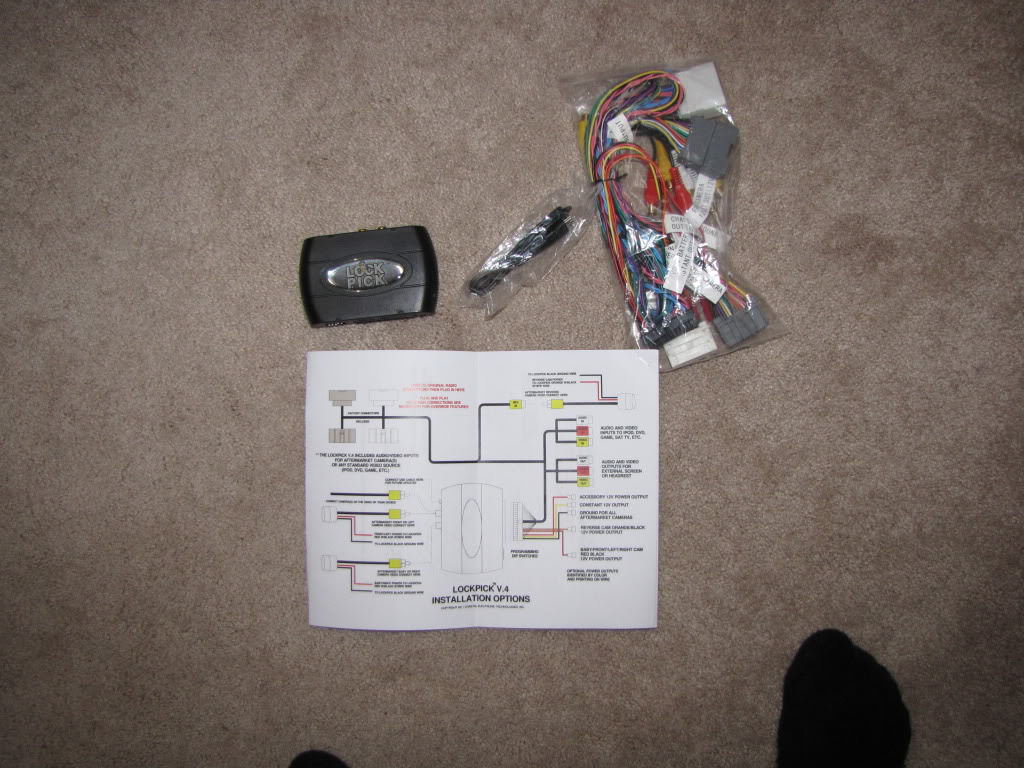
It comes with everything you need to install. You will also need a 7mm socket wrench with an extension and I also used some double sided sticky tape.
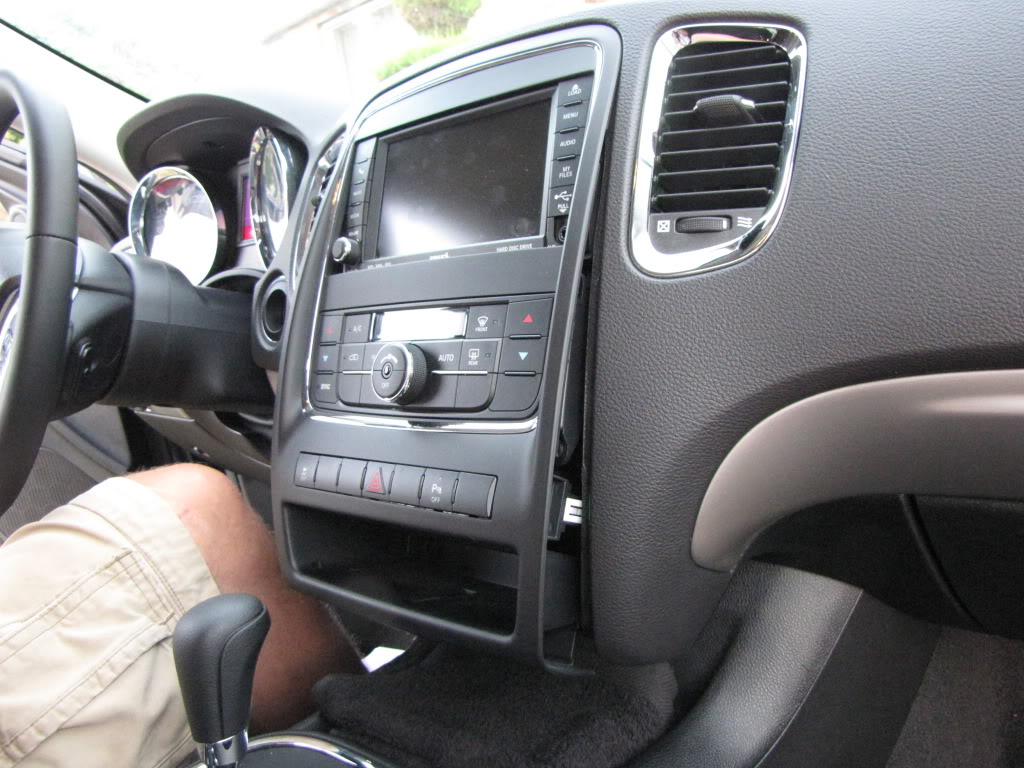
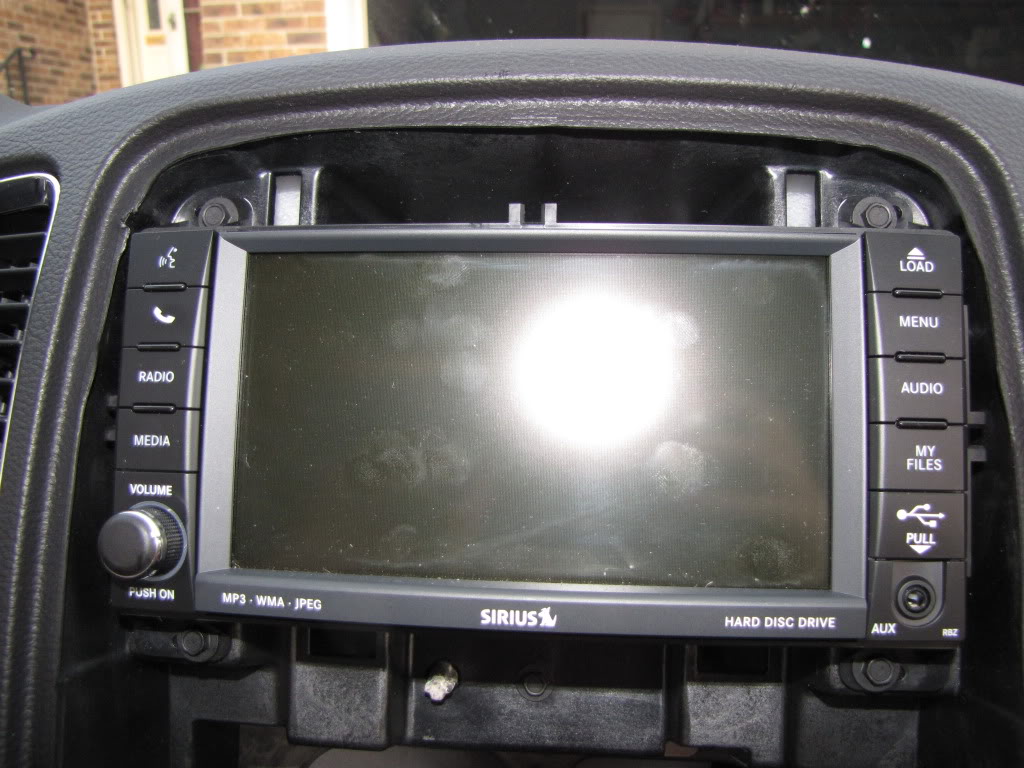
Here is the dash to start...

You will need to start in the lower console opening.
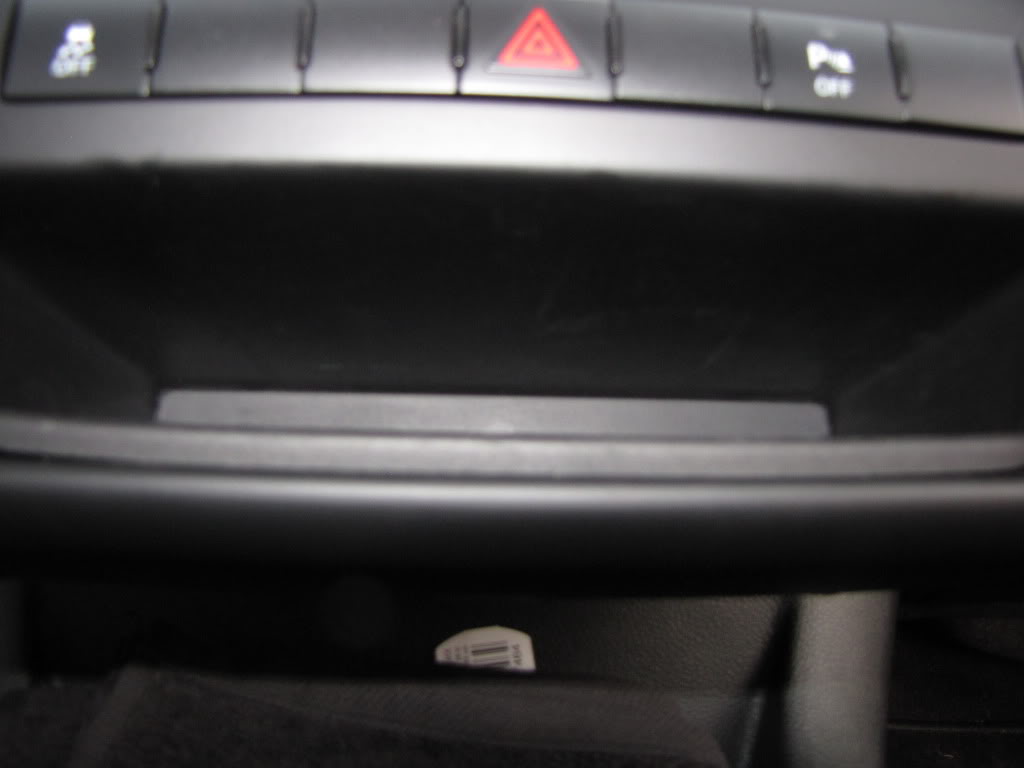
Pull up the rubber insert in here to expose 2, 7mm bolts.

After you remove those 2 bolts, grab the bottom of the dash insert and pull gently. There are several clips holding this dash insert in and it is tough to remove but just pull gently and the bottom of the insert will pop out.
Next move your fingers up the sides of the insert to around the top where the headunit is and pull gently. There are 2 clips here above the headunit and you have to pop them out but make sure you pull straight out or you may risk snapping these off...
There are several harnesses plugged into the back of this insert. They have a push button on them in order to remove them. Just press on that release and pull and they will pop out as well.

Set the insert aside some place where it wont get scratched or banged up. Next you have to remove the headunit. You have 4 7mm bolts holding the unit in.
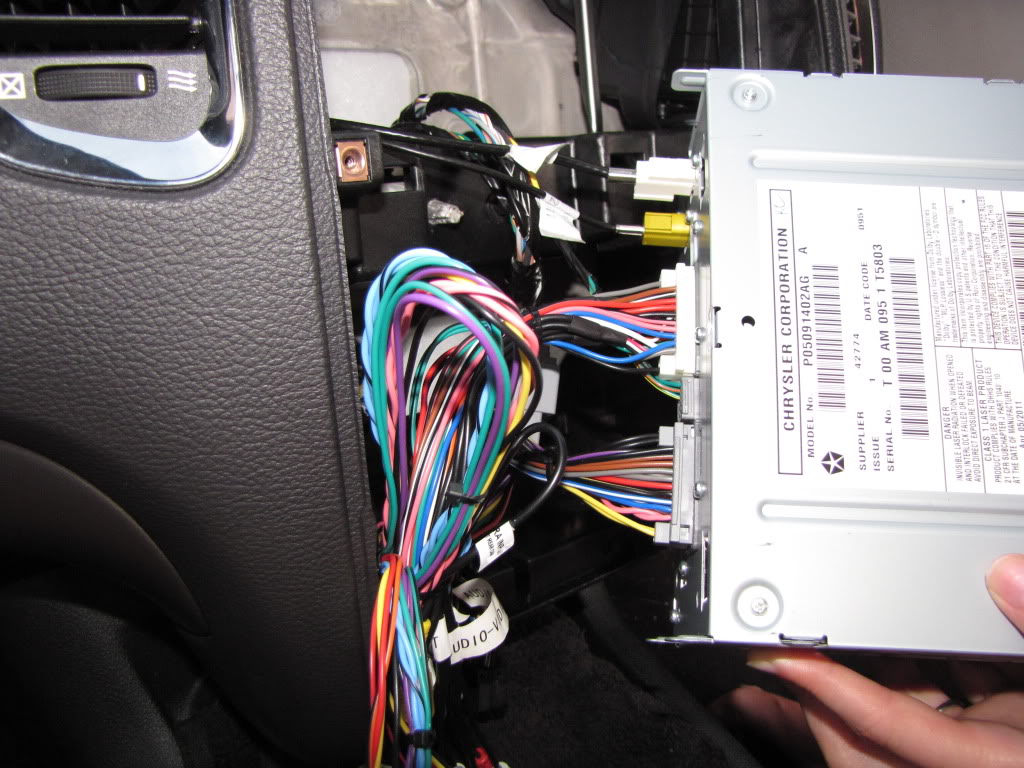
Just remove them and the unit will slide out. It is a tight fit and needs some convincing but again be gentle and it will come out...

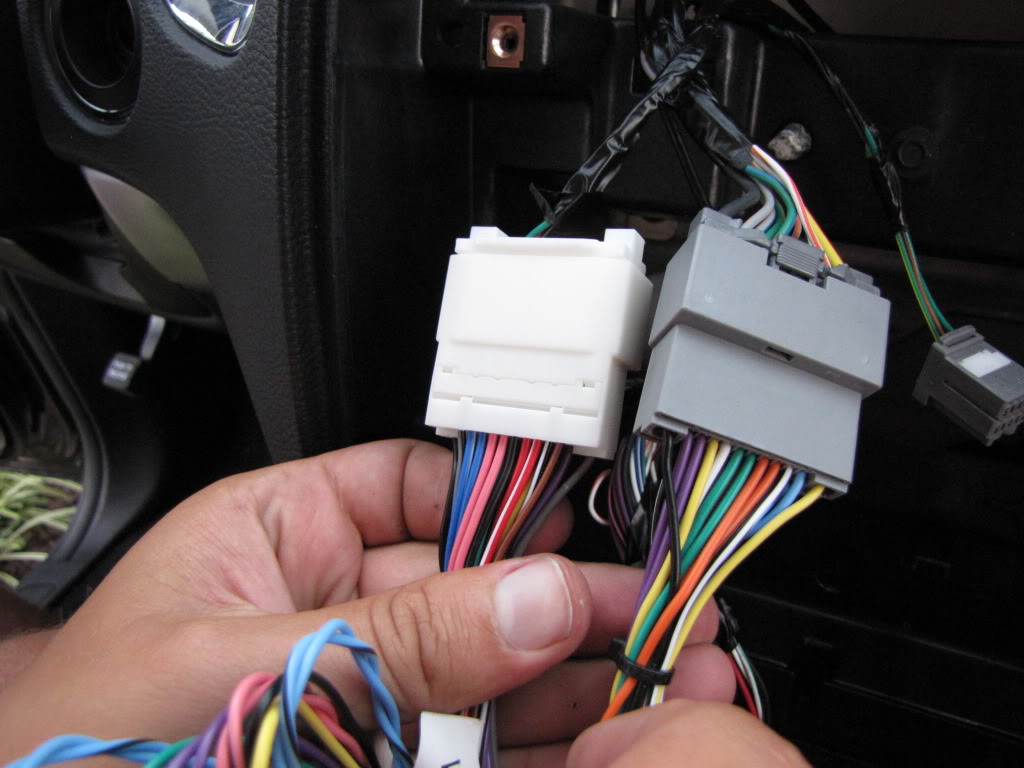
Now unplug all the connections in the back of the unit and set it aside. These connections in the center (gray and white) are very tight and seated really well and take a good tug to get out.
Next take the harness that came with the kit and follow the directions in the kit. Connect the white male connector with the white female and the gray male connector with the gray female connector. Make sure they are lined up and you dont bend any pins! Also make sure they are all the way inserted and locked in.
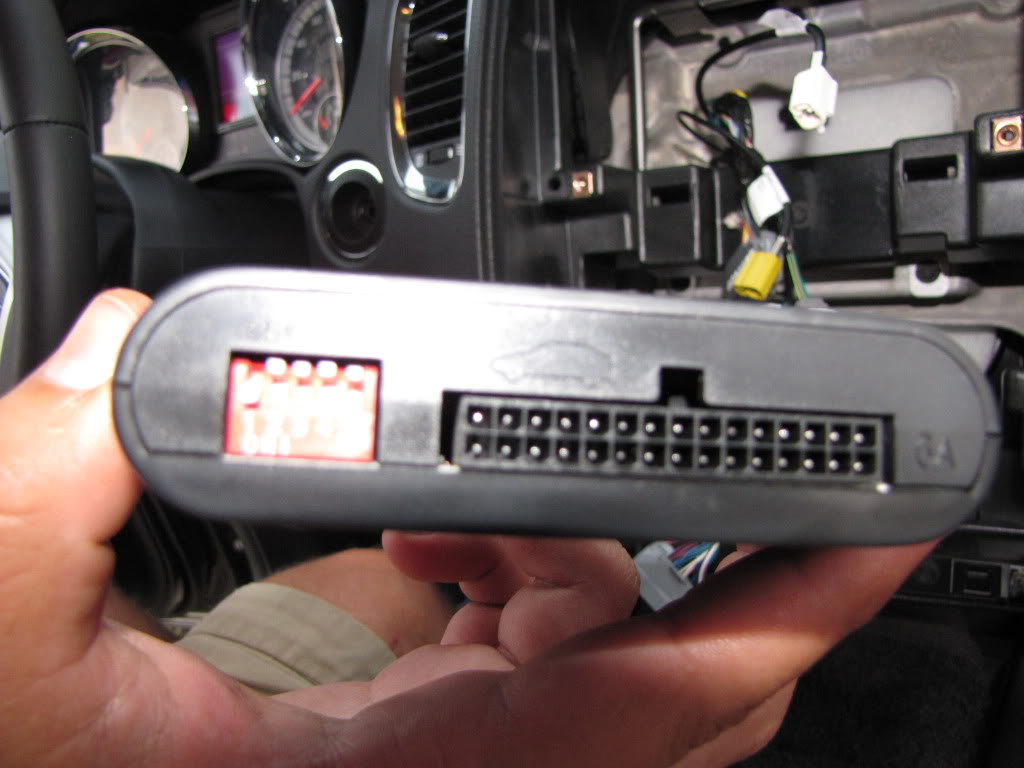
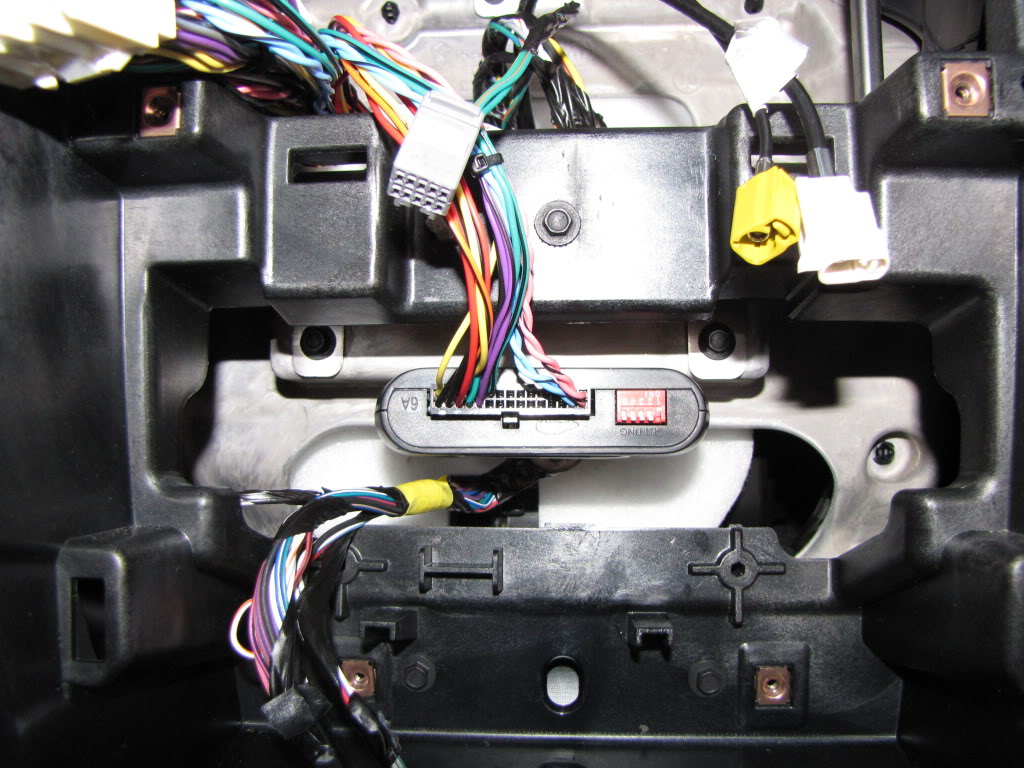
Now set up the LockPick according to the unit you have (High speed or low speed) This is the set-up for the lowspeed bus but it did not work for my RBZ. In the directions it said to set it up with 2 and 3 up for low speed and I did that and the unit did not work but when I placed switches 2 and 3 down which was for high speed my unit worked. Yours may or may not look different than this picture...
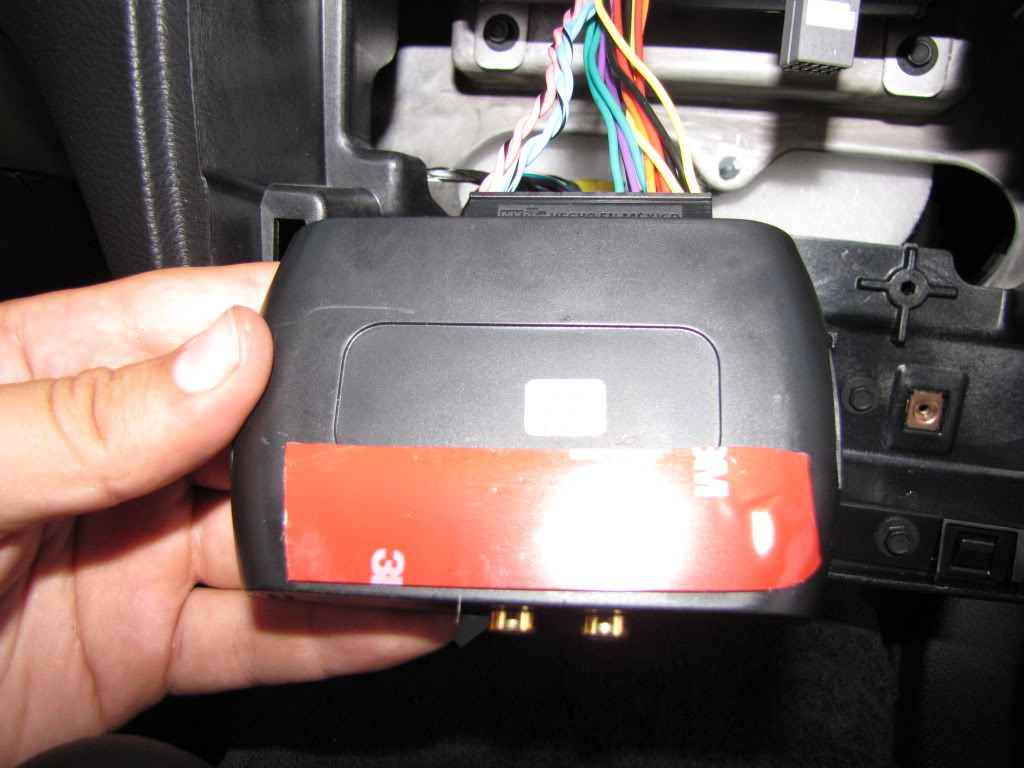
Now take the black connector from the wiring harness and plug it into the LockPick.
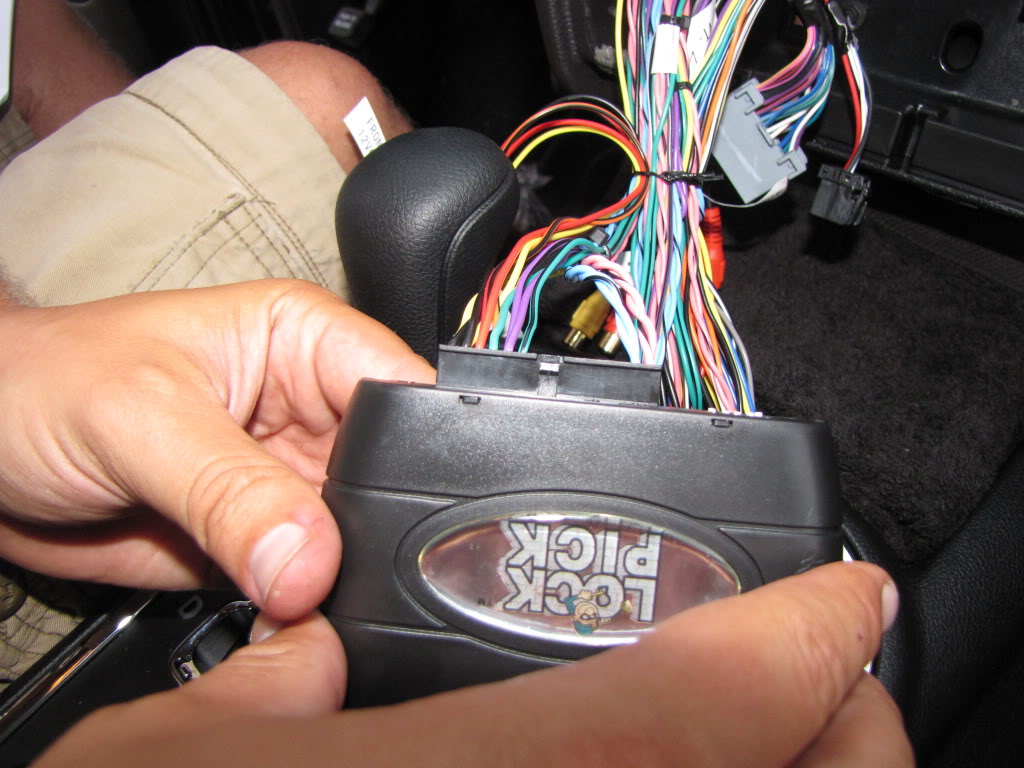
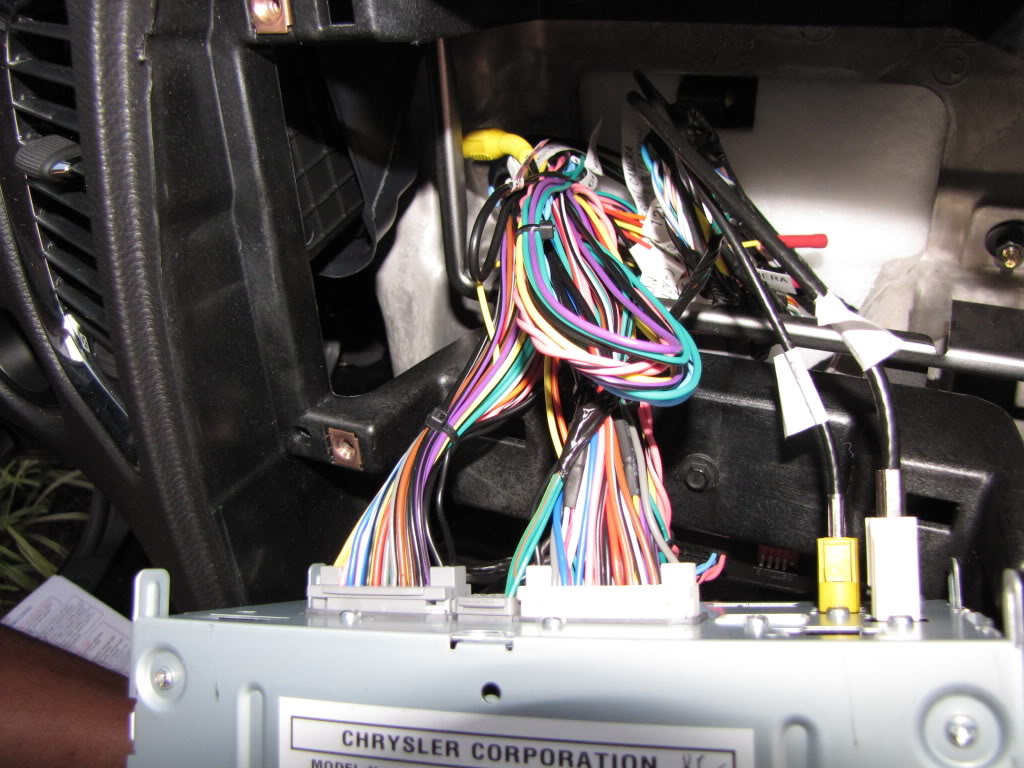
Take the white and gray connectors from the LockPick harness and plug them into the back of your unit along with all the other connections. MAKE SURE YOU PRESS ON THESE HARD AND MAKE THEM ALL SNAP IT! You will know when it is completely seated.
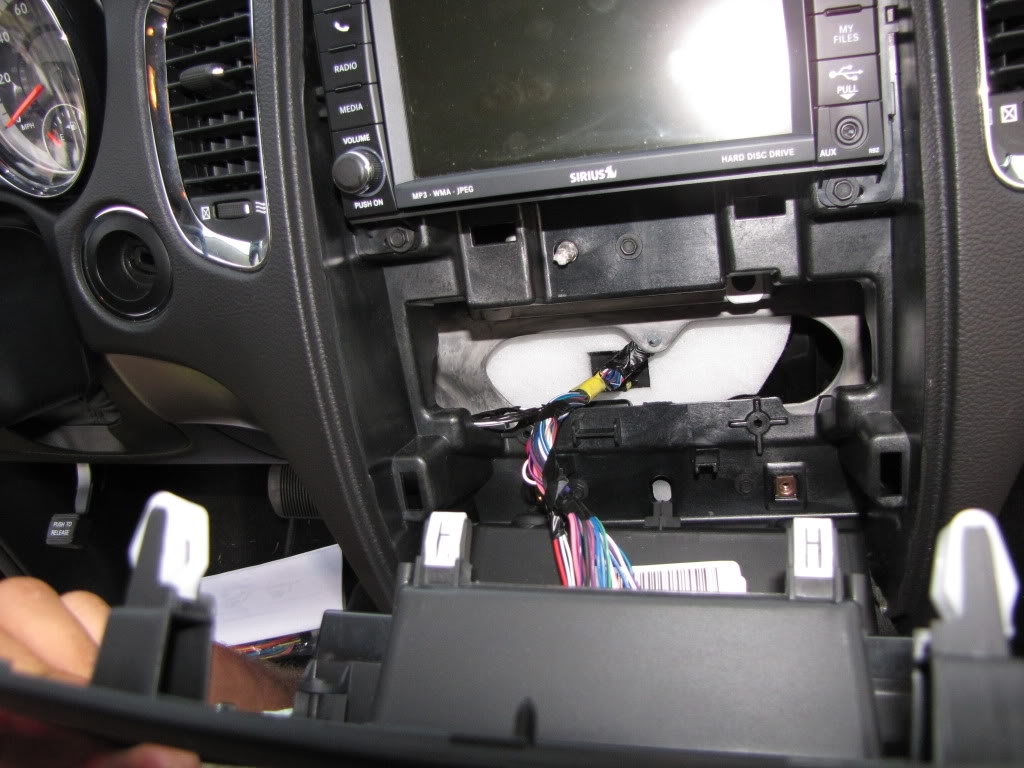
There is not a lot of room in here for the LockPick even though it is very small so I used some double sided sticky tape and mounted it under the headunit.
Now carefully slide the unit into the slot while manuevering all the wires behind it and make sure not to pinch anything.
Sorry but my camera started acting up and died so I have no more pics to show you but now its just reversing the beginning steps to put everything back together so I can just type most of that.
Once the headunit is back in replace the 4 7mm bolts and tighten them down. Then plug the connectors back into the dash insert and then put the insert back in very carefully. Replace the 2 7mm bolts in the console and replace the rubber cover and the install is complete! Enjoy your LockPick!
EDIT: There are a lot of other things you can hook up here as well... Say you want the rearview camera on all the time you just need to run power from the LockPick to the camera in the rear. But I did not mess with any of that just yet. If and when I do I will add to this write up. Also a note about the settings for the High and Low Speed Bus. If you set it on Low or High and it is the incorrect setting you will know because the headunit will not turn on. Also the light inside the LockPick will remain Red. Just simply disconnect the adapter into the LockPick and switch the number 2 and 3 switches to the other position then reconnect and turn on. Then the light in the LockPick will turn green and the headunit will turn on!
So I installed my MyGig Lockpick V.4 in my Durango and the install was very simple. The instructions had great pictures and went into some decent detail. Here is my experience installing the unit.
Here is the package as it came from the company....
It comes with everything you need to install. You will also need a 7mm socket wrench with an extension and I also used some double sided sticky tape.
Here is the dash to start...
You will need to start in the lower console opening.
Pull up the rubber insert in here to expose 2, 7mm bolts.
After you remove those 2 bolts, grab the bottom of the dash insert and pull gently. There are several clips holding this dash insert in and it is tough to remove but just pull gently and the bottom of the insert will pop out.
Next move your fingers up the sides of the insert to around the top where the headunit is and pull gently. There are 2 clips here above the headunit and you have to pop them out but make sure you pull straight out or you may risk snapping these off...
There are several harnesses plugged into the back of this insert. They have a push button on them in order to remove them. Just press on that release and pull and they will pop out as well.
Set the insert aside some place where it wont get scratched or banged up. Next you have to remove the headunit. You have 4 7mm bolts holding the unit in.
Just remove them and the unit will slide out. It is a tight fit and needs some convincing but again be gentle and it will come out...
Now unplug all the connections in the back of the unit and set it aside. These connections in the center (gray and white) are very tight and seated really well and take a good tug to get out.
Next take the harness that came with the kit and follow the directions in the kit. Connect the white male connector with the white female and the gray male connector with the gray female connector. Make sure they are lined up and you dont bend any pins! Also make sure they are all the way inserted and locked in.
Now set up the LockPick according to the unit you have (High speed or low speed) This is the set-up for the lowspeed bus but it did not work for my RBZ. In the directions it said to set it up with 2 and 3 up for low speed and I did that and the unit did not work but when I placed switches 2 and 3 down which was for high speed my unit worked. Yours may or may not look different than this picture...
Now take the black connector from the wiring harness and plug it into the LockPick.
Take the white and gray connectors from the LockPick harness and plug them into the back of your unit along with all the other connections. MAKE SURE YOU PRESS ON THESE HARD AND MAKE THEM ALL SNAP IT! You will know when it is completely seated.
There is not a lot of room in here for the LockPick even though it is very small so I used some double sided sticky tape and mounted it under the headunit.
Now carefully slide the unit into the slot while manuevering all the wires behind it and make sure not to pinch anything.
Sorry but my camera started acting up and died so I have no more pics to show you but now its just reversing the beginning steps to put everything back together so I can just type most of that.
Once the headunit is back in replace the 4 7mm bolts and tighten them down. Then plug the connectors back into the dash insert and then put the insert back in very carefully. Replace the 2 7mm bolts in the console and replace the rubber cover and the install is complete! Enjoy your LockPick!
EDIT: There are a lot of other things you can hook up here as well... Say you want the rearview camera on all the time you just need to run power from the LockPick to the camera in the rear. But I did not mess with any of that just yet. If and when I do I will add to this write up. Also a note about the settings for the High and Low Speed Bus. If you set it on Low or High and it is the incorrect setting you will know because the headunit will not turn on. Also the light inside the LockPick will remain Red. Just simply disconnect the adapter into the LockPick and switch the number 2 and 3 switches to the other position then reconnect and turn on. Then the light in the LockPick will turn green and the headunit will turn on!
Last edited by cbrrider012; Jun 23, 2011 at 03:20 PM.


Professional
Joined: Aug 2011
Posts: 111
Likes: 0
Thanks for the info, just installed the CHR550 which is basically a v4 with added features for iphone/ipod users. Install was about 30min, I put the iphone cable into the middle console. the lockpick is well worth the $280 I paid because now I can input text while driving, watching movies is unlocked for passenger while driving. i can output video from my iphone to the screen like netflix/slingbox. and I can later add front cam, side cams, or a gaming system. cheers! thanks mate!

Amateur
Joined: Aug 2011
Posts: 26
Likes: 0
quick question. i have been trying to post pictures and it tells me i am at my limit. how do you embed pictures with commentary and not exceed the 5 picture limit?
Trending Topics


Registered User
Joined: Sep 2011
Posts: 6
Likes: 0
Great write up and I concur that it is an easy install. Anyone have experience with the chr550? I love the features but when watching an aux video source such as iPod or other, there is interference and bleed in which I can see the backup camera feed. Additionally, the backup camera feed isn't bright or crisp like it is without the chr500 lockpick.