

Intermittent wiper DIY fix

Thread Starter
|
Captain
Joined: Aug 2011
Posts: 723
Likes: 8
From: Dublin, OH
Hey guys, I know there are several threads around about this, but I hadn't seen any with pictures, so I thought I would share my methodology for trying to self-fix the issue with the intermittent wipers not working. This is fairly simple job, all you need are a few basic hand tools and some white electrical contact grease and a little patience.
We are going to take apart the contacts that keep track of the timing of the wipers as well as the wiper motor, to get to that we need to take the wiper shroud off.
First take off the wipers, just press with your finger or a screwdriver the little tab and the wipers lift right off
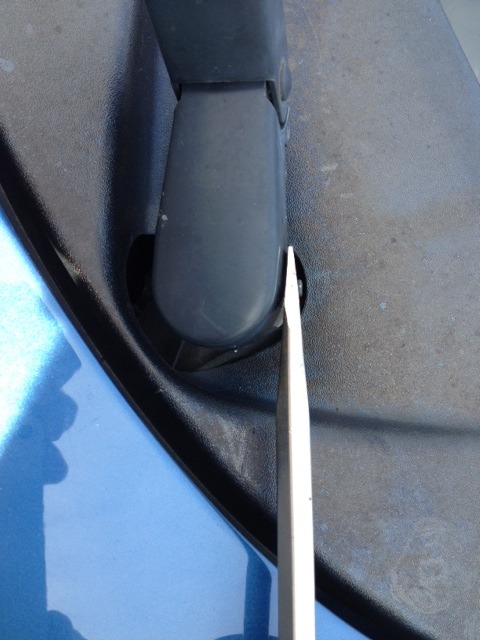
Be sure to not lose the little key that keeps the wipers in the right spot, it's not held in by anything but the pressure of the wiper, one of mine fell out and I had to hunt around for it, luckily didn't lose it.

Next we need to get the shroud off, there are six tabs across the front, pry under the shroud with a screwdriver so you don't bust any of them

Disconnect the wiper fluid line over by the passenger side of the engine bay
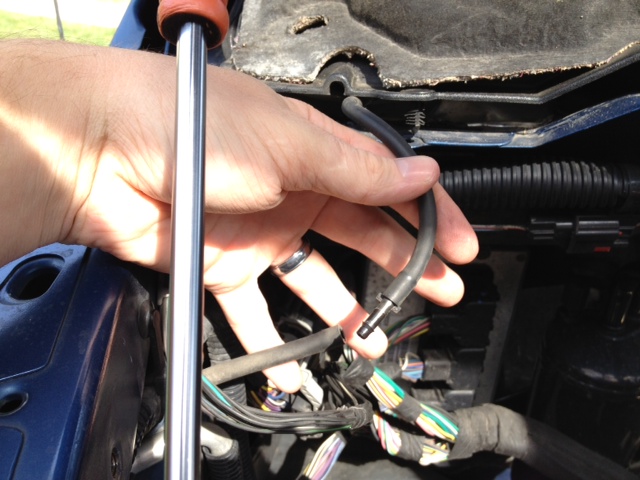
Now the shroud should basically come out, you will need to push it up and back towards the back of the truck to release two little catches before you can pull it forward off the truck.
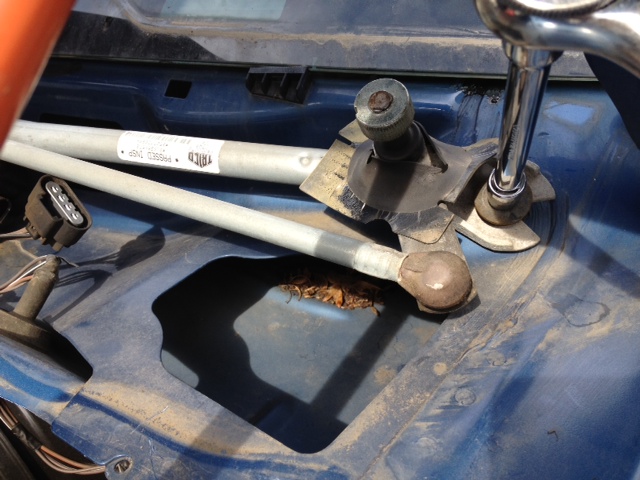
Once you have that off, you will see the wiper assembly and motor

Undo the three bolts holding the wiper assembly on, they are 10mm.
Now you need to open up the motor housing, there are 2 torque star bolts (size 27) that hold the housing in. If you are worried about putting it back backwards, make a little mark so you know you put it back right. There is a tab that helps keep it aligned too.

Once the motor is open you can clean it out of any debris or junk. Mine wasn't too bad but I wiped it out.
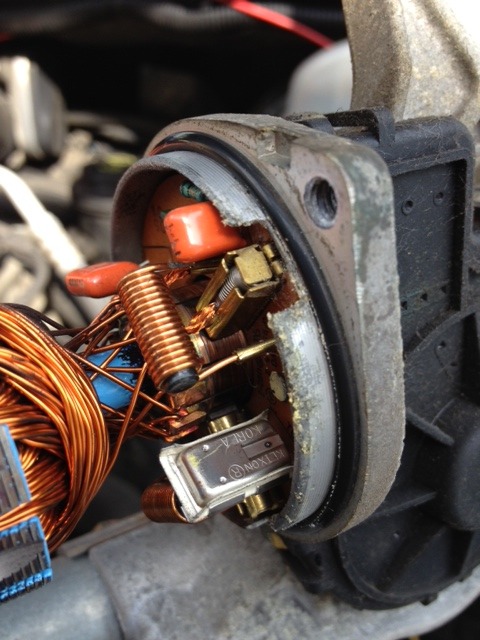
Now you need to take the timing mechanism apart. There are 6 tabs that come undone and the top comes right off, you can see it in the backround to the right in the motor picture.
The black piece that comes off looks like this

You can see the circles where the timing is kept. Wipe out the grease and carefully sand the brass till its nice and shiny with high grit sandpaper (at least 300).
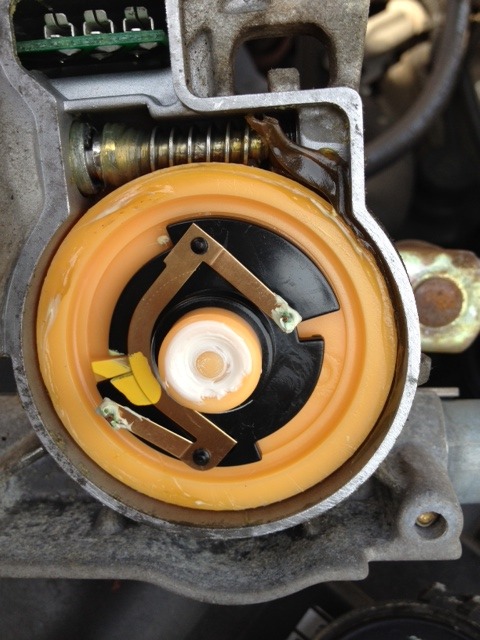
The other piece looks like this and has 2 contacts on it. Sand down the contacts gently till they are shiny as well.
Spray white grease in the components to replace what you wiped out, dont get too much in there though.
Reassemble everything and test for proper operation. If there is a lot of excess grease you might take a few cycles for it to get back to good contact. Enjoy proper operating wipers!!!
We are going to take apart the contacts that keep track of the timing of the wipers as well as the wiper motor, to get to that we need to take the wiper shroud off.
First take off the wipers, just press with your finger or a screwdriver the little tab and the wipers lift right off
Be sure to not lose the little key that keeps the wipers in the right spot, it's not held in by anything but the pressure of the wiper, one of mine fell out and I had to hunt around for it, luckily didn't lose it.
Next we need to get the shroud off, there are six tabs across the front, pry under the shroud with a screwdriver so you don't bust any of them
Disconnect the wiper fluid line over by the passenger side of the engine bay
Now the shroud should basically come out, you will need to push it up and back towards the back of the truck to release two little catches before you can pull it forward off the truck.
Once you have that off, you will see the wiper assembly and motor
Undo the three bolts holding the wiper assembly on, they are 10mm.
Now you need to open up the motor housing, there are 2 torque star bolts (size 27) that hold the housing in. If you are worried about putting it back backwards, make a little mark so you know you put it back right. There is a tab that helps keep it aligned too.
Once the motor is open you can clean it out of any debris or junk. Mine wasn't too bad but I wiped it out.
Now you need to take the timing mechanism apart. There are 6 tabs that come undone and the top comes right off, you can see it in the backround to the right in the motor picture.
The black piece that comes off looks like this
You can see the circles where the timing is kept. Wipe out the grease and carefully sand the brass till its nice and shiny with high grit sandpaper (at least 300).
The other piece looks like this and has 2 contacts on it. Sand down the contacts gently till they are shiny as well.
Spray white grease in the components to replace what you wiped out, dont get too much in there though.
Reassemble everything and test for proper operation. If there is a lot of excess grease you might take a few cycles for it to get back to good contact. Enjoy proper operating wipers!!!