


 Aug 5, 2015, 08:52 PM
Last edit by: IB Advertising
See related guides and technical advice from our community experts:
Browse all: Interior Guides
- Dodge Ram 2002-2008: How to Hardwire Subwoofer
Step by step instructions for the do-it-yourself repairs
Browse all: Interior Guides

Stock Head Unit Subwoofer Install (DIY)
Thread Starter
|
Rookie
Joined: Jan 2010
Posts: 82
Likes: 0
From: California Northern and Southern
Where to begin... After the cheap RCA wiring that the car audio place I went to basically broke I went through a hell of a time trying many different methods to get my subs working again.
This resulted in me basically tracing every wire back to where it is, and figuring out how to put new RCA wires in. During this adventure, I found out how they set up my whole system to a stock head unit. (WIth a couple of really screwed up things they did.) So I took pictures and am posting this so hopefully a few more people don't have to go through the ordeal of going back and forth to the car audio place and dicking around with wires all day, and instead just knowing where everything is. The lessons I learned from this were to take due diligence in researching EVERYTHING before making a purchase, and also if you want to absolutely make sure that something is done right, well you just have to do it yourself. I've had nothing but problems ever since the system was installed but i finally have it correct now. (Or at least halfway there.)
This IS NOT a complete guide, I'm not sure what wire they attatched the hi/lo converter too, but I do know WHERE it is, and how to easily wire it from there, So hopefully a few people can help out with that part.
Let's begin.
First things first you're going to need your power. This comes from the battery and works its way all the way to the amplifier. Here is where it hooks up.
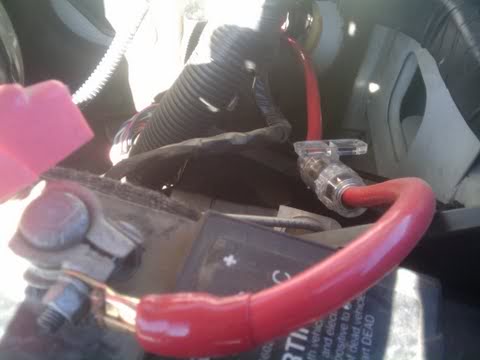
As you can see, these ******** decided that I didn't need a sealed off firewall. (Considering i've been offroading lately, that's a huge dick move.)
Here is a closeup image of where the wire went through.
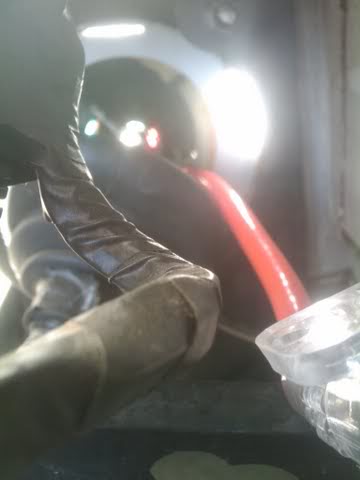
I am going to be making a hole in that rubber grommet, feeding your wire through then sealing it off with silicone/caulking/cement/whatever. (I'm going to do that later today and will post pictures.)
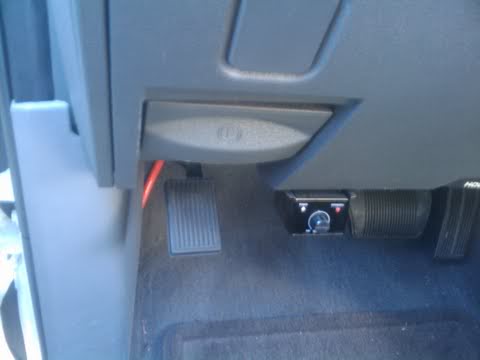
From there, running the wire to the amplifier is pretty simple.
Here is the general area of where the wire would come out of, i pulled it out a little bit so you can see where it is and what direction it goes.
Once you run it through that little panel you can take the little skirts on the side of the vehicle off very easily. You can just grab a screwdriver and with reasonable caution You'll hear the clips pop off one by one.
From there, it is tucked into the carpeting but the carpeting is very easy to lift up.
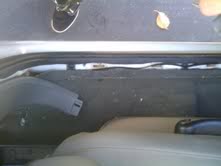
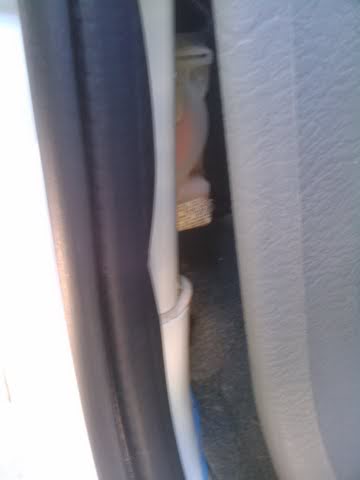
It runs from there up to this point.
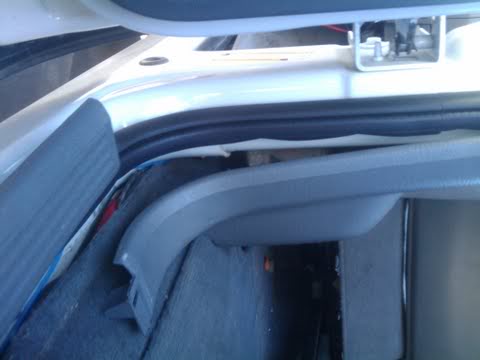
That body cover pulls right off with a little effort, you might have to remove the seatbelt bolt with a torx wrench to REALLY get in there, but i don't know if that's safe and it seems very plausible without doing that.
It runs into the other skirt here.
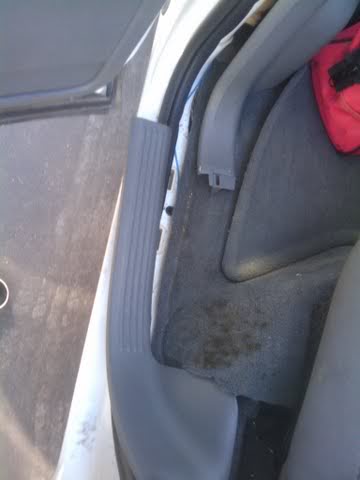
From there it goes here.
Into that rear little area.
ALL the wires go through this area.
Now i'm going to show you WHERE the wires are connected from the car. (Which would be the hardest part to figure out.)
The blue antennae wire was connected here.
As you can see it's clamped onto that pink and yellow wire.
Here is a closeup so you can find it.
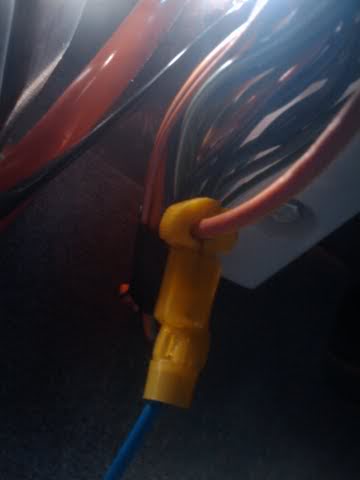
It is clamped onto the pink and yellow wire, then runs all the way through the back just like the power wire did.
Here is the part that isn't complete.
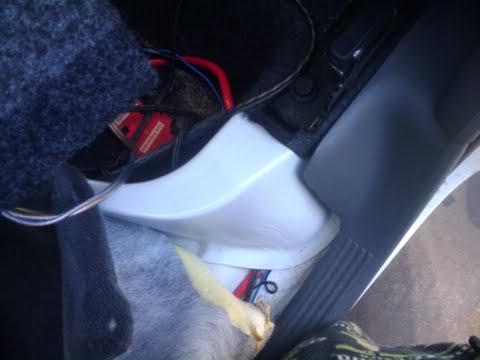
The Hi/lo Converter. I know that's basically the most important part, but I DO know where it is and I did connect to it.
It basically runs off of the speaker wire, and in my truck it is located in this area.
Right behind that panel there, where the RCA wire connects to it then runs into the back.
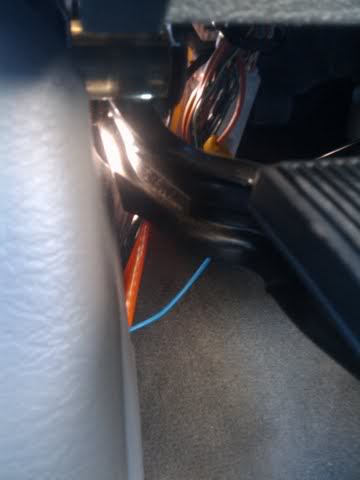
Here is a closeup.
I'll figure out eventually which wire it connects to exactly, but it wouldn't be too complicated to find out.
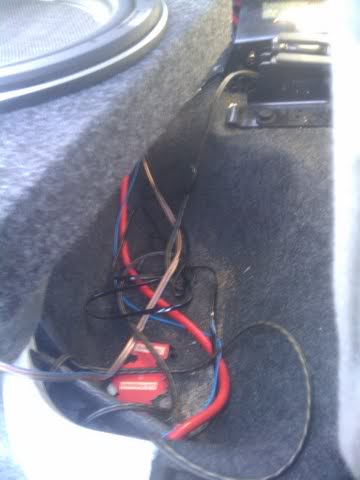
Here is where all the wires end up.
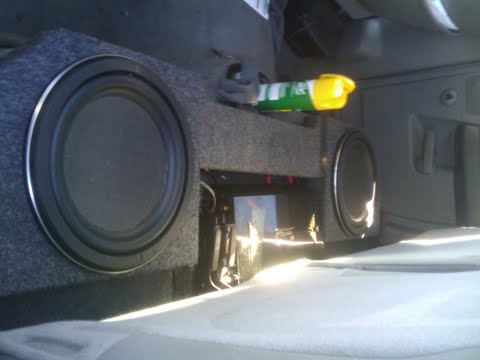
This is the finished product.
I'll work on which wire the hi/lo is located when i find a way to take a picture of it. (I can feel it.)
Anyways, I know i caught some flak because of the subwoofer exchange, but now you can probably understand why I did that. (Open firewall?) Come ON.
This guide will be complete once the hi/lo area is figured out.
This resulted in me basically tracing every wire back to where it is, and figuring out how to put new RCA wires in. During this adventure, I found out how they set up my whole system to a stock head unit. (WIth a couple of really screwed up things they did.) So I took pictures and am posting this so hopefully a few more people don't have to go through the ordeal of going back and forth to the car audio place and dicking around with wires all day, and instead just knowing where everything is. The lessons I learned from this were to take due diligence in researching EVERYTHING before making a purchase, and also if you want to absolutely make sure that something is done right, well you just have to do it yourself. I've had nothing but problems ever since the system was installed but i finally have it correct now. (Or at least halfway there.)
This IS NOT a complete guide, I'm not sure what wire they attatched the hi/lo converter too, but I do know WHERE it is, and how to easily wire it from there, So hopefully a few people can help out with that part.
Let's begin.
First things first you're going to need your power. This comes from the battery and works its way all the way to the amplifier. Here is where it hooks up.
As you can see, these ******** decided that I didn't need a sealed off firewall. (Considering i've been offroading lately, that's a huge dick move.)
Here is a closeup image of where the wire went through.
I am going to be making a hole in that rubber grommet, feeding your wire through then sealing it off with silicone/caulking/cement/whatever. (I'm going to do that later today and will post pictures.)
From there, running the wire to the amplifier is pretty simple.
Here is the general area of where the wire would come out of, i pulled it out a little bit so you can see where it is and what direction it goes.
Once you run it through that little panel you can take the little skirts on the side of the vehicle off very easily. You can just grab a screwdriver and with reasonable caution You'll hear the clips pop off one by one.
From there, it is tucked into the carpeting but the carpeting is very easy to lift up.
It runs from there up to this point.
That body cover pulls right off with a little effort, you might have to remove the seatbelt bolt with a torx wrench to REALLY get in there, but i don't know if that's safe and it seems very plausible without doing that.
It runs into the other skirt here.
From there it goes here.
Into that rear little area.
ALL the wires go through this area.
Now i'm going to show you WHERE the wires are connected from the car. (Which would be the hardest part to figure out.)
The blue antennae wire was connected here.
As you can see it's clamped onto that pink and yellow wire.
Here is a closeup so you can find it.
It is clamped onto the pink and yellow wire, then runs all the way through the back just like the power wire did.
Here is the part that isn't complete.
The Hi/lo Converter. I know that's basically the most important part, but I DO know where it is and I did connect to it.
It basically runs off of the speaker wire, and in my truck it is located in this area.
Right behind that panel there, where the RCA wire connects to it then runs into the back.
Here is a closeup.
I'll figure out eventually which wire it connects to exactly, but it wouldn't be too complicated to find out.
Here is where all the wires end up.
This is the finished product.
I'll work on which wire the hi/lo is located when i find a way to take a picture of it. (I can feel it.)
Anyways, I know i caught some flak because of the subwoofer exchange, but now you can probably understand why I did that. (Open firewall?) Come ON.
This guide will be complete once the hi/lo area is figured out.
Thread Starter
|
Rookie
Joined: Jan 2010
Posts: 82
Likes: 0
From: California Northern and Southern
Thank you, it's not along it but it is close enough too it. I didn't know that it would cause interference i'll move that..
Basically, that is what the car audio place did to it. Once I replace my amp i'm probably going to run all new quality wiring throughout the entire thing along with a cleansweep or a new head unit and i'll post pictures of the WHOLE thing taken apart.
Champion
Joined: Jun 2009
Posts: 3,210
Likes: 0
From: Collinsville, Oklahoma
i replaced all of my wire with Rockford fosgate 16g. i ran it so you cant see anything...
here is the thread
https://dodgeforum.com/forum/3rd-gen...ines-play.html
here is the thread
https://dodgeforum.com/forum/3rd-gen...ines-play.html
Thread Starter
|
Rookie
Joined: Jan 2010
Posts: 82
Likes: 0
From: California Northern and Southern
I'll check out that filter, Also oklahemi, does that alpine power adder unit flatline the eq like a JL audio cleansweep does? I was going to get a seperate amp for my speakers but that Alpine unit seems like a cheaper and easier solution to it.
Record Breaker
Joined: Dec 2009
Posts: 1,262
Likes: 1
From: Ontario Canada
i used to install systems in cars and i always ran the power wires on one side (or under the car away from the gas tank) of the car and rcs's on the other side, never had interference when doing it this way
i would ask for a bit of a refund looks like they didn't do a very professional job.
i would ask for a bit of a refund looks like they didn't do a very professional job.
Trending Topics

Champion
Joined: Oct 2006
Posts: 2,752
Likes: 0
while i do agree that their install was trash, running the RCA's near power wire on a sub setup isn't horrible. If you've already put everything back together and don't wanna tear it apart and arn't getting interference don't bother. The low pass filters on the amp usually eliminate the interference as the noise it creates is at a higher frequency. But if it was my car i would have run them seperately but i'm just throwing an alternative to it.
Record Breaker
Joined: Jul 2007
Posts: 1,562
Likes: 1
From:
ill give you some advice, if you want to do evrything right and professional then you have to pull the whole interior out. Seats, carpet everything. That way you can run wires easily and make everything clean looking. After my first system, that is the one thing I regret is not taking the whole interior out at once.