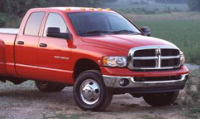
Brake lights staying on..
#1
So I've noticed driving at night time that occassionally my brake lights are staying on after I release the pedal. If I reach under the brake pedal with my toe and pull it up they will go off.
So I'm thinking brake light switch? How hard is it to change on these trucks? I know on my VW it was a matter of 5 minutes. Haven't taken a close look on my truck though.
So I'm thinking brake light switch? How hard is it to change on these trucks? I know on my VW it was a matter of 5 minutes. Haven't taken a close look on my truck though.
#3
#4
#5
ADJUSTABLE PEDAL SWITCH
REMOVAL
(1) Remove the lower drivers side bezel (Refer to 23 - BODY/INSTRUMENT PANEL/INSTRUMENT PANEL DR SIDE BEZEL - REMOVAL).
(2) Disconnect the electrical connector from the adjustable pedal switch.
(3) Remove the switch from the lower drivers side bezel by squeezing the retaining clips together and pushing the switch outwards (Fig. 2).
INSTALLATION
(1) Install the switch to the lower drivers side bezel by pushing the switch inwards seating the retaining clips to the lower drivers side bezel.
(2) Reconnect the electrical connector to the adjustable pedal switch.
(3) Install the lower drivers side bezel (Fig. 2) (Refer to 23 - BODY/INSTRUMENT PANEL/INSTRUMENT PANEL DR SIDE BEZEL - INSTALLATION).
#6
ADJUSTABLE PEDAL SWITCH
REMOVAL
(1) Remove the lower drivers side bezel (Refer to 23 - BODY/INSTRUMENT PANEL/INSTRUMENT PANEL DR SIDE BEZEL - REMOVAL).
(2) Disconnect the electrical connector from the adjustable used engines for sale pedal switch.
(3) Remove the switch from the lower drivers side bezel by squeezing the retaining clips together and pushing the switch outwards (Fig. 2).
INSTALLATION of a used transmissions
(1) Install the switch to the lower drivers side bezel by pushing the switch inwards seating the retaining clips to the lower drivers side bezel.
(2) Reconnect the electrical connector to the adjustable pedal switch.
(3) Install the lower drivers side bezel (Fig. 2) (Refer to 23 - BODY/INSTRUMENT PANEL/INSTRUMENT PANEL DR SIDE BEZEL - INSTALLATION).
Last edited by entitledg; 01-11-2011 at 04:33 PM.


