


for all you 2500 guys


Thread Starter
|
Captain
Joined: May 2008
Posts: 731
Likes: 0
From: Inverness
Finally got my 2.5 leveling kit installed yesterday!! since theres a lack of 2500 leveling kit write ups im gonna attempt one 
Thing your going to need
-2.5" leveling kit from top gunz customs $75 http://i227.photobucket.com/albums/d...nstruck016.jpg
-Assorted sockets and wrenches ranging up to 18MM and 13/16's
-X2 jacks and jack stands
-Coil spring compressor (you can rent one at an autozone $38 bucks)
-1 can of PB blaster very important!
-Air tools, arent necessary but are very helpful
OK now that you have all the stuff gathered, park the truck on level ground set E-brake and pop the hood and blast top shock mounts the 3 retaining nuts http://i227.photobucket.com/albums/d...e/100_1220.jpg ..go underneath blast the sway bar end links http://i227.photobucket.com/albums/d...e/100_1221.jpg and the panard bar endlink on your axel...didint get a picture so its the bar that connects to the frame on the drivers side and connects to the axle on the passengers side..
remove the air filter box, top and bottom, remove the top shock mount retaining nut 18MM and 9MM (the 9MM is to keep the top of the shock from spinning)both sides. keep nuts for reinstallation.
Then remove the 3 retaining nuts that hold the top of the shock in place (both sides) the (drivers side has the axle breather tube attached so just push it aside) you can toss the nuts as the kit comes with 3 new locking nuts
all right now loosen your lug nuts on both sides of the vehicle...JUST LOOSEN NOT TAKE OFF jack vehicle up making sure you have about 2 inches under the tires, place jack stands on the frame behind the bumper..
remove the bottom shock mount 13/16's, on both sides (theres a little hole in the spring purch to get to them) remove both shocks and set aside keep hardware for reinstallation
Remove the sway bar enlinks http://i227.photobucket.com/albums/d...e/100_1221.jpg keep hardware for reinstallation
Remove the panard bar retaining nut (very hard...) http://i227.photobucket.com/albums/d...4/100_1212.jpg its behind the steering crossover without a nut in it now before you ask YES you have to take it out the passenger side wont come down far enough with it in (found this our the hard way..)
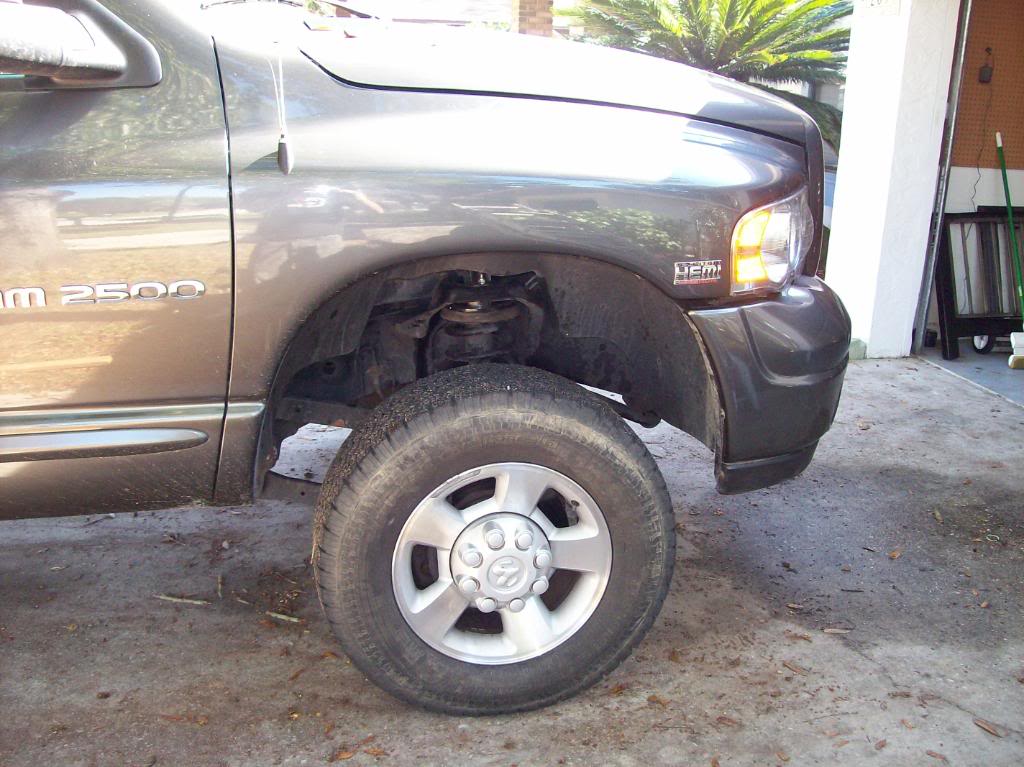
now comes the fun part, remove the wheels on both sides (making sure your jackstands are secure and lower the axle to full droop http://i227.photobucket.com/albums/d...4/100_1208.jpg (springs may look long but they really are that big) now you may have use the coil spring compressor to get the spring out such as i did and just do one side at a time..
Once the spring is out toss the metal ring with the studs in it keep the rubber isolator and reinstall on your spacer, place spacer into spring cup and tighten one nut to keep it in place....before http://i227.photobucket.com/albums/d...4/100_1210.jpg After http://i227.photobucket.com/albums/d...4/100_1209.jpg
Compress the spring a little more for it to fit, then jack it up SLIGHTLY dont lift off jackstands, and decompress the sping repeat the last 3 steps for passenger side
after the spings are in take off that one nut you used to hold the spacer in place, reinstall the shock (both sides) bolt up the lower mount first then compress the shock and reinstall the upper mount with the new hardware and bolt the shock in
reinstall the sway bar endlinks (may have to jack the axle up to get them into place)
now put the tires back on, take off the jackstands and jacks,
ok to put the panard bar back in is a little tricky..your going to have to turn the wheel a little to the left or right to reinstall the bolt....in my case i had to turn the wheels really far to the left and the crossover bar got in the way so heres what i did.....turn the wheels as far as you need to get the bolt in...using the 2 jacks lift the tires off the ground and turn them manually wile ur under the truck until you can get the bolt to fit....now the nut isnt welded into the back of the housing like i thought it was instead its welded to this nifty little handle..sorry didint get a pic of that
reinstall intake box, tighten up lug nuts and step back....YOUR DONE
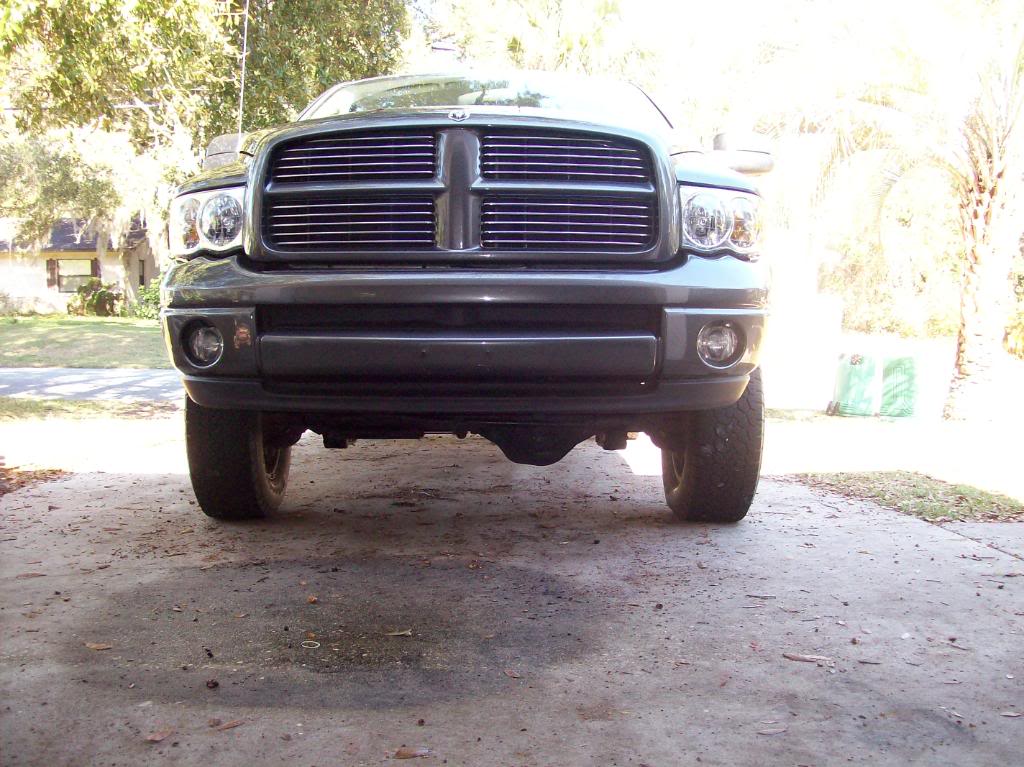
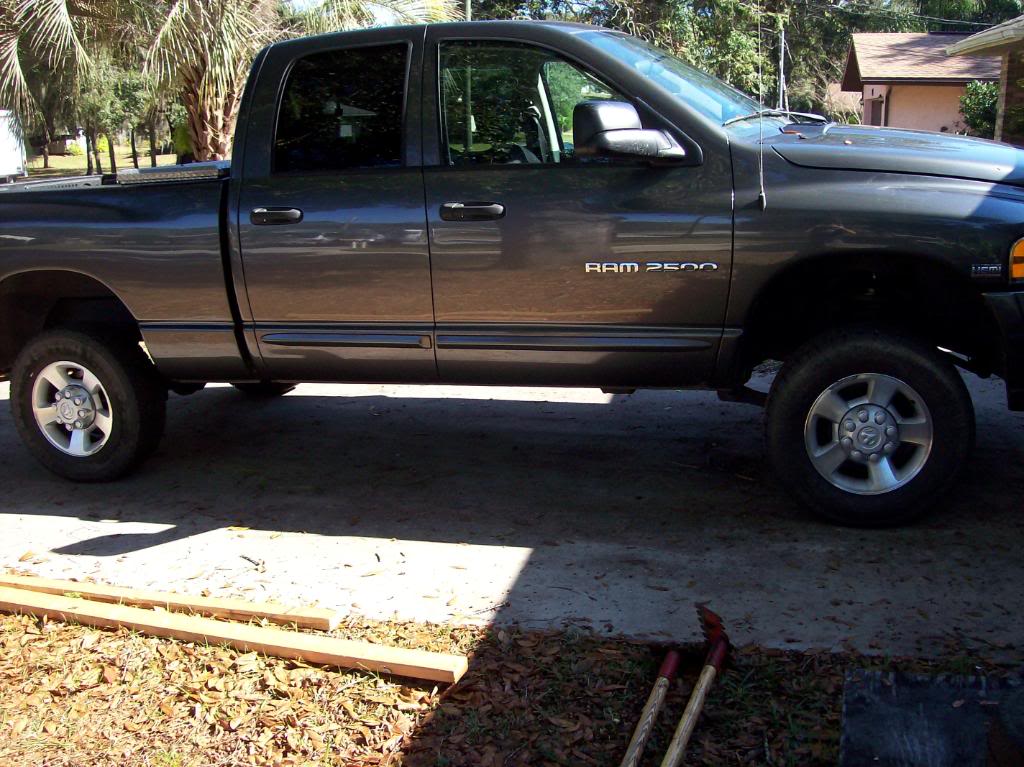
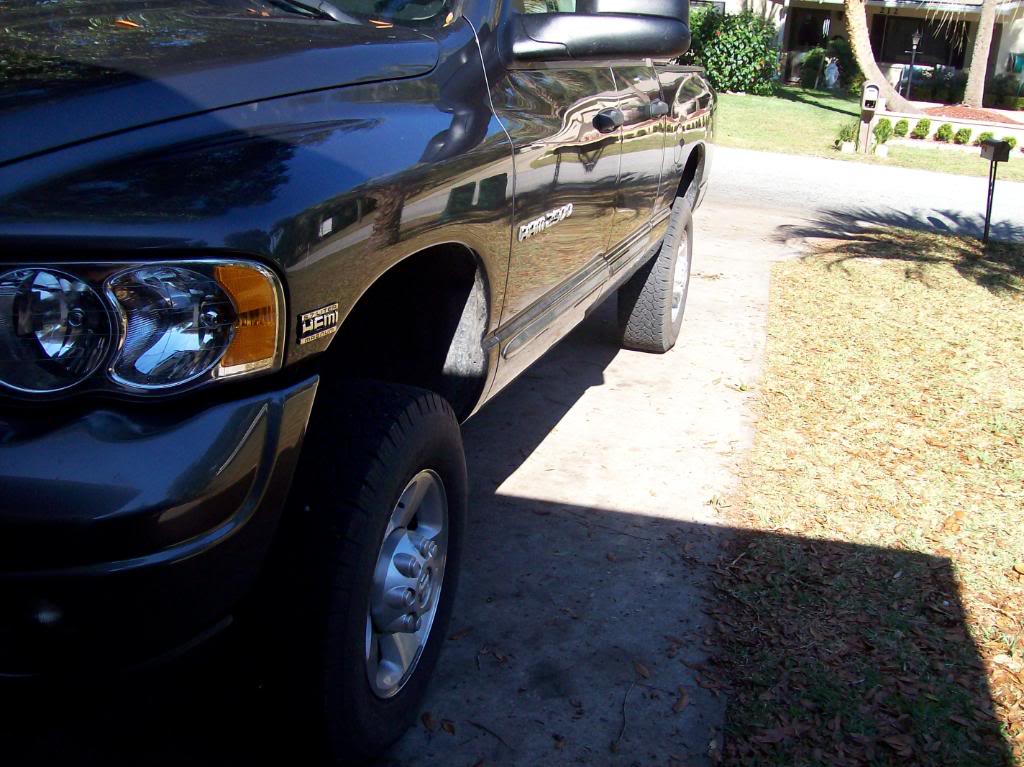
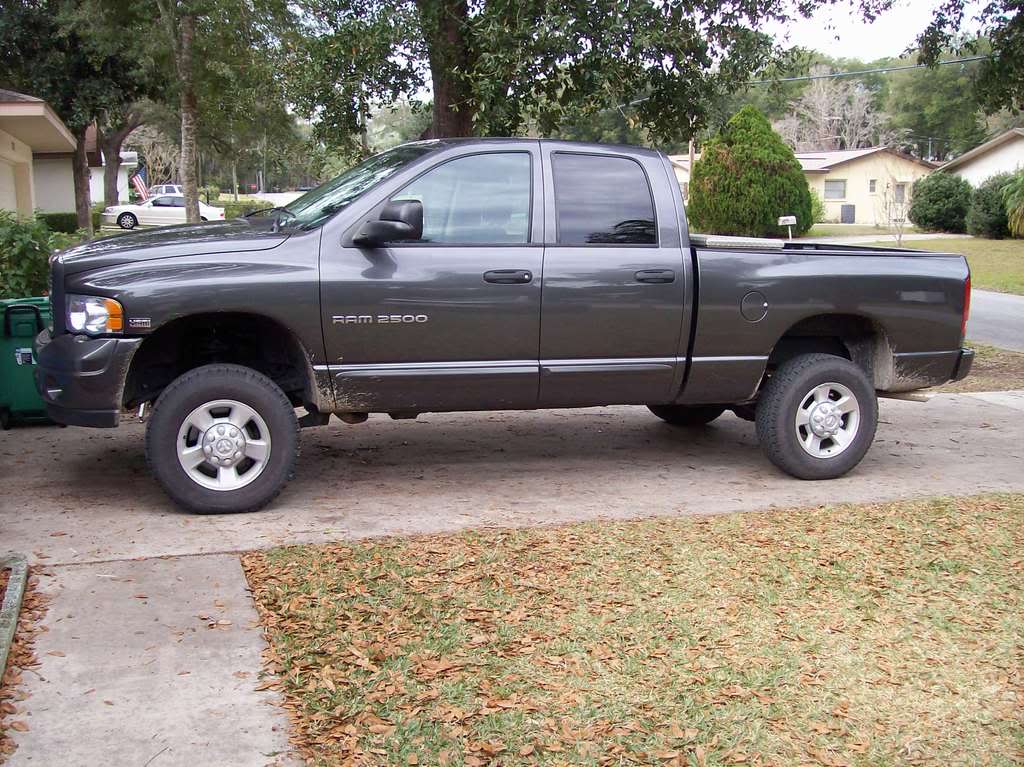
heres some pics of the finished product
Before (had 35"s on it)
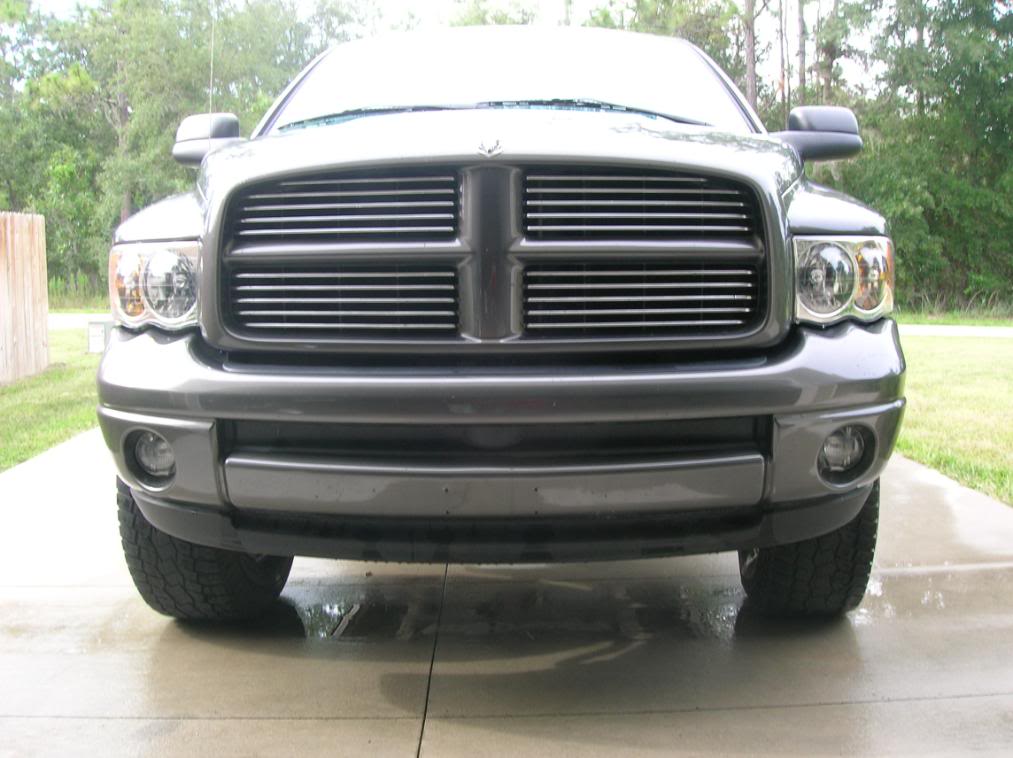
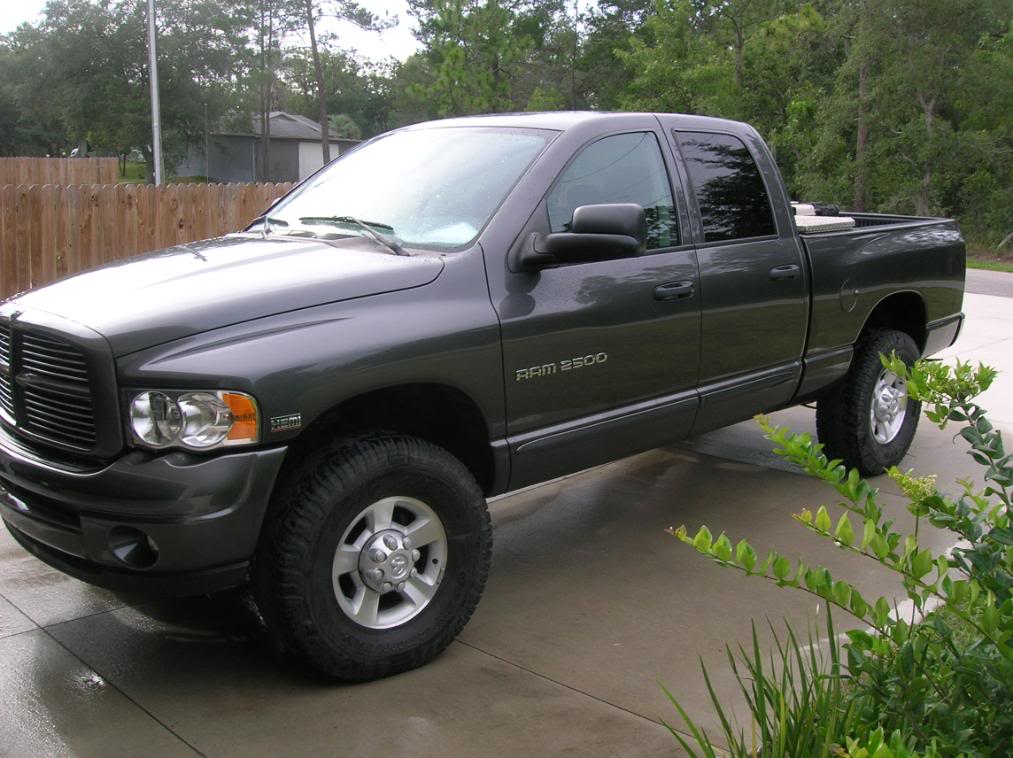
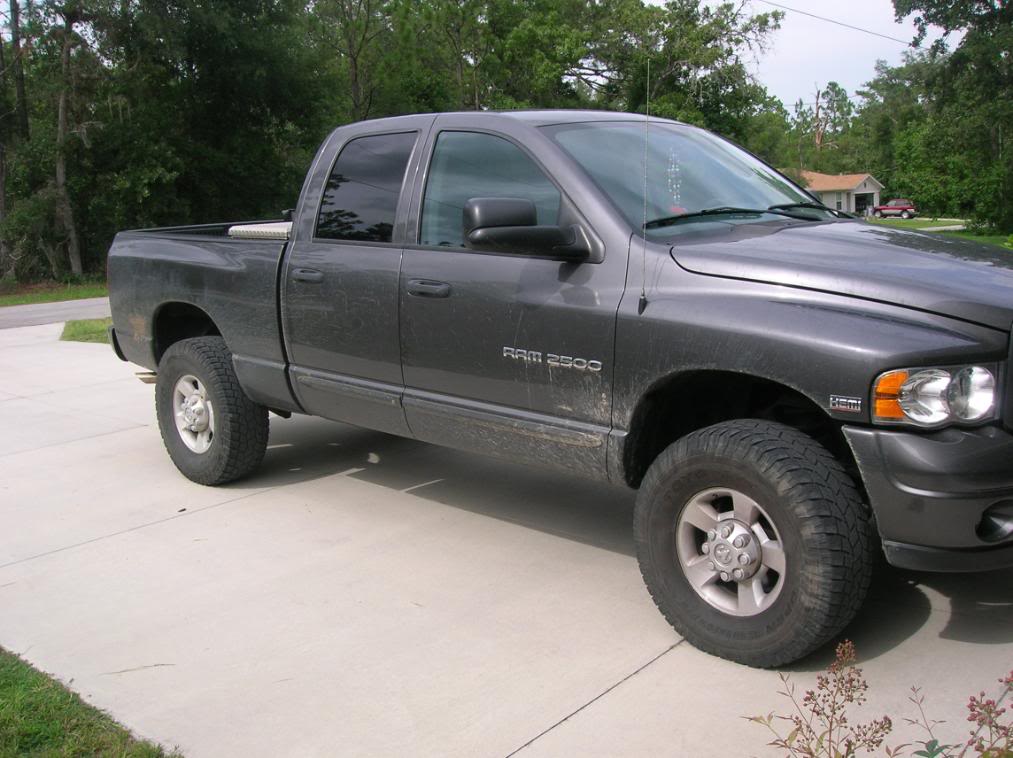
AFTER!! has (265"s on it)
Lemme know what ya think
Thing your going to need
-2.5" leveling kit from top gunz customs $75 http://i227.photobucket.com/albums/d...nstruck016.jpg
-Assorted sockets and wrenches ranging up to 18MM and 13/16's
-X2 jacks and jack stands
-Coil spring compressor (you can rent one at an autozone $38 bucks)
-1 can of PB blaster very important!
-Air tools, arent necessary but are very helpful
OK now that you have all the stuff gathered, park the truck on level ground set E-brake and pop the hood and blast top shock mounts the 3 retaining nuts http://i227.photobucket.com/albums/d...e/100_1220.jpg ..go underneath blast the sway bar end links http://i227.photobucket.com/albums/d...e/100_1221.jpg and the panard bar endlink on your axel...didint get a picture so its the bar that connects to the frame on the drivers side and connects to the axle on the passengers side..
remove the air filter box, top and bottom, remove the top shock mount retaining nut 18MM and 9MM (the 9MM is to keep the top of the shock from spinning)both sides. keep nuts for reinstallation.
Then remove the 3 retaining nuts that hold the top of the shock in place (both sides) the (drivers side has the axle breather tube attached so just push it aside) you can toss the nuts as the kit comes with 3 new locking nuts
all right now loosen your lug nuts on both sides of the vehicle...JUST LOOSEN NOT TAKE OFF jack vehicle up making sure you have about 2 inches under the tires, place jack stands on the frame behind the bumper..
remove the bottom shock mount 13/16's, on both sides (theres a little hole in the spring purch to get to them) remove both shocks and set aside keep hardware for reinstallation
Remove the sway bar enlinks http://i227.photobucket.com/albums/d...e/100_1221.jpg keep hardware for reinstallation
Remove the panard bar retaining nut (very hard...) http://i227.photobucket.com/albums/d...4/100_1212.jpg its behind the steering crossover without a nut in it
now before you ask YES you have to take it out the passenger side wont come down far enough with it in (found this our the hard way..)now comes the fun part, remove the wheels on both sides (making sure your jackstands are secure and lower the axle to full droop http://i227.photobucket.com/albums/d...4/100_1208.jpg (springs may look long but they really are that big) now you may have use the coil spring compressor to get the spring out such as i did and just do one side at a time..
Once the spring is out toss the metal ring with the studs in it keep the rubber isolator and reinstall on your spacer, place spacer into spring cup and tighten one nut to keep it in place....before http://i227.photobucket.com/albums/d...4/100_1210.jpg After http://i227.photobucket.com/albums/d...4/100_1209.jpg
Compress the spring a little more for it to fit, then jack it up SLIGHTLY dont lift off jackstands, and decompress the sping repeat the last 3 steps for passenger side
after the spings are in take off that one nut you used to hold the spacer in place, reinstall the shock (both sides) bolt up the lower mount first then compress the shock and reinstall the upper mount with the new hardware and bolt the shock in
reinstall the sway bar endlinks (may have to jack the axle up to get them into place)
now put the tires back on, take off the jackstands and jacks,
ok to put the panard bar back in is a little tricky..your going to have to turn the wheel a little to the left or right to reinstall the bolt....in my case i had to turn the wheels really far to the left and the crossover bar got in the way so heres what i did.....turn the wheels as far as you need to get the bolt in...using the 2 jacks lift the tires off the ground and turn them manually wile ur under the truck until you can get the bolt to fit....now the nut isnt welded into the back of the housing like i thought it was instead its welded to this nifty little handle..sorry didint get a pic of that
reinstall intake box, tighten up lug nuts and step back....YOUR DONE
heres some pics of the finished product
Before (had 35"s on it)
AFTER!! has (265"s on it)
Lemme know what ya think
Last edited by draco8494; Jan 15, 2009 at 12:54 PM. Reason: bad links/ better pic
Thread Starter
|
Captain
Joined: May 2008
Posts: 731
Likes: 0
From: Inverness
yeah i didint wanna resize all the pics so they werent so big + i wanted people to see the full size image, i hate diy's with crappy pics, and the 265"s r cuz the 35"s ran outta life so i put the stockers back on
Thread Starter
|
Captain
Joined: May 2008
Posts: 731
Likes: 0
From: Inverness
would love for some 35"/36" mud terrains...but unfortunately cash flo has diminished lol the constriction field has taken a blow so..itll be a while...i had the leveling kit since last year sometime just never had the time to put em on!!

Record Breaker
Joined: Sep 2008
Posts: 1,018
Likes: 0
From: NJ