

Front speaker install Dakota 3rd Gen by Altair

Thread Starter
|
Admin formally known as 94rt10ohio
Joined: Apr 2005
Posts: 9,025
Likes: 3
From: Curtice, OH
This DIY is for replacing the front speakers in a Gen 3 Dakota (2005-2007) (Should be the same for the new '08+ bodystyle as well. If anyone with an '08+ does this please let me know. -Altair).
Reference Info: The stock speaker size front and rear on our trucks is 6.5"
(Click on any of the pictures to view a larger image.)
Edit: If you do not want to make your own brackets to hold the new speakers in Metra makes an adapter for it. Best Buy or a local shop can probably get it for you. (Thanks to superdak05 and ericemercy for pointing this out)
Ok, so you've decided to replace the stock speakers in your truck with something a little nicer. The first step is to get the stock ones out. I recommend downloading the factory service manual from the stickies at the top of the 3rd gen Dakota forum and looking up the door panel removal if you're not sure how to do it. Please note that I do not have the factory tweeters on mine so I won't be mentioning them here.
I'll give you a quick rundown of removing the panel here if you don't feel like using the service manual, unfortunately I forgot to take any pictures before I pulled the panels off. On the front door panels there are two screws at the very bottom of the door which have to be removed. There is also one behind the door handle and one in the bottom of the handhold/cup. These screws need to be removed and the handhold can be pulled out if desired.
DO NOT pull straight out on the door panel yet, you'll break the fasteners. Grab the door panel and slide the entire thing upwards, now you can pull it away from the door. Now reach down in-between the panel and the door and unclip the fastener holding the metal rod on the door handle. After you've removed that unplug the window, door lock and mirror controls, there is a button on one side of the plug that needs to be pushed in then you can slide it right out.
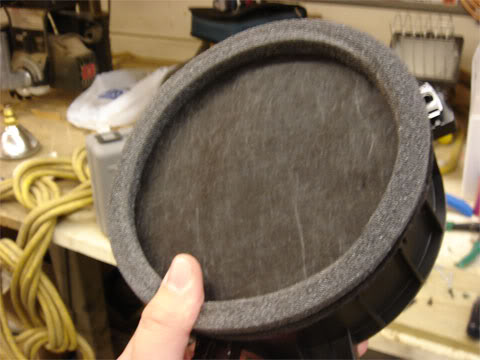
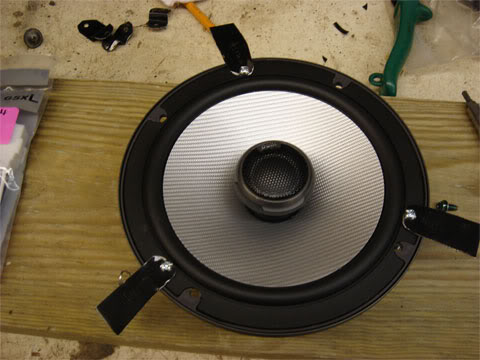
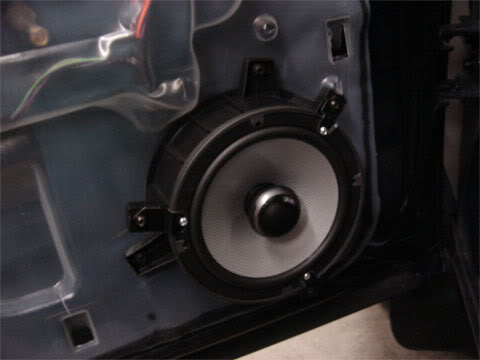
Now that the panels are out of the way locate the speaker at the bottom of the door towards the front. It should look like this:
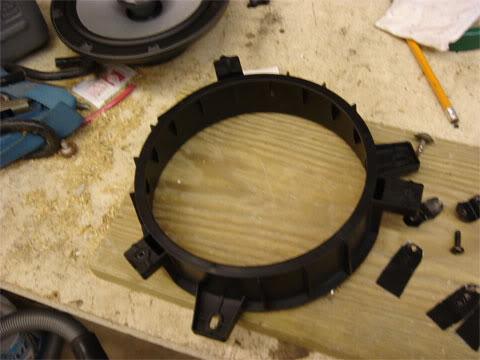
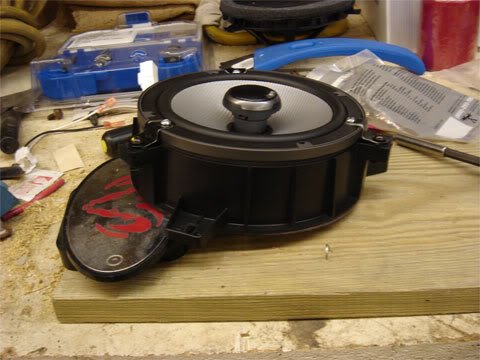
There are 3 screws holding the speaker bracket to the door, take those out and remove the speaker. The wires are plugged in on the back of the speaker, just disconnect the plug. Now take out the 3 screws holding the speaker to the bracket and pull them apart. You'll end up with this:
Out with the old:

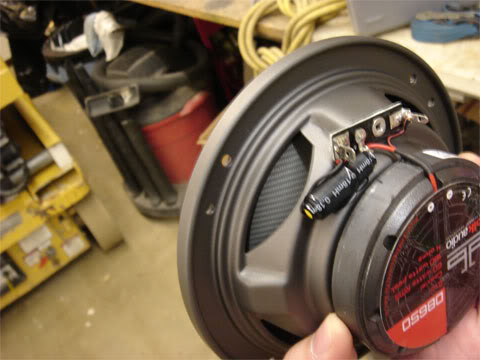
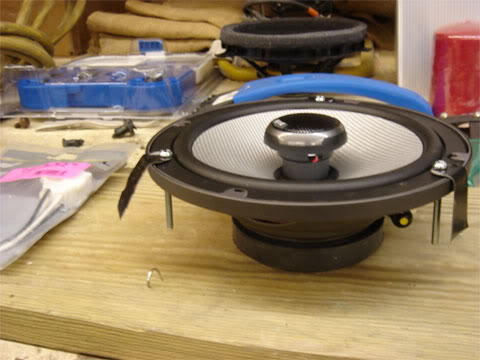
In with the new:
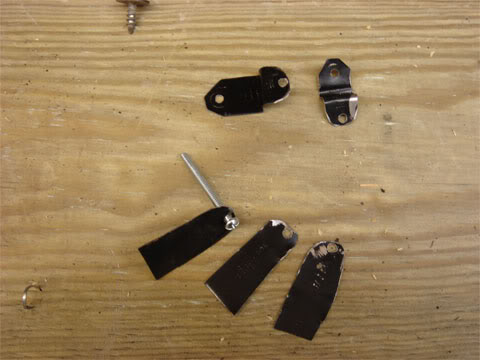
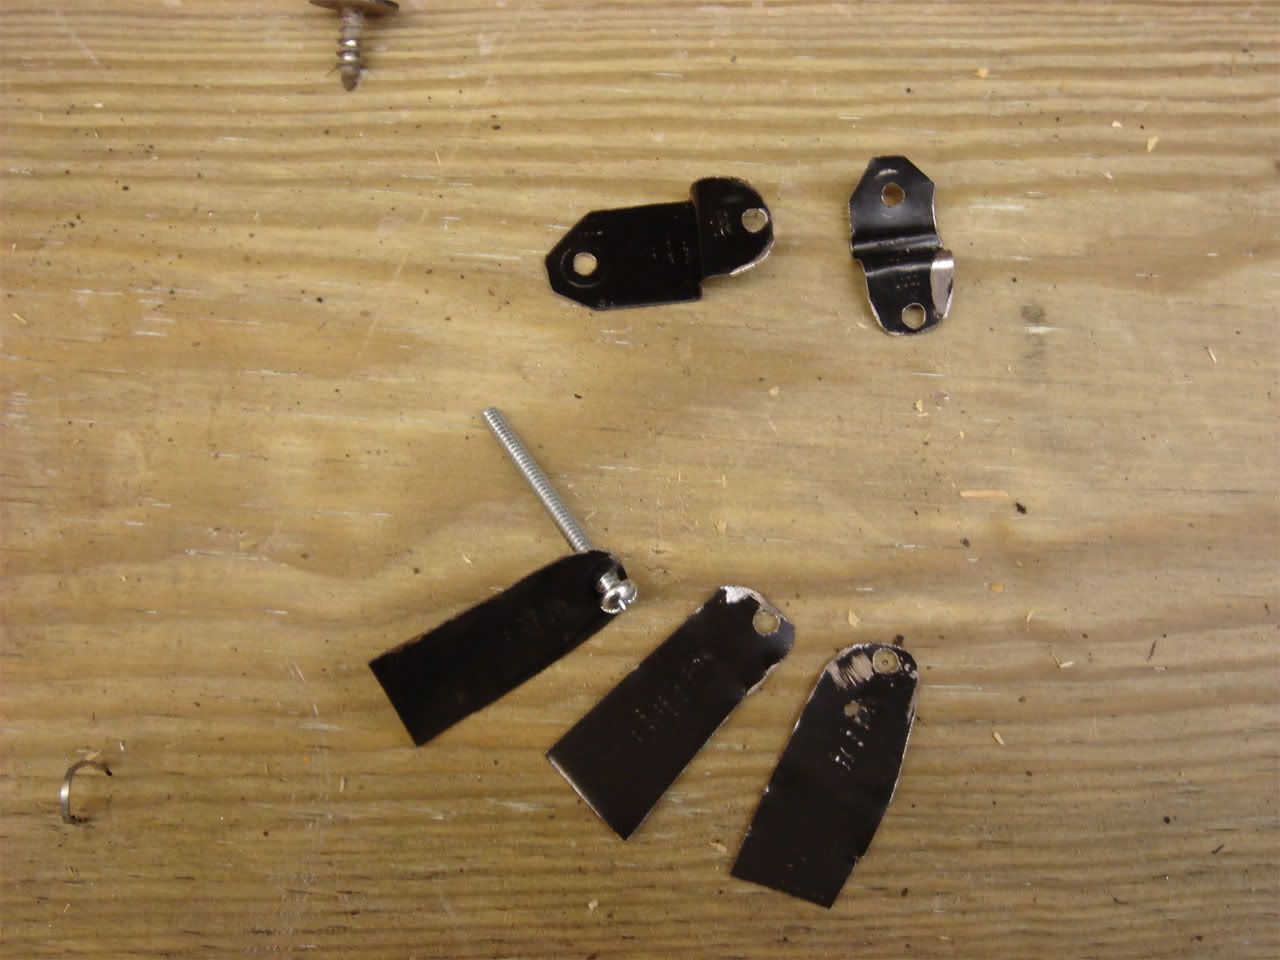
Now you may have noticed the factory speakers mounting points stick out beyond the speaker, something aftermarket speakers typically don't have. I made my own brackets for this, it's pretty easy to do. I took some sheet metal I had laying around and cut 6 strips of it roughly 1/2" wide by 2" long. I then took a 7/64 (#35) drill bit and drilled a hole as close to the end of each strip as possible.
Ignore the two at the top for now.
As you can see in the picture I also rounded off the side I drilled the hole on. This will be going on the speaker and you don't want any sharp edges sticking out that might puncture the rubber surround. Next place a bolt through the hole in the bracket you've just made and place it on the speaker:
Now bend the bracket down 90 degrees at the edge of the speaker:
Draw a line on the brackets even with the bottom of the speaker mounting ring (where it would sit against the bracket). Now bend them 90 degrees the opposite way of the previous bend so it looks like an s.
Look at the two top brackets in this picture:
Now that you have the brackets bent correctly all that's left is to drill the second hole that will match up to the hole on the factory speaker bracket. Put them on the speakers again and set the speakers in the factory brackets. Notice that on the factory brackets there is a raised line going across it where the hole is. You want to draw a line on your bracket that matches that one, then drill in the center of that line. See the below picture if you're confused (drill where the green dot is, red line is where you should draw your line):

I recommend doing two of the three brackets for one speaker, then screwing them down temporarily and doing the third to ensure a good fit. When you have all of them drilled mount the brackets to the speakers using small bolts and a nut on the back, then place the speaker in the factory bracket. Don't forget to put the gaskets that came with your speakers in-between the speaker and the factory bracket. Now screw the brackets you made into the factory bracket using the screws you took out before.
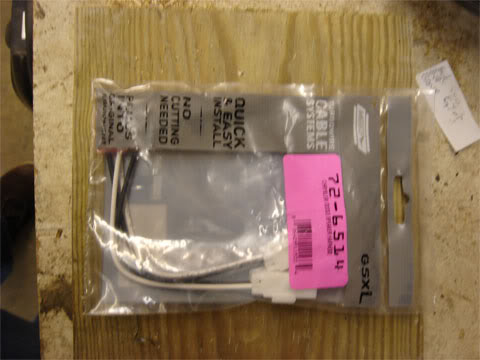
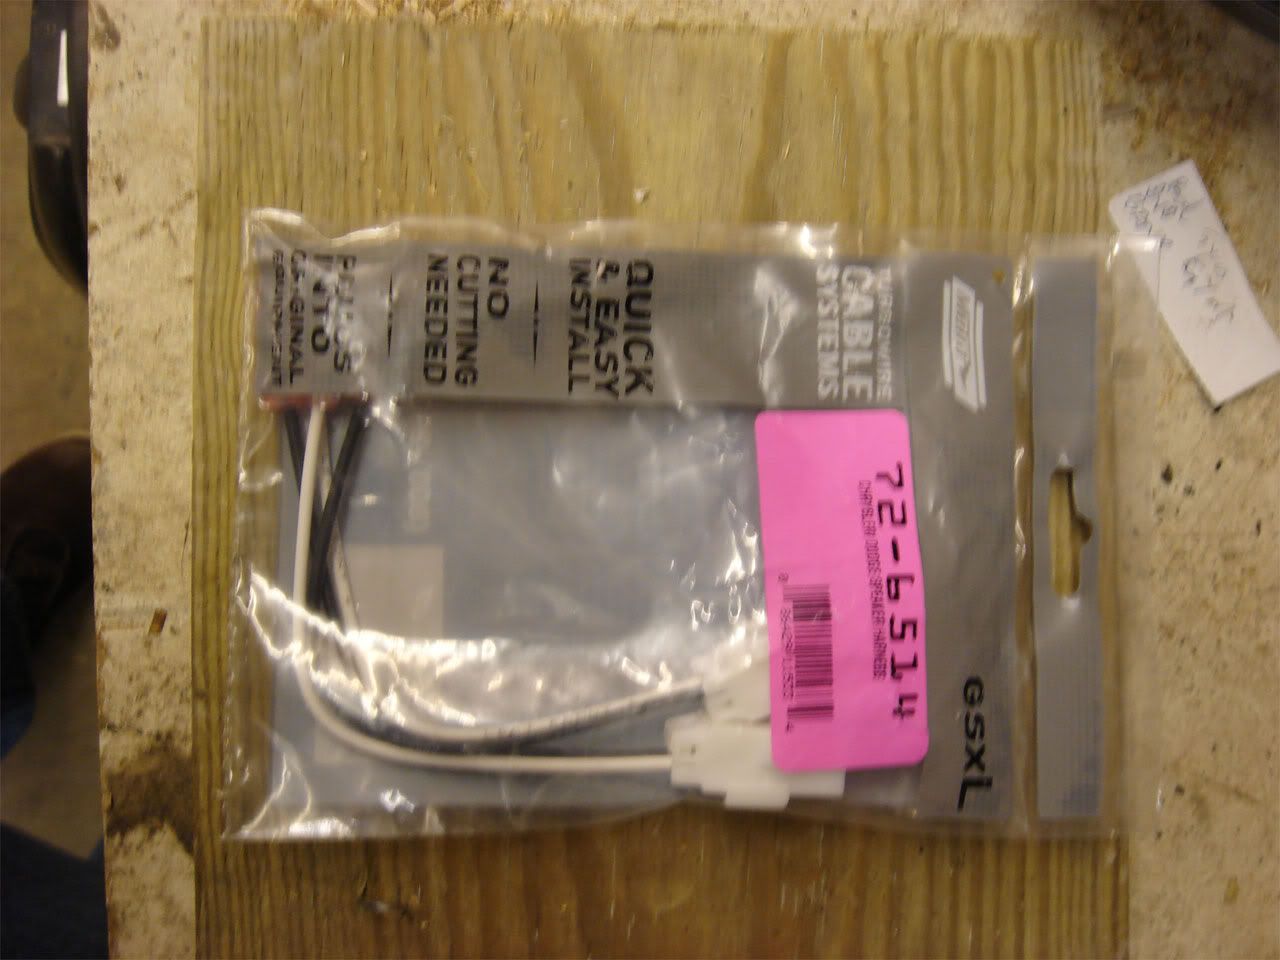
You can wire the speakers in one of two ways. You can either cut the factory plugs off, splice the wires and solder them to the speaker terminals or you can buy plugs from Best Buy or your local stereo shop that match the factory plugs and connect to your speakers. I chose to go the second route in case I need to put the factory speakers back in for any reason. Metra makes the connectors, part # is 72-6514:
My thanks to ericemery for the following info:
The connectors are very simple, they already have terminals on them that slide right over the terminals on the speaker and lock on.
Now all you have to do is plug them into the factory wiring, screw the factory brackets back into the door (one of them has a little nub sticking out that matches the door, they only go on one way), put the panel back on and enjoy your new speakers!
Dakota3rdGen
Reference Info: The stock speaker size front and rear on our trucks is 6.5"
(Click on any of the pictures to view a larger image.)
Edit: If you do not want to make your own brackets to hold the new speakers in Metra makes an adapter for it. Best Buy or a local shop can probably get it for you. (Thanks to superdak05 and ericemercy for pointing this out)
Ok, so you've decided to replace the stock speakers in your truck with something a little nicer. The first step is to get the stock ones out. I recommend downloading the factory service manual from the stickies at the top of the 3rd gen Dakota forum and looking up the door panel removal if you're not sure how to do it. Please note that I do not have the factory tweeters on mine so I won't be mentioning them here.
I'll give you a quick rundown of removing the panel here if you don't feel like using the service manual, unfortunately I forgot to take any pictures before I pulled the panels off. On the front door panels there are two screws at the very bottom of the door which have to be removed. There is also one behind the door handle and one in the bottom of the handhold/cup. These screws need to be removed and the handhold can be pulled out if desired.
DO NOT pull straight out on the door panel yet, you'll break the fasteners. Grab the door panel and slide the entire thing upwards, now you can pull it away from the door. Now reach down in-between the panel and the door and unclip the fastener holding the metal rod on the door handle. After you've removed that unplug the window, door lock and mirror controls, there is a button on one side of the plug that needs to be pushed in then you can slide it right out.
Now that the panels are out of the way locate the speaker at the bottom of the door towards the front. It should look like this:

There are 3 screws holding the speaker bracket to the door, take those out and remove the speaker. The wires are plugged in on the back of the speaker, just disconnect the plug. Now take out the 3 screws holding the speaker to the bracket and pull them apart. You'll end up with this:

Out with the old:

In with the new:

Now you may have noticed the factory speakers mounting points stick out beyond the speaker, something aftermarket speakers typically don't have. I made my own brackets for this, it's pretty easy to do. I took some sheet metal I had laying around and cut 6 strips of it roughly 1/2" wide by 2" long. I then took a 7/64 (#35) drill bit and drilled a hole as close to the end of each strip as possible.
Ignore the two at the top for now.
As you can see in the picture I also rounded off the side I drilled the hole on. This will be going on the speaker and you don't want any sharp edges sticking out that might puncture the rubber surround. Next place a bolt through the hole in the bracket you've just made and place it on the speaker:
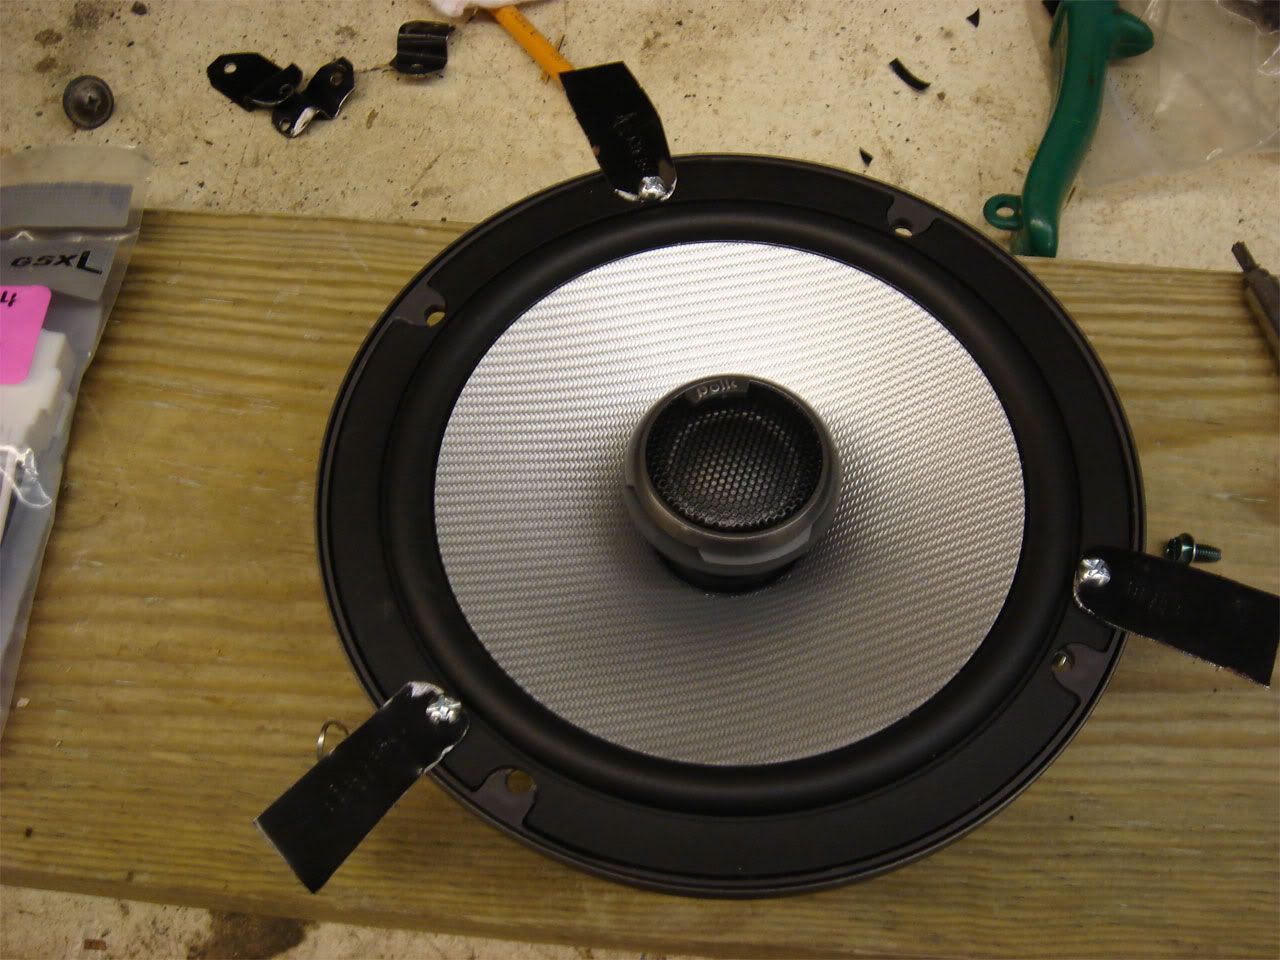
Now bend the bracket down 90 degrees at the edge of the speaker:

Draw a line on the brackets even with the bottom of the speaker mounting ring (where it would sit against the bracket). Now bend them 90 degrees the opposite way of the previous bend so it looks like an s.
Look at the two top brackets in this picture:
Now that you have the brackets bent correctly all that's left is to drill the second hole that will match up to the hole on the factory speaker bracket. Put them on the speakers again and set the speakers in the factory brackets. Notice that on the factory brackets there is a raised line going across it where the hole is. You want to draw a line on your bracket that matches that one, then drill in the center of that line. See the below picture if you're confused (drill where the green dot is, red line is where you should draw your line):

I recommend doing two of the three brackets for one speaker, then screwing them down temporarily and doing the third to ensure a good fit. When you have all of them drilled mount the brackets to the speakers using small bolts and a nut on the back, then place the speaker in the factory bracket. Don't forget to put the gaskets that came with your speakers in-between the speaker and the factory bracket. Now screw the brackets you made into the factory bracket using the screws you took out before.

You can wire the speakers in one of two ways. You can either cut the factory plugs off, splice the wires and solder them to the speaker terminals or you can buy plugs from Best Buy or your local stereo shop that match the factory plugs and connect to your speakers. I chose to go the second route in case I need to put the factory speakers back in for any reason. Metra makes the connectors, part # is 72-6514:
My thanks to ericemery for the following info:
ORIGINAL: ericemery
Good write up... I will add a little bit for those who don't want to buy the speaker adapter.
Before I get into it, I suggest soldering a new chunk of speaker wire onto the factory speaker wires to make them a little longer...
Ok, cut the plug off the speaker, leaving yourself about an inch and a half to two inches of wire on the speaker plug, just in case you want to put them back in later, all you will have to do is cut the new speaker wire off and solder these back on.
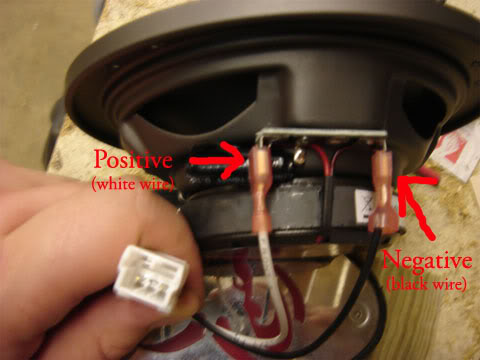
To find out the polarity of the speaker wire, you can check the service manual OR take a 9 volt battery and put the speaker wire to the + and - terminals on the battery. If the cone pops out, you have the right wires on the right terminals. (Positive wire on the positive lead.)
Now just solder your new speaker wire on, keeping in mind the positive wire should be red, or have red stripe... there you just saved a couple bucks.
Good write up... I will add a little bit for those who don't want to buy the speaker adapter.
Before I get into it, I suggest soldering a new chunk of speaker wire onto the factory speaker wires to make them a little longer...
Ok, cut the plug off the speaker, leaving yourself about an inch and a half to two inches of wire on the speaker plug, just in case you want to put them back in later, all you will have to do is cut the new speaker wire off and solder these back on.
To find out the polarity of the speaker wire, you can check the service manual OR take a 9 volt battery and put the speaker wire to the + and - terminals on the battery. If the cone pops out, you have the right wires on the right terminals. (Positive wire on the positive lead.)
Now just solder your new speaker wire on, keeping in mind the positive wire should be red, or have red stripe... there you just saved a couple bucks.

Now all you have to do is plug them into the factory wiring, screw the factory brackets back into the door (one of them has a little nub sticking out that matches the door, they only go on one way), put the panel back on and enjoy your new speakers!

Dakota3rdGen
Last edited by Altair; Jul 24, 2009 at 10:04 PM.