

E-Fan write up by studlyblueiz

Thread Starter
|
Veteran
Joined: Oct 2006
Posts: 383
Likes: 1
From: Raleigh, NC
[align=left] I know everybody has been aiming to do an electric fan swap to gain some extra HP and fuel economy. So...many of us have been eyeballing that Flexalite or Black Magic fan. But that can put a hole in a pocket quick and needs a fat wallet. There are several options and I�€™ll try to speak about some. Though, the main goal of this is that some don't know where to start. I�€™ll speak of the path I took and maybe a few extra details that can prove useful to you. I started my project by first heading out to the junkyard. Sure you can find loads of electric fans out there but there�€™s one that has been used on numerous applications. So spit it, right. It's commonly known as a Ford Taurus fan found in mid 90's on 3.8L V6's. But actually it can be found in about any Ford or Lincoln 3.8L in mid 90's. You can find this fan for about $25 at any pick-n-pull junkyard. I picked up two.
[/align]
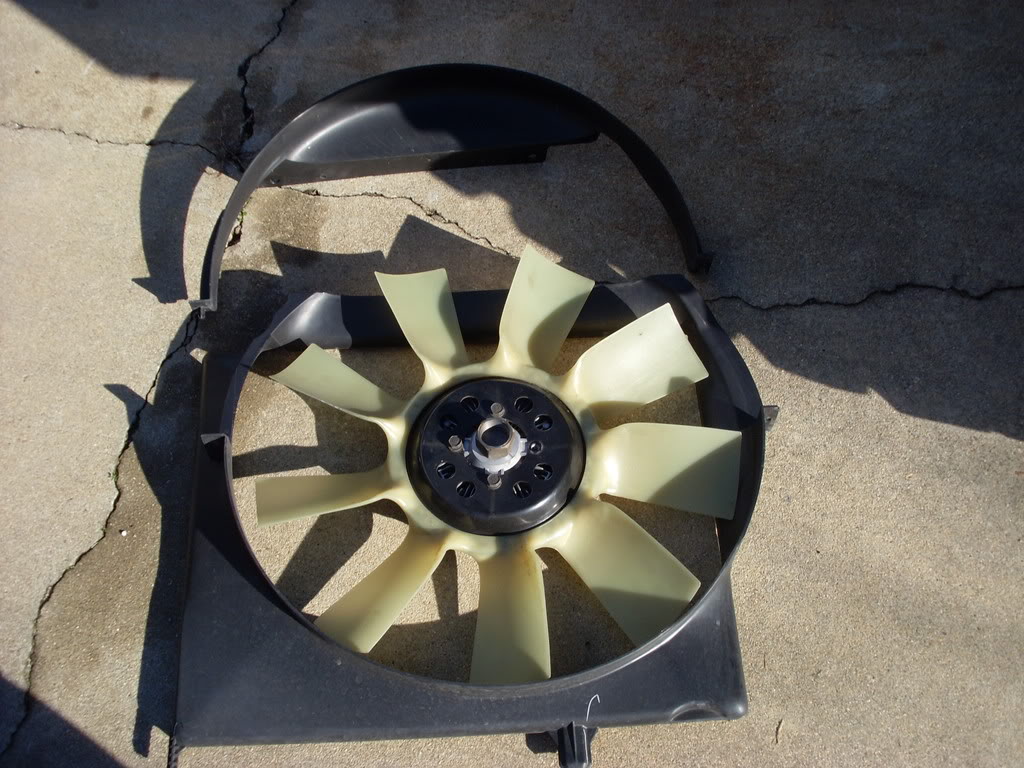
Here's of the one I used:
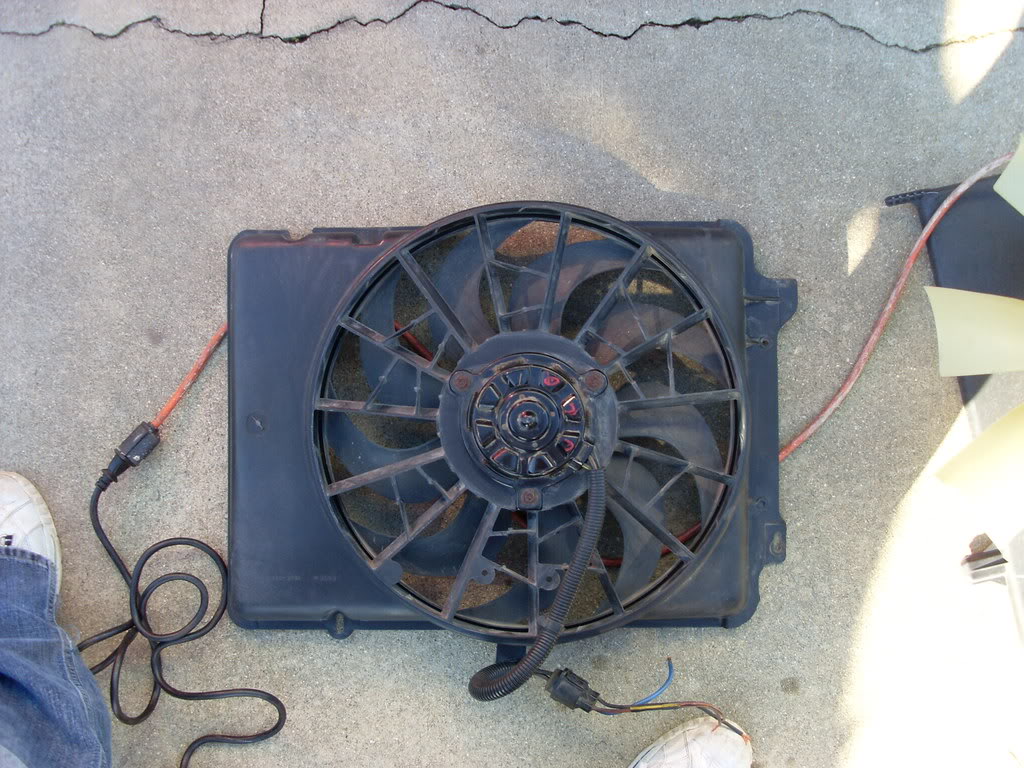
Now the fan you want to look for has three wires: blue wire-high setting, black/orange-low setting, and black-ground. When pulling just make sure you cut as much wire you can take. The fan has been proven on many well-built V8's and sure to hold for our Dakota's. Now this fan is a puller estimated around 2000cfm(not clear). Most claim low setting is more than sufficient. If you look at the pic you can tell that there is a shroud molded to the Taurus fan. Now by memory this thing is approximately 22"x18" and like 5-6" deep. Fortunately, you can shave off a few inches if less depth is needed.
Now the downside: This sucker takes about 100 amps to start for high and uses like 33 amps continuous when running. So far I haven�€™t ran into any issues yet but I run on low which isn't as bad. Of course, you can always stick with any aftermarket fans. They�€™ll just run you a little more but they won�€™t have the same amp drawbacks.
Next we move on to wiring. There are tons of ways to wire this sucker up. A common setup is an Imperial Controller (PN: 3647)-$36, Imperial Mount Kit (PN: 226201)-$6, and Bosch 150amp Relay (PN: 0 332 002 156)-$30.
If you take this route you end up spending about $72 + wires for your wiring.
I used SPAL's Automatic Programmable Fan controller for $90. It'll run at 100% power for a few sec to start the fan then run at 50% on first programmed temp setting (ie: 185*) and 100% if needed on second temp setting (ie: 200*). If you hook it up to A/C as well it will default to 100%. Here�€™s what I got out of the box:
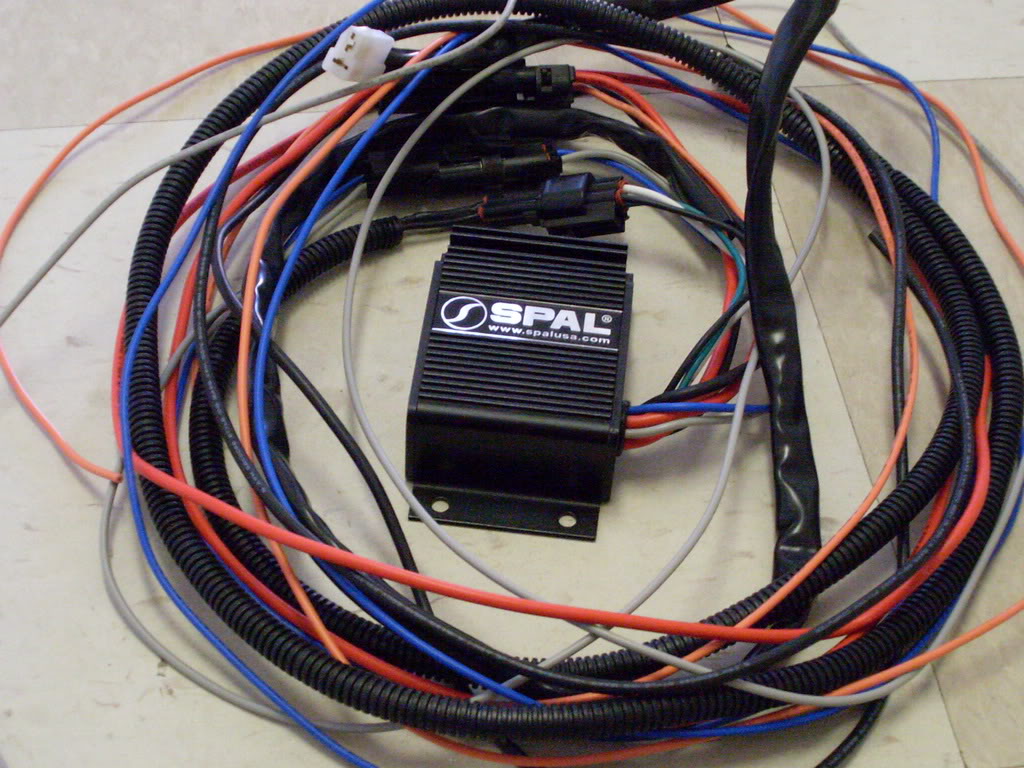
********
Now that you know some background I will walk you through my setup. I would recommend completing most of your wiring before you start, as that�€™ll take the longest of your time. If you do this ahead of time your truck won�€™t see any down time. I didn�€™t do this because I was indecisive on where I wanted to mount the SPAL controller. First, you want to remove everything in the fans way of coming out. Begin with taking off the radiator cover by popping the plastic rivets out.
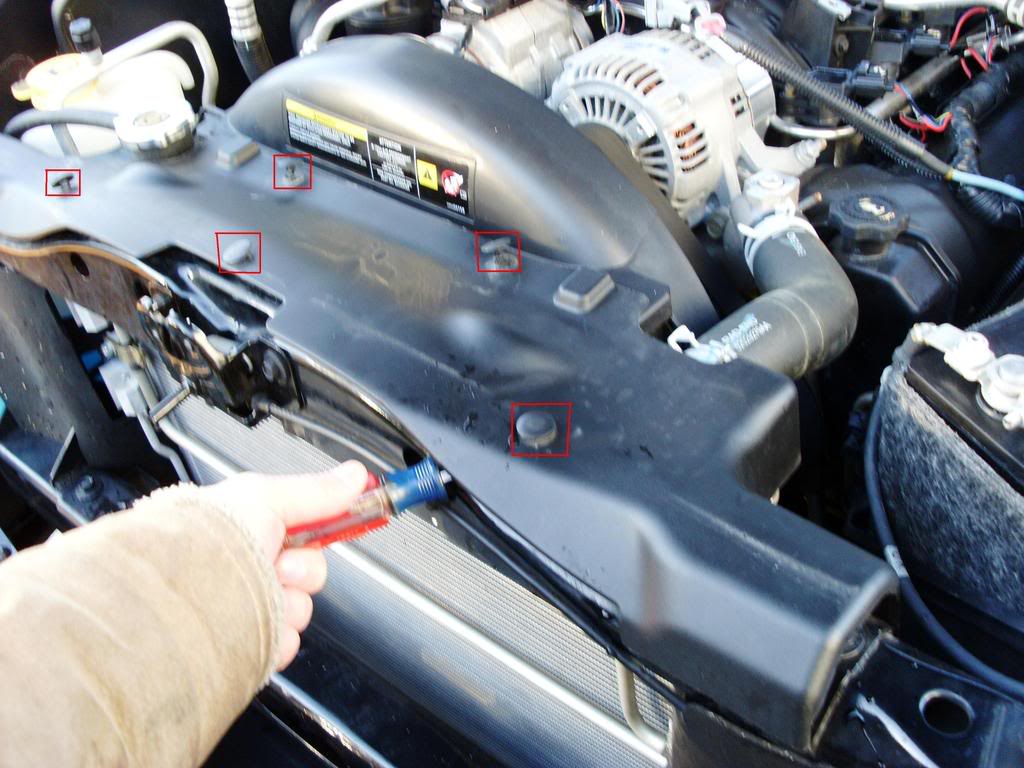
Next, remove the two bolts holding the upper plastic shroud.
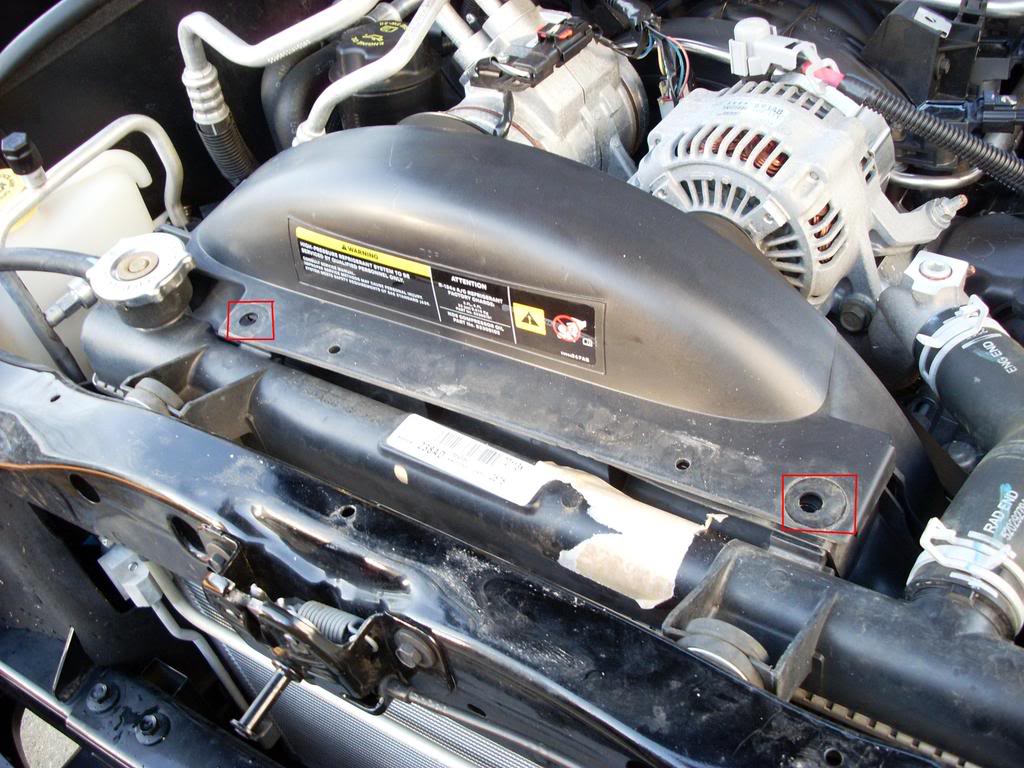
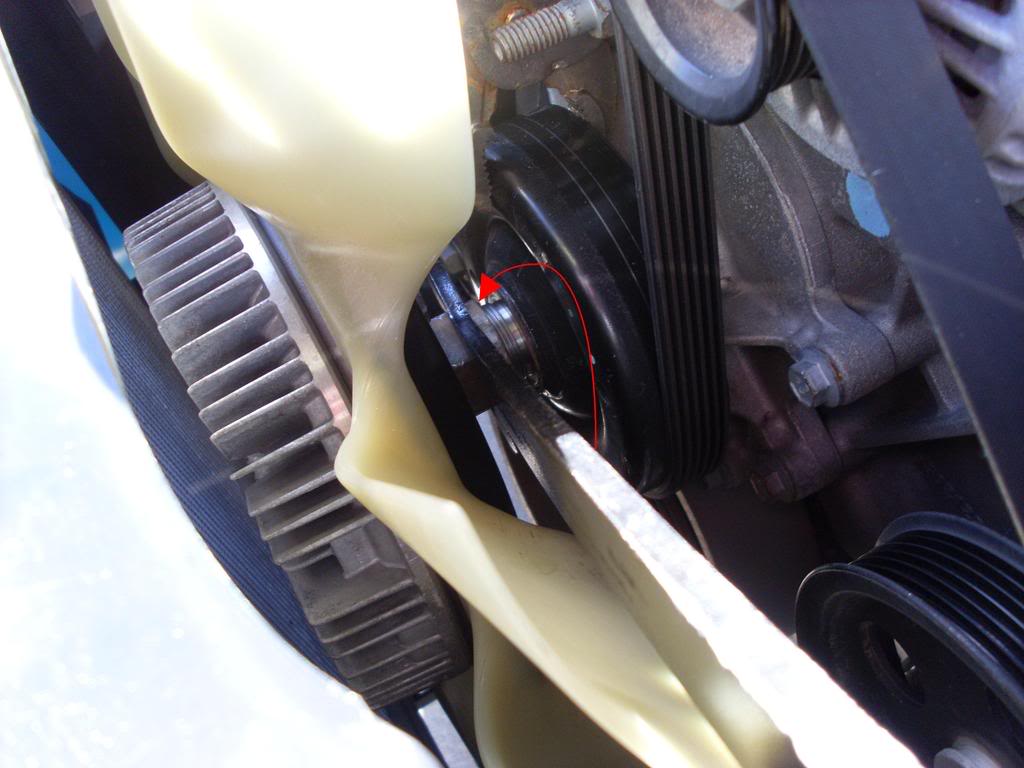
Now you should have access to the clutch fan bolt. You want to secure the pulley for fan so that it will not spin. There are four evenly spaced holes in the pulley. Usually, you can insert two bolts in the holes that will catch a surface on the engine to keep it from spinning. I wasn�€™t able to make this work so I just used a rag and an adjustable wrench to lock it in place. Not the advisable way but I suffered no damage doing it. Once you have it locked, I used a rented fan puller set from Advanced Auto that had the right wrench size to remove the nut. If your standing in front facing the cab the nut should be spinning counter-clockwise for removal.
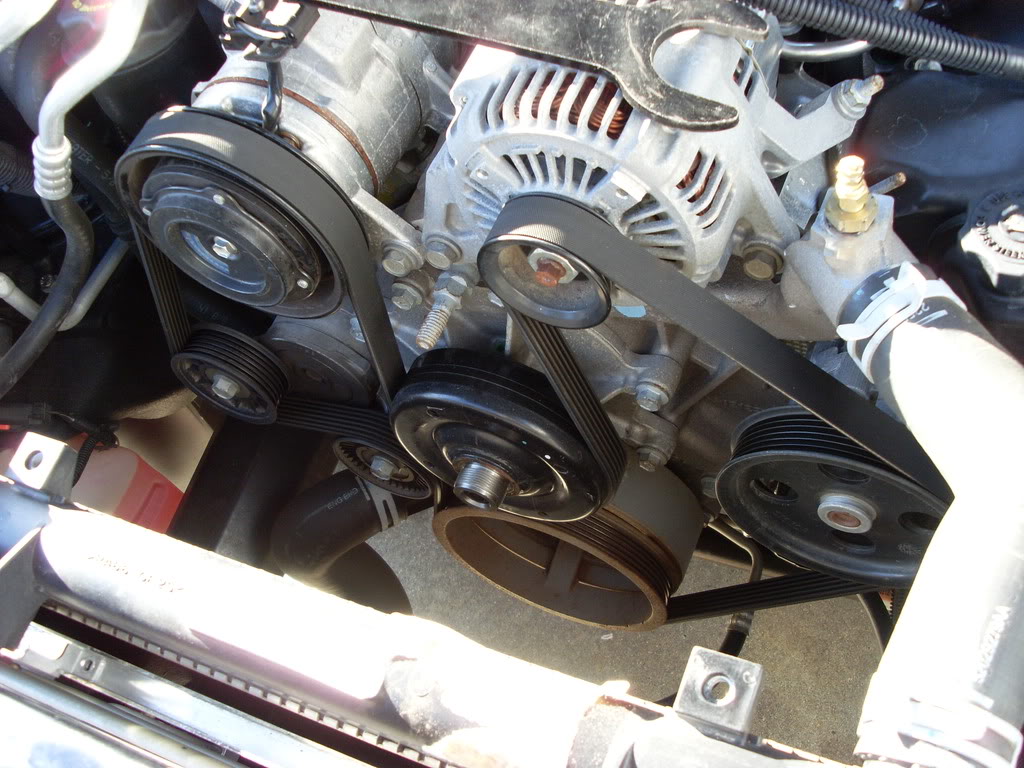
Pull the fan and clutch assembly out and you can now remove the lower shroud from the radiator. Look at all the new space!
Next, it�€™s time to put the E-fan in. I chose to trim off some of the older mount edges and took off some of the depth. Sliding the fan in there may be a little tricky as the Taurus fan is about perfect for our radiator. It�€™s just maneuvering around the newly exposed threaded shaft and the fan motor. For the Taurus fan you want to have the side where the stock wires are secured facing up. This will orient the fan motor more to the driver side of the radiator and gives enough clearance from the pulley shaft. I used pull through straps to secure the fan. You can find these at Advanced Auto near their E-fans. I drilled holes into the E-fans shroud ahead of time. In the pic you can see the stock wiring on top and one of the straps.

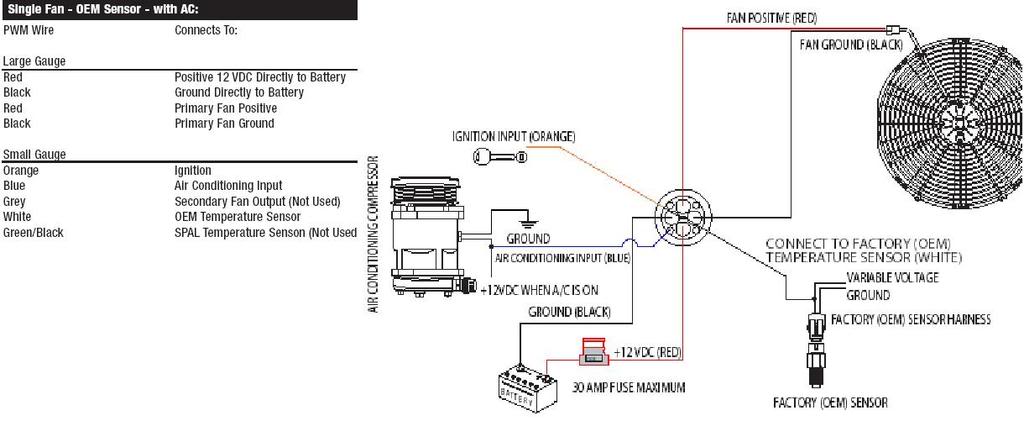
Now that the fan is in place we can move onto wiring. Below you can see the wiring diagram I used from SPAL.
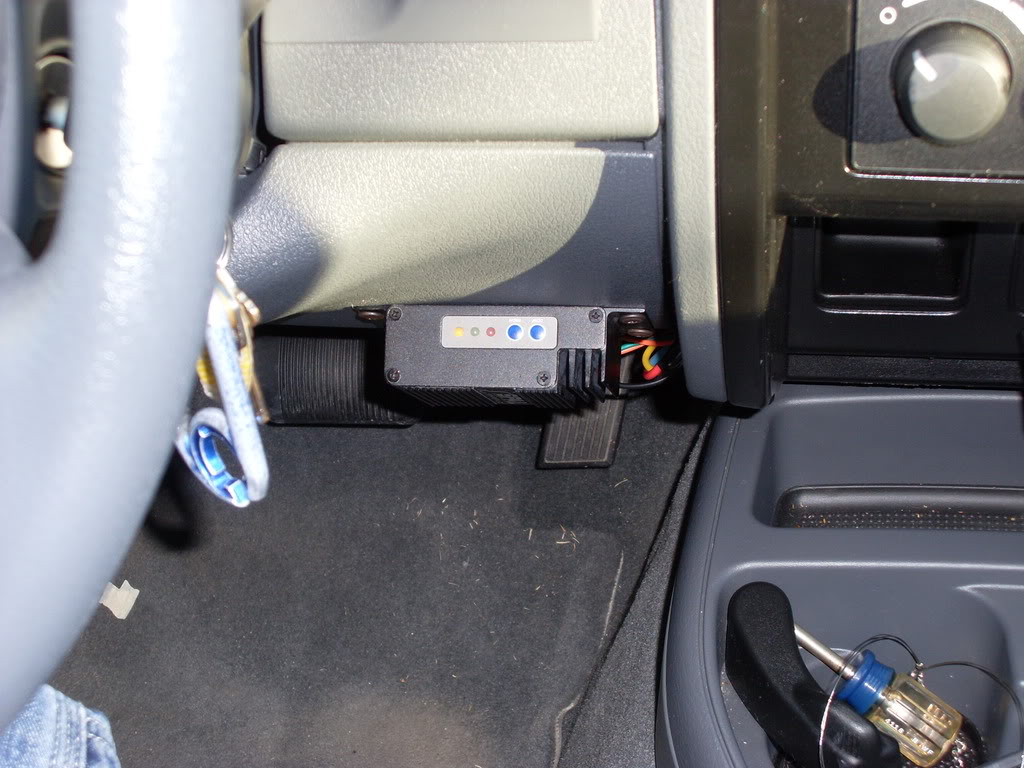
Plan this ahead of time so you know what you�€™re getting into. I could have chose to install my controller in the engine compartment, which would make this very quick and easy. But the SPAL controller is programmable and has three informatory lights on it. Each LED lets you know whether it�€™s on LOW, HIGH, or because A/C is on. I haven�€™t found anybody who has used the SPAL controller with the Taurus fan so I opted to put it in the cab. That way I know it�€™s cutting on and working. My setup involved a multitude of wires from cab to engine: Batt, Ign, Ground, Thermostat, A/C, Fan +, and Fan -. Also, I installed an electric Autometer gauge to give me detailed water temps. (The three main power wires for the SPAL unit weren�€™t long enough so I spliced longer wire in) Once you know what wires need to go to the engine compartment you can begin sending them that way. I�€™d start from inside the cab and work your way. Open your driver door and you should find a grommet with nothing going through it. Go ahead and pop it out. Depending on how many wires you�€™ll use you can cut all of the grommet inside out/ or cut an X into it. Take your wires and feed them from the inside cab through the exposed hole. Now push the wires through the grommet and pop it back in place. See pic:
Take a stretched coat hanger and curl the end. With the hood open you can pass the hanger through the fender towards door seal to pull wires up. You may need to only do a few wires at a time. Now, most of your wires are close to battery and fuse box! Here�€™s a pic looking at the hanger access near the hood hinge:
Feed the wires through the fender to inside the cab. I used electrical tape and wire loom to protect from sharp edges.
Use a mini-fuse tie in for ignition source. I used #58; should say Audio Amplifier. You will need to trim the cover edge so it won�€™t crush or expose the wire.
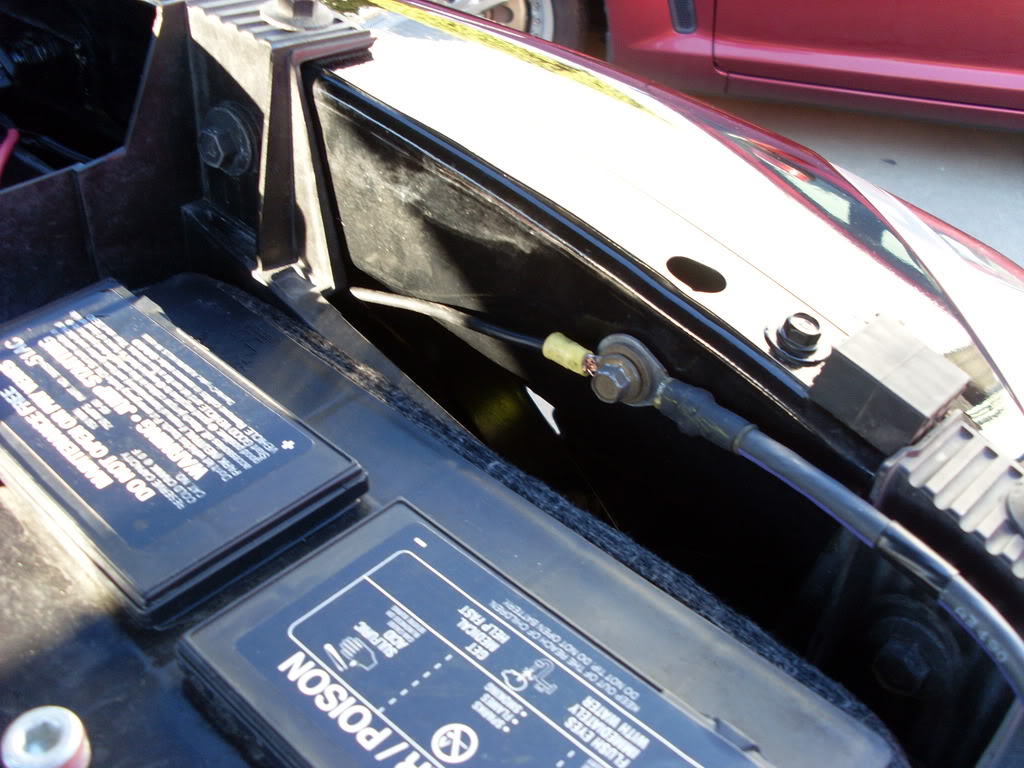
Now, hook up your Batt +. I connected mine straight to the fuse box terminal. Some trimming on cover should be done here as well.
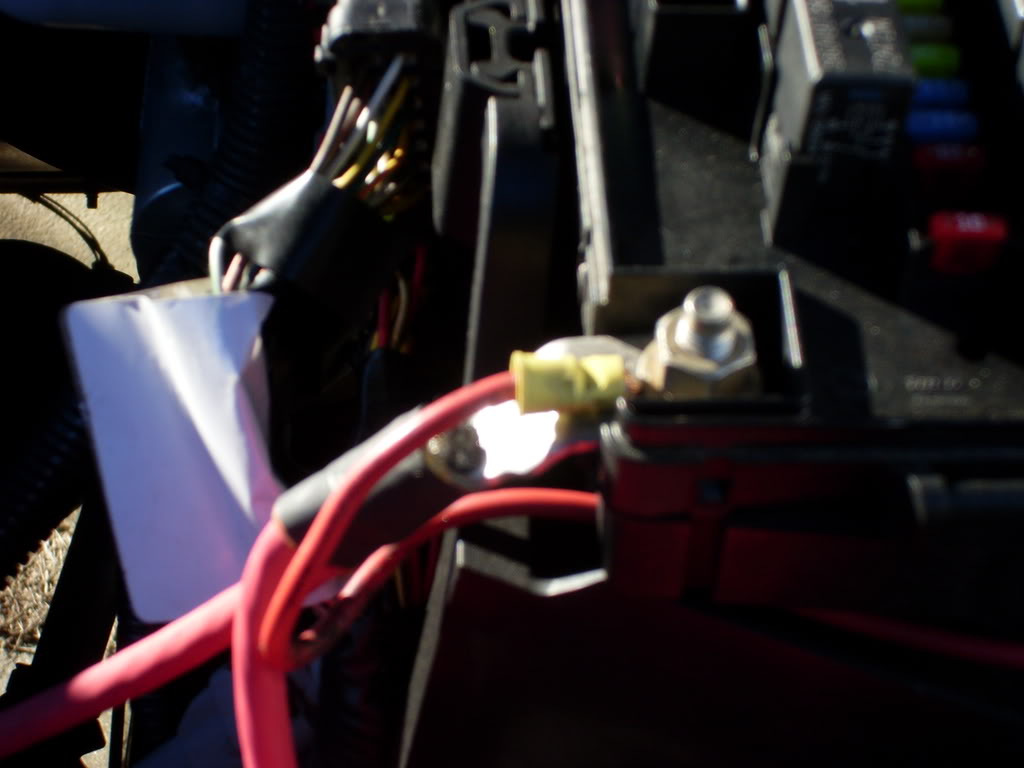
I grounded mine using the same bolt that currently grounds the fender to battery.
I also installed an Autometer gauge I picked up at AutoZone so it came with a thermostat sensor. I just removed the plug near the top hose and installed the sensor. I then plugged both SPAL and gauge wires to it.
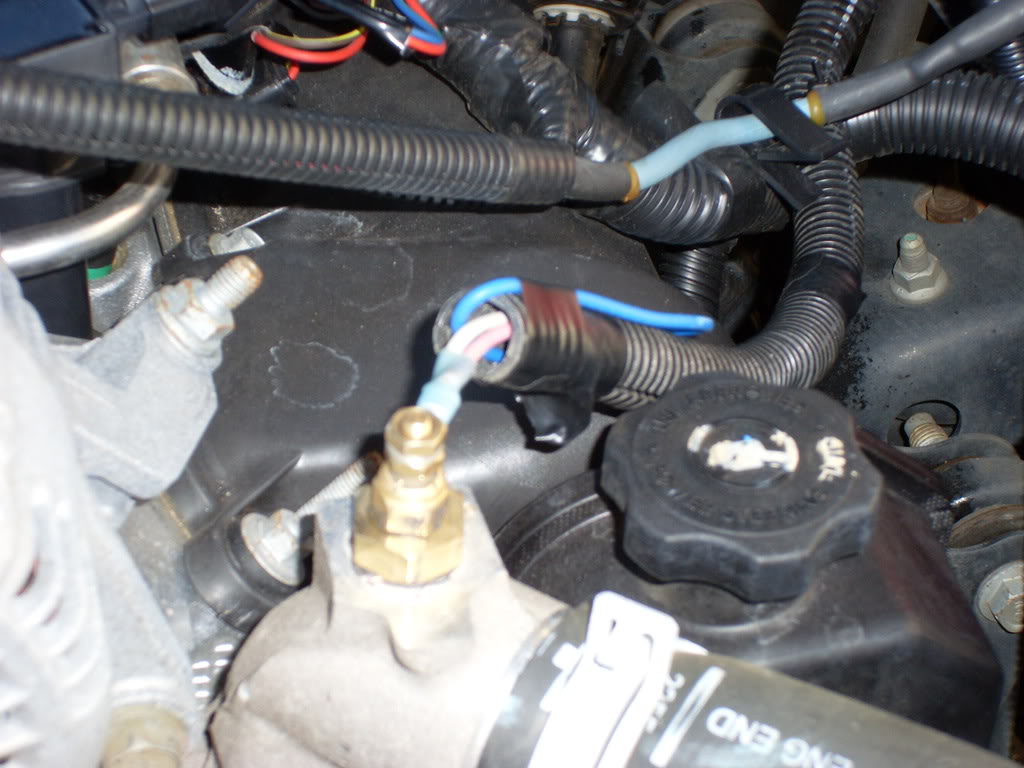
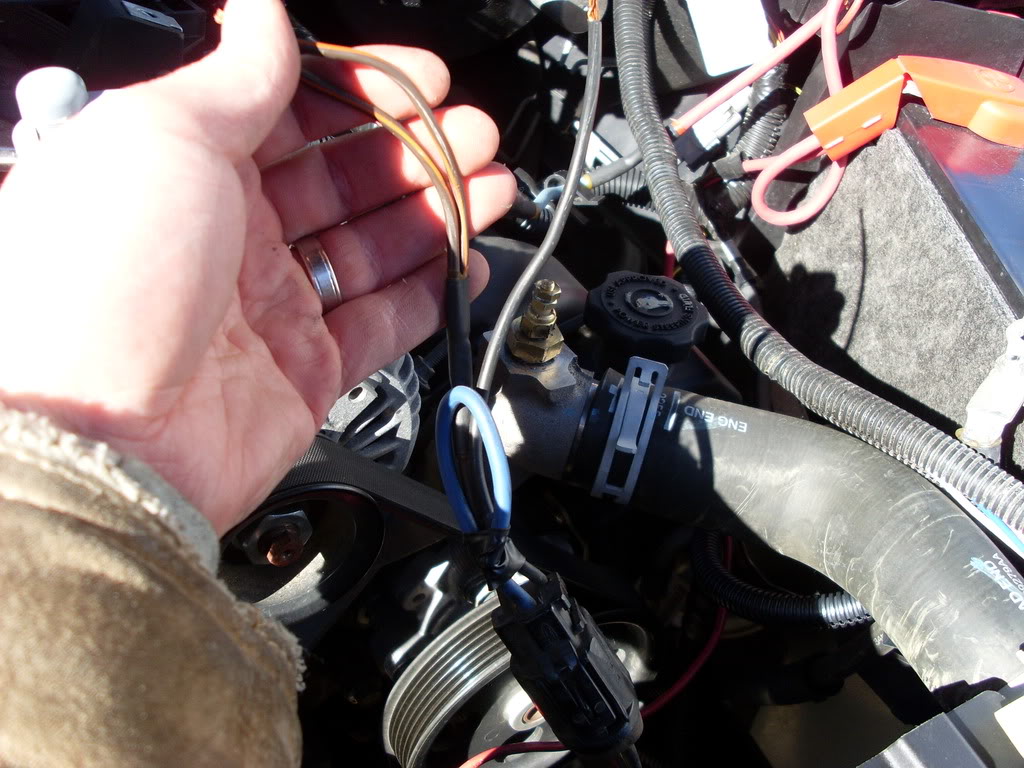
I plan to hook the A/C wire up to have the fan kick on to 100% when it�€™s on but for now I taped the blue wire back. Seen in last photo. Now it�€™s time to plug the E-fan up to the SPAL unit. I used the fan�€™s low wires (BLK/ORG). Should work well enough. Make sure you tie your wires away from any pulley or belt. I taped the fan�€™s blue wire back. I may use it later if necessary.
Next, I moved on to mounting my controller and gauge. Bought a simple Pillar pod and trimmed and heated until it fit.
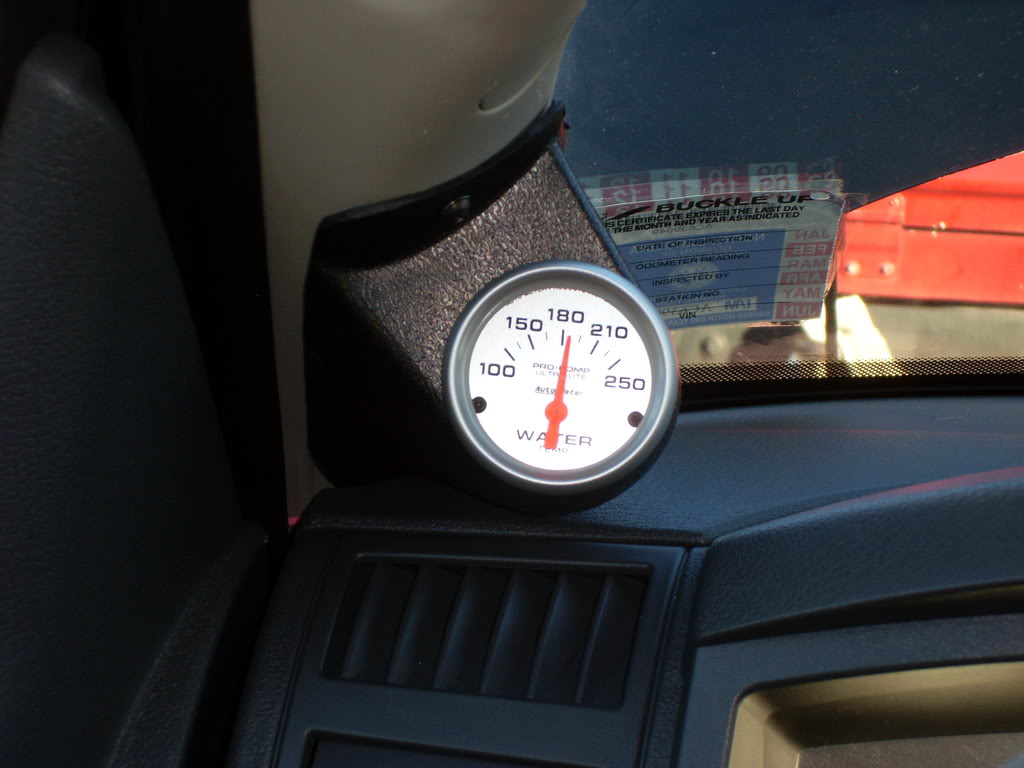
Now that all the wiring and installation is done just fire her up. I programmed mine at 170° for LOW speed and 195° for HIGH speed. It�€™s as simple as holding the button for 3 seconds. The two speeds need to be at least 25° apart. I�€™ll re-adjust when temps warm up and the 180° T-stat is in. So far the temp hasn�€™t gone above 182° on the Autometer gauge and about a 1/4" below half mark on instrument panel. Pretty significant without a low T-stat but it is cold right now. Summer may change that. Wiring is where most can differ and again I suggest doing that first. Mine could have been easier if I mounted the SPAL unit in the engine compartment. But I like knowing the security it�€™s working. Although, I did find that it�€™s basically an advanced relay. It stays on with the ignition even if the battery + blows a fuse. This means the SPAL is on but the fan isn�€™t. I�€™ve been running a 20amp fuse cause I accidentally blew the 30amp that comes with it and no problems yet.
Well I hope everyone finds this useful and good luck with your install!
Written by: Robert Ancheta (StudlyblueIz)
More info on SPAL unit:
http://etxiow.accpaconline.com/media/FAN%2DPWM%2Epdf
http://www.fordmuscle.com/archives/2...cfan/index.php
http://www.geocities.com/smithmonte/...rkVIII_Fan.htm
Dakota3rdGEN
[/align]
Here's of the one I used:
Now the fan you want to look for has three wires: blue wire-high setting, black/orange-low setting, and black-ground. When pulling just make sure you cut as much wire you can take. The fan has been proven on many well-built V8's and sure to hold for our Dakota's. Now this fan is a puller estimated around 2000cfm(not clear). Most claim low setting is more than sufficient. If you look at the pic you can tell that there is a shroud molded to the Taurus fan. Now by memory this thing is approximately 22"x18" and like 5-6" deep. Fortunately, you can shave off a few inches if less depth is needed.
Now the downside: This sucker takes about 100 amps to start for high and uses like 33 amps continuous when running. So far I haven�€™t ran into any issues yet but I run on low which isn't as bad. Of course, you can always stick with any aftermarket fans. They�€™ll just run you a little more but they won�€™t have the same amp drawbacks.
Next we move on to wiring. There are tons of ways to wire this sucker up. A common setup is an Imperial Controller (PN: 3647)-$36, Imperial Mount Kit (PN: 226201)-$6, and Bosch 150amp Relay (PN: 0 332 002 156)-$30.
If you take this route you end up spending about $72 + wires for your wiring.
I used SPAL's Automatic Programmable Fan controller for $90. It'll run at 100% power for a few sec to start the fan then run at 50% on first programmed temp setting (ie: 185*) and 100% if needed on second temp setting (ie: 200*). If you hook it up to A/C as well it will default to 100%. Here�€™s what I got out of the box:
********
Now that you know some background I will walk you through my setup. I would recommend completing most of your wiring before you start, as that�€™ll take the longest of your time. If you do this ahead of time your truck won�€™t see any down time. I didn�€™t do this because I was indecisive on where I wanted to mount the SPAL controller. First, you want to remove everything in the fans way of coming out. Begin with taking off the radiator cover by popping the plastic rivets out.
Next, remove the two bolts holding the upper plastic shroud.
Now you should have access to the clutch fan bolt. You want to secure the pulley for fan so that it will not spin. There are four evenly spaced holes in the pulley. Usually, you can insert two bolts in the holes that will catch a surface on the engine to keep it from spinning. I wasn�€™t able to make this work so I just used a rag and an adjustable wrench to lock it in place. Not the advisable way but I suffered no damage doing it. Once you have it locked, I used a rented fan puller set from Advanced Auto that had the right wrench size to remove the nut. If your standing in front facing the cab the nut should be spinning counter-clockwise for removal.
Pull the fan and clutch assembly out and you can now remove the lower shroud from the radiator. Look at all the new space!
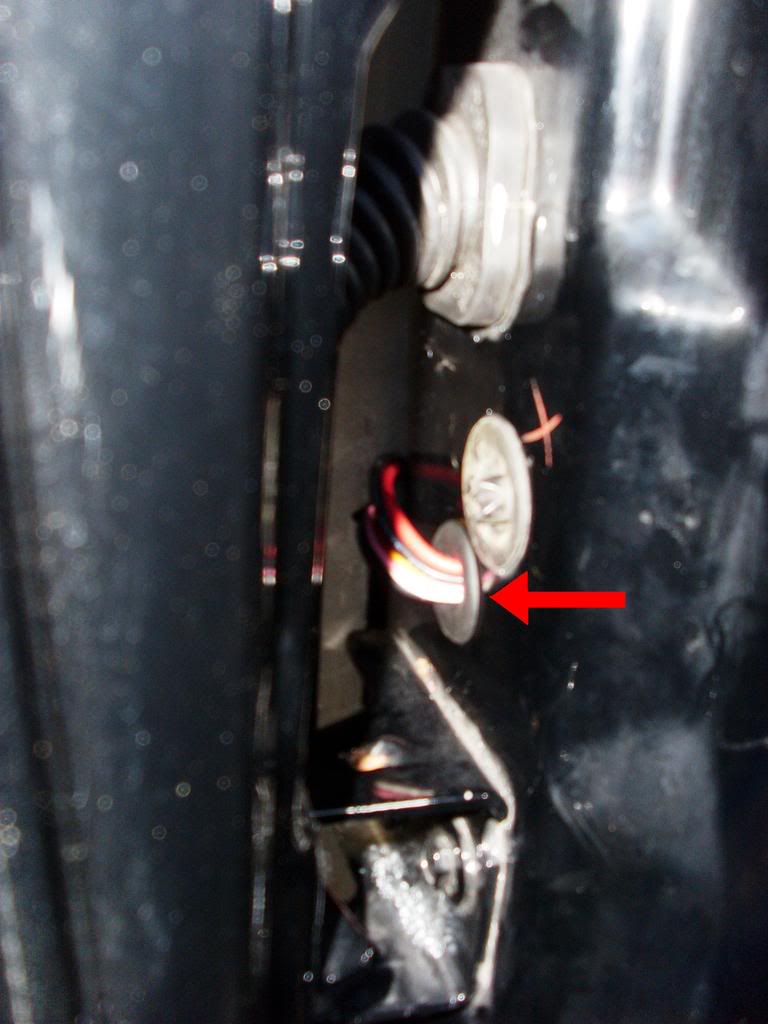
Next, it�€™s time to put the E-fan in. I chose to trim off some of the older mount edges and took off some of the depth. Sliding the fan in there may be a little tricky as the Taurus fan is about perfect for our radiator. It�€™s just maneuvering around the newly exposed threaded shaft and the fan motor. For the Taurus fan you want to have the side where the stock wires are secured facing up. This will orient the fan motor more to the driver side of the radiator and gives enough clearance from the pulley shaft. I used pull through straps to secure the fan. You can find these at Advanced Auto near their E-fans. I drilled holes into the E-fans shroud ahead of time. In the pic you can see the stock wiring on top and one of the straps.
Now that the fan is in place we can move onto wiring. Below you can see the wiring diagram I used from SPAL.
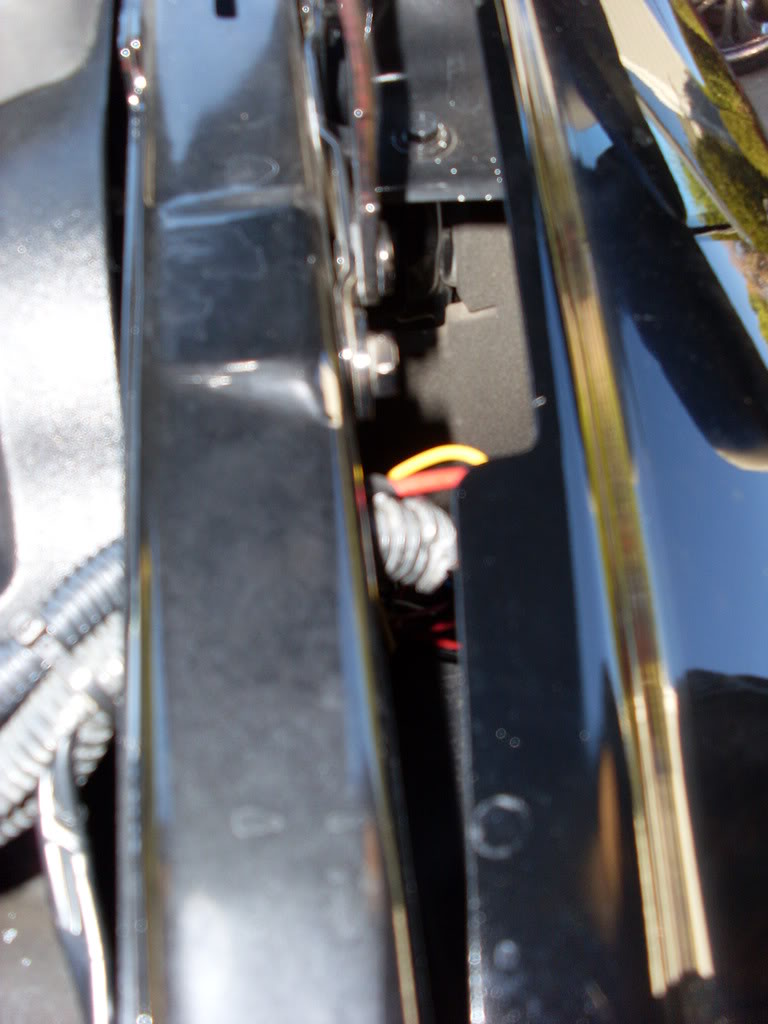
Plan this ahead of time so you know what you�€™re getting into. I could have chose to install my controller in the engine compartment, which would make this very quick and easy. But the SPAL controller is programmable and has three informatory lights on it. Each LED lets you know whether it�€™s on LOW, HIGH, or because A/C is on. I haven�€™t found anybody who has used the SPAL controller with the Taurus fan so I opted to put it in the cab. That way I know it�€™s cutting on and working. My setup involved a multitude of wires from cab to engine: Batt, Ign, Ground, Thermostat, A/C, Fan +, and Fan -. Also, I installed an electric Autometer gauge to give me detailed water temps. (The three main power wires for the SPAL unit weren�€™t long enough so I spliced longer wire in) Once you know what wires need to go to the engine compartment you can begin sending them that way. I�€™d start from inside the cab and work your way. Open your driver door and you should find a grommet with nothing going through it. Go ahead and pop it out. Depending on how many wires you�€™ll use you can cut all of the grommet inside out/ or cut an X into it. Take your wires and feed them from the inside cab through the exposed hole. Now push the wires through the grommet and pop it back in place. See pic:
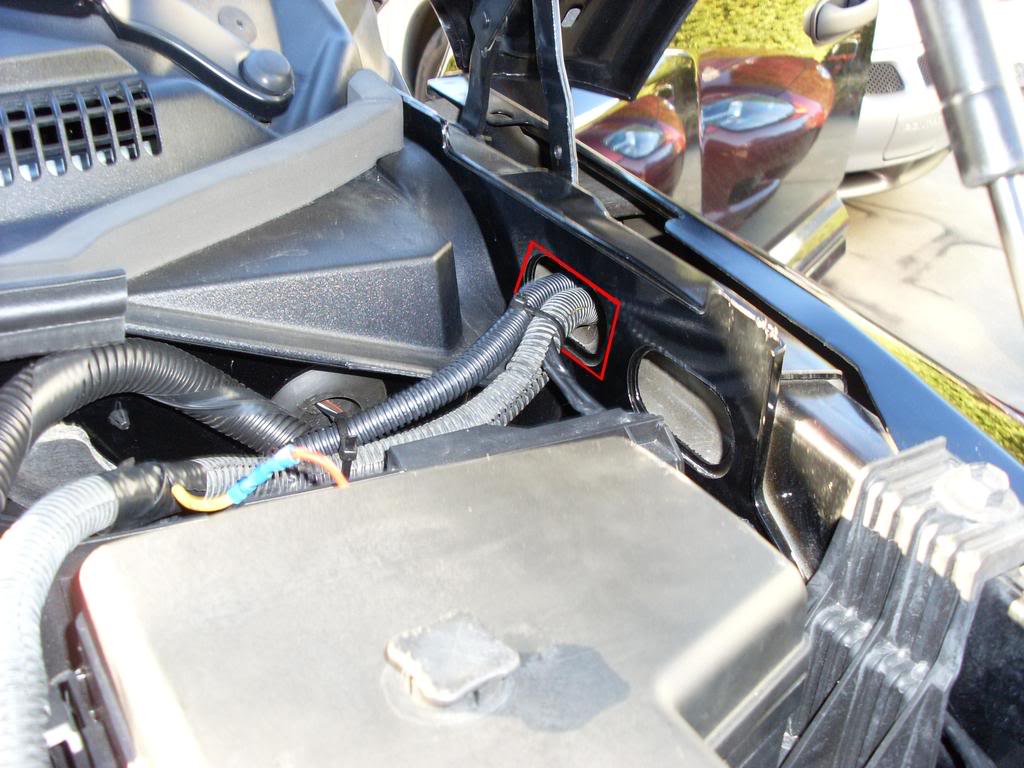
Take a stretched coat hanger and curl the end. With the hood open you can pass the hanger through the fender towards door seal to pull wires up. You may need to only do a few wires at a time. Now, most of your wires are close to battery and fuse box! Here�€™s a pic looking at the hanger access near the hood hinge:
Feed the wires through the fender to inside the cab. I used electrical tape and wire loom to protect from sharp edges.
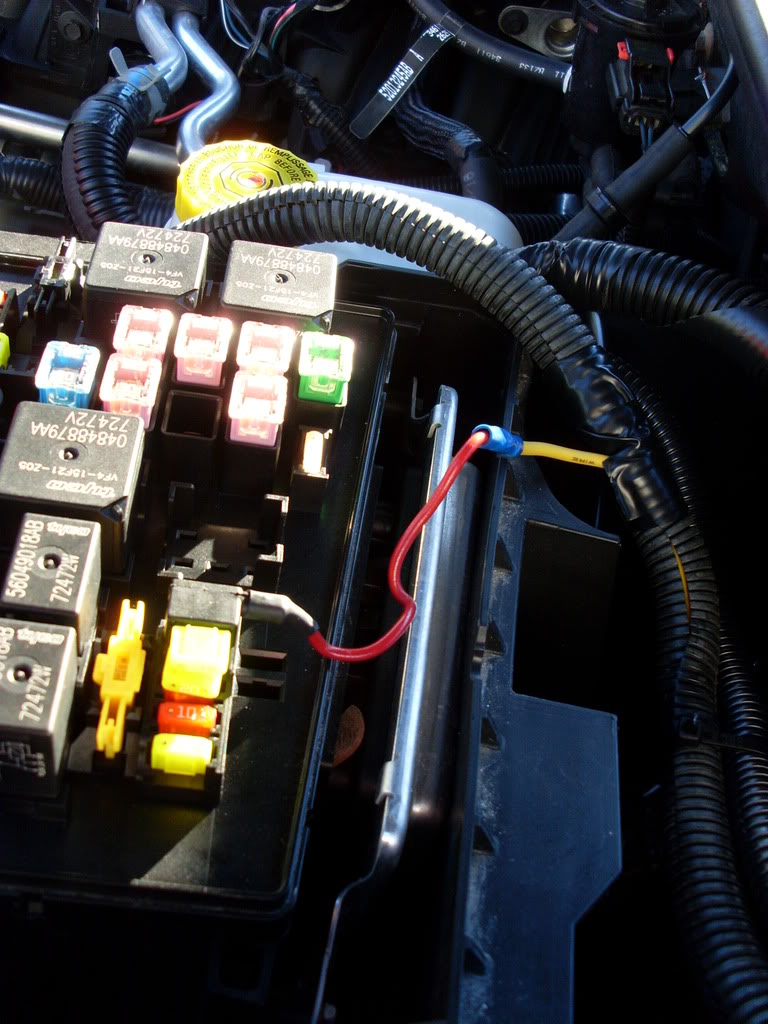
Use a mini-fuse tie in for ignition source. I used #58; should say Audio Amplifier. You will need to trim the cover edge so it won�€™t crush or expose the wire.
Now, hook up your Batt +. I connected mine straight to the fuse box terminal. Some trimming on cover should be done here as well.
I grounded mine using the same bolt that currently grounds the fender to battery.
I also installed an Autometer gauge I picked up at AutoZone so it came with a thermostat sensor. I just removed the plug near the top hose and installed the sensor. I then plugged both SPAL and gauge wires to it.
I plan to hook the A/C wire up to have the fan kick on to 100% when it�€™s on but for now I taped the blue wire back. Seen in last photo. Now it�€™s time to plug the E-fan up to the SPAL unit. I used the fan�€™s low wires (BLK/ORG). Should work well enough. Make sure you tie your wires away from any pulley or belt. I taped the fan�€™s blue wire back. I may use it later if necessary.
Next, I moved on to mounting my controller and gauge. Bought a simple Pillar pod and trimmed and heated until it fit.
Now that all the wiring and installation is done just fire her up. I programmed mine at 170° for LOW speed and 195° for HIGH speed. It�€™s as simple as holding the button for 3 seconds. The two speeds need to be at least 25° apart. I�€™ll re-adjust when temps warm up and the 180° T-stat is in. So far the temp hasn�€™t gone above 182° on the Autometer gauge and about a 1/4" below half mark on instrument panel. Pretty significant without a low T-stat but it is cold right now. Summer may change that. Wiring is where most can differ and again I suggest doing that first. Mine could have been easier if I mounted the SPAL unit in the engine compartment. But I like knowing the security it�€™s working. Although, I did find that it�€™s basically an advanced relay. It stays on with the ignition even if the battery + blows a fuse. This means the SPAL is on but the fan isn�€™t. I�€™ve been running a 20amp fuse cause I accidentally blew the 30amp that comes with it and no problems yet.
Well I hope everyone finds this useful and good luck with your install!
Written by: Robert Ancheta (StudlyblueIz)
More info on SPAL unit:
http://etxiow.accpaconline.com/media/FAN%2DPWM%2Epdf
http://www.fordmuscle.com/archives/2...cfan/index.php
http://www.geocities.com/smithmonte/...rkVIII_Fan.htm
Dakota3rdGEN
Last edited by Altair; Aug 9, 2008 at 06:04 PM.

Veteran
Joined: Apr 2007
Posts: 405
Likes: 0
From:
Great job. I have been wanting to add a water temp gauge to my setup. My flex-a-lite fan came with a probe that you push into the radiator and I'm not to crazy about it but its been working. Some time I may change it. The flex-a-lite fan really ain't that bad cost wise and its worth every penny I spent for it. The thing I don't like about the junk yard fan is no warranty. If anything goes wrong with my fan they send me a new one for free.

Banned
Joined: Dec 2003
Posts: 0
Likes: 1
Well, let's think here, what was it, 200 for the flex a lite?
You get a 25 dollar one from the junkyard, if it goes bad, you are out 25 dollars, go buy another one, 25 more dollars...
You can buy EIGHT fans, for the price of one flex a lite...
Uhmmm, I prefer this method...
And, hey Rob, I NEVER got any emails, I've been checking it like, every 15 - 30 minutes... nothing ever came in...
For the time, I'm gonna sticky this to the top...


Banned
Joined: Dec 2003
Posts: 0
Likes: 1
Ya, but initial cost is 8 times higher, therefore...
I still win.
I still win.
Trending Topics
Thread Starter
|
Veteran
Joined: Oct 2006
Posts: 383
Likes: 1
From: Raleigh, NC
ORIGINAL: shrpshtr325
i would take the third on method and make it a manual switch on in order to turn it on but thats just me and something iw ould do as a failsafe
i would take the third on method and make it a manual switch on in order to turn it on but thats just me and something iw ould do as a failsafe