


How to change rear brakes and rotors 2006 DGC


Thread Starter
|
Veteran
Joined: Feb 2010
Posts: 309
Likes: 3
From: va
 How to change rear brakes and rotors 2006 DGC
Thanks to help from Tizzy1 and this forum I have done rear disk brake pads and rotors on my 2006 Dodge Grand Caravan,
here is some pics and my advice, so use according to your own ability and at your own risk
warning, so brake materials might contain asbestos so you may want to use gloves, mask and eye protection for safety
it took me 45mins for the first side(taking pics)
2nd side took 25mins
then 20mins bleeding brakes
things you will Need
7mm Allen wrench socket
brake cleaner (I used 1 1/2 cans)
rotors,
pads
3/8 box wrench for bleeding the brakes
Dot 3 brake fluid
optional but I used,
caliper grease
and anti squeal grease
step 1
park the van on level surface, block the both sides of the front tires to prevent rolling
Loosen the Lug nuts
Make sure the Parking brake is Off
step 2
Jack up the back tire, (I only did one at a time) place it on jack stands
remove the tire
step 3
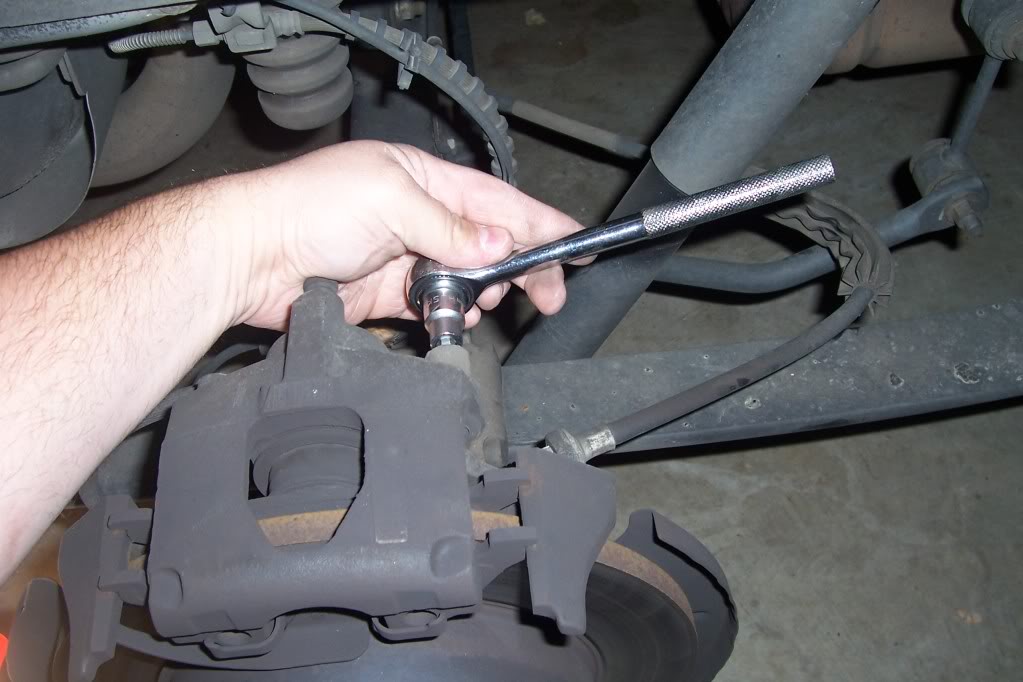
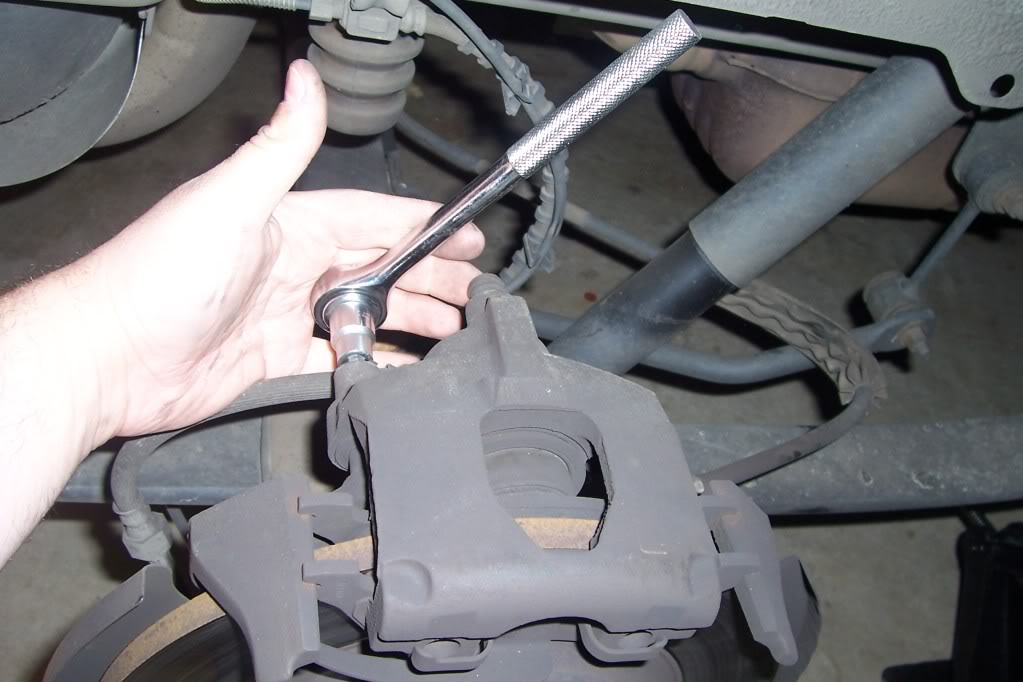
remove the two 7mm Allen head bolts
step 4
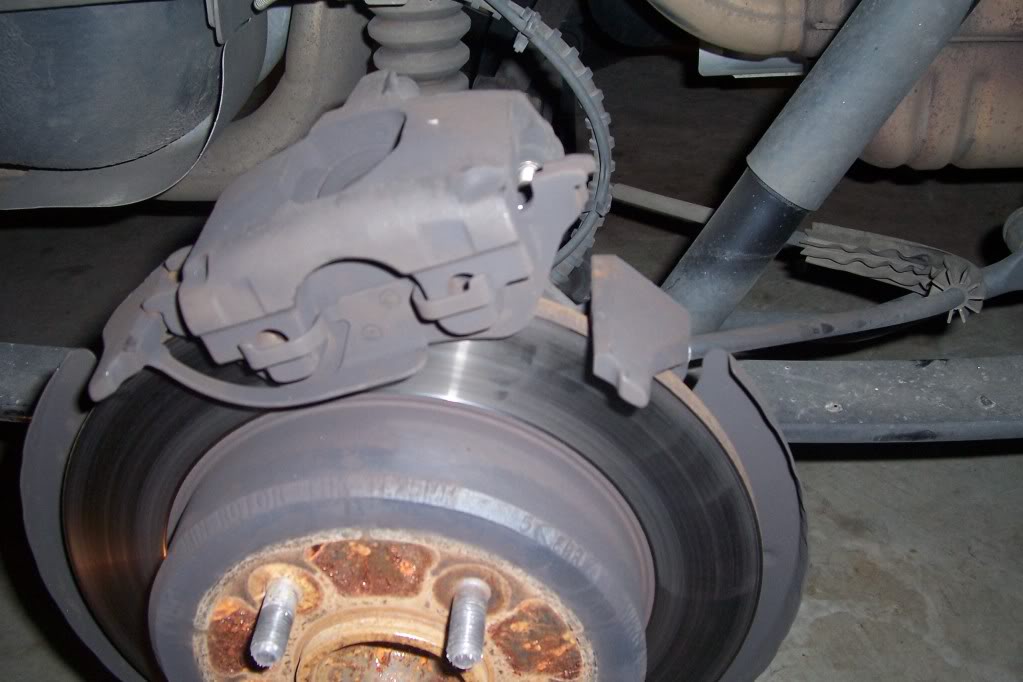
press the one side of the caliper up (press on the side opposite the metal spring type tab) takes a little force to get it loose, then it comes up freely
step 5
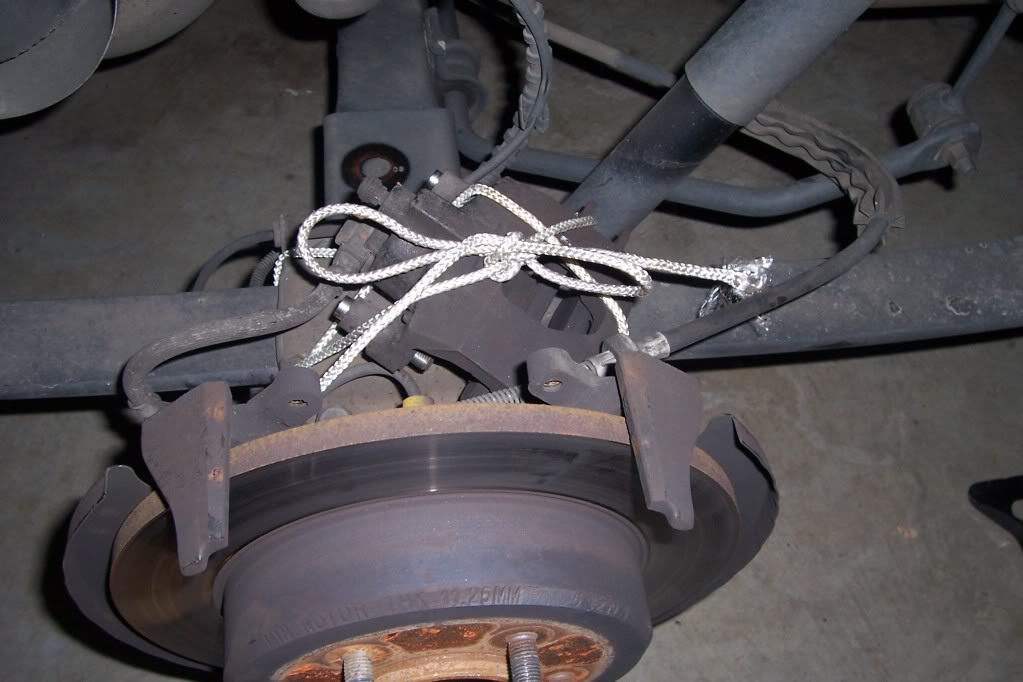
secure the caliper so that it is not hanging on the brake hose
step 6
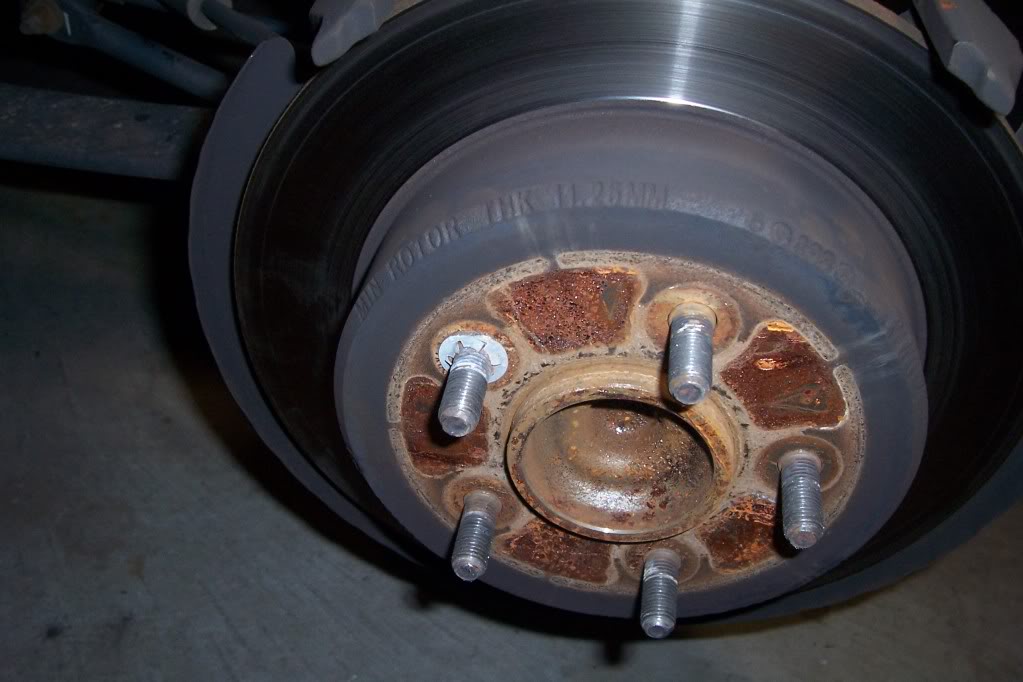
remove the rotors
they should pull right off, my first one came off easily
but the other side had never been removed, it still had a clip to hold the rotor on, simply remove it and discard it, that rotor I had to work to get off due to rust, I used a rubber mallet and whacked it along the center hub and on the back of the rotor being carefully not to hit anything else
step 7
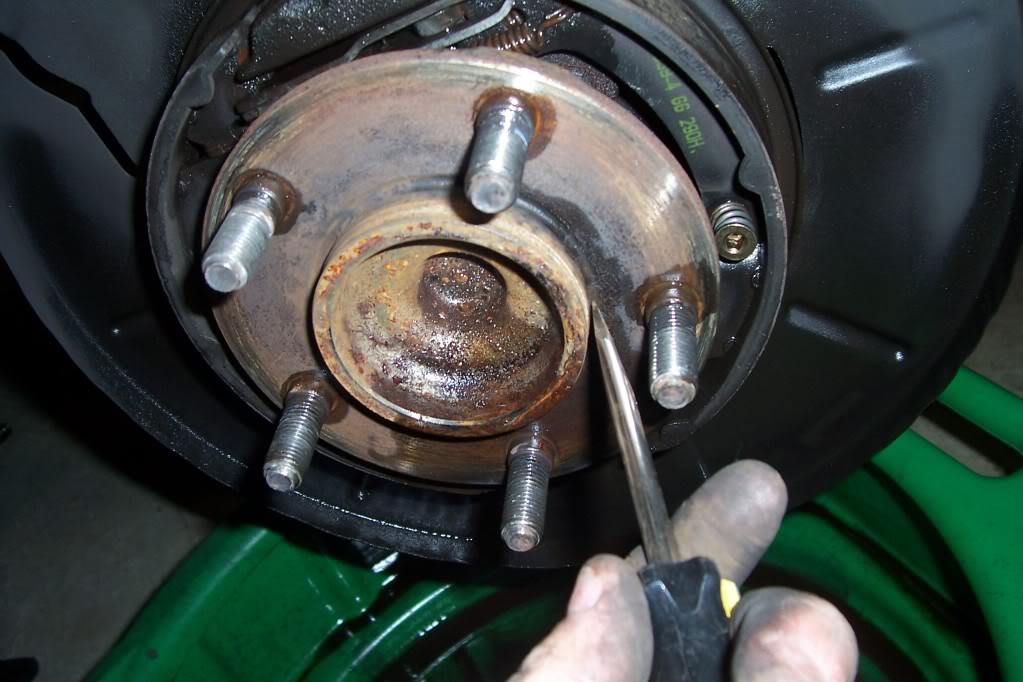
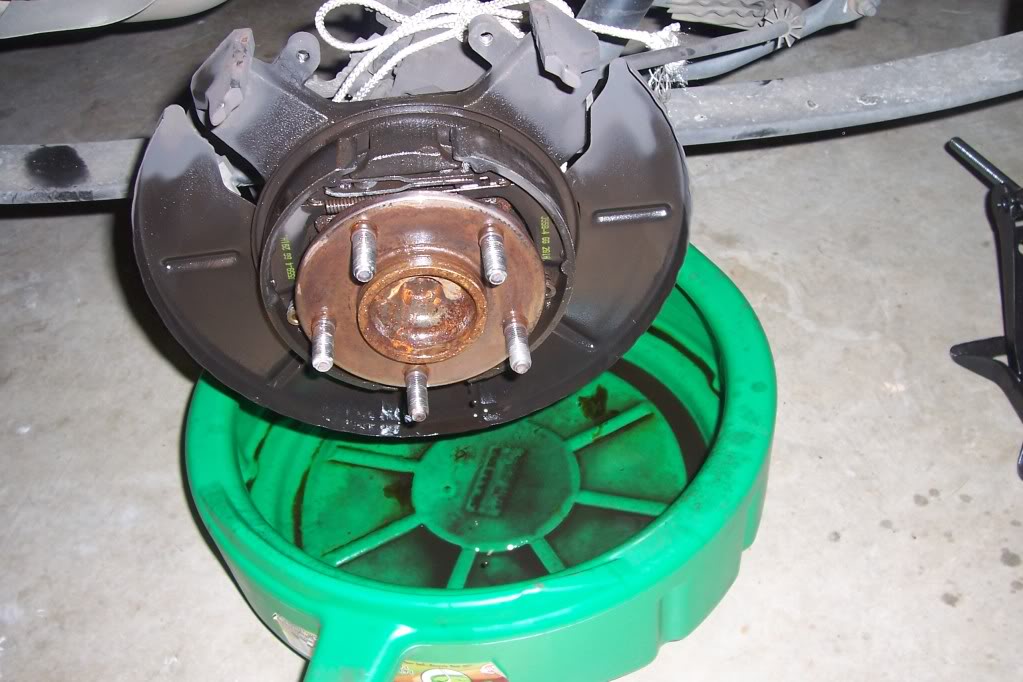
then I sprayed everything off with brake cleaner, being careful not to hit the rubber brake line
also when cleaning after that rotor came off I notice a slight build up off rust along the center hub, so I gently scrapped it off
step 8
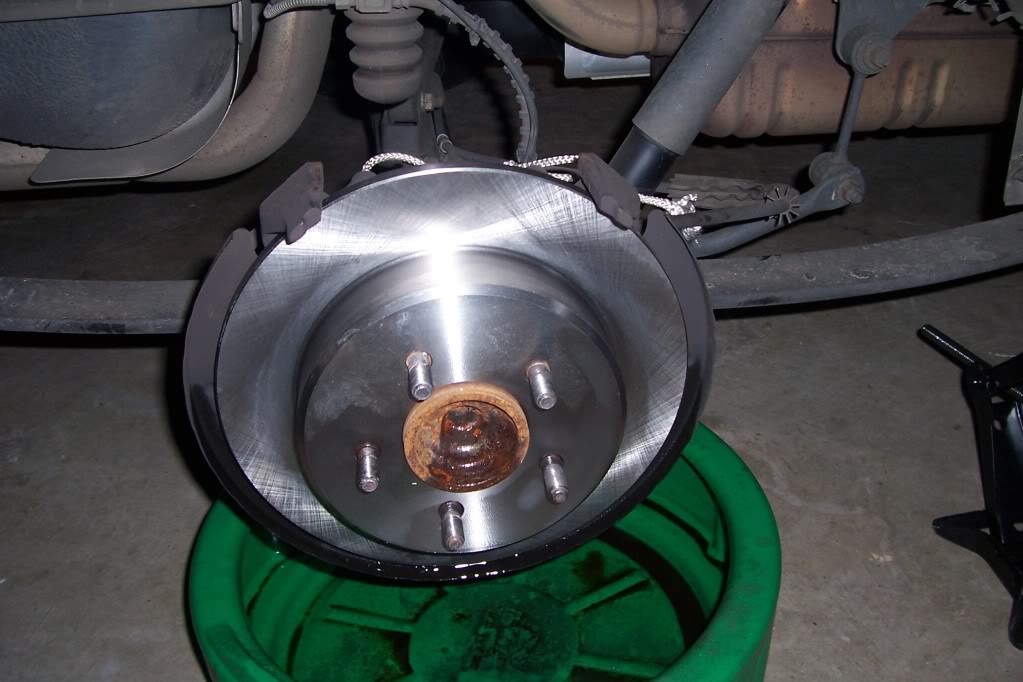
take the new rotor and spray it off with brake cleaner to get the packing oil off,
then simply slide it on to the wheel studs
step 9
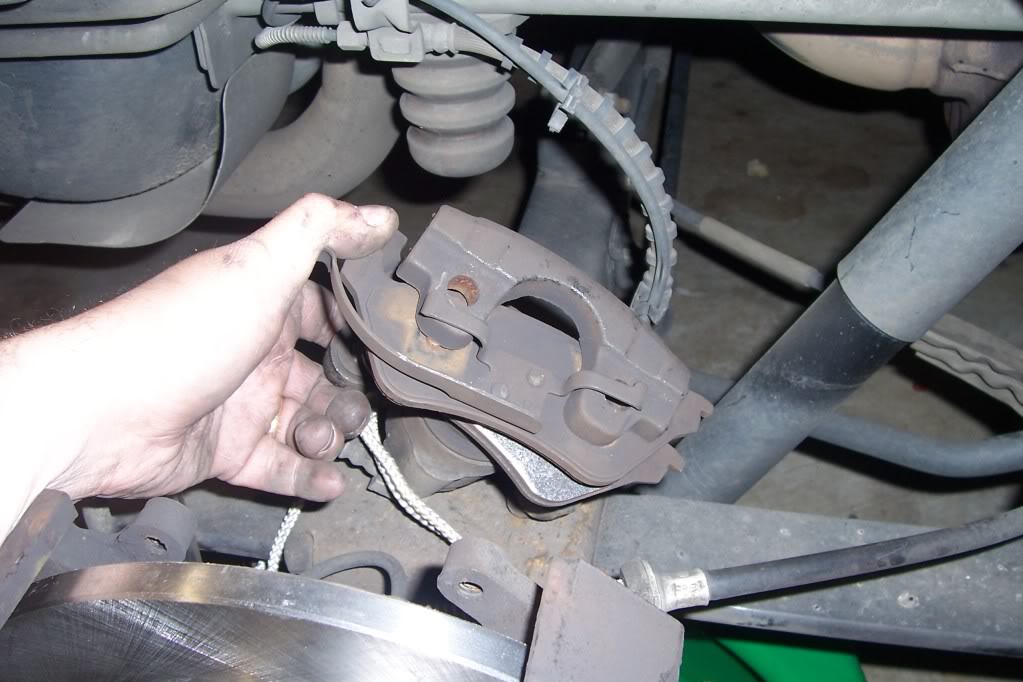
press down on the outboard side of the brake pad (it takes some pressure to get it to separate, then simply pull the pad off
step 10
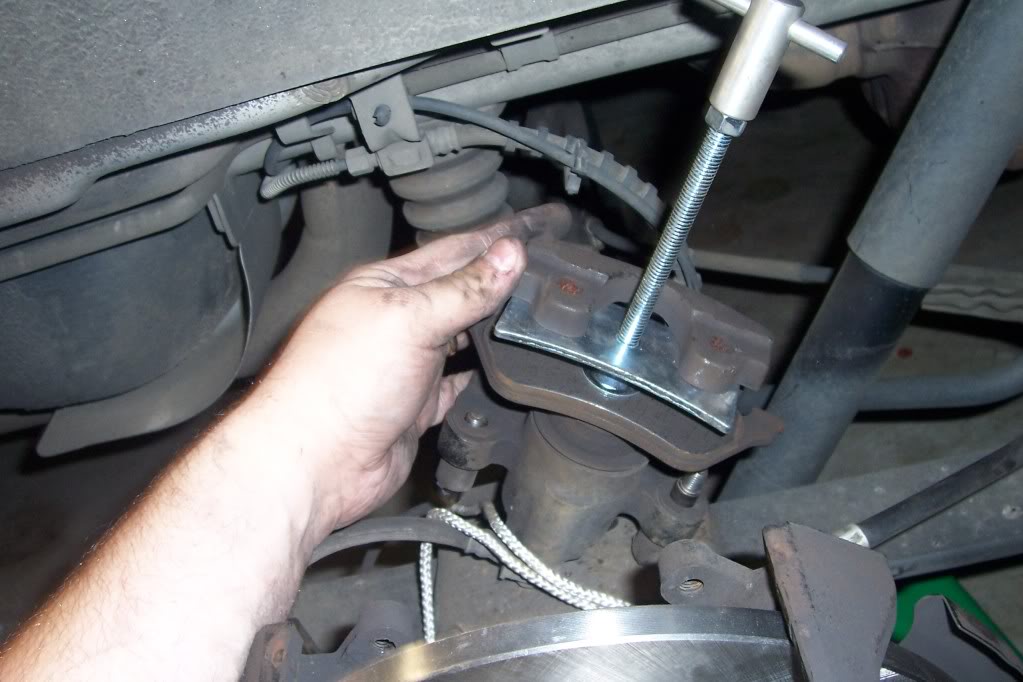
using the brake caliper compression tool on top of the old inboard brake pad, Slowly compress the brake caliper, you will want to keep an eye on the master cylinder to make sure it does not over flow, you may have to remove some fluid so it does not over flow
( I personally opened the brake bleeder valve just a crack to help)
step 11
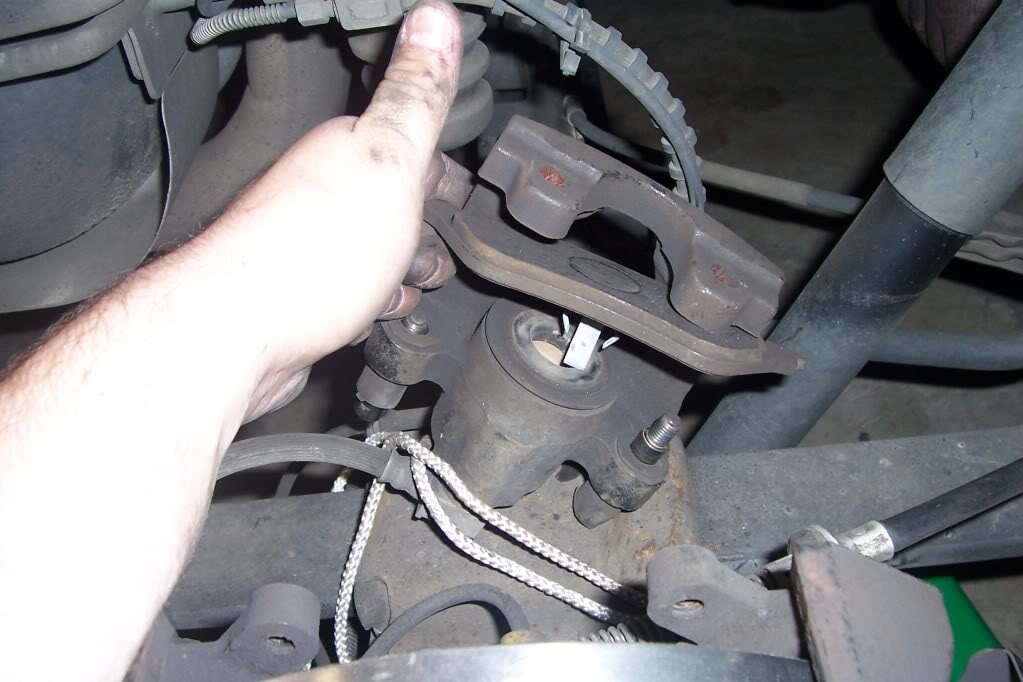
remove the inboard brake pad
step 12,
reinstall brake pads
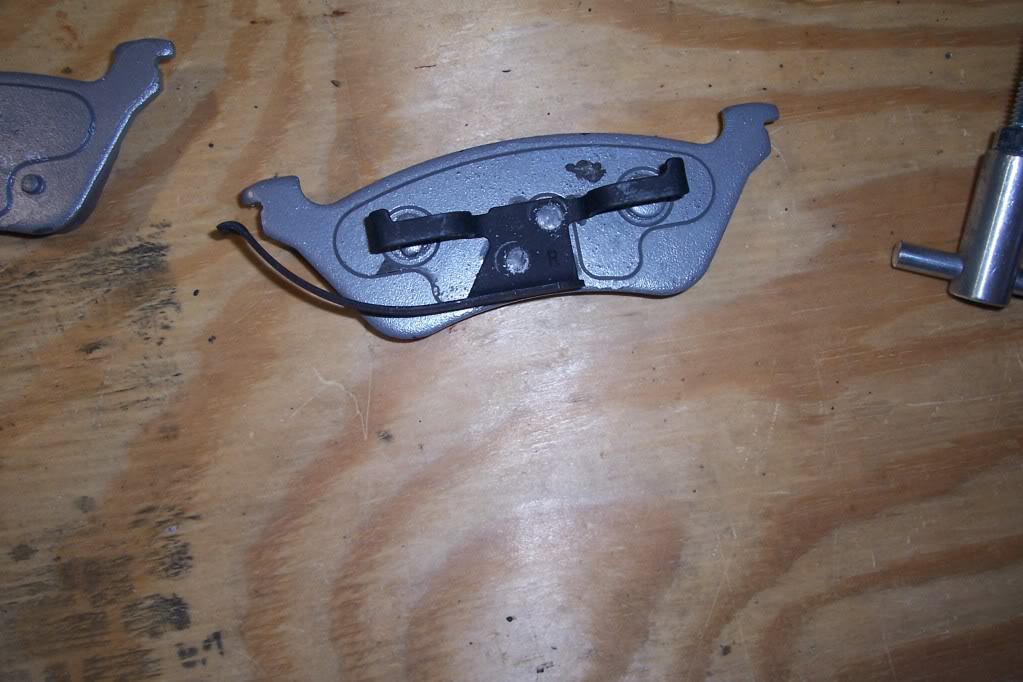
you can put the anti squall grease on the back side of the pads if you like on just the metal parts that make metal to metal contact,
also grease the 7mm caliper bolts with caliper grease
with my brake pads the both in-board pads were the same, but my out-board pads Had R and L marks on them so let you know which side they went
step 13
reinstall the caliper, this part takes some force, you start by in stalling the side that has the metal spring tab in, (hint, make sure the caliper bolts are pulled out a bit so they are not getting hung up when trying to push the caliper on)
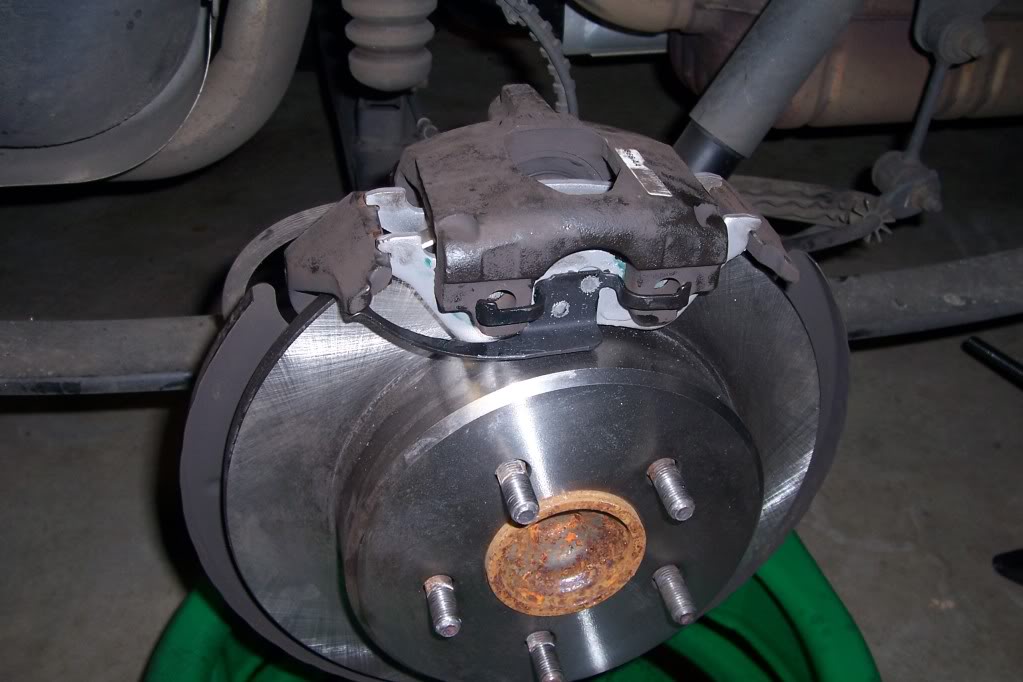
step 14
Tighten the 7mm Allen bolts to 26 ft/lbs
put tire on, snugging the lugs, Lower van and do other side
after finishing other side and lowering van, tighten Lugs to 95 ft/lbs
step 15
bleed brakes, starting at DR, PF, PR, DF using your 3/8 brake bleeder wrench
here is some pics and my advice, so use according to your own ability and at your own risk
warning, so brake materials might contain asbestos so you may want to use gloves, mask and eye protection for safety
it took me 45mins for the first side(taking pics)
2nd side took 25mins
then 20mins bleeding brakes
things you will Need
7mm Allen wrench socket
brake cleaner (I used 1 1/2 cans)
rotors,
pads
3/8 box wrench for bleeding the brakes
Dot 3 brake fluid
optional but I used,
caliper grease
and anti squeal grease
step 1
park the van on level surface, block the both sides of the front tires to prevent rolling
Loosen the Lug nuts
Make sure the Parking brake is Off
step 2
Jack up the back tire, (I only did one at a time) place it on jack stands
remove the tire
step 3
remove the two 7mm Allen head bolts
step 4
press the one side of the caliper up (press on the side opposite the metal spring type tab) takes a little force to get it loose, then it comes up freely
step 5
secure the caliper so that it is not hanging on the brake hose
step 6
remove the rotors
they should pull right off, my first one came off easily
but the other side had never been removed, it still had a clip to hold the rotor on, simply remove it and discard it, that rotor I had to work to get off due to rust, I used a rubber mallet and whacked it along the center hub and on the back of the rotor being carefully not to hit anything else
step 7
then I sprayed everything off with brake cleaner, being careful not to hit the rubber brake line
also when cleaning after that rotor came off I notice a slight build up off rust along the center hub, so I gently scrapped it off
step 8
take the new rotor and spray it off with brake cleaner to get the packing oil off,
then simply slide it on to the wheel studs
step 9
press down on the outboard side of the brake pad (it takes some pressure to get it to separate, then simply pull the pad off
step 10
using the brake caliper compression tool on top of the old inboard brake pad, Slowly compress the brake caliper, you will want to keep an eye on the master cylinder to make sure it does not over flow, you may have to remove some fluid so it does not over flow
( I personally opened the brake bleeder valve just a crack to help)
step 11
remove the inboard brake pad
step 12,
reinstall brake pads
you can put the anti squall grease on the back side of the pads if you like on just the metal parts that make metal to metal contact,
also grease the 7mm caliper bolts with caliper grease
with my brake pads the both in-board pads were the same, but my out-board pads Had R and L marks on them so let you know which side they went
step 13
reinstall the caliper, this part takes some force, you start by in stalling the side that has the metal spring tab in, (hint, make sure the caliper bolts are pulled out a bit so they are not getting hung up when trying to push the caliper on)
step 14
Tighten the 7mm Allen bolts to 26 ft/lbs
put tire on, snugging the lugs, Lower van and do other side
after finishing other side and lowering van, tighten Lugs to 95 ft/lbs
step 15
bleed brakes, starting at DR, PF, PR, DF using your 3/8 brake bleeder wrench


All Star
Joined: Aug 2010
Posts: 843
Likes: 1
From: Toronto Canada
want a job? within a week u'll be doin them in 10 mins a side lol.
Should always crack the bleeders dont want to push crap from the wheel cylinder/caliper back up
nice job saved you some bucks
hey Vern, how'd you keep yer boot on when your shoelace is holding up the caliper? lol
Should always crack the bleeders dont want to push crap from the wheel cylinder/caliper back up
nice job saved you some bucks
hey Vern, how'd you keep yer boot on when your shoelace is holding up the caliper? lol
Last edited by hemi4spd; Oct 30, 2010 at 06:15 AM.
Thread Starter
|
Veteran
Joined: Feb 2010
Posts: 309
Likes: 3
From: va
yeah I cracked the bleeders cause of pushing the stuff out of the caliper
job, would be nice, I keep pretty busy with my son, oh and this last weekend, I replaced a cv joint on my jeeps front drive shaft, so I got some nice greasy hands from that
job, would be nice, I keep pretty busy with my son, oh and this last weekend, I replaced a cv joint on my jeeps front drive shaft, so I got some nice greasy hands from that
Last edited by trophyslayer; Oct 30, 2010 at 01:48 PM.

Registered User
Joined: May 2007
Posts: 10
Likes: 0
Great pics. Doing my front brakes on my 2004 Caravan SXT for the first time next week. Can someone please confirm I should use the same tools (i.e. the 7 mm allen?) and if any steps should be different? Thanks in advance!
Last edited by weigojmi; Jun 19, 2011 at 07:48 AM.
Thread Starter
|
Veteran
Joined: Feb 2010
Posts: 309
Likes: 3
From: va
I am not sure, but I think it is basicly the same, I did take the front drives brakes off last month when I replaced a wheel clyinder and I believe it was still the 7mm allen head bolts, for me to remove replace the wheel stud and re-assemble was 1hr 15mins,
if you want to be sure you can get something like this (I got mine from Harbor freight http://www.harborfreight.com/9-piece...7880-html.html


Champion
Joined: Jan 2010
Posts: 3,023
Likes: 5
This is how I do it, I take off the caliper and the caliper addapter on one piece. The bolts for the addapter are 21mm. Then I can take out the pads and do the cleaning with them assembled. Just seems easier to me.

Trending Topics
Registered User
Joined: May 2007
Posts: 10
Likes: 0
Curious where you guys place the jack stands for the front? A mechanic suggested the control arms but I'm not sure how that works if just doing one wheel at a time? Assume you never want to use just one jack stand...