

Need help putting that signature together? Lookie Here!

Alright, since some people need help getting pictures in their signatures, here is a little DIY on how to do it.
First, go here from any page on DF in which you are signed in on:
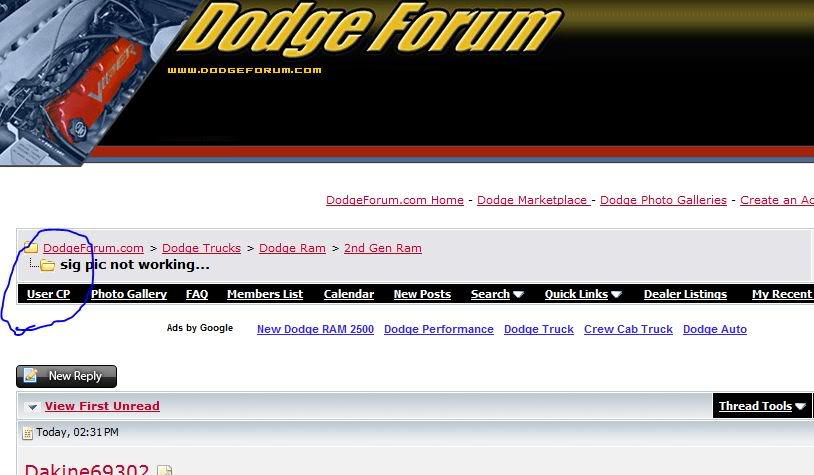
Now, on the left hand side, there should be a bunch of links at your disposal.
Go to the one circled.
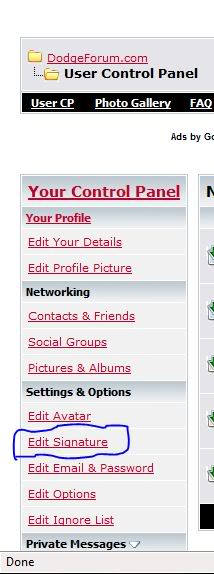
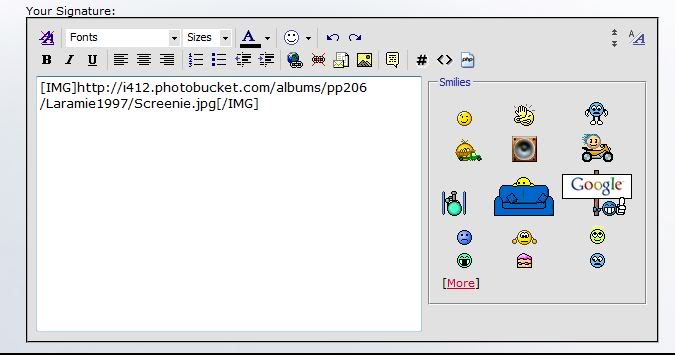
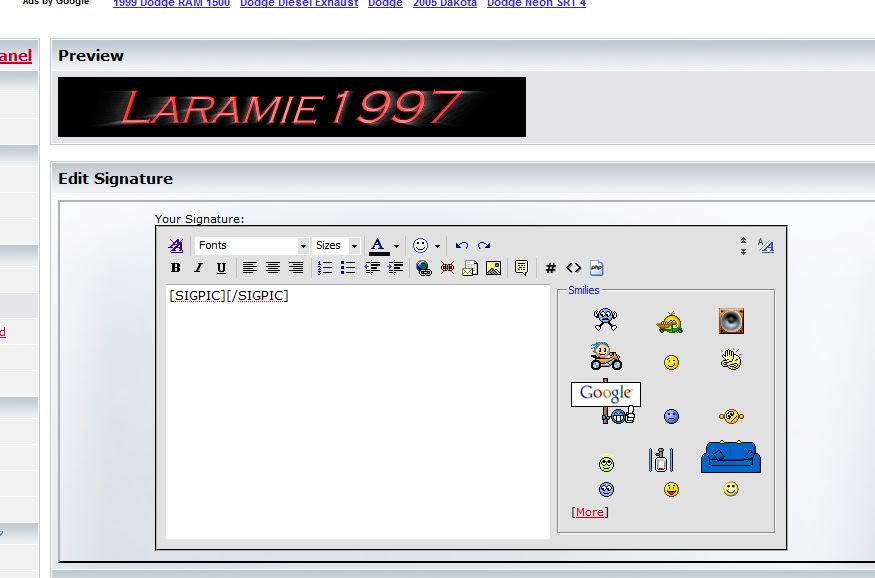
When you click on that, you should be taken to this page:
At this page, you have a lot of different options at your disposal to add to your sig.
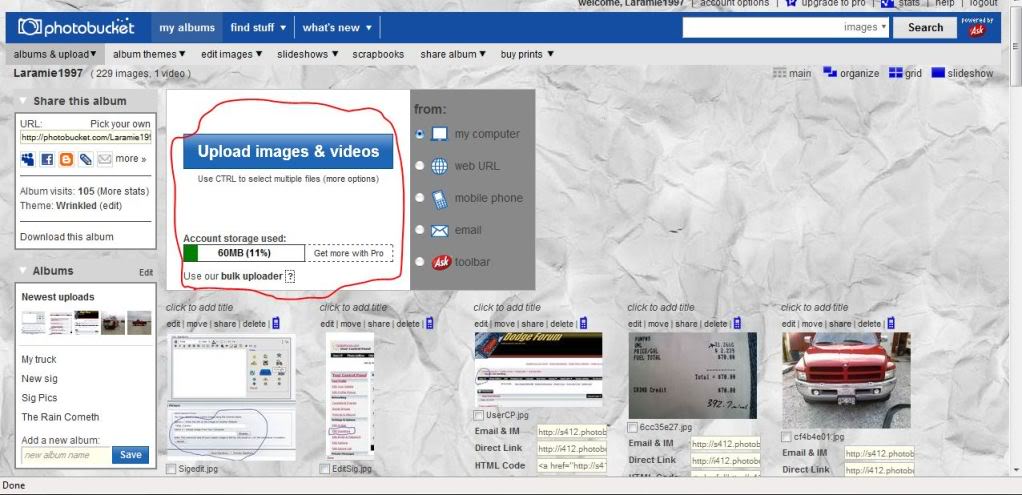
Many people will go to www.photobucket.com and create an account and go that route. Here are the steps:
1. Go to www.photobucket.com
2. Here is the screen:

Go to the portion that I have marked, and either sign in, or create an account. once you create an account, this is the albums and upload page you will be taken to.
3. You are going to click the upload pictures to upload a picture.
4. A new box will pop up:
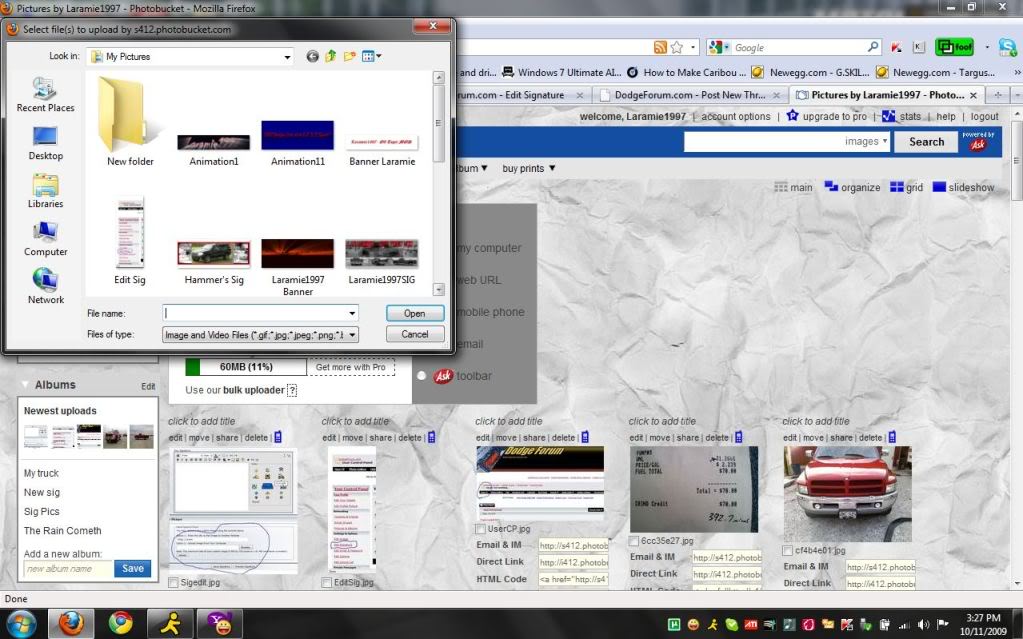
The default location will be My pictures from your PC. It is now up to you to know where your picture is located on your PC. Once you find it, select it, and click Open. The box will close, and this is what you should see:
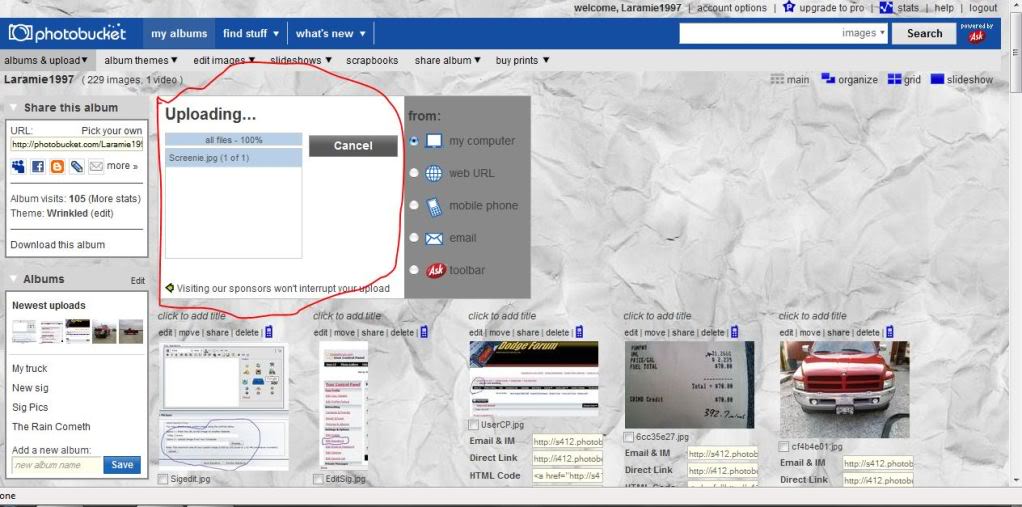
Depending on your connection speed, it should only take a few seconds to upload a picture.
Once the photo has been uploaded, you will be taken to this page:
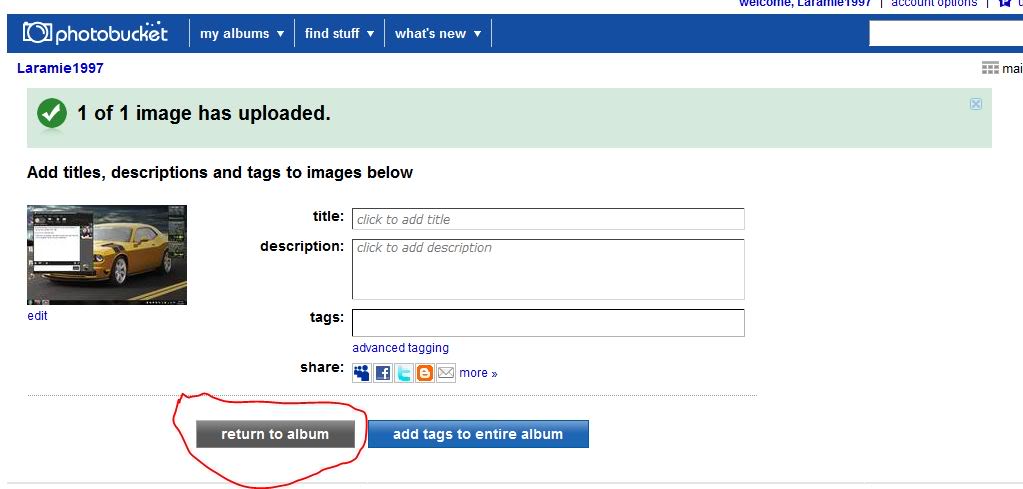
This is the edit tags page. I usually don't add tags to my pictures, so I just click return to album.
Now, if you have done everything correctly up to this point, you should see your pic on the album page.
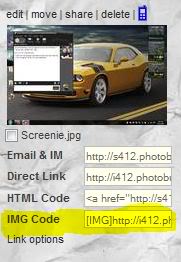
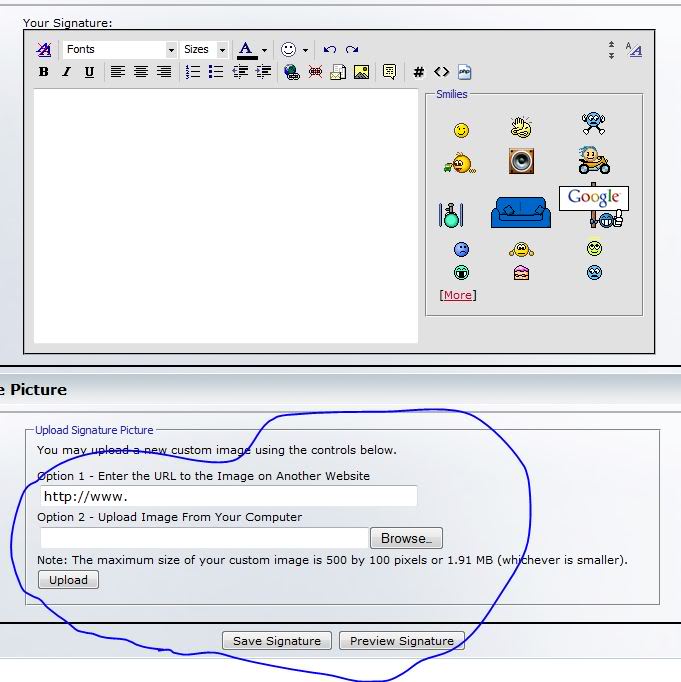
The portion in yellow is the IMG code that you need to copy and paste into your sig box.
Then you can scroll down and click save signature.
Make sure that your pic is within the specified photo limit of 500X250.
Your other option to upload pics is to just upload them to the Forum from your PC.
When you are back to this page:
Click the browse button, and a new box should pop up.
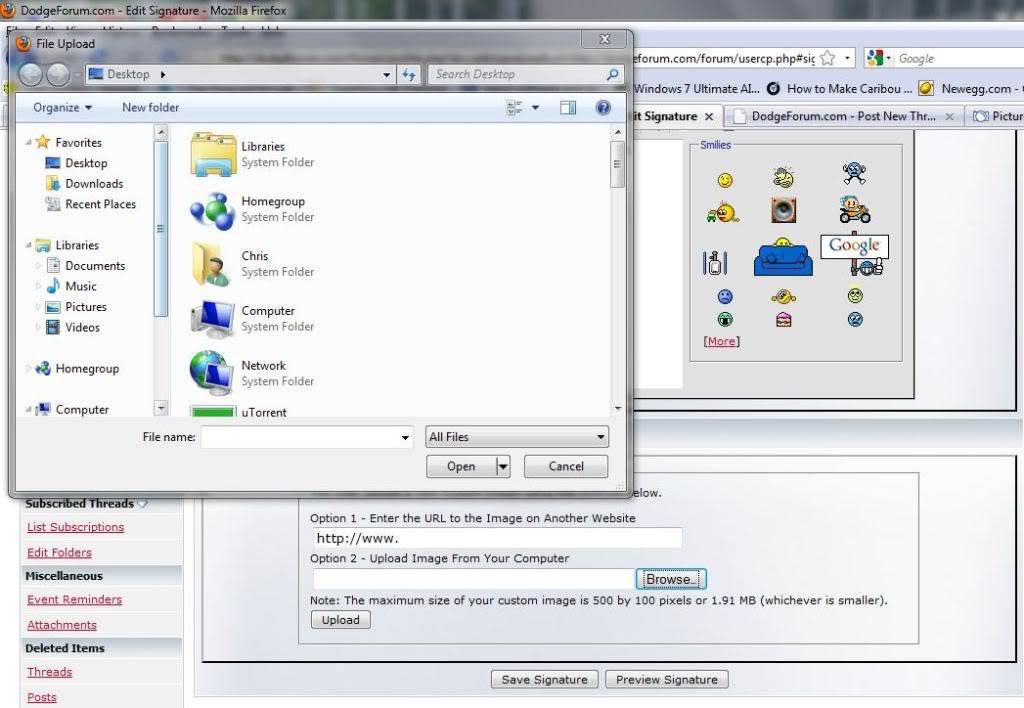
Again, find the pic that you want to upload from your PC.
Make sure that the file size is smaller than 500X100 or 1.91 MB. Which ever one comes first.
Once you find the pic, click open, and your screen should look like this:
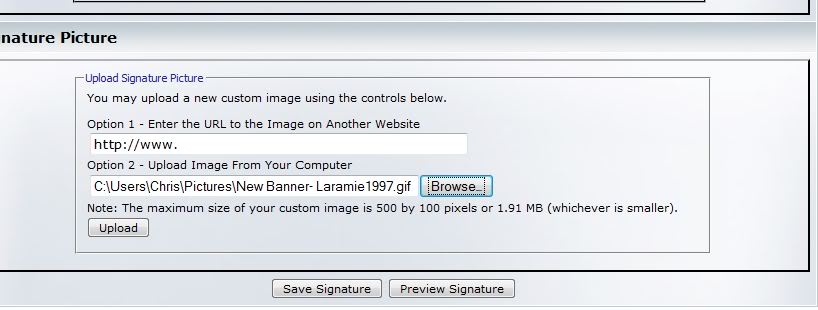
Next, you need to click upload.
Once the pic is uploaded, your sig box will look like this:
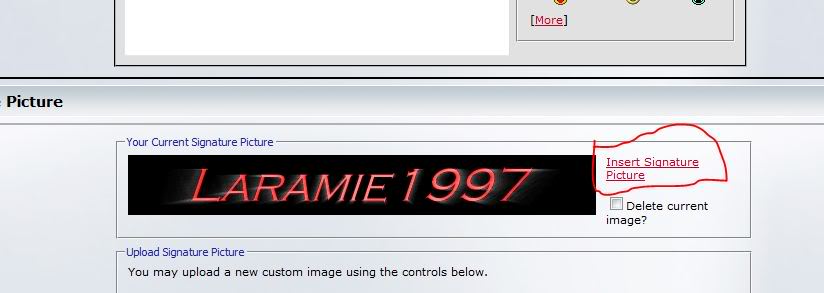
Here, you need to click on the "Insert Picture into sig link".
This is what the sig edit box will look like:
Now you need to click "Save"
And if you did everything correctly, you now have a picture under your posts.


First, go here from any page on DF in which you are signed in on:
Now, on the left hand side, there should be a bunch of links at your disposal.
Go to the one circled.
When you click on that, you should be taken to this page:
At this page, you have a lot of different options at your disposal to add to your sig.
Many people will go to www.photobucket.com and create an account and go that route. Here are the steps:
1. Go to www.photobucket.com
2. Here is the screen:
Go to the portion that I have marked, and either sign in, or create an account. once you create an account, this is the albums and upload page you will be taken to.
3. You are going to click the upload pictures to upload a picture.
4. A new box will pop up:
The default location will be My pictures from your PC. It is now up to you to know where your picture is located on your PC. Once you find it, select it, and click Open. The box will close, and this is what you should see:
Depending on your connection speed, it should only take a few seconds to upload a picture.
Once the photo has been uploaded, you will be taken to this page:
This is the edit tags page. I usually don't add tags to my pictures, so I just click return to album.
Now, if you have done everything correctly up to this point, you should see your pic on the album page.
The portion in yellow is the IMG code that you need to copy and paste into your sig box.
Then you can scroll down and click save signature.
Make sure that your pic is within the specified photo limit of 500X250.
Your other option to upload pics is to just upload them to the Forum from your PC.
When you are back to this page:
Click the browse button, and a new box should pop up.
Again, find the pic that you want to upload from your PC.
Make sure that the file size is smaller than 500X100 or 1.91 MB. Which ever one comes first.
Once you find the pic, click open, and your screen should look like this:
Next, you need to click upload.
Once the pic is uploaded, your sig box will look like this:
Here, you need to click on the "Insert Picture into sig link".
This is what the sig edit box will look like:
Now you need to click "Save"
And if you did everything correctly, you now have a picture under your posts.