

Dug into the rear AC system today


Thread Starter
|
Rookie
Joined: May 2012
Posts: 95
Likes: 0
From: Miami, Florida

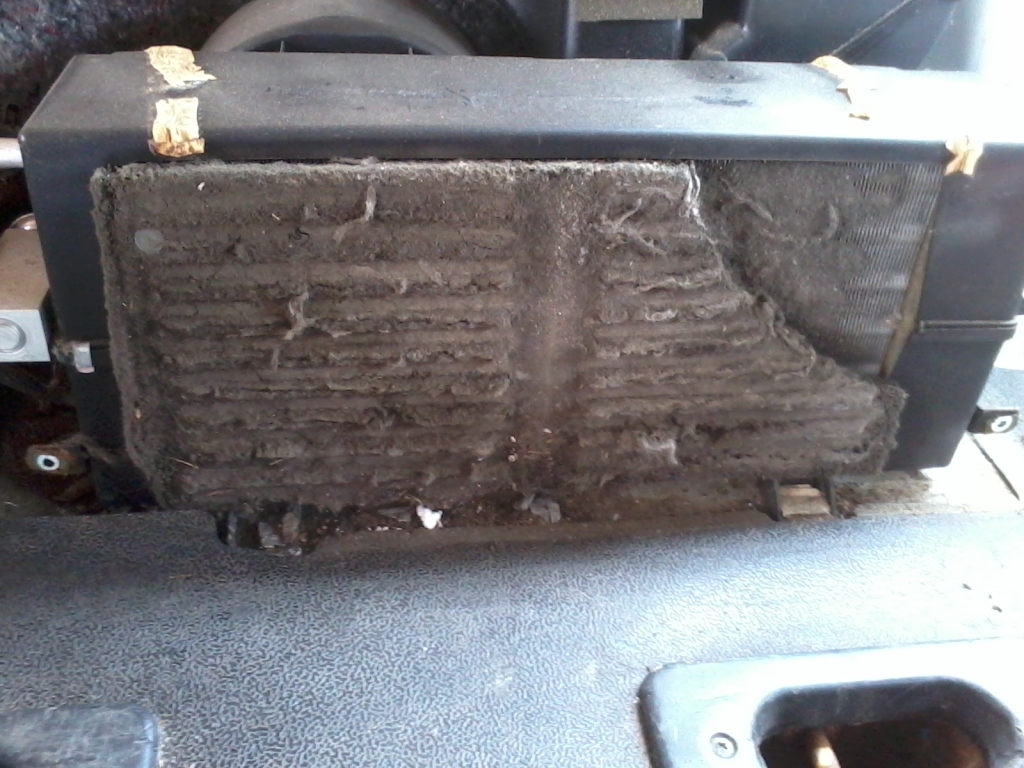

Looks like somebody with half a brain designed this system. Notice that the evaporator has a foam filter in front of it, and it actually did its job. The opening you see in the corner appears to be intentional, as a kind of bypass, in case the filter gets too dirty. Simply removing the dirty filter and passing the shop-vac over the exposed section of the core had it clean as you see in the "after" picture.
The good news is that the evaporator core appears to be free of any leaks. The expansion block and evaporator block appear to have been joined incorrectly, creating a leak. I have the complete new gasket set, so I shouldn't have a problem putting it back together in working order. But, before I do anything else, I am going to pull the evaporator and take it to a professional shop to be leak tested.
The hotter months are coming to Florida, and I'll be hauling alot of people to a lot of fine, fun, Miami Beach events, so I need to have my AC in order.

The new and improved front AC is working like a champ, so it can only get better from here (I hope).


Record Breaker
Joined: Dec 2005
Posts: 1,412
Likes: 2
From: Nashville
That rear unit was engineered and designed by Denso. My company has the rear actuator on the back side of the unit's duct work.
That rear RAD operates as both the AC core and a heater core. It's known as a combi core. The combi core is expensive to ever replace unless you have a donor.
BTW, I tossed out the foam filter thingy. I spend time always to clean the van once a month and the rear unit gets a cleaning too.
That rear RAD operates as both the AC core and a heater core. It's known as a combi core. The combi core is expensive to ever replace unless you have a donor.
BTW, I tossed out the foam filter thingy. I spend time always to clean the van once a month and the rear unit gets a cleaning too.
Last edited by stev; May 23, 2012 at 01:07 AM.

Registered User
Joined: May 2012
Posts: 4
Likes: 0
From: NE Oklahoma
Well, you got me to thinking about the fact that I hadn't cleaned mine since I had it and the temps are starting get into the mid 90's here already. We bought it with 3500 miles on it in 1999 and it was emaculate. Funny, how they don't stay that way when you have children riding in them. Anyway, the method I used to get to the rear coil was not printed in any manual and some of the words I used shouldn't be either! It seems on the Regency Conversions, they don't care if you ever get back to it again. But after about 30 minutes of taking out multiple screws and then prying heavily, I was finally able to remove the small nicly covered box around the blower, combi core and ducting that goes into the overhead . It had a thin film of dust and debris over the surface, but nothing like the one in the picture. Also, there was no filter pad in front of the combi core. The combi core seemed quite a bit smaller than the one in the picture also. I ran out of daylight and didn't think to take pictures. I will take pictures of the sequence, the next time I clean it, if I live long enough to get that ambitious again.
Last edited by DLT1960; May 28, 2012 at 11:55 PM.
Thread Starter
|
Rookie
Joined: May 2012
Posts: 95
Likes: 0
From: Miami, Florida
I am taking the combi-core out to have it pressure tested. If it flunks, there is a very young van just like mine that just turned up in our local U-Pullit. I already hit that van up for those ultra long AC lines to replace the ones that were cut on my van.
You better believe it. The heat is on, and I am not playing any games where the AC system is concerned.
Assuming the combi-core checks out, and all of the intermediate plumbing between the long AC hoses and the combi-core check out, I will be replacing the AC compressor with a new (not rebuilt) component, replacing the drier, flushing all of the lines, and putting the whole system on 4 inches of vacuum for 24 hours, before adding fresh Dupont Suva R134 and synthetic compressor lube.
Trending Topics
All Star
Joined: Mar 2012
Posts: 808
Likes: 0
If it really dies, you could consider a ProAir...
http://www.proairllc.com/rear_mounted_evaporators.html
The 1100 series unit was designed for the luxury van conversion market. Its slim compact size provides reliable heating and air conditioning while maintaining a very quiet operation. The three speed permanent magnet motor provides quiet, long lasting operation.
Model: 1100
Part#: 50 001 223BTU Cooling 15,000/CFM 290BTU Heating 24,000/CFM 290Dimensions: 17.25" x 6" x 12"9.5 Amps @ 13.5 VoltsWeight: 9 lbs.

