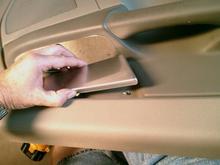
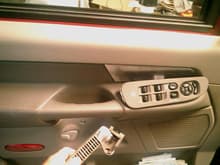
To remove the door trim panel, you will need a #2 phillips, a 1/8" flat tip screwdriver, and a T30 torx or a 10mm socket (I think). I used the flat tip to gently pry up the power window/lock panel and the lock button dish. There are two phillips screws to remove, one behind the door handle and one near the mirror. My left door did NOT have any at the bottom of the panel, but my right door did (#2 philips). The T30 torx fits the screw that holds the door handle to the mechanism. Once these are removed, and the power plugs removed from the window/lock panel, life the entire door trim panel up and out!