Dodge Ram 1994-2001: How to Replace Radiator
Replacing your radiator isn't as hard as it sounds, and it will save you a bundle in repairs in the long run.
This article applies to the Dodge Ram 2nd Generation (1994-2001).
A bad radiator will quickly destroy your engine if you don't get it fixed straight away. Performing a coolant flush at the recommended intervals will help ensure that your engine and cooling system lasts a very long time. If you have found a coolant leak coming from the radiator, you should replace it as soon as possible. Using the stop leak products is only a short term fix at best. Eventually, the stop leak products can easily cause other clogs in places where you do not want any blockage. This can lead to an overheated and blown engine. Watch your thermostat closely and get that radiator replaced sooner rather than later. A professional is going to charge a significant fee to replace your radiator, but fortunately, the job is not too tough to take on yourself, saving you a bundle of cash.

Materials Needed
- Catch can for old fluid
- Radiator flush kit (optional, but good practice before installing new equipment)
- Ratchet and 10mm socket
- New radiator hoses (optional)
- Plastic push clips (if needed)
- Open-end box wrench
Step 1 – Disconnect battery and check radiator temp
Before working in your engine compartment, it is always best practice to disconnect the battery.
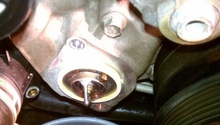
Make sure the truck is completely cooled. Never work on or replace a hot radiator. The cap is under pressure and hot fluid will blast, causing serious burn injuries. Remove the radiator cap to release any cooling system pressure.

Figure 1. Always disconnect your battery before working in the engine compartment. 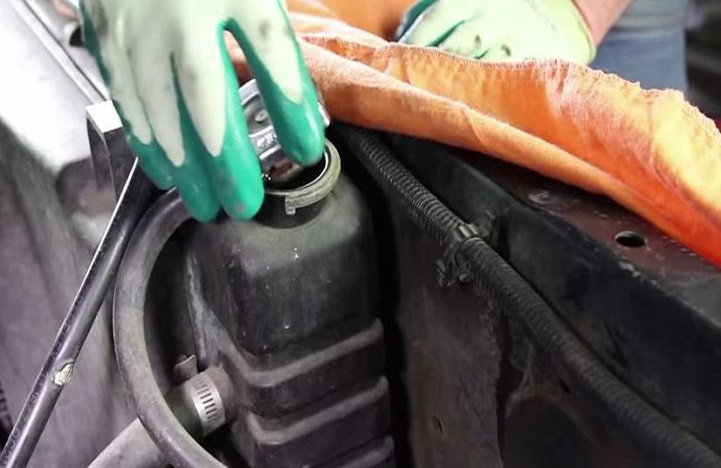
Figure 2. Never remove the radiator cap or hoses when the engine is still hot.
Step 2 – Drain the old fluid
Flushing the system is a good idea before you replace the radiator, unless this was done very recently. A flush kit makes the job super easy and is a very nominal cost.
- Make sure you clean up any spills and put the old fluid in an approved container. Any oil change shop should take your old fluid at no charge to you.
- Remove the drain plug on the bottom of the radiator to get any residual fluid out.
- Remove the two drain bolts on the bottom-center of the engine block near the mounts to remove any residual fluid from there as well.
Warning
Antifreeze is deadly to pets and very toxic to humans. It is also very slick. Clean up any spills immediately; cat litter works well to absorb the nasty stuff.
(Related Article: How to Flush Radiator Coolant - DodgeForum.com)
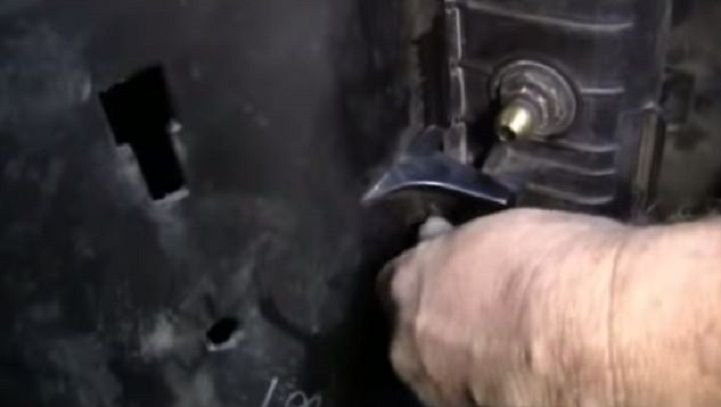
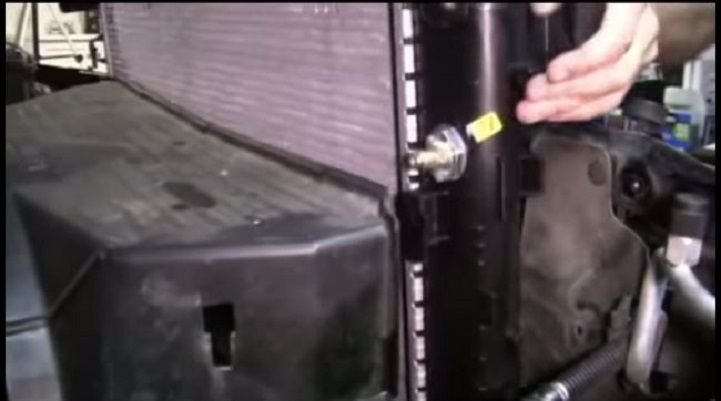
Step 3 – Disconnect radiator hoses and transmission cooler lines
Your manual may not indicate that a transmission line is connected to the radiator, but it is. Removing the tranny cooler lines is the most difficult part of this job. Take care when removing the quick disconnects, as they are under tension and can fly away rather easily. You can "cap" the line with aluminum foil to prevent much leakage, but be prepared to add more transmission fluid after you install the new radiator.
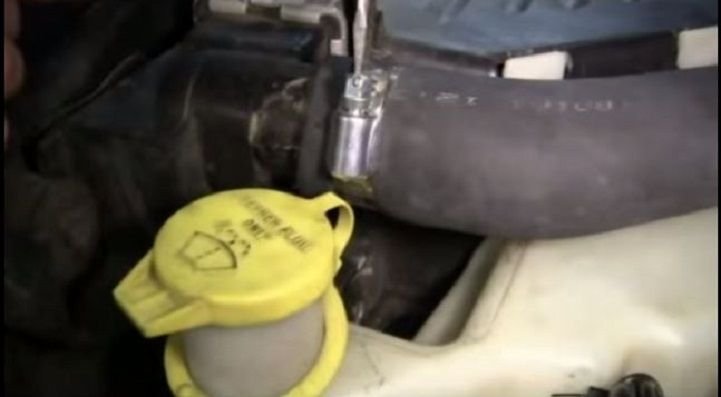
Figure 4. Remove the upper and lower radiator hoses. 
Figure 5. Use an open-end box wrench to disconnect the transmission line. The other line will have a quick disconnect attachment for it.
Step 4 – Remove the cooler recovery tank
The cooler recovery tank is connected with one hose. Disconnect the hose, and the tank is just clipped into the bracket. Press the clip to release the tank and remove it.

Step 5 – Remove washer fluid tank
The washer fluid tank is as easy to remove as the coolant recovery tank, and in a very similar fashion. It has an additional electrical quick connect wiring harness that needs to be removed as well.

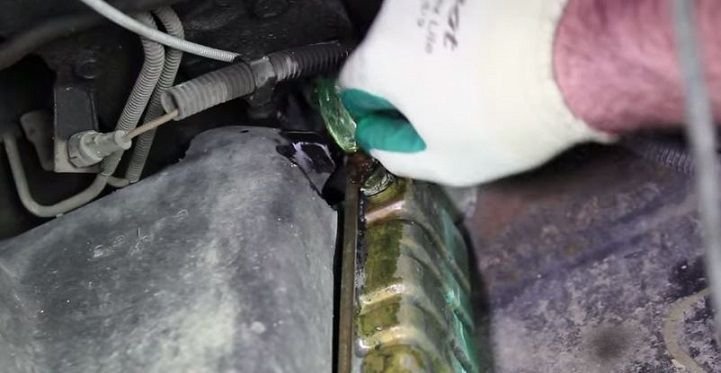
Step 6 – Remove fan shroud
Remove the four bolts (two on each side) of the fan shroud. Push the fan shroud back; it does not have to be completely removed. You will not need to remove the fan to remove and install the radiator. You may have splash shields on either side of the radiator that will need to be removed as well. These are only fastened on with plastic clips that can be snipped off and replaced.
Step 7 – Remove radiator
The old radiator is ready to be pulled. There are two 10mm bolts that mount the radiator to the frame. These are located on the top of the radiator to the front of the frame. Use a ratchet with and 10mm socket with no extension to remove these bolts. The radiator can now be lifted straight up and out. Take care to not bang against the fan blades when removing the old or inserting the new radiator.

Step 8 – Install new radiator
Be sure to follow the installation instructions that came with your new radiator. It should be a direct fit with little issues with installing to the OEM connections. You may have to pre-assemble the new mounting hardware into the old rubber mounts, fan shroud clips, and transmission cooler line connections depending upon the new radiator you purchased and how it was packaged.
Step 9 – Reconnect all the hoses and lines
The new radiator install is basically the reverse process of taking the old one out.
- Replace the two mounting bolts to the top-front of the new radiator.
- Replace the splash guards if your vehicle came with them.
- Reconnect the fan shroud with the four bolts.
- Replace the windshield fluid pump and reservoir. Make sure to reconnect the low fluid sensor and electrical connections.
- Replace the coolant overflow tank (now is a great time to wash it out so as to not contaminate the new fluid with this old nasty sludge).
- Replace the transmission cooler line hoses (be sure to check your transmission fluid level and replace as needed).
- Replace the lower and upper radiator hoses (now is a good time to just replace them with new ones).
- Make sure you have replaced the engine block drain plugs.
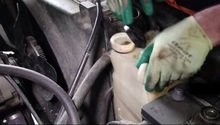
- Fill your radiator and reservoir tank with new, manufacturer approved antifreeze.
- Replace the battery cable.
- Start your truck with the heater on high for about five minutes or until the engine is completely warmed up. Watch your thermostat reading. Add more antifreeze as needed.

Featured Video: How to Replace Radiator
Related Discussions
- Replacing My Radiator - DodgeForum.com
- Can I Replace the Radiator Myself? - DodgeForum.com
- Replacing Radiator - DodgeForum.com
- How to Replace My Radiator - DodgeForum.com