

1988 Dakota Project?

Thread Starter
|
All Star


Joined: Jun 2011
Posts: 858
Likes: 2
From: Pinellas County, FL
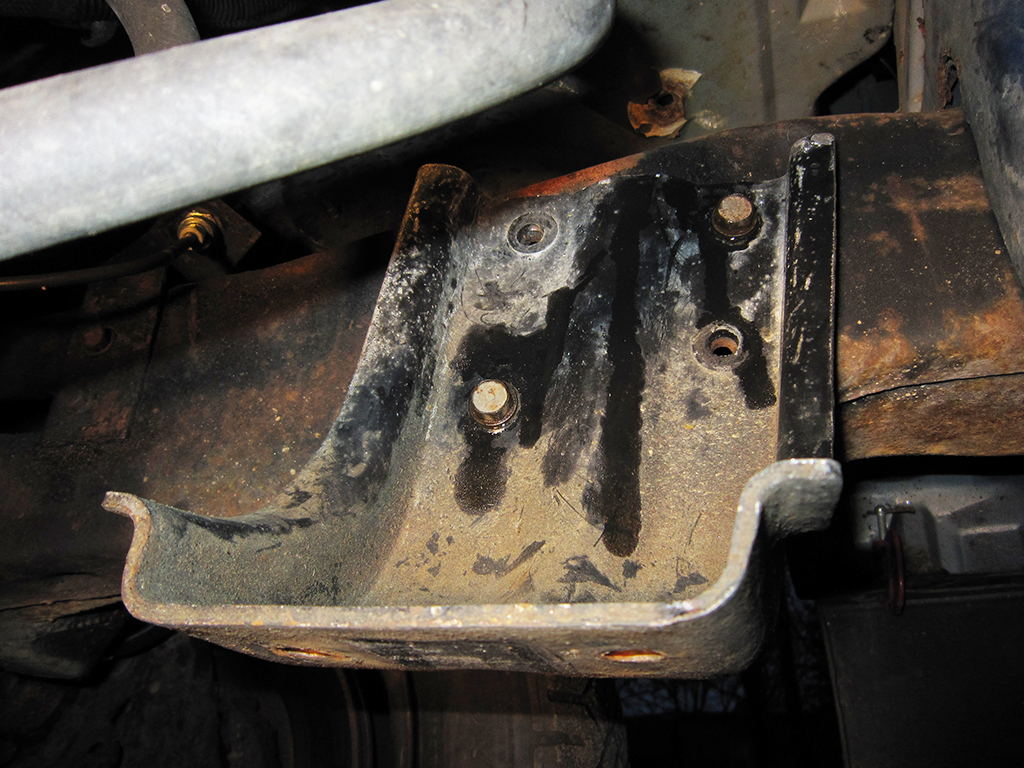
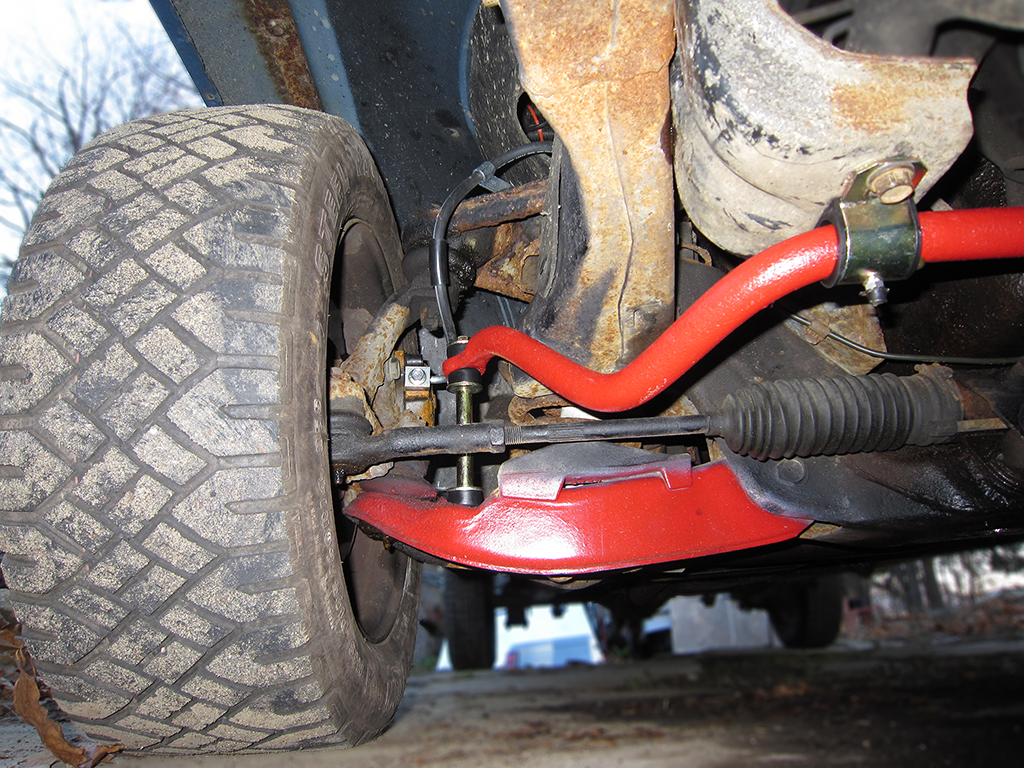
I finally installed that sway bar and hardware I purchased a while back, I was worried about the weld nuts on my frame and mounting the "L" brackets. As you can see I only used 2 of the 4 on each bracket to get them squared, the remaining two were drilled a bit wider and I used larger bolts with a nut on the back inside the frame rail:
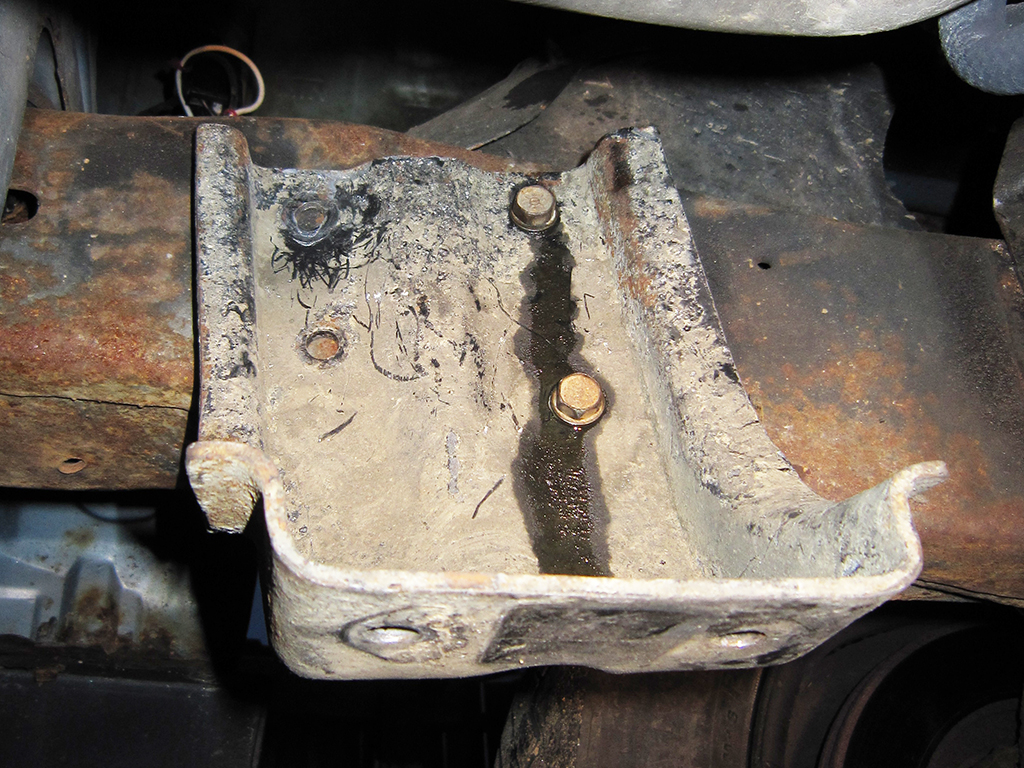
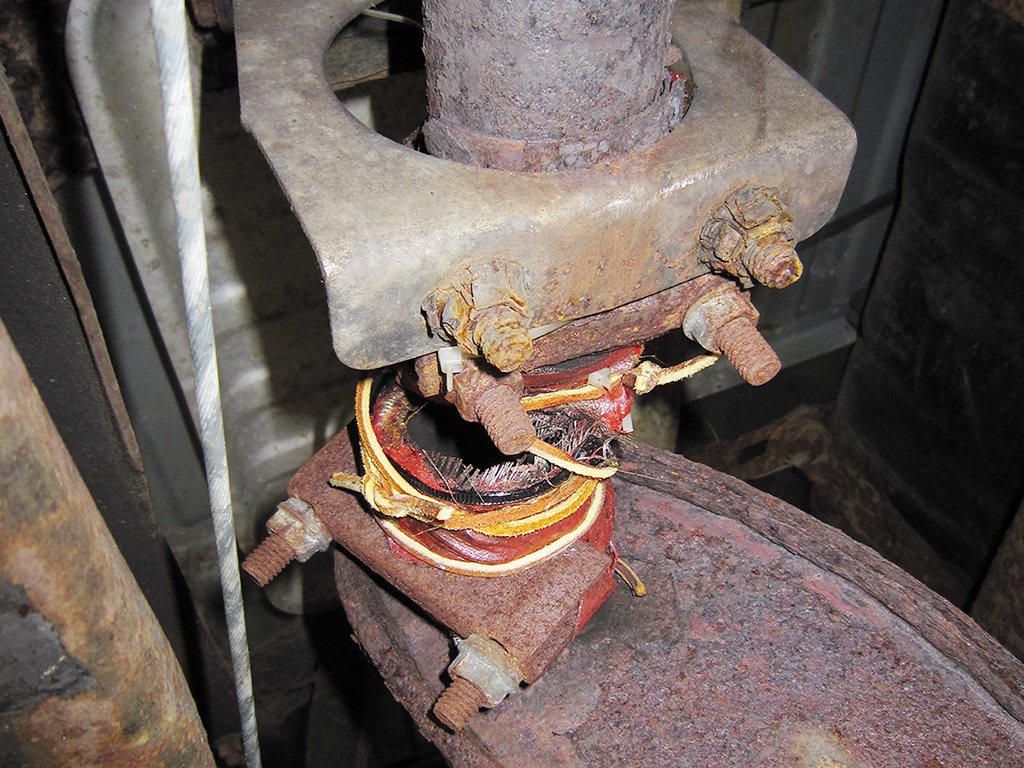
The other side was a bit more complicated, since the truck was hit and my grandfather had a new piece of a frame welded onto the passengers side the mount holes on the extension did not line up. Luckily it was welded right in the middle between the 4 bolt holes so I was able to use the 2 on the original frame and drill new ones on the extension to stay squared:
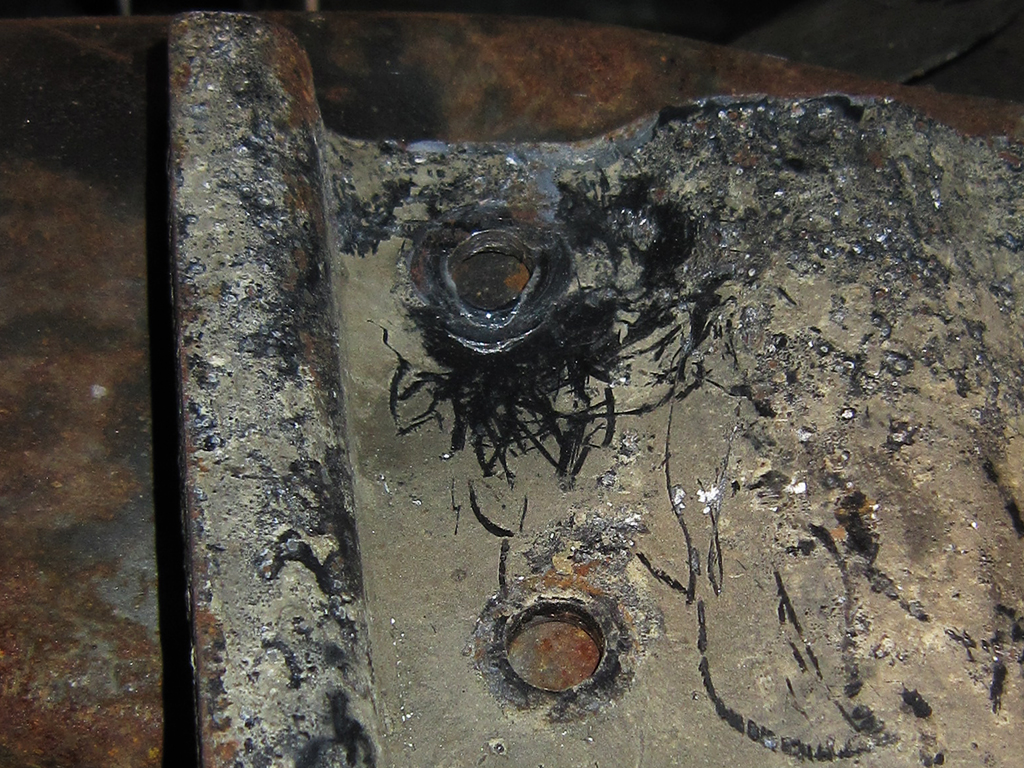
This is the only entry point to install nuts so I was only able to do the lower bolt on each side, I may have to punch a new hole to access the top bolts:

When I installed it I had to pull it to the drivers side all the way for the end links to be vertically straight, not sure what the deal there was:
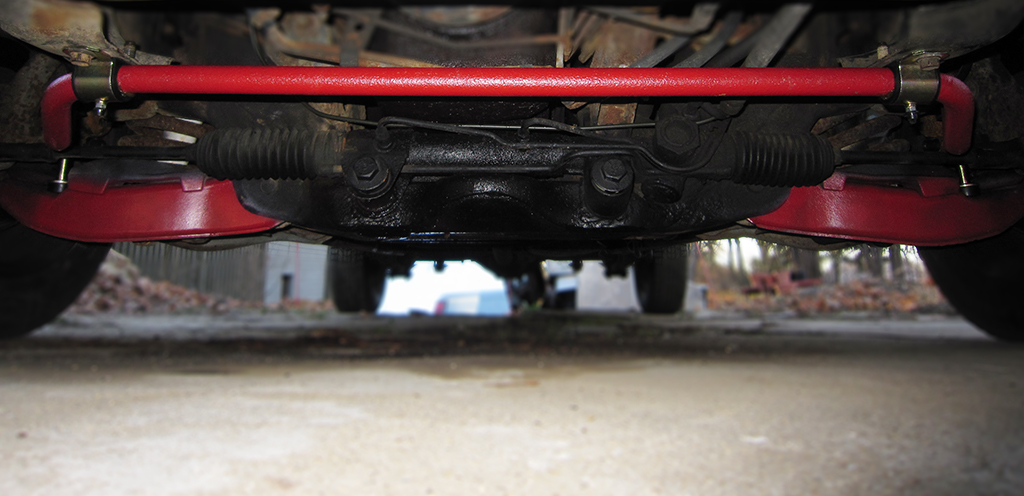
I'm a bit concerned about how close the new brake line elbows are to the bar ends!
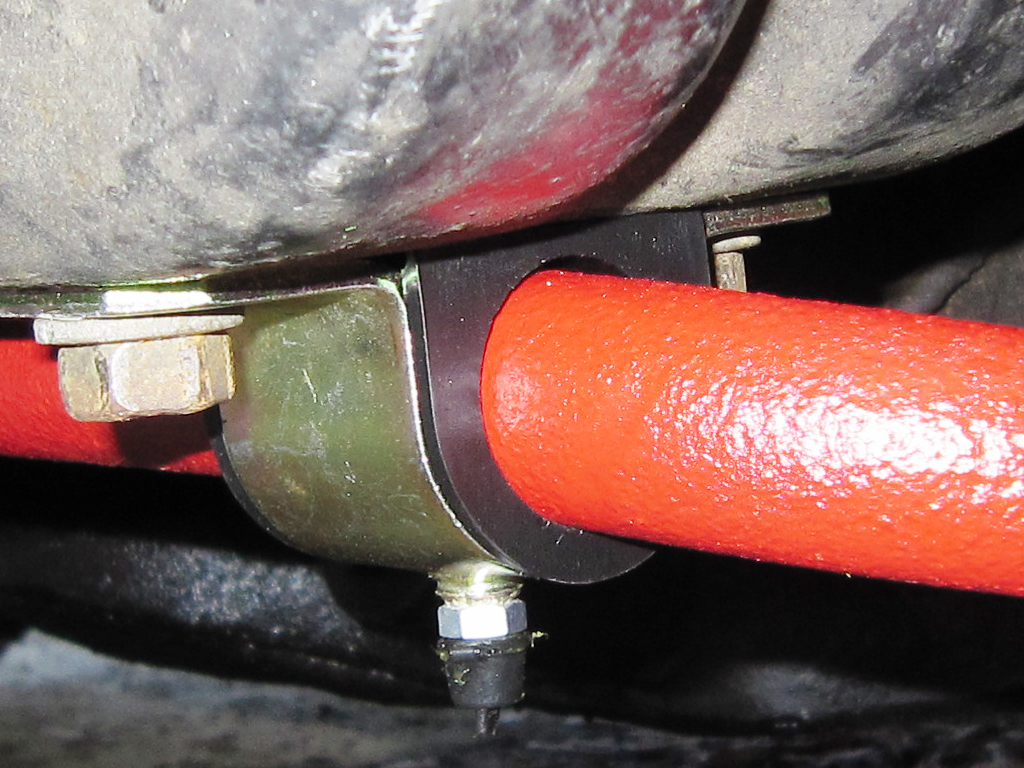
Appeared to be more of a gap in the passengers side bushing then the drivers, here is the drivers....then passengers it's a bit hard to see in pictures:

Two steps forward, one step back...at least it's not the other way around (knock on wood). I really put a whole new definition to getting every last dollar out of your muffler haha. The tailpipe broke off shortly after I bought the truck and there was not enough left to bolt on a turn down and then it slowly got louder over time, I felt some air around the seams so I used this fiberglass tape that heats up and glues holes and that worked for a while then the ****er fell off going uphill and **** got loud quick just the muffler hanging there:
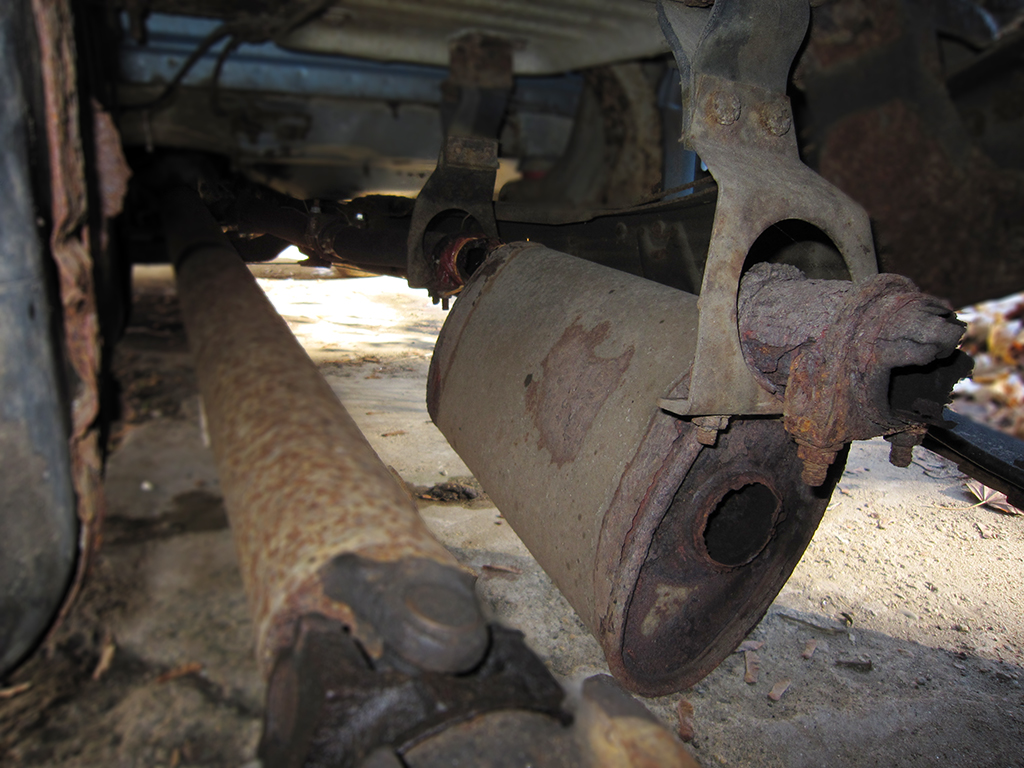
I could not see this hole on the top, so I have been driving it without a muffler....or cat this week. Loud as **** and I hope it is not bad for my truck (burning valves, etc) it's seem to have lost high rpm power without any back pressure, some low end power too but it has extended power in the lower rpms. To my knowledge the factory system is mostly 2" and I slipped a pipe over the header down pipe and connecting pipe between the cat and muffler a while back to bypass the cat. I ordered a 2.25" Thrush Welded muffler that has a centered inlet and dual offset outlets, I may run 2.25" pipe from the muffler right up to in front of where the cat used to be; header down pipe. This is going to cause mounting issues though with that stock connecting pipe that ran between the cat and muffler it has a bend in it to compensate the stock offset muffler inlet so running one long new pipe will eliminate this, plus the less bends the better, so I will have a straight system with no cat restriction and a 1/4" larger pipe and muffler should be just enough back pressure that I guess I apparently need with a V6?

The other side was a bit more complicated, since the truck was hit and my grandfather had a new piece of a frame welded onto the passengers side the mount holes on the extension did not line up. Luckily it was welded right in the middle between the 4 bolt holes so I was able to use the 2 on the original frame and drill new ones on the extension to stay squared:
This is the only entry point to install nuts so I was only able to do the lower bolt on each side, I may have to punch a new hole to access the top bolts:
When I installed it I had to pull it to the drivers side all the way for the end links to be vertically straight, not sure what the deal there was:
I'm a bit concerned about how close the new brake line elbows are to the bar ends!
Appeared to be more of a gap in the passengers side bushing then the drivers, here is the drivers....then passengers it's a bit hard to see in pictures:
Two steps forward, one step back...at least it's not the other way around (knock on wood). I really put a whole new definition to getting every last dollar out of your muffler haha. The tailpipe broke off shortly after I bought the truck and there was not enough left to bolt on a turn down and then it slowly got louder over time, I felt some air around the seams so I used this fiberglass tape that heats up and glues holes and that worked for a while then the ****er fell off going uphill and **** got loud quick just the muffler hanging there:
I could not see this hole on the top, so I have been driving it without a muffler....or cat this week. Loud as **** and I hope it is not bad for my truck (burning valves, etc) it's seem to have lost high rpm power without any back pressure, some low end power too but it has extended power in the lower rpms. To my knowledge the factory system is mostly 2" and I slipped a pipe over the header down pipe and connecting pipe between the cat and muffler a while back to bypass the cat. I ordered a 2.25" Thrush Welded muffler that has a centered inlet and dual offset outlets, I may run 2.25" pipe from the muffler right up to in front of where the cat used to be; header down pipe. This is going to cause mounting issues though with that stock connecting pipe that ran between the cat and muffler it has a bend in it to compensate the stock offset muffler inlet so running one long new pipe will eliminate this, plus the less bends the better, so I will have a straight system with no cat restriction and a 1/4" larger pipe and muffler should be just enough back pressure that I guess I apparently need with a V6?
Thread Starter
|
All Star
Joined: Jun 2011
Posts: 858
Likes: 2
From: Pinellas County, FL
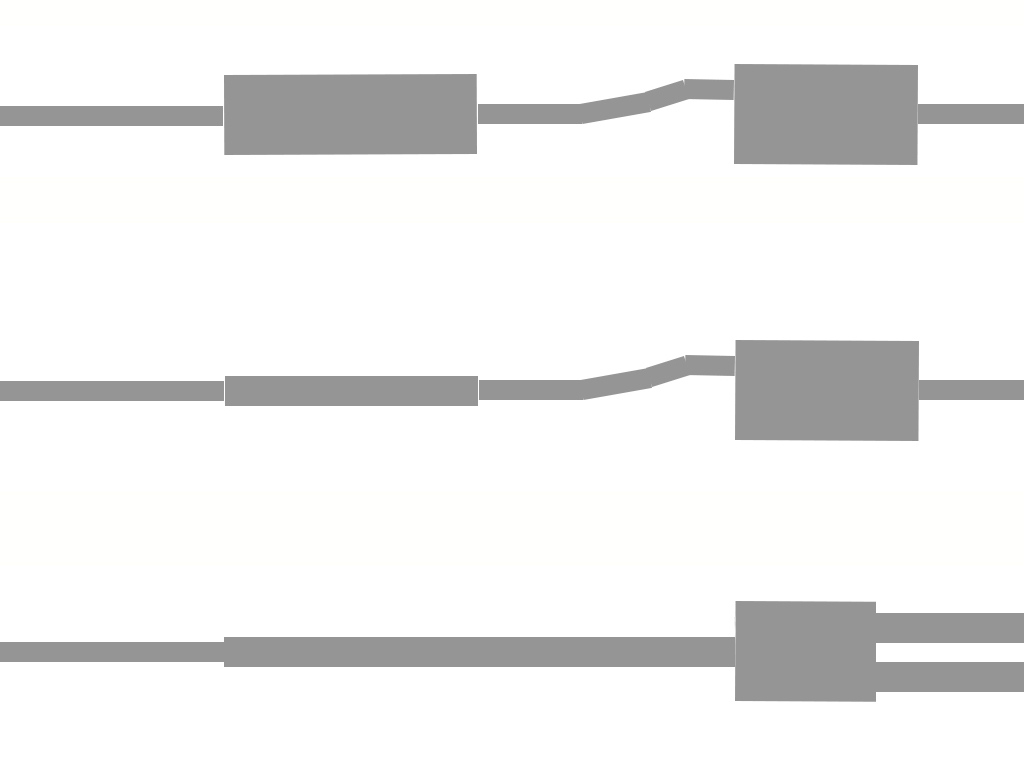
So this is the plan the top is the factory exhaust system, the middle is what I did when I replaced the cat with a larger pipe, and the bottom is what I am going to do removing the patch pipe and S bend pipe which also centers it for my new muffler:
I bought 10ft of 2.25" OD pipe:

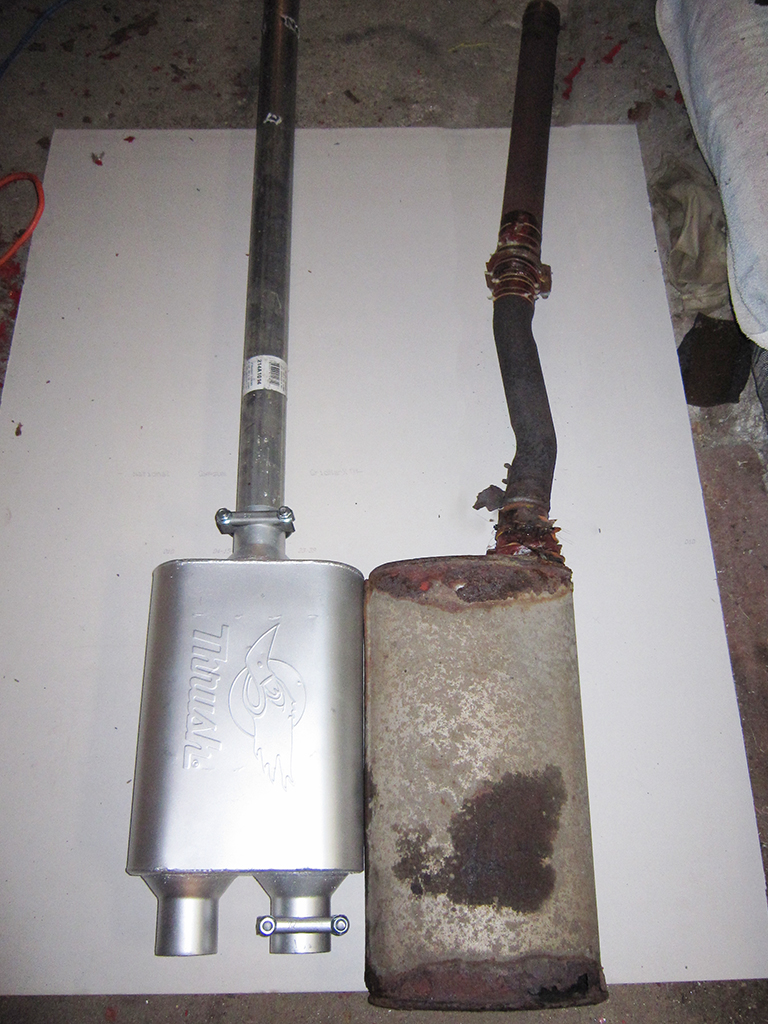
The new Thrush Welded chamber muffler, its aluminiumized and 1/4" larger in flow diameter then my stock muffler was:


I inserted the 2.25" OD pipe into the 2.25" ID muffler inlet so there is no restriction with a straighter design:
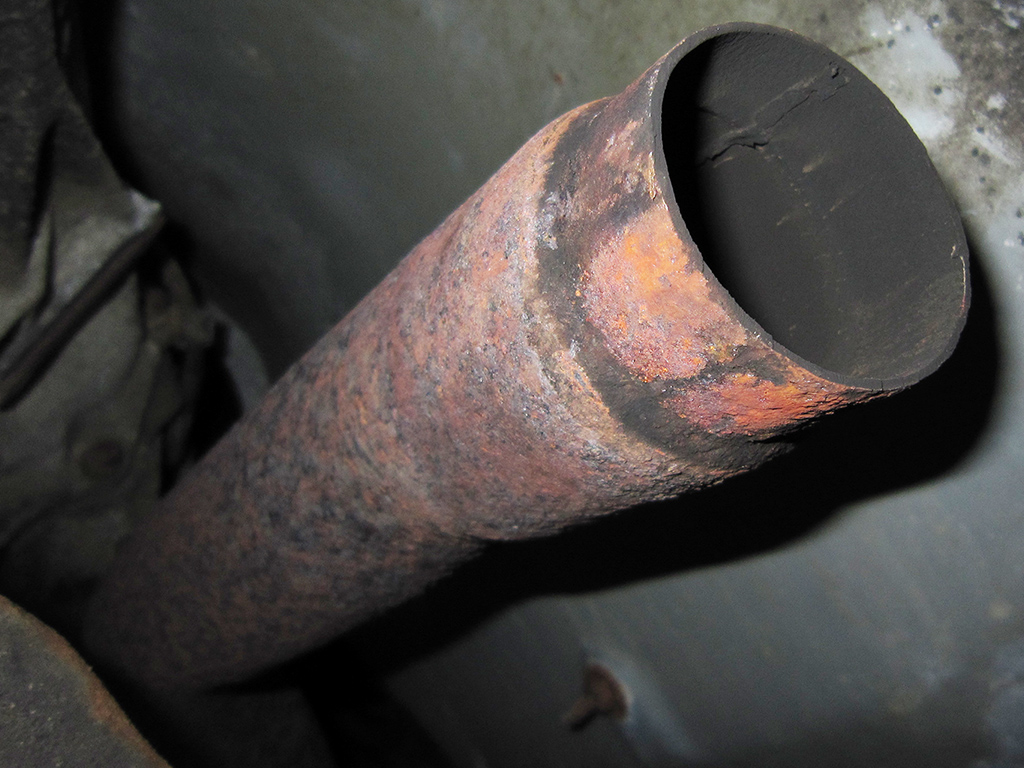
Here is where it gets controversial this is the pipe that goes over the transmission cross member between the Y pipe and cat, as you can see it steps down from 2.25" to 2" (I think). Some say it was for slip together convenience others say it was for velocity I just cut it off to reduce any bottle necking since I am using wider pipe and a wider muffler:
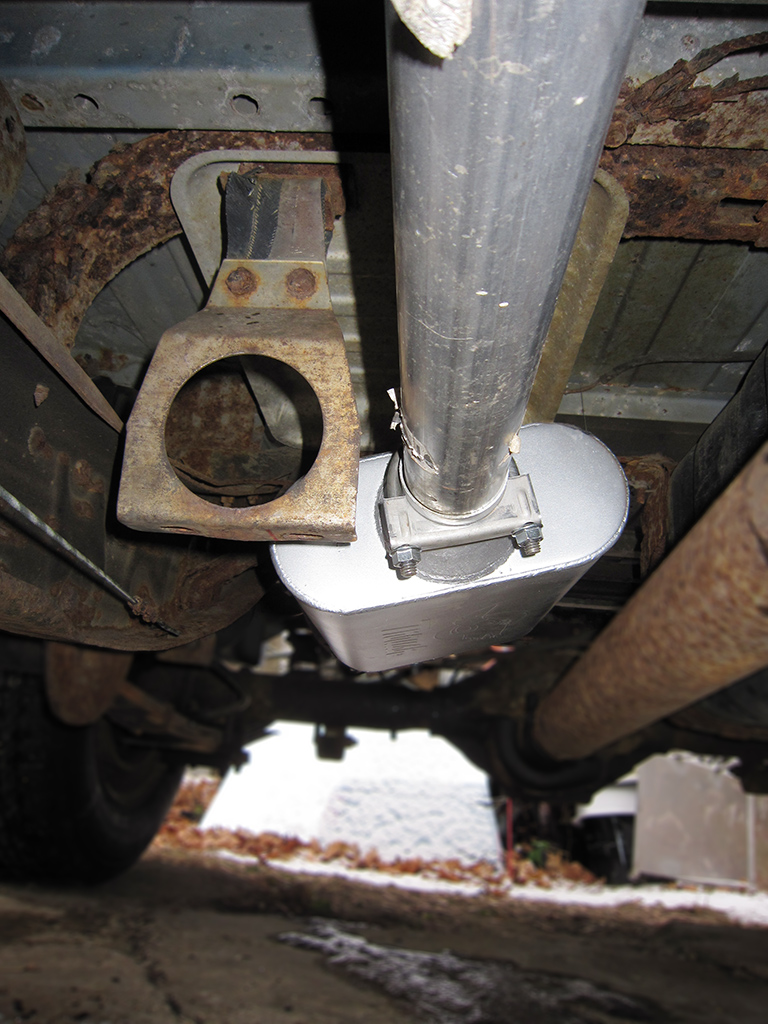
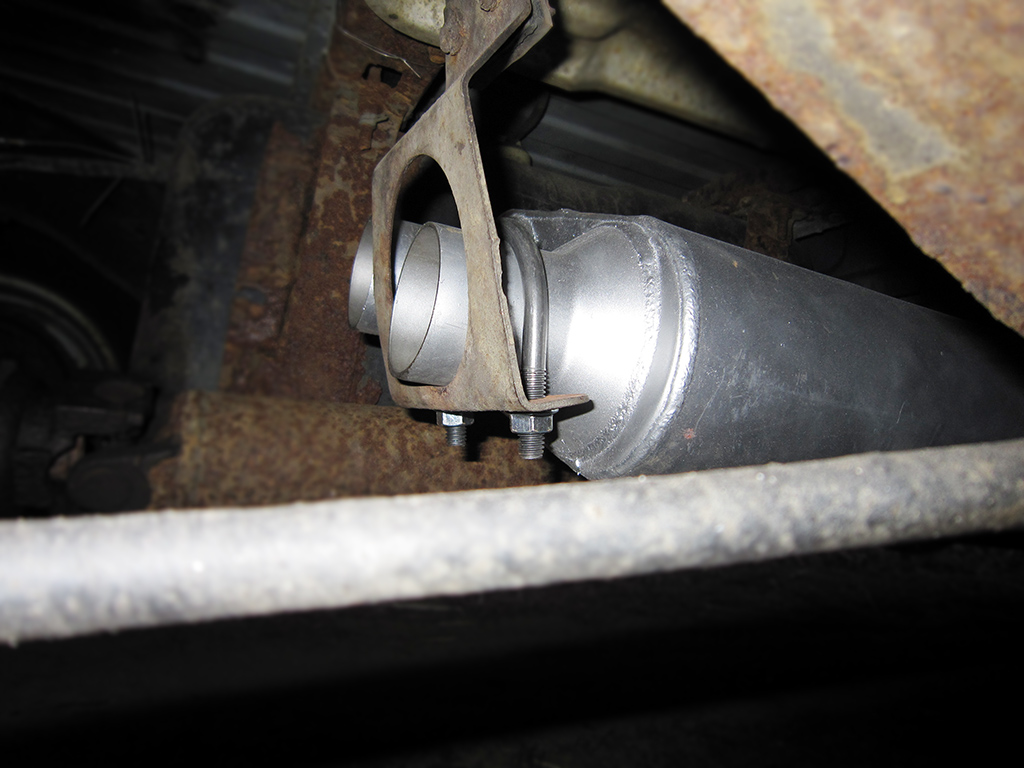
Now with the entire system 2.25" OD I hammered a coupler over the pipe it was a very tight fit and I was only able to get it about 1.5" over the pipe:

I slipped the 2.25" OD pipe in and clamped it up:


I think I am going to either clamp this onto the side of the pipe or place a mount further up where the cat was since it is rock solid as is and there is nothing holding the pipe up front besides the manifolds on the block I think:
I was able to use the rear factory muffler hanger, it was really loud like this but I put 90 degree elbows on there they fire at the ground and its much quieter but extremely deep it vibrates the truck with elbows:

I bought 10ft of 2.25" OD pipe:
The new Thrush Welded chamber muffler, its aluminiumized and 1/4" larger in flow diameter then my stock muffler was:
I inserted the 2.25" OD pipe into the 2.25" ID muffler inlet so there is no restriction with a straighter design:
Here is where it gets controversial this is the pipe that goes over the transmission cross member between the Y pipe and cat, as you can see it steps down from 2.25" to 2" (I think). Some say it was for slip together convenience others say it was for velocity I just cut it off to reduce any bottle necking since I am using wider pipe and a wider muffler:
Now with the entire system 2.25" OD I hammered a coupler over the pipe it was a very tight fit and I was only able to get it about 1.5" over the pipe:
I slipped the 2.25" OD pipe in and clamped it up:
I think I am going to either clamp this onto the side of the pipe or place a mount further up where the cat was since it is rock solid as is and there is nothing holding the pipe up front besides the manifolds on the block I think:
I was able to use the rear factory muffler hanger, it was really loud like this but I put 90 degree elbows on there they fire at the ground and its much quieter but extremely deep it vibrates the truck with elbows:
Thread Starter
|
All Star
Joined: Jun 2011
Posts: 858
Likes: 2
From: Pinellas County, FL
Bought new tires, for the front 215/60-R15 and for the rear 245/60-R15. Now I just have to wait until spring to roll on them:
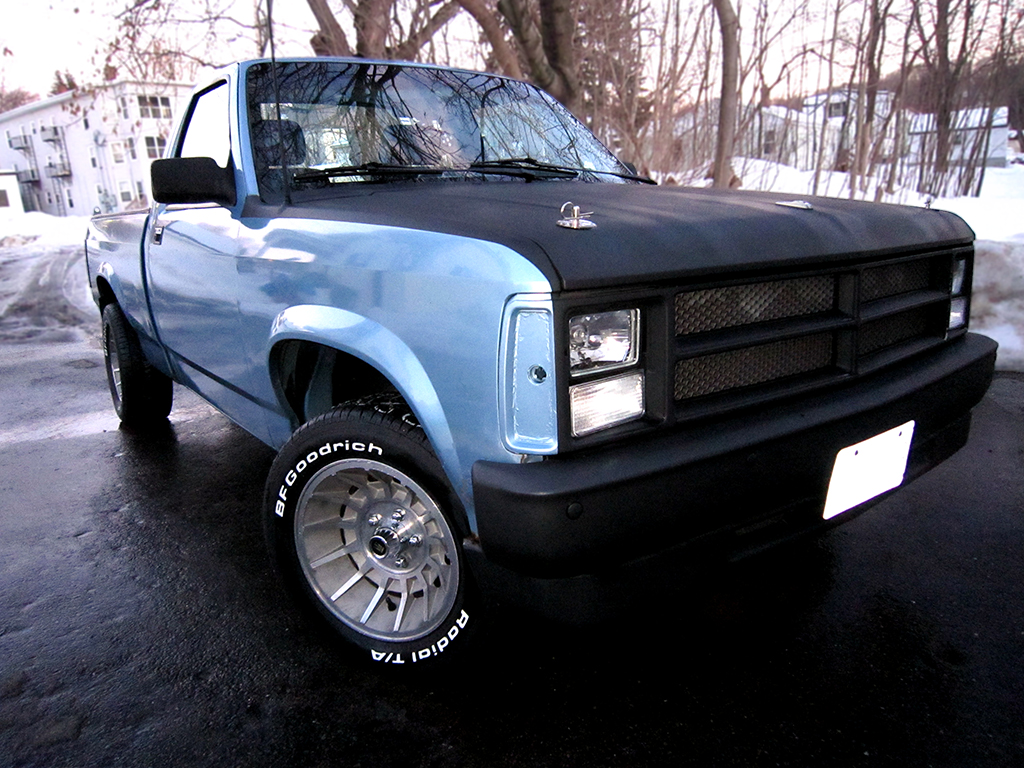
Now that the front has been getting closer I have been rendering the rear end, by the way my blue base color is going to be either bright white or a metallic silvery grey. The soon to be vanity plate will be centered set in a box on a non-embossed (sport) gate with the handle and third light shaved, using the old school bar for black and I might make that black break away on the sides towards the taillights instead of that sharp line at the gate/bed split. The taillights are something I want to keep Mopar/Dodge/Chrysler and something that is a rear show only no wrap around lights as the factory lights do (I believe that requires a side reflector to be street legal) the ones in the rendering are from a Dodge Rampage flipped upside down and reversed. I will be using a straight welded rollpan and I am undecided about the exhaust exit choice, either way I like the modern touch of exiting through some mesh to save your exhaust opening paint on the body:

Now that the front has been getting closer I have been rendering the rear end, by the way my blue base color is going to be either bright white or a metallic silvery grey. The soon to be vanity plate will be centered set in a box on a non-embossed (sport) gate with the handle and third light shaved, using the old school bar for black and I might make that black break away on the sides towards the taillights instead of that sharp line at the gate/bed split. The taillights are something I want to keep Mopar/Dodge/Chrysler and something that is a rear show only no wrap around lights as the factory lights do (I believe that requires a side reflector to be street legal) the ones in the rendering are from a Dodge Rampage flipped upside down and reversed. I will be using a straight welded rollpan and I am undecided about the exhaust exit choice, either way I like the modern touch of exiting through some mesh to save your exhaust opening paint on the body:
Last edited by pinkfloydeffect; Feb 26, 2014 at 03:10 AM.
Thread Starter
|
All Star
Joined: Jun 2011
Posts: 858
Likes: 2
From: Pinellas County, FL
Okay so here we go again I decided to dump some money into this project to upgrade the electrical system and freshen the engine up a bit. I finally completely killed my old used and abused EverStart so I invested in an Optima Yellow Top

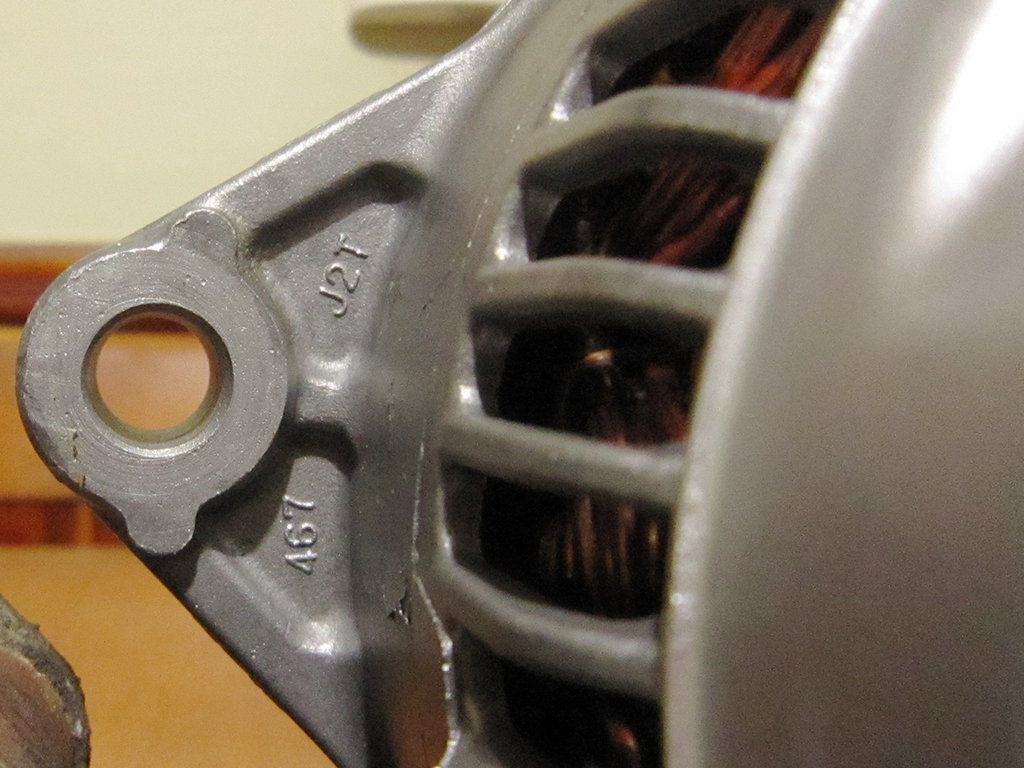
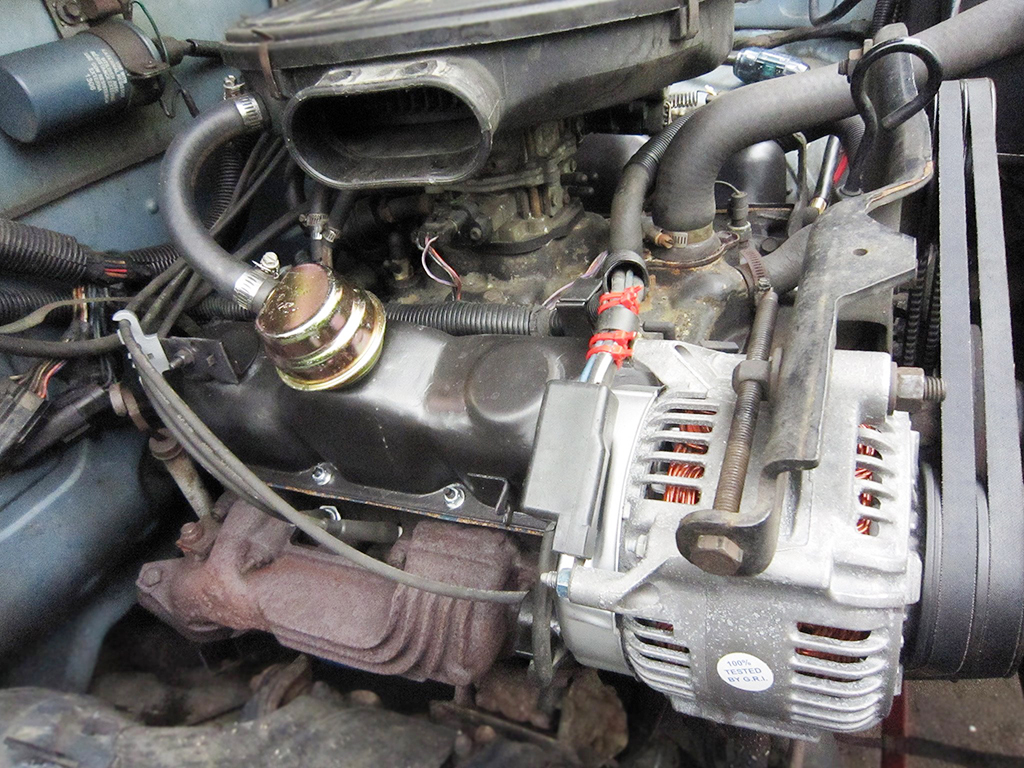
To keep that new battery topped off on short rides I upgraded the 65A alternator to 136A, I couldn't even find a 136A alternator for my truck so I purchased one cheap off eBay for a "97/98 Jeep Cherokee"
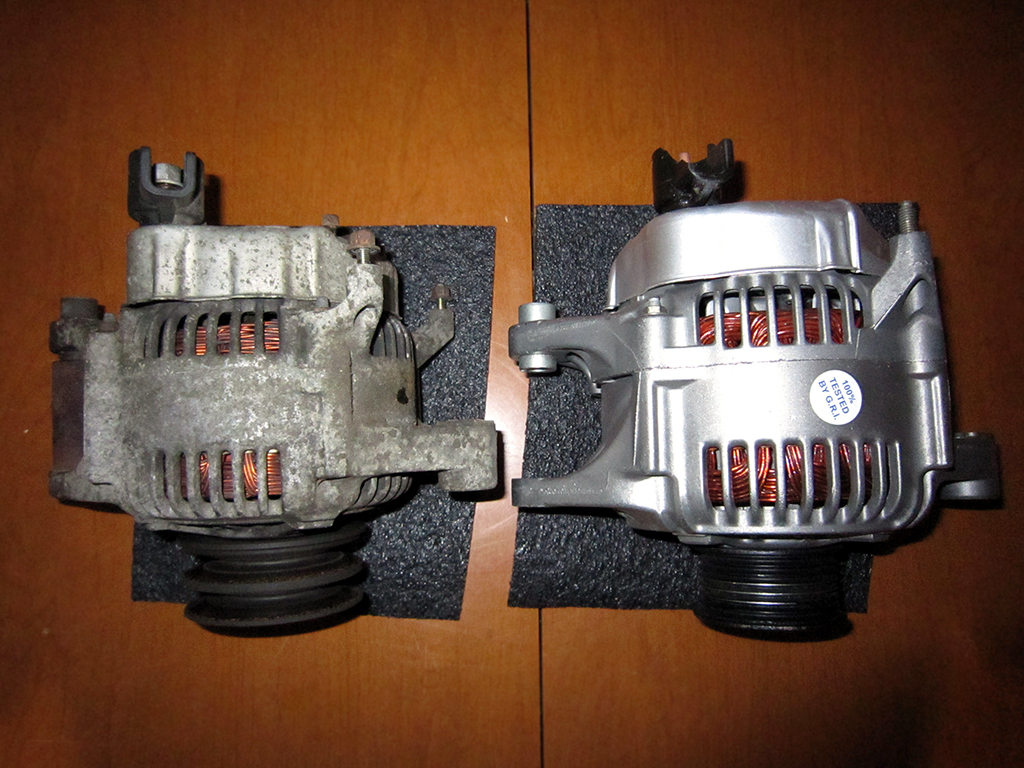
The wiring as you can see is all the same which is why I bought it

This is where I started running into problems, the bottom mounting hole was the same but the top was slightly larger. Jeeps do not use the same tension i-bolt on the top so I had to improvise with the one mine used
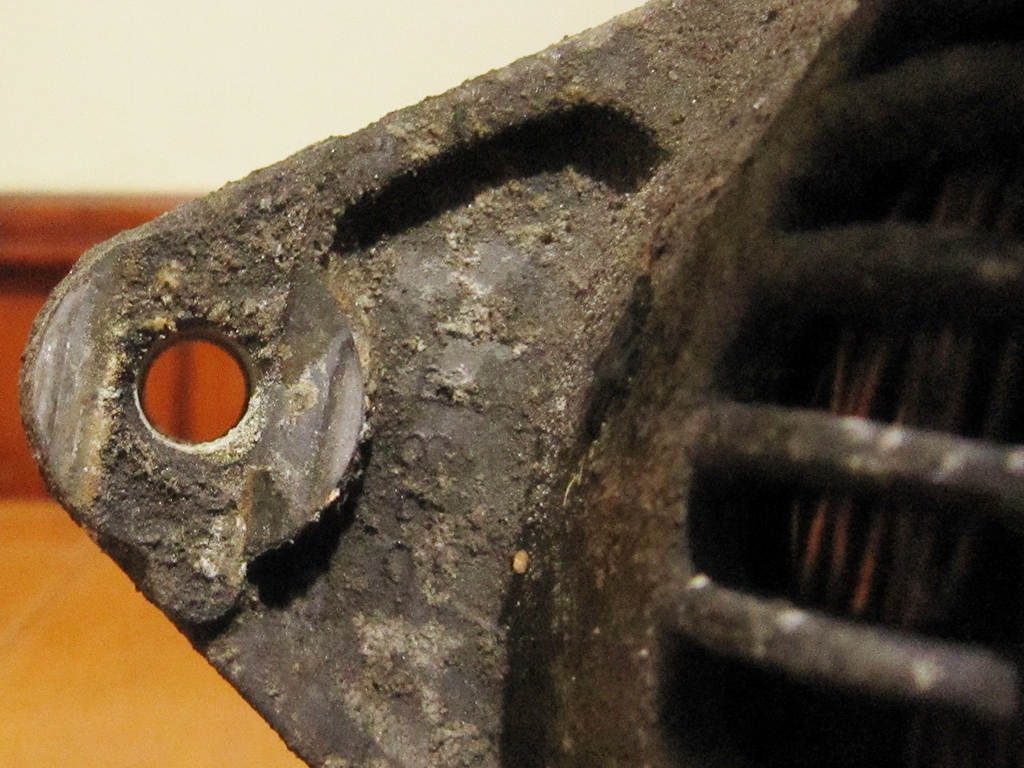
The only spacer sleeve I could find was too long, wider then the already larger hole with a slightly larger ID then the bolt but I made do. Bored the hole out wider and pressed in the sleeve, cut off the remaining length and its solid...

Sadly I resorted to a thin layer of duck tape to center the bolt and it worked fine (one way tensioning)

For now I am using the stock harness but I will be running 1/0G cable(s) soon so that cracked edge on the cable shield/guide is no problem

The only thing I did have to do with the wiring on this alternator was drill out this terminal ring and the wire bundle support on the other side, apparently the larger casing has larger posts

This alternator came with a serpentine belt pulley figuring I could just swap them...nope; the shaft is larger so I'm assuming the 120-160A use a larger casing and 7/10" shaft while the 115A and under use the smaller casing and 6/10" shaft so I had to have the seller send me the correct 7/10" double V-groove pulley

Two new alternator belts....
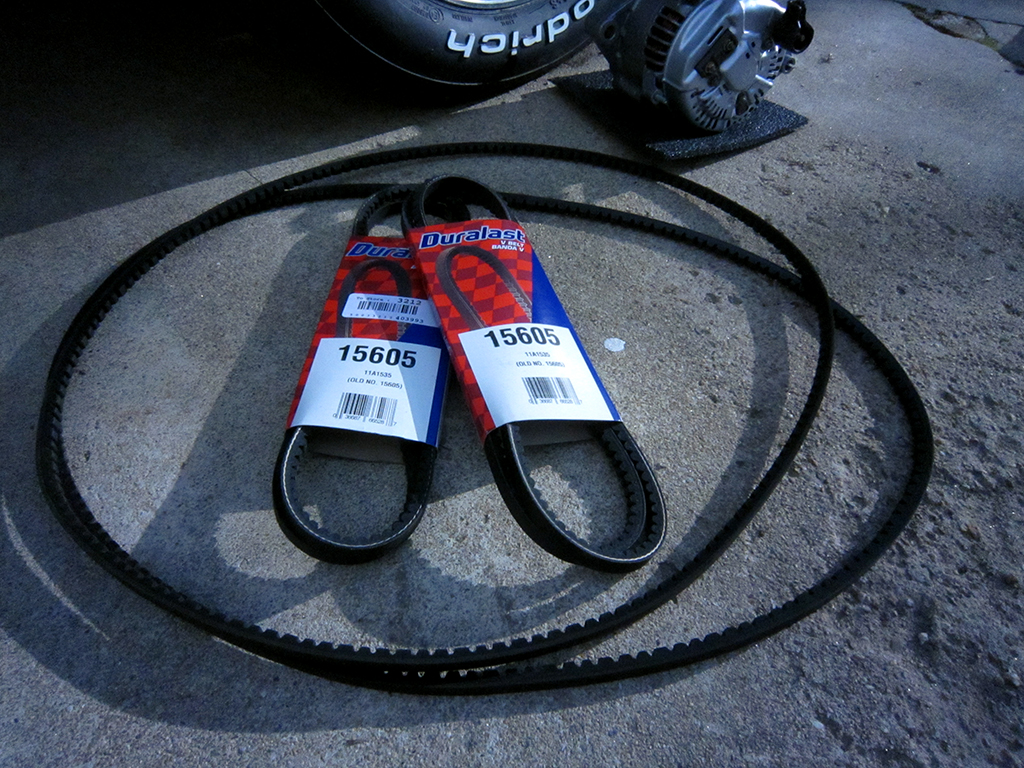
Checkout how nasty and old my belts were the lettering is barley visible

I might as well do the AC delete idler while I'm at it since there is a nasty squeal when I rev it up

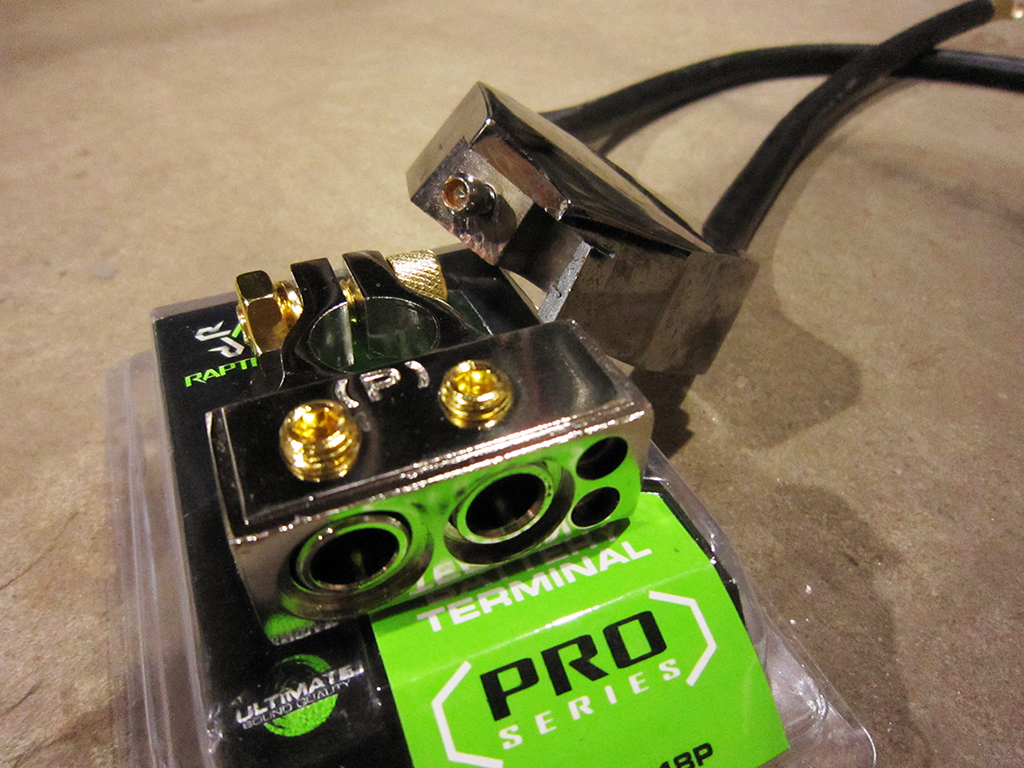
Just my luck the KnuKonceptz negative terminal busted on me so I replaced it with a different model
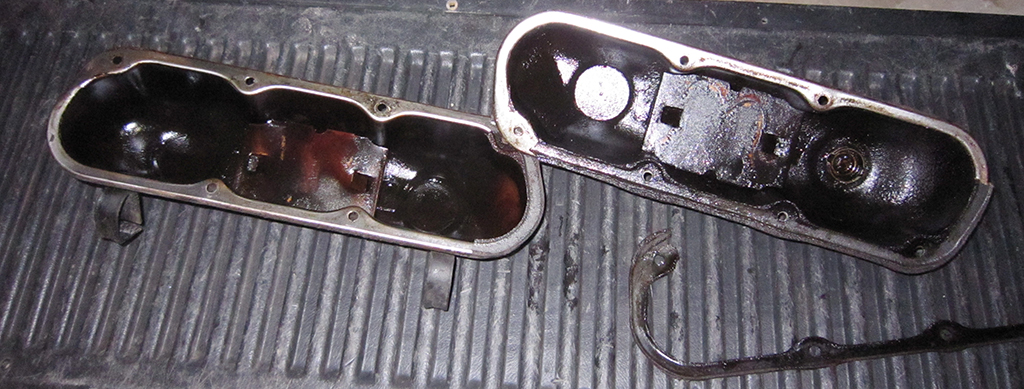
My leaky valve covers! I decided it was finally time to pull them off
Replacing things just kind of snowballed on me and I ended up doing the breather and PCV valve too

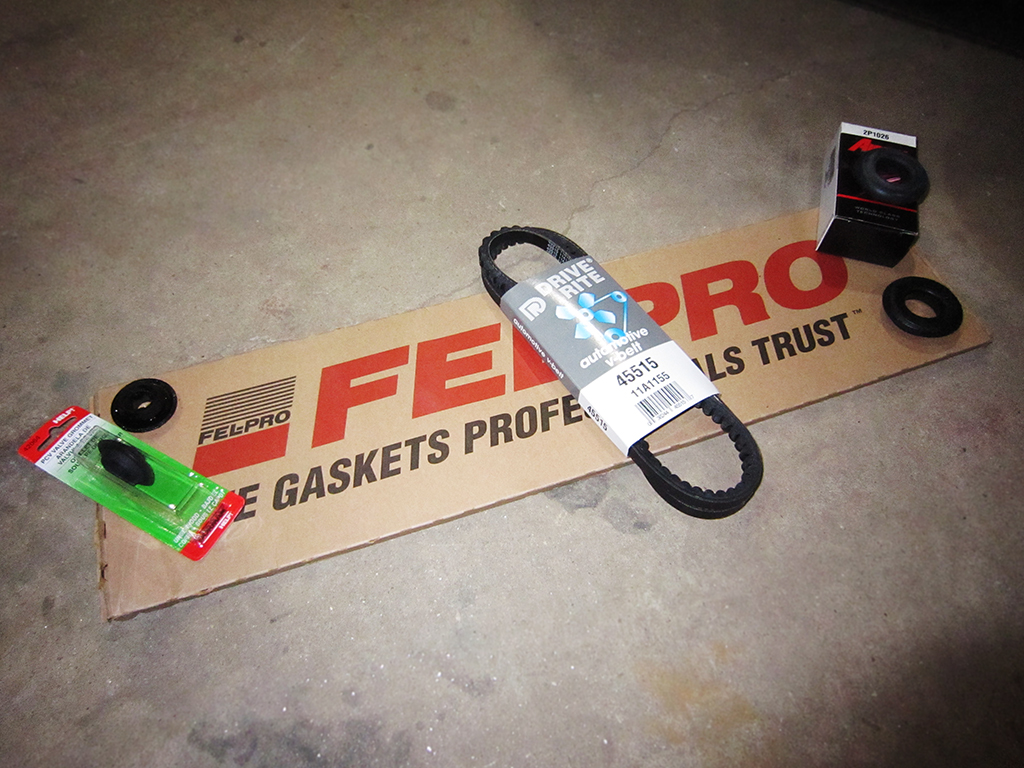
I got cover gaskets to stop the leak (just cork I only need to get a few thousand miles/few years) I also got PCV and breather grommets and a pump belt to ensure no more squealing!
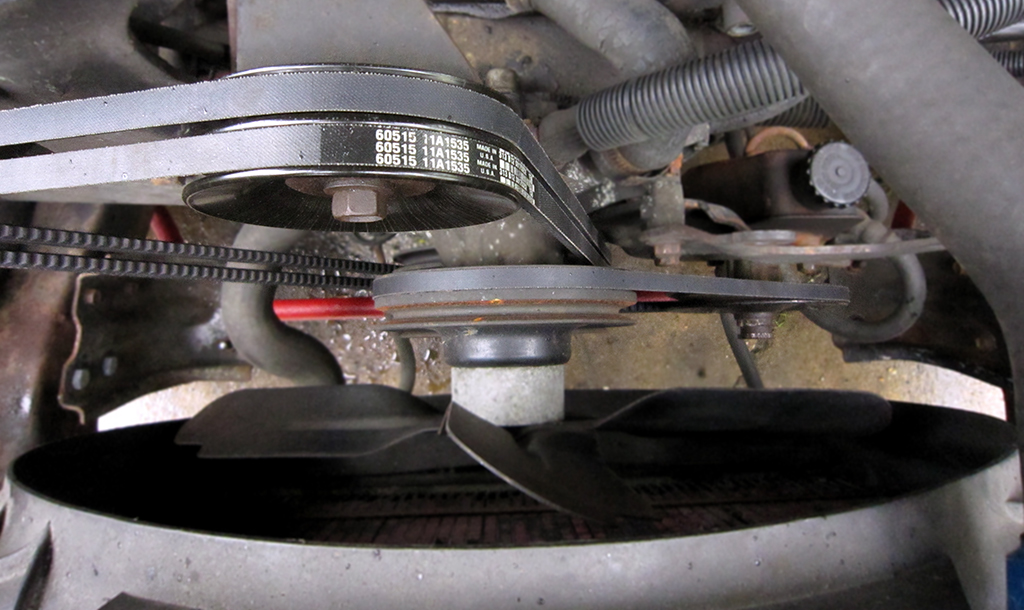
I have had a warped steering pulley on the truck since I bought it (grandfather used a 3 point pullet to remove the pulley when he changed the pump) so I bought one from the junkyard and changed that too
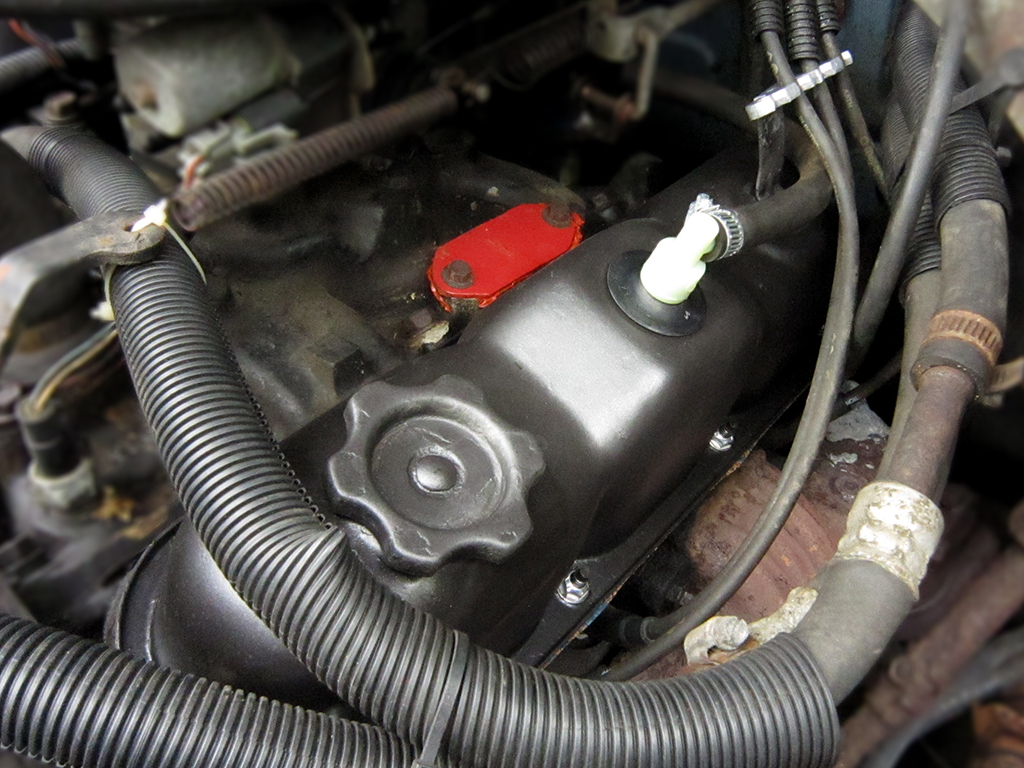
While the covers were off I painted them using VHT high temp paint, I cut a new breather hose and removed the screening I had placed over the air cleaner housing inlet

The old greasy nuts were loose and never stayed tight so I got these stainless all metal locking nuts with washers

Tried some hammered metal finish paint...I may do more accents in this

Other side....
To keep that new battery topped off on short rides I upgraded the 65A alternator to 136A, I couldn't even find a 136A alternator for my truck so I purchased one cheap off eBay for a "97/98 Jeep Cherokee"
The wiring as you can see is all the same which is why I bought it
This is where I started running into problems, the bottom mounting hole was the same but the top was slightly larger. Jeeps do not use the same tension i-bolt on the top so I had to improvise with the one mine used
The only spacer sleeve I could find was too long, wider then the already larger hole with a slightly larger ID then the bolt but I made do. Bored the hole out wider and pressed in the sleeve, cut off the remaining length and its solid...
Sadly I resorted to a thin layer of duck tape to center the bolt and it worked fine (one way tensioning)
For now I am using the stock harness but I will be running 1/0G cable(s) soon so that cracked edge on the cable shield/guide is no problem
The only thing I did have to do with the wiring on this alternator was drill out this terminal ring and the wire bundle support on the other side, apparently the larger casing has larger posts
This alternator came with a serpentine belt pulley figuring I could just swap them...nope; the shaft is larger so I'm assuming the 120-160A use a larger casing and 7/10" shaft while the 115A and under use the smaller casing and 6/10" shaft so I had to have the seller send me the correct 7/10" double V-groove pulley
Two new alternator belts....
Checkout how nasty and old my belts were the lettering is barley visible
I might as well do the AC delete idler while I'm at it since there is a nasty squeal when I rev it up
Just my luck the KnuKonceptz negative terminal busted on me so I replaced it with a different model
My leaky valve covers! I decided it was finally time to pull them off
Replacing things just kind of snowballed on me and I ended up doing the breather and PCV valve too
I got cover gaskets to stop the leak (just cork I only need to get a few thousand miles/few years) I also got PCV and breather grommets and a pump belt to ensure no more squealing!
I have had a warped steering pulley on the truck since I bought it (grandfather used a 3 point pullet to remove the pulley when he changed the pump) so I bought one from the junkyard and changed that too
While the covers were off I painted them using VHT high temp paint, I cut a new breather hose and removed the screening I had placed over the air cleaner housing inlet
The old greasy nuts were loose and never stayed tight so I got these stainless all metal locking nuts with washers
Tried some hammered metal finish paint...I may do more accents in this
Other side....

Veteran
Joined: Oct 2012
Posts: 471
Likes: 1
gawd.. lots of time into this, nice work man, makes me wish i kept my 92, but unfortunately fuel vs need of a truck.. plus I couldnt refuse the high offer i was given for my old beast, and i became a traitor and bought a Jeep TJ (miss my truck already) but hey i still got my 91 2wd to SAS whenever i get the time lol
Again Nice work but i gotta ask. .. when you gonnna SAS that thing? you have done almost everythign else
Again Nice work but i gotta ask. .. when you gonnna SAS that thing? you have done almost everythign else
Thread Starter
|
All Star
Joined: Jun 2011
Posts: 858
Likes: 2
From: Pinellas County, FL
SAS? I'm going to be using an 8-1/4 or 8-3/4 LSD with a possible air locker for drag use.
Next is a new radiator and hoses, then a roll pan and lower the truck more. I need to take pictures of the exhaust system I worked on it more and did custom tailpipes out the back now.
Next is a new radiator and hoses, then a roll pan and lower the truck more. I need to take pictures of the exhaust system I worked on it more and did custom tailpipes out the back now.
Thread Starter
|
All Star
Joined: Jun 2011
Posts: 858
Likes: 2
From: Pinellas County, FL
I knew what SAS is I just did not get why you wanted me to do so. I am buying a second Dakota to lift, this is a summer truck even though we do have potholes all over here I am going 2" lower in the front and 4" in the rear.
Veteran
Joined: Oct 2012
Posts: 471
Likes: 1
ah understood... the summer toy... maybe convertible conversion?
http://www.slidingragtops.com/Truck-...ible-Kits.html
Scroll down kits are like 400 bucks US lol
http://www.slidingragtops.com/Truck-...ible-Kits.html
Scroll down kits are like 400 bucks US lol