
The Victim Build Thread -- Featuring frame replacement
#41
 12-23-2014, 12:02 AM

FUEL
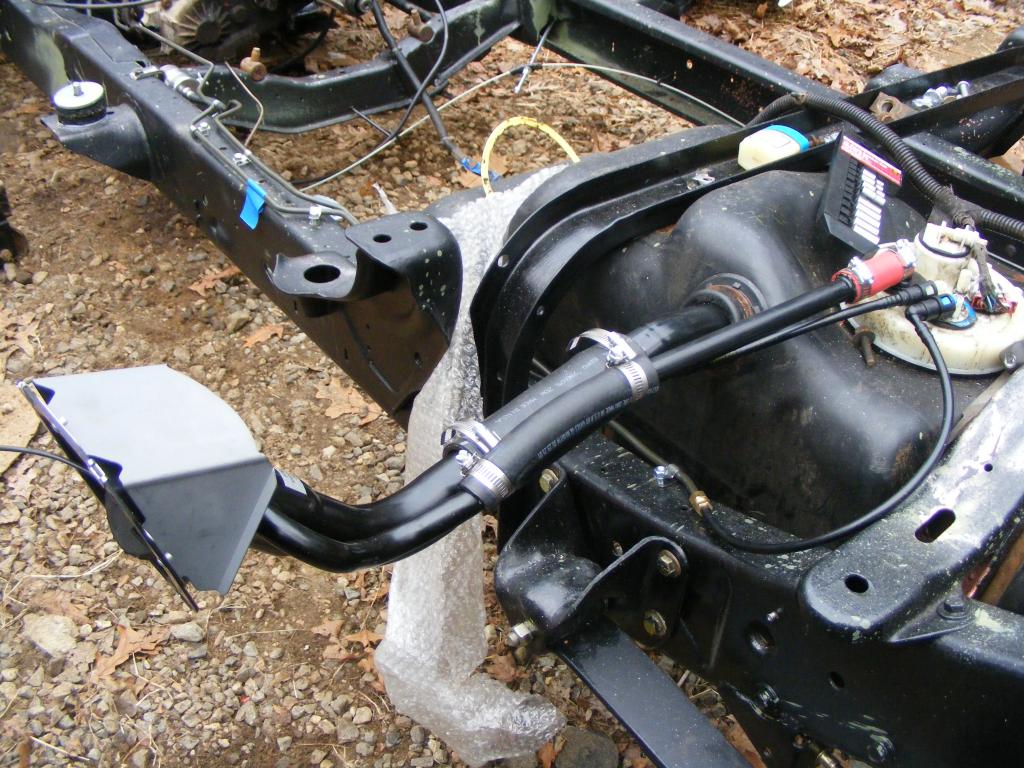
I'm basically done with the fuel system now. It's not the prettiest but it is functional. I *sort of* duplicated the original line routing for the supply and return, (with nylon and steel) and the vent line (with Ni-Copp 3/16" hard line and 3/16" vent hose).
I got my new filler neck and hoses from fillernecksupply.com, part # 4279735
See here: http://www.fillernecksupply.com/serv...-Dakota/Detail. Even though it is not pictured, it actually came with the plastic fill hole bezel (??? whatever it's called)...which is nice because mine was reusable but cracked. Only other things you need are hose clamps and a very short section of 3/4" vent tube, because for whatever reason the neck only comes with the upper section of hose. As you can see in this picture, I had to pick up a bit of 3/4" (red) hose at NAPA. Hardly a big deal.

I bought a Dorman nylon fuel line kit, part # 800-300 and length of 5/16" steel (coated) fuel line at Autozone.
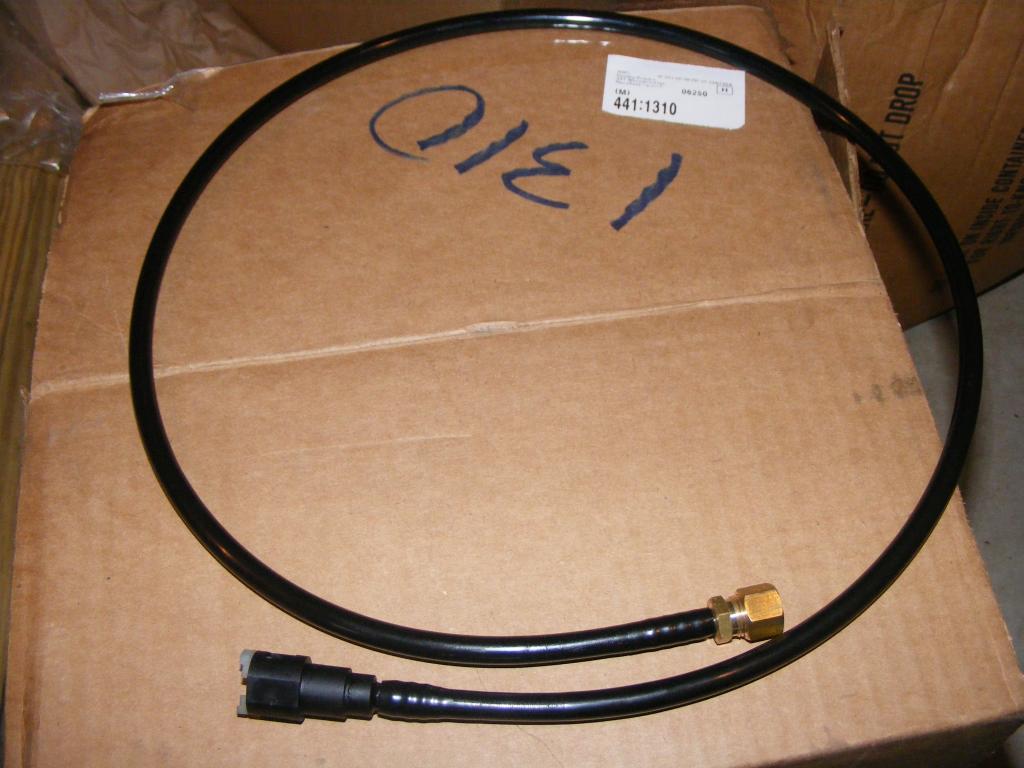
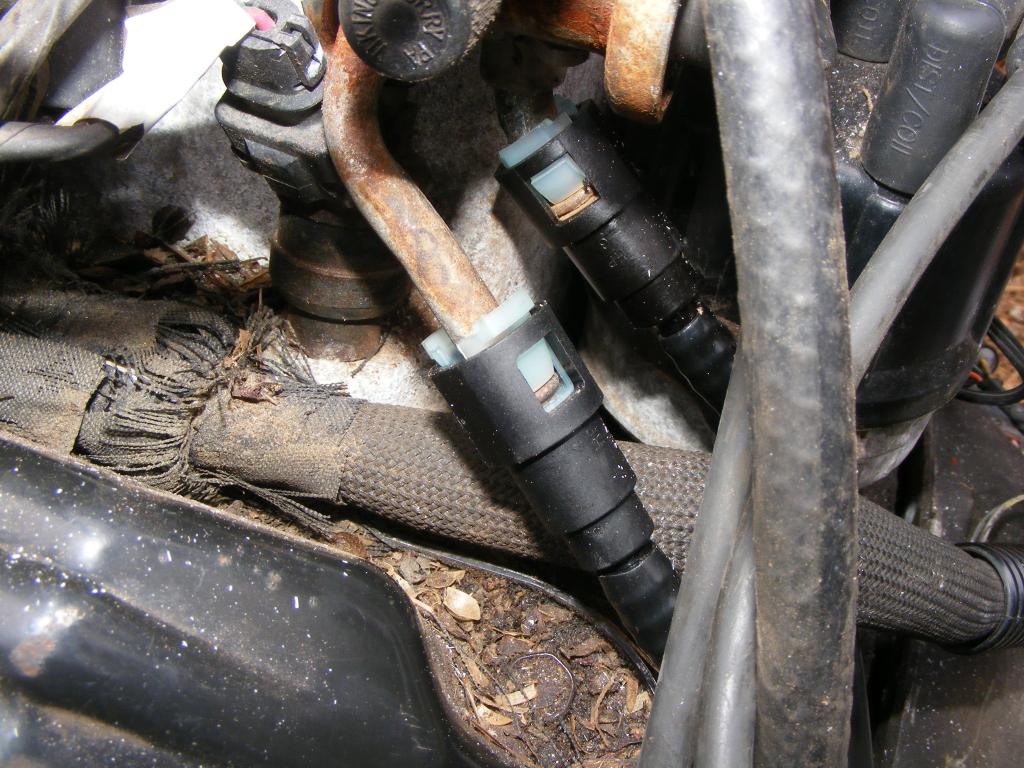
I was able to use the quick disconnects included in the kit to replace the originals. As an aside, all of the fuel lines (supply & return) on my truck are 5/16", but the outlet at the tank and the inlet at the fuel rail for the SUPPLY line are both 3/8". Therefore you must either use a 3/8" to 5/16" quick disconnect (what I did) and run the stock sized 5/16" lines or a 3/8" to 3/8" quick disconnect and run all new 3/8" lines. The fittings for the RETURN side are ALL 5/16", so no worries there.
This kid made it very easy to make my own nylon tubing with the correct fittings.
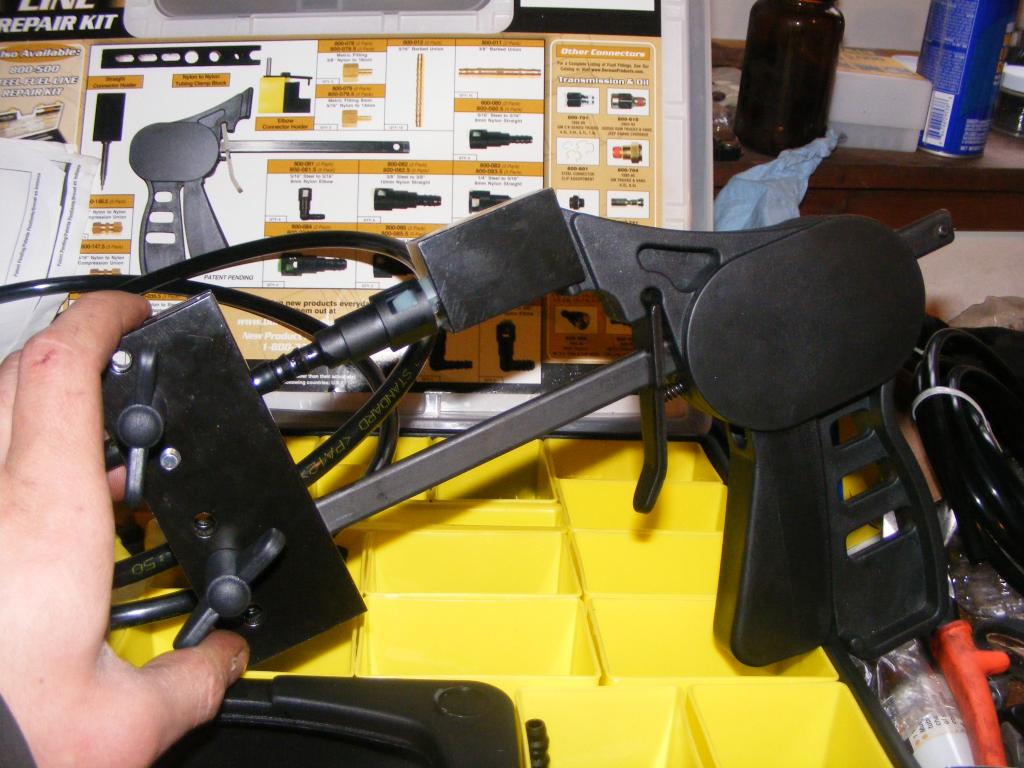
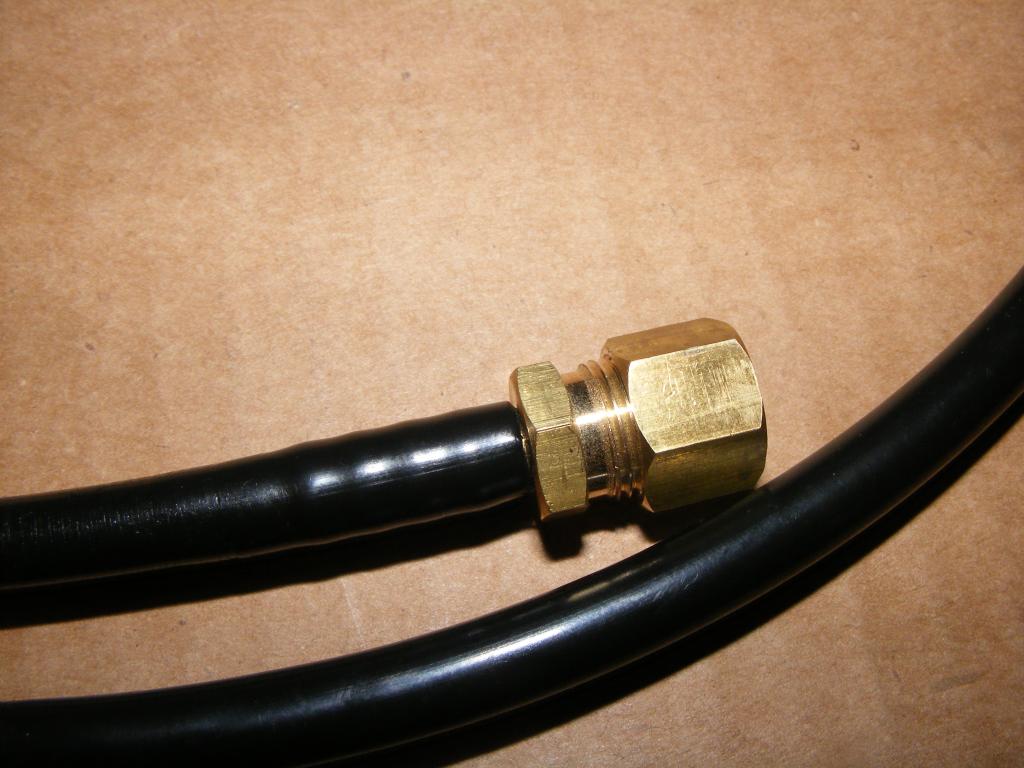
Along with the quick disconnect assortment, the kit comes with some compression fittings for connecting nylon and steel lines.
At fuel rail. Pardon the nasty mess in the engine nooks and crannies...
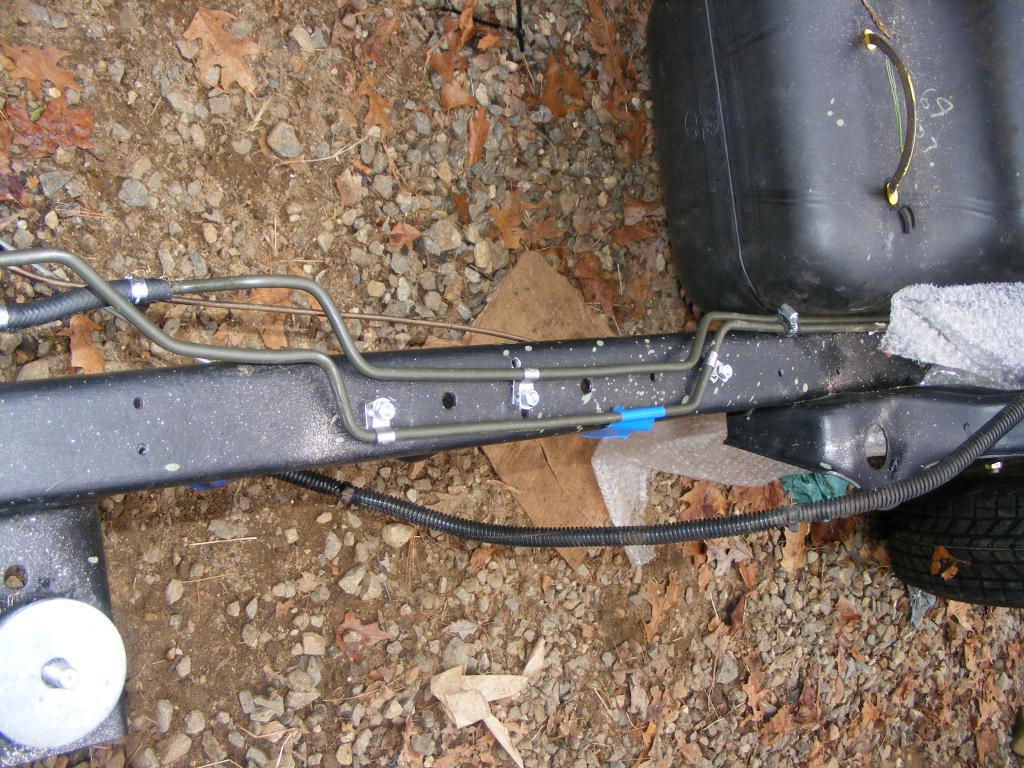
Front section is all nylon for supply & return. The rubber hose is for the tank vent and I haven't run the hard lines for the vent yet.
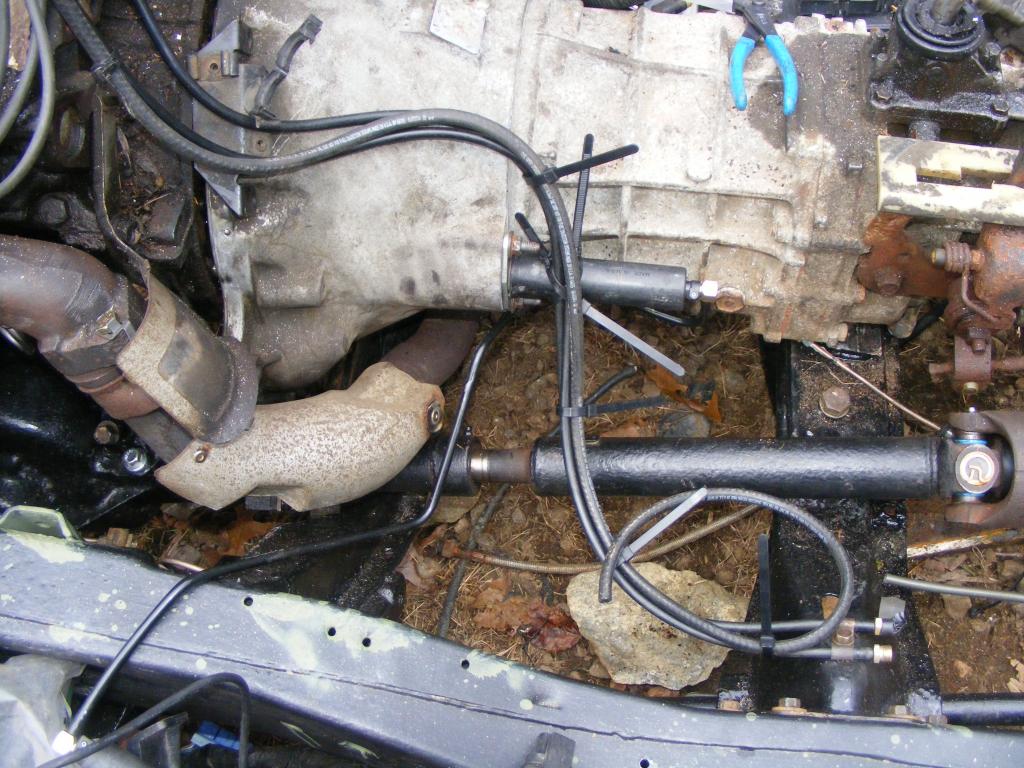
I have to cut the zip ties obviously. No, the original lines were not zip tied to the clutch slave assembly. I was a little concerned about putting too much stress on the slave assembly but the lines are pretty relaxed and definitely aren't putting undue stress on anything.
I also installed a new inline fuel filter (visible in the background of the first picture), which was a Wix Part # 33318
I'm basically done with the fuel system now. It's not the prettiest but it is functional. I *sort of* duplicated the original line routing for the supply and return, (with nylon and steel) and the vent line (with Ni-Copp 3/16" hard line and 3/16" vent hose).
I got my new filler neck and hoses from fillernecksupply.com, part # 4279735
See here: http://www.fillernecksupply.com/serv...-Dakota/Detail. Even though it is not pictured, it actually came with the plastic fill hole bezel (??? whatever it's called)...which is nice because mine was reusable but cracked. Only other things you need are hose clamps and a very short section of 3/4" vent tube, because for whatever reason the neck only comes with the upper section of hose. As you can see in this picture, I had to pick up a bit of 3/4" (red) hose at NAPA. Hardly a big deal.


I bought a Dorman nylon fuel line kit, part # 800-300 and length of 5/16" steel (coated) fuel line at Autozone.
I was able to use the quick disconnects included in the kit to replace the originals. As an aside, all of the fuel lines (supply & return) on my truck are 5/16", but the outlet at the tank and the inlet at the fuel rail for the SUPPLY line are both 3/8". Therefore you must either use a 3/8" to 5/16" quick disconnect (what I did) and run the stock sized 5/16" lines or a 3/8" to 3/8" quick disconnect and run all new 3/8" lines. The fittings for the RETURN side are ALL 5/16", so no worries there.
This kid made it very easy to make my own nylon tubing with the correct fittings.

Along with the quick disconnect assortment, the kit comes with some compression fittings for connecting nylon and steel lines.


At fuel rail. Pardon the nasty mess in the engine nooks and crannies...


Front section is all nylon for supply & return. The rubber hose is for the tank vent and I haven't run the hard lines for the vent yet.

I have to cut the zip ties obviously. No, the original lines were not zip tied to the clutch slave assembly.
I was a little concerned about putting too much stress on the slave assembly but the lines are pretty relaxed and definitely aren't putting undue stress on anything. I also installed a new inline fuel filter (visible in the background of the first picture), which was a Wix Part # 33318
Last edited by tbugden; 12-23-2014 at 12:05 AM.


#45
12-23-2014, 10:27 PM
First thing I did today was switch around the hose clamps. Great advice there.
I haven't much left to do before I can drop the cab back on. However I did find that my EGR transducer had come loose from a vacuum hose and appeared to have dropped onto the EGR pipe, melting the vacuum inlet (outlet?). It also appears that it was not ever attached to anything...just supported by the hoses connected to it. I bought a new one from Rockauto.
I haven't much left to do before I can drop the cab back on. However I did find that my EGR transducer had come loose from a vacuum hose and appeared to have dropped onto the EGR pipe, melting the vacuum inlet (outlet?). It also appears that it was not ever attached to anything...just supported by the hoses connected to it. I bought a new one from Rockauto.
#46
12-27-2014, 01:47 AM
Headliner Replacement
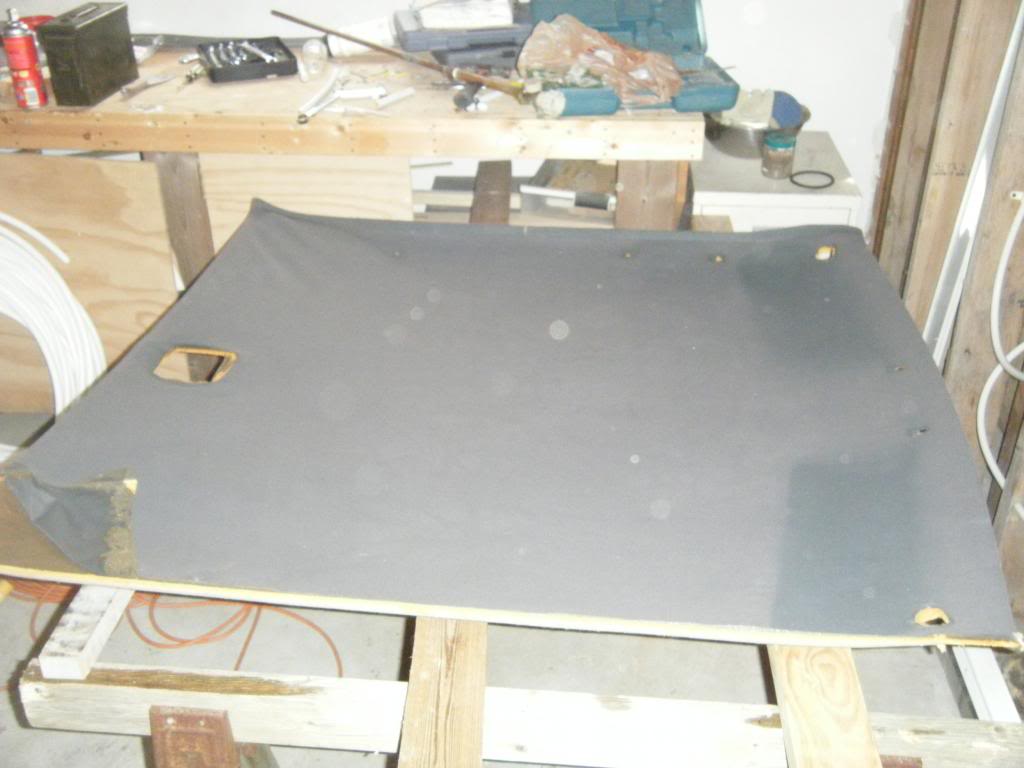
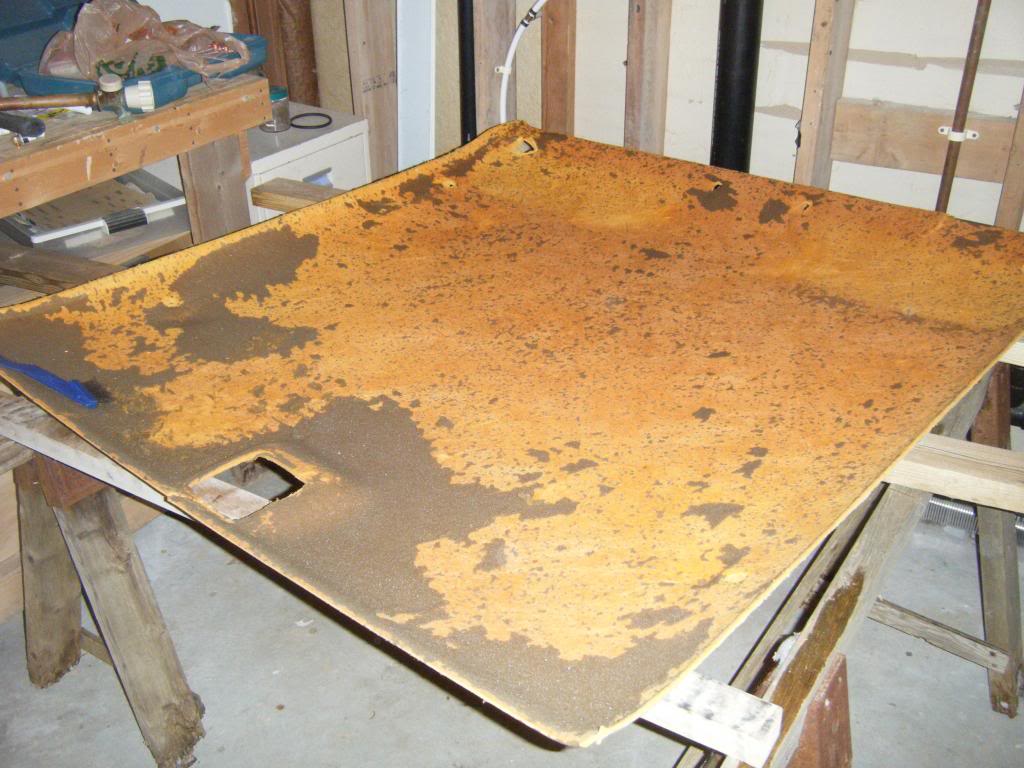
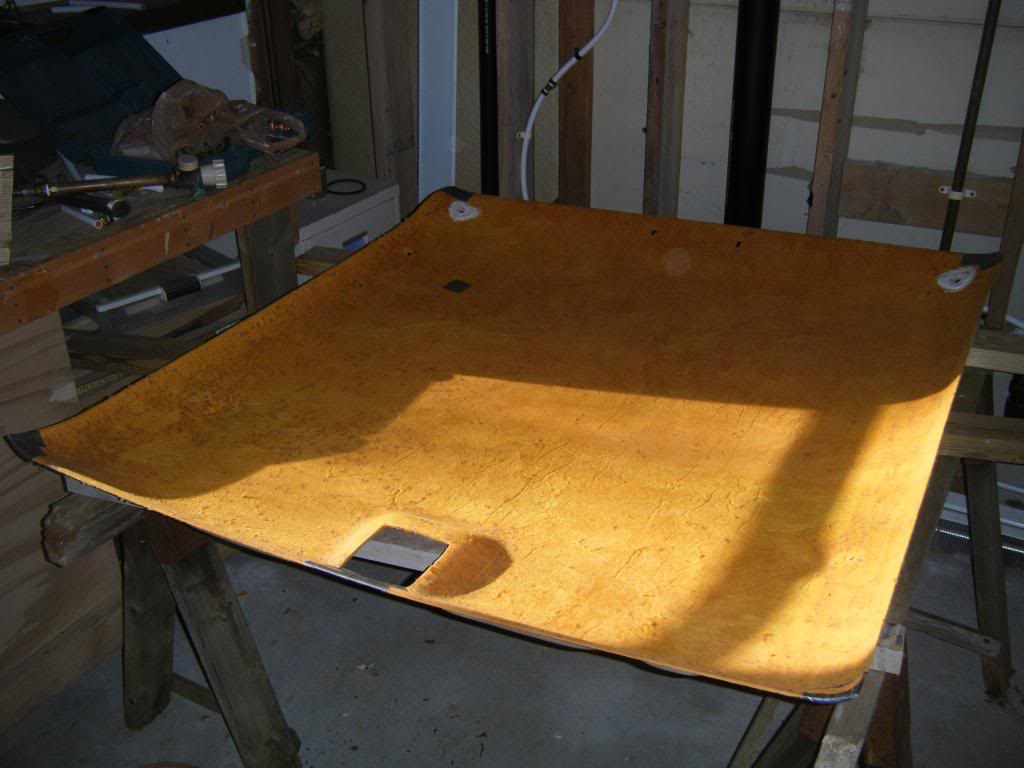
I actually did this last winter, but I never posted it up here. The headliner was sagging and separating from the board in a few places. I used headliner material from Jo-Ann's fabric...yes they actually have headliner material and it's sweet. This is the old one:
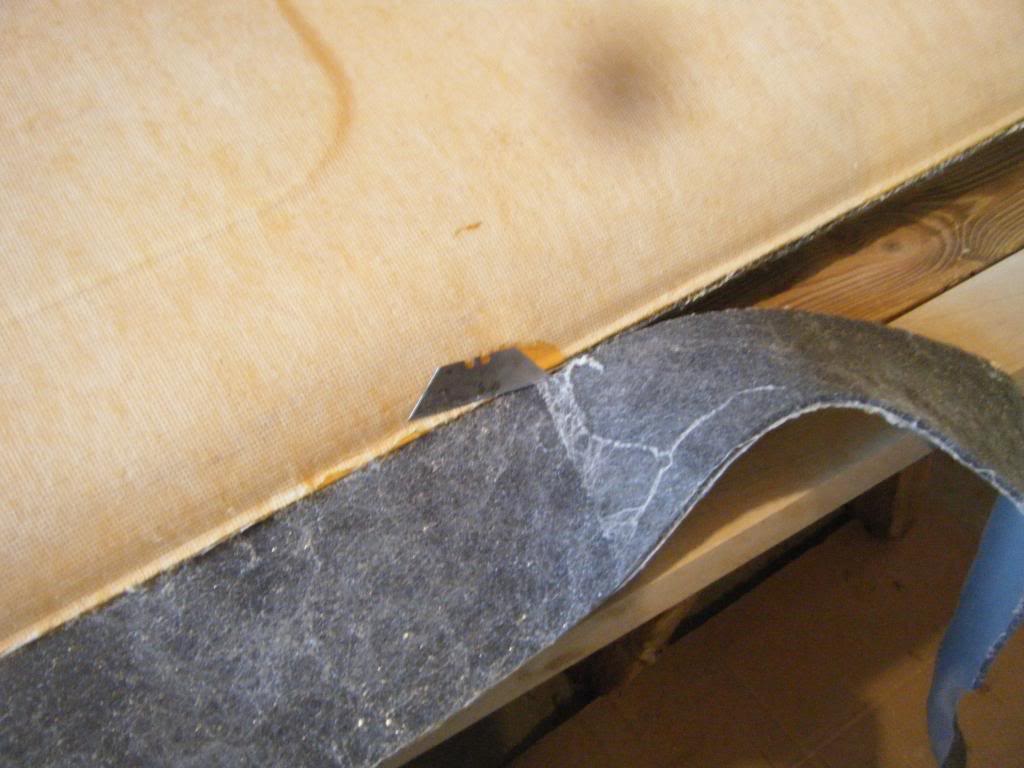
After pulling the fabric off, I broke out a stiff plastic bristle brush (which worked AWESOME) and removed as much of the foam residue as possible.
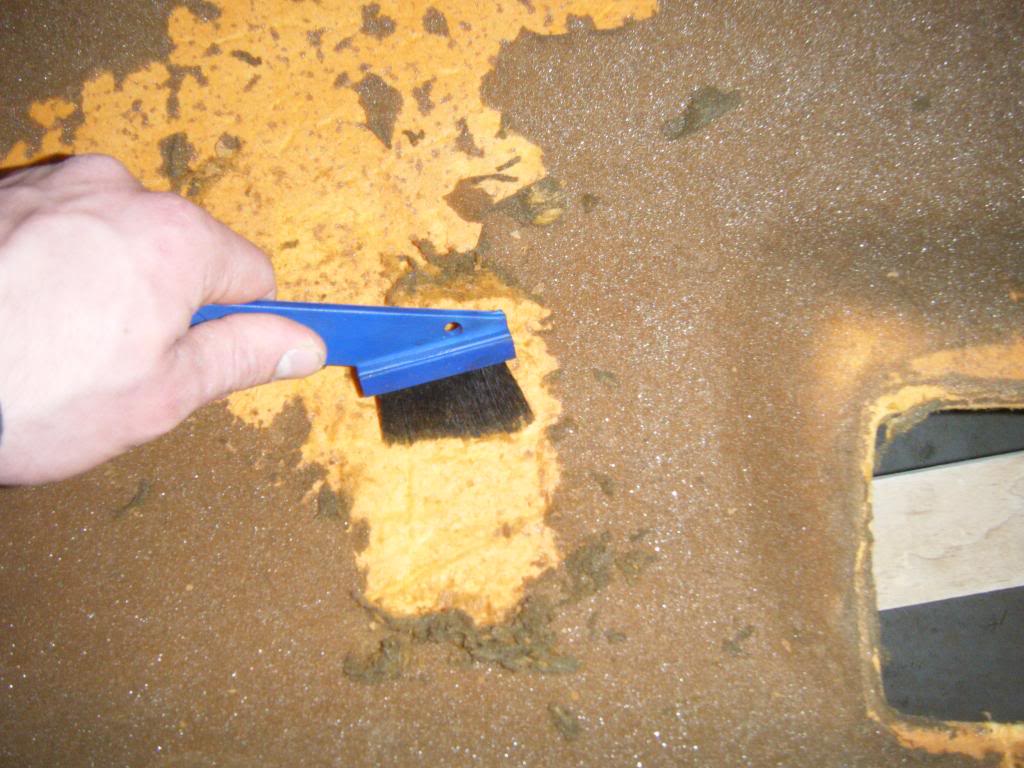
Then I used a razor blade at a right angle to scrape even more crap off.
Before.
Good to go.
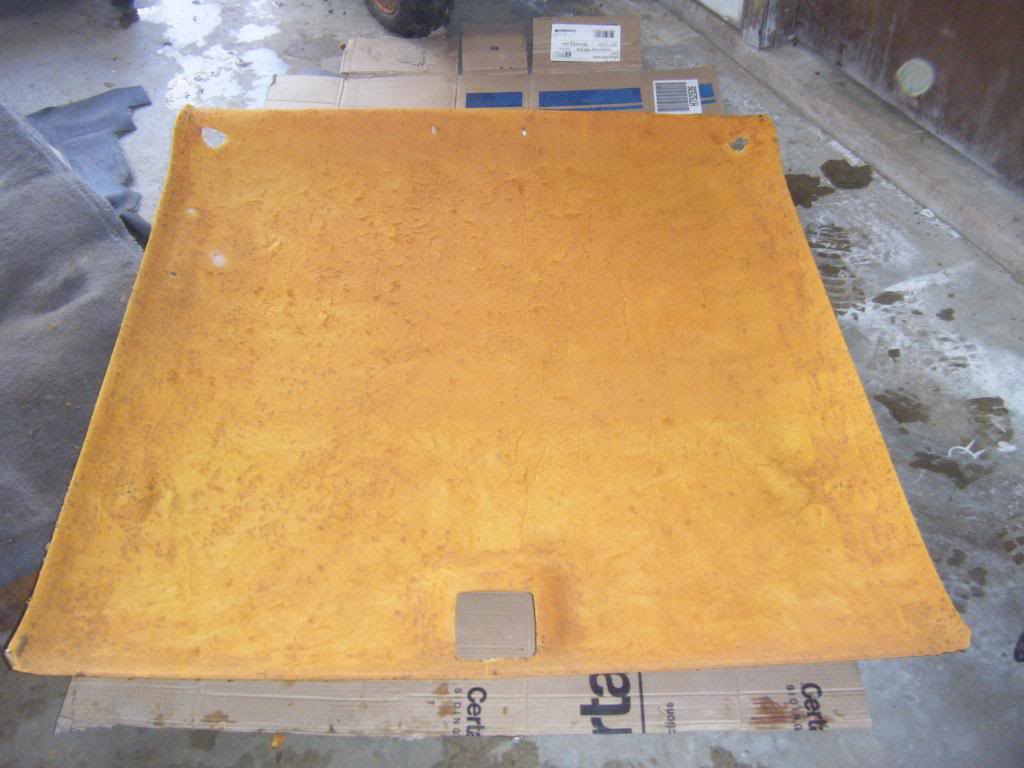
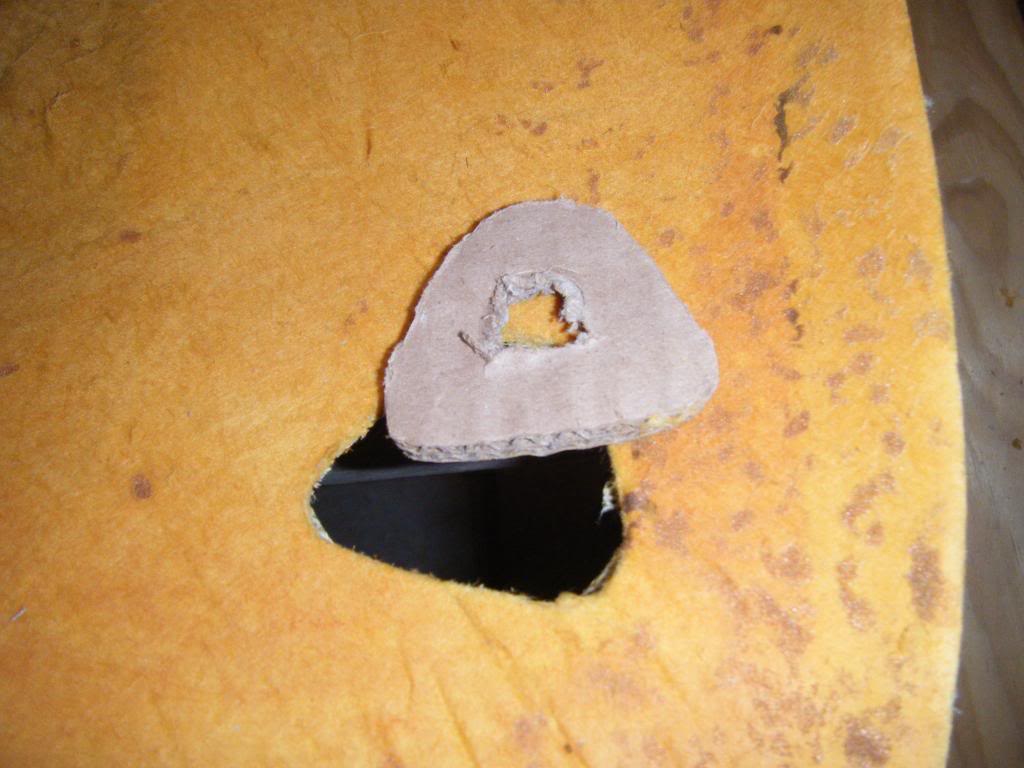
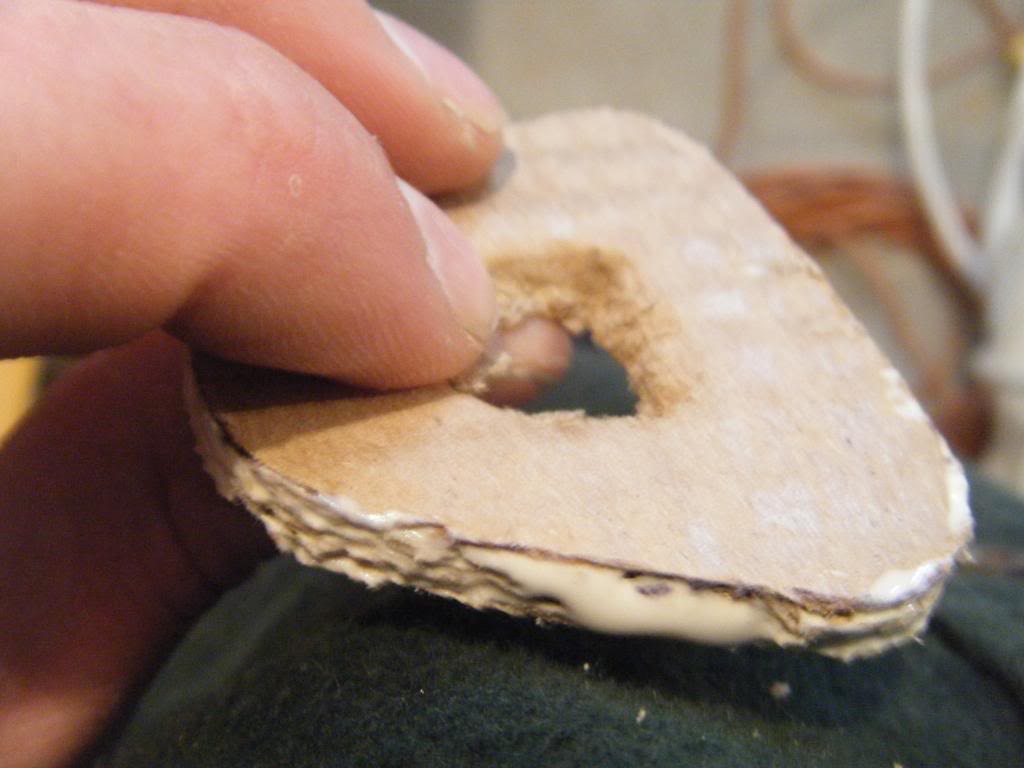
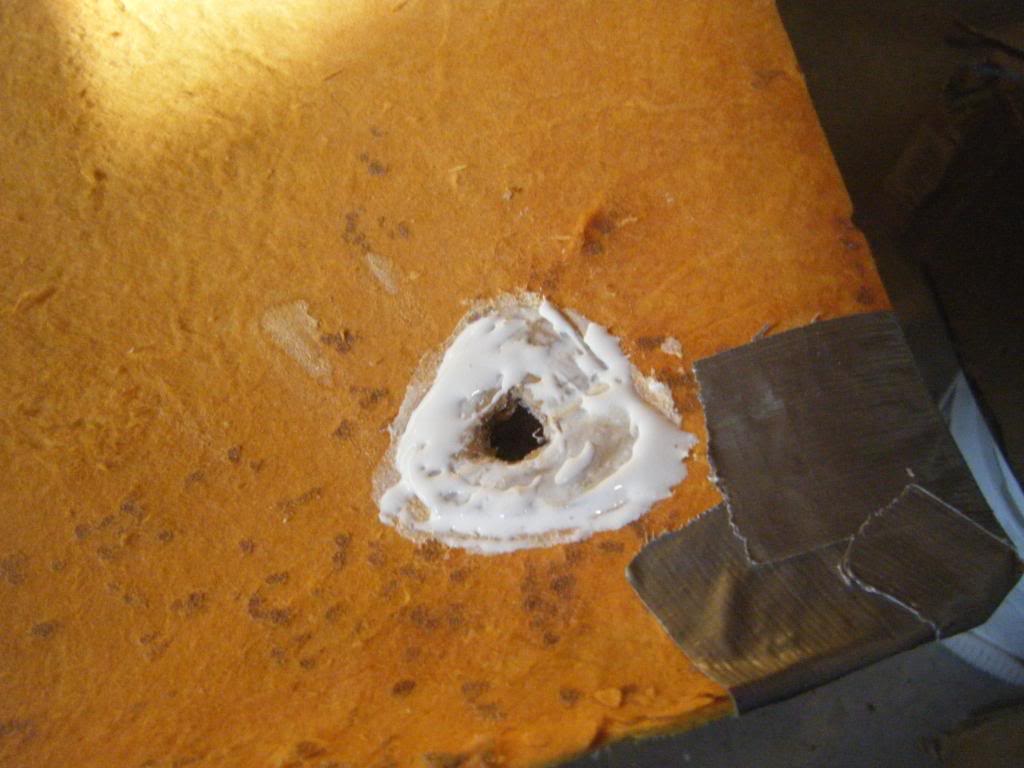
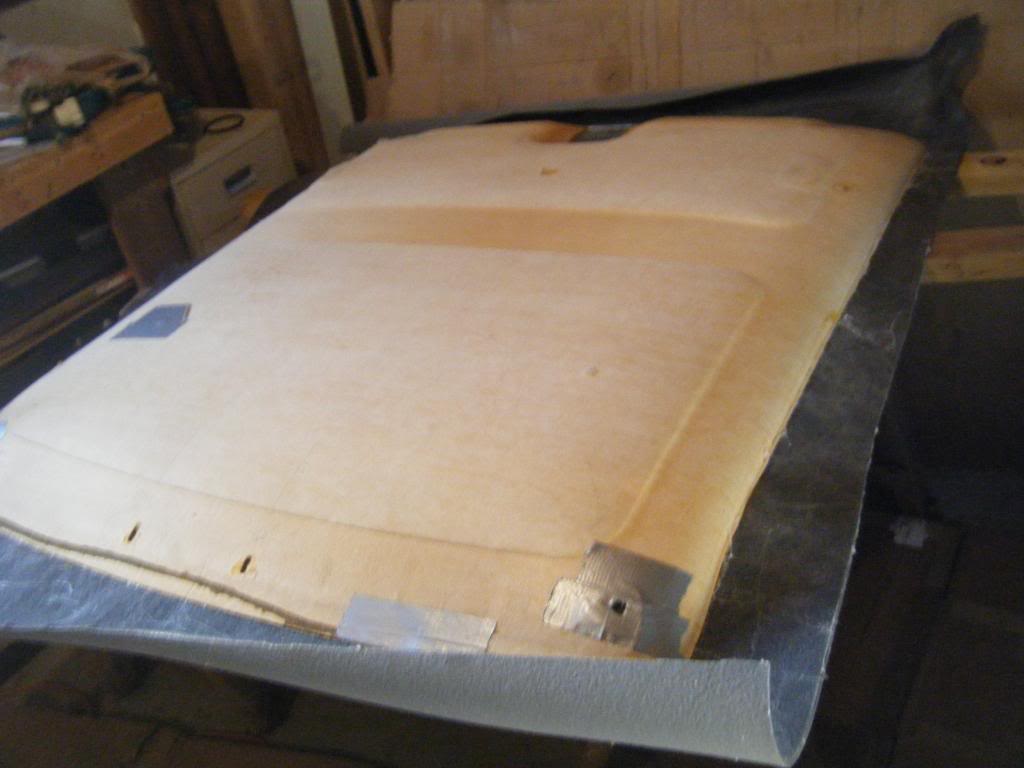
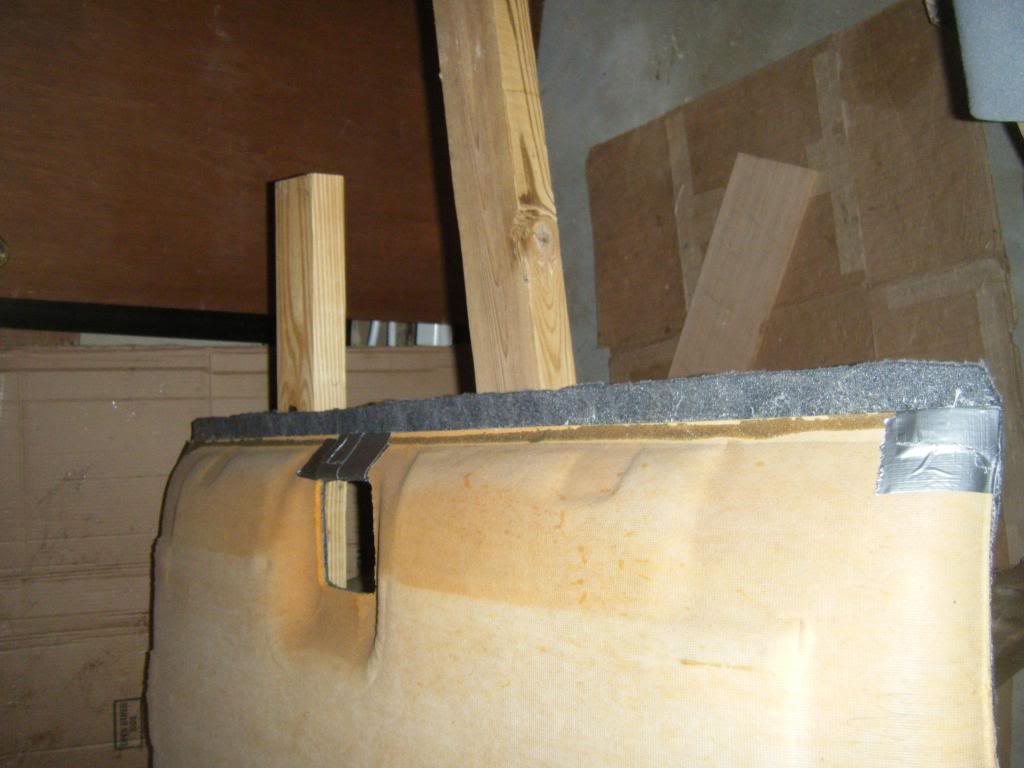
There were a few repairs I had to make. The rear of the headliner right behind the dome light was ripped, so I glued that. I made repairs using cardboard and duct tape to 3 corners of the liner. Also, the spot for the sun visor mount is supposed to have an inset piece which is what allows the visor mount to hold the liner up. Those pieces fell out, so I made new ones...out of cardboard and wood glue.
All repairs completed, ready for fabric.
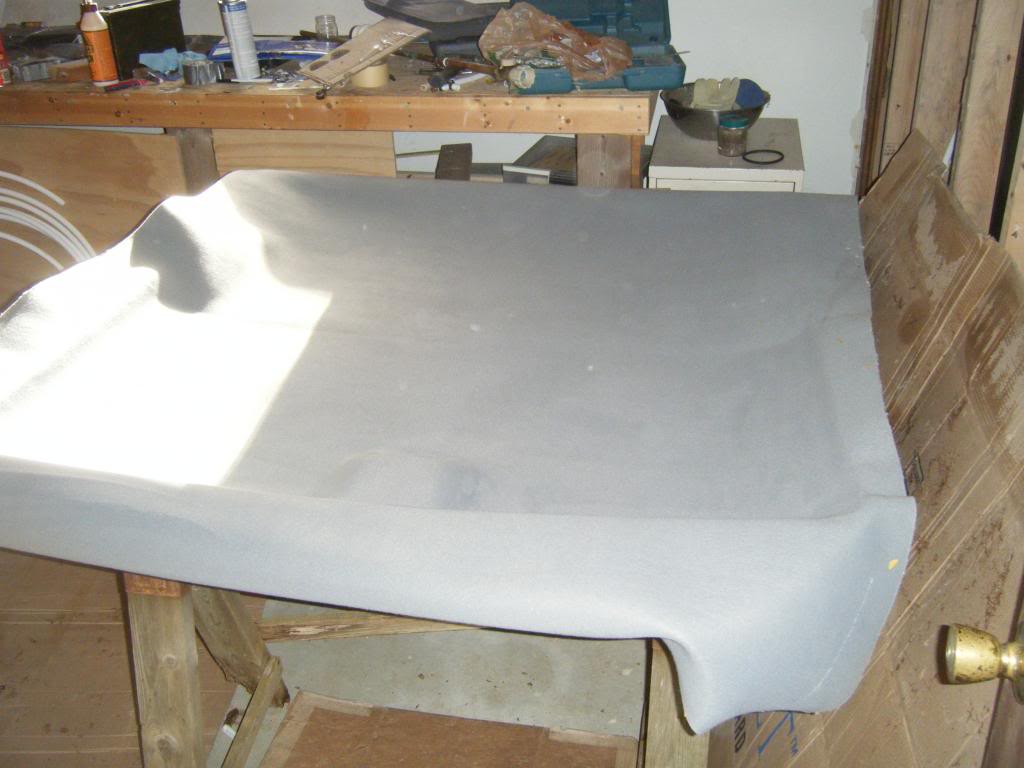
Lay the fabric out nice and centered, then fold half of it back so that it completely covers the other half (this will prevent glue from getting on the front of the fabric)
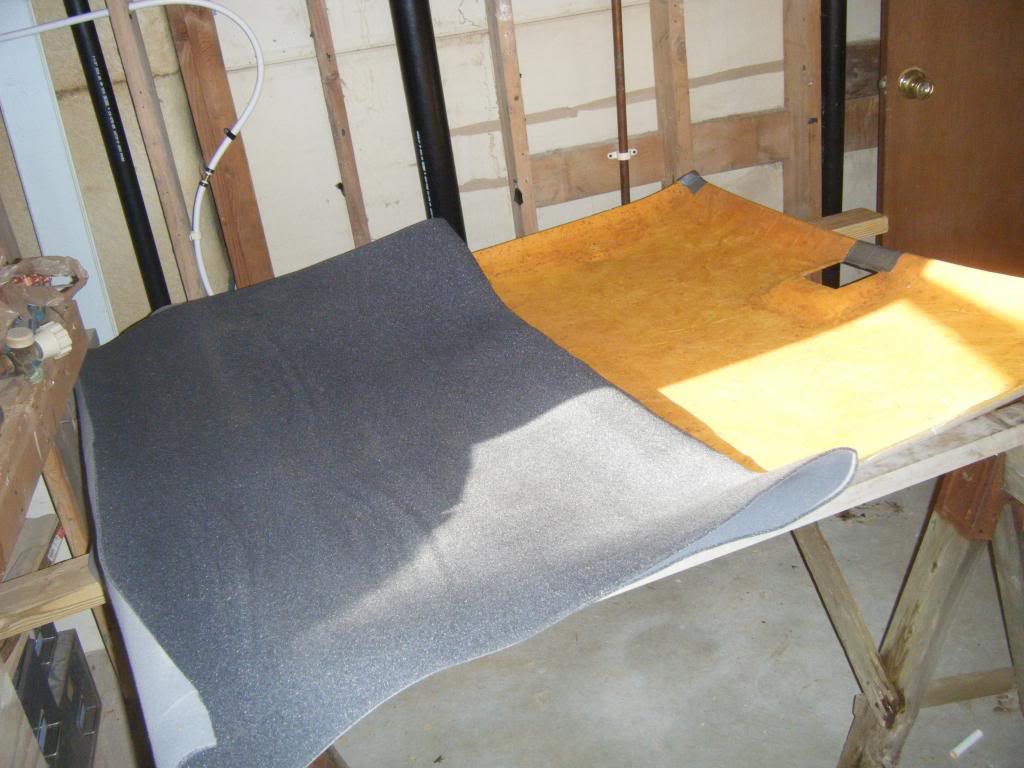
This seemed to work well. I sprayed it liberally on both the fabric and the liner and let them dry for a few minutes.

Careful, once the liner is folded down, you pretty much can't move it. It's pretty easy to work wrinkles out, but you will not be able to reposition the liner. I did a lot of rubbing to make sure the foam was well adhered.
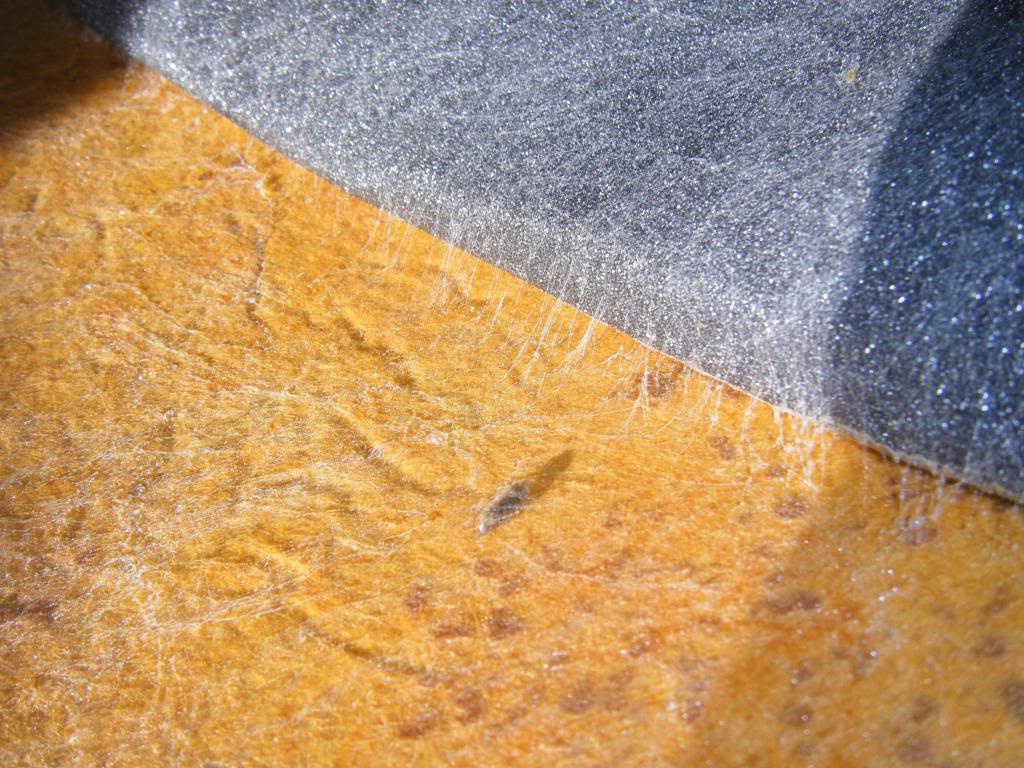
Now fold the free half over the adhered half and repeat the procedure. This is what the glue looks like.
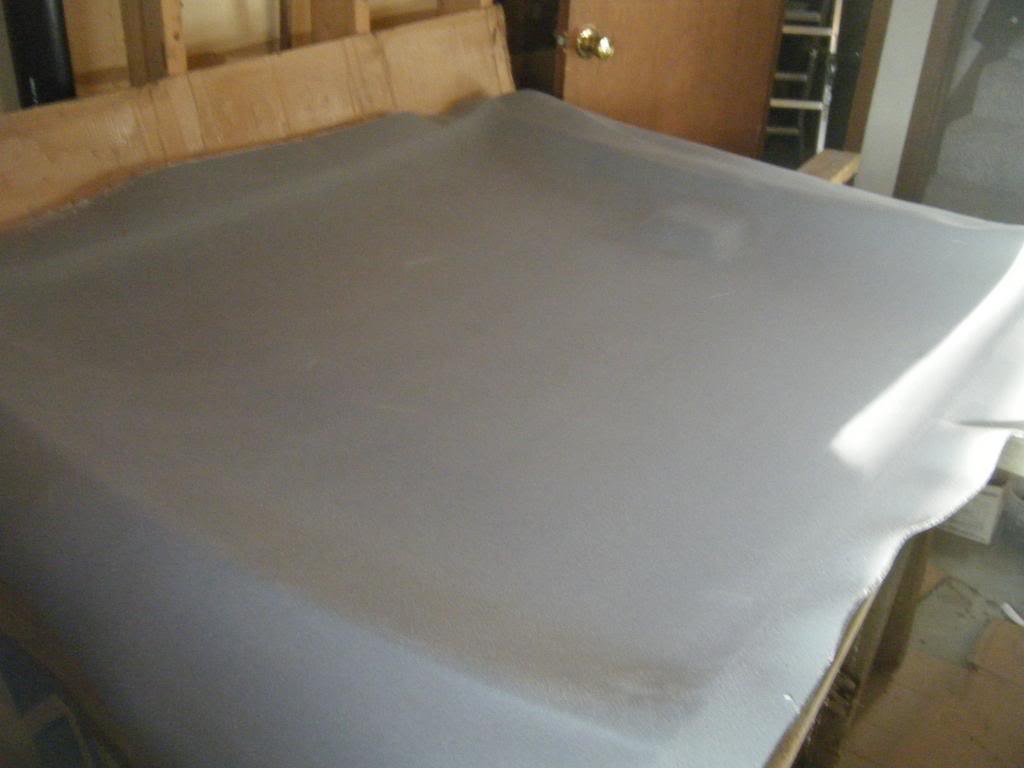
Both halves done.
Let it dry for a bit, then flip the liner over and cut holes where there needs to be holes. A tip for small holes (e.g. ones for the clothes hanger) is to not try to cut the whole hole out because it's a pain in the butt...just cut a cross into it so that the screw will go through. There is much less chance for a **** up if you do it this way.
Oh yeah, take note of where the old headliner fabric was folded over the liner. I forgot to, but it was pretty obvious that mine was folded along the front and the back from the leftover adhesive, and the sides were cut flush. So, that's exactly what I did for the new one.
After the sides were cut flush, I cut the front and back so that the remaining fabric would fold over. I broke out the glue again and folded the fabric over the liner.
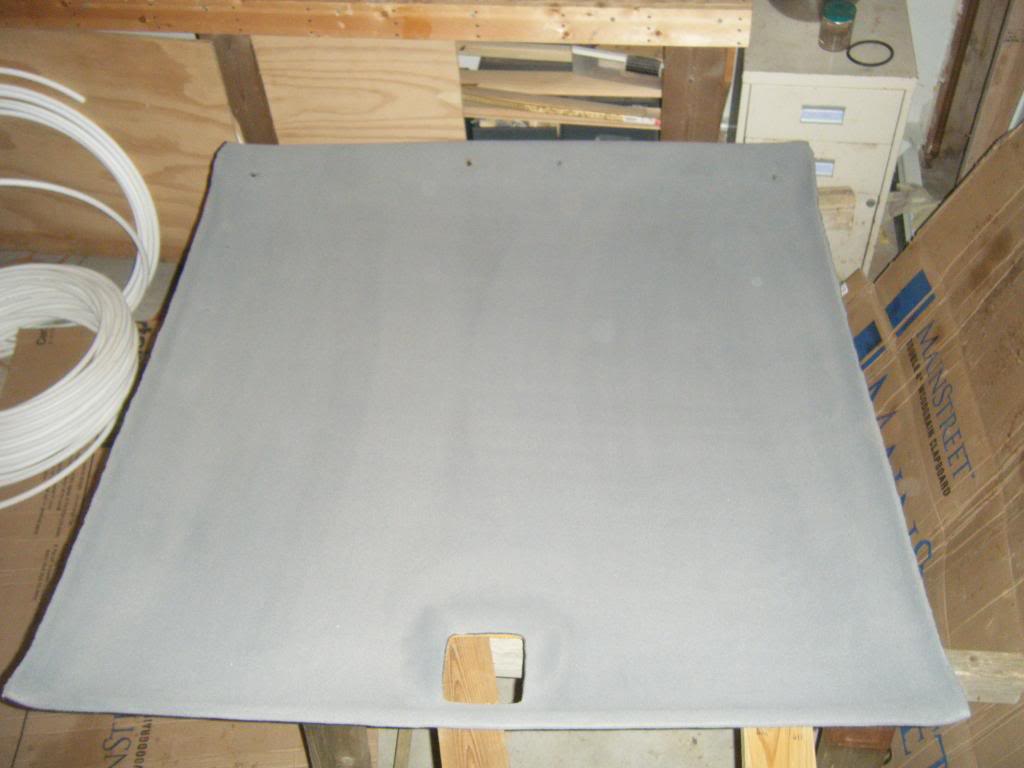
Done. Color is lighter than the OEM, but I couldn't give a **** less.
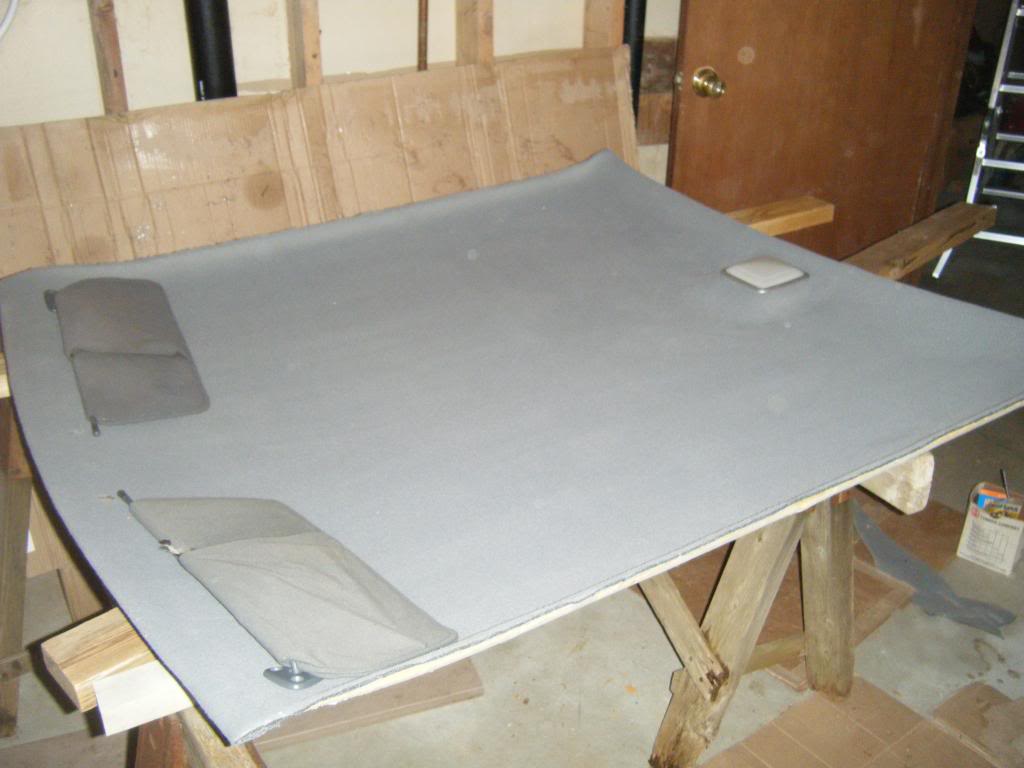
I actually did this last winter, but I never posted it up here. The headliner was sagging and separating from the board in a few places. I used headliner material from Jo-Ann's fabric...yes they actually have headliner material and it's sweet. This is the old one:

After pulling the fabric off, I broke out a stiff plastic bristle brush (which worked AWESOME) and removed as much of the foam residue as possible.

Then I used a razor blade at a right angle to scrape even more crap off.
Before.

Good to go.

There were a few repairs I had to make. The rear of the headliner right behind the dome light was ripped, so I glued that. I made repairs using cardboard and duct tape to 3 corners of the liner. Also, the spot for the sun visor mount is supposed to have an inset piece which is what allows the visor mount to hold the liner up. Those pieces fell out, so I made new ones...out of cardboard and wood glue.


All repairs completed, ready for fabric.

Lay the fabric out nice and centered, then fold half of it back so that it completely covers the other half (this will prevent glue from getting on the front of the fabric)

This seemed to work well. I sprayed it liberally on both the fabric and the liner and let them dry for a few minutes.

Careful, once the liner is folded down, you pretty much can't move it. It's pretty easy to work wrinkles out, but you will not be able to reposition the liner. I did a lot of rubbing to make sure the foam was well adhered.

Now fold the free half over the adhered half and repeat the procedure. This is what the glue looks like.

Both halves done.

Let it dry for a bit, then flip the liner over and cut holes where there needs to be holes. A tip for small holes (e.g. ones for the clothes hanger) is to not try to cut the whole hole out because it's a pain in the butt...just cut a cross into it so that the screw will go through. There is much less chance for a **** up if you do it this way.

Oh yeah, take note of where the old headliner fabric was folded over the liner. I forgot to, but it was pretty obvious that mine was folded along the front and the back from the leftover adhesive, and the sides were cut flush. So, that's exactly what I did for the new one.

After the sides were cut flush, I cut the front and back so that the remaining fabric would fold over. I broke out the glue again and folded the fabric over the liner.

Done. Color is lighter than the OEM, but I couldn't give a **** less.


Last edited by tbugden; 12-27-2014 at 01:50 AM.
#47
12-30-2014, 08:51 PM
Rust Removal using Electrolysis
A member on NASIOC posted a thread about using electrolysis to remove rust from rusty parts, and I decided I had to give it a try.
First of all, I'm not a chemist. As I understand it, rust is Fe2O3 (Iron Oxide). Electrolysis uses electric current to promote the removal of negatively charged oxygen ions from the rusted part (cathode) towards the anode, which is a positively charged piece of metal, through an electrolytic (current conducting) medium. Don't know what I'm talking about? Neither do I, but the great thing is that you don't have to! This is a very inexpensive and easy to setup process. This is my setup:
-Rusty part: This will be your cathode.
-Sacrificial steel: Get PLAIN steel. Not galvanized, stainless, or coated. Just plain rebar or flat steel. 4 ft. of 1 1/2" wide flat steel did it for me.
-Clean 5 gallon bucket
-Battery charger: mine is a trickle charger (12V/1.5A). I had doubts about it being powerful enough, but it works just fine. A slightly more powerful battery charger would likely yield quicker results. edit: it has to be one of those barebones type chargers that just charge with no voltage sensors or whatever...those will get confused and might work, might not. HOWEVER, i've been having success with using an old car battery. It lasts quite a long time, and you can use any damn charger to charge it at intervals...so I recommend that method. A car battery also works super fast.
-Arm & Hammer washing soda (sodium carbonate): This is your electrolyte. I have heard that baking soda (sodium bicarbonate) will work, but not as well.
-Small piece of wood to lay across bucket
-Wires
-Hardware as necessary
The pieces of sacrificial steel are bolted to the bucket. This process works on "line of sight". That is, if the rust can't "see" an anode, it will not be de-rusted as well as it would be if it could.
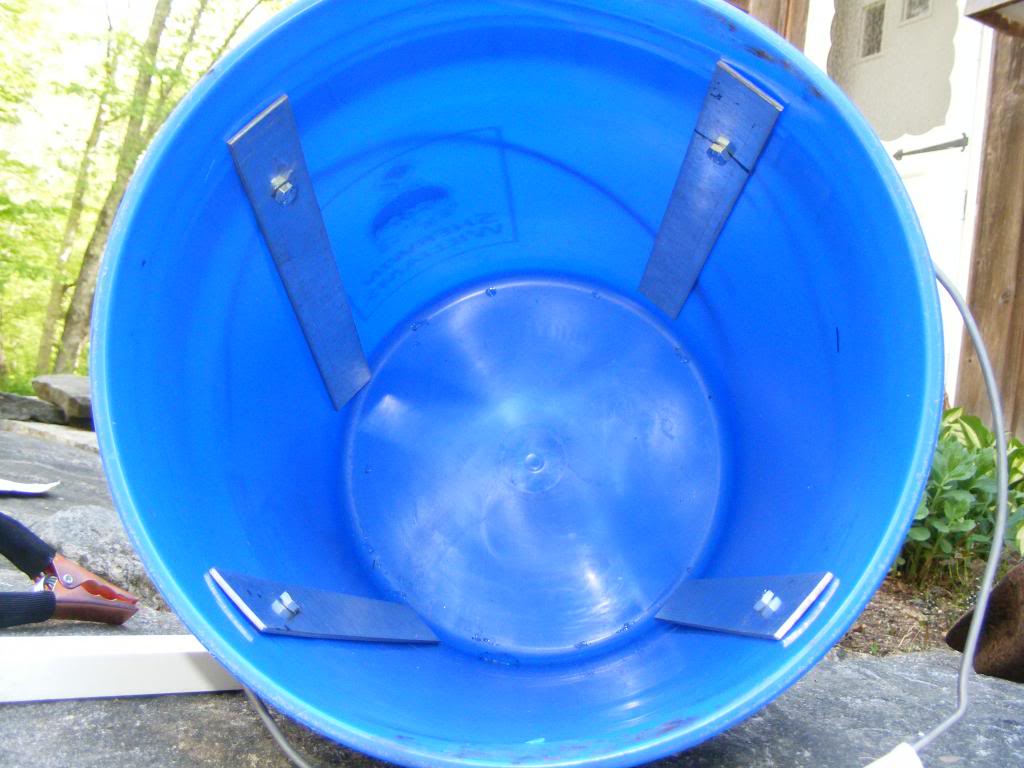
I used an old jumper cable to connect the four pieces of sacrificial steel.

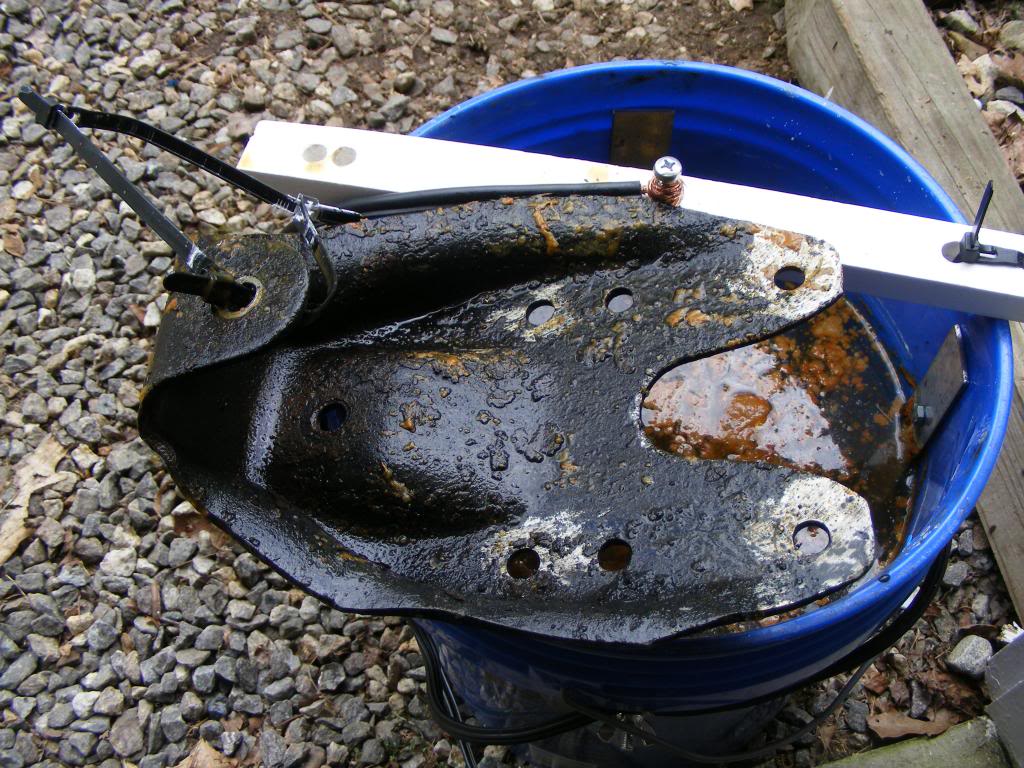
Suspend the part to be de-rusted in the bucket, so that it does not touch any of the anodes. Releasable zipties work great for this purpose. Fill the bucket with water and add 1 tablespoon of A&H washing soda PER GALLON of water.
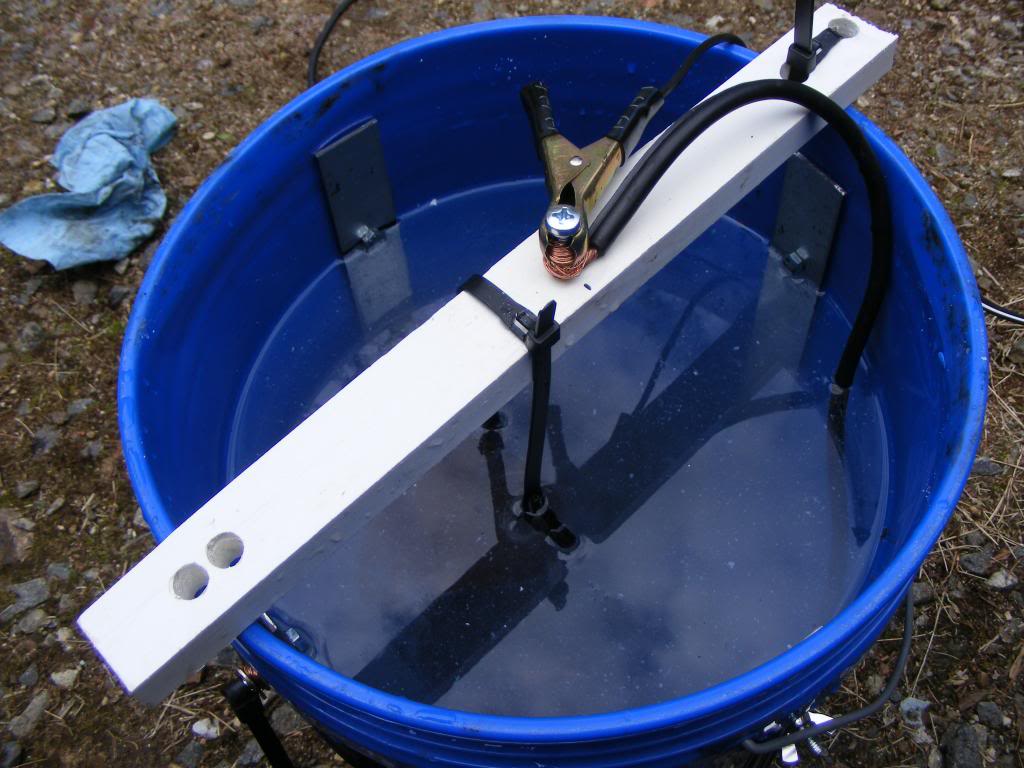
Then, you will connect the NEGATIVE lead of the battery charger to the part to be de-rusted. It may be a good idea to connect the lead instead to a length of wire (see above picture), which is then connected to the part, so that the lead is not submerged in the solution. This will ensure that the battery charger clips aren't damaged. The POSITIVE lead will be connected to the anodes. Turn the battery charger on, and after a while, you will see rusty foam forming at the surface.
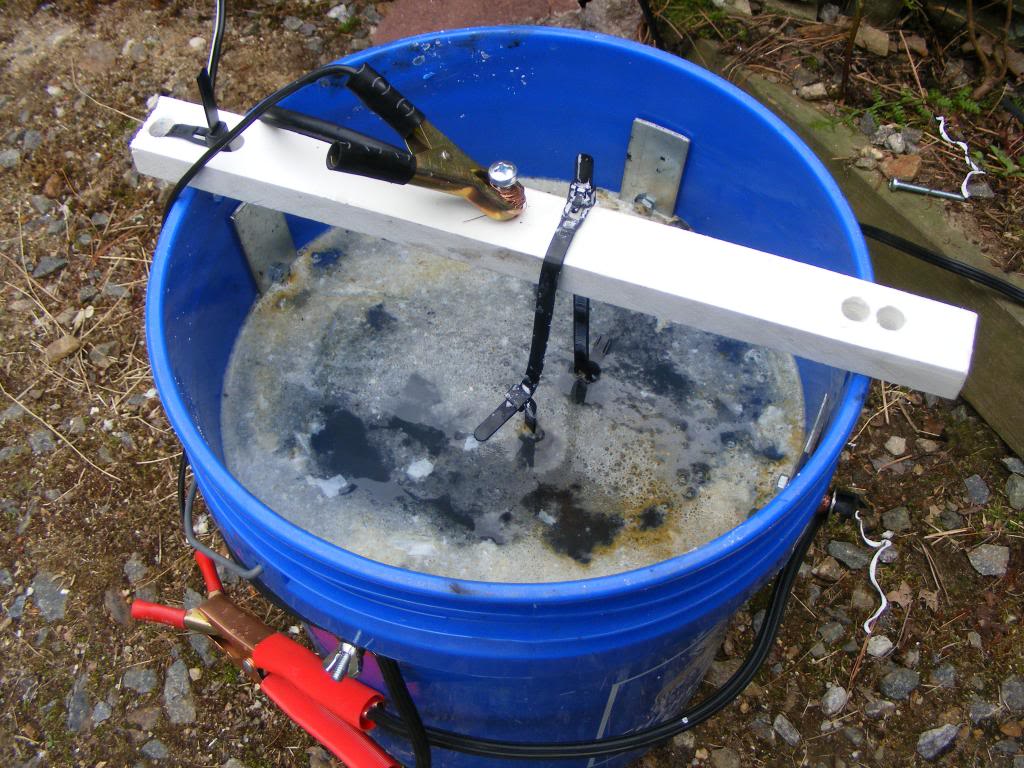
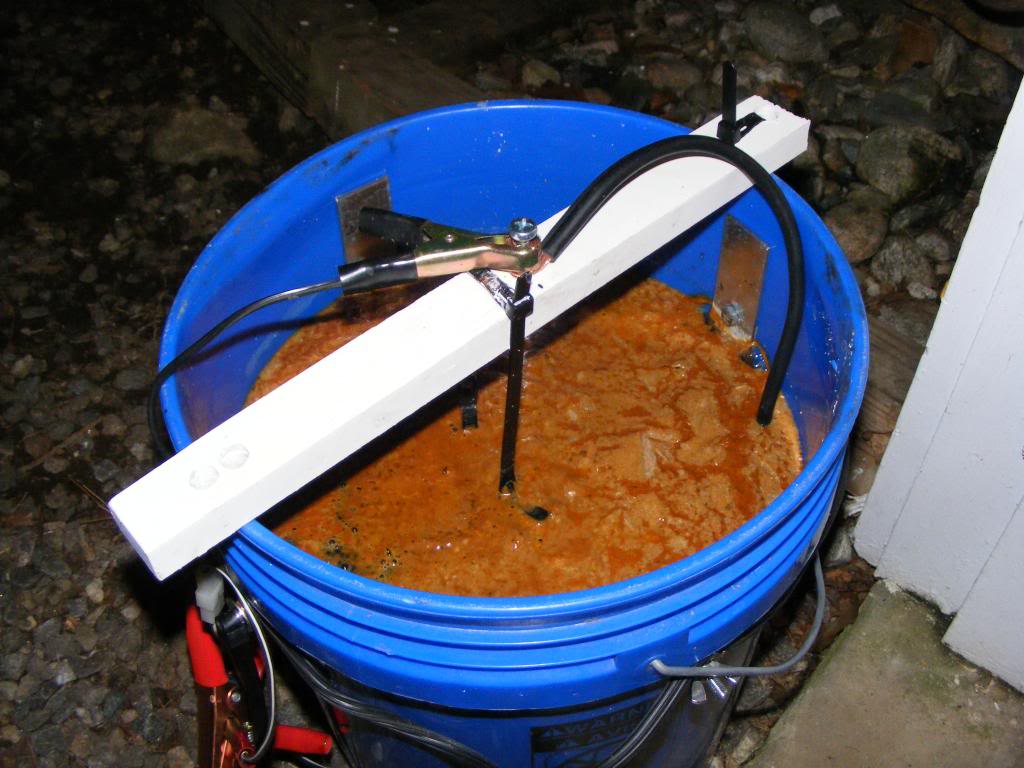
After three-ish hours.
The part comes out looking like this.
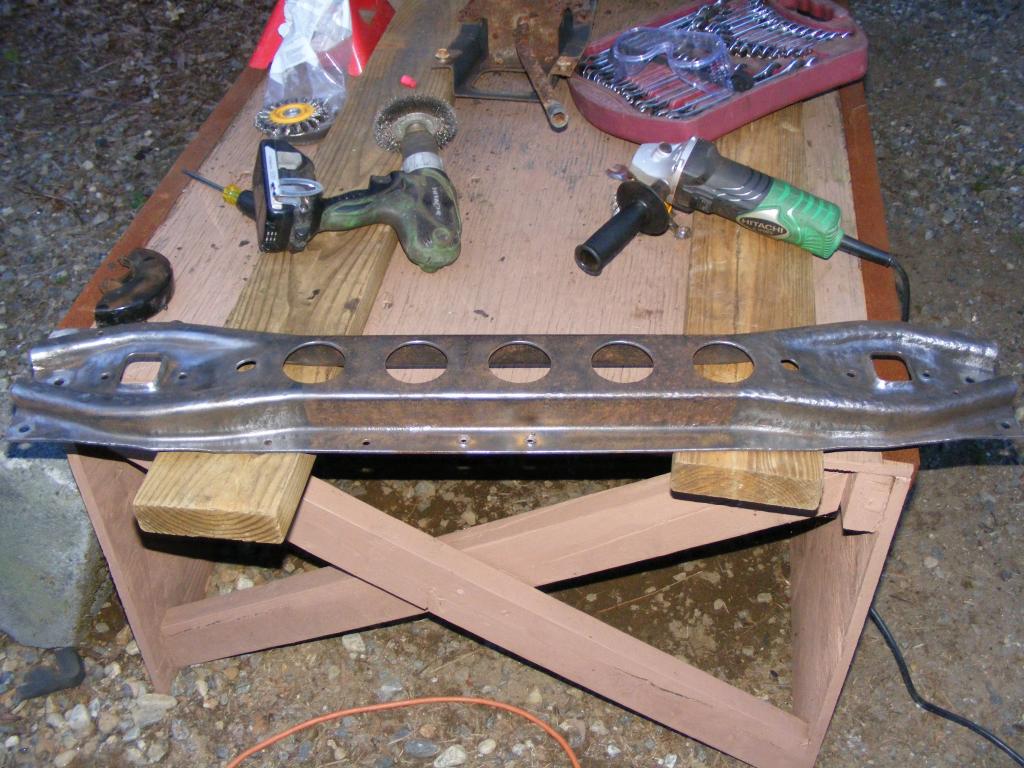
Take a wire wheel to it for a few minutes, and see the difference.
Clean.
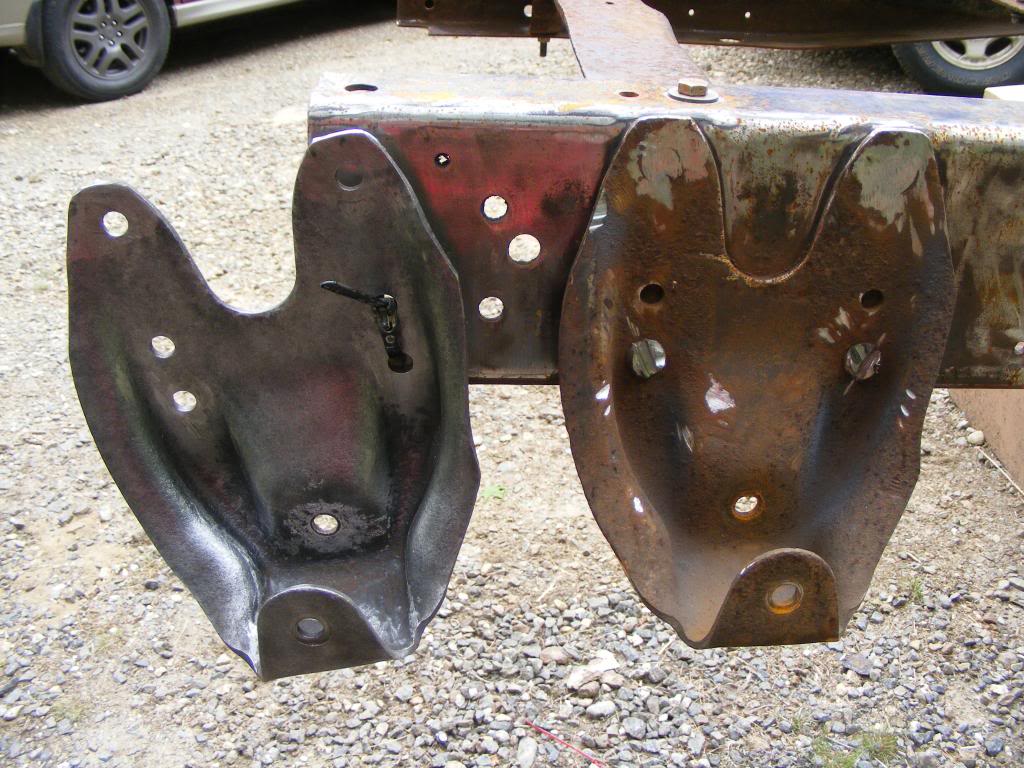
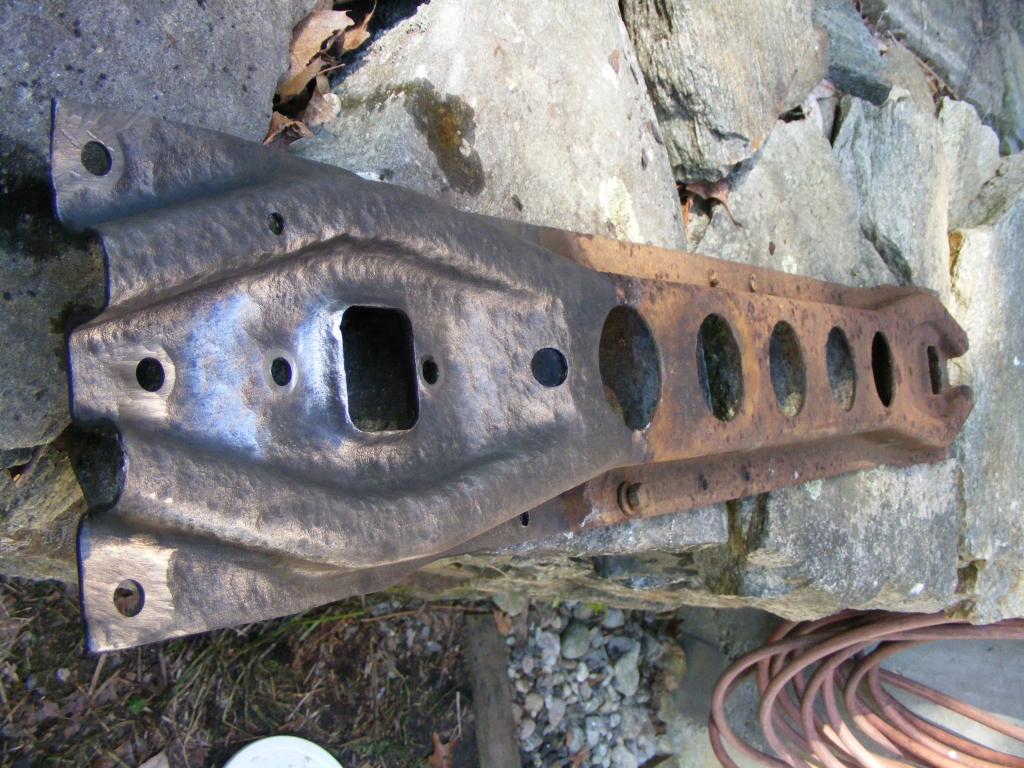
See the difference? The ends were put through electrolysis, the center piece was only hit with a wire wheel. As you can see electrolysis does a much better job.
For the guy who wants to do it himself and doesn't have lots of money...I think this is a good way to remove rust from small parts without damaging the good metal.
A member on NASIOC posted a thread about using electrolysis to remove rust from rusty parts, and I decided I had to give it a try.
First of all, I'm not a chemist. As I understand it, rust is Fe2O3 (Iron Oxide). Electrolysis uses electric current to promote the removal of negatively charged oxygen ions from the rusted part (cathode) towards the anode, which is a positively charged piece of metal, through an electrolytic (current conducting) medium. Don't know what I'm talking about? Neither do I, but the great thing is that you don't have to! This is a very inexpensive and easy to setup process. This is my setup:
-Rusty part: This will be your cathode.
-Sacrificial steel: Get PLAIN steel. Not galvanized, stainless, or coated. Just plain rebar or flat steel. 4 ft. of 1 1/2" wide flat steel did it for me.
-Clean 5 gallon bucket
-Battery charger: mine is a trickle charger (12V/1.5A). I had doubts about it being powerful enough, but it works just fine. A slightly more powerful battery charger would likely yield quicker results. edit: it has to be one of those barebones type chargers that just charge with no voltage sensors or whatever...those will get confused and might work, might not. HOWEVER, i've been having success with using an old car battery. It lasts quite a long time, and you can use any damn charger to charge it at intervals...so I recommend that method. A car battery also works super fast.
-Arm & Hammer washing soda (sodium carbonate): This is your electrolyte. I have heard that baking soda (sodium bicarbonate) will work, but not as well.
-Small piece of wood to lay across bucket
-Wires
-Hardware as necessary
The pieces of sacrificial steel are bolted to the bucket. This process works on "line of sight". That is, if the rust can't "see" an anode, it will not be de-rusted as well as it would be if it could.

I used an old jumper cable to connect the four pieces of sacrificial steel.

Suspend the part to be de-rusted in the bucket, so that it does not touch any of the anodes. Releasable zipties work great for this purpose. Fill the bucket with water and add 1 tablespoon of A&H washing soda PER GALLON of water.

Then, you will connect the NEGATIVE lead of the battery charger to the part to be de-rusted. It may be a good idea to connect the lead instead to a length of wire (see above picture), which is then connected to the part, so that the lead is not submerged in the solution. This will ensure that the battery charger clips aren't damaged. The POSITIVE lead will be connected to the anodes. Turn the battery charger on, and after a while, you will see rusty foam forming at the surface.

After three-ish hours.

The part comes out looking like this.

Take a wire wheel to it for a few minutes, and see the difference.
Clean.


See the difference? The ends were put through electrolysis, the center piece was only hit with a wire wheel. As you can see electrolysis does a much better job.

For the guy who wants to do it himself and doesn't have lots of money...I think this is a good way to remove rust from small parts without damaging the good metal.
Last edited by tbugden; 12-31-2014 at 01:11 AM.
#50
01-02-2015, 12:11 AM
Yep I enjoyed it, really cool to watch the rust just bubble right off.
I'm so close to putting the cab back on I can feel it. I'd rough estimate about 5 more hours of work to do on the chassis, including bolting up the axles, going from the back to the front and making sure every fastener is tight (minus suspension bushings...not going to tighten bushings down until most of the weight is on the truck) fixing a little wiring, spraying the frame and basically everything else with Fluid Film, and making just one more cab mount. Also I facked up one of the bolts for the sway bar to control arm bracket because the control arm threads are rusty and need to be cleaned, but the sway bar can be put on at anytime.
Then I still haven't welded the floor in...so yeah...that should be done at some point, lol.
Last edited by tbugden; 01-02-2015 at 12:15 AM.