When you click on links to various merchants on this site and make a purchase, this can result in this site earning a commission. Affiliate programs and affiliations include, but are not limited to, the eBay Partner Network.
I�ve been working on a �89 Dakota 4WD convertible, which includes a motor and transmission upgrade. This truck came into the family when my son purchased it as a project truck that we planned to fix up together. It was in sad shape; drive-able, but beat up and tired. I�ve actually been working on it, on and off, for a few years now, as I have lots of responsibilities and little time, if you know what I mean. My oldest son has since moved out of town but he keeps track of my progress on the truck. My younger son isn�t as into gear-head stuff, though he may show up if I decide to MegaSquirt the Dak � computers are his primary addiction.
Anyway, I�ve taken some pictures along the way and figured I could log this multi-year project in a condensed form. I hope you enjoy viewing it.
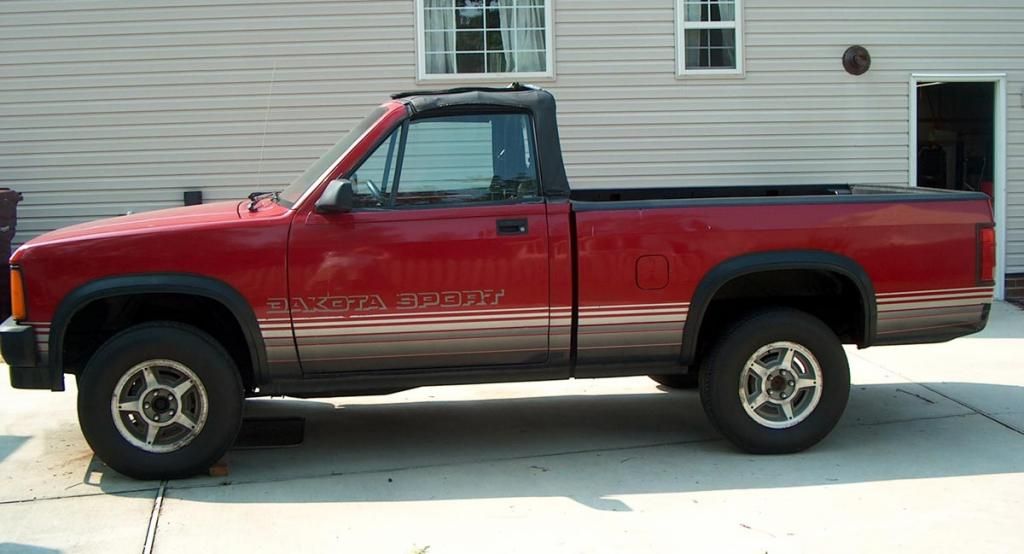
The truck had 200K miles on the odo, and every panel on it, except maybe one of the front fenders and the hood, was dented. The engine had low compression on two cylinders, and the convertible top leaked. A donor truck would�ve made things easier, but my wife would have killed me, and I really didn�t have the room. It's all updated now, enjoy the story! (Edited 9/8/17)-> Photobucket images no longer display some of the "before" pictures, so I thought I'd stick an "after" picture here first:
[img]
Q [/img]
I�m a decent mechanic, but my body work skills aren�t the best. I have a friend, Rod, who is a paint pro and hotrod builder, so when I started talking about straightening the body he was the guy I went to. He went well beyond my expectations for the body work. I wanted to get rid of the dents and have a decent paint job, but he took the truck apart, worked over every panel, and eventually had it straight as an arrow:[img]
As the body work and paint progressed I was inspired to do more than I had planned originally. It became one of those projects that has a life of its own, so I started making bigger plans. My only real contribution to the paint was some airbrush work I did on the tailgate:
[IMG]
[/IMG]
Once the truck was painted, I started on the interior. This truck has become my re-interpretation of the convertible truck Dodge built, so besides the shade of red on the exterior I also decided to change the interior color - from red to black.
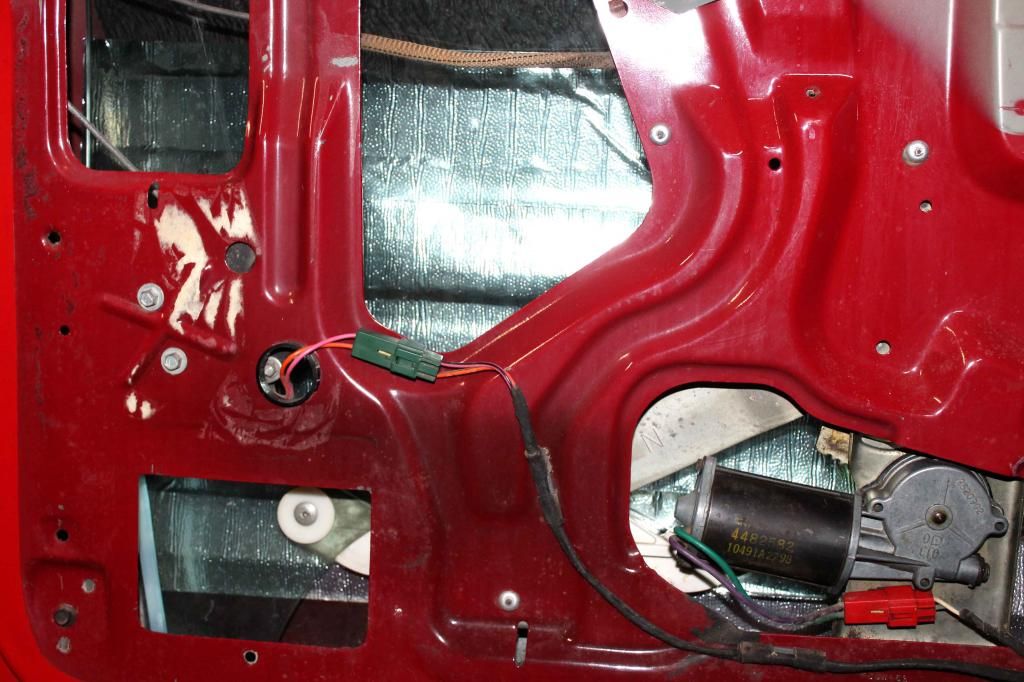
I picked up Dak door panels from the junk yard and cut out the middle sections that go below and around the armrest. I covered these cut-out pieces with silver vinyl upholstery then over-layed them unto the truck’s door panels. I had to fabricate some aluminum extensions to cover the gaps between the covered panel sections and the door latches, which were now recessed. The second picture shows the recessed handle, a little dusty & dirty but they’ll clean up OK. I’m not sure this is the final version of the door panels, but I’m good with ‘em for now.
[IMG]
[/IMG]
There were no black interiors in these early Daks so I had to put some effort in to make it work. I used dark grey panels which I washed, sanded, MEK’d, and then flame-treated just before applying a black vinyl paint. Polypropylene plastics are not a good painting surface, but I tested several pieces after using this process and they’ve held up well to abuse tests. If the color doesn’t hold up after all this, there are replacement panels available in black ABS, which might be preferable. I minimized the areas where painted polypropylene panels are used - only on the uncovered portions of the doors, the kick panels, and the side trim in the rear corners of the cab (partially protected by the roll bar). The dash is a solid black ABS cover-lay while the floor console and rear trim piece are both ABS plastic that vinyl paint adheres to well. Seatbelts were a challenge, as I couldn’t actually find black belts for an early Dakota. Eventually I ran across a mid-nineties Dak in the junk yard with charcoal grey belts that were in good shape.
I also scrapped the original red carpet, and replaced with a black pre-formed carpet. While the interior was gutted I removed all surface rust on the floor and coated with an epoxy barrier paint from Eastwood, to keep moisture out. The drains were removed and replaced with fresh ones. I also added some wiring while I was in the dash and under the carpet, mostly for audio and new interior lighting. The floor and insides of the doors have been lined with sound-dampening material to help dampen rattles. The stock steering wheel (no airbag) has been replaced with a Grant Formula 4 wheel.
[IMG]
[/IMG]
A lot of work went into the dash, even though it’s not apparent just looking at it. The entire dash was removed so that the plastic dash overlay could be properly installed. Once removed, I noticed the dash frame was cracked in several places where it screws to the firewall. The areas around the screws had cracked over the years and I imagine this would have contributed quite a few rattles and squeaks to the ride. Using ABS glue I built up and re-attached the broken sections, then I used HD 3M mounting tape to attach a 1 inch aluminum flat bar across the leading edge of the dash to stiffen it up. I installed the dash overlay per the instructions (clean, abrade, then glue). I was not happy with the cutouts in the dash cover-lay for the defroster vents. They were not formed well and weren’t cut out cleanly. I worked them carefully with a heat gun to get rid of some of the unevenness, then I did some trimming with an exacto-knife to clean up the openings. They’re better now, but still not as straight as I would have liked.
Wish I had more pictures of the dash repairs, but I just didn't take the time when I was doing that piece.
[IMG]
[/IMG]
The window tracks had Teflon lining inserts that were worn through in a few places. I ditched the worn-out inserts and lined the window edges with a thicker adhesive-backed Teflon material that I found on the Aircraft Spruce & Specialty web-site. You can just see the Teflon on the window track in the first picture, lower left corner. The Teflon tape worked great, but I also had to replace the small plastic window guides for the window; luckily the dealer was able to get those. The latches have been cleaned up, as have the strikers, pins, and other hardware.
[IMG][/IMG]
[IMG][/IMG]
One detail I’ve have planned for the interior is the addition of a rear-view mirror with map lights built-in. I never found an interior light in this truck (it’s a convertible, no dome light?), so the mirror map lights would be perfect. My Neon RT has this and I like the way it lights up the interior but never blinds your eyes at night. The mirror pictured is one of two styles I’ve found, both are from Dodge Intrepids.
[IMG][/IMG]
As mentioned earlier, I found a freshened 5.2 motor to give the truck more go. It’s a ’92 Magnum motor, not the most badass of engine options, but a big improvement over the 125 horse V6 that used to live under the hood. I have 2 Magnum computers to try out with the new engine, a standard ’92 V8 truck PCM and a ’92 Mopar HP computer. Good-bye V6 - and your little smog pump too.
The original NP2500 5 speed wasn’t built to handle a V8, so it’s gone as well. A 4WD NV3500 from a wrecked ’97 Dakota has taken that job now. It had a little under 80K miles on the odo, but the fluid looked clean and nothing was leaking, so I’m hoping it’ll be fine. It may have been rebuilt, as there are marks on it that look like it might have been in a rebuild jig at some point. Here’s the happy couple, dressed up for the occasion:
[IMG]
Looking in the engine bay once the V6 came out, there were a few things to deal before the new motor went in. The list included motor mounts and all the front end brake lines, down to the proportioning valve. I pulled out the old brake lines and installed new poly-coated brake lines, bending them to fit, mostly by hand. The long one, from the T fitting to the passenger side brake, took a 51 inch line. The driver’s side brake to the T, and the front pair line from the T to the proportioning valve, were both 20 inch lines. The front and rear lines from the master cylinder to the proportioning valve took 30 inches each. Here's how the brake lines leading to the master cylinder came out:
[IMG]
[/IMG]
[IMG]
[/IMG]
I also cleaned and painted the engine bay. It was a mess, caked with oil and grease. I think all that oily gook that coated the frame really kept the rust away on many parts though. Here’s the engine bay before and after:
[IMG]
[/IMG]
The V6 motor mounts weren’t in bad shape, but they had settled a little and I figured the extra weight and torque of a V8 would be asking too much from them. I ordered V8 mounts to fit a ’94 4WD V8 Dakota, but it turns out ma Mopar widened the 4WD mounts once they started putting V8’s in the 4WD Dakotas – so the mounts I ordered wouldn’t fit. Instead of kicking and swearing, my usual reaction, I decided to order some liquid urethane and upgrade my old mounts. First I cleaned up the old mounts with a small wire wheel and some MEK solvent, then I hot-glued plastic caps to the ends to form a mold. Next I mixed up the two part urethane and poured it into the voids. For anyone who’s interested, I get the urethane from McMaster Carr, an online supplier. I’ve worked with epoxy resins quite a bit, and mixing and using the urethane was very similar. If you do this, clean the mounts thoroughly, pour carefully, and use a popsicle stick to gently scrape the sides of the mount as the urethane goes in so you get good adhesion and no bubbles or voids. I also extended the urethane material out beyond the original width of the mounts as far as I could go without making the mounts too wide. This should add support and prevent the mounts from shifting within the frame brackets. I used a urethane formula that is similar to the stock stiffness, as I didn’t want hard mounts. I’m happy with the way they turned out so far, but only driving the truck will tell how good they perform in the end.
[IMG]
[/IMG]
When it came to finally dropping the motor and transmission in, I was anxious because I needed it to go smoothly. If things didn’t go right there’s no telling how long it would be before I had another full day to do it. This had to be done outside as I don’t have enough room in the garage - therefore weather is also an issue. The old V6 and tranny came out easy, but the V8 was obviously bigger, and the NV3500 was not only bigger, but the bell housing was not removable.
I removed the front sheet metal from the truck, which helped a lot, and I was able to slip the tranny in without too much trouble. I supported it temporarily on the rear cross member mount, with a jack up front under the bell housing. I lowered the engine in slowly, watching the input shaft of the trans and adjusting the trans jack to stay aligned with the engine. When the engine and trans were aligned and an inch or so apart I crawled under the truck and jiggled the trans until it pushed up against the motor. Got the motor and trans in and bolted up in about 4 hours!
[IMG]
[/IMG]


 [/img]
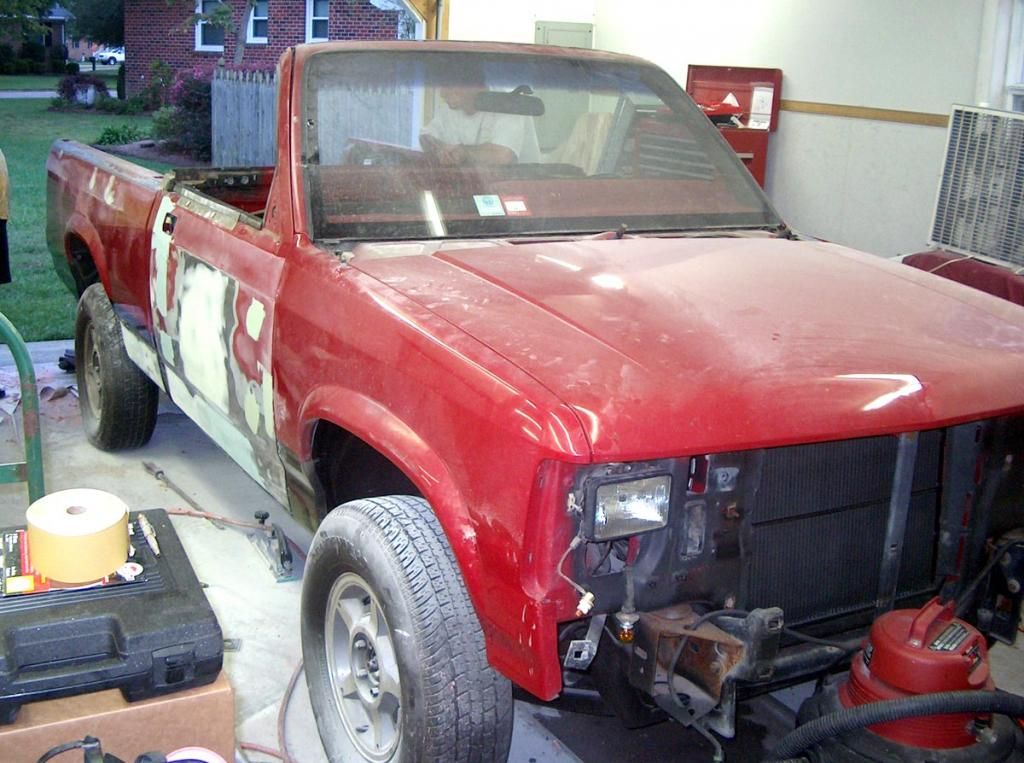 [/img][img]
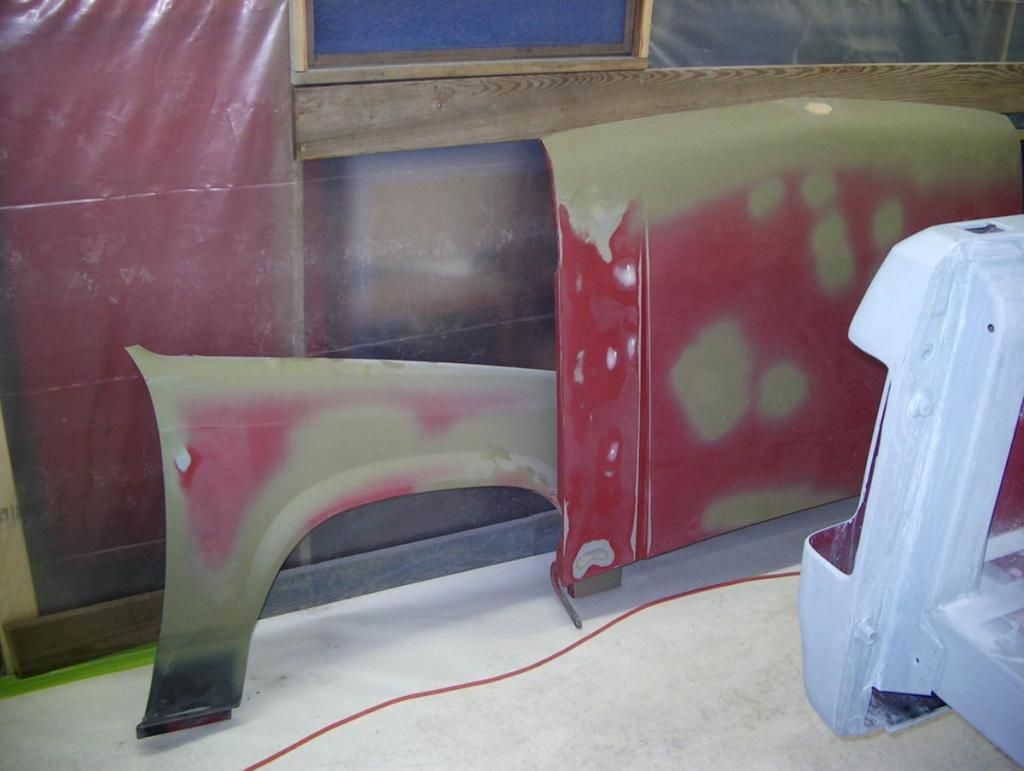 [/img][img]
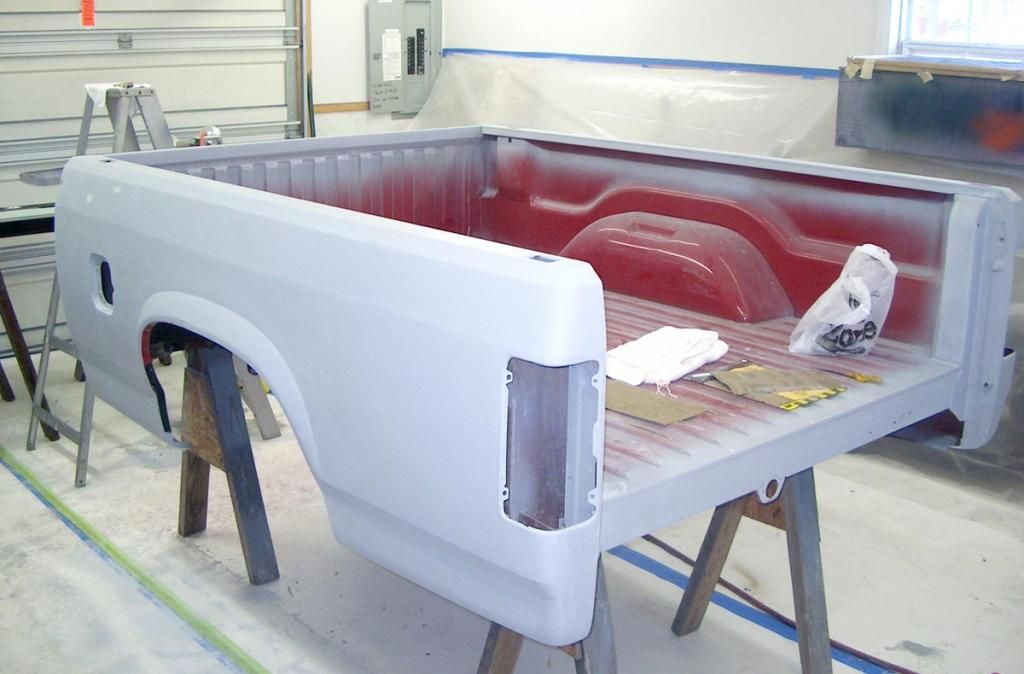 [/img][img]
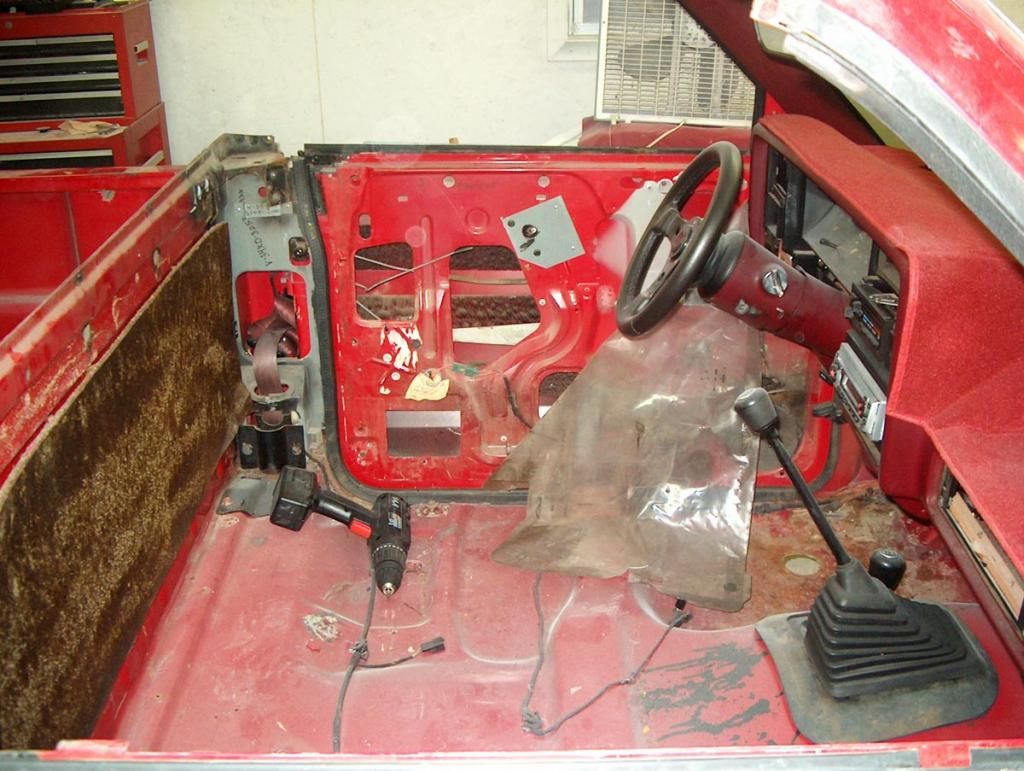 [/img][img]
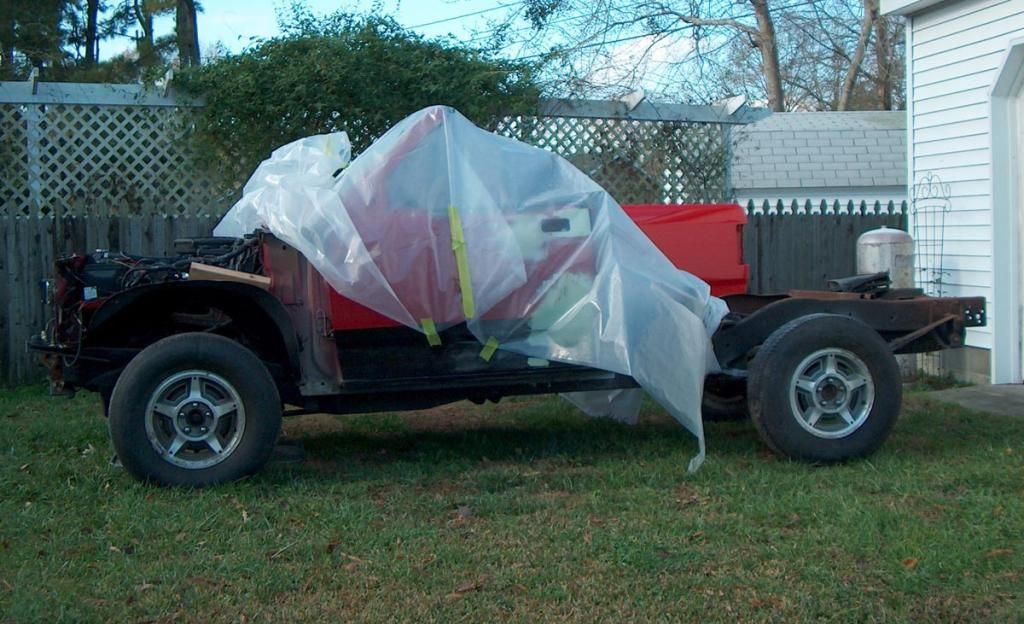 [/img]

 [/img]
 [/img][img]
 [/img][img]
 [/img][img]
 [/img][img]
 [/img]


 [/IMG]
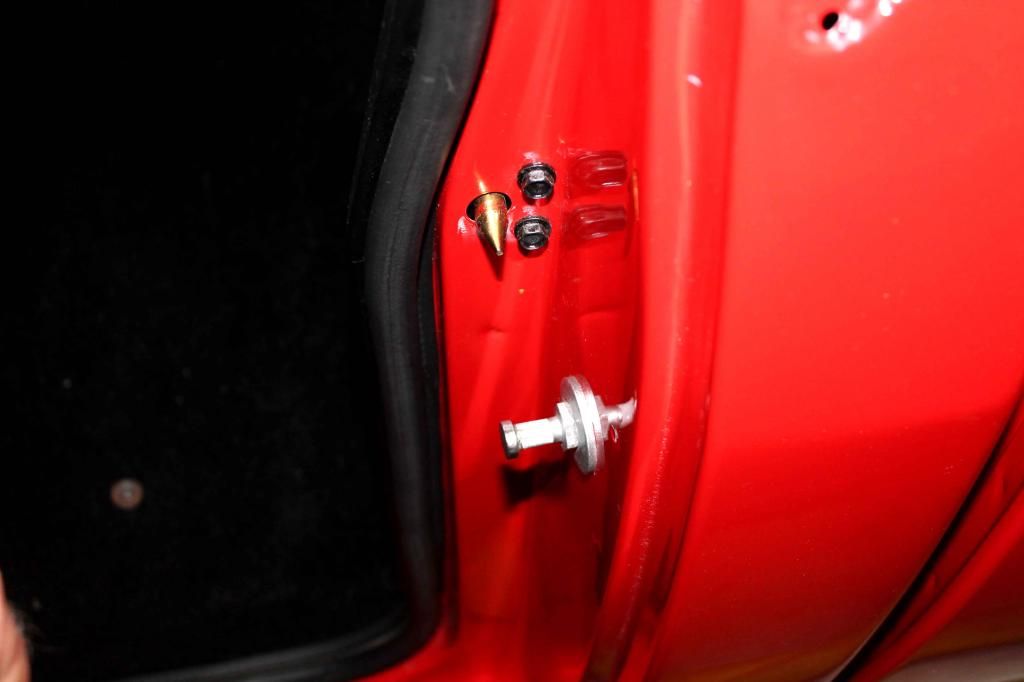 [/IMG]
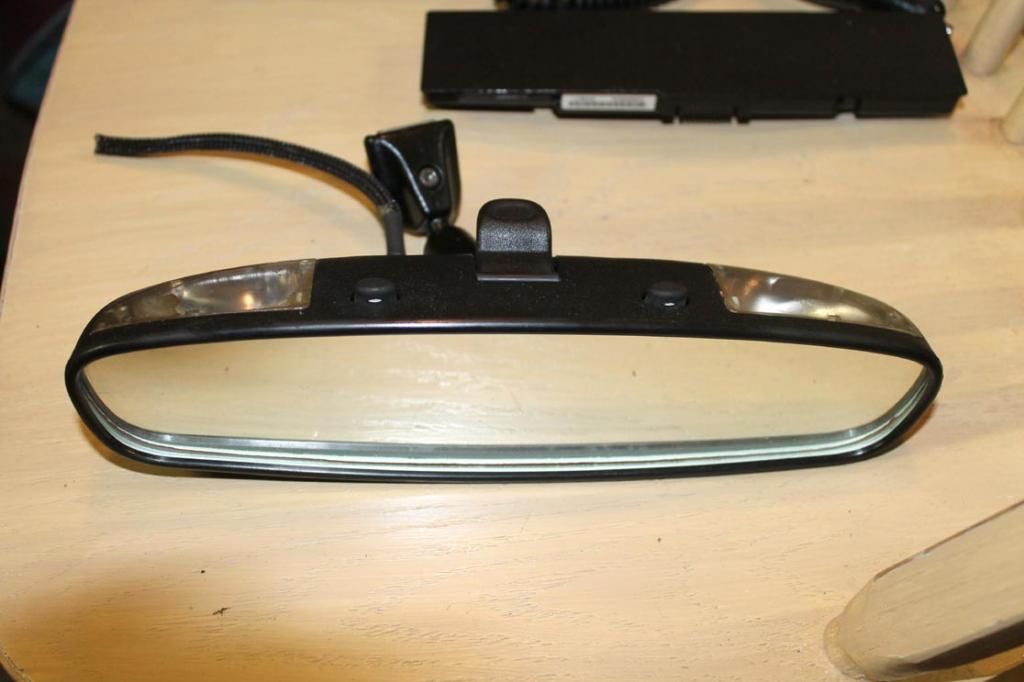 [/IMG]
 [/IMG]
 [/IMG]
 [/IMG]