
DIY: Window Removal (Power Windows)
#1
 12-16-2009, 05:15 PM

These pictures are based on the driver's side door.
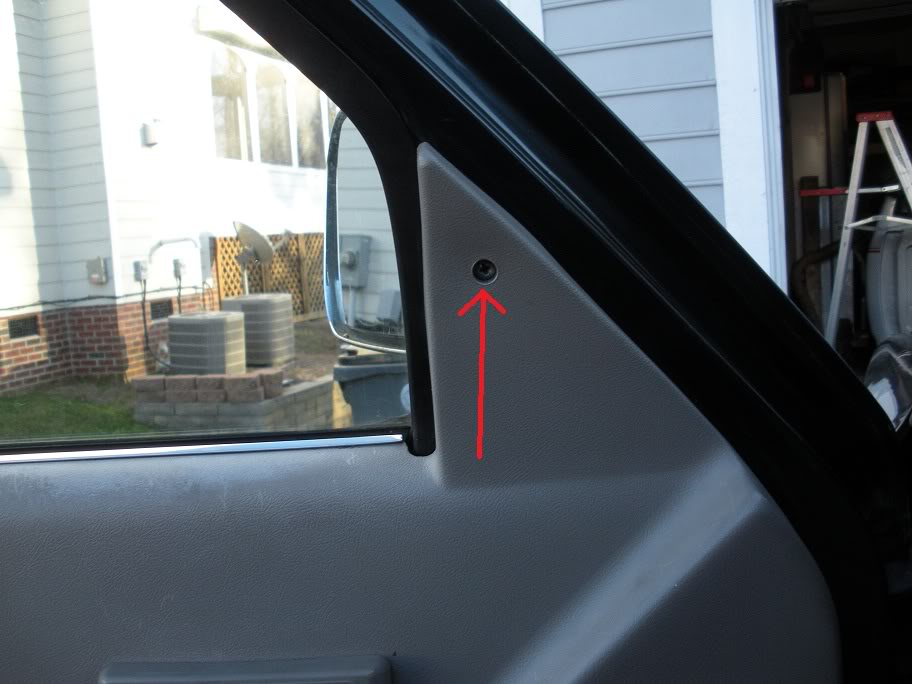
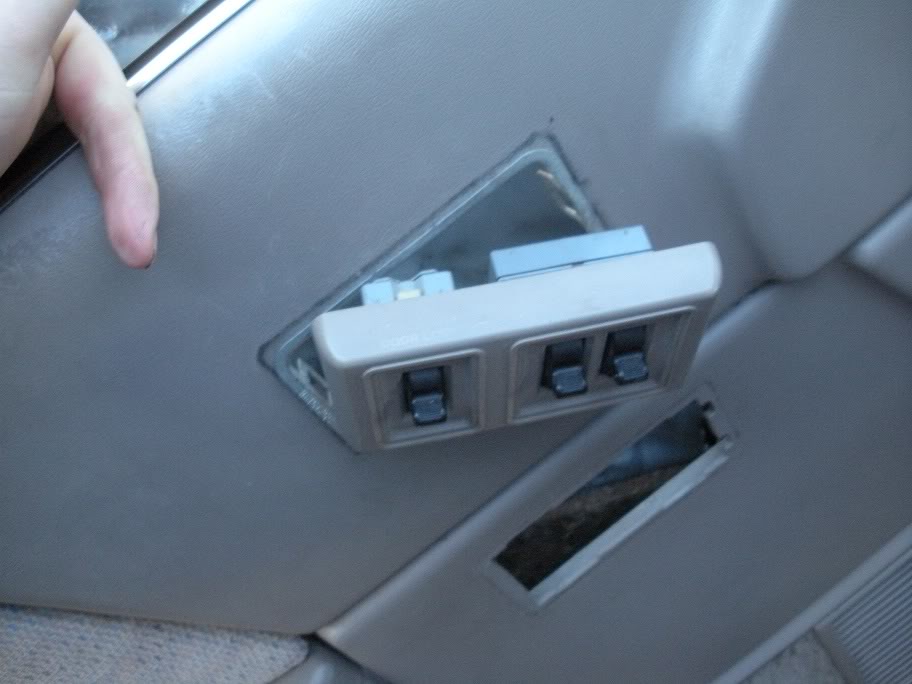
1) Remove the trim peice around the door handle by sliding it in the directon of the arrow:
DSCN0570.jpg?t=1261000571
2) Remove the 2 screws holding the interior trim panel on:

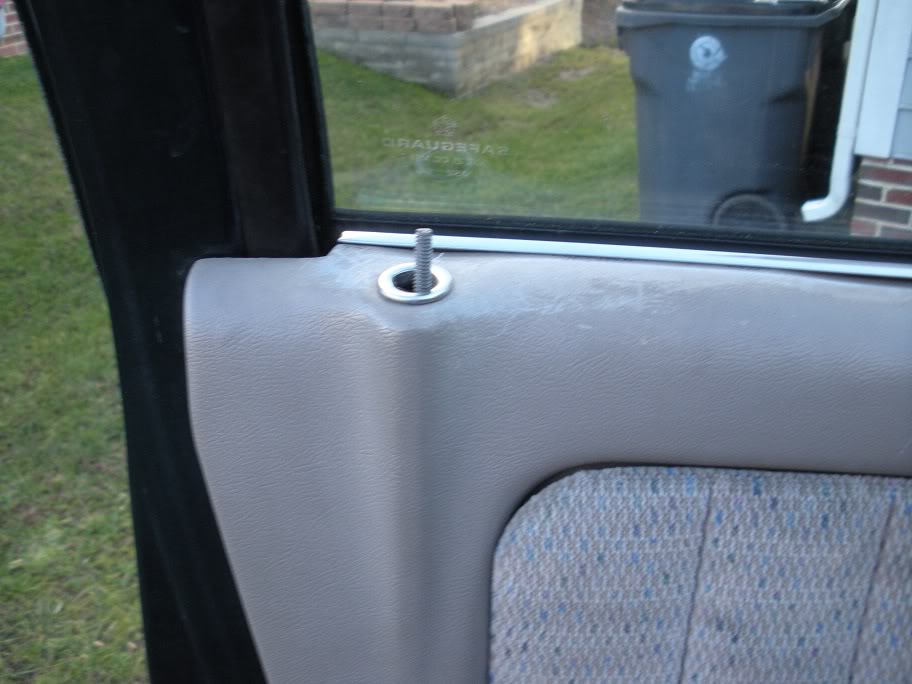
3) Unthread the door lock trim peice:

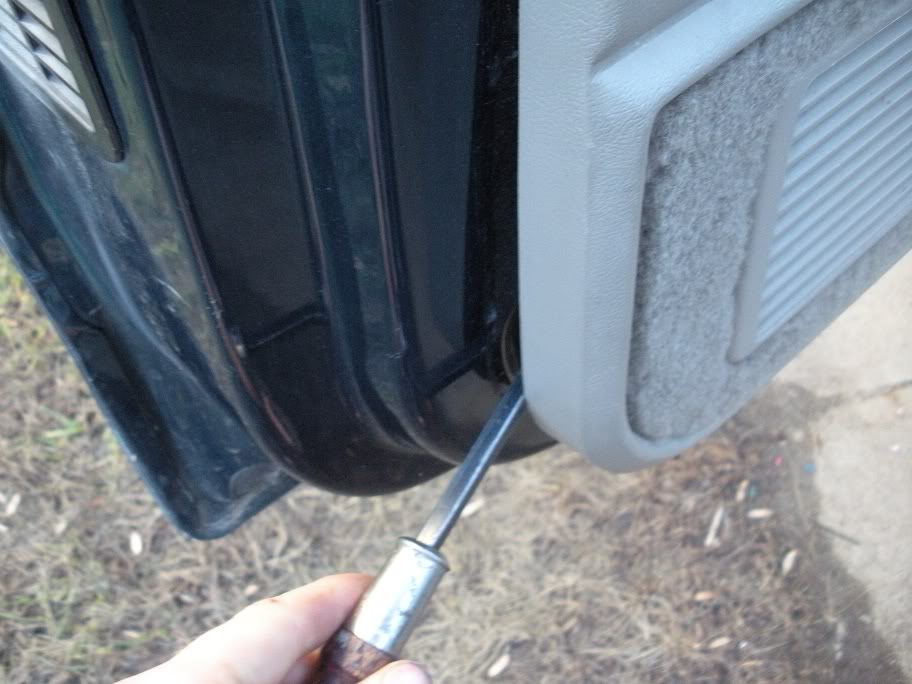
4) Take a large flathead screwdriver or mini pry bar and pry out each one of the clips holding in the interior trim panel. They go all around the door, so feel around for them. It's important to pry at the clip, not half way between two clips. Keep in mind that these things are 14+ years old, so be gentle not to crack it:
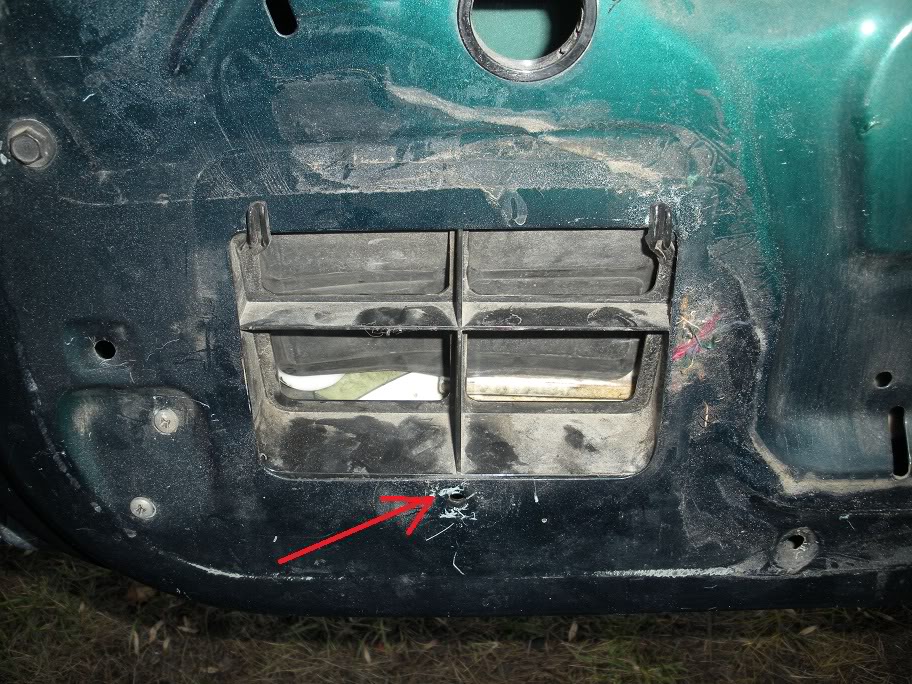
5) Pop the switch panel loose by taking a mini flat head screwdriver and prying the clip out (there is one on each side):
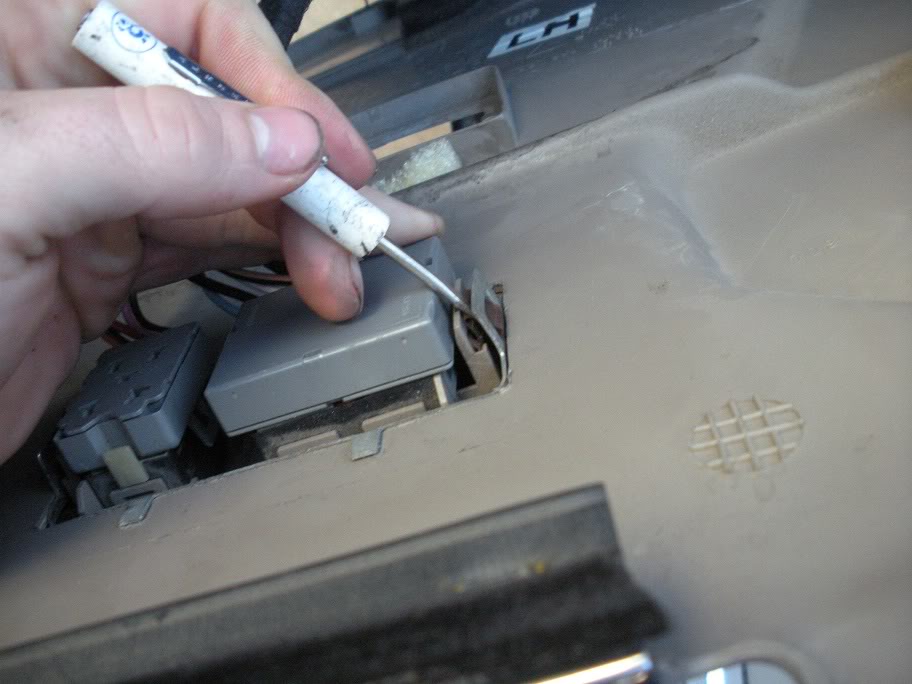
Then slide it through to panel:
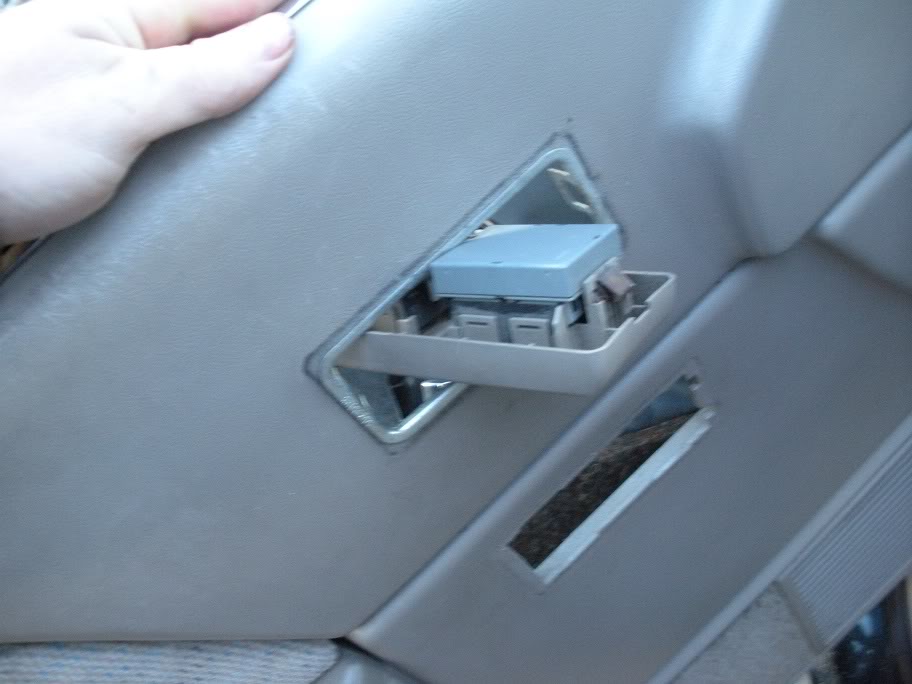
Now you should have this:
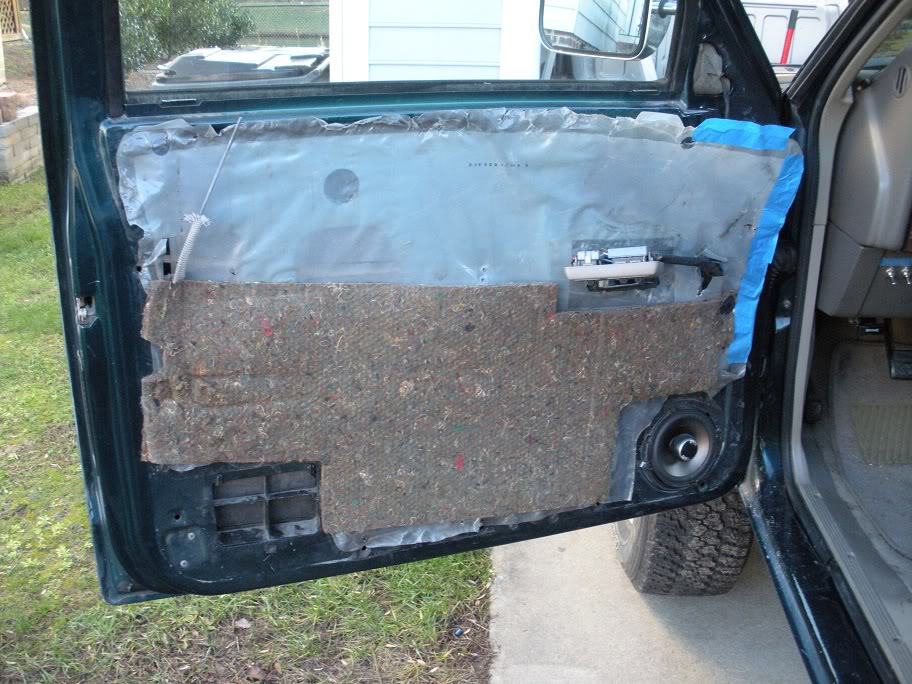
6) Peel off the insulation and vapor shield:
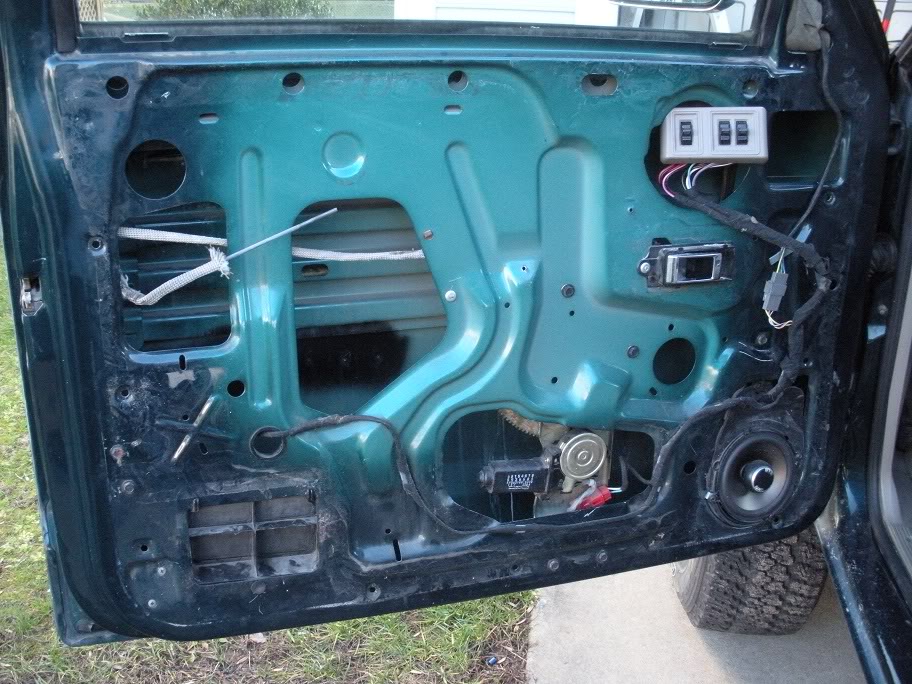
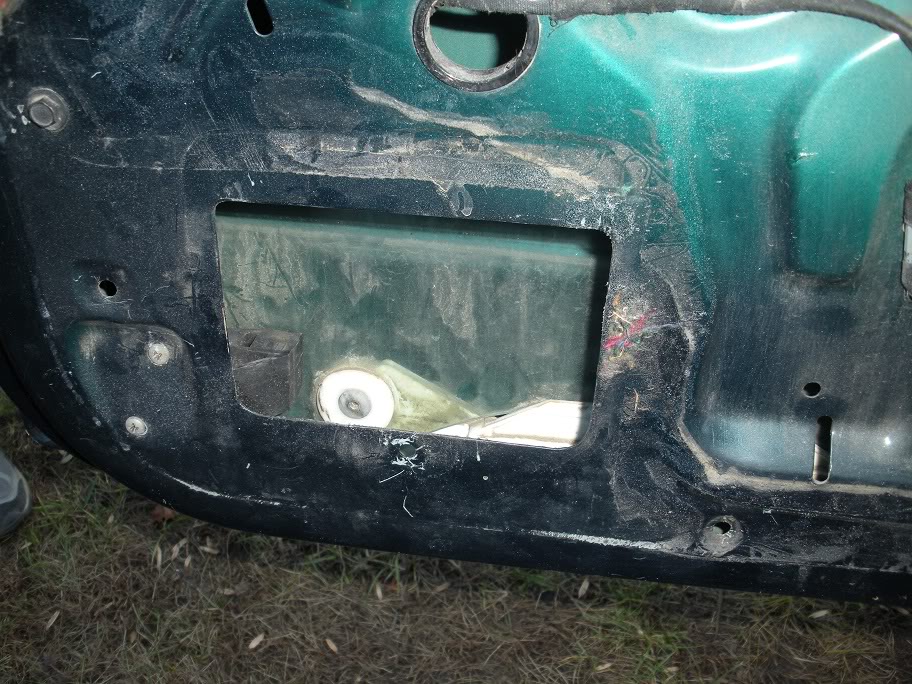
7) Roll the window down while watching this roller:

When that roller gets to the edge, stop.
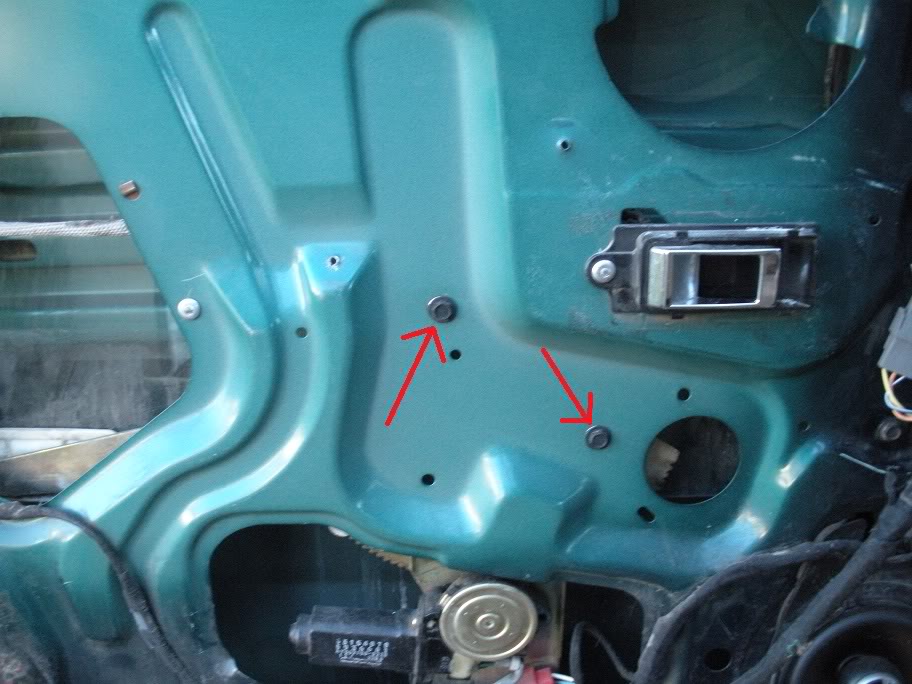
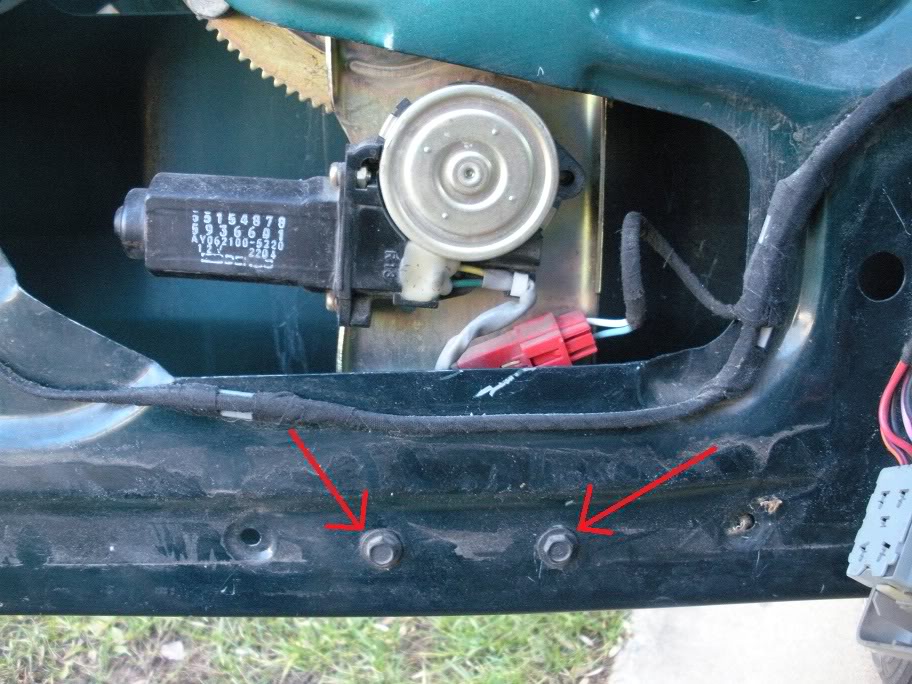
8) Remove these 4 bolts that hold in the power window regulator:
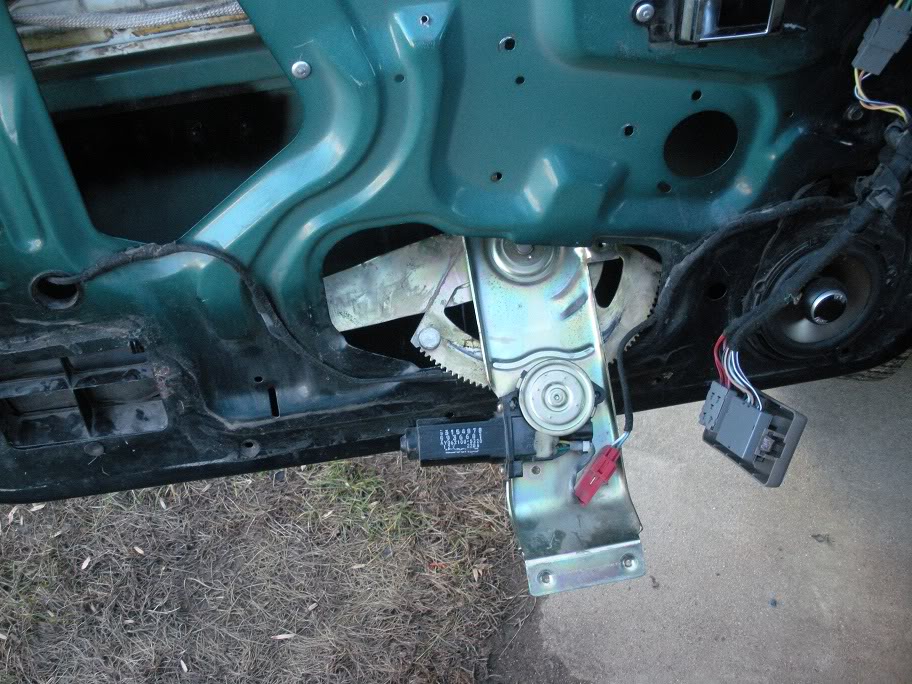
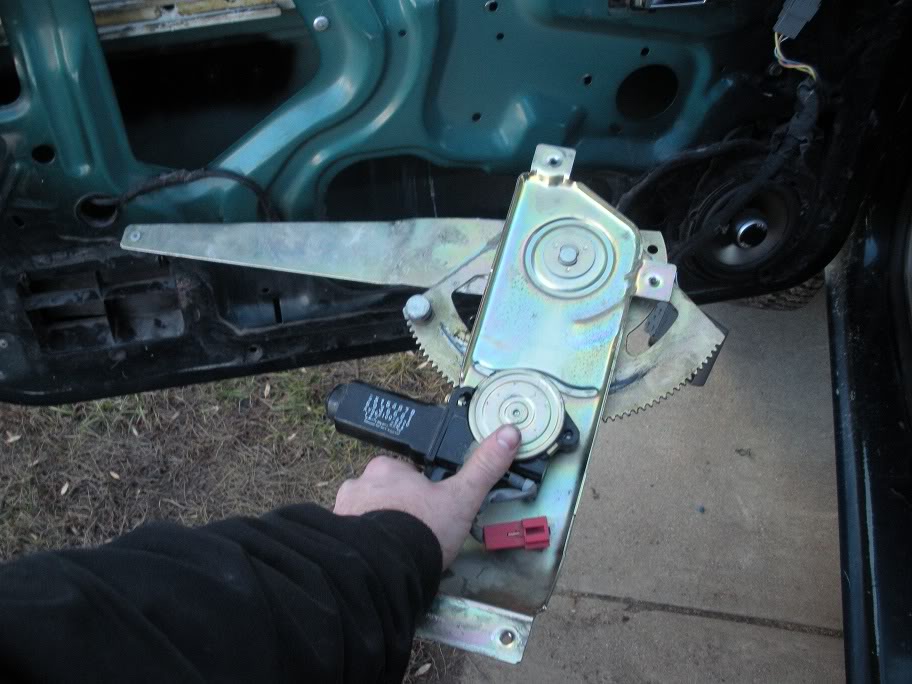
9) Now manuever the slider out of the window and pull the window regulator out:
10) Remove this bolt that holds in the inner track:

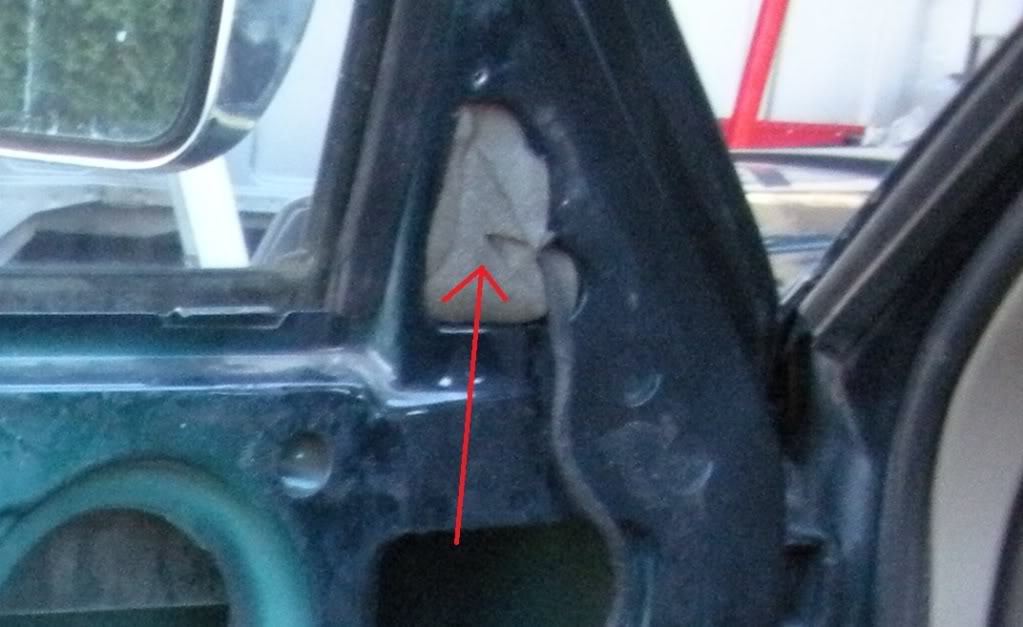
Optional: If you want more room to see or grab parts, you can remove this peice by popping the clip out and manuevering it out of the door:
This is where I stopped for now because I don't have the parts I need, I was just trying to find my problem, so I don't have many pictures of these next steps.
11) Let the window rest against the bottom of the door. Remove the side view mirror and belt molding. For the side view mirror, pull out the peice of foam (if its there) remove the 3 nuts, unplug the wire harness and pull it out:
For the belt moulding, there are screws holding it in. Remove them and pull it up and out:

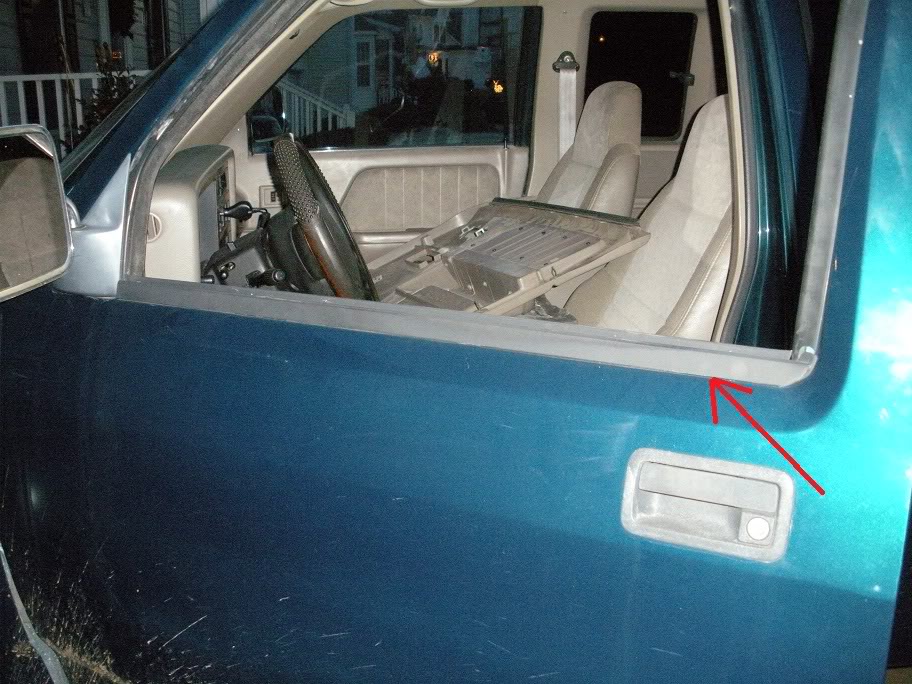
12) Now with those out of the way, and the window resting at the bottom of the door, pull the window track/weatherstripping out. It's all 1 peice. Just be very careful not to tear it!!!
13) With that out of the way, you should be able to maneuver the window out of the door.
Assembly is reverse. A couple of important points: 1) When you get back to the vapor shield, you may have to tape it or spray on an adhesive to hold it to the door. 2) When you get ready to clip the interior trim panel back on, make sure all the clips are on the door panel (none of them stuck in the door), and make sure they are all lined up and then hit each one with your fist to pop them in. I'll stress the importance of making sure they are all lined up before you start banging on it cause they are easy to break!!
1) Remove the trim peice around the door handle by sliding it in the directon of the arrow:
DSCN0570.jpg?t=1261000571
2) Remove the 2 screws holding the interior trim panel on:
3) Unthread the door lock trim peice:
4) Take a large flathead screwdriver or mini pry bar and pry out each one of the clips holding in the interior trim panel. They go all around the door, so feel around for them. It's important to pry at the clip, not half way between two clips. Keep in mind that these things are 14+ years old, so be gentle not to crack it:
5) Pop the switch panel loose by taking a mini flat head screwdriver and prying the clip out (there is one on each side):
Then slide it through to panel:
Now you should have this:
6) Peel off the insulation and vapor shield:
7) Roll the window down while watching this roller:
When that roller gets to the edge, stop.
8) Remove these 4 bolts that hold in the power window regulator:
9) Now manuever the slider out of the window and pull the window regulator out:
10) Remove this bolt that holds in the inner track:
Optional: If you want more room to see or grab parts, you can remove this peice by popping the clip out and manuevering it out of the door:
This is where I stopped for now because I don't have the parts I need, I was just trying to find my problem, so I don't have many pictures of these next steps.
11) Let the window rest against the bottom of the door. Remove the side view mirror and belt molding. For the side view mirror, pull out the peice of foam (if its there) remove the 3 nuts, unplug the wire harness and pull it out:
For the belt moulding, there are screws holding it in. Remove them and pull it up and out:
12) Now with those out of the way, and the window resting at the bottom of the door, pull the window track/weatherstripping out. It's all 1 peice. Just be very careful not to tear it!!!
13) With that out of the way, you should be able to maneuver the window out of the door.
Assembly is reverse. A couple of important points: 1) When you get back to the vapor shield, you may have to tape it or spray on an adhesive to hold it to the door. 2) When you get ready to clip the interior trim panel back on, make sure all the clips are on the door panel (none of them stuck in the door), and make sure they are all lined up and then hit each one with your fist to pop them in. I'll stress the importance of making sure they are all lined up before you start banging on it cause they are easy to break!!
Last edited by 95_318SLT; 12-16-2009 at 08:32 PM.
#4
12-16-2009, 06:41 PM

Professional
Join Date: Aug 2009
Location: Corpus Christi
Posts: 144
Likes: 0
Received 0 Likes
on
0 Posts
#5
12-16-2009, 08:20 PM
I noticed you removed all the plastic from inside the door panels... I'm going to do this now, too.
Mine also has power windows and locks but the setup isn't the same and I can't fit the button assembly through like you did. Next time I take off the door panels I'll have to try again.
I have broken/ cracked the plastic in a few places. These door panels get very brittle with age.. It doesn't take much so be gentle, like 318 says.
Last edited by LO 619; 12-16-2009 at 08:32 PM.
#6
12-16-2009, 08:29 PM
#7
12-16-2009, 08:37 PM
** nevermind the pic where you removed it just loaded.
Last edited by LO 619; 12-16-2009 at 08:42 PM.
Trending Topics
#9
12-16-2009, 09:06 PM
It just peels out of the channel that it sits in. I honestly can't remember if there are any screws holding it it or not, there might be, but its too dark to go out and look right now and I'm not interested in taking it out. I'll say for sure tomorrow though. But like I said, pull on it easy, cause it can tear... mine is torn on the driver's side. Anyway, start at the top and start pulling it out and work your way around each side to the bottom, then pull the tracks out of the door. Like I said before, its all 1 piece!
I did remove mine back when I painted my truck and I would definately suggest anybody else do the same. I worked for several years in a high quality body shop and learned how to do things the right way. If it comes out, take it out... don't tape it up.
I did remove mine back when I painted my truck and I would definately suggest anybody else do the same. I worked for several years in a high quality body shop and learned how to do things the right way. If it comes out, take it out... don't tape it up.
#10
12-16-2009, 11:13 PM
It just peels out of the channel that it sits in. I honestly can't remember if there are any screws holding it it or not, there might be, but its too dark to go out and look right now and I'm not interested in taking it out. I'll say for sure tomorrow though. But like I said, pull on it easy, cause it can tear... mine is torn on the driver's side. Anyway, start at the top and start pulling it out and work your way around each side to the bottom, then pull the tracks out of the door. Like I said before, its all 1 piece!
I did remove mine back when I painted my truck and I would definately suggest anybody else do the same. I worked for several years in a high quality body shop and learned how to do things the right way. If it comes out, take it out... don't tape it up.
I did remove mine back when I painted my truck and I would definately suggest anybody else do the same. I worked for several years in a high quality body shop and learned how to do things the right way. If it comes out, take it out... don't tape it up.