


 Aug 7, 2015, 12:50 PM
Last edit by: IB Advertising
See related guides and technical advice from our community experts:
Browse all: Engine
- Dodge Ram 2nd Gen How to Replace Distributor Cap and Rotor
Step by step instructions for the do-it-yourself repairs.
Browse all: Engine

Cap and Rotor Change Out
Thread Starter
|
Hall Of Fame


Joined: Jun 2005
Posts: 14,228
Likes: 19
From: Riverton, UT
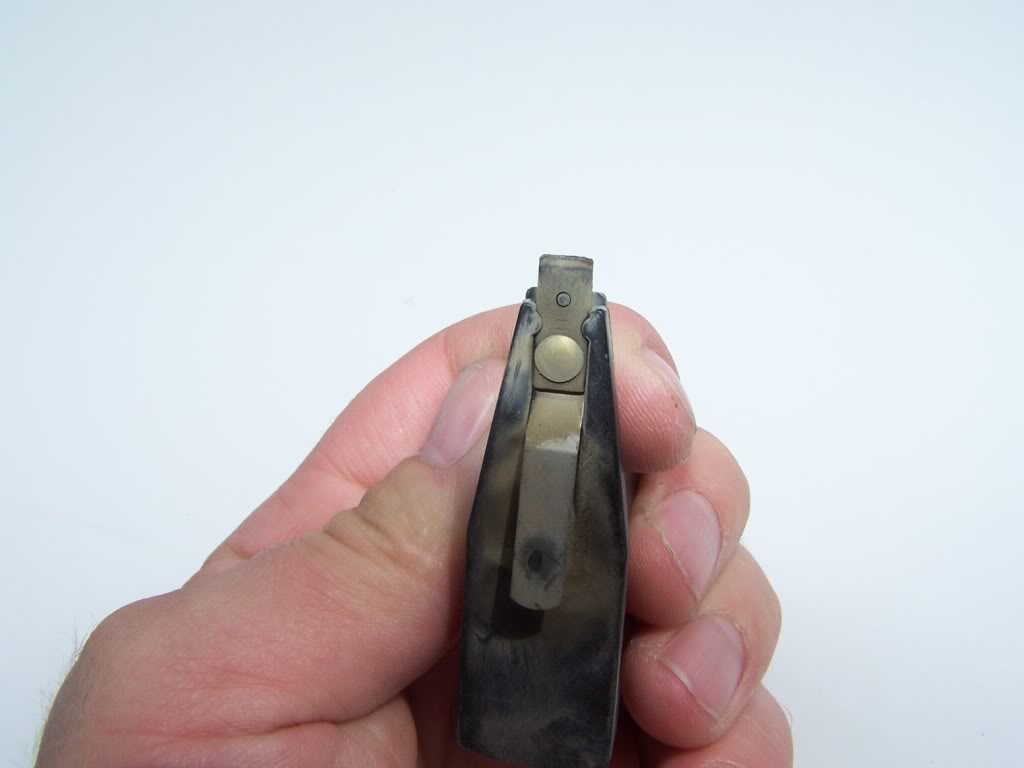
Here are the part numbers for the Preformance Ignition I put on my truck and what I'm currently running. I got a new cap and rotor from NAPA in Echlin Performance to compair them in wear as IndyDurango has talked about. I don't know what materials that the rotor is made of but it looks like the same as Accel's. The Cap is Brass contacts and posts just like Accel. The only reason I was using Accel instead of MSD is because MSD doesn't make them for the 1998 and up 5.9L and 5.2L. I also use Champion Truck Plugs gaped at .042 and replace them each year or 15k.
MSD 8.5mm Wires #32189
MSD Blaster Coil #8228
Accel Distributor Cap #120329
Accel Distributor Rotor #130328
Accel OEM Adapter to Coil #140021AH
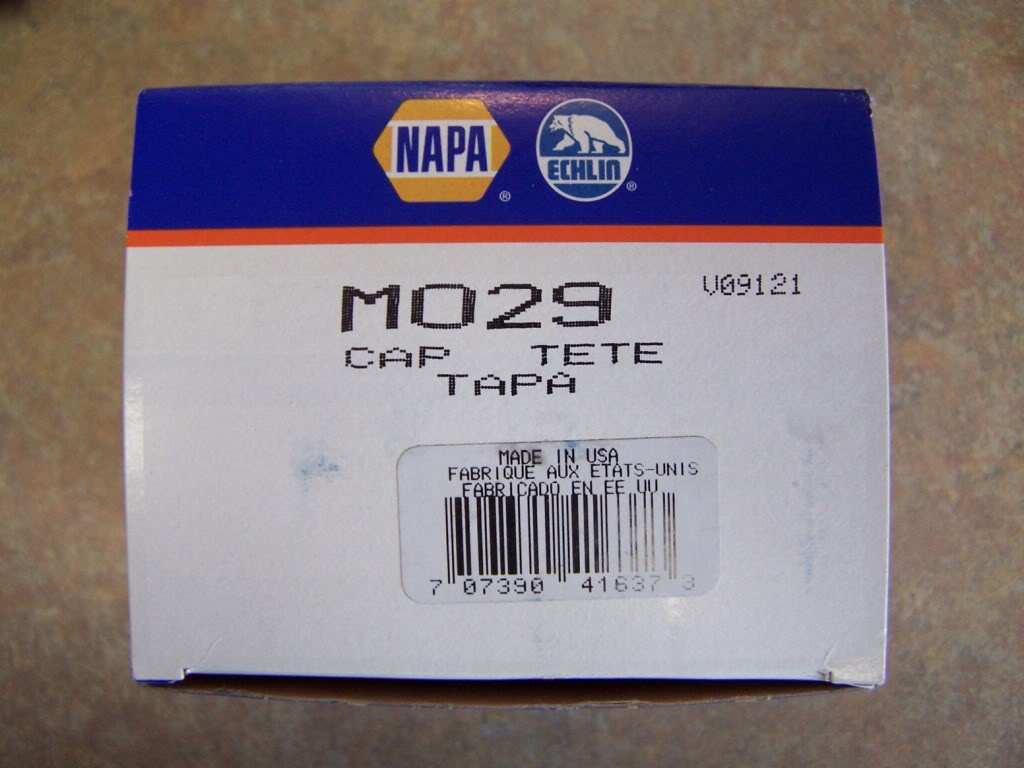
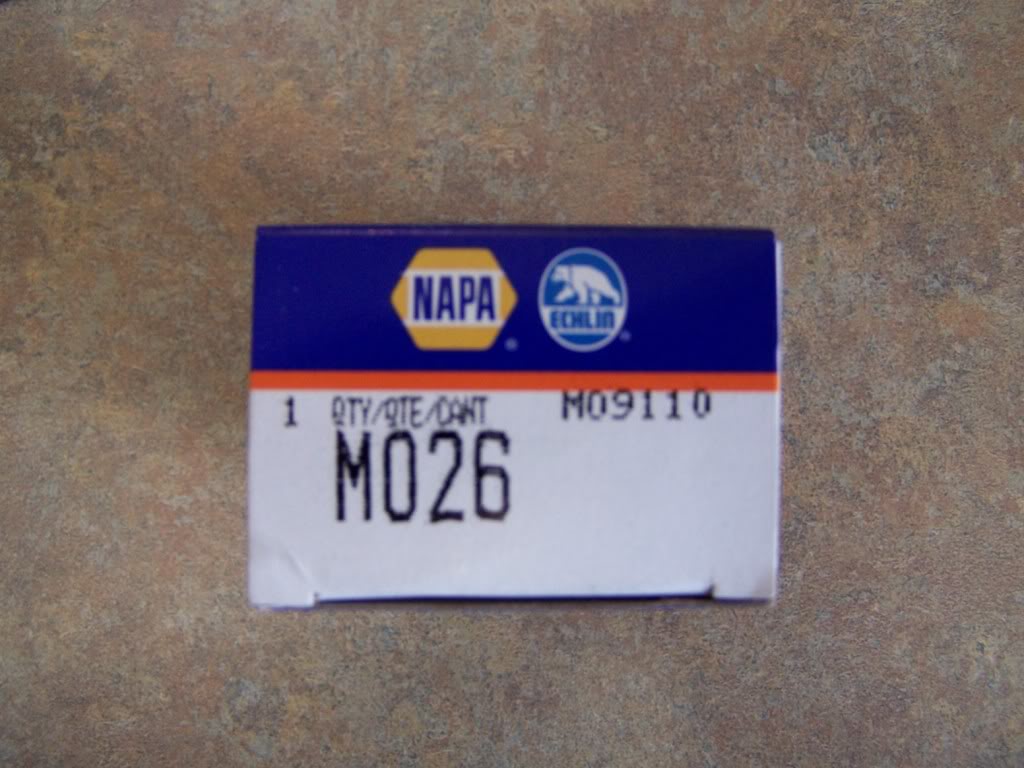
The new Part numbers for Echlin Performance (NAPA Brass Contact Performance) that I am going to use are along with the part #'s listed above minus the cap and rotor whick I am switching out:
Echlin
Cap............MO29
Rotor..........MO26
I currently have 50,000 miles on this cap and rotor.
MSD 8.5mm Wires #32189
MSD Blaster Coil #8228
Accel Distributor Cap #120329
Accel Distributor Rotor #130328
Accel OEM Adapter to Coil #140021AH
The new Part numbers for Echlin Performance (NAPA Brass Contact Performance) that I am going to use are along with the part #'s listed above minus the cap and rotor whick I am switching out:
Echlin
Cap............MO29
Rotor..........MO26
I currently have 50,000 miles on this cap and rotor.
Last edited by hydrashocker; Jul 27, 2009 at 07:51 PM.
Champion
Joined: Jun 2006
Posts: 4,822
Likes: 4
From: Indiana
They very well may be. I'll take the NAPA price and their easy to get availability for Accel items any day 
I heard rumor that their Echlin O2 sensors for the Durango are the exact same as the Mopar part, right down to the on-part labeling. Can't confirm, but I do recommend ONLY to use the OEM O2 sensors so this may open the door to lower prices and easier availability (especially with Chryslers part sourcing problems right now due to their bankruptcy.)
IndyDurango
Last edited by IndyDurango; Jul 28, 2009 at 11:02 PM.
Champion
Joined: Jun 2006
Posts: 4,822
Likes: 4
From: Indiana
Ya know, I was concerned about it too but after I went ahead and did my cap the first time, it wasn't as bad as I expected. IIRC, I used a stubby screwdriver.
Just make sure you know what wire goes where before you pull them off.
IndyD
Just make sure you know what wire goes where before you pull them off.
IndyD
Thread Starter
|
Hall Of Fame
Joined: Jun 2005
Posts: 14,228
Likes: 19
From: Riverton, UT
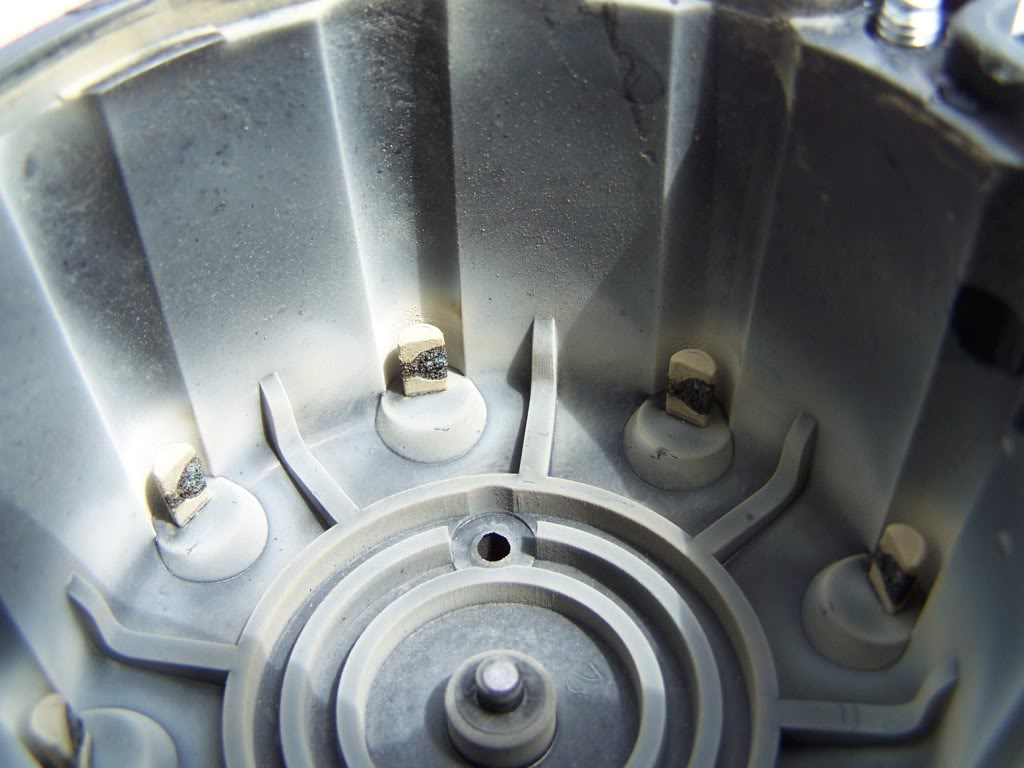
First, look at the cap and locate the 1 on the outside of the cap. This marks where number one cylinder is. The new cap goes back in the same place and is marked the number 1. You pull back the heater hose and pull the passenger side wires off marking where they go. The coil wire is in the middle. Leave the drivers side wires attached. Get a stubby Philips screwdriver on the 2 screws and lift it out. Make sure you install the wires back in the correct order as you took them off.
Trending Topics

Professional
Joined: Nov 2008
Posts: 119
Likes: 0
Got r done! Sure was a small space to work in. The cap was every bit as bad as Hydra's picture. I replaced the OEM with a Borg Warner cap & rotor with copper contacts. While I was at it I removed, cleaned and replaced the IAC. It was full of carbon deposits. In fact, I had to use a soft wire brush to clean up the tip. So, new cap, rotor, coil, MAP, plugs and a cleaned up IAC. Can't hardly feel it idle. Put your foot in it - oh my gawd!!. Looking forward to the next trip hauling the camper. Should be a whole lot easier going up a hill. Thankfully, the cap and rotor don't need to be changed that often. Thanks for the encouragement and pix guys.
Last edited by Facory; Jul 31, 2009 at 08:15 PM.
Thread Starter
|
Hall Of Fame
Joined: Jun 2005
Posts: 14,228
Likes: 19
From: Riverton, UT
No problem.!
Glad you like the change! Remember that cooper doesn't last as long as brass but it will do. Replace the spark plugs with Champion Regular Copper plugs or Champion Truck plugs...... Then again I think you just did?
Also replace wires with OEM or MSD. Again I think you just did.
The last ting to do is clean the Throttle Body if you haven't done that yet.