


Plenum Gasket


Hall Of Fame


Joined: Jun 2005
Posts: 14,228
Likes: 19
From: Riverton, UT
Here is some info: https://dodgeforum.com/forum/2nd-gen...onal-info.html
Here is also a Kegger Mod you can do: https://dodgeforum.com/forum/2nd-gen...egger-mod.html
Here is also a Kegger Mod you can do: https://dodgeforum.com/forum/2nd-gen...egger-mod.html
Ok guys, I have torn it all apart, took me a little under 3.5 hours to tear down last night. I managed to do it in the dark while holding a flashlight (stupid garage doesn't have electricity) but I had to get it torn apart last night to give me time to clean it today, and put it together Monday.
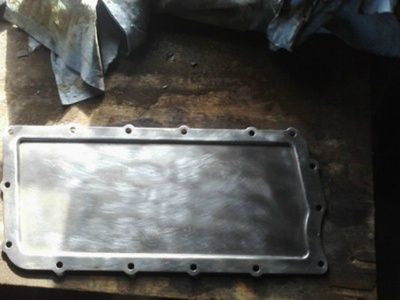
I had a little bit of time this morning and did a little cleaning of the kegger and plenum plate. I believe the hardest part of the whole ordeal so far was removing the plenum gasket off of the plate. But that is done now.
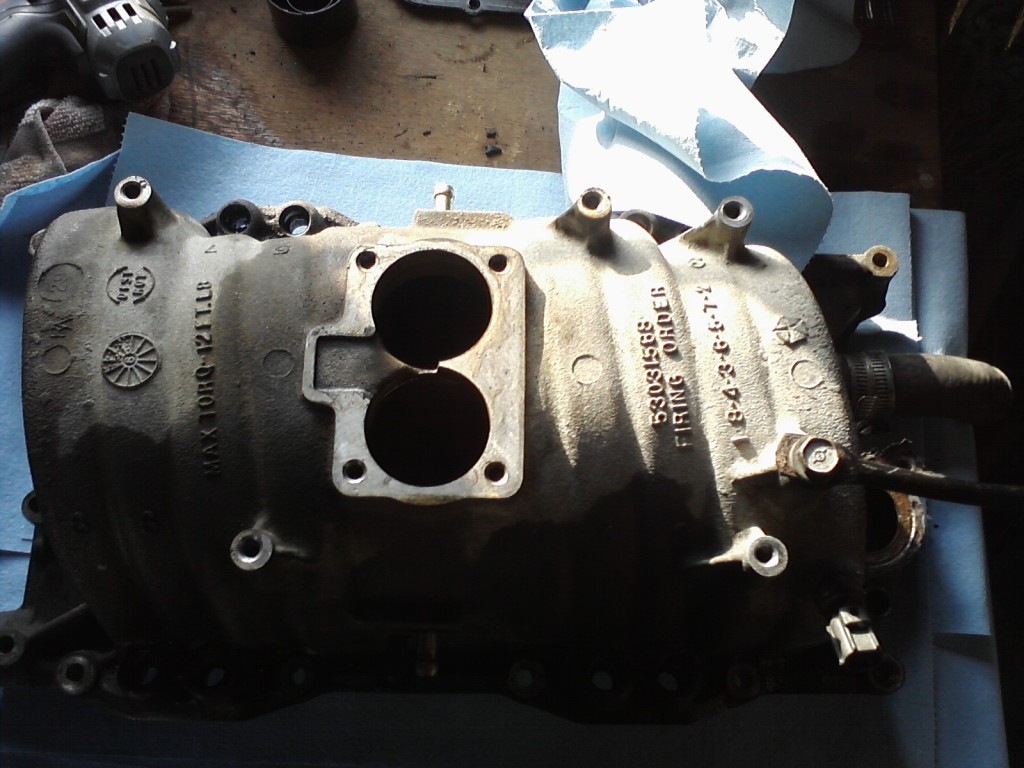
Only question I have is, inside the kegger you have the, injector ports? Guess that would be what you call them, What is the best way to clean those? Not easy getting anything down there to scrub. I plan on using compressed air and a vacuum to get the loose dirt from inside there, as well as the little bit of debris that fell inside the valley upon removal of the kegger. Thought I had gotten all of the debris but alas I did not. Take a look at the pics below.
Think the plenum gasket was the problem?

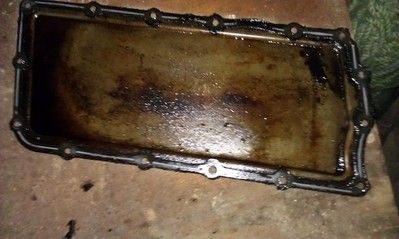
All Clean now
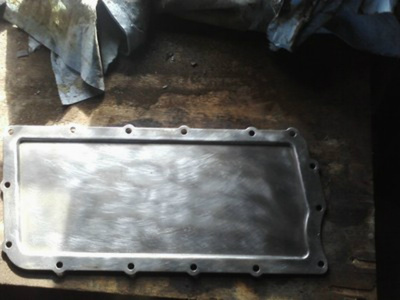
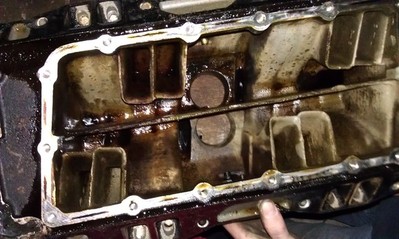
At the start
Half Cleaned but you can't really tell

I will finish it Monday, and take more pictures, I will post the pictures and a write up with a step by step guide when I am done. Thanks you guys!
I had a little bit of time this morning and did a little cleaning of the kegger and plenum plate. I believe the hardest part of the whole ordeal so far was removing the plenum gasket off of the plate. But that is done now.
Only question I have is, inside the kegger you have the, injector ports? Guess that would be what you call them, What is the best way to clean those? Not easy getting anything down there to scrub. I plan on using compressed air and a vacuum to get the loose dirt from inside there, as well as the little bit of debris that fell inside the valley upon removal of the kegger. Thought I had gotten all of the debris but alas I did not. Take a look at the pics below.
Think the plenum gasket was the problem?
All Clean now
At the start
Half Cleaned but you can't really tell
I will finish it Monday, and take more pictures, I will post the pictures and a write up with a step by step guide when I am done. Thanks you guys!

Professional
Joined: Aug 2011
Posts: 144
Likes: 1
Ok guys, I have torn it all apart, took me a little under 3.5 hours to tear down last night. I managed to do it in the dark while holding a flashlight (stupid garage doesn't have electricity) but I had to get it torn apart last night to give me time to clean it today, and put it together Monday.
I had a little bit of time this morning and did a little cleaning of the kegger and plenum plate. I believe the hardest part of the whole ordeal so far was removing the plenum gasket off of the plate. But that is done now.
Only question I have is, inside the kegger you have the, injector ports? Guess that would be what you call them, What is the best way to clean those? Not easy getting anything down there to scrub. I plan on using compressed air and a vacuum to get the loose dirt from inside there, as well as the little bit of debris that fell inside the valley upon removal of the kegger. Thought I had gotten all of the debris but alas I did not. Take a look at the pics below.
Think the plenum gasket was the problem?
All Clean now

At the start

Half Cleaned but you can't really tell

I will finish it Monday, and take more pictures, I will post the pictures and a write up with a step by step guide when I am done. Thanks you guys!
I had a little bit of time this morning and did a little cleaning of the kegger and plenum plate. I believe the hardest part of the whole ordeal so far was removing the plenum gasket off of the plate. But that is done now.
Only question I have is, inside the kegger you have the, injector ports? Guess that would be what you call them, What is the best way to clean those? Not easy getting anything down there to scrub. I plan on using compressed air and a vacuum to get the loose dirt from inside there, as well as the little bit of debris that fell inside the valley upon removal of the kegger. Thought I had gotten all of the debris but alas I did not. Take a look at the pics below.
Think the plenum gasket was the problem?
All Clean now
At the start
Half Cleaned but you can't really tell
I will finish it Monday, and take more pictures, I will post the pictures and a write up with a step by step guide when I am done. Thanks you guys!
if you have a big bucket around that you can fit it in and submerge it in water then fill it with hot water and some powder laundry detergent, preferbly not one a detergent that talks about being green for the enviroment. the phosphates in the detergent will do a good job getting the oil off.
remove anything steel that you are able to first. let it soak for a few hours then rince with clean water, should be pretty clean when done.
Professional
Joined: Aug 2011
Posts: 144
Likes: 1
it wont take long to dry when you put it in the oven or use a hair dryer, just dont tell your wife what your doing :P
actually it really wont take long to dry if you can put it somewhere warm and tip it back and forth to get most of the water out. the key is hot water and let it soak for a few hours. you can usually get away with multiple days soaking but I dont advise much more then a week unatended. in reality I usually let something soak overnight then rinch it in the morning and if needed soak again all day while at work. unless its the sludge from a sludged up 4.7 or the snot in the 4.7 oil filler it should get most if not all of it from the soak and rince.
it will corrode if you leave it in to long(weeks). make sure its fully submerged though or the waterline area will get that white powdery corrosion alluminum gets but it will wipe off.
Yeah I am going to submerge it in the cooler, the wife will be ok with it...Hell she let me go work on my truck all morning rather than hang out with her family and wrap gifts this morning, and allowing me to take our vacuum to vacuum out the valley where there is a little debris. I will get the kegger from the shop tomorrow along with the cooler and let it soak for about 6-10 hours, then I have to dry it! I HAVE to be able to have my truck together my Tuesday Morning. Guess like 30 minutes on 125 will dry the water out of it.
Record Breaker
Joined: Dec 2008
Posts: 1,200
Likes: 1
From: Claremont NC
I use the Purple Power cleaner full strength. Spray it on...let it sit for about 5-10 minutes...rinse it off with a garden hose...blow it off with compressed air. Any spray degreaser will clean it up very well will very little effort.