Glow Shift Gauges
#13
Yes you do install it on top of the OEM. At least according to the directions. Thats probably why he painted the OEM pod also. Maybe he figured out a way to do without the old one? That I don't know. 
And I don't think you can put them on the dimmer circuit. Nothing about that in the directions I'm looking at for the vac gauge. Either way, they are not too bright even if not dimmed.

And I don't think you can put them on the dimmer circuit. Nothing about that in the directions I'm looking at for the vac gauge. Either way, they are not too bright even if not dimmed.
Last edited by zman17; 01-22-2012 at 08:40 AM.
#14
Thanks guys. I was happy with the way it turned out.
Two of the gauges have an orange wire for dimming, one does not. But they all look the same when illuminated. Strange.
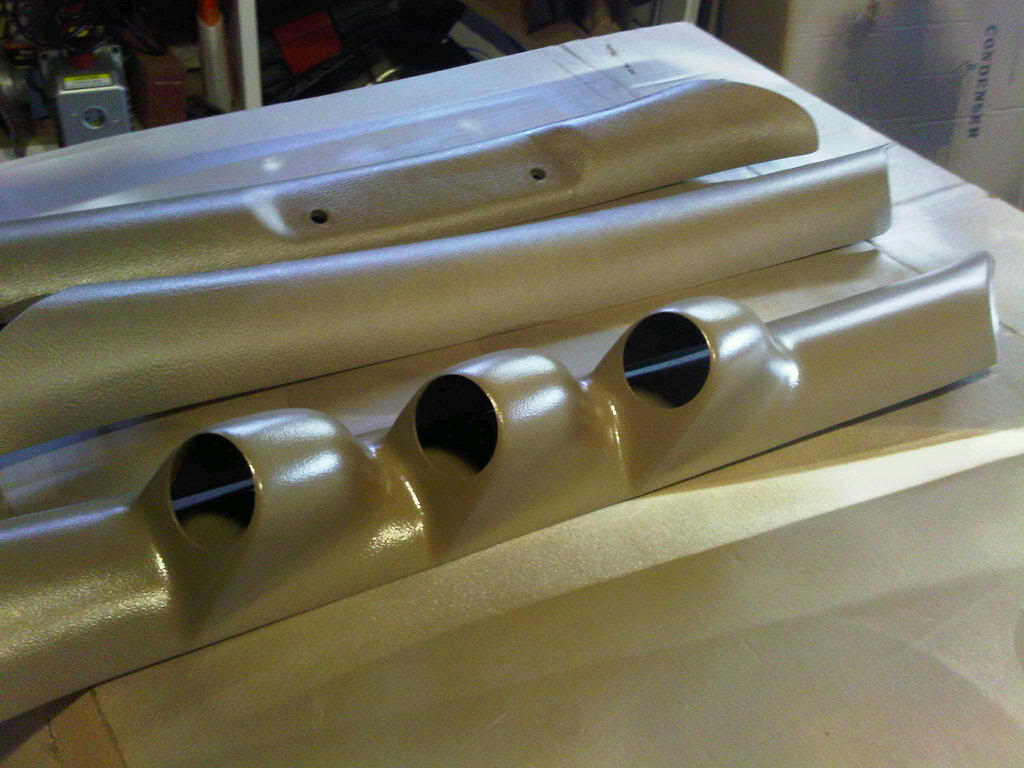
I used the origianal pilar cover and painted it just in case the edge showed slightly. I used velcro to attach the pod to the pilar cover. The passenger A Pillar cover is at the top, driver side in the middle and the pod. I wanted to make sure left and right side matched?

You have to use the original pillar cover as there is not means to attach the pod to the pillar in the cab without using the cover. Glow Shift provides screws and screw covers for attachment, but as brittle as the Dodge plastic is, I was not thrilled about the idea of trying to put a screw into it.
When I went out to the garage this afternoon, I decided to fire up the Ram and loiok at the gauges. I remembered that I broke one of those skinny, brittle vacuum lines while connecting vacuum gauge. Had to repair that. Also noticed that the gauges were noit the same color that I had them last night. They defaulted to blue. I double checked the wiring, and discovered that the circut for the memory was tied to a wire that was hot when the key was on, but circuit opens on start. I rerouted that to the PDC and problem went away.
I not only disccovered a bolt rubbing slightly on the belt under the hood, I also found some really ugly wiring. Some of it I had seen when I replaced the dash, but did not correct. I spent some time today cutting out splices and soldering and heat shrinking the repairs. Some people should NOT be allowed to work on things!

Two of the gauges have an orange wire for dimming, one does not. But they all look the same when illuminated. Strange.
I used the origianal pilar cover and painted it just in case the edge showed slightly. I used velcro to attach the pod to the pilar cover. The passenger A Pillar cover is at the top, driver side in the middle and the pod. I wanted to make sure left and right side matched?

You have to use the original pillar cover as there is not means to attach the pod to the pillar in the cab without using the cover. Glow Shift provides screws and screw covers for attachment, but as brittle as the Dodge plastic is, I was not thrilled about the idea of trying to put a screw into it.
When I went out to the garage this afternoon, I decided to fire up the Ram and loiok at the gauges. I remembered that I broke one of those skinny, brittle vacuum lines while connecting vacuum gauge. Had to repair that. Also noticed that the gauges were noit the same color that I had them last night. They defaulted to blue. I double checked the wiring, and discovered that the circut for the memory was tied to a wire that was hot when the key was on, but circuit opens on start. I rerouted that to the PDC and problem went away.
I not only disccovered a bolt rubbing slightly on the belt under the hood, I also found some really ugly wiring. Some of it I had seen when I replaced the dash, but did not correct. I spent some time today cutting out splices and soldering and heat shrinking the repairs. Some people should NOT be allowed to work on things!

#16
When I went out to the garage this afternoon, I decided to fire up the Ram and loiok at the gauges. I remembered that I broke one of those skinny, brittle vacuum lines while connecting vacuum gauge. Had to repair that. Also noticed that the gauges were noit the same color that I had them last night. They defaulted to blue. I double checked the wiring, and discovered that the circut for the memory was tied to a wire that was hot when the key was on, but circuit opens on start. I rerouted that to the PDC and problem went away.
I had the same problem at first with the lights changing back. Found an empty slot in the dash fuse panel that had one side hot at all times.
#17
Well done, good write-up.  Just out of curiosity, are the wires going to be same color through all the 2nd gen years? The wires that you needed to connect into, or are they going to be different from truck to truck. Noticed you said something about yours being a 2wd and a 318. Either way, great job, and the paint job looks great on those pillars!
 How is the velcro holding up? Maybe I'll steal that idea for when I put my gauges in, I don't really want to screw it in or anything like that. I was thinking double sided tape, but the velcro is a good idea.
 Just out of curiosity, are the wires going to be same color through all the 2nd gen years? The wires that you needed to connect into, or are they going to be different from truck to truck. Noticed you said something about yours being a 2wd and a 318. Either way, great job, and the paint job looks great on those pillars!
#18
#20
Well done, good write-up.  Just out of curiosity, are the wires going to be same color through all the 2nd gen years? The wires that you needed to connect into, or are they going to be different from truck to truck. Noticed you said something about yours being a 2wd and a 318. Either way, great job, and the paint job looks great on those pillars!
 How is the velcro holding up? Maybe I'll steal that idea for when I put my gauges in, I don't really want to screw it in or anything like that. I was thinking double sided tape, but the velcro is a good idea.
 Just out of curiosity, are the wires going to be same color through all the 2nd gen years? The wires that you needed to connect into, or are they going to be different from truck to truck. Noticed you said something about yours being a 2wd and a 318. Either way, great job, and the paint job looks great on those pillars!
Thanks. Don't know about velcro holding as truck has been in garage for two weeks for paint and body and brake work, and I have been out of town this week. Test will be when i can get it back on the road which is not likely to happen for another couple of weeks. Weather is probably going to hamper painting. but being parked, velcro works great!
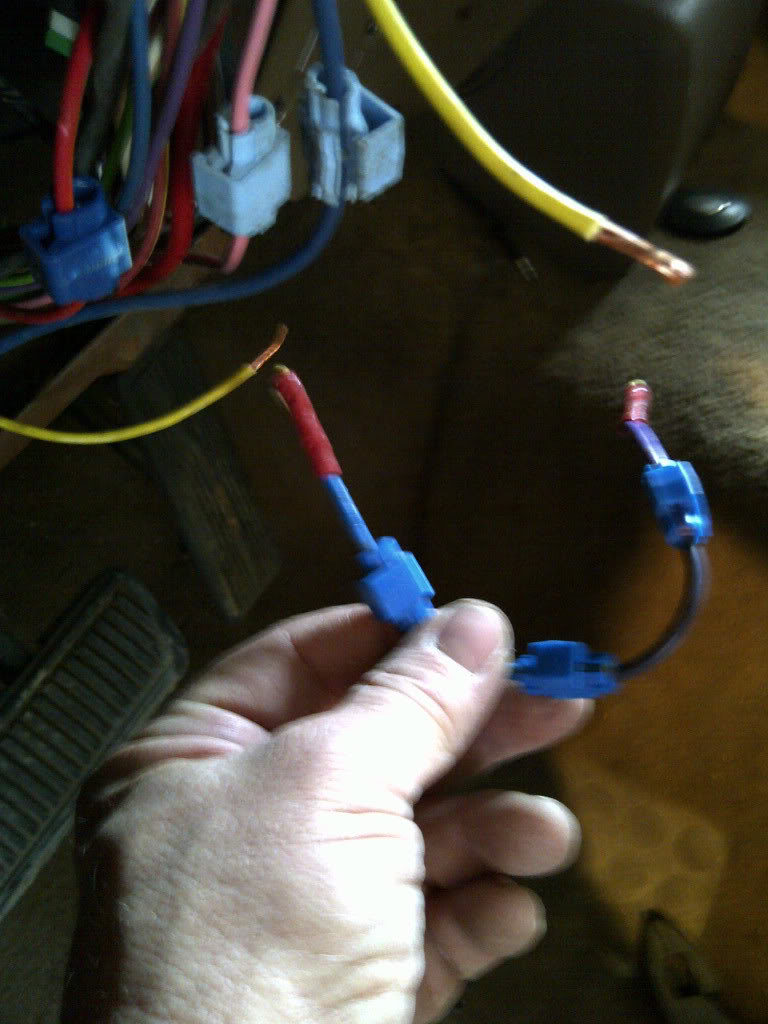
Wire colors are standard - red fo 12v, vlack for ground, and yellow for constant 12v for memory (like radio). Looking at a couple different year model wiring diagrams, truck wiring does not seem to change. Only confusing part is Glow Shift Wiring Harness has 3 wires for instruments - and one of them is green. This is NOT for ground! I think it was blue, green, and brown. Don't recall the order, but they indicate Gauge 1, Gauge 2, and Gauge 3. You just decide whether you are counting from top to bottom. As I am old and forgetful, I marked on instruction sheet to minimize my confusion.
A good double sided tape such as they use on body moulding would hold, but I wanted to have the capability to swap gauges if I decide on using something else at a later date. As brittle as this plastic is, the body moulding tape would be so hard to remove I would be afraid the A Pillar cover would come apart before tape let go.

