

Dana 60 Swap DIY

Posting this here so people can see it for a while. What y'all think?
Dana 60 Swap DIY
First off, let me say that IMO this is the single best upgrade you can do to your 1500 to improve the overall drivability, reliability and life of your truck. Parts will wear out less, everything is bigger, tougher and more “truck-like” for lack of a better word.
This is a pretty involved swap, and can get pricey fast, so let’s start with WHY you would want do this swap.
Parts are more heavy duty and have the potential to last longer
Handle bigger tires better
Bigger and better brakes
Steering upgrade (see note)
More options for gears and lockers
8 lug sexiness
Diesel guys will wave at you going down the road because they think you’re one of them
NOTE: On the steering, you can keep the stock y-style crap. If you have up to a 99 you can do the 99HD steering upgrade. Or if you have a 00-01 you can do the t-style 8.5 upgrade, they are basically the same thing.
BE WARNED the 8.5 tie rod ends have had issues. The ends are snapping clean off on the third gens. Resulting in complete steering loss. Personally, I believe it’s a problem in bad steering geometry and axle setup. But you have been warned, and use AT YOUR OWN RISK.
Tools needed
Basic socket set, 21mm is a must. 1/2in drive is a must also
Wrenches
BFH, BMFH, and an even bigger BFH
Lots of PB Blaster
Jack stands
Jacks
Air tools make everything go easier as always
Now into the nitty gritty stuff. Remember that this is meant to be a general guideline on how to do this swap. Different people do things in different ways, and nothing works for everyone.
Rear Axle Removal
I took my bed off to gain access and just make everything easier. You DON’T have to do this, I just chose to.
Jack the 9.25 and put it on jack stands. Remove the wheels.

Disconnect the breather hose from the brake junction box. You will need to put a wrench on it and unscrew the tube. The end of the tube has a bolt, then the junction box will just come off. If your new 60 has rear disc brakes you will have to disconnect the soft line from the hard line at the frame rail, if not you should be able to reuse it??? Remove the two hard lines that split off from the box. Disconnect the abs/speed sensor while you are there.
Remove the shocks completely to get them out of the way. Two bolts, one on top and one on bottom.
Remove the rear driveshaft, make sure your front wheels are blocked front and back. Its four bolts then the yoke should come right off. You might need to motivate it to come off with the BFH. Pull the front out of the end of the t-case. A little fluid will come out, don’t be alarmed. \
If you want to use the 2500 3in leaf springs:
Now block your frame up so the trucks weight is on the blocks, while the axle is still on the stands. Then remove the four U-bolt nuts and U-bolts. The rear leafs are held to the frame by two eye bolts. One at the front in the hangar and the other in the shackle at the rear. To remove the front driver side you will have to drop the tank, or remove one strap and be creative. Either way it is a PITA. Remove these and your leaf springs should be loose. There should be no weight on them. Pull them out, along with the block the springs sit on.
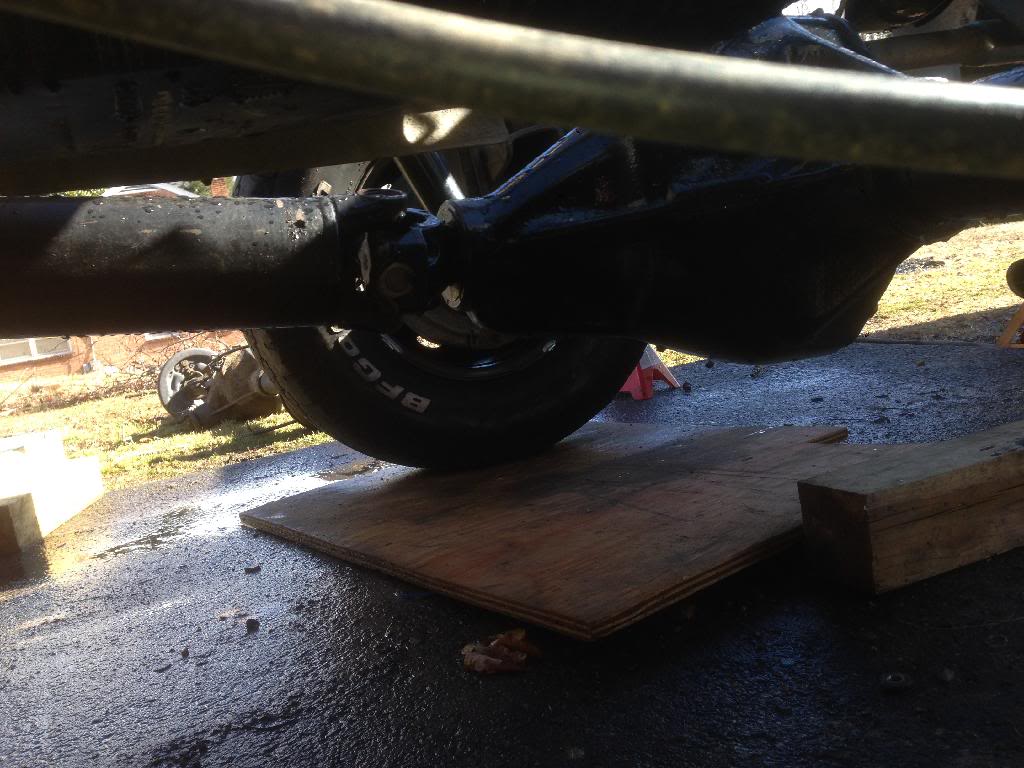
Your rear axle is now free. Lower it down off the stands and drag it out. There are a lot of ways to do this. I put plywood under the brakes and dragged it out by hand. Hook it up to the horses or whatever, just get it out.
At this point there are two options. Dana 60 install with the 2.5 1500 leaf springs or the 2500 3in leaf springs.
For 2500 3in leaf springs
The 1500 hangar is too small to simply put the bigger 2500 shackle in, so you have to bust all the frame rivets off. I used an electric high speed drill, drilled the center out, knocked them out with the BMFH and a big chisel to knock one cap off, then punched the other side out with a big punch/rebar I had lying around.
After that, the front hangar should bolt right up with grade 8 bolts, grade washers and equivalent lock nut.
The rear you will more than likely have to drill new holes into the frame. The new holes are close to the old ones, so you need to reinforce the frame. I used a plate of 1/4in steel welded to the inside of the frame web. There are many ways to reinforce the frame. Do it however you deem necessary.
2500 hangar is bigger and a has a different pattern

Install new hangar with grade 8 hardware.

Get the 60 under there. Install the front end of the leaf spring into the hangar, and then the rear shackle into the hangar. The shackle should be nearly 90 degrees in relation to the hangar. Do this for both sides.
Put the leaf spring block on the perches, stop pad pointing toward the diff , and jack the axle up till the center hole goes into the bottom of the leaf spring pack. Put the centering pad on top of the leaf spring and put the u-bolts and bracket on. It is best practice to use new u bolts, especially with a lift. Do this for both sides. It’s helpful to have at least two jacks and a helper. Torque u-bolt nuts to spec. I installed the front eyelet bolt in the leaf spring so it would be easier to handle. Them suckers are heavy and awkward.

Install driveshaft, slide it into the trans and then bolt It up to the axle.
As far as driveshaft’s go you can keep the 1500 and same size u joints and change the yoke on the 60 to match the 1500 7290 style. See below for part numbers.
This 7290 pinion yoke fits the Chrysler 9.25" differential and takes the strap kit number 2970-20.
Be careful with this yoke. It is common for customers to confuse the 9.25" with the Dana 60 yoke and think it is defective.
Although the measurements are very similar the splines of a Dana 60 and Chrysler 9.25" are cut differently and do not interchange.
Dana/Spicer Pinion Yoke - for 2-4-7681-1X 7290 joint and Dana 60
Powertrain Industries. Part Number 2904-60 see above this is an alternate yoke.
You will also need to shorten the stock 1500 ds to 86in because the dana 60 sticks out forward quite a bit more than the Chrysler 9.25.
NOTE: If you have a different wheelbase (ie short bed reg cab or extended cab long bed) then you will need to take your own measurements.
The other option would be to find a 2500 ds of the same wheelbase as your truck. This means you will you get to use the larger 2500 u joints. I am 99% sure all 2500s have the same u joint size, diesel or not, but im not 100% on that.
Install the brake line junction box, along with the breather tube.
Install hard brake lines to junction box. Plug in abs/speed sensor.

NOTE: If you are going from drums to rear discs. You will have to get the corresponding soft line and junction box for the rear discs. The junction box from the 1500 will NOT work. The threads are too small for the bigger rear disc lines.
Install shocks.
Install the calipers if not already on. Skip if you have drums. Make sure the bleeder screw is ABOVE the brake line coming into the caliper. Else you will never get them bled.
Bolt up your parking brake. Yes don’t skip this part. If you’re going to disc rears you might have to get a different intermediate line. If you’re keeping drums it should just match right up. Be sure to properly adjust them.
The rear axle swap should now be complete. If you have already done the front swap then do a complete brake bleeding, put the tires on and go test everything out.
Front Dana 60 swap
The front swap is basically a complete bolt in job. Remove the 44 and then bolt in the 60.
Start by jacking up and supporting properly. Chock your back wheels.
Remove the front wheels.
Remove the front driveshaft. You will need a 2500 driveshaft. There has been confusion on the lengths. Some are longer and some are shorter. Best thing to do is take a measurement before going to buy one. I had a parts truck so mine fit fine. The 1500 ds will be too long. And uses the smaller u joints. I suppose you could shorten it and change the yoke on the axle just like the rear.
Disconnect the steering completely from the truck. Disconnect both tie rod ends (tre) at the steering knuckle. The steering stabilizer. And up at the pitman arm.
Next up disconnect the sway bar. I took it completely off also. To get as much room as possible to work in.
Next I disconnected the track bar at the axle. I left it connected at the frame. But tied it up out of the way.
Now is a good time to block up the frame. Next thing coming out is the coil springs and shocks.
Be VERY careful blocking up the front. Make sure your back wheels are chocked and cant moved at all. I had several jack stands, blocks, and wheels and tires under the truck as back up measures here. Don’t screw around.
Remove the shocks. I start at the bottom and then just remove the whole tower through the engine bay.
Next up is the brakes.
Take the brake line off the caliper. Put the line in a bucket or something.
You should be able to leave the rest of the brakes attached. Disconnect your abs sensor if you have front wheel abs.
I remove the coil springs by lowering the axle down until I can get the spring out. I do it one side at a time. But you can lower both sides down also.
Your axle should now be free.
Pull the 44 out somehow. I once again put plywood under the rotors and pulled it out by hand. The 44 isnt that heavy. But you will likely need help getting the 60 into position.
Install is the opposite of removal. It should literally bolt right up to everything. I reused my 1500 shocks. But I used 2500 diesel coil springs.
Some notes.
The 2500 calipers use a different banjo bolt for the brake caliper. Don’t try to reuse the 1500 one you will just break it.
Be sure bleeding screws are on top of caliper, not bottom.
When installing your track bar you will have to have a buddy pry the axle over so you can get the track bar in the bracket.
Depending on your steering setup you chose you will have to do different things for the steering stabilizer.
If you’re putting the 2500 setup in you likely have a stabilizer to go with it. I would recommend the 99hd setup if you have a pre 2000 axle.
The 1500 steering might bolt up? Not sure on this.
If you have a late model axle, after 2000. You can use the 2008.5 t style setup. This is what I went with. Your stock stabilizer will not work. You can get an aftermarket or the stock 2008.5 stabby. I haven’t put one on and don’t plan too. SEE NOTE AT TOP OF POST ABOUT THIS STEERING SETUP
Now would be a good time to install new sway bar end links, bushings, tie rod ends, rotors/pads, u joints, ball joints and wheel bearings.
Dana 60 Swap DIY
First off, let me say that IMO this is the single best upgrade you can do to your 1500 to improve the overall drivability, reliability and life of your truck. Parts will wear out less, everything is bigger, tougher and more “truck-like” for lack of a better word.
This is a pretty involved swap, and can get pricey fast, so let’s start with WHY you would want do this swap.
Parts are more heavy duty and have the potential to last longer
Handle bigger tires better
Bigger and better brakes
Steering upgrade (see note)
More options for gears and lockers
8 lug sexiness
Diesel guys will wave at you going down the road because they think you’re one of them
NOTE: On the steering, you can keep the stock y-style crap. If you have up to a 99 you can do the 99HD steering upgrade. Or if you have a 00-01 you can do the t-style 8.5 upgrade, they are basically the same thing.
BE WARNED the 8.5 tie rod ends have had issues. The ends are snapping clean off on the third gens. Resulting in complete steering loss. Personally, I believe it’s a problem in bad steering geometry and axle setup. But you have been warned, and use AT YOUR OWN RISK.
Tools needed
Basic socket set, 21mm is a must. 1/2in drive is a must also
Wrenches
BFH, BMFH, and an even bigger BFH
Lots of PB Blaster
Jack stands
Jacks
Air tools make everything go easier as always
Now into the nitty gritty stuff. Remember that this is meant to be a general guideline on how to do this swap. Different people do things in different ways, and nothing works for everyone.
Rear Axle Removal
I took my bed off to gain access and just make everything easier. You DON’T have to do this, I just chose to.
Jack the 9.25 and put it on jack stands. Remove the wheels.

Disconnect the breather hose from the brake junction box. You will need to put a wrench on it and unscrew the tube. The end of the tube has a bolt, then the junction box will just come off. If your new 60 has rear disc brakes you will have to disconnect the soft line from the hard line at the frame rail, if not you should be able to reuse it??? Remove the two hard lines that split off from the box. Disconnect the abs/speed sensor while you are there.
Remove the shocks completely to get them out of the way. Two bolts, one on top and one on bottom.
Remove the rear driveshaft, make sure your front wheels are blocked front and back. Its four bolts then the yoke should come right off. You might need to motivate it to come off with the BFH. Pull the front out of the end of the t-case. A little fluid will come out, don’t be alarmed. \
If you want to use the 2500 3in leaf springs:
Now block your frame up so the trucks weight is on the blocks, while the axle is still on the stands. Then remove the four U-bolt nuts and U-bolts. The rear leafs are held to the frame by two eye bolts. One at the front in the hangar and the other in the shackle at the rear. To remove the front driver side you will have to drop the tank, or remove one strap and be creative. Either way it is a PITA. Remove these and your leaf springs should be loose. There should be no weight on them. Pull them out, along with the block the springs sit on.
Your rear axle is now free. Lower it down off the stands and drag it out. There are a lot of ways to do this. I put plywood under the brakes and dragged it out by hand. Hook it up to the horses or whatever, just get it out.
At this point there are two options. Dana 60 install with the 2.5 1500 leaf springs or the 2500 3in leaf springs.
For 2500 3in leaf springs
The 1500 hangar is too small to simply put the bigger 2500 shackle in, so you have to bust all the frame rivets off. I used an electric high speed drill, drilled the center out, knocked them out with the BMFH and a big chisel to knock one cap off, then punched the other side out with a big punch/rebar I had lying around.
After that, the front hangar should bolt right up with grade 8 bolts, grade washers and equivalent lock nut.
The rear you will more than likely have to drill new holes into the frame. The new holes are close to the old ones, so you need to reinforce the frame. I used a plate of 1/4in steel welded to the inside of the frame web. There are many ways to reinforce the frame. Do it however you deem necessary.
2500 hangar is bigger and a has a different pattern

Install new hangar with grade 8 hardware.

Get the 60 under there. Install the front end of the leaf spring into the hangar, and then the rear shackle into the hangar. The shackle should be nearly 90 degrees in relation to the hangar. Do this for both sides.
Put the leaf spring block on the perches, stop pad pointing toward the diff , and jack the axle up till the center hole goes into the bottom of the leaf spring pack. Put the centering pad on top of the leaf spring and put the u-bolts and bracket on. It is best practice to use new u bolts, especially with a lift. Do this for both sides. It’s helpful to have at least two jacks and a helper. Torque u-bolt nuts to spec. I installed the front eyelet bolt in the leaf spring so it would be easier to handle. Them suckers are heavy and awkward.

Install driveshaft, slide it into the trans and then bolt It up to the axle.
As far as driveshaft’s go you can keep the 1500 and same size u joints and change the yoke on the 60 to match the 1500 7290 style. See below for part numbers.
This 7290 pinion yoke fits the Chrysler 9.25" differential and takes the strap kit number 2970-20.
Be careful with this yoke. It is common for customers to confuse the 9.25" with the Dana 60 yoke and think it is defective.
Although the measurements are very similar the splines of a Dana 60 and Chrysler 9.25" are cut differently and do not interchange.
Dana/Spicer Pinion Yoke - for 2-4-7681-1X 7290 joint and Dana 60
Powertrain Industries. Part Number 2904-60 see above this is an alternate yoke.
You will also need to shorten the stock 1500 ds to 86in because the dana 60 sticks out forward quite a bit more than the Chrysler 9.25.
NOTE: If you have a different wheelbase (ie short bed reg cab or extended cab long bed) then you will need to take your own measurements.
The other option would be to find a 2500 ds of the same wheelbase as your truck. This means you will you get to use the larger 2500 u joints. I am 99% sure all 2500s have the same u joint size, diesel or not, but im not 100% on that.

Install the brake line junction box, along with the breather tube.
Install hard brake lines to junction box. Plug in abs/speed sensor.

NOTE: If you are going from drums to rear discs. You will have to get the corresponding soft line and junction box for the rear discs. The junction box from the 1500 will NOT work. The threads are too small for the bigger rear disc lines.
Install shocks.
Install the calipers if not already on. Skip if you have drums. Make sure the bleeder screw is ABOVE the brake line coming into the caliper. Else you will never get them bled.
Bolt up your parking brake. Yes don’t skip this part. If you’re going to disc rears you might have to get a different intermediate line. If you’re keeping drums it should just match right up. Be sure to properly adjust them.
The rear axle swap should now be complete. If you have already done the front swap then do a complete brake bleeding, put the tires on and go test everything out.
Front Dana 60 swap
The front swap is basically a complete bolt in job. Remove the 44 and then bolt in the 60.
Start by jacking up and supporting properly. Chock your back wheels.
Remove the front wheels.
Remove the front driveshaft. You will need a 2500 driveshaft. There has been confusion on the lengths. Some are longer and some are shorter. Best thing to do is take a measurement before going to buy one. I had a parts truck so mine fit fine. The 1500 ds will be too long. And uses the smaller u joints. I suppose you could shorten it and change the yoke on the axle just like the rear.
Disconnect the steering completely from the truck. Disconnect both tie rod ends (tre) at the steering knuckle. The steering stabilizer. And up at the pitman arm.
Next up disconnect the sway bar. I took it completely off also. To get as much room as possible to work in.
Next I disconnected the track bar at the axle. I left it connected at the frame. But tied it up out of the way.
Now is a good time to block up the frame. Next thing coming out is the coil springs and shocks.
Be VERY careful blocking up the front. Make sure your back wheels are chocked and cant moved at all. I had several jack stands, blocks, and wheels and tires under the truck as back up measures here. Don’t screw around.
Remove the shocks. I start at the bottom and then just remove the whole tower through the engine bay.
Next up is the brakes.
Take the brake line off the caliper. Put the line in a bucket or something.
You should be able to leave the rest of the brakes attached. Disconnect your abs sensor if you have front wheel abs.
I remove the coil springs by lowering the axle down until I can get the spring out. I do it one side at a time. But you can lower both sides down also.
Your axle should now be free.
Pull the 44 out somehow. I once again put plywood under the rotors and pulled it out by hand. The 44 isnt that heavy. But you will likely need help getting the 60 into position.
Install is the opposite of removal. It should literally bolt right up to everything. I reused my 1500 shocks. But I used 2500 diesel coil springs.
Some notes.
The 2500 calipers use a different banjo bolt for the brake caliper. Don’t try to reuse the 1500 one you will just break it.
Be sure bleeding screws are on top of caliper, not bottom.
When installing your track bar you will have to have a buddy pry the axle over so you can get the track bar in the bracket.
Depending on your steering setup you chose you will have to do different things for the steering stabilizer.
If you’re putting the 2500 setup in you likely have a stabilizer to go with it. I would recommend the 99hd setup if you have a pre 2000 axle.
The 1500 steering might bolt up? Not sure on this.
If you have a late model axle, after 2000. You can use the 2008.5 t style setup. This is what I went with. Your stock stabilizer will not work. You can get an aftermarket or the stock 2008.5 stabby. I haven’t put one on and don’t plan too. SEE NOTE AT TOP OF POST ABOUT THIS STEERING SETUP
Now would be a good time to install new sway bar end links, bushings, tie rod ends, rotors/pads, u joints, ball joints and wheel bearings.
Last edited by Ham Bone; Oct 1, 2015 at 10:38 PM.
Some other things to remember.
Dana 60s are 8 lug not five so don't forget to have some new wheels
You will get some lift out of this swap, just from the bigger axles. I would guess around 1-2inches. But I didn’t take any exact measurements. If you go with 2500 leaf springs you will get even more in the rear. My 1500 springs were sagging, and now I have rake in the back. It’s noticeably taller.
Be sure to torque everything to spec. Get the proper year FSM out of the DIY section and torque everything properly. You will need a 1/2in torque wrench. Get a good one. This is not the time to skimp out. This is your suspension and driveline we are working on.
Be sure to get an alignment or do one yourself If you are so inclined. But get it done ASAP.
CHECK EVERY BOLT AFTER DRIVING. You should recheck every single bolt you put in after driving around some and working the bugs out. This is a major swap and likely will not be perfect the first time you go for a test drive. Check after your first drive. And then check every week or so for a while to make sure nothing works loose. It’s a good idea to give everything a look over once in a while anyway. Such as at oil changes.
If you do this swap be sure to make a thread and post plenty of pictures
Grand Champion


Joined: Feb 2015
Posts: 7,435
Likes: 578
BFH, BMFH, and an even bigger BFH
In addition to this swap if you want to keep the 5 lug bolt pattern with the dana 60 you may want to consider the mod in the link. This is for a mopar muscle car build but could be made for any vehicle. Some of you may be familiar but back in the mopar muscle car era some came with 5 lugs dana 60's from the factory! Mainly big displacement stick cars. Finding one of them now is rare and pricey so the alternative is this mod. I am considering a build with a 496 (six pack) big block in my Indy and the 9 1/4 may not be enough. A dana 60 with a 4 link set up will get the job done! And i get to keep the 5 lug bolt pattern.

http://www.dragzine.com/tech-stories...udget-dana-60/

Registered User
Joined: Oct 2015
Posts: 12
Likes: 0
I have a 2001 dodge ram 1500 5.2 2 wheel drive and i have upgraded some Stuff on engine but a friend told me i could also upgrade the axle that i just had to change gears but i dont know how that work a and thought maybe you guys could help me out i want it to have faster acceleration and yeah maybe do some burn outs i have 22x10 srt10 rims on it What gears do i have to get and were do i get them
Last edited by Dego123; Oct 14, 2015 at 09:22 PM.
Record Breaker
Joined: Mar 2013
Posts: 1,130
Likes: 15
From: Somewhere in Kentucky
HamBone,
I remember you and Merc talking and his suggestion was to weld the leaf spring mounts onto the frame so you wouldn't have to check and re-torque the grade 8 bolts that you installed. If you were to weld the grade 8 bolt and nut together, would that be beneficial?
Just thinking out loud here, in case I ever do this swap myself.
Champion
Joined: Sep 2011
Posts: 3,891
Likes: 8
From: NorCal
^Not a good idea to weld the nut and bolt together. That will hurt the bolt. It won't add to anything anyways. Welding the brackets directly to the frame is good as long as there is good contact and places the welds in shear. I recall the factory brackets have some curves that might make that a challenge.
Trending Topics
Wow have I have really been riding around on this contraption for 4 years?
Nothing negative to report. Everything holding up well. Only thing that I can remember happening is that 100 dollar set of BFG deflating as I was backing down the driveway one day.
Nothing negative to report. Everything holding up well. Only thing that I can remember happening is that 100 dollar set of BFG deflating as I was backing down the driveway one day.