

Project 51 build thread

Thread Starter
|
Captain
Joined: Dec 2011
Posts: 555
Likes: 3
From: Wisconsin
That would look nice. Right now I'm almost leaving it as is. . . rusty. Kinda fits the build that way. Plus I don't have to mess with wire wheeling everything
Thread Starter
|
Captain
Joined: Dec 2011
Posts: 555
Likes: 3
From: Wisconsin
Have put a little time in this week. I brought a bunch of parts to work to wash in the hot water parts washer and found a little issue with the timing cover. . .
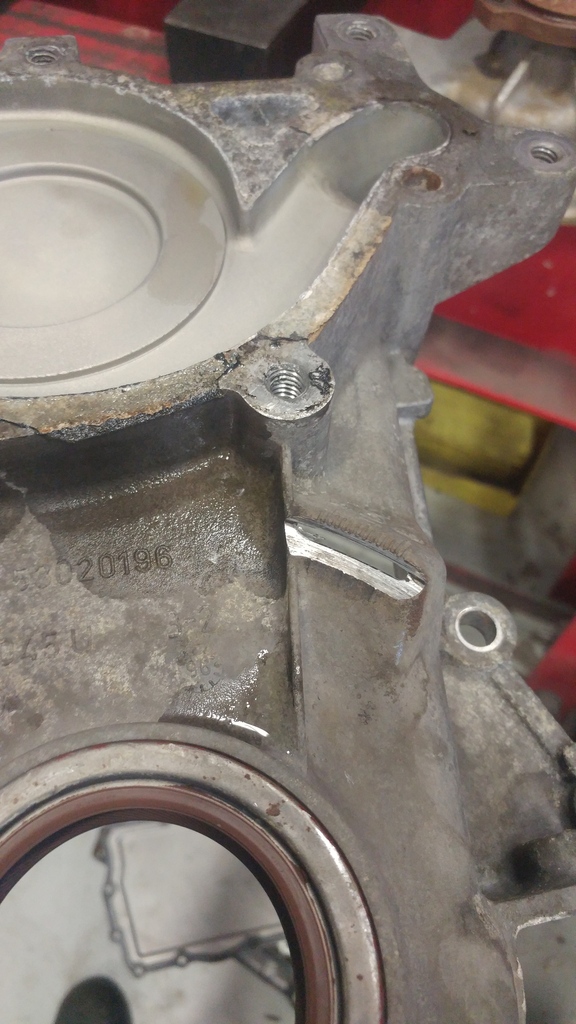
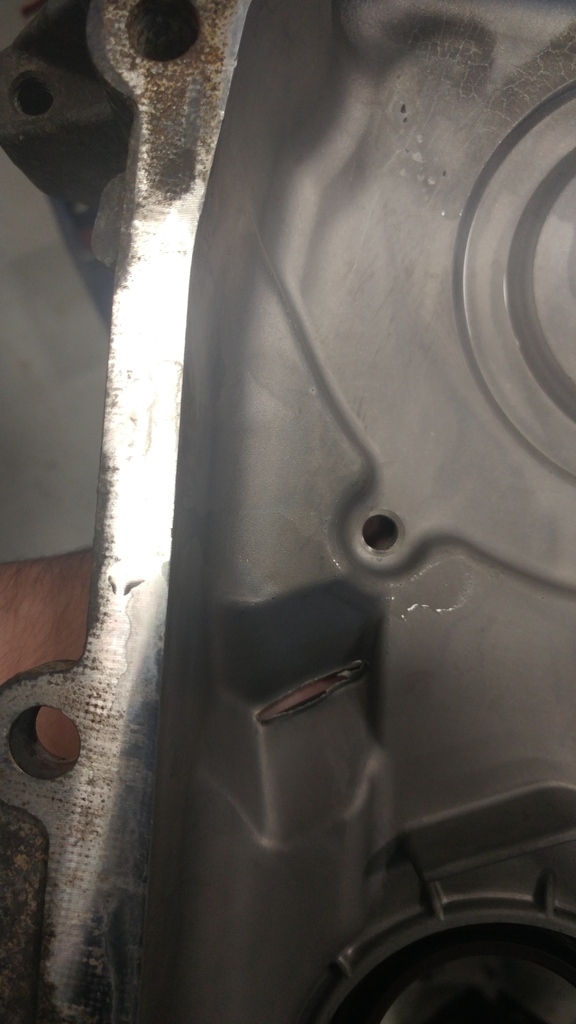
So I welded the gap up and it should be good to go. I talked to the previous owner and he said the balancer came apart on him and must've chewed through. Funny thing is he said that was over 30,000 miles ago!
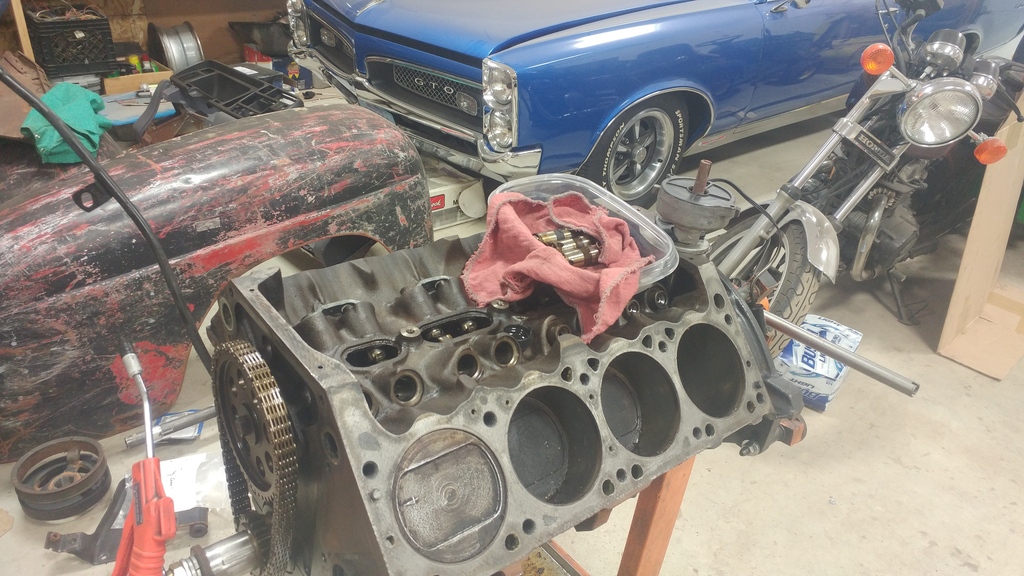
Tonight I spent some time cleaning up the engine and heads getting it ready to go back together.
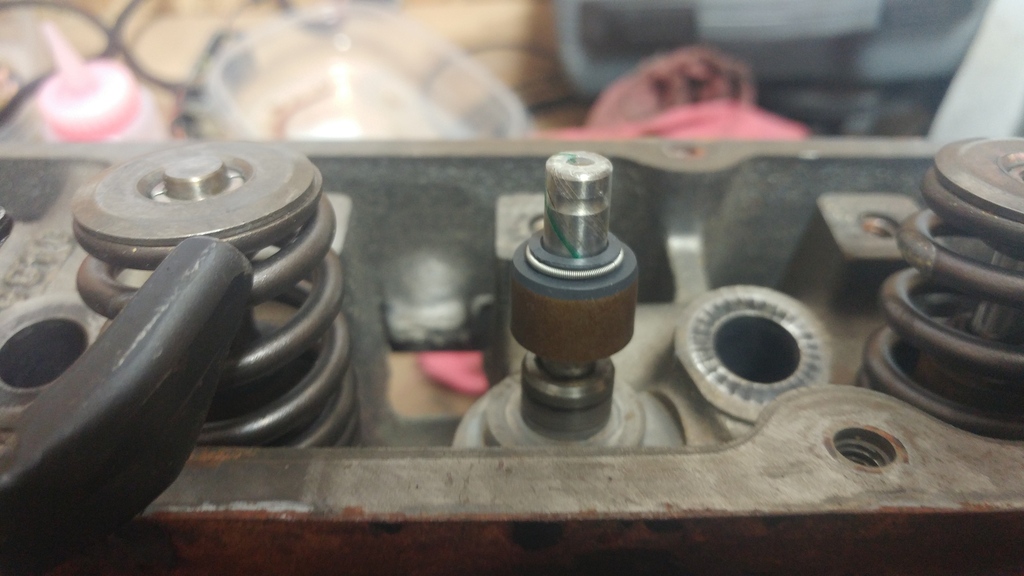
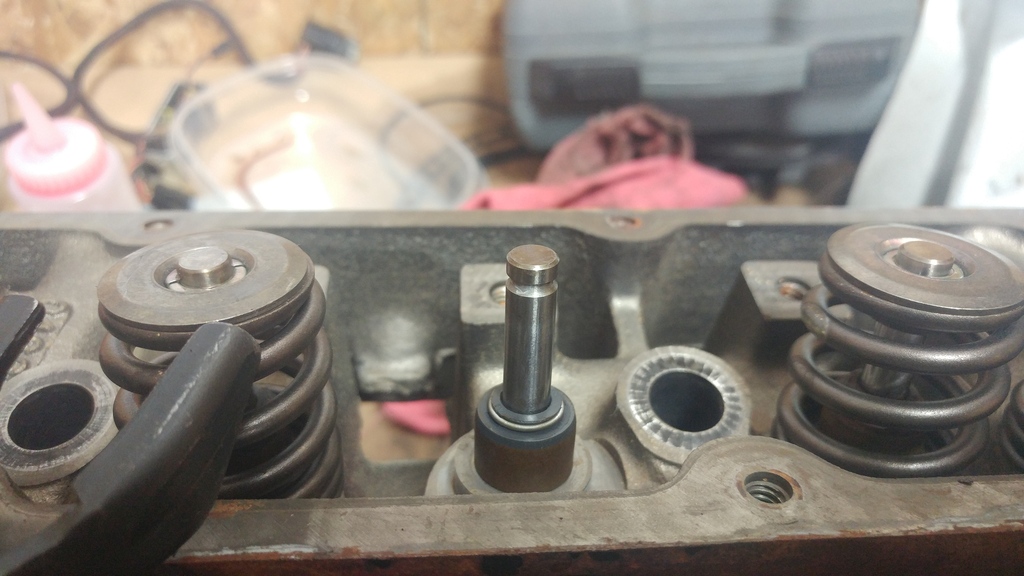
I also replaced the valve seals while I have the heads off:
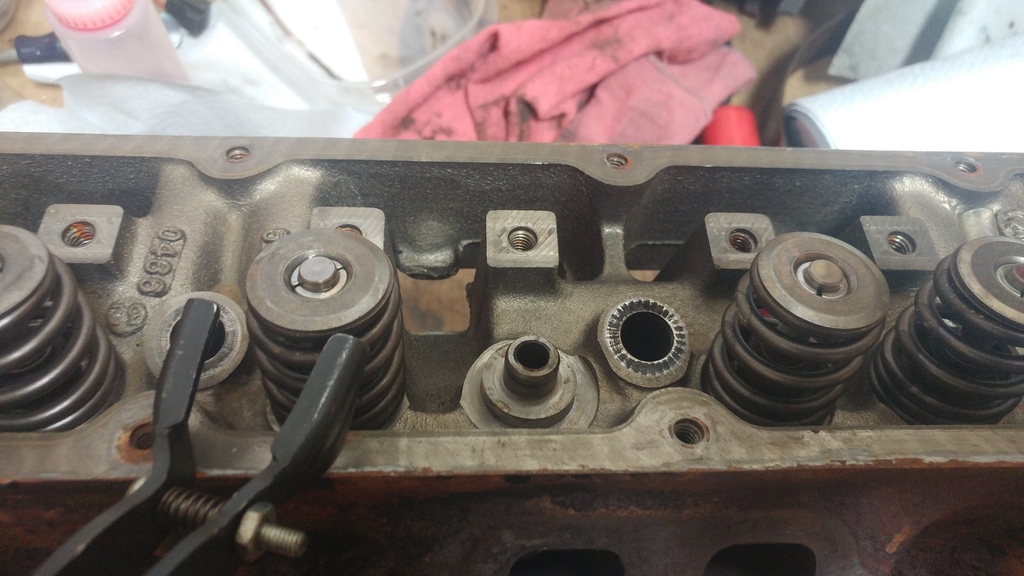
If you ever do valve seals, make sure you use the seal condom! Or else you will ruin the seal installing it over the valve.
I went to bolt the heads on and I was shorted 2 long bolts in my box of new head bolts. I have to work tomorrow morning for a few hours then I'll stop at the parts store and get that taken care of. Most of my parts will be in Monday and I will be doing the kegger mod throughout next week after work. I should have my new plenum plates by the end of next week so next weekend I will get everything buttoned up. I have to source the correct temp and oil pressure senders to make my gauges work correctly.
Would anyone happen to know if the pcm needs the oil pressure sender input to make other parts function properly or is it just for the gauge?
So I welded the gap up and it should be good to go. I talked to the previous owner and he said the balancer came apart on him and must've chewed through. Funny thing is he said that was over 30,000 miles ago!
Tonight I spent some time cleaning up the engine and heads getting it ready to go back together.
I also replaced the valve seals while I have the heads off:
If you ever do valve seals, make sure you use the seal condom! Or else you will ruin the seal installing it over the valve.
I went to bolt the heads on and I was shorted 2 long bolts in my box of new head bolts. I have to work tomorrow morning for a few hours then I'll stop at the parts store and get that taken care of. Most of my parts will be in Monday and I will be doing the kegger mod throughout next week after work. I should have my new plenum plates by the end of next week so next weekend I will get everything buttoned up. I have to source the correct temp and oil pressure senders to make my gauges work correctly.
Would anyone happen to know if the pcm needs the oil pressure sender input to make other parts function properly or is it just for the gauge?
Administrator


Joined: Apr 2010
Posts: 87,468
Likes: 4,220
From: Clayton MI
PCM doesn't care about oil pressure. I think on the 98 and up, the PCM is aware, but, the most it does if it doesn't see any oil pressure is tell the cluster to make an annoying noise.
You can weld aluminum? (I know it's possible, you actually have the equipment? Yes, that's jealousy you hear there. )
)
You can weld aluminum? (I know it's possible, you actually have the equipment? Yes, that's jealousy you hear there.
)
Thread Starter
|
Captain
Joined: Dec 2011
Posts: 555
Likes: 3
From: Wisconsin
PCM doesn't care about oil pressure. I think on the 98 and up, the PCM is aware, but, the most it does if it doesn't see any oil pressure is tell the cluster to make an annoying noise.
You can weld aluminum? (I know it's possible, you actually have the equipment? Yes, that's jealousy you hear there. )
You can weld aluminum? (I know it's possible, you actually have the equipment? Yes, that's jealousy you hear there.
)Last edited by 97ramrod1500; Mar 18, 2017 at 07:31 AM.
Thread Starter
|
Captain
Joined: Dec 2011
Posts: 555
Likes: 3
From: Wisconsin
Went to the auto parts store today to get the head bolt issue straightened out. When I told the guy behind the counter that there were only 8 long bolts instead of 10 he responded with; "are you sure you need 10?" I quickly said, "do you need 4 tires on your car? Of course I need 10!" So he went in back and grabbed another box and I opened it and confirmed the correct quantity.
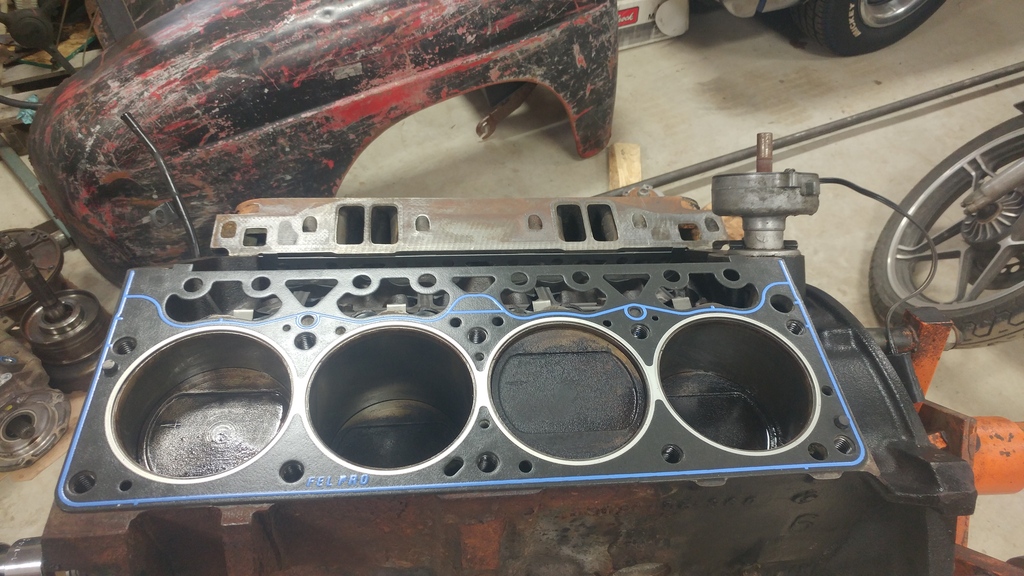
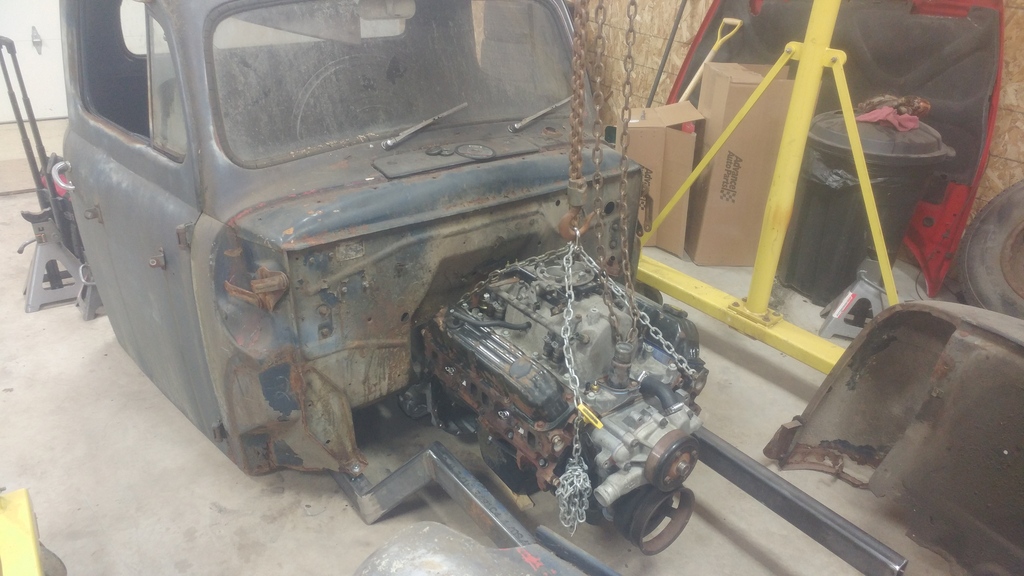
I managed to get my cylinder heads bolted on, valvetrain all reassembled, valve covers, rear main seal and oil pan all back together in the little amount of time I worked on it today.

I will get the intake manifold work done this week and get the engine all buttoned up. I also ordered the parts to get the transmission back together. I do have to get the shift kit yet though. After I do a rebuild and r&r for a customer I will work on my transmission and post progress.
I ordered some more material this week. 40' of square tubing for the cab subfloor and 40' of DOM tubing for a bunch of different parts: front control arms, engine/trans mounts etc. my total thus far into the project is $2041.
I managed to get my cylinder heads bolted on, valvetrain all reassembled, valve covers, rear main seal and oil pan all back together in the little amount of time I worked on it today.
I will get the intake manifold work done this week and get the engine all buttoned up. I also ordered the parts to get the transmission back together. I do have to get the shift kit yet though. After I do a rebuild and r&r for a customer I will work on my transmission and post progress.
I ordered some more material this week. 40' of square tubing for the cab subfloor and 40' of DOM tubing for a bunch of different parts: front control arms, engine/trans mounts etc. my total thus far into the project is $2041.
Last edited by 97ramrod1500; Mar 18, 2017 at 11:23 PM.


Thread Starter
|
Captain
Joined: Dec 2011
Posts: 555
Likes: 3
From: Wisconsin
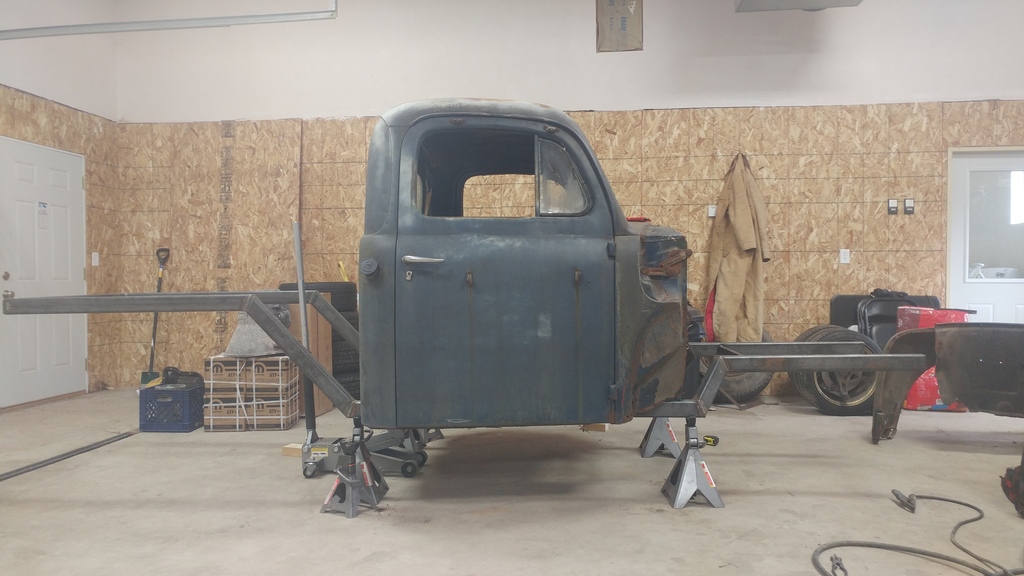
Got the frame back under the cab and where I want it. Tacked on the front body mounts
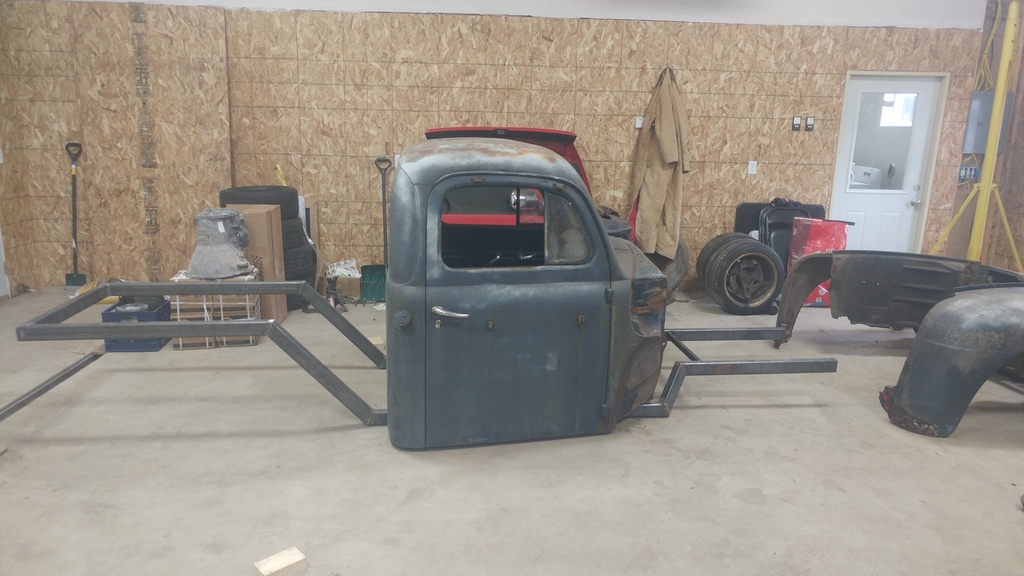
Put everything in the air to get ready to remove the rest of the floor, only to realize I need to get the engine and trans back in place and mounted so I need to drop it back down.
I ordered all the prothane bushings I need for the engine mounts, trans mounts, lower control arms and upper control arms. Everything will be fabbed from DOM tubing ranging from 1.25" to 1.75".
Last edited by 97ramrod1500; Mar 19, 2017 at 07:23 PM.
Thread Starter
|
Captain
Joined: Dec 2011
Posts: 555
Likes: 3
From: Wisconsin
Got a little work done last week and this weekend but not too much.
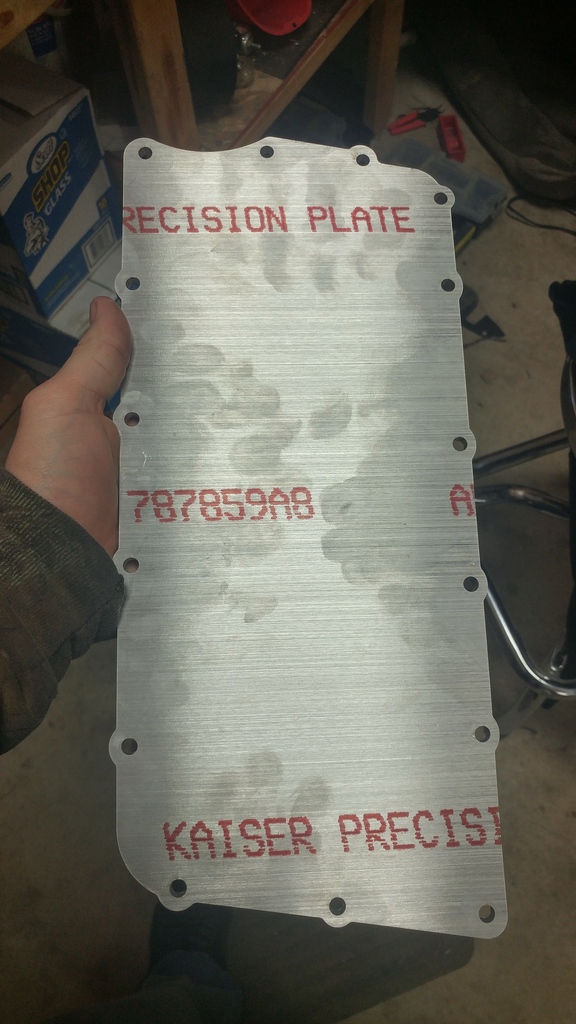
I got some plenum plates lasered out. I had 5 done, I need 1 my buddy needs 2 and I'll be selling the other 2.
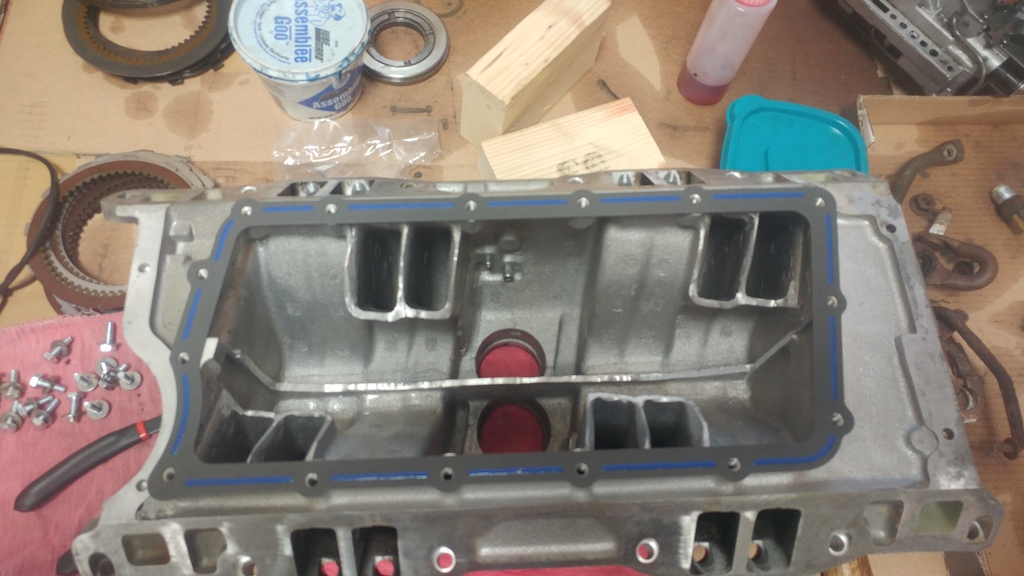
I also did the kegger mod while it was off and apart. I spent about 3 hours on it, mostly cleaning up around the ports and smoothing them out. I didn't spend too much time cleaning up the leftover areas from knocking out the center divider.
I also replaced the 97 fuel rail with a 99. Mainly because I forgot to keep the fuel line that goes into the 97 rail so I got a rail with the line from the local pick-n-pull. Also the plastic line that connects the 2 rails on the 97 was cracked so it needed to be replaced anyways.
Today I bolted the transmission case back onto the engine and put it where it needs to be. I started fabricating my engine mounts. I have the pieces cut but need to pick up a notching tool tomorrow so I can finish them up. I'll update with more pictures this week as I go.
I got some plenum plates lasered out. I had 5 done, I need 1 my buddy needs 2 and I'll be selling the other 2.
I also did the kegger mod while it was off and apart. I spent about 3 hours on it, mostly cleaning up around the ports and smoothing them out. I didn't spend too much time cleaning up the leftover areas from knocking out the center divider.
I also replaced the 97 fuel rail with a 99. Mainly because I forgot to keep the fuel line that goes into the 97 rail so I got a rail with the line from the local pick-n-pull. Also the plastic line that connects the 2 rails on the 97 was cracked so it needed to be replaced anyways.
Today I bolted the transmission case back onto the engine and put it where it needs to be. I started fabricating my engine mounts. I have the pieces cut but need to pick up a notching tool tomorrow so I can finish them up. I'll update with more pictures this week as I go.