


408 stroker build

Champion


Joined: Oct 2009
Posts: 4,717
Likes: 10
From: N/A
Quote: Overall i personally think i got a good deal $1200, for a 408 stroker w/ 2.02 r/t heads, m1 intake, crower 1.7 rollers, ignition system, mopar air hat, injectors, flexplate, and mopar valve covers... maybe forgetting something. a similar build is upwards of $5k
Good deal!!!
Take it to the guy that built it and have him go through it; everything needs to be checked / cleaned from bearings to valve guides. Spend what you need to, now will be cheaper than later.
Good deal!!!
Take it to the guy that built it and have him go through it; everything needs to be checked / cleaned from bearings to valve guides. Spend what you need to, now will be cheaper than later.

Rookie
Joined: Nov 2010
Posts: 85
Likes: 0
From: Tacoma Wa
clearances etc should not be an issue if it was done correct from the start, as stated. I personally would dis assemble the whole thing, if you are going to hone it the rotating assy will obviously be out. but I think you should also pull the cam etc. at that point every thing can be measured (gamble if you like) but I dont go thru all that work without knowing exactly what I am dealling with. this also lends itself to a thorough cleaning, contaminants of rust-metal dust can kill a fresh motor. use lots of assy lube on all bearings and cam during re-assembly and torque progressively.
do all that and pay very close attention to details and you are going to be golden. Im so jealous.
Doug
do all that and pay very close attention to details and you are going to be golden. Im so jealous.
Doug
Thread Starter
|
Record Breaker
Joined: Feb 2010
Posts: 1,504
Likes: 1
From: Chesapeake, VA
yea i plan to dissassemble it entirely, take everything to the builder have him clean everything up, then follow the haynes manual on rebuild. shouldnt be too hard ot take too long

Thread Starter
|
Record Breaker
Joined: Feb 2010
Posts: 1,504
Likes: 1
From: Chesapeake, VA
<a href="http://s480.photobucket.com/albums/r...t=S7306341.jpg" target="_blank"><img src="http://i480.photobucket.com/albums/r...5/S7306341.jpg" border="0" alt="Photobucket"></a>
<a href="http://s480.photobucket.com/albums/r...t=S7306341.jpg" target="_blank"><img src="http://i480.photobucket.com/albums/r...5/S7306341.jpg" border="0" alt="Photobucket"></a>
<a href="http://s480.photobucket.com/albums/r...t=S7306339.jpg" target="_blank"><img src="http://i480.photobucket.com/albums/r...5/S7306339.jpg" border="0" alt="Photobucket"></a>
<a href="http://s480.photobucket.com/albums/r...t=S7306338.jpg" target="_blank"><img src="http://i480.photobucket.com/albums/r...5/S7306338.jpg" border="0" alt="Photobucket"></a>
<a href="http://s480.photobucket.com/albums/r...t=S7306337.jpg" target="_blank"><img src="http://i480.photobucket.com/albums/r...5/S7306337.jpg" border="0" alt="Photobucket"></a>
<a href="http://s480.photobucket.com/albums/r...t=S7306336.jpg" target="_blank"><img src="http://i480.photobucket.com/albums/r...5/S7306336.jpg" border="0" alt="Photobucket"></a>
<a href="http://s480.photobucket.com/albums/r...t=S7306342.jpg" target="_blank"><img src="http://i480.photobucket.com/albums/r...5/S7306342.jpg" border="0" alt="Photobucket"></a>

Thread Starter
|
Record Breaker
Joined: Feb 2010
Posts: 1,504
Likes: 1
From: Chesapeake, VA
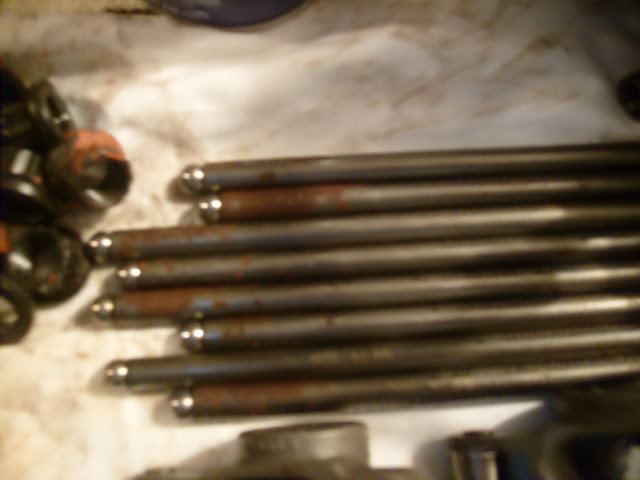
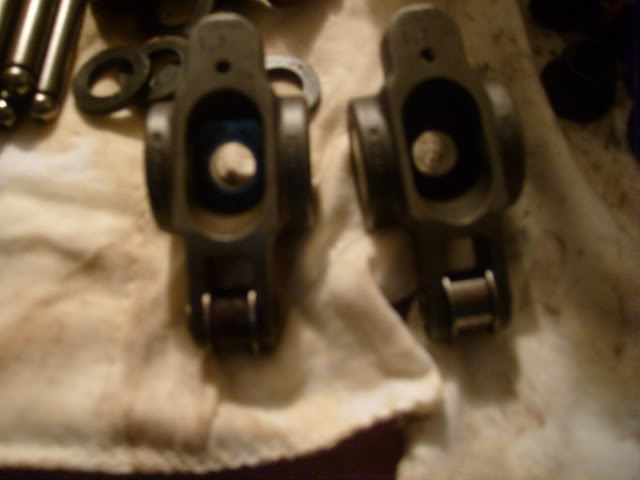
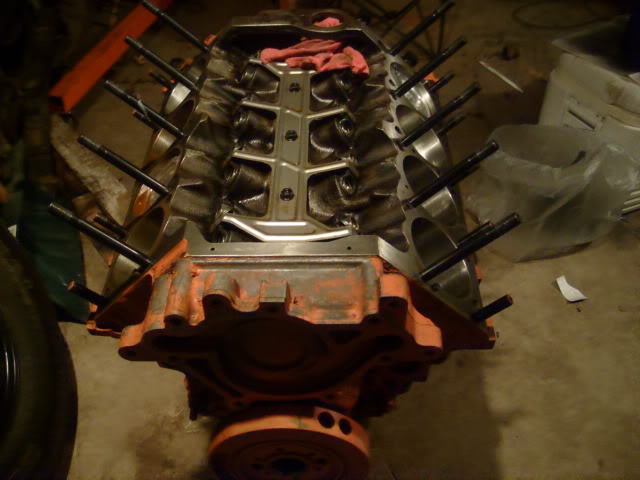
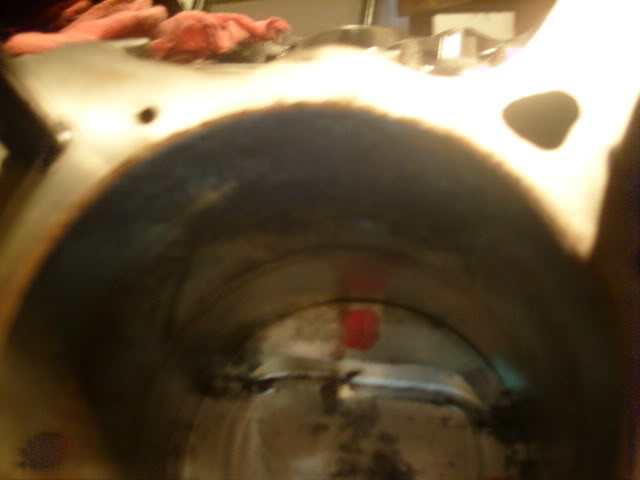
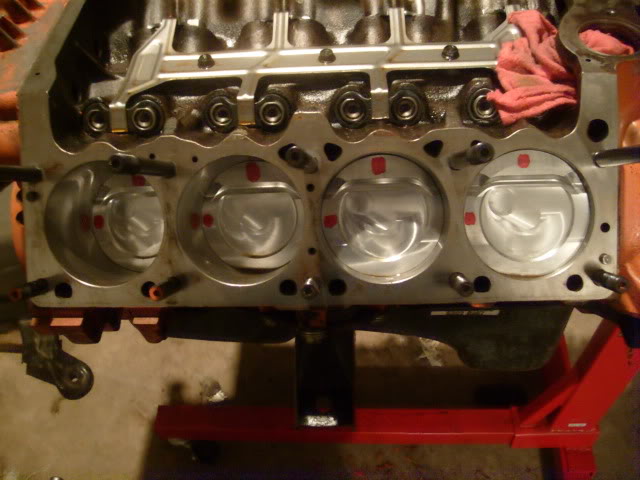
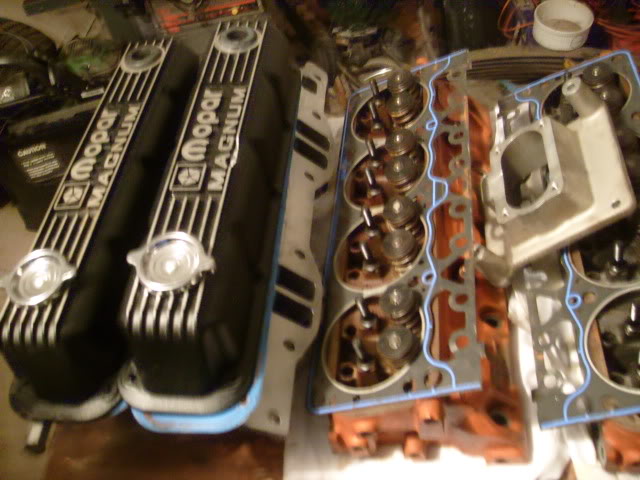
as you can see all the odd cylinders are pristine, as is #8. how do those pushrods look? you can see the difference b/w the two rollers on the rocker arms. what you see on the pistons is the corrosion i was talking of.
Administrator


Joined: Apr 2010
Posts: 87,550
Likes: 4,230
From: Clayton MI
Wow. Very nice. I do think that complete disassembly, and clean up is in order there. Not sure on the rockers.... do all of the other ones have that coating on the roller? Does it flake off easily?? Wonder if its dried on assembly lube on the others?