


Another ball joint question


Thread Starter
|
Registered User
Joined: Oct 2011
Posts: 9
Likes: 0
From: Denton, TX
Hello, new to this forum. Learning a lot here. I replaced a fuel pump last week thanks to this forum.
I have a new (to me) 98 1500 and I am planning on replacing all ball joints today after work. I've read a lot here on these forums, and watched several videos.
So here's a potentially "dumb" question, but I'll ask it anyway;
On a 2wd, is it necessary to remove the rotor and hub from the knuckle? It looks like I could remove the caliper, and then treat the rest like one piece. Yes?
I appreciate any help on this.

Rookie
Joined: Oct 2011
Posts: 52
Likes: 0
It's a lot easier to just go ahead and take them off I did upper and lower on mine and it was ridiculous btw if yours is like mine was you will need a torch it took me and my dad a full 6 hours to to them on just one side

Rookie
Joined: Sep 2011
Posts: 55
Likes: 0
From: Memphis, TN
it shouldnt be too hard. i did all four on my 96 in about an hour and a half. just get a BFH and taking the whole hub assembly ff will make it a lot easier. the hardest part really is separating them so thats why i say a big ****ing hammer lol
Legend
Joined: Mar 2011
Posts: 8,914
Likes: 4
From: Fredericksburg, Virginia
What year is yours? I see the OP's is a 1998. Mine is a 2001 and has bolt on ball joints, I'm hoping they aren't too bad to replace.
Professional
Joined: Jan 2011
Posts: 235
Likes: 0
From: Zephyrhills,Fl
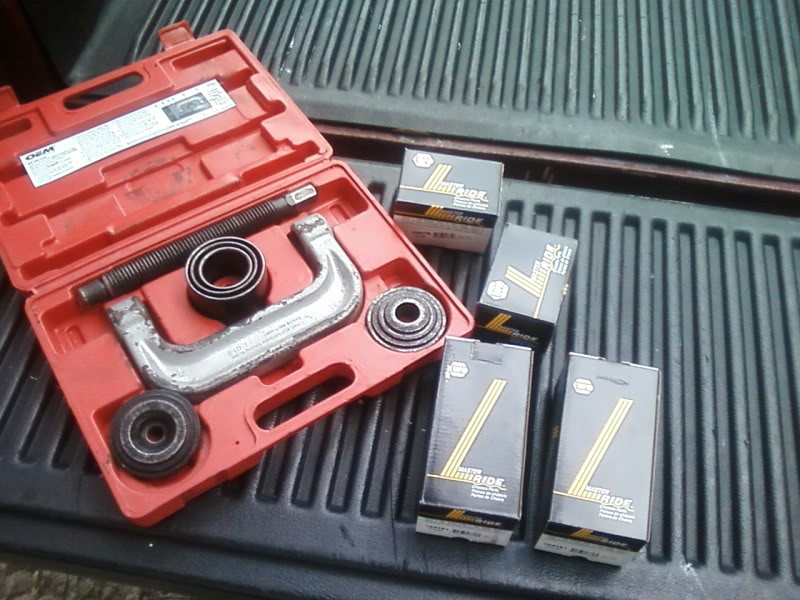
I did the ball joints on my 96 about a month ago...both uppers and lowers are pressed in. It wasnt that bad after I modded the ball joint press from Autozone to work correctly. I didnt have to use a torch or anything. took off the tire/wheel...unbolted the calipers, hung them to the coil spring...then unbolted the knuckle WITH the rotor attached, and got it out of the way...pressed them all out, pressed the new ones in, installed my grease fittings, greased them up and reassembled them...
here is the pressing tool and ball joints I used...
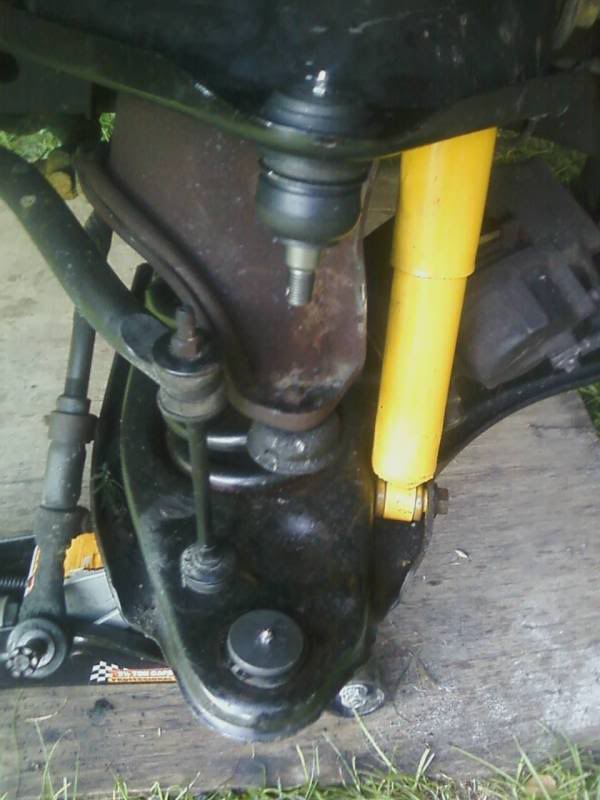
new ball joints installed...
here is the pressing tool and ball joints I used...
new ball joints installed...
Thread Starter
|
Registered User
Joined: Oct 2011
Posts: 9
Likes: 0
From: Denton, TX
Thanks 96mag. I have the same press from Autozone (and a bfh and torch if it comes to that).
I didn't get to it Thursday night. We had rain and wind, so I came in to watch the Rangers . Today should be the day. I think I will try to remove the knuckle with the rotor attached. If that doesn't work, I'll go to plan "B".
I didn't get to it Thursday night. We had rain and wind, so I came in to watch the Rangers
. Today should be the day. I think I will try to remove the knuckle with the rotor attached. If that doesn't work, I'll go to plan "B".
Trending Topics
Thread Starter
|
Registered User
Joined: Oct 2011
Posts: 9
Likes: 0
From: Denton, TX
Just a quick follow up to close out this thread. I finished the ball joints over the weekend. I would have to guess that it was about 4 - 5 hours in total working time. A lot of time was spent separating the old joints from the knuckle. I used the pickle fork, and a big hammer. I did leave the rotors on the knuckle.
I also spent some time trying to get the "universal" press to fit the new ball joints to press them in. 3 of 4 went in fine. The last one, lower passenger side, went in a little a little crooked. It's about 1/8 of an inch higher on one side. I could not get the press to get it in straight. But I think it's OK. It's not going anywhere, that's for sure. There was plenty of room for the snap clip/ring. If anyone sees a problem with this, definitely let me know. But like I said, it's in really tight, so I think it should be OK.
The reason I decided to replace them was originally because of a loud squeak. When I went looking for the squeak, I noticed that all of the ball joints were trashed. Now the squeak is completely gone, and I have the satisfaction of new ball joints.
Next project...
Last edited by UglyTruckling; Oct 31, 2011 at 11:58 PM.
Legend
Joined: Mar 2011
Posts: 8,914
Likes: 4
From: Fredericksburg, Virginia
Just a quick follow up to close out this thread. I finished the ball joints over the weekend. I would have to guess that it was about 4 - 5 hours in total working time. A lot of time was spent separating the old joints from the knuckle. I used the pickle fork, and a big hammer. I did leave the rotors on the knuckle.
I also spent some time trying to get the "universal" press to fit the new ball joints to press them in. 3 of 4 went in fine. The last one, lower passenger side, went in a little a little crooked. It's about 1/8 of an inch higher on one side. I could not get the press to get it in straight. But I think it's OK. It's not going anywhere, that's for sure. There was plenty of room for the snap clip/ring. If anyone sees a problem with this, definitely let me know. But like I said, it's in really tight, so I think it should be OK.
The reason I decided to replace them was originally because of a loud squeak. When I went looking for the squeak, I noticed that all of the ball joints were trashed. Now the squeak is completely gone, and I have the satisfaction of new ball joints.
Next project...
I also spent some time trying to get the "universal" press to fit the new ball joints to press them in. 3 of 4 went in fine. The last one, lower passenger side, went in a little a little crooked. It's about 1/8 of an inch higher on one side. I could not get the press to get it in straight. But I think it's OK. It's not going anywhere, that's for sure. There was plenty of room for the snap clip/ring. If anyone sees a problem with this, definitely let me know. But like I said, it's in really tight, so I think it should be OK.
The reason I decided to replace them was originally because of a loud squeak. When I went looking for the squeak, I noticed that all of the ball joints were trashed. Now the squeak is completely gone, and I have the satisfaction of new ball joints.
Next project...
Same with my rig, new ball joints on the driver side, NO squeaking and NO more wheel rub!!