


Install Writeup: 2.5" leveling kit - 2008 4x4


Thread Starter
|
Rookie
Joined: Mar 2006
Posts: 70
Likes: 0
From: Katy, TX
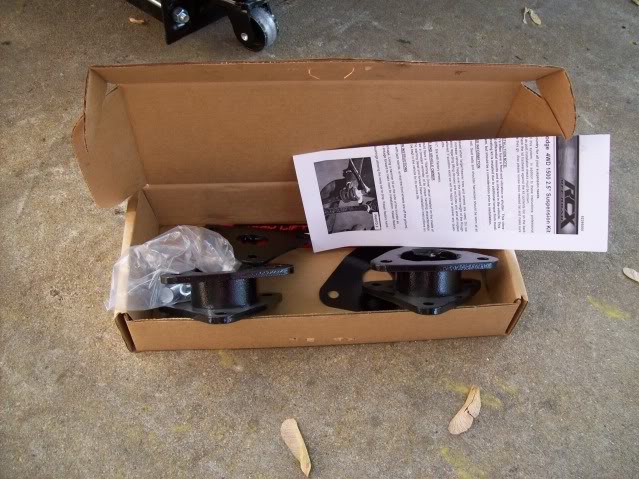
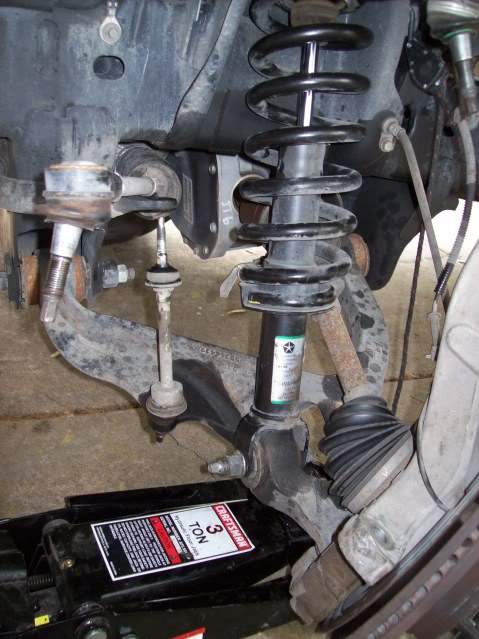
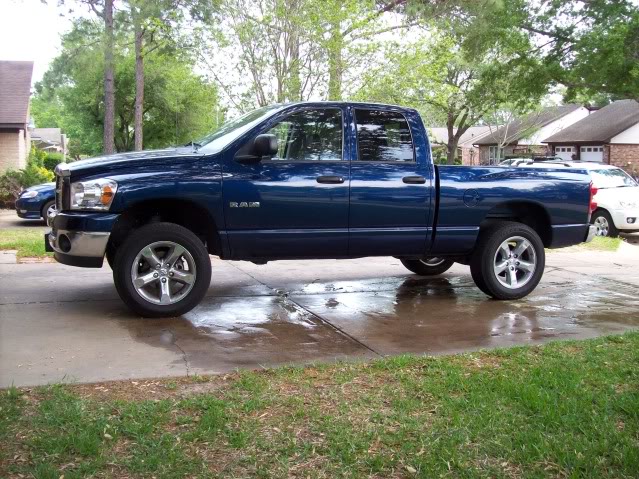
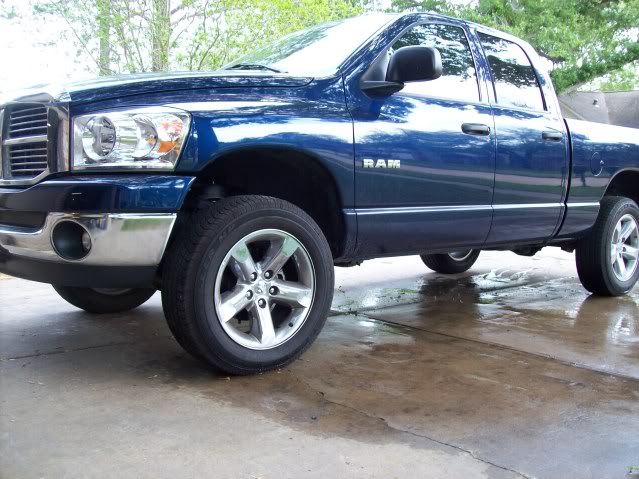
This write-up is to document the installation of a Rough Country 2.5" coil/strut spacer for a 2008 Dodge 1500 4x4.
The installation instructions included in the kit are very good, as they usually are from Rough Country, but this will hopefully shed light on some of the small things left unmentioned in the manufacturer's instructions, and possibly some larger pictures.
The following steps required for the installation of the RC spacers should be valid and very similar to those from other companies. The physical design of the spacers will vary from company to company, but the removal of the strut and installation will be the same.
Brand: Rough Country
Product: 2006-2008 4wd Ram 1500 2.5" Leveling Suspension
Item#: 395
Price: $99.95 + shipping
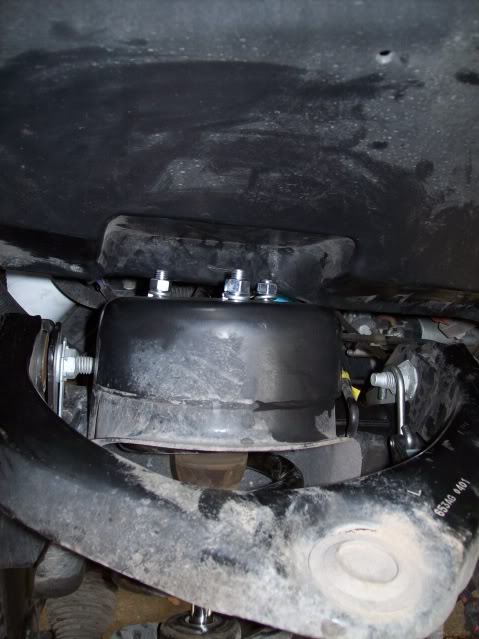
Options: 1.5" rear block kit and rear RC Nitro 9000 series shocks (+$100)
http://www.roughcountry.com/dodge_4wd_leveling_kit.html
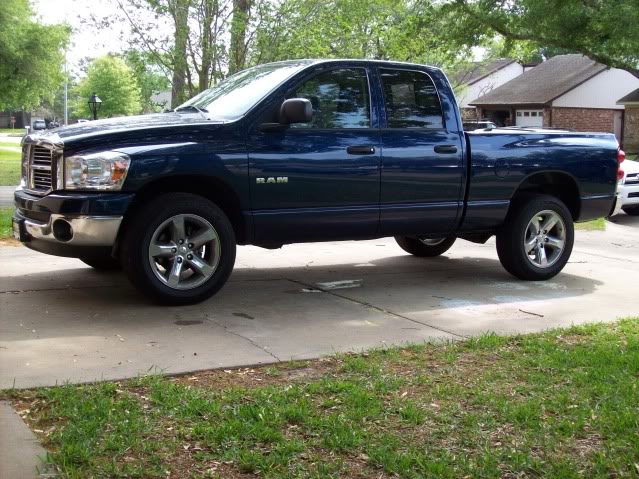
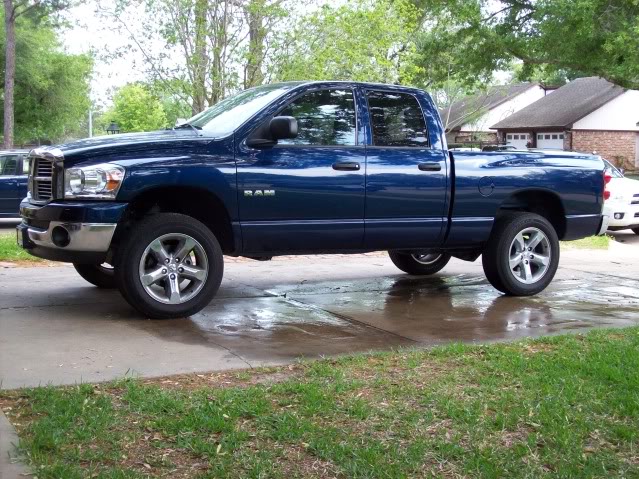
Vehicle: 2008 Dodge 1500 4x4, crew cab
Tools needed:
floor jack
jack stand
ratchet wrench (1/2" prefered)
15mm, 21mm, 24mm DEEP sockets
15mm, 21mm wrench
9/16" socket
9'16" wrench
channel lock pliers
adjustable wrench
hammer
*The following steps are documented from the driver's side as it was done first. It makes no difference which side you start with. The install is the same on both sides.*
Step 1
With the weight of the truck still on the tire, break the lug nuts loose, but do not remove. The instructions say to use a 22mm socket. I find a 12-point socket does not fit well. A 6-point socket works best. You can also use a 7/8" socket (6-point). Of course your factory tire-iron will work as well.
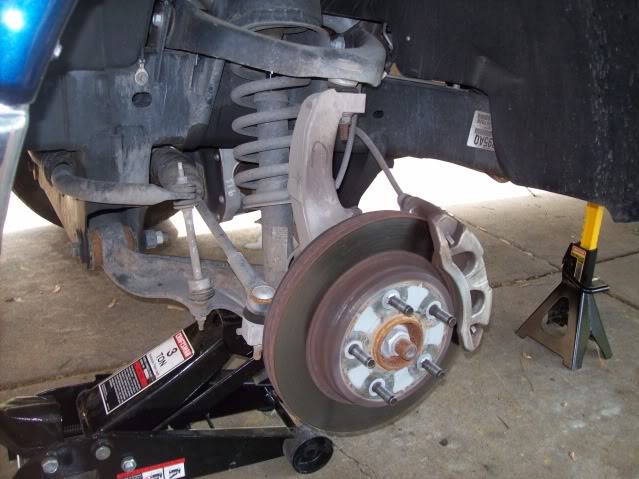
Step 2
Place floor jack under the lower control arm to raise the frontend.
Place jack stand under the frame rail where it flattens out.
Remove lug nuts and remove tire.
Keep floor jack in place with pressure applied to the lower control arm.
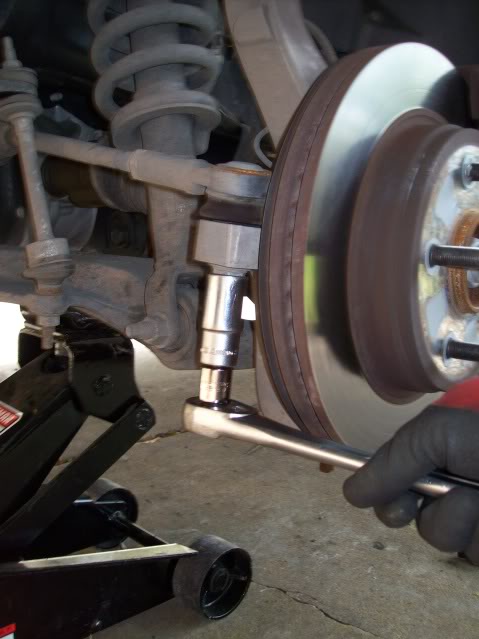
Step 3
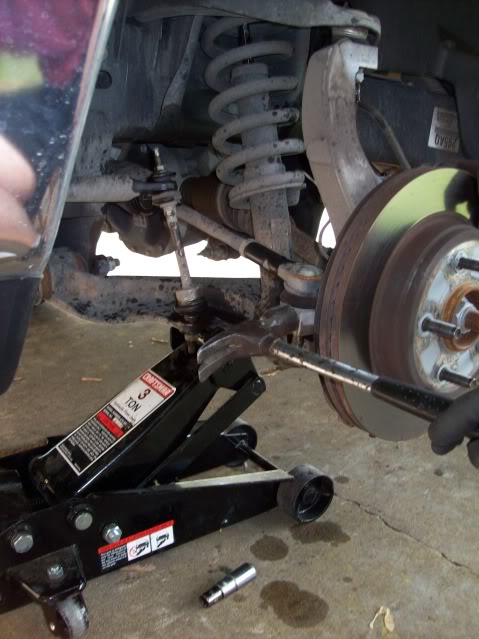
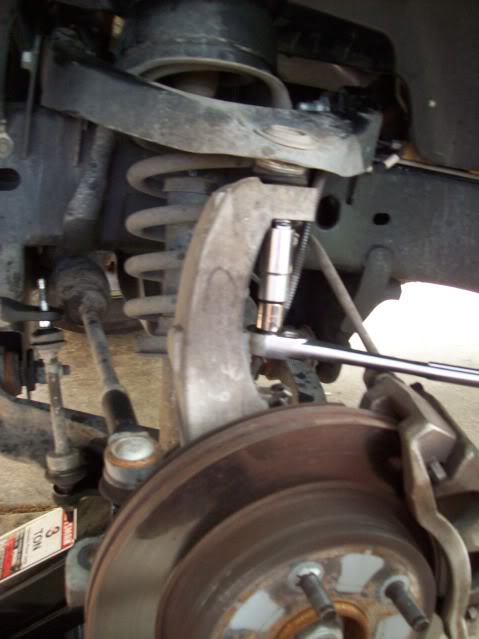
Using a 21mm deep socket, remove the nut holding the tie rod to the spindle. Save hardware.
Step 4
Strike the side of the spindle with a large/heavy hammer to break the tie rod balljoint stud loose. Do not hit the stud itself. It may take several hard blows to break free....don't worry, it will happen.
Step 5
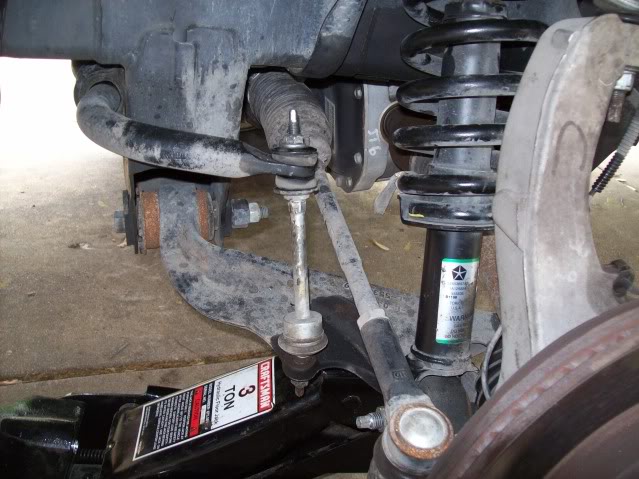
Using a 15mm deep socket, remove the upper swaybar link nut, then the washer and bushing. You will need to hold the swaybar link itself using channel lock pliers or an adjustable wrench to keep it from spinning while removing the nut. Save hardware.
Step 6
Using a 15mm wrench, remove the 3 upper strut nuts. Save hardware.
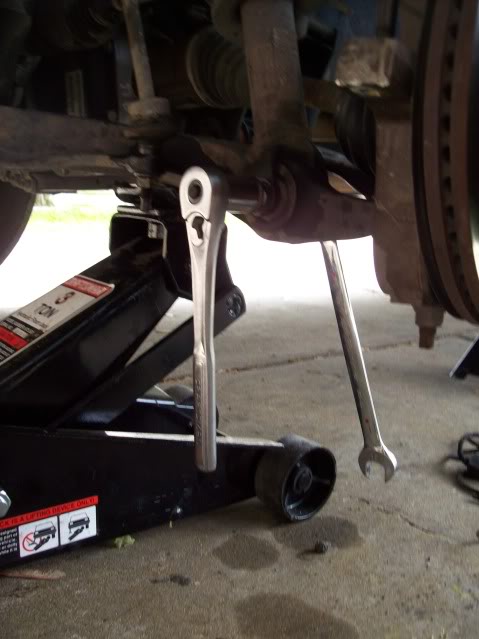
Step 7
Using a 24mm deep socket and 21mm wrench, remove the lower strut nut. There will be too much tension on the actual bolt to remove it at this time. It will be removed soon, though. Save hardware.
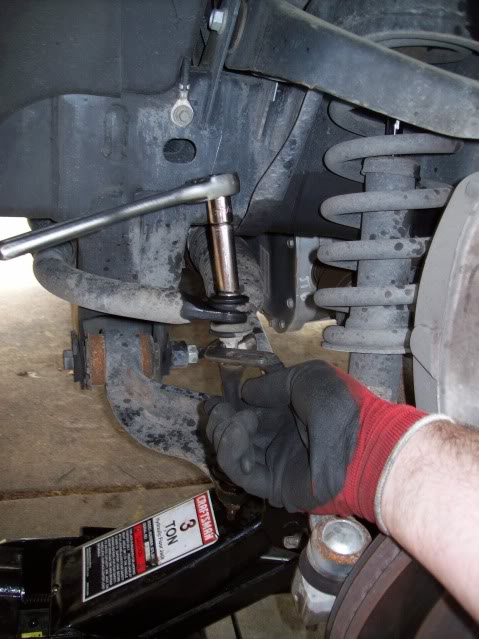
Step 8
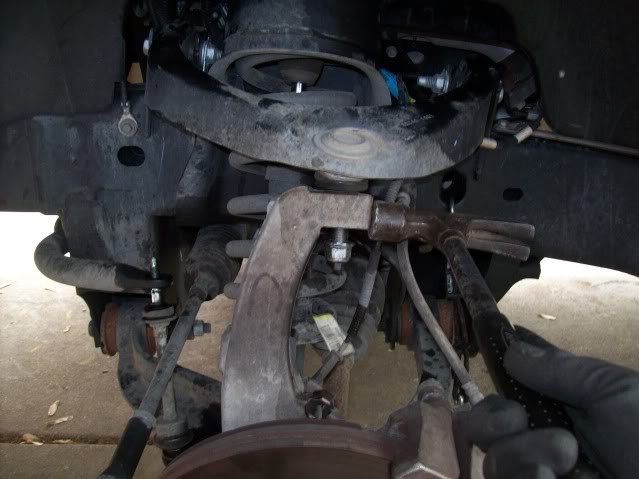
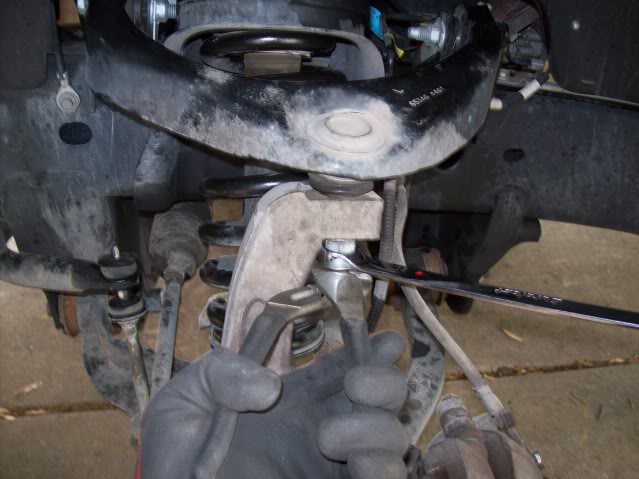
Using a 21mm deep socket, remove the nut holding the upper control arm ball joint to the spindle. Once the nut is completely removed, thread it back on a few turns. The reason for removing it completely is because there is locktite on the treads that needs to be broken loose. This is easier while the stud is still pressed in the spindle and not able to freely spin. Once the stud is loose and can freely spin, it is very difficult to remove the nut if the locktite has not been broken loose.
Step 9
Strike the spindle with a large/heavy hammer to break the balljoint loose from the spindle. The nut was threaded back on in the previous step because the ball joint will break loose with a lot of force.
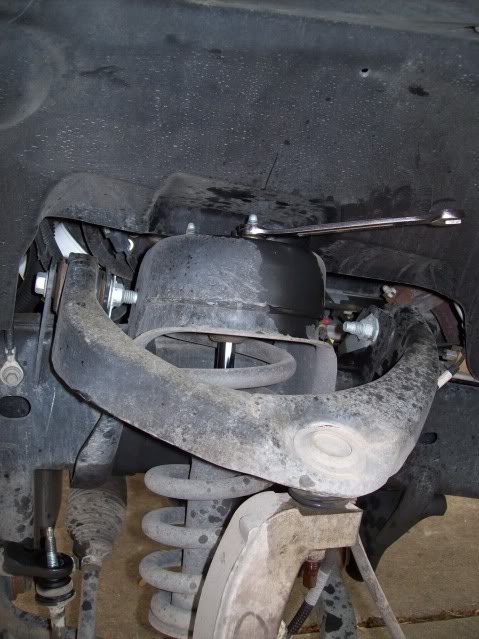
Step 10
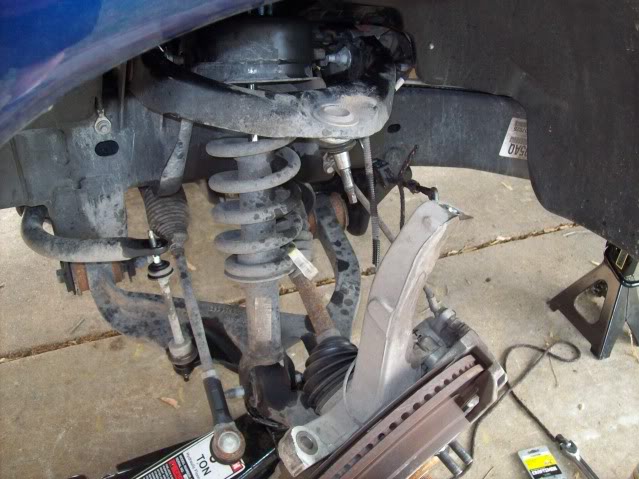
Remove the upper balljoint nut and hold the spindle to the side. I like to use a ratcheting type of hook and rope to hold it out of the way, but where the brake lines and axle are not allowed to stretch too far. Save hardware.
Step 11
Slowly lower the floor jack, lowering the lower control arm. At this time, the tension will be off of the lower strut bolt and it can be removed. Save hardware.
Step 12
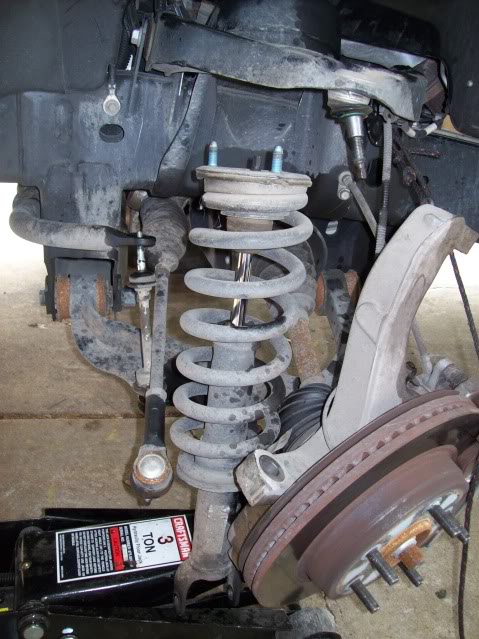
Remove the strut assembly from the vehicle.
Step 13
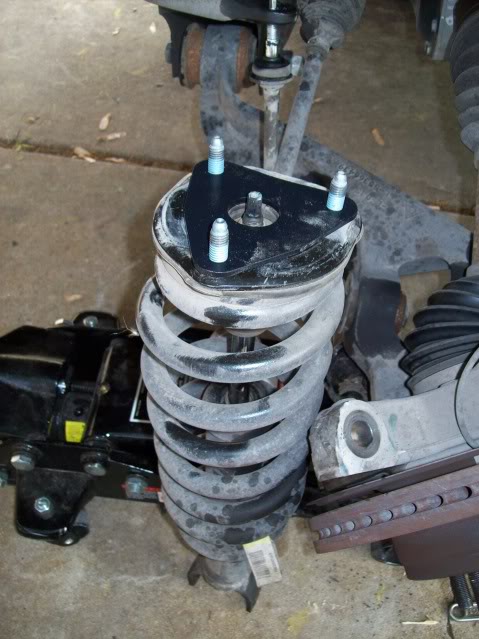
Install one of the shims from the kit on top of the strut. It can only be installed one way.
Step 14
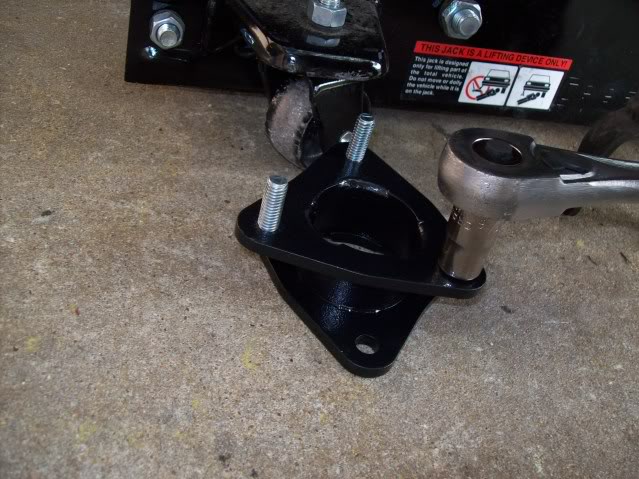
Locate one spacer, three 3/8" studs, and one nut. Insert one stud in the spacer and tread the nut on by hand. Using a 9/16" socket, tighten the nut to the stud to lock the stud in place. Back the nut off and remove. Repeat for the remaining two studs.
Step 15
Place assembled spacer on top of the strut assembly. As with the shim, this can only go on in one direction. Using a 15mm socket and/or wrench, tighten the factory nuts to secure the spacer to the strut.
Step 16
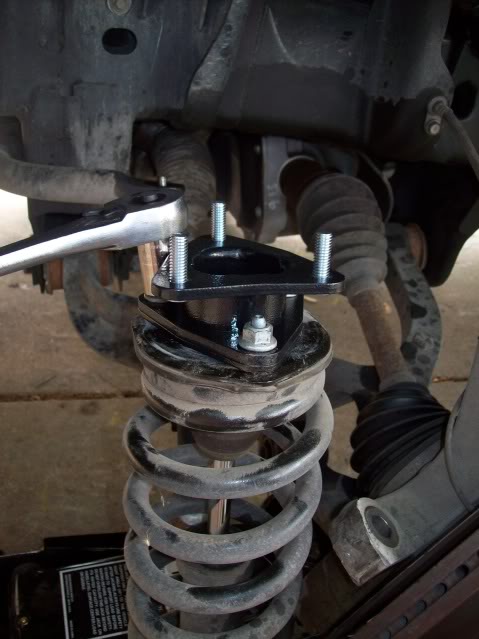
Locate three lock washers and three nuts from the kit. Insert the strut assembly back into the upper strut tower. The strut will be rotated 180* from the direction it was originally installed. Place a lock washer on each stud and loosely thread a nut to each stud. You will want some wiggle room when connecting the lower strut mount.
Step 17
Reconnect the lower strut. It may be necessary to use a screwdriver to help align the holes so the bolt can be reinstalled. Reinstall the nut with the 24mm deep socket and 21mm wrench.
Step 18
Raise the floor jack to raise the spindle to the upper control arm ball joint. Reinstall the nut to the ball joint stud. If the stud spins freely, you will need to hold the bottom tip of the stud with channel lock or locking pliers and use a 21mm wrench to tighten the nut.
Step 19
Place the tie rod end back into the spindle. Install nut with 21mm deep socket. If the ball joint studs spins, use the proceedure in Step 18 to tighten it.
Step 20
Reinstall the swaybar bushing, washer and nut to the upper swaybar link. Tighten nut with 15mm deep socket and adjustable wrench on the link.
Step 21
Tighten the upper strut nuts with a 9/16" wrench.
Step 22
Replace the tire and lug nuts.
Step 23
Remove the jack stand and lower truck to the ground.
Step 24
With the weight of the truck back on the tires, tighten the lug nuts.
Repeat steps 1-24 on opposite side.
Please feel free to ask any questions.
The installation instructions included in the kit are very good, as they usually are from Rough Country, but this will hopefully shed light on some of the small things left unmentioned in the manufacturer's instructions, and possibly some larger pictures.
The following steps required for the installation of the RC spacers should be valid and very similar to those from other companies. The physical design of the spacers will vary from company to company, but the removal of the strut and installation will be the same.
Brand: Rough Country
Product: 2006-2008 4wd Ram 1500 2.5" Leveling Suspension
Item#: 395
Price: $99.95 + shipping
Options: 1.5" rear block kit and rear RC Nitro 9000 series shocks (+$100)
http://www.roughcountry.com/dodge_4wd_leveling_kit.html
Vehicle: 2008 Dodge 1500 4x4, crew cab
Tools needed:
floor jack
jack stand
ratchet wrench (1/2" prefered)
15mm, 21mm, 24mm DEEP sockets
15mm, 21mm wrench
9/16" socket
9'16" wrench
channel lock pliers
adjustable wrench
hammer
*The following steps are documented from the driver's side as it was done first. It makes no difference which side you start with. The install is the same on both sides.*
Step 1
With the weight of the truck still on the tire, break the lug nuts loose, but do not remove. The instructions say to use a 22mm socket. I find a 12-point socket does not fit well. A 6-point socket works best. You can also use a 7/8" socket (6-point). Of course your factory tire-iron will work as well.
Step 2
Place floor jack under the lower control arm to raise the frontend.
Place jack stand under the frame rail where it flattens out.
Remove lug nuts and remove tire.
Keep floor jack in place with pressure applied to the lower control arm.
Step 3
Using a 21mm deep socket, remove the nut holding the tie rod to the spindle. Save hardware.
Step 4
Strike the side of the spindle with a large/heavy hammer to break the tie rod balljoint stud loose. Do not hit the stud itself. It may take several hard blows to break free....don't worry, it will happen.
Step 5
Using a 15mm deep socket, remove the upper swaybar link nut, then the washer and bushing. You will need to hold the swaybar link itself using channel lock pliers or an adjustable wrench to keep it from spinning while removing the nut. Save hardware.
Step 6
Using a 15mm wrench, remove the 3 upper strut nuts. Save hardware.
Step 7
Using a 24mm deep socket and 21mm wrench, remove the lower strut nut. There will be too much tension on the actual bolt to remove it at this time. It will be removed soon, though. Save hardware.
Step 8
Using a 21mm deep socket, remove the nut holding the upper control arm ball joint to the spindle. Once the nut is completely removed, thread it back on a few turns. The reason for removing it completely is because there is locktite on the treads that needs to be broken loose. This is easier while the stud is still pressed in the spindle and not able to freely spin. Once the stud is loose and can freely spin, it is very difficult to remove the nut if the locktite has not been broken loose.
Step 9
Strike the spindle with a large/heavy hammer to break the balljoint loose from the spindle. The nut was threaded back on in the previous step because the ball joint will break loose with a lot of force.
Step 10
Remove the upper balljoint nut and hold the spindle to the side. I like to use a ratcheting type of hook and rope to hold it out of the way, but where the brake lines and axle are not allowed to stretch too far. Save hardware.
Step 11
Slowly lower the floor jack, lowering the lower control arm. At this time, the tension will be off of the lower strut bolt and it can be removed. Save hardware.
Step 12
Remove the strut assembly from the vehicle.
Step 13
Install one of the shims from the kit on top of the strut. It can only be installed one way.
Step 14
Locate one spacer, three 3/8" studs, and one nut. Insert one stud in the spacer and tread the nut on by hand. Using a 9/16" socket, tighten the nut to the stud to lock the stud in place. Back the nut off and remove. Repeat for the remaining two studs.
Step 15
Place assembled spacer on top of the strut assembly. As with the shim, this can only go on in one direction. Using a 15mm socket and/or wrench, tighten the factory nuts to secure the spacer to the strut.
Step 16
Locate three lock washers and three nuts from the kit. Insert the strut assembly back into the upper strut tower. The strut will be rotated 180* from the direction it was originally installed. Place a lock washer on each stud and loosely thread a nut to each stud. You will want some wiggle room when connecting the lower strut mount.
Step 17
Reconnect the lower strut. It may be necessary to use a screwdriver to help align the holes so the bolt can be reinstalled. Reinstall the nut with the 24mm deep socket and 21mm wrench.
Step 18
Raise the floor jack to raise the spindle to the upper control arm ball joint. Reinstall the nut to the ball joint stud. If the stud spins freely, you will need to hold the bottom tip of the stud with channel lock or locking pliers and use a 21mm wrench to tighten the nut.
Step 19
Place the tie rod end back into the spindle. Install nut with 21mm deep socket. If the ball joint studs spins, use the proceedure in Step 18 to tighten it.
Step 20
Reinstall the swaybar bushing, washer and nut to the upper swaybar link. Tighten nut with 15mm deep socket and adjustable wrench on the link.
Step 21
Tighten the upper strut nuts with a 9/16" wrench.
Step 22
Replace the tire and lug nuts.
Step 23
Remove the jack stand and lower truck to the ground.
Step 24
With the weight of the truck back on the tires, tighten the lug nuts.
Repeat steps 1-24 on opposite side.
Please feel free to ask any questions.
Thread Starter
|
Rookie
Joined: Mar 2006
Posts: 70
Likes: 0
From: Katy, TX
Thanks. I hope it is of use for someone.
I do these installs on a regular basis. I usually don't bother taking pictures along the way, but sometimes I will document an install to create a write-up.
It really is very easy to do. And anyone with the tools mentioned above can do it in 2-3 hours.
I do these installs on a regular basis. I usually don't bother taking pictures along the way, but sometimes I will document an install to create a write-up.
It really is very easy to do. And anyone with the tools mentioned above can do it in 2-3 hours.
