


Smoked Tail Lights with VHT Nite Shades.

Before...
Process:
1. Removed Tail Lights from truck (includes 2 screws on each side, Torx T25's; followed by a firm tug to pull it out of the clips on the sides).
2. Cleaned lenses with windex and a microfiber towel.
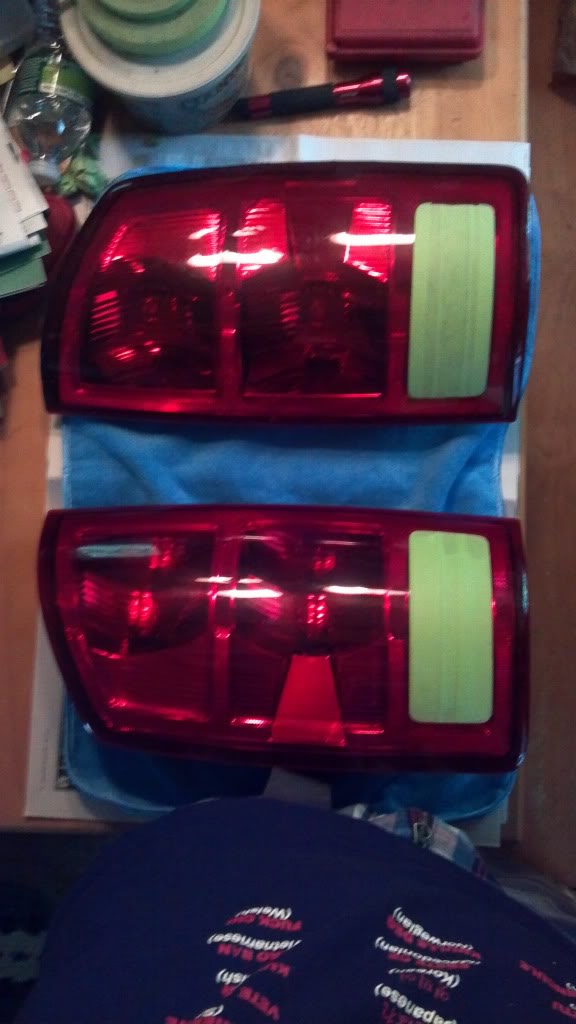
3. Taped off Reverse Lenses with green body tape (masking tape will do).
a. Easy taping includes: Line the tape edge over the top and bottom portions of the clear reverse lens, and tape the whole length of it.
b. Take a flashlight and place it pointed down at the green tape directly pointing at it so it illuminates the inner lens, providing you with clear lines on the sides to gently cut away the tape around the corners and left/right sides.
The finished product after preparation looks something like this...
4. Clean the remaining "red" parts of the lenses with rubbing alcohol (I used alcohol pads for a neater application) followed by wiping the alcohol off the lenses with some elbow grease and a microfiber towel. [Remember, the cleaner it is, the better it will look and the less work you'll have to do later].
5. Bring the lenses to a well ventilated area (I used an old picnic table in my back yard), cover your surface with news paper.
6. Shake your can of VHT Nite Shades for about 2 minutes, followed by 10 seconds after every minute of use. Apply the coats evenly and not too wet, and not too much like a dusting[medium wet coats]. To do this evenly, begin spraying approximately 5-6 inches to the left or right of the lens and continue on through 3-4 inches passed the lens in each sweeping motion. Make sure the coats are even, or your lights will not be the same throughout. DO NOT put more than 3 coats on, unless you want BLACK body pieces, because they will no longer be useful as "lights". (I did 2 coats) Allow 5 minutes between coats, and 1.5 hours for the lenses to dry before you remove the body tape carefully. (I put my lenses in a gazebo for 2 hours, so they did not get covered in flying particles while drying).
After 2 coats, still wet the lenses looked like this...

7. Take your freshly tinted lights, carefully place them back on your vehicle (do not apply a lot of pressure to the lens, you may still leave finger prints because it hasn't cured completely yet).
8. Stand back and admire your success.
With drying time, and application time the entire process should take less than 2 hours, but do not be upset if it takes longer. You can't rush a good job.
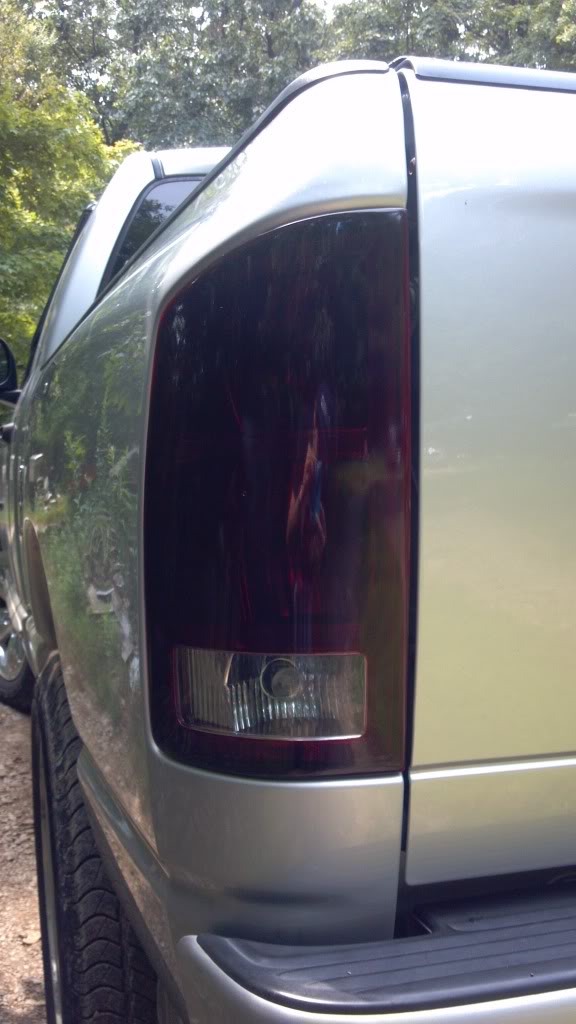
After...
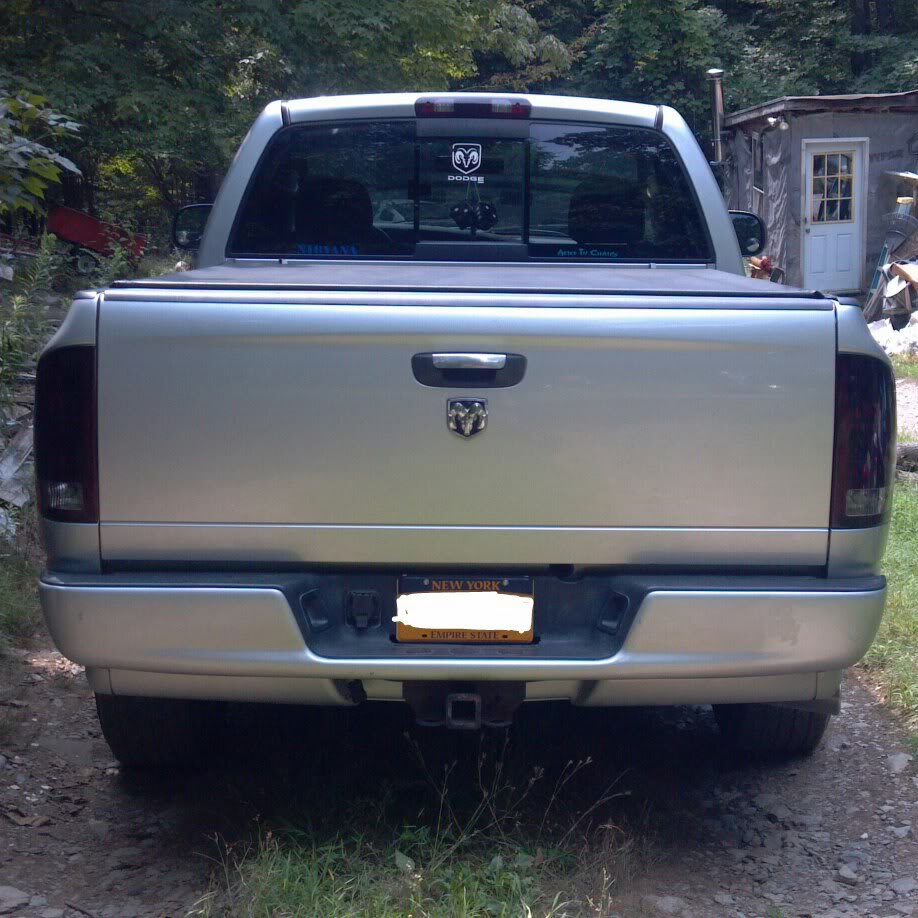
I think it makes the truck look great.
Process:
1. Removed Tail Lights from truck (includes 2 screws on each side, Torx T25's; followed by a firm tug to pull it out of the clips on the sides).
2. Cleaned lenses with windex and a microfiber towel.
3. Taped off Reverse Lenses with green body tape (masking tape will do).
a. Easy taping includes: Line the tape edge over the top and bottom portions of the clear reverse lens, and tape the whole length of it.
b. Take a flashlight and place it pointed down at the green tape directly pointing at it so it illuminates the inner lens, providing you with clear lines on the sides to gently cut away the tape around the corners and left/right sides.
The finished product after preparation looks something like this...
4. Clean the remaining "red" parts of the lenses with rubbing alcohol (I used alcohol pads for a neater application) followed by wiping the alcohol off the lenses with some elbow grease and a microfiber towel. [Remember, the cleaner it is, the better it will look and the less work you'll have to do later].
5. Bring the lenses to a well ventilated area (I used an old picnic table in my back yard), cover your surface with news paper.
6. Shake your can of VHT Nite Shades for about 2 minutes, followed by 10 seconds after every minute of use. Apply the coats evenly and not too wet, and not too much like a dusting[medium wet coats]. To do this evenly, begin spraying approximately 5-6 inches to the left or right of the lens and continue on through 3-4 inches passed the lens in each sweeping motion. Make sure the coats are even, or your lights will not be the same throughout. DO NOT put more than 3 coats on, unless you want BLACK body pieces, because they will no longer be useful as "lights". (I did 2 coats) Allow 5 minutes between coats, and 1.5 hours for the lenses to dry before you remove the body tape carefully. (I put my lenses in a gazebo for 2 hours, so they did not get covered in flying particles while drying).
After 2 coats, still wet the lenses looked like this...
7. Take your freshly tinted lights, carefully place them back on your vehicle (do not apply a lot of pressure to the lens, you may still leave finger prints because it hasn't cured completely yet).
8. Stand back and admire your success.
With drying time, and application time the entire process should take less than 2 hours, but do not be upset if it takes longer. You can't rush a good job.
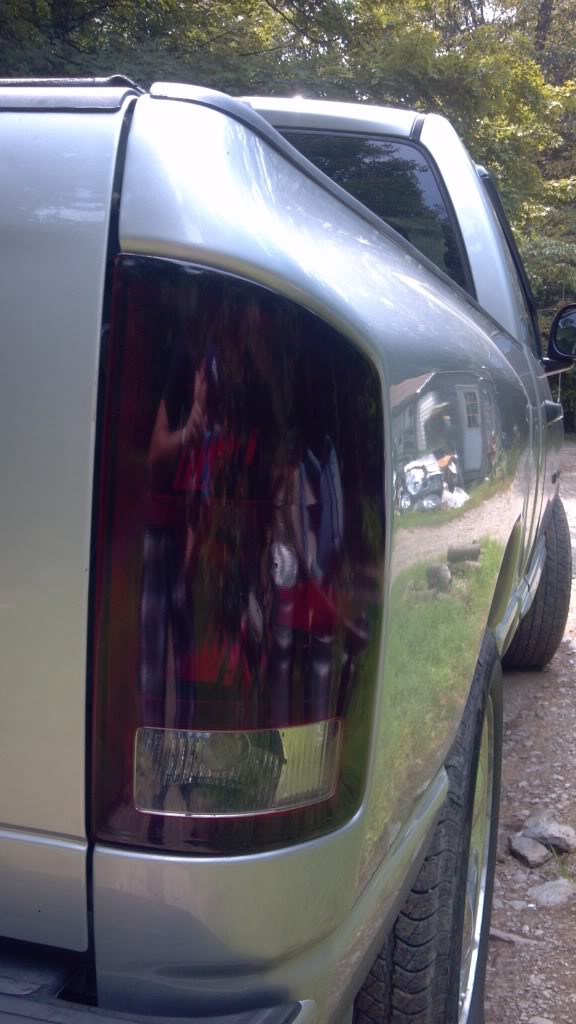
After...
I think it makes the truck look great.
Last edited by OhFive_Daytona; Aug 17, 2012 at 02:45 PM.


Thank you, I really tried to avoid wet sanding and clear coating, so I just put a lot of extra care into prep-work like cleaning with windex first, then scrubbing with alcohol. Also the microfiber towels are phenomenal inventions.
Well I hope not, I like the level of darkness they are, I was satisfied with how clean they were before I sprayed them. I used rubber gloves to keep my oils off of them, I put on even coats with reasonable drying time. And by now they've cured and adhered to the lenses pretty well. Only time will tell though!

Veteran
Joined: Jan 2010
Posts: 411
Likes: 2
From: Williston,sc
After a few months mine started to fade and some spots you could tell where the sun was fading it fast I sanded them down and redid them with a few coats of clear and they still look like they did the day I did them
I'm not sure I'm even keeping the truck through my entire loan. If I find a 2010 camaro or challenger I can swing with a trade in, this beast is gone for someone else to enjoy fully
So the lights may not matter.
So the lights may not matter.