


DIY Custom Sub Boxes Build (Instructions + Pics)


Thread Starter
|
Amateur
Joined: Nov 2009
Posts: 42
Likes: 0
From: South Carolina
To begin, let me go ahead and say that this thread is going to be a �work in progress� since I have not completed this project by any stretch of the imagination. However, once I finish, I will try and post directions for exact measurements, materials and cost list so that if someone else want to copy it, the process will be easy. I planned on waiting until I was at my dad�s workshop over Thanksgiving to start working on some custom sub boxes, but since it was raining and I actually for once didn�t have any other priorities on my list, I decided to get started. My father has a full blown workshop with every woodworking tool and jig known to man and it makes fabricating stuff like this much easier. I on the other hand have a limited amount of tools, but have found ways to get the job done. I had a pair of Pioneer Premier 8� shallow mount subs, and a 760 watt amp that I had installed in my Tacoma and I figured what the hell, I might as well get started on my new Dodge. I still haven�t decided on whether or not I�m going to retain the factory RES unit I have and get the adaptor that will give me 2 sets of RCA�s or go the more expensive/�better in my opinion as of now� route of buying the $130 adapter, wiring harness and dash kit that will allow me to install my aftermarket head unit. Either way, I have to build sub boxes, so here we go.
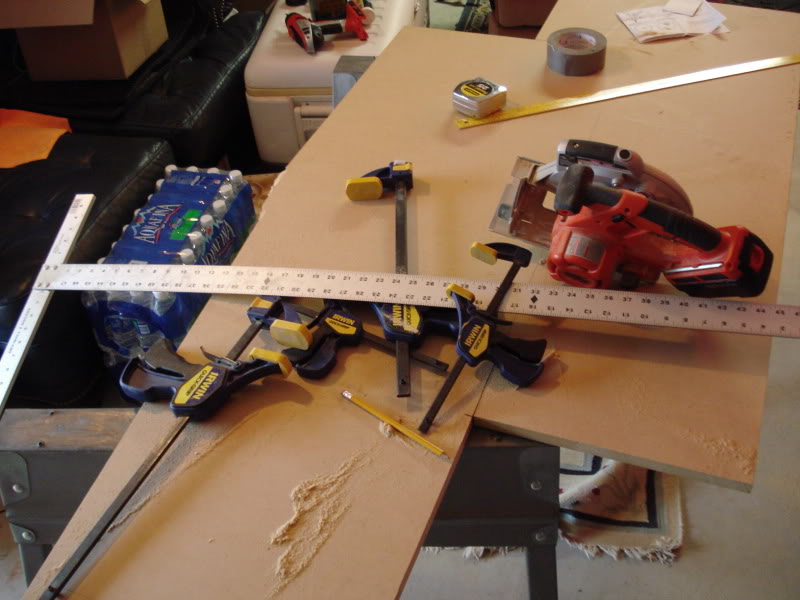
My tools � pretty basic. I used a sheetrock T-square, quick grip claps, small circular saw and a B&D jig saw and a few other common tools. I had a sheet of MDF left over from the Tacoma box build (seen here http://www.toyotanation.com/forum/sh...d.php?t=258197) . I just cannot see paying hundreds of dollars for something I know I can build myself.
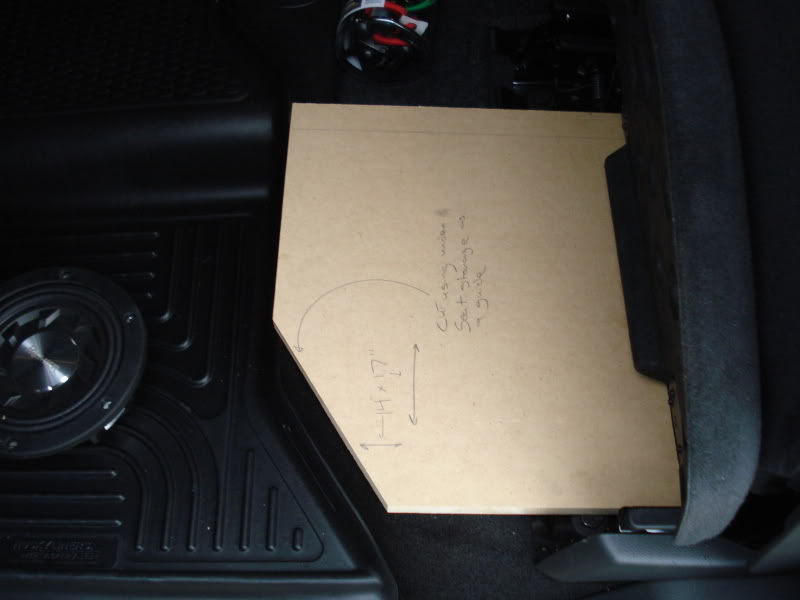
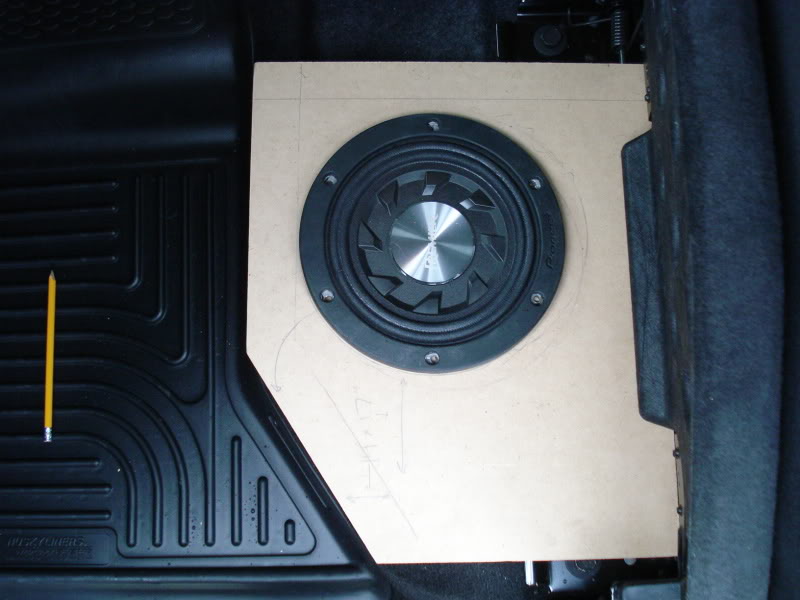
I decided to first mock up the size of the upward �face� of the boxes so I used the driver�s side rear, since it has the smallest compartment.
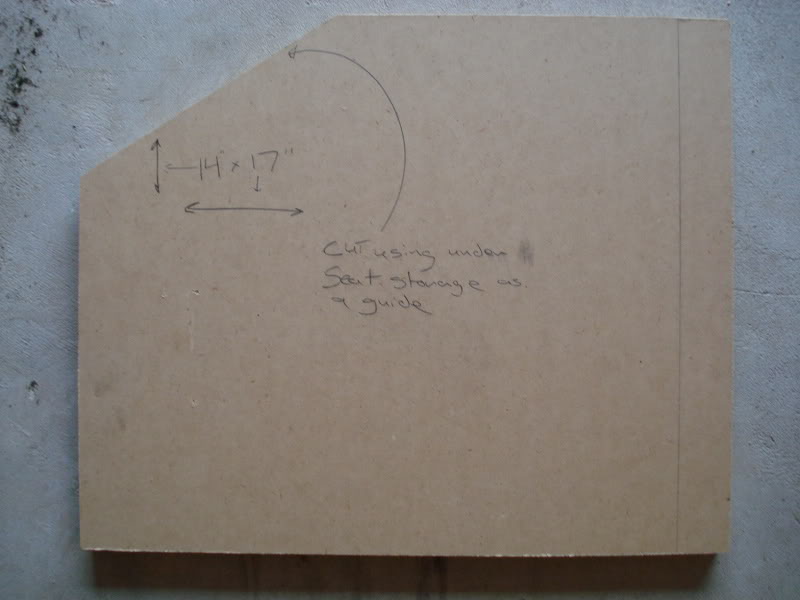
I started with 14� x 17� minus the angled cut that you see in the pics that matches the line of the under seat storage area. The final product slightly varies in measurement from this and this will be noted later.
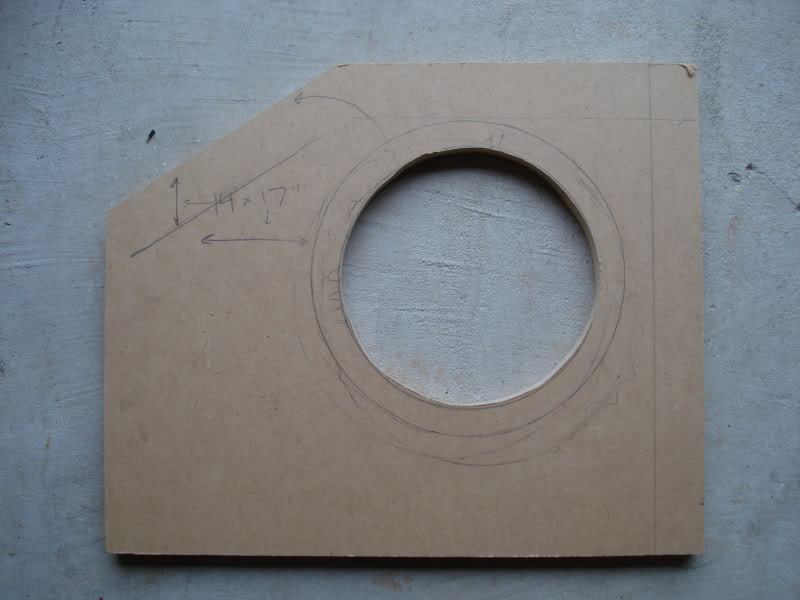
I usually build the boxes and then cut the hole in the face for mounting the sub, but this application requires more than a �normal� rectangular box, so I actually cut out the hole first and built around it.
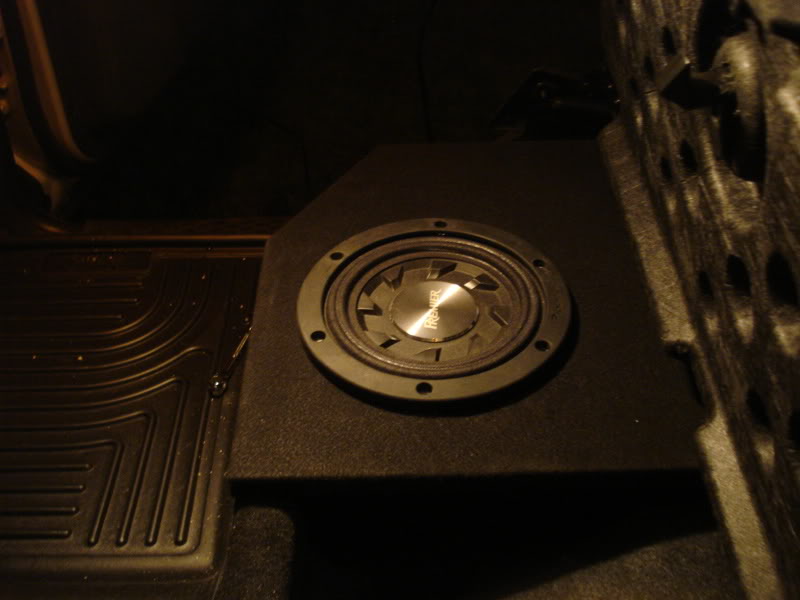
This is just the face with the sub in it on the driver�s side rear � at this point there is nothing under it.
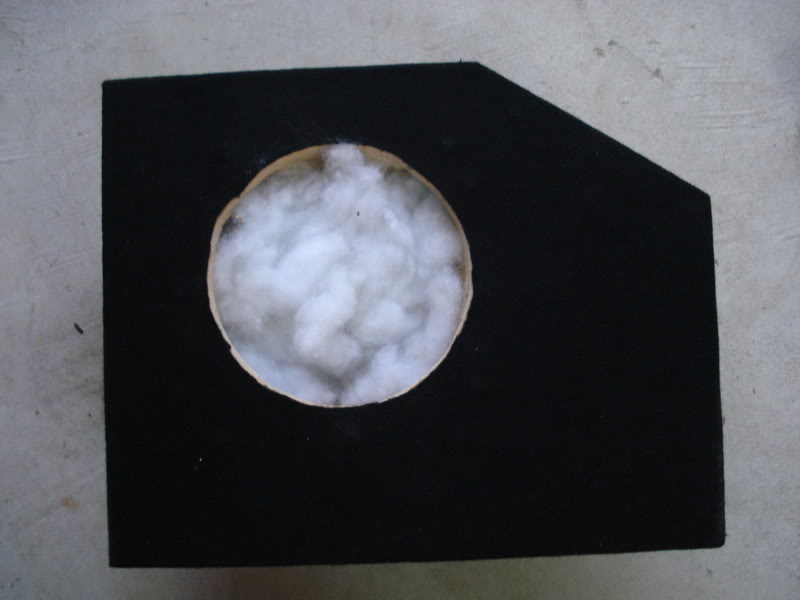
Fast forward version�.built a �box� in the bottom of the face that houses the sub. Filled it with polyfil to �increase� air-space. Went to Joann�s craft store and bought black felt that is on sale this week for $3.49 a yard (72� in width). Spent $5 for enough material to cover 4 of these boxes. I had generic brand spray adhesive (Lowes) left over from the last project so that is what I used to adhere the felt to the box. I also used wood glue in addition to the screws to hold everything together. Again, the details/more pics will come later when I have both sides completed.
One sub fitted (the sub isn�t screwed into the box yet)
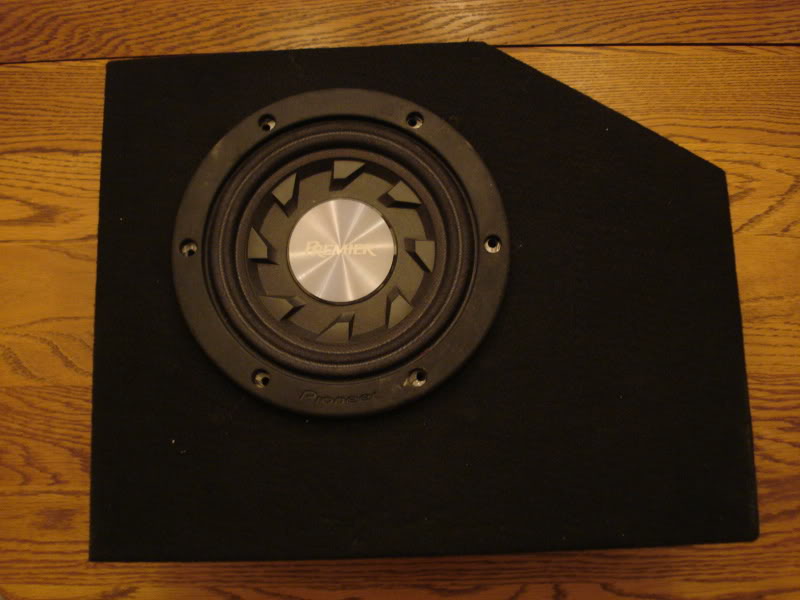
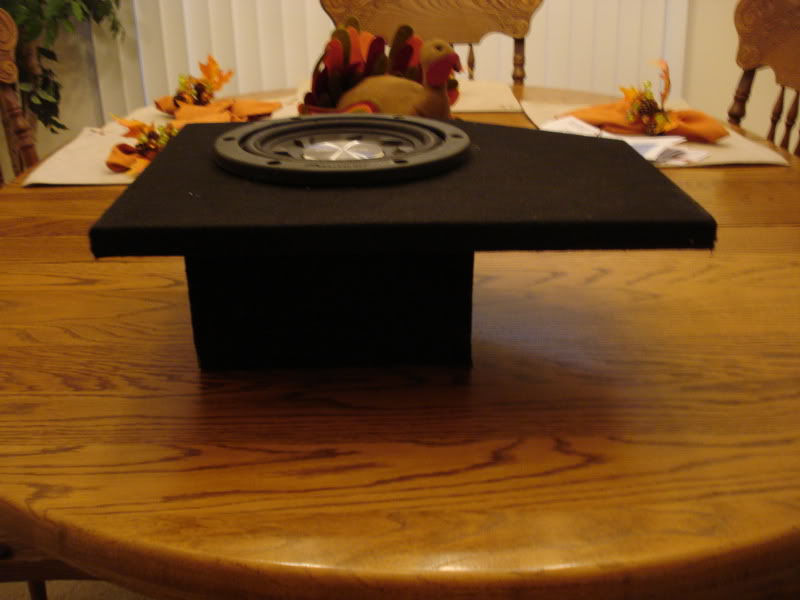
Other views

I have one side of the �storage lid� for the rear compartment unbolted so that I can fit the box that I have fabricated under the rear passenger side. In the future I will have to remove this whole piece, but for the time being I left it in place. More to come soon- Paul
My tools � pretty basic. I used a sheetrock T-square, quick grip claps, small circular saw and a B&D jig saw and a few other common tools. I had a sheet of MDF left over from the Tacoma box build (seen here http://www.toyotanation.com/forum/sh...d.php?t=258197) . I just cannot see paying hundreds of dollars for something I know I can build myself.
I decided to first mock up the size of the upward �face� of the boxes so I used the driver�s side rear, since it has the smallest compartment.
I started with 14� x 17� minus the angled cut that you see in the pics that matches the line of the under seat storage area. The final product slightly varies in measurement from this and this will be noted later.
I usually build the boxes and then cut the hole in the face for mounting the sub, but this application requires more than a �normal� rectangular box, so I actually cut out the hole first and built around it.
This is just the face with the sub in it on the driver�s side rear � at this point there is nothing under it.
Fast forward version�.built a �box� in the bottom of the face that houses the sub. Filled it with polyfil to �increase� air-space. Went to Joann�s craft store and bought black felt that is on sale this week for $3.49 a yard (72� in width). Spent $5 for enough material to cover 4 of these boxes. I had generic brand spray adhesive (Lowes) left over from the last project so that is what I used to adhere the felt to the box. I also used wood glue in addition to the screws to hold everything together. Again, the details/more pics will come later when I have both sides completed.
One sub fitted (the sub isn�t screwed into the box yet)
Other views
I have one side of the �storage lid� for the rear compartment unbolted so that I can fit the box that I have fabricated under the rear passenger side. In the future I will have to remove this whole piece, but for the time being I left it in place. More to come soon- Paul
Veteran
Joined: Feb 2009
Posts: 385
Likes: 0
From: San Antonio, TX
half tempted to pay you to make me one 
But I have a rockford P3 10" that isn't a shallow mount. I was thinking of just putting the box in the center of the back seat in the leg area. I don't have kids or anyone that requires the third (center) seat area...
But I have a rockford P3 10" that isn't a shallow mount. I was thinking of just putting the box in the center of the back seat in the leg area. I don't have kids or anyone that requires the third (center) seat area...

Thread Starter
|
Amateur
Joined: Nov 2009
Posts: 42
Likes: 0
From: South Carolina
Thanks guys. I finished the other box that goes behind the driver's seat, and it was much more difficult than the passenger side because the cut out area under the seat is significantly smaller. I had to cut 8 angled pieces to form an octagon "box" with the MDF below the sub which was a PIA without a table saw. Anyhow, I'll get some pics of the almost completed boxes...I am happy with the way they turned out. Now I have to figure out whether to retain the factory unit or get the necessary adapter, wiring kit and dash kit to put in my aftermarket unit.
Jason, I have a Q-logic box with an Infinity Reference Series 10" in it and it fit great on that middle area but that box is big. In the beginning, I thought about building a downward firing box for the 10" and put it in that area. It would have been much less labor intensive, but I wanted to keep everything out of sight and I need the floor space. I think it would work well though.
Jason, I have a Q-logic box with an Infinity Reference Series 10" in it and it fit great on that middle area but that box is big. In the beginning, I thought about building a downward firing box for the 10" and put it in that area. It would have been much less labor intensive, but I wanted to keep everything out of sight and I need the floor space. I think it would work well though.