


Bilstein 5100 DIY Install (Pic Heavy)

Thread Starter
|
Record Breaker
Joined: Mar 2011
Posts: 1,035
Likes: 2
From: South, FL
So I installed the Bilstein 5100 Height Adjustable's in my truck today...Here is a write up of how to install and pictures of what you should loosen and what I found easiest..
******These are not official instructions just a guide to assist you since there are not any instructions that come w/ the shocks...Use them if you'd like if not then enjoy, hope this thread helps out some people!******
I set my 5100's to the 2.8" settings..
1) Lift the truck via floor jack or frame lift and remove both front driver and passenger wheels...
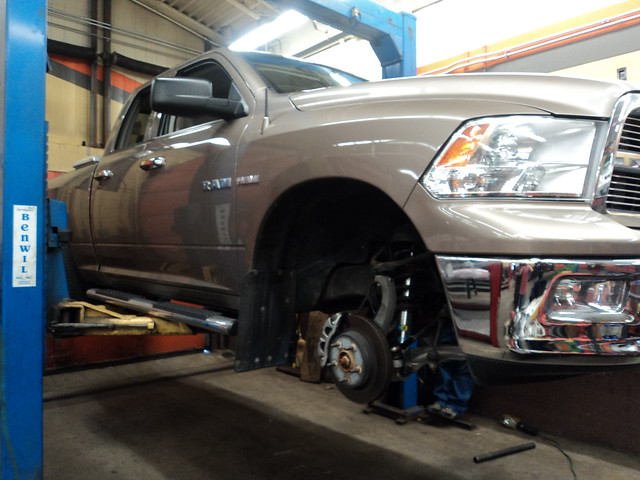
DSC01373 by Mikeyyy816, on Flickr
2) Remove the nut from the steering linkage, if needed take a hammer and hit the knuckle to remove the linkage from the knuckle(keep all factory hardware).(21 OR 22MM, Can't really remember)
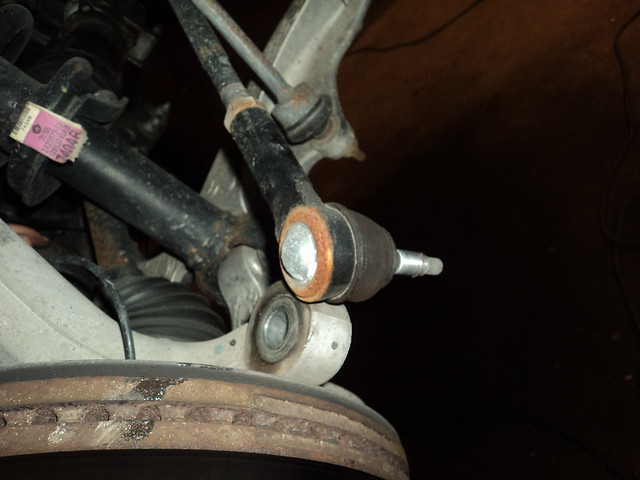
DSC01350 by Mikeyyy816, on Flickr
3) Next remove the sway bar linkage nut (15MM)
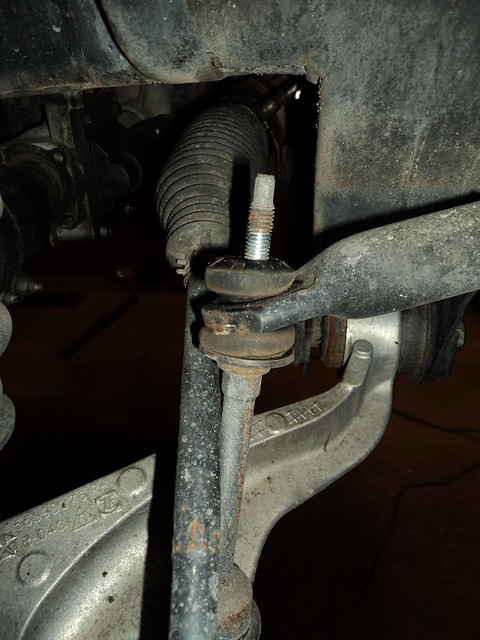
DSC01351 by Mikeyyy816, on Flickr
4) Then pull the three bolts from the top of the upper strut tower..(15MM)
DSC01356 by Mikeyyy816, on Flickr
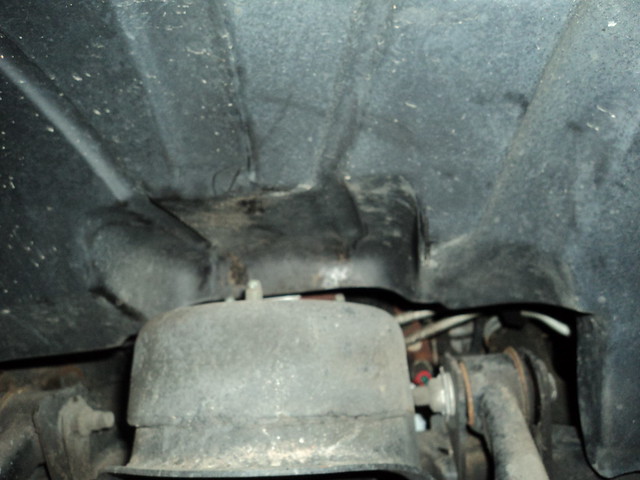
5) Next I took off the Caliper to eliminate stress on the hoses when I remover the Upper Ball Joint nut and it allows the rotor and lower control arm to drop down. As you can see I zip tied it to the Lower Control Arm since I had this on a frame lift and couldn't use anything to hold it up.
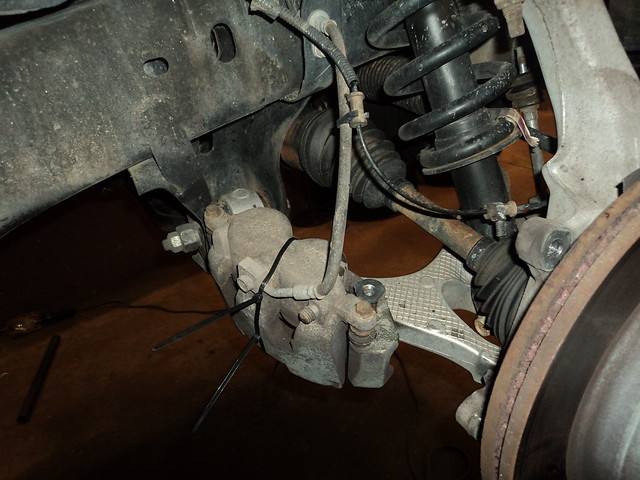
DSC01353 by Mikeyyy816, on Flickr
6) I then removed the ball joint nut, this was a P.I.T.A for me, everything was corroded in and used a TON of PB Blaster. But take a jack and put pressure on the Lower Control Arm (LCA) and use an impact and run it on the nut and run it off...(forgot to take a picture of this haha) (21MM)
7) Remove the strut bolt from the LCA and remove the strut assembly, keep the factory hardware. (21MM & 24MM). You may need a buddy to put some weight on the LCA so you can pull the bolt out and so you can remove the strut assembly. When doing this be careful not to pull the shaft out of the differential..
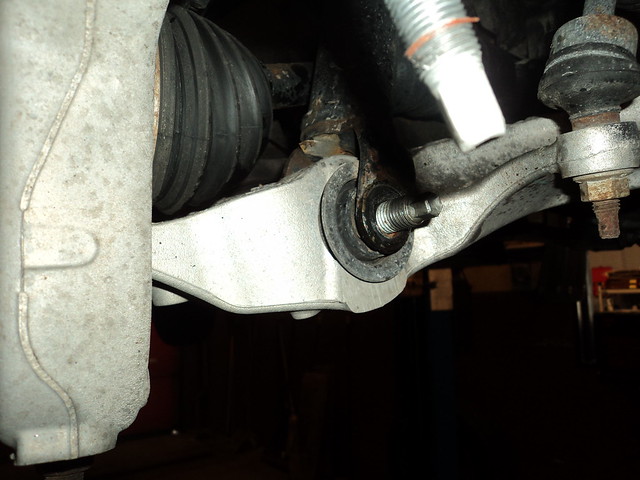
DSC01355 by Mikeyyy816, on Flickr
DSC01358 by Mikeyyy816, on Flickr
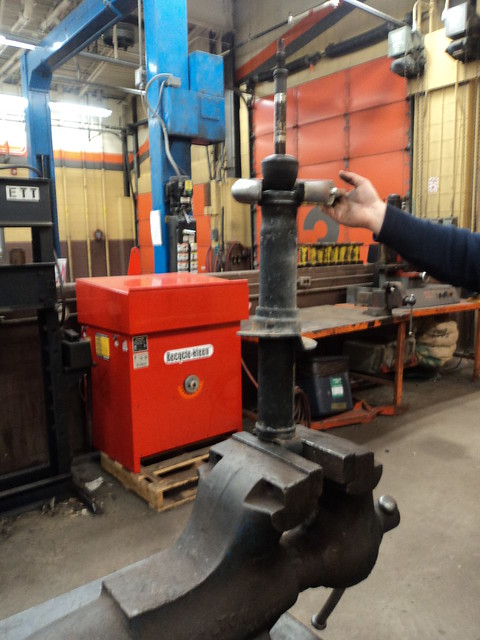
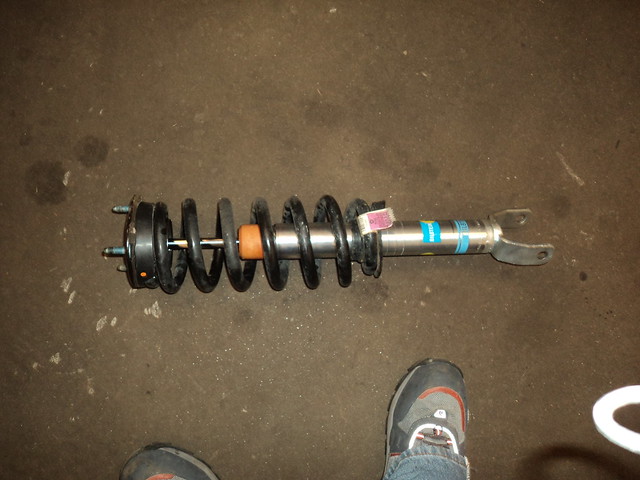
8) Then take the spring to a spring compressor and compress the spring (this is the fun yet scary part) ***Compressing a spring is dangerous, if you do not know what you are doing or have the proper tools take it to a local shop and have them do it***
I had the privilege of using a wall mount spring compressor which helped w/ removing the strut. I personally had some issues once I mounted the tried removing the nut on the strut itself. I kept spinning the strut rod, so I got some advice and held an impact on the strut nut for about 45 seconds and it broke loose (I released some of the pressure on the spring to put pressure on the nut to help guide it off, and it worked)
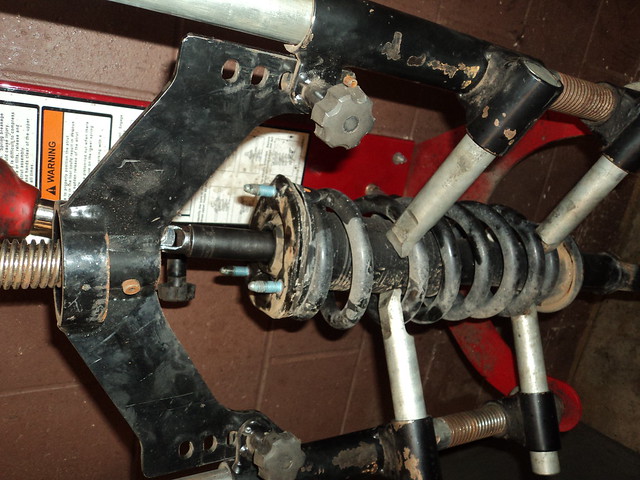
DSC01361 by Mikeyyy816, on Flickr
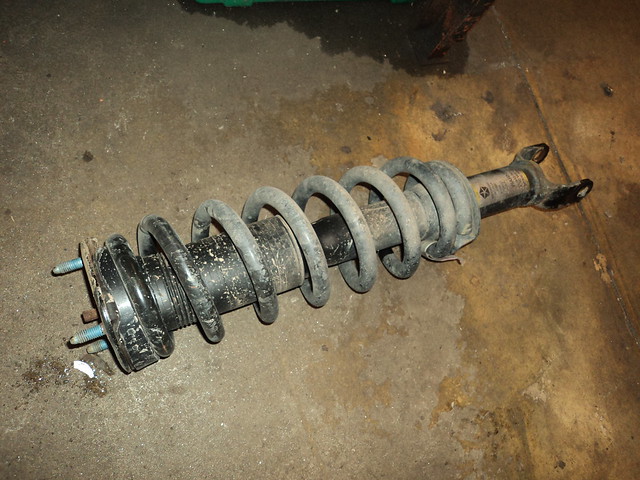
Once it broke loose the strut dropped and here is the spring still compressed..
DSC01362 by Mikeyyy816, on Flickr
9) You need to use your original OEM Spring seat so pull the bump stop off the shaft and the round part of the strut off and you can slide the spring seat off....
DSC01364 by Mikeyyy816, on Flickr
OEM Spring seat
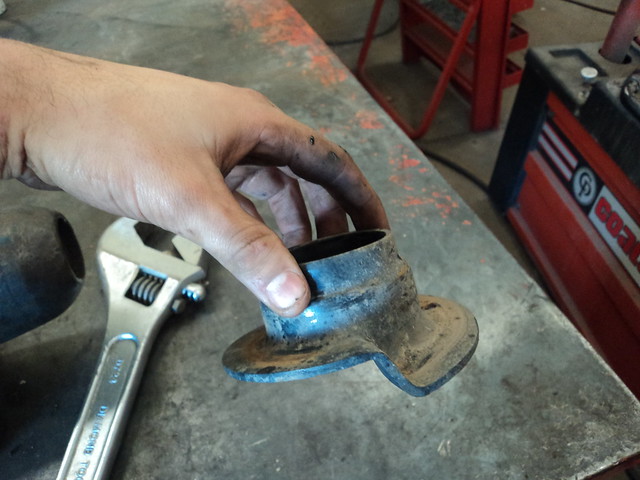
DSC01365 by Mikeyyy816, on Flickr
10) When you put the OEM Spring Seat on make sure the spring is sitting in the groove correctly and seated all the way in....Same goes for the upper part of the spring make sure it sits in correctly on both top and bottom!!
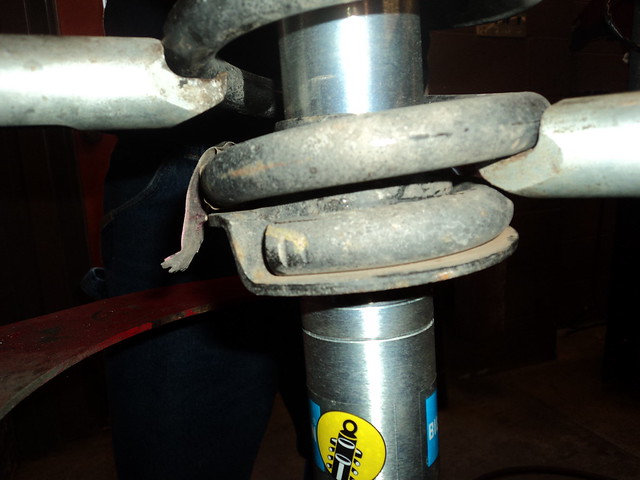
DSC01367 by Mikeyyy816, on Flickr
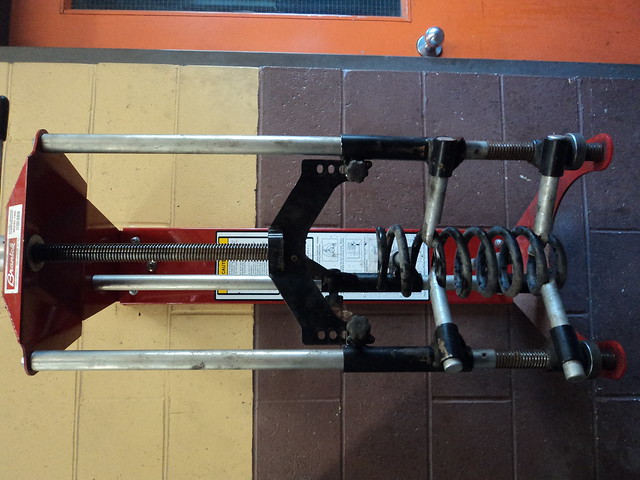
11) Put your new strut together w/ OEM springs and BOOOOM, looks like this...
DSC01369 by Mikeyyy816, on Flickr
12) Re-Install everything in reverse order and button her up!

DSC01370 by Mikeyyy816, on Flickr
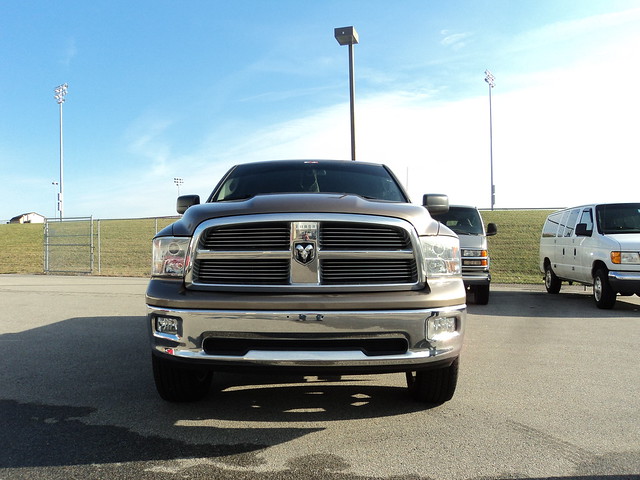
Here are some finished shots of the truck (I know it's FILTHY!!!!) But I noticed that the rear is a little lower than the front. So I ordered TopGunz Spacers (.75") for the rear to raise it up a bit and make it level.
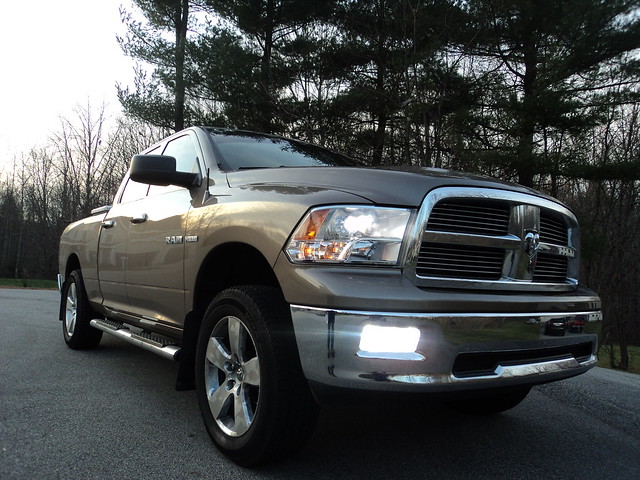
DSC01386 by Mikeyyy816, on Flickr
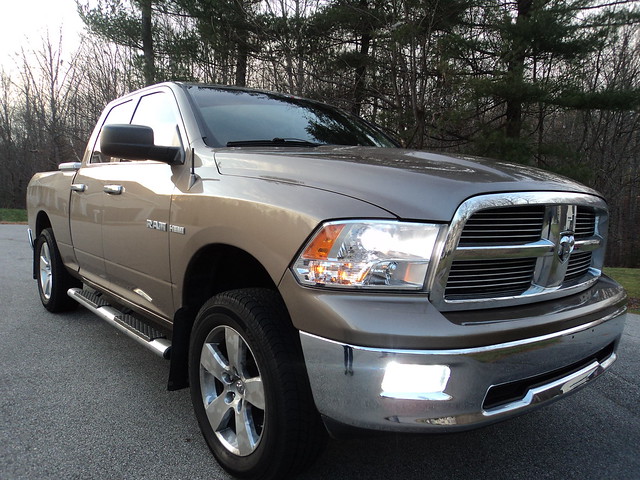
DSC01385 by Mikeyyy816, on Flickr
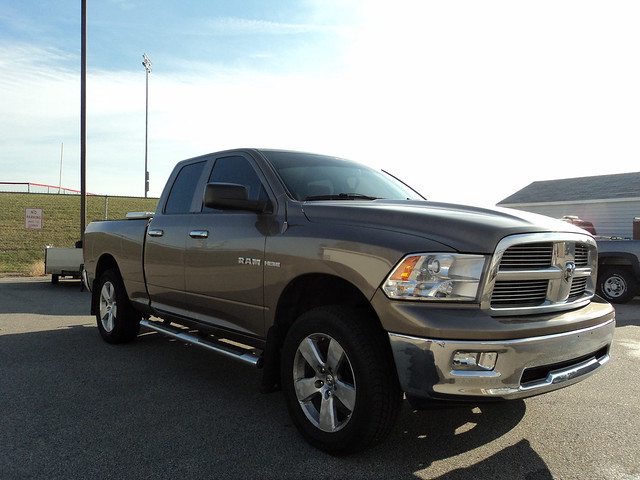
DSC01376 by Mikeyyy816, on Flickr
DSC01380 by Mikeyyy816, on Flickr

DSC01377 by Mikeyyy816, on Flickr
Hope you enjoy this thread and can put it to use if you decide to do this...
******These are not official instructions just a guide to assist you since there are not any instructions that come w/ the shocks...Use them if you'd like if not then enjoy, hope this thread helps out some people!******
I set my 5100's to the 2.8" settings..
1) Lift the truck via floor jack or frame lift and remove both front driver and passenger wheels...
DSC01373 by Mikeyyy816, on Flickr
2) Remove the nut from the steering linkage, if needed take a hammer and hit the knuckle to remove the linkage from the knuckle(keep all factory hardware).(21 OR 22MM, Can't really remember)
DSC01350 by Mikeyyy816, on Flickr
3) Next remove the sway bar linkage nut (15MM)
DSC01351 by Mikeyyy816, on Flickr
4) Then pull the three bolts from the top of the upper strut tower..(15MM)
DSC01356 by Mikeyyy816, on Flickr
5) Next I took off the Caliper to eliminate stress on the hoses when I remover the Upper Ball Joint nut and it allows the rotor and lower control arm to drop down. As you can see I zip tied it to the Lower Control Arm since I had this on a frame lift and couldn't use anything to hold it up.
DSC01353 by Mikeyyy816, on Flickr
6) I then removed the ball joint nut, this was a P.I.T.A for me, everything was corroded in and used a TON of PB Blaster. But take a jack and put pressure on the Lower Control Arm (LCA) and use an impact and run it on the nut and run it off...(forgot to take a picture of this haha) (21MM)
7) Remove the strut bolt from the LCA and remove the strut assembly, keep the factory hardware. (21MM & 24MM). You may need a buddy to put some weight on the LCA so you can pull the bolt out and so you can remove the strut assembly. When doing this be careful not to pull the shaft out of the differential..
DSC01355 by Mikeyyy816, on Flickr
DSC01358 by Mikeyyy816, on Flickr
8) Then take the spring to a spring compressor and compress the spring (this is the fun yet scary part) ***Compressing a spring is dangerous, if you do not know what you are doing or have the proper tools take it to a local shop and have them do it***
I had the privilege of using a wall mount spring compressor which helped w/ removing the strut. I personally had some issues once I mounted the tried removing the nut on the strut itself. I kept spinning the strut rod, so I got some advice and held an impact on the strut nut for about 45 seconds and it broke loose (I released some of the pressure on the spring to put pressure on the nut to help guide it off, and it worked)
DSC01361 by Mikeyyy816, on Flickr
Once it broke loose the strut dropped and here is the spring still compressed..
DSC01362 by Mikeyyy816, on Flickr
9) You need to use your original OEM Spring seat so pull the bump stop off the shaft and the round part of the strut off and you can slide the spring seat off....
DSC01364 by Mikeyyy816, on Flickr
OEM Spring seat
DSC01365 by Mikeyyy816, on Flickr
10) When you put the OEM Spring Seat on make sure the spring is sitting in the groove correctly and seated all the way in....Same goes for the upper part of the spring make sure it sits in correctly on both top and bottom!!
DSC01367 by Mikeyyy816, on Flickr
11) Put your new strut together w/ OEM springs and BOOOOM, looks like this...
DSC01369 by Mikeyyy816, on Flickr
12) Re-Install everything in reverse order and button her up!
DSC01370 by Mikeyyy816, on Flickr
Here are some finished shots of the truck (I know it's FILTHY!!!!) But I noticed that the rear is a little lower than the front. So I ordered TopGunz Spacers (.75") for the rear to raise it up a bit and make it level.
DSC01386 by Mikeyyy816, on Flickr
DSC01385 by Mikeyyy816, on Flickr
DSC01376 by Mikeyyy816, on Flickr
DSC01380 by Mikeyyy816, on Flickr
DSC01377 by Mikeyyy816, on Flickr
Hope you enjoy this thread and can put it to use if you decide to do this...
Last edited by Mikeyyy816; Dec 9, 2011 at 10:26 PM.


Thread Starter
|
Record Breaker
Joined: Mar 2011
Posts: 1,035
Likes: 2
From: South, FL
I haven't tried the 4x4 on the pavement and not in my truck...so I don't know yet. I'll try it once I get it offroad.
Thread Starter
|
Record Breaker
Joined: Mar 2011
Posts: 1,035
Likes: 2
From: South, FL
Thanks bud! It'll be washed as soon as I get back to NJ and get my Cat Back installed.
Trending Topics
Captain
Joined: Sep 2010
Posts: 664
Likes: 0
From: Wisconsin
Not to roll off the thread topic, but could you shoot me a PM as to what setup you did on your projector headlights. I was just a day ago exchanging emails with Jeremy at Retro Shop, the setup on your Ram really looks sharpe, pretty much what I'm looking to accomplish. Thanks!
Thread Starter
|
Record Breaker
Joined: Mar 2011
Posts: 1,035
Likes: 2
From: South, FL
Not to roll off the thread topic, but could you shoot me a PM as to what setup you did on your projector headlights. I was just a day ago exchanging emails with Jeremy at Retro Shop, the setup on your Ram really looks sharpe, pretty much what I'm looking to accomplish. Thanks!
https://dodgeforum.com/forum/4th-gen...-new-pics.html